There are two modes of the SIP registration of the 2N Indoor Compact unit in this example, to the My2N portal:
-
Local - allows you to use the 2N Indoor Compact in your local network. The reason why you can choose this mode is to make the configuration of the intercom easier so it is not necessary for you to disable the automatic configuration and you can just simply add the 2N Indoor Compact in your local mode and the intercom will be configured automatically. In this mode, the 2N Indoor Compact has to be placed in the same LAN as the intercom.
-
Cloud - this mode allows you to make the calls from the 2N Indoor Compact to the 2N Mobile Video application and vice versa. You can use this mode in situations where the unit is placed in a different LAN than the intercom.
2N Indoor Compact My2N Registration:
Security code
-
Security code is included in the package with the device on the card.

-
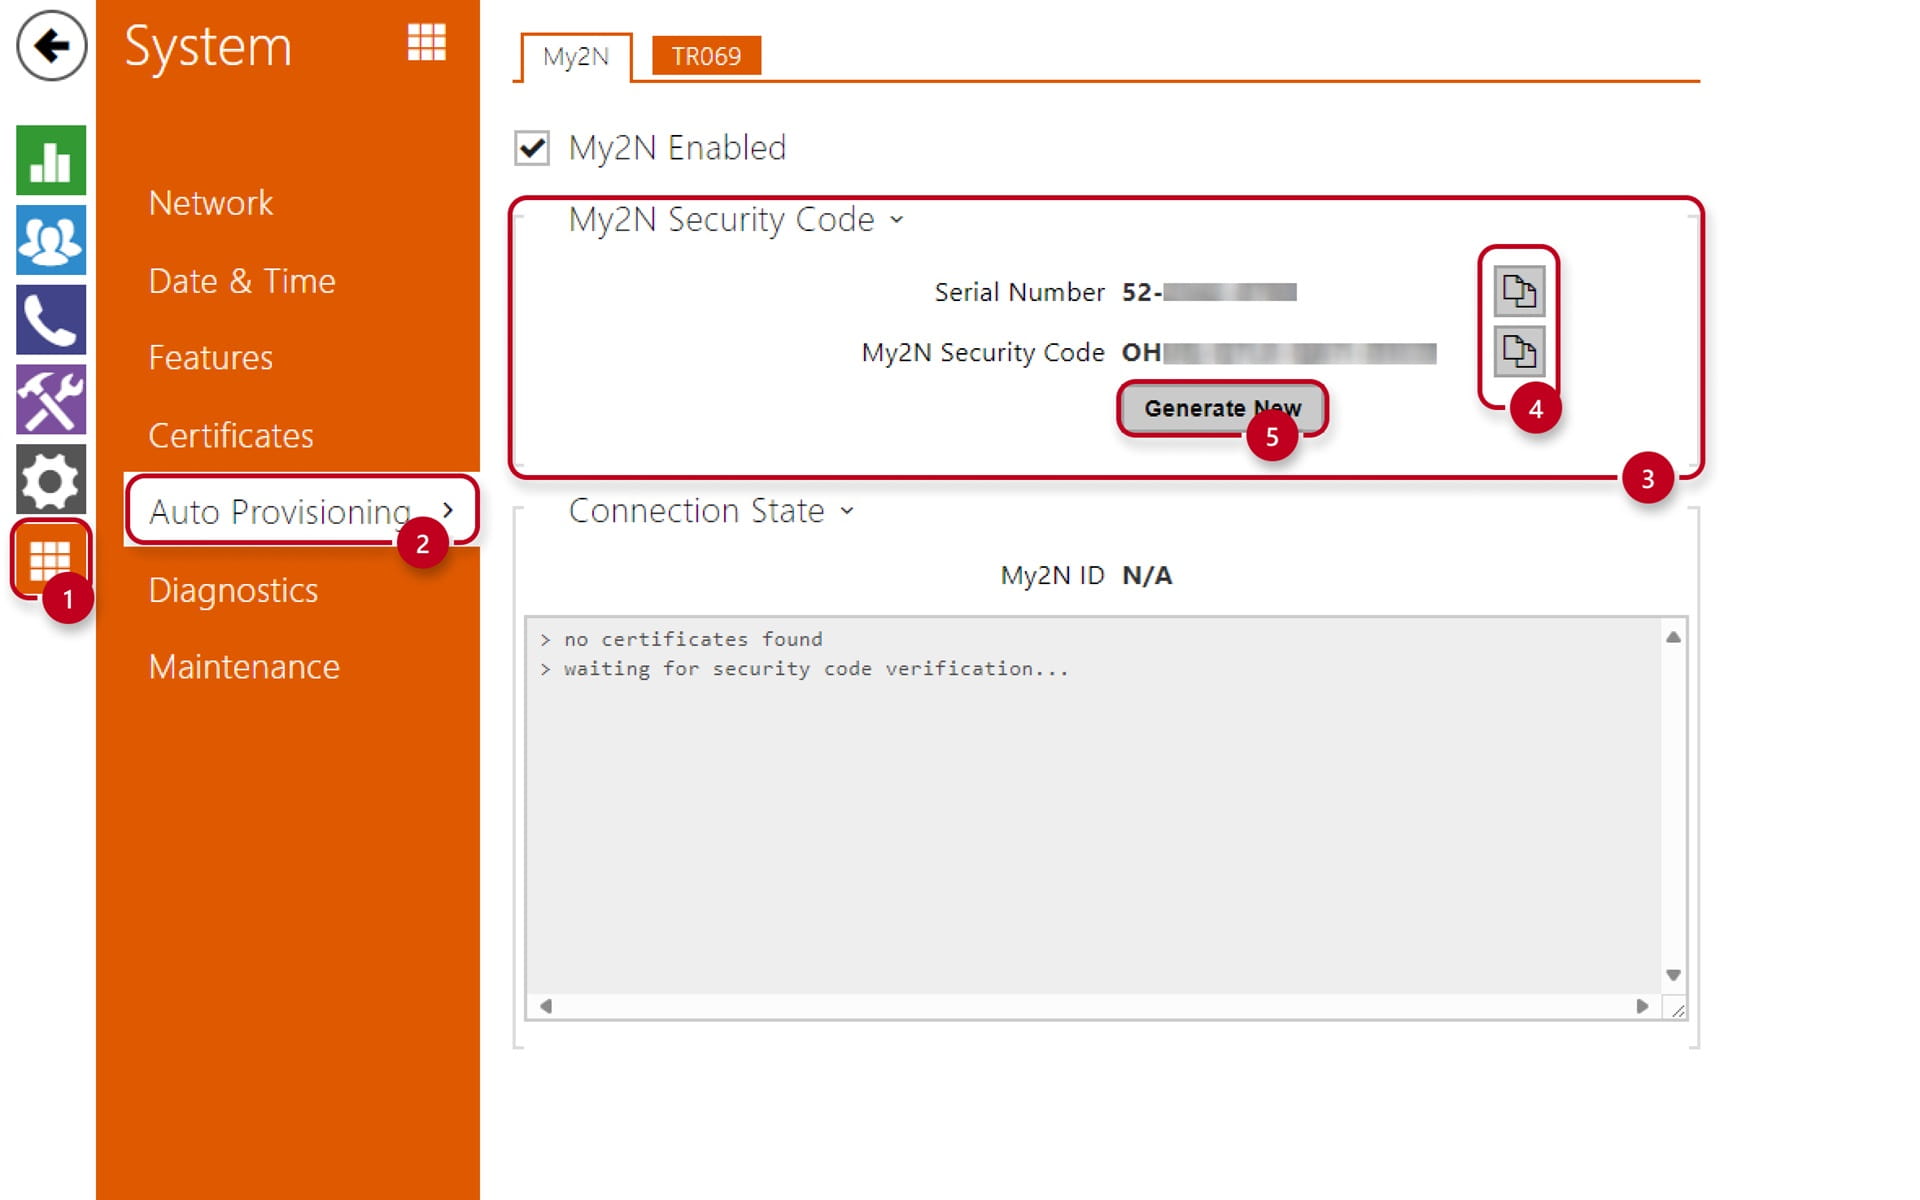
Another way how you can obtain the security code is to go to the device setting section "System" (1) - "Auto Provisioning" (2) - "My2N Security Code" (3)
- You can quickly copy each credential by clicking on the copy buttons (4) on the right side
-
Note that security code is shown in the firmware version 2.26 and higher
- In Old Web Interface:
- In New Web Interface:

You will have to navigate through "Integration" (1) - "Auto Provisioning" (2) - "My2N" (3) - "General Information" (4) -
You can also generate a new security code (5)
-
If you do so, remember to verify the device's security code again in My2N
Local mode
-
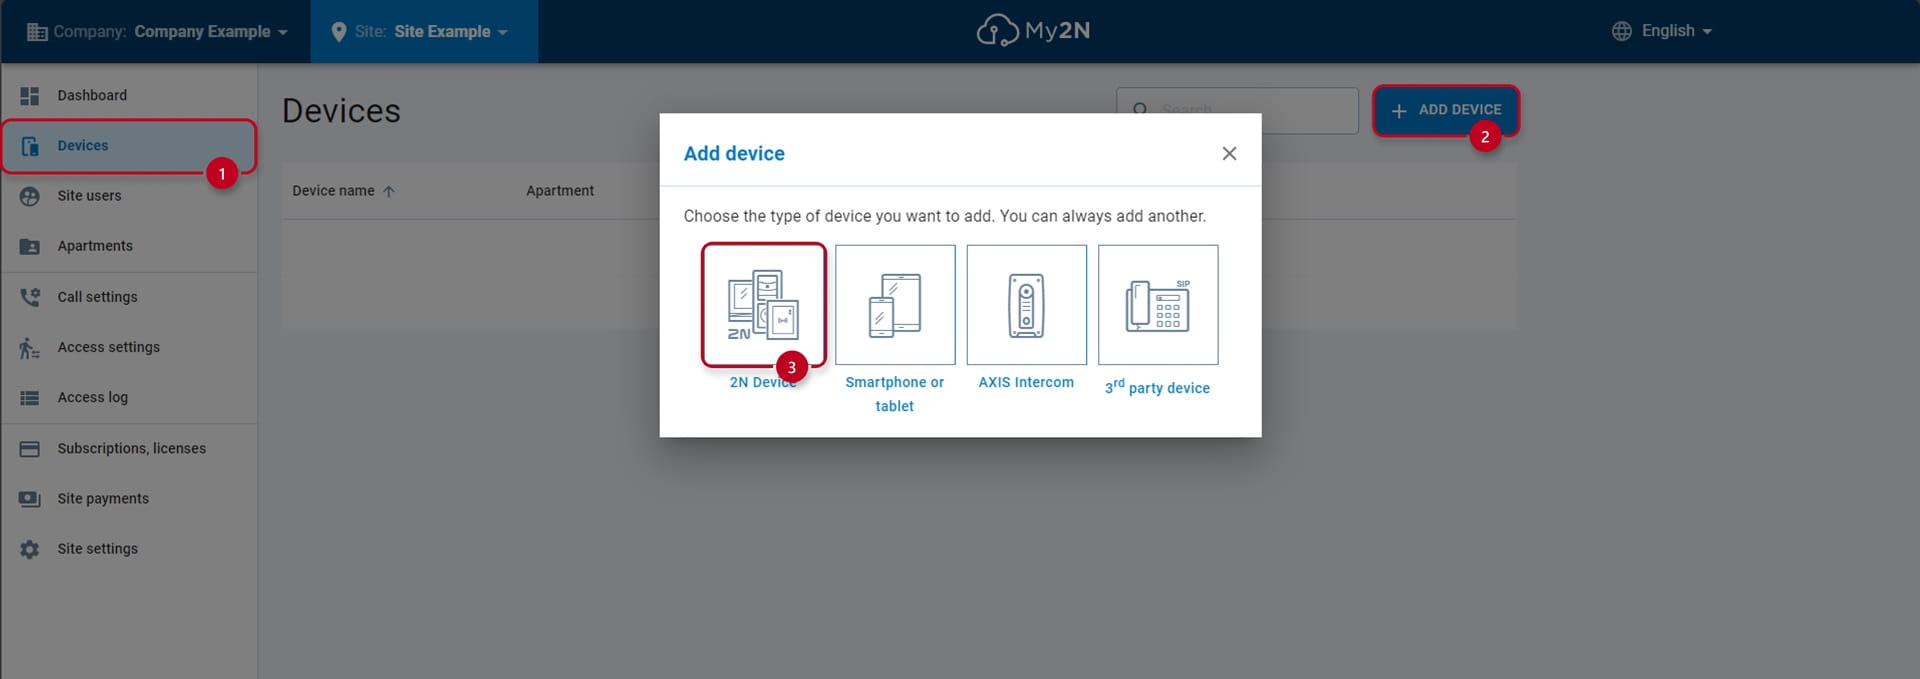
You can add the 2N Indoor Compact by clicking on the "Devices" (1) button and then the "ADD DEVICE" (2) button. Then choose "2N Device" (3) option:
-
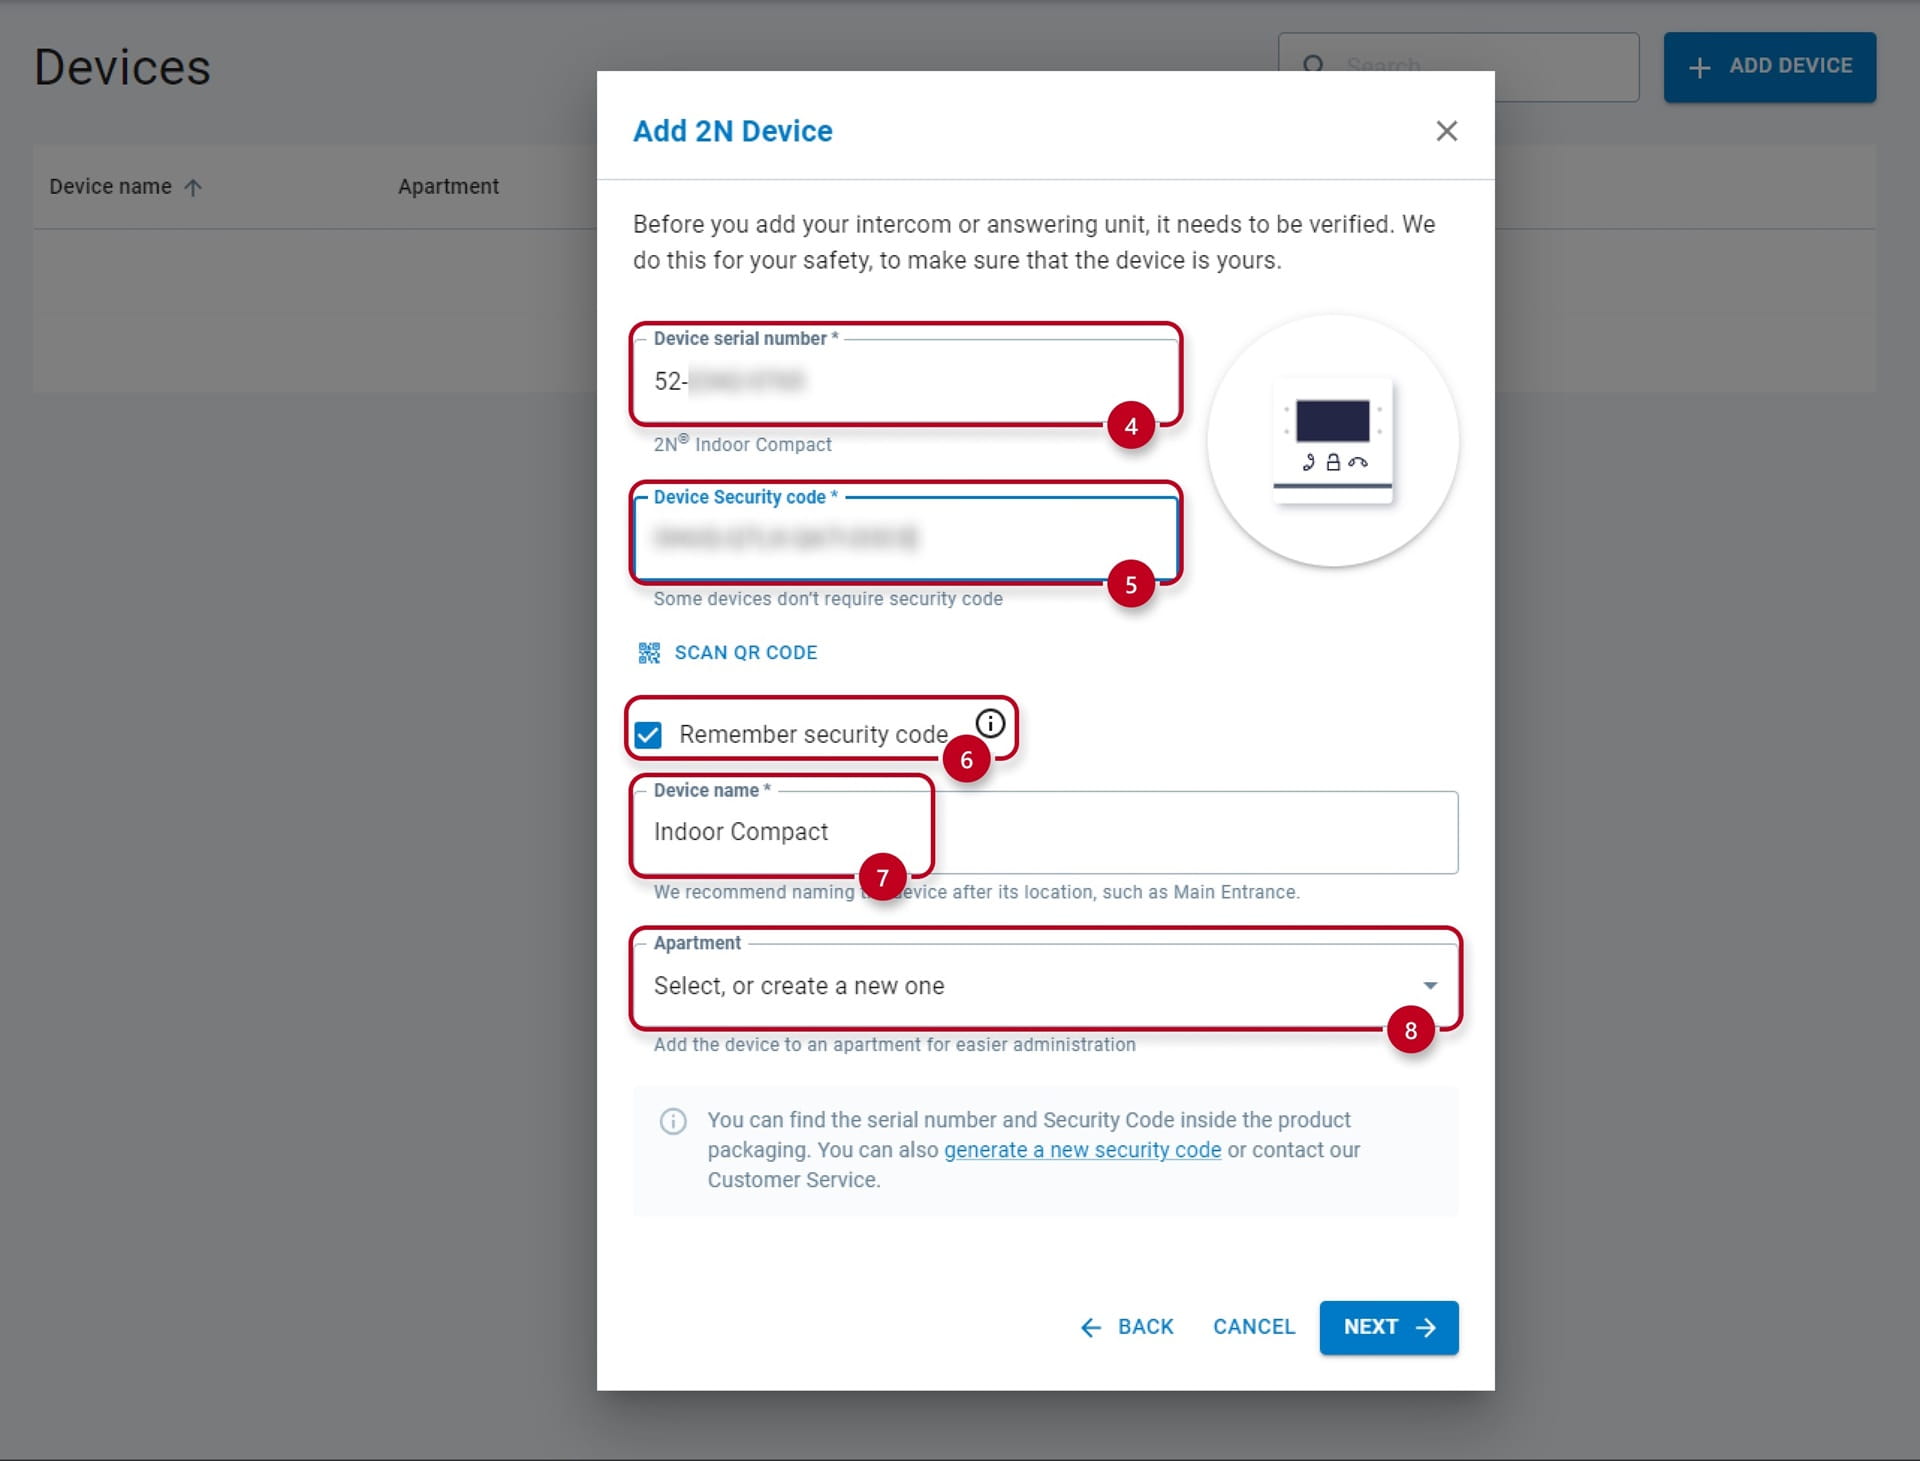
Fill out the "Device serial number" (4), then fill out the "Device Security code" (5)
-
It is recommended to check the "Remember security code" (6)
-
Optionally, you can also fill out a custom "Device Name" (7) and select or create new "Apartment" (8) if desired
-
In the next step you will be asked for selecting the "Configuration mode" (9) and "Connection mode" (10)
- For Automatic mode select "Automatic", for Local mode select "Local":
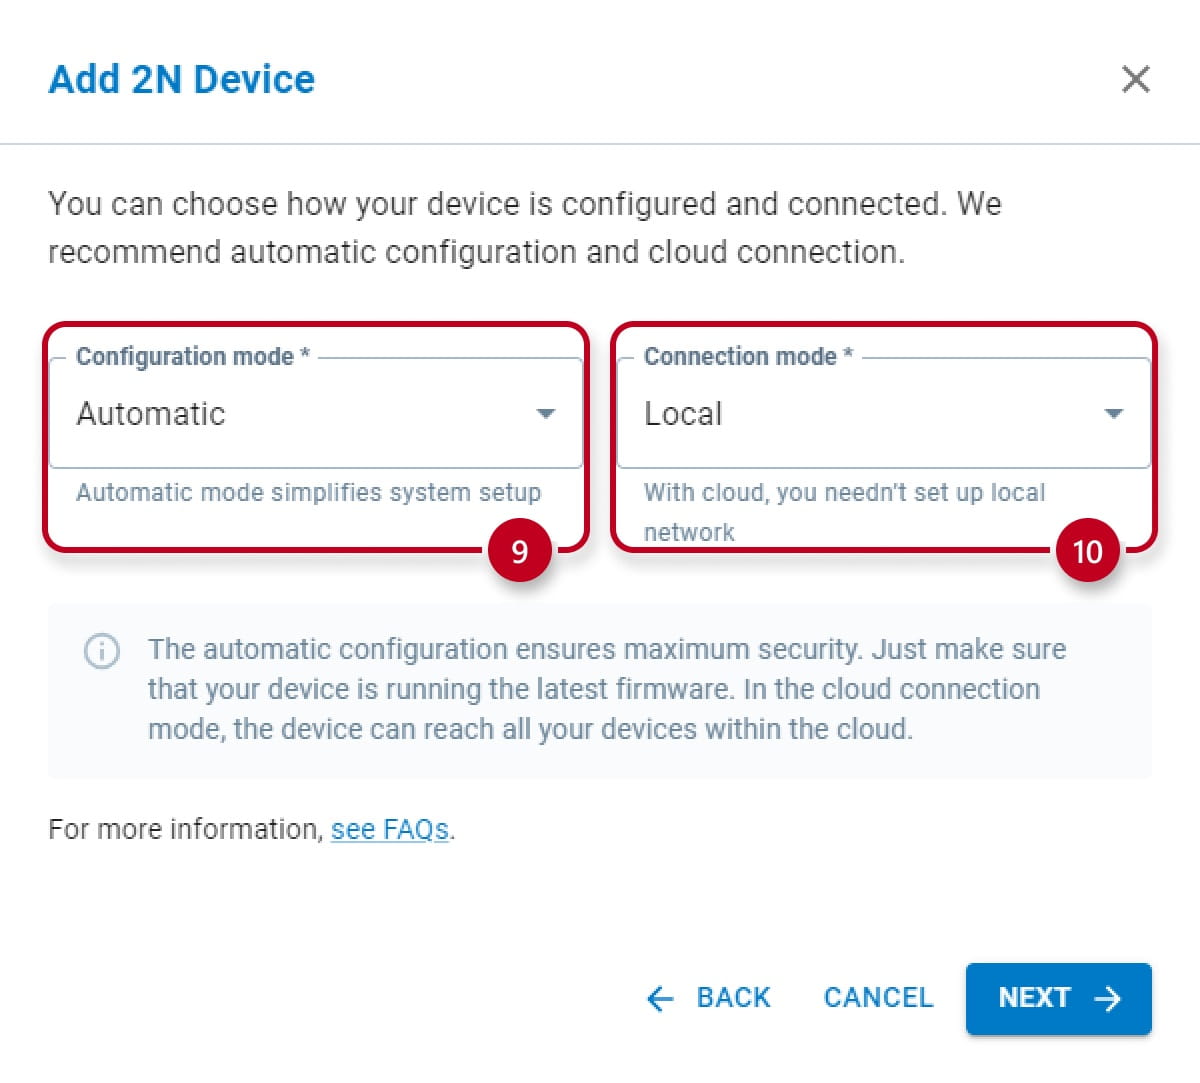
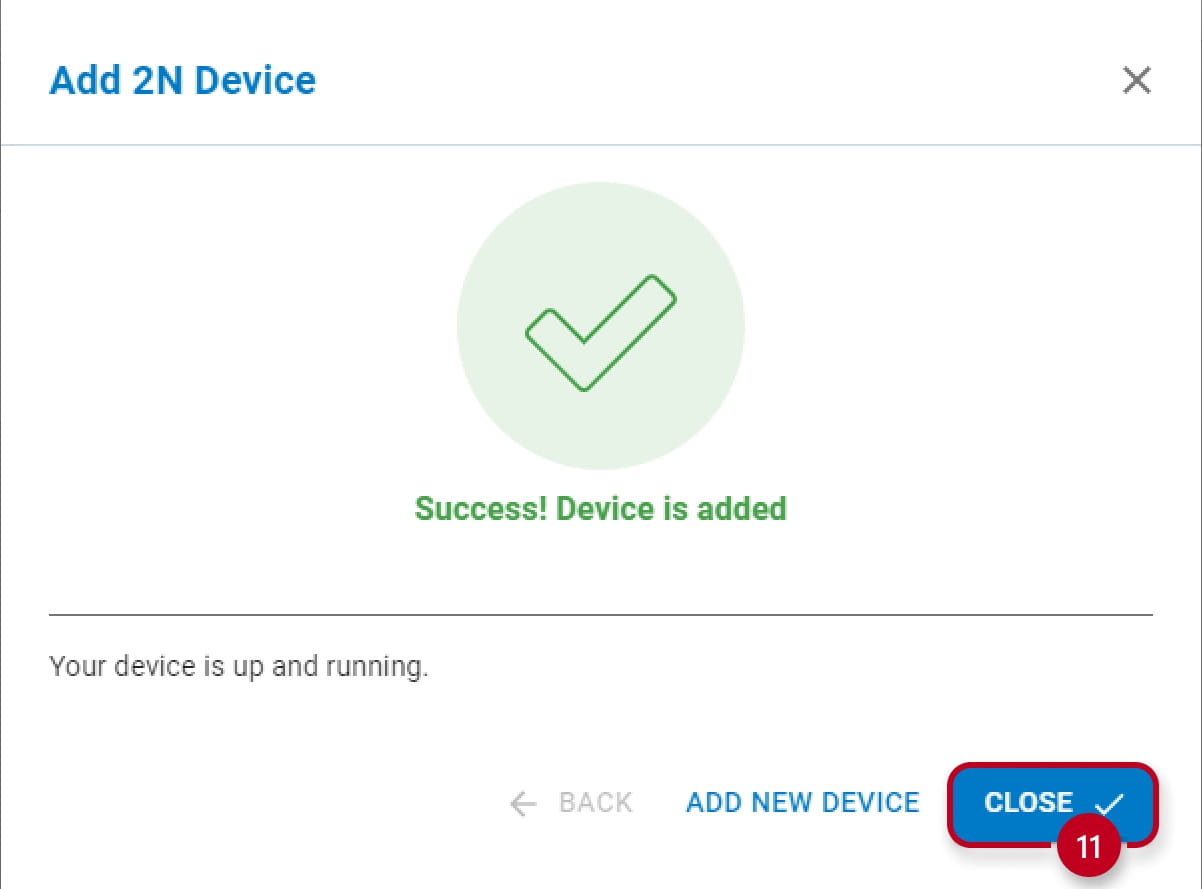
- Click on "CLOSE" (11) to finish the configuration
Cloud mode
-
You have two options how to set up your 2N Indoor Compact:
-
You can use automatic or manual configuration mode
-
-
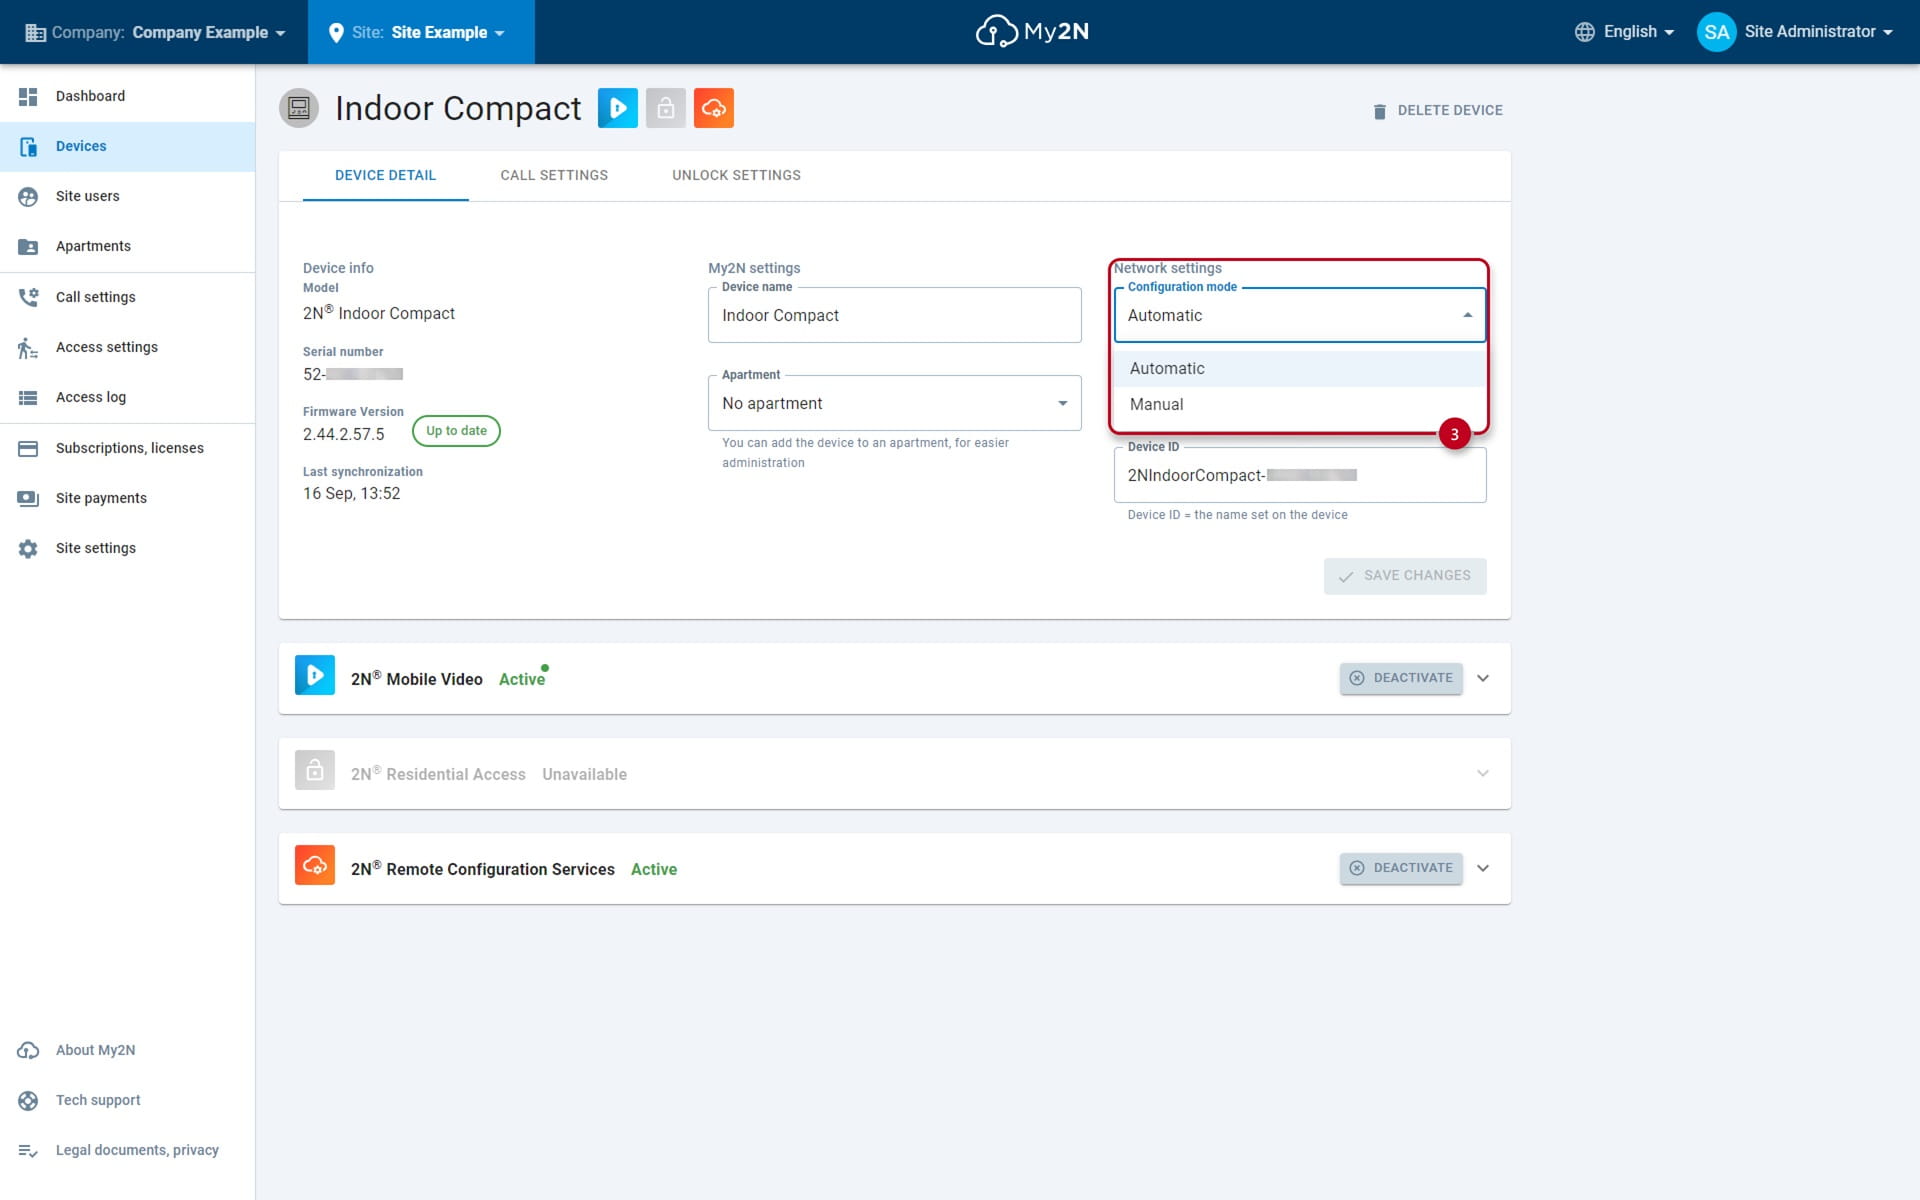
Mode selection is available while adding device (see above) or you can change the mode in device details
-
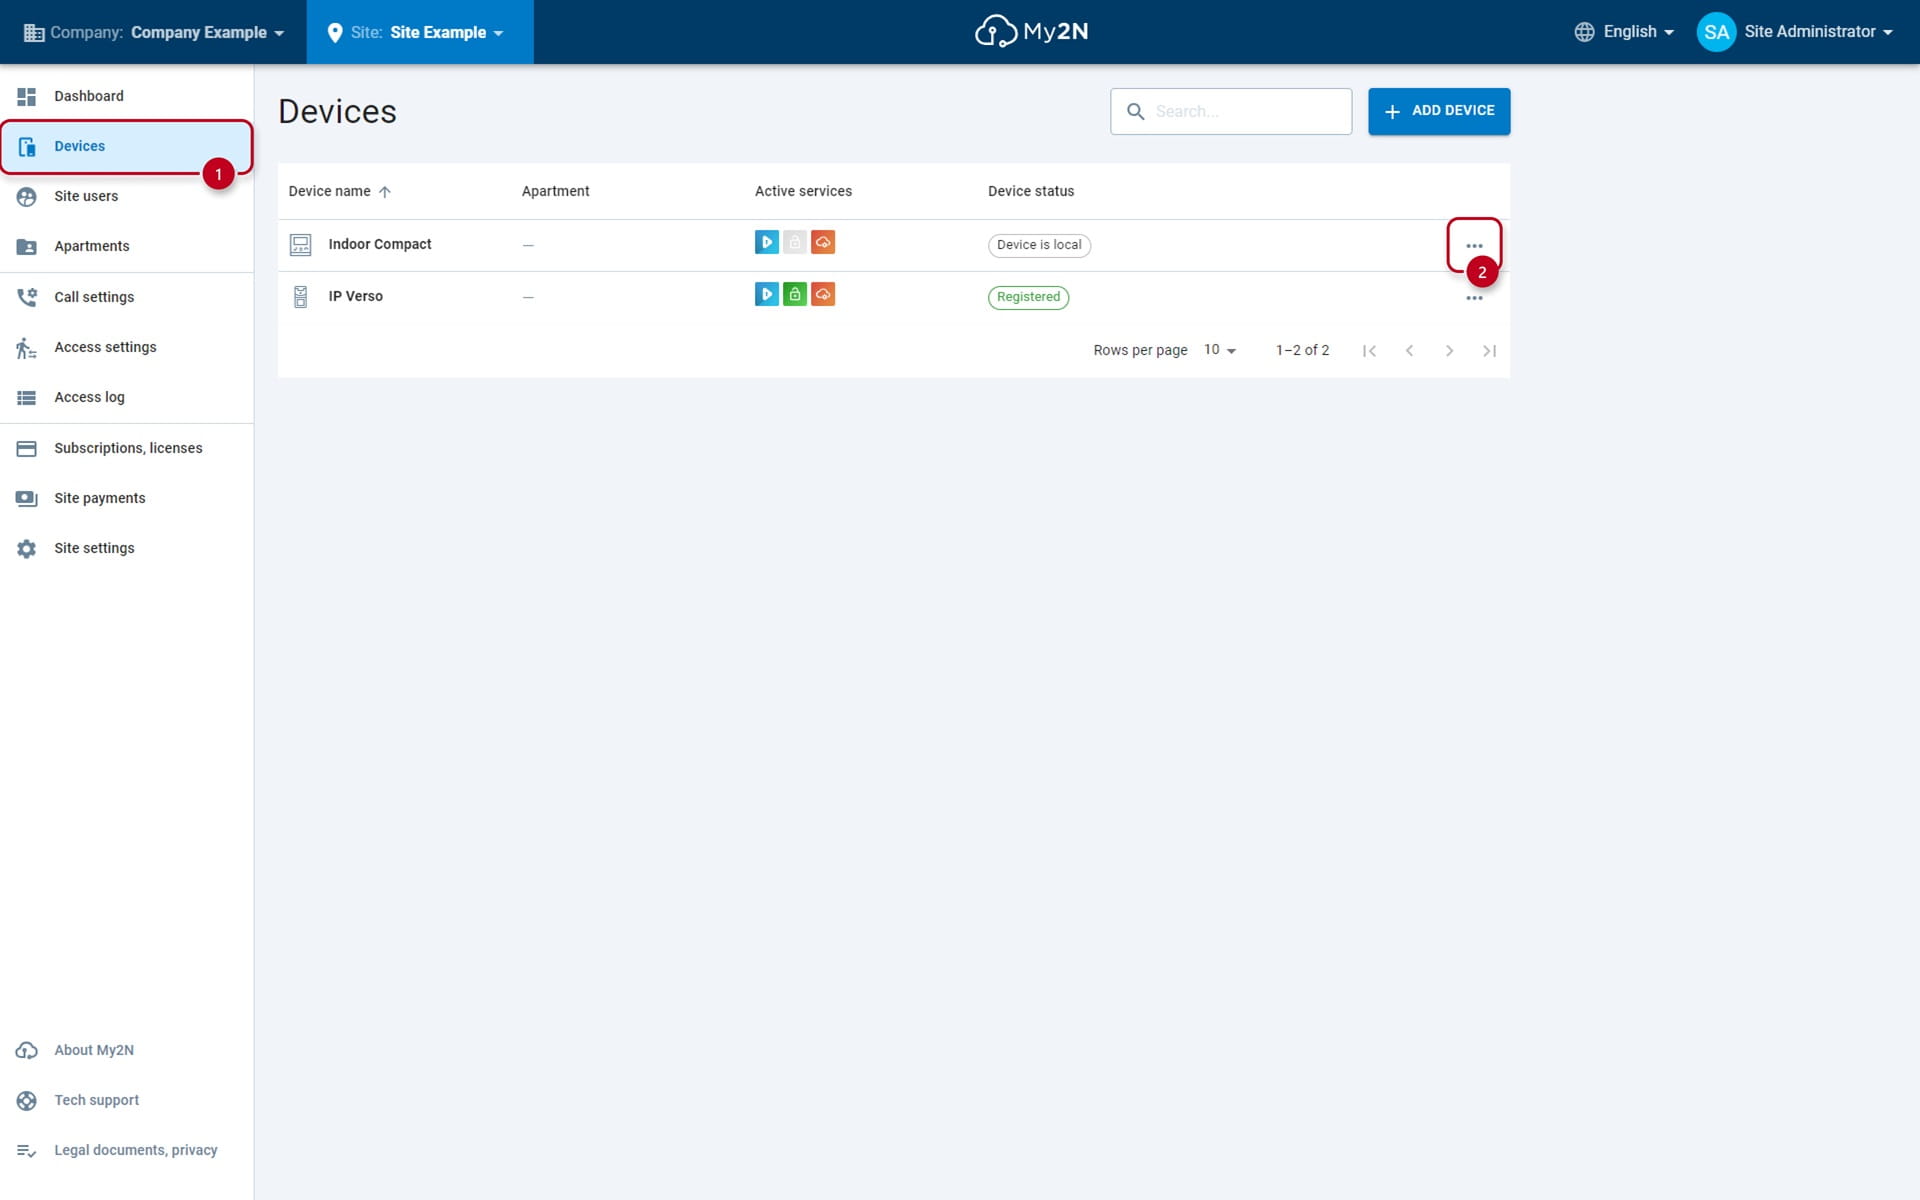
You can open device details by clicking on the "Devices" (1) and three dots (2) as shown below:
Automatic configuration
First option is an Automatic Configuration mode (3):
-
This mode is used for comfortable configuration of your answering unit via My2N service
Call settings
-
You are able to configure switch codes and dial button of the 2N Indoor Compact
-
Select "Call Settings" (1), fill out the name under "Contact name" (2)
-
The select the call destination (3), which will be assigned to calling button, from the list of the devices connected in your MY2N account
-
Save the configuration (4)

Even in Automatic Configuration Mode you can add manually an user from the device's Web Interface:
-
You can specify the number to which the call should be established and SIP account which will be responsible for the forwarding of the call
-
The number of the device (Device ID) is shown in My2N portal Settings section
-
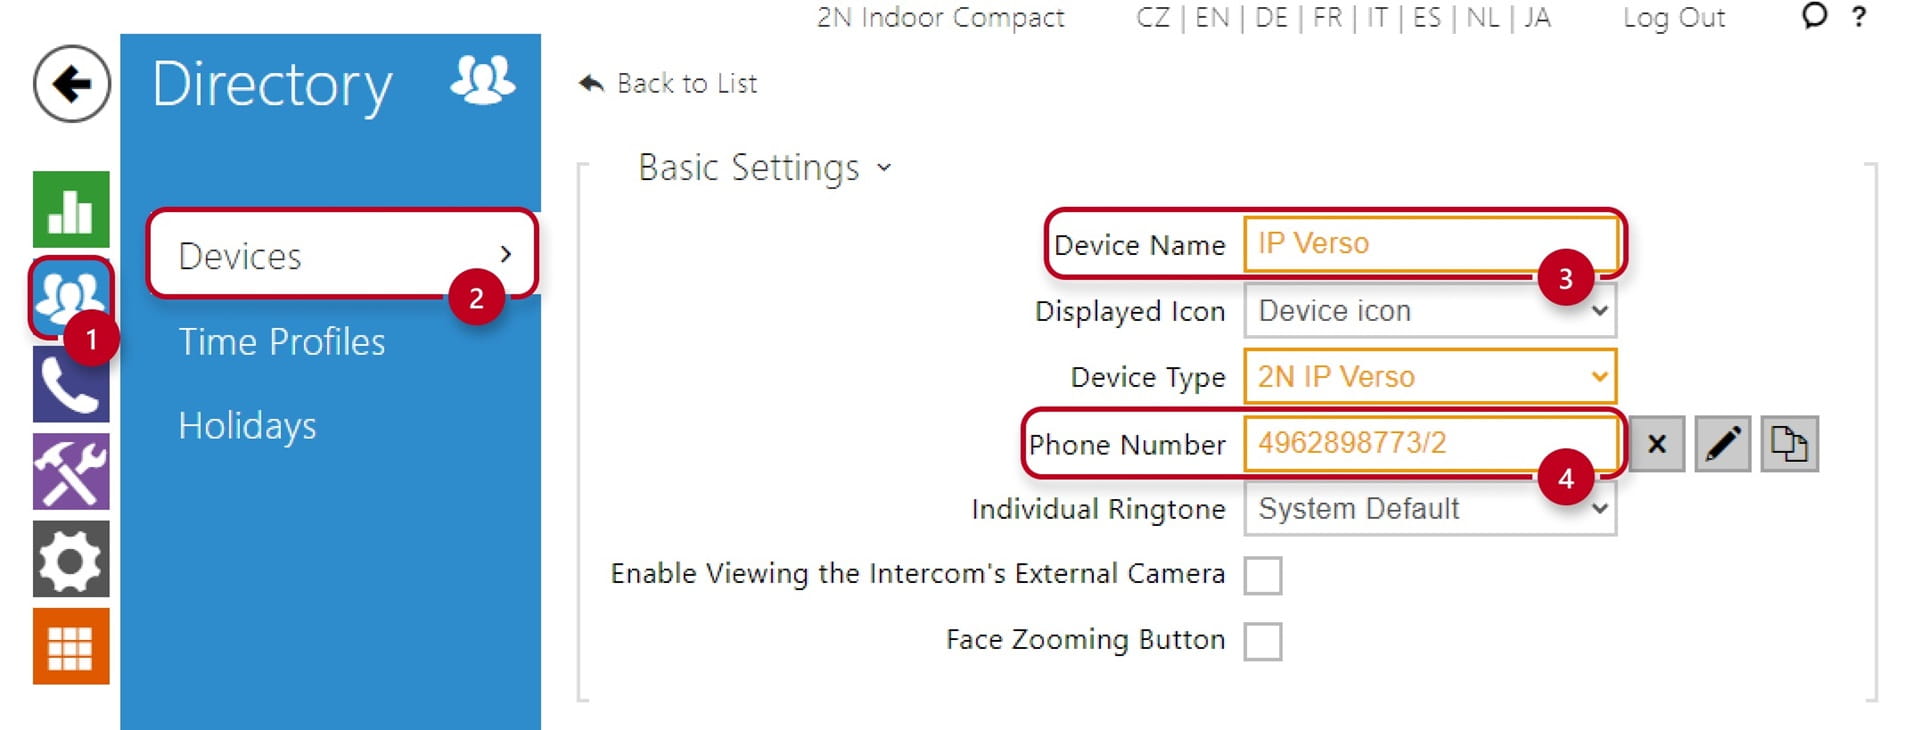
In this example the number is 4962898773 which is the ID of the registered Intercom in the site
-
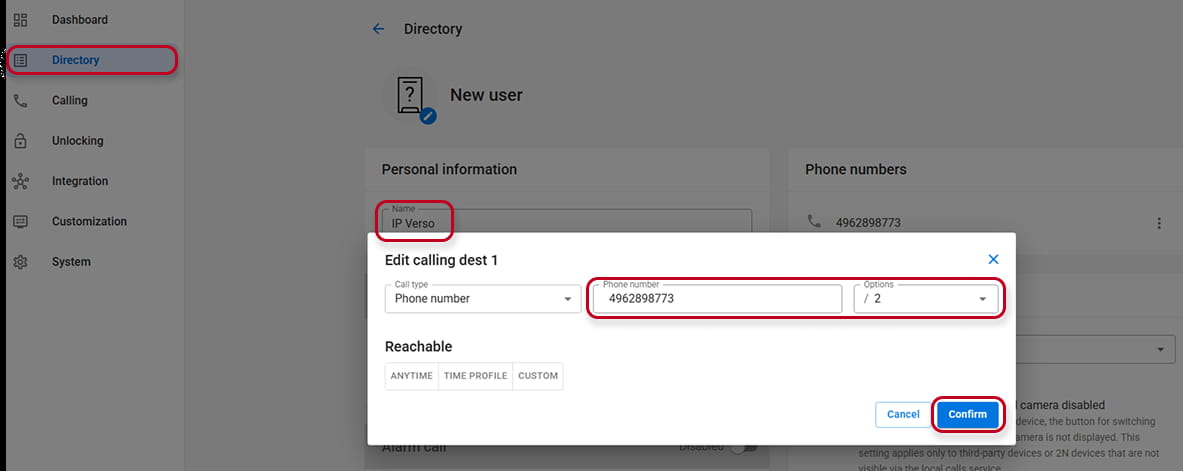
You can specify this number in the Directory menu section of the 2N Indoor Compact
-
SIP account is defined by /2 parameter in the Phone number field
-
It is necessary to use SIP account number 2 for the proper function
-
In Old Web Interface:
- In New Web Interface:
Unlock Settings
-
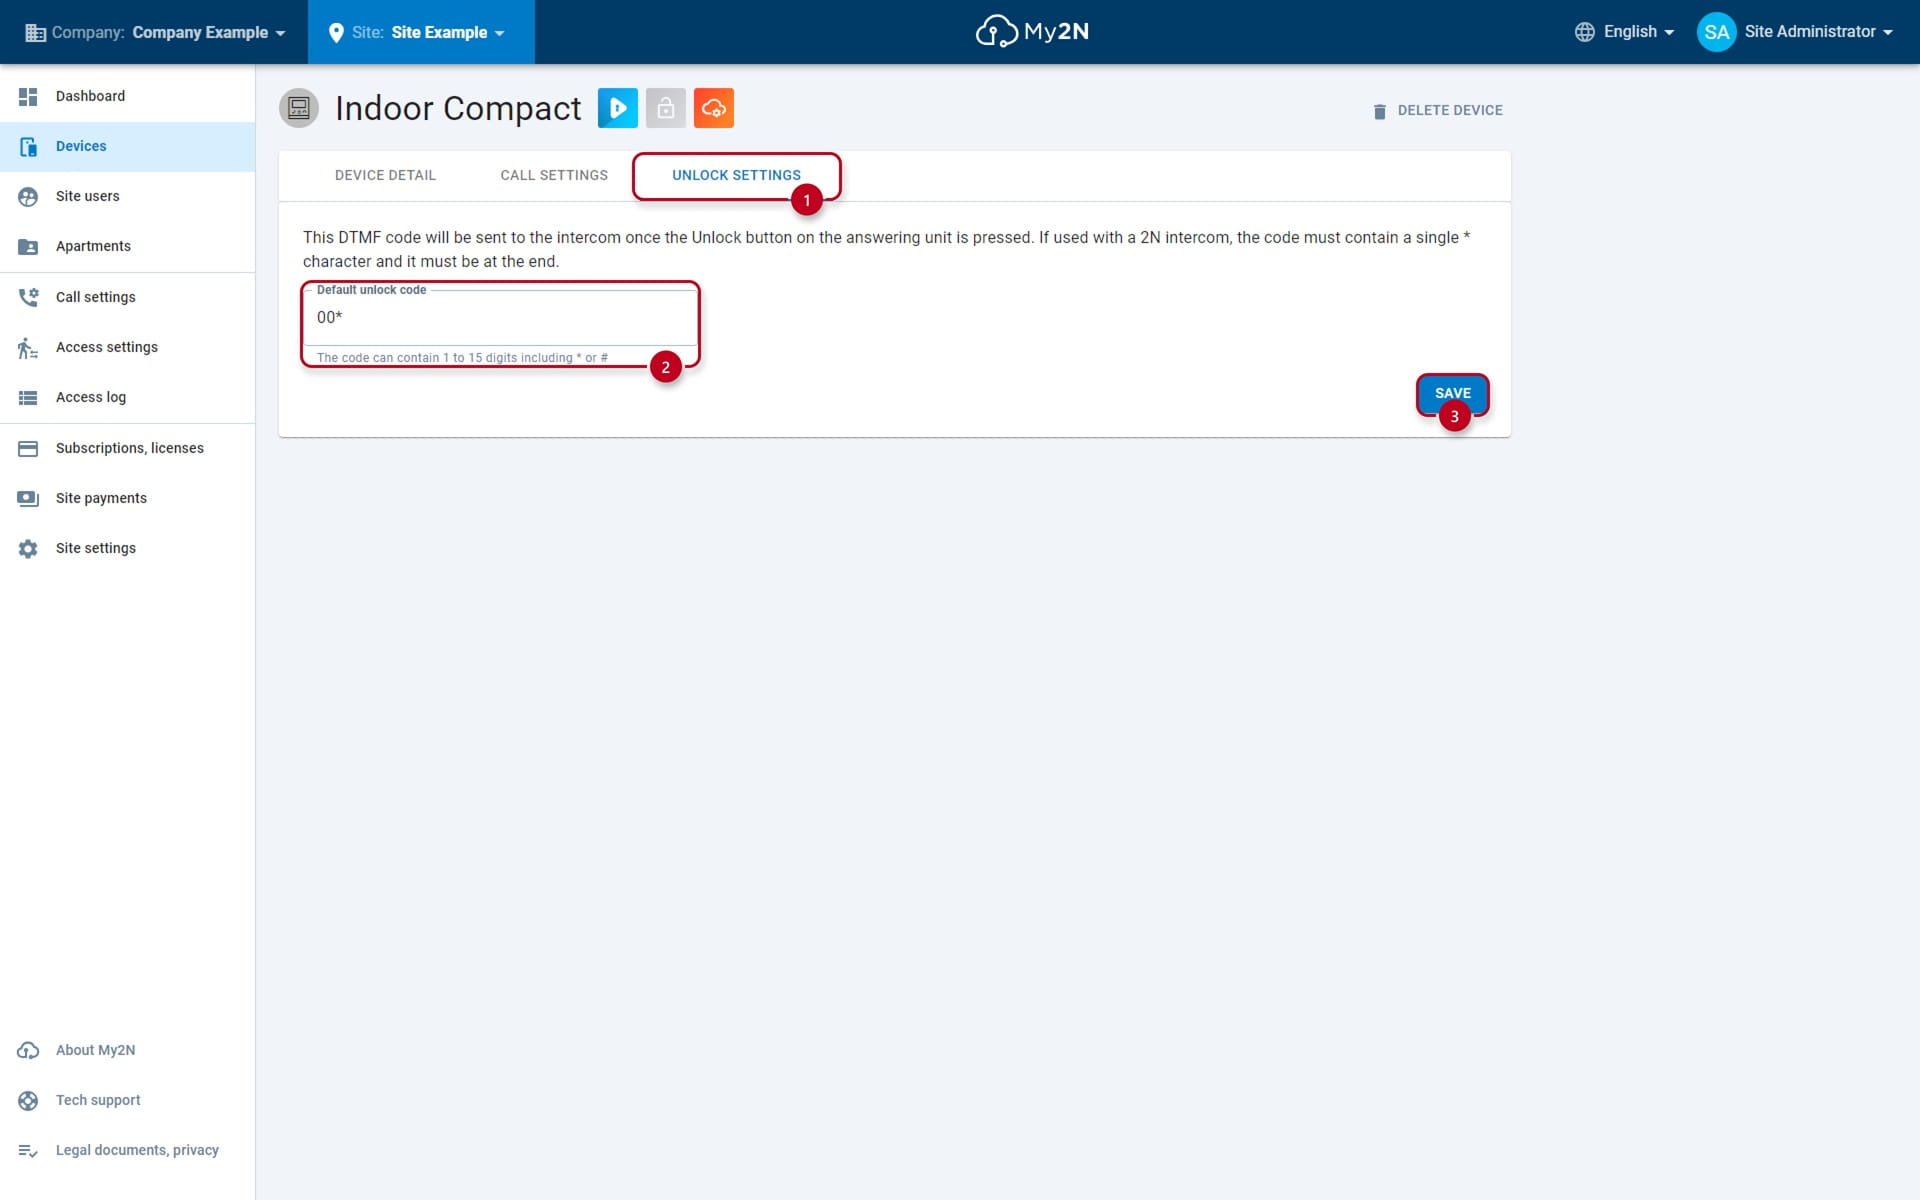
You can also change the unlock code sequence under "Unlock settings" (1)
-
The code can be changed under "Default unlock code" (2), by default the code is 00*
-
Save the configuration (3)
Answering modes
Last step is to check the answering mode
-
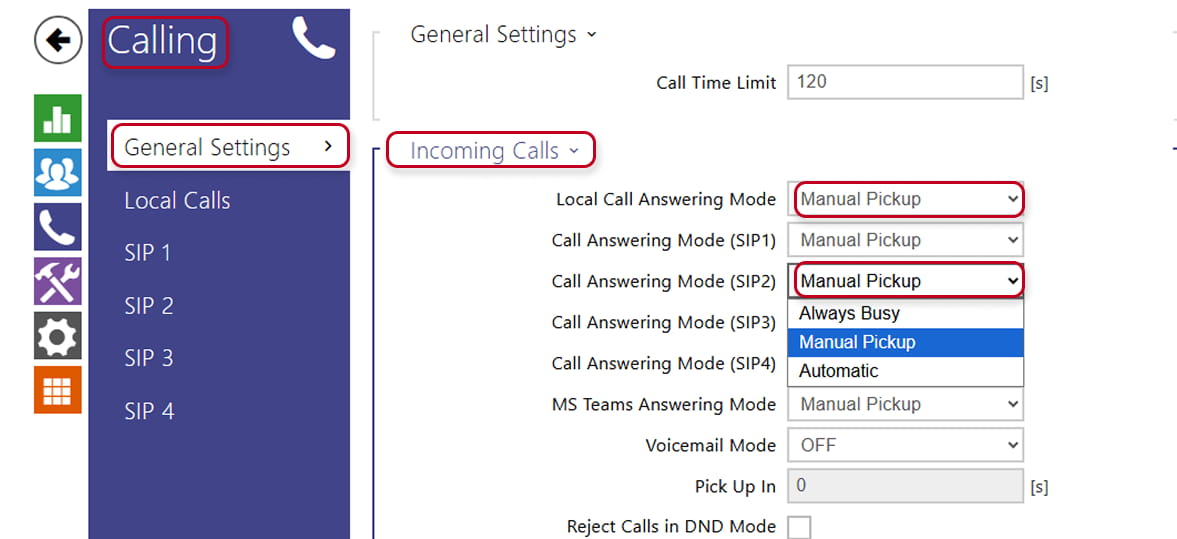
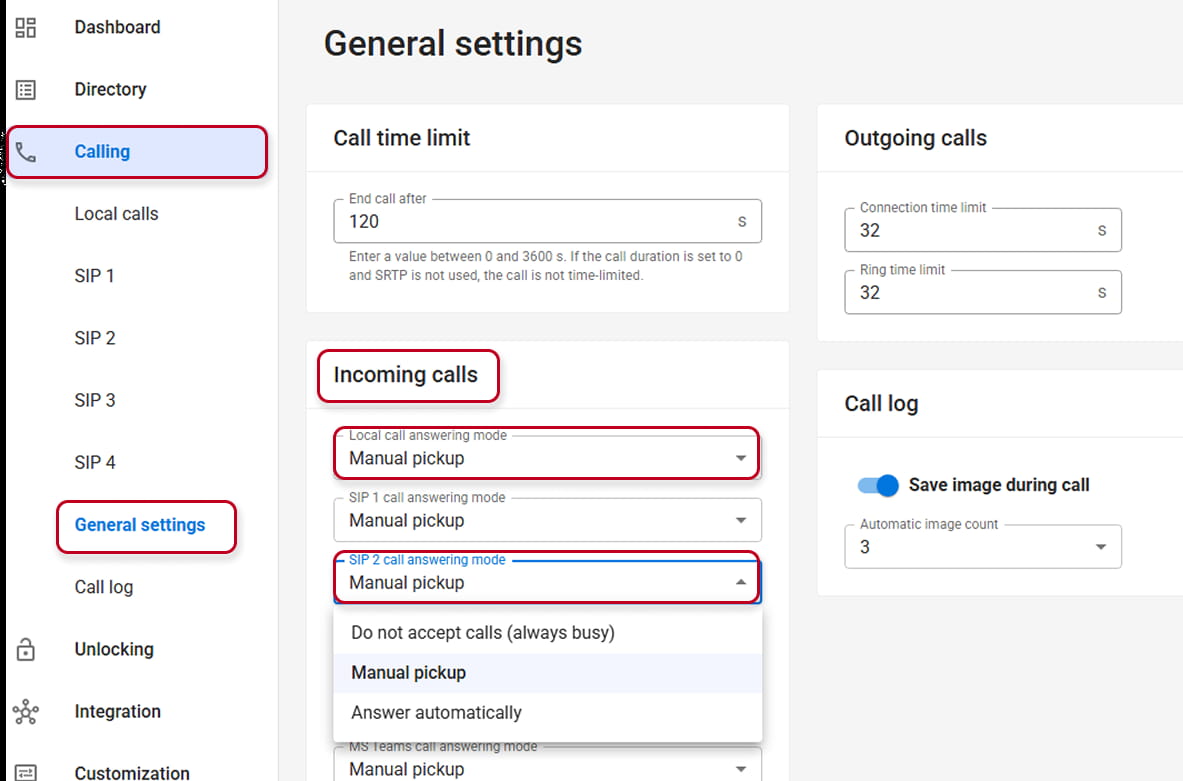
Go under "Calling", "General Settings", "Incoming Calls"
-
Check if the "Call Answering Mode (SIP2)" or Local Answering Mode has been set to "Manual Pickup", accordingly with the choice you have made for calling
-
Make sure to save the configuration
Old Web Interface:
In New Interface:
DTMF Sending Receiving modes
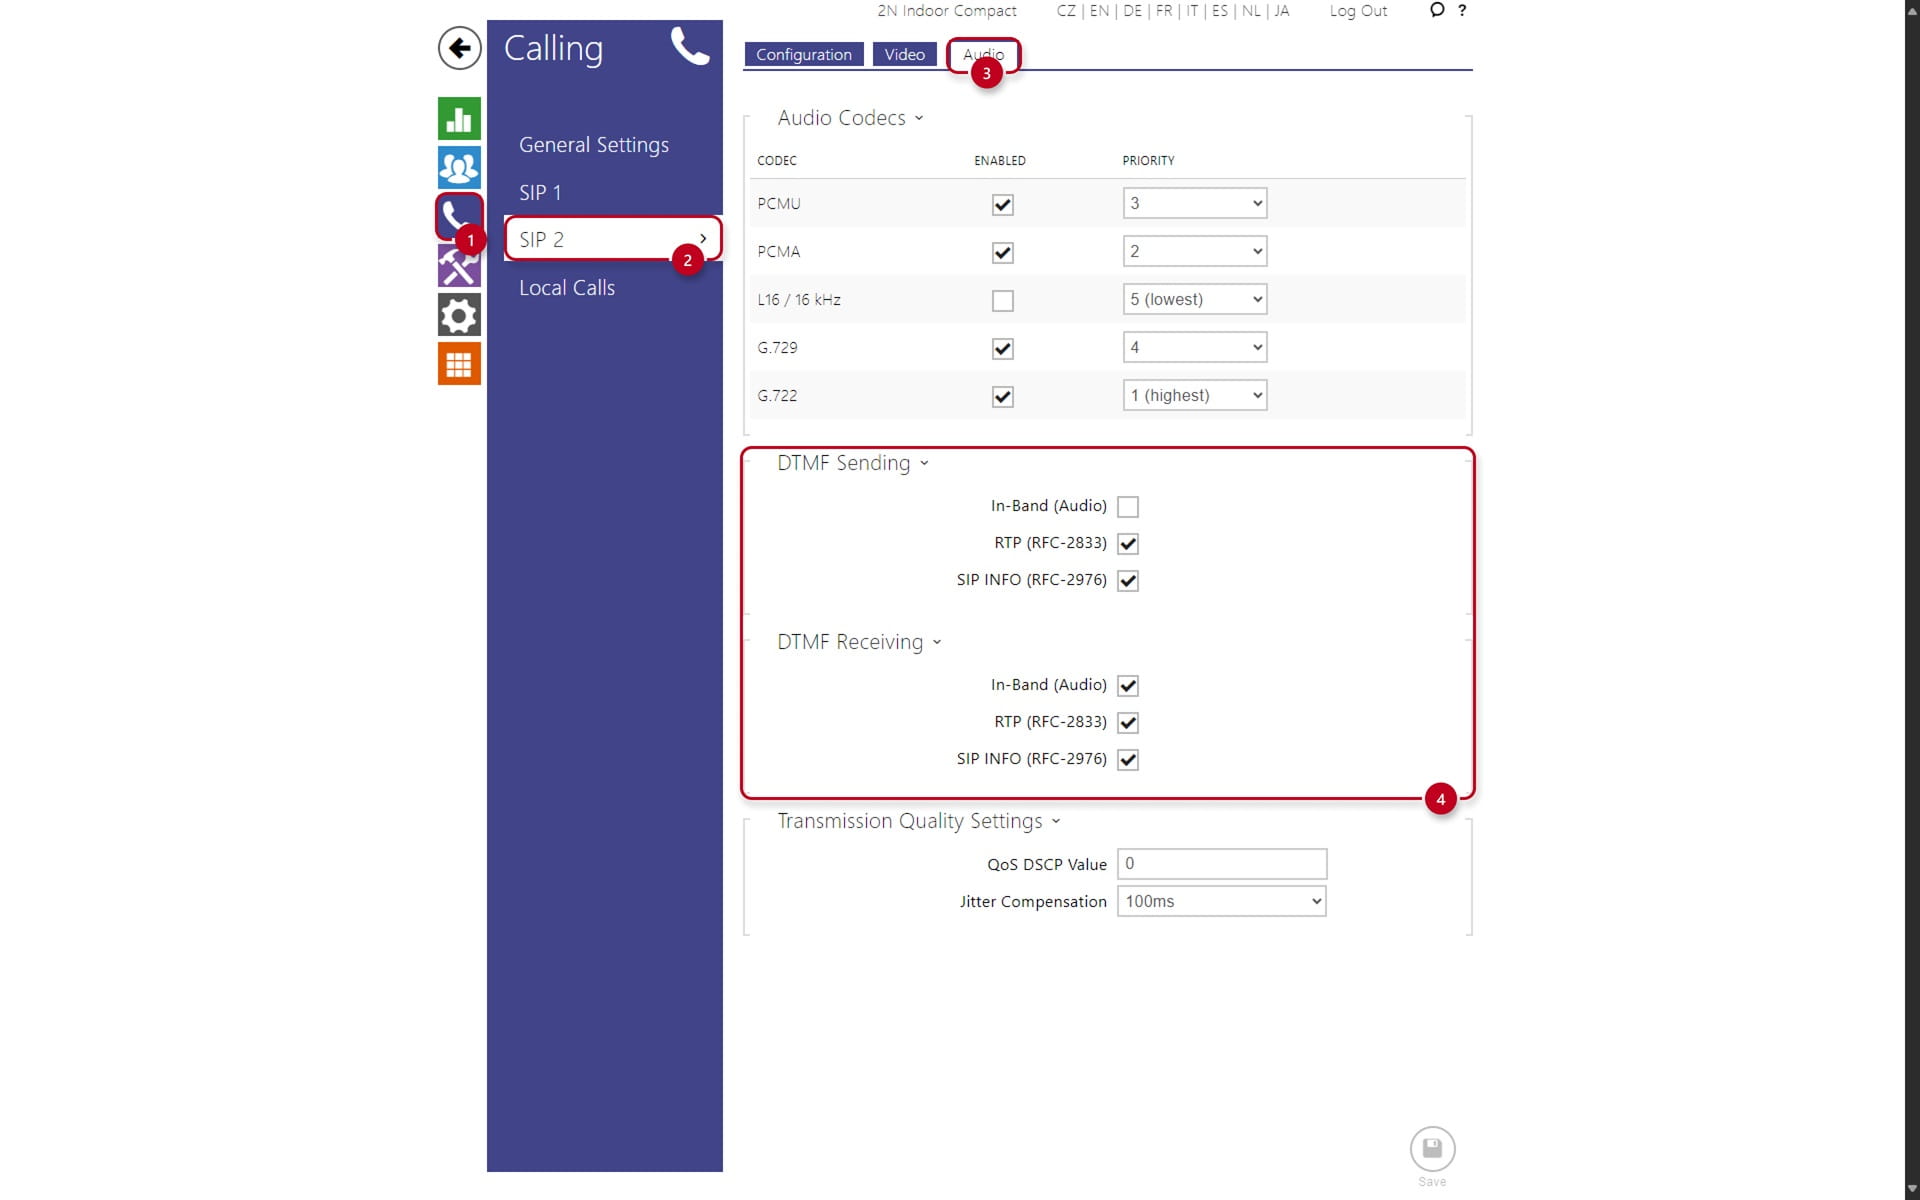
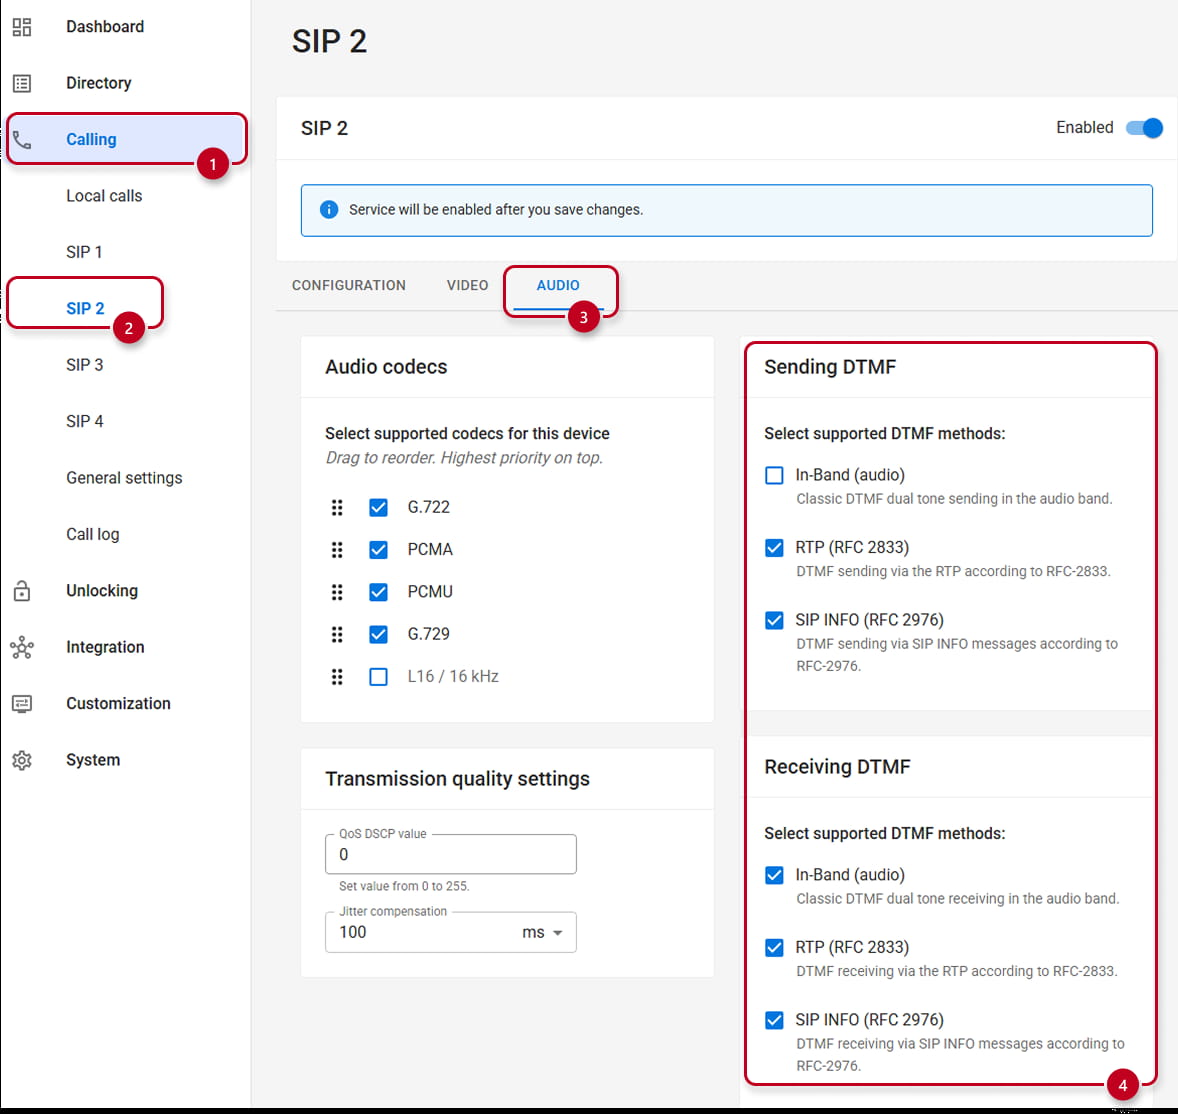
If you wish to activate switches over the call, make sure the DTMF modes are set up correctly:
-
Go under the "Calling" (1)
-
Select the SIP account 2, or the Local Calls, accordingly with you initial choice, in this example "SIP 2" (2)
-
Then click on the "Audio" (3) tab
-
Locate the DTMF Section, check if the "DTMF Sending/Receiving" (4) is set up correctly (in Old and then in New Web Interface)
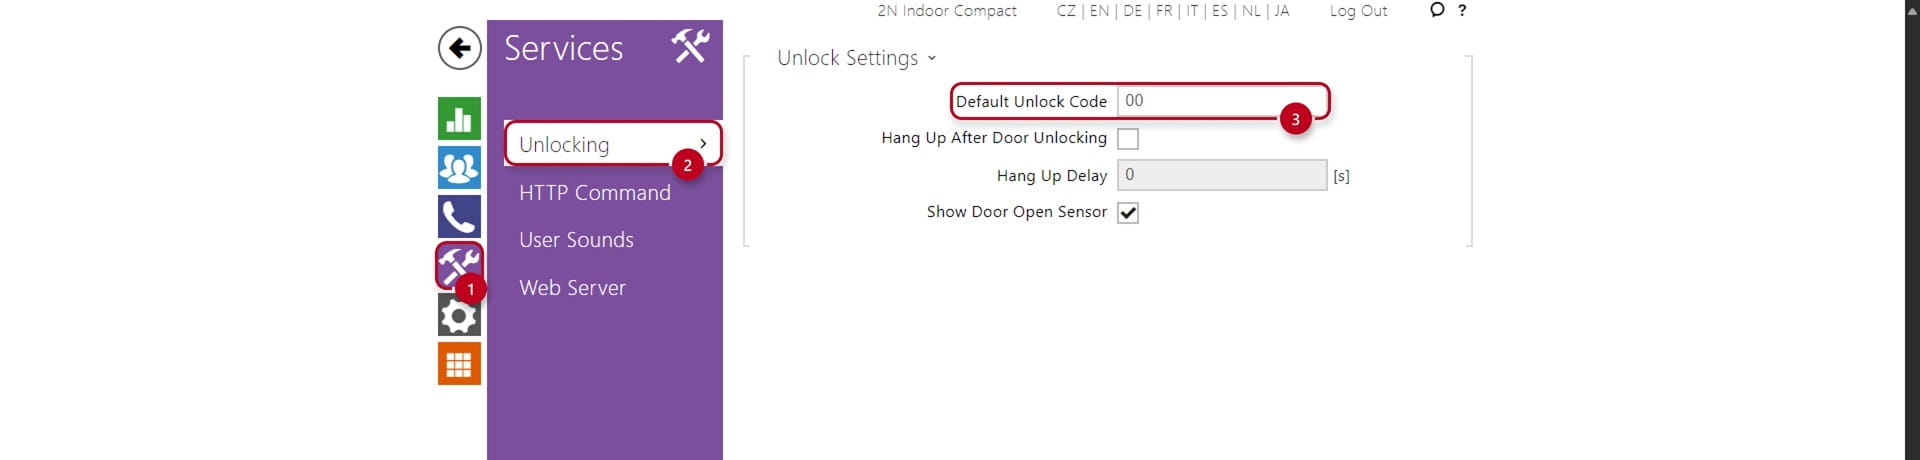
Unlocking
You can also configure the "Default Unlock Code", which is by default configured in the Hardware - Switches section of the Intercom
-
Click on "Services" (1)
-
Select "Unlocking" (2)
-
Enter the default code under "Default Unlock Code" (3), for example "00"