The steps in this article require using the web interface of a 2N device. Please follow this manual in case this is your first time using the web interface.
2N IP Intercom is capable of making direct IP calls without the need of registration to SIP Proxy (PBX),
using Device ID (2N devices) or IP address (any SIP device).
Registration to SIP Proxy is described in this article: SIP Proxy registration
Prerequisites
- 2N IP Intercom with the latest firmware,
no additional license is required. - Another SIP device to be called.
(2N Answering unit / 2N IP Intercom / 3rd party SIP device)
Be sure, it is capable to receive the call.
Click here for instructions for firmware 3.0 and newer.
Read more about the differences in long-term support and active track 2N OS.
Firmware 2.50 and older (LTS)
Basic calling configuration
Click on the part according to what device you would like to call.
2N Answering unit or 2N IP Intercom
- Call features are disabled by default.
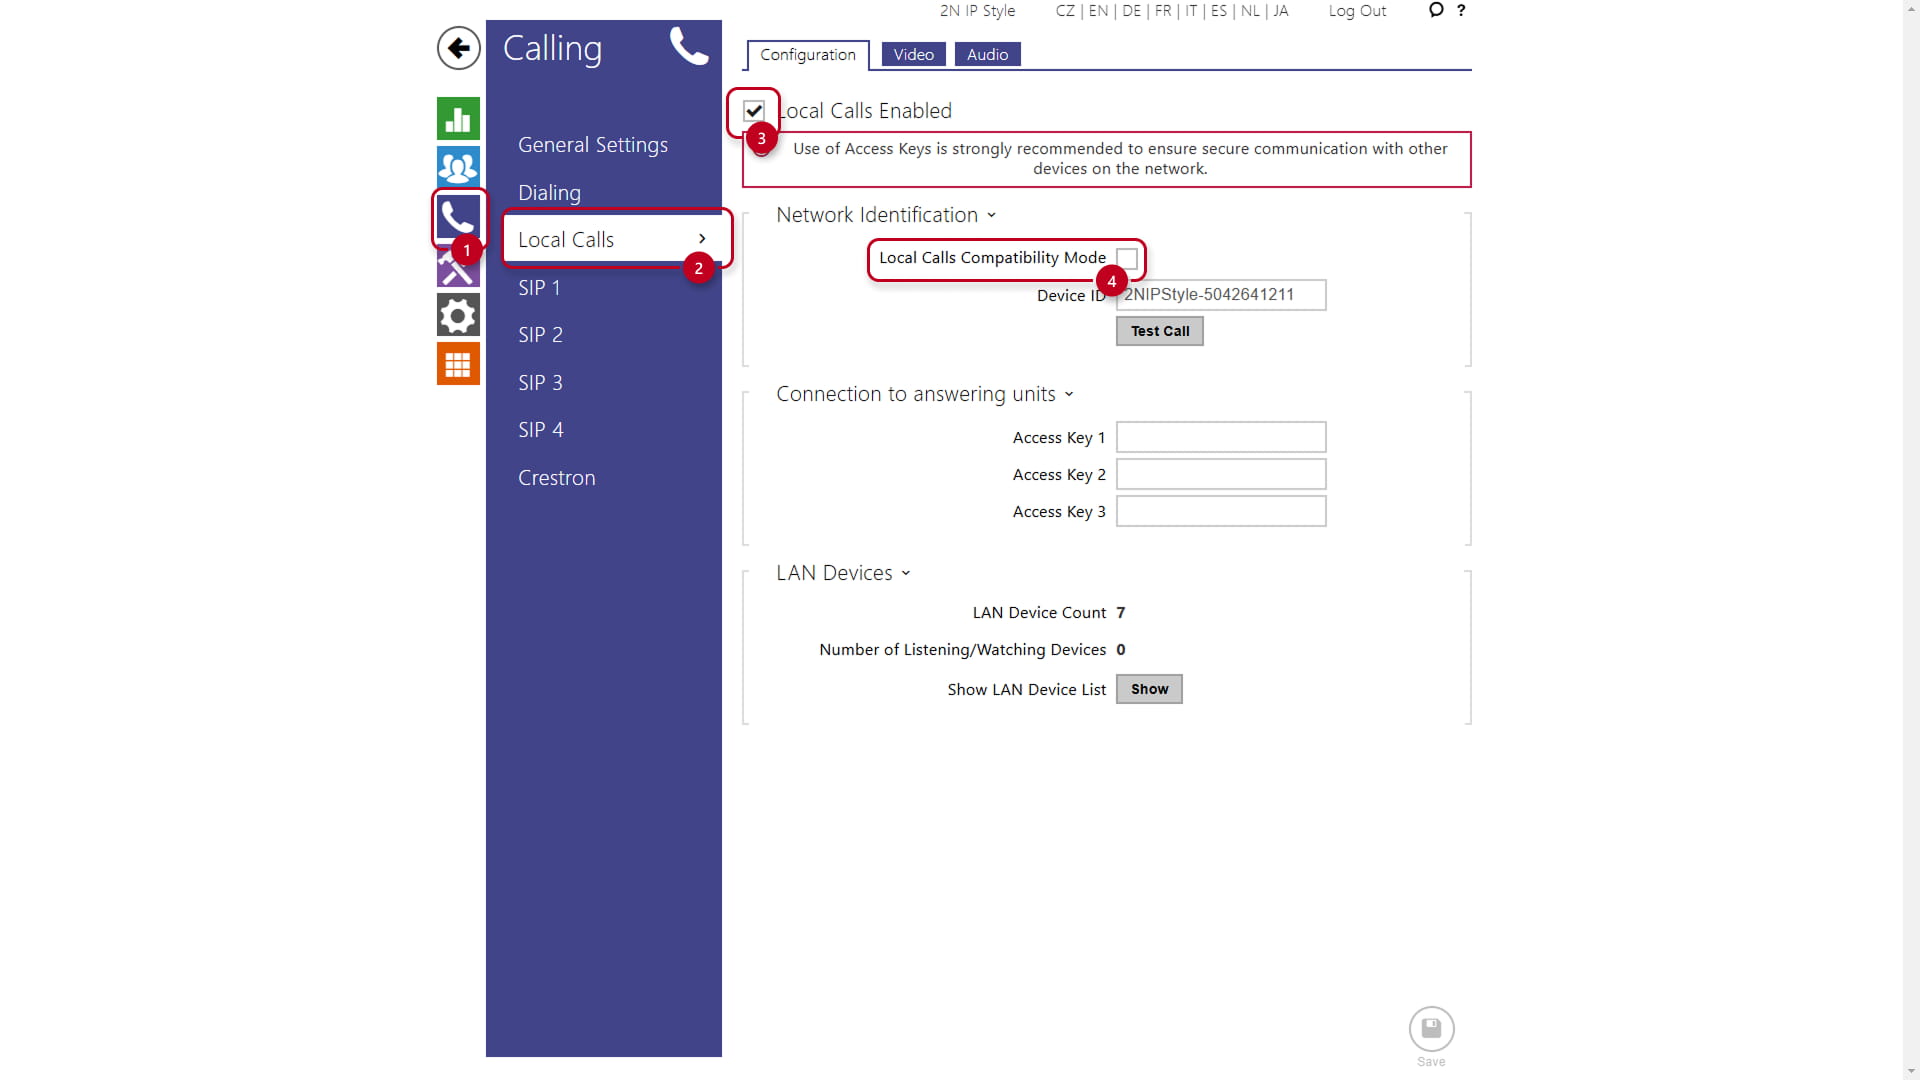
Go to the calling and also called device web interface,
section Calling - Local Calls - Configuration and enable the feature. -
Ensure that all devices in your network operate in the same mode, configured via Calling > Local Calls > Configuration > Network Identification > Local Calls Compatibility Mode
For networks with legacy devices, such as 2N Indoor Touch, the Local Calls Compatibility Mode must always be enabled. This mode is exclusive and doesn't allow calling with devices in a different mode.
By default this parameter is disabled that means that: SIPS and SRTP are now enforced for Local Calls after a factory reset.
- Assign the called device to the user.
You can use the inbuilt scanner or set the user manually.
- Using inbuilt scanner
- Go to the calling device web interface, section Directory - Users and click the Find Device button.
- Using inbuilt scanner

-
-
- Select the devices and click the Add button.
-

-
- Set the user manually
- Go to the calling device web interface, section Directory - Users
and open the existing user or create a new one by clicking the Add User button.
- Go to the calling device web interface, section Directory - Users
- Set the user manually

-
-
- Find the part User Phone Numbers and fill in the first Phone Number in format device:DeviceID.
-

In default, Device ID is in format Model-SN, e.g. 2NIndoorView-5412345678.
In the called device, you can adjust it in section Calling - Local Calls - Configuration.

- If you wish to start the call by pressing the button, you need to assign the user to the button
in section Calling - Dialing - Quick Dial Buttons.

any SIP device (2N and also 3rd party)
- Call features are disabled from default.
Go to the 2N calling device web interface,
section Calling - SIP 1 - Configuration and enable the feature.
Ensure enabling calling also in the called device.

- Set the user
- Go to the 2N calling device web interface, section Directory - Users
and open the existing user or create a new one by clicking the Add User button.
- Go to the 2N calling device web interface, section Directory - Users
-
- Find the part User Phone Numbers and fill in the first Phone Number in format sip:IPaddress (e.g. sip:192.168.1.101).
IPaddress is IP address of the called device. If it is under SIP Proxy and there is no SIP Proxy registration,
you can use also format sip:extension@IPorDomain (e.g. sip:[email protected]).
- Find the part User Phone Numbers and fill in the first Phone Number in format sip:IPaddress (e.g. sip:192.168.1.101).

- If you wish to start the call by pressing the button, you need to assign the user to the button
in section Calling - Dialing - Quick Dial Buttons.
Calling more devices
- You can set more devices to the user and call the next device if the previous one is busy.

- You can also assign a deputy user (with another 3 devices) to ensure answering call even if you are busy at all three phone numbers.

-
If you need to call the devices at once, enable parameter Group call to next number.

Alternatively, you can make multiple users with one or more phone numbers and assign them all to one button.

Firmware 3.0 and newer
Basic calling configuration
Click on the part according to what device you would like to call.
2N Answering unit or 2N IP Intercom
- Call features are disabled by default.
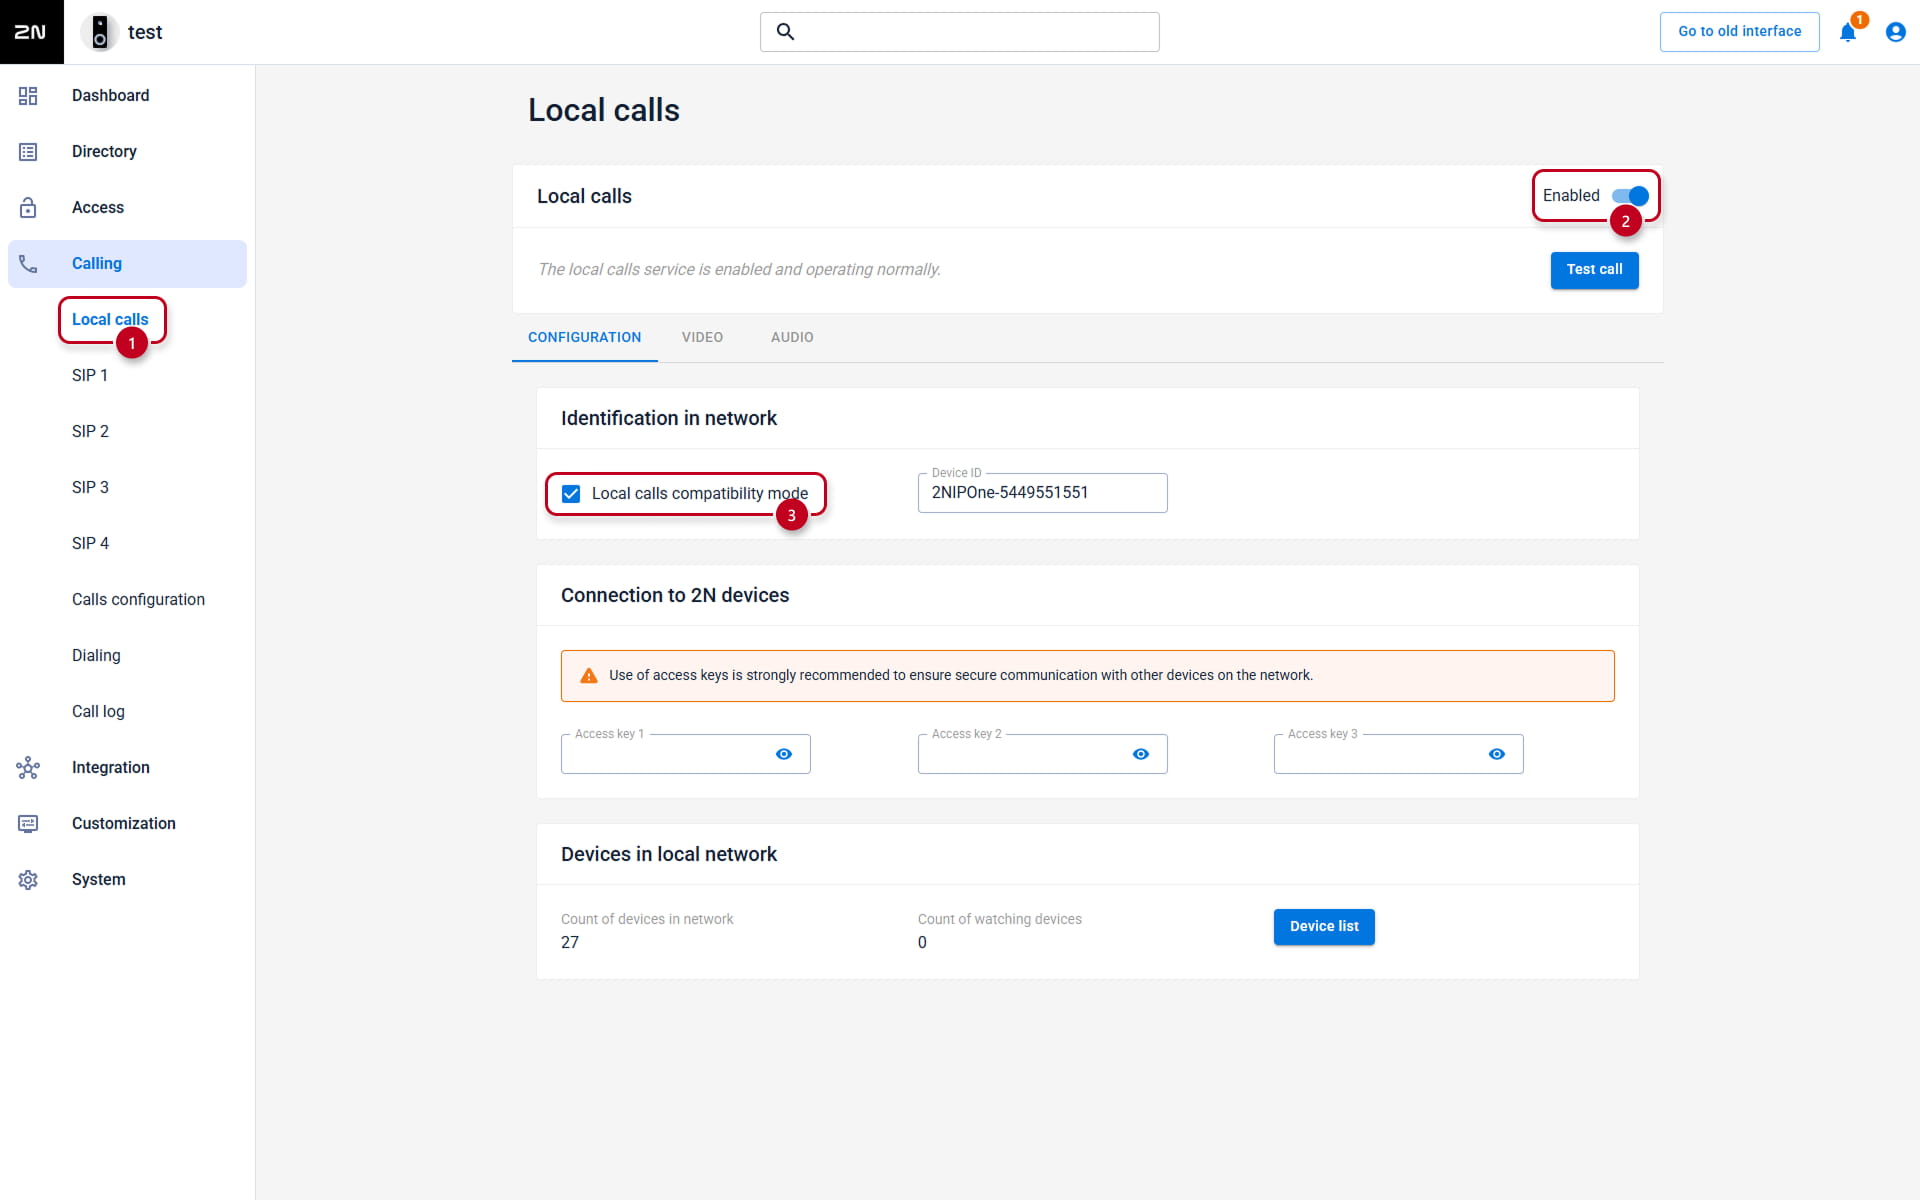
Go to the calling and also called device web interface,
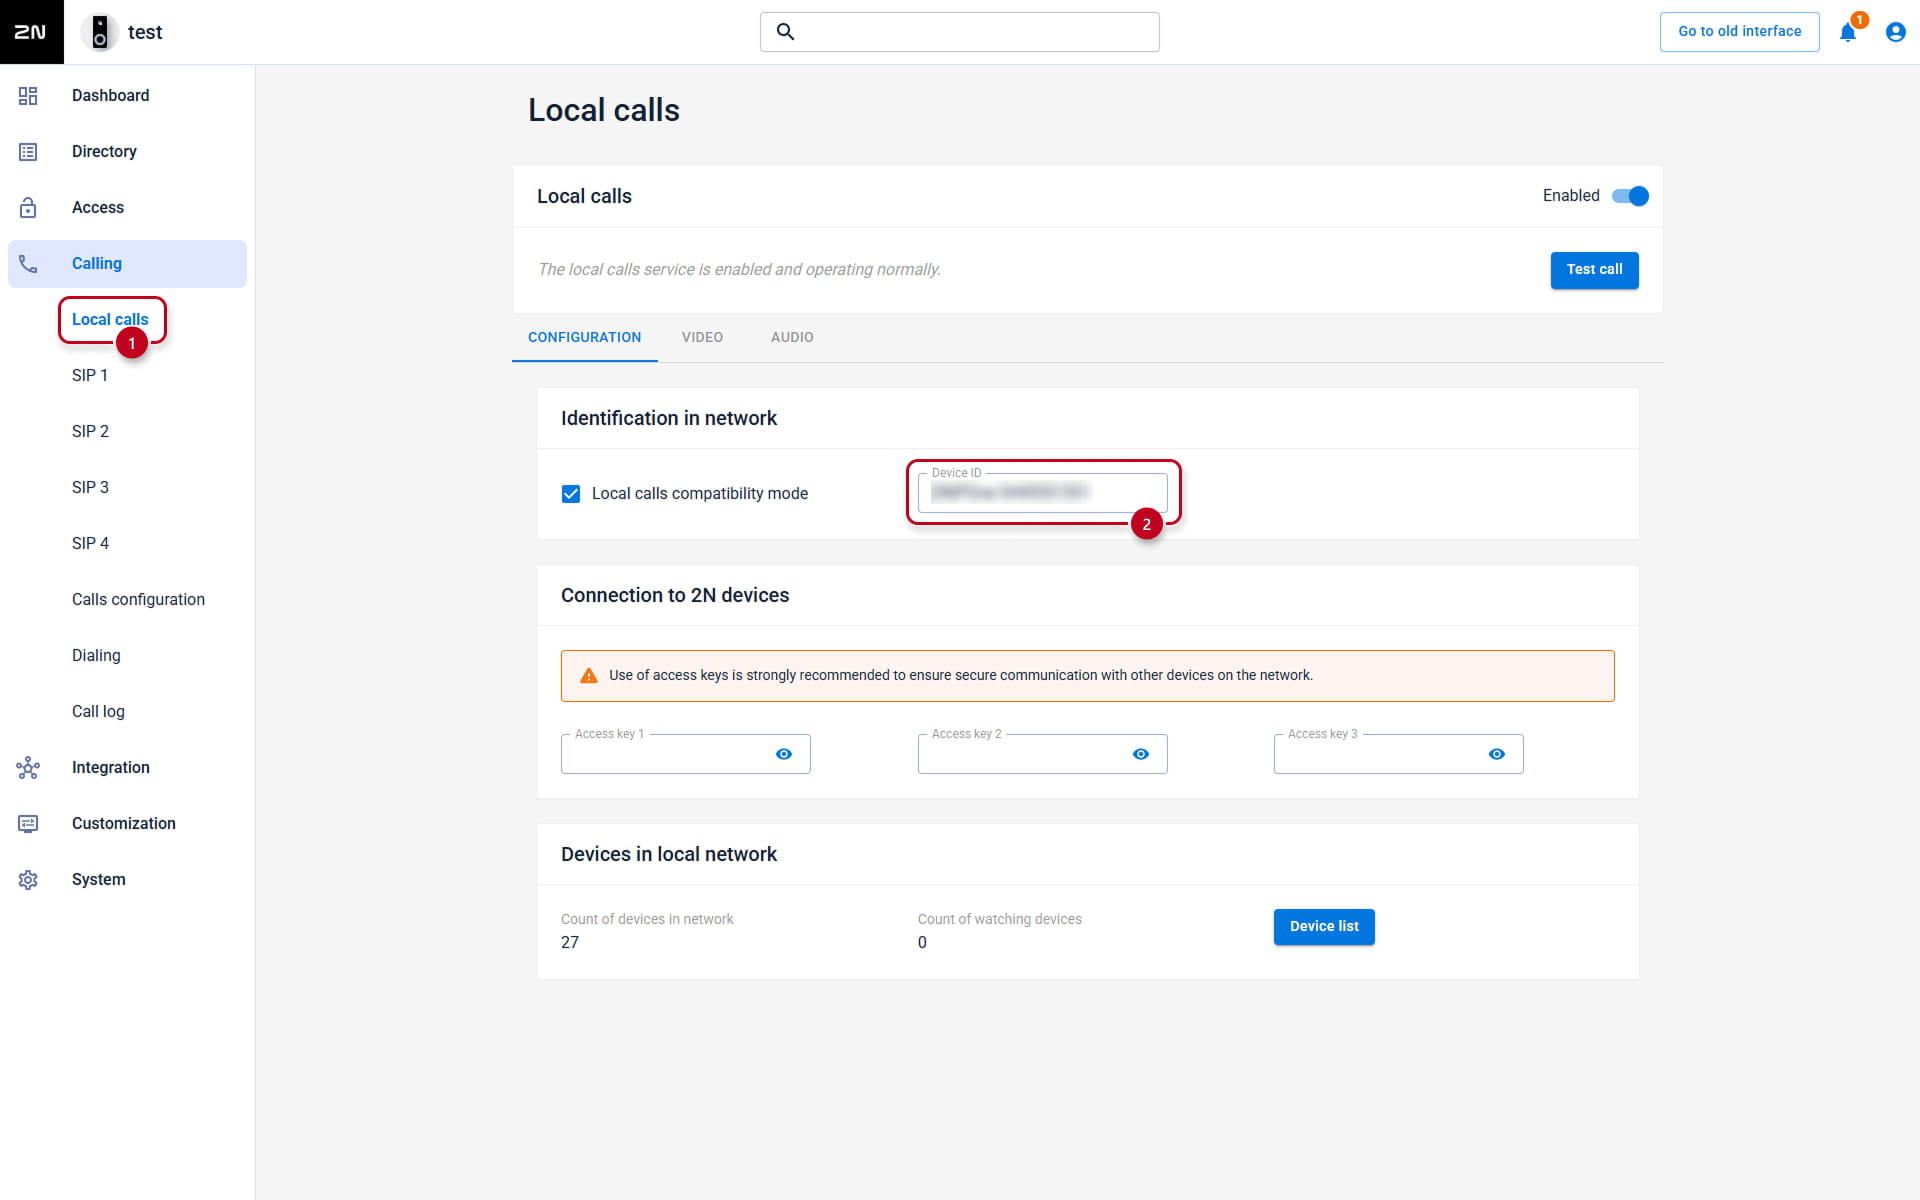
section Calling - Local Calls - Configuration and enable the feature. -
Ensure that all devices in your network operate in the same mode, configured via Calling > Local Calls > Configuration > Identification in network > Local Calls Compatibility Mode
For networks with legacy devices, such as 2N Indoor Touch, the Local Calls Compatibility Mode must always be enabled. This mode is exclusive and doesn't allow calling with devices in a different mode.
By default this parameter is disabled that means that: SIPS and SRTP are now enforced for Local Calls after a factory reset.
- Assign the called device to the user.
You can use the inbuilt scanner or set the user manually.
- Using inbuilt scanner
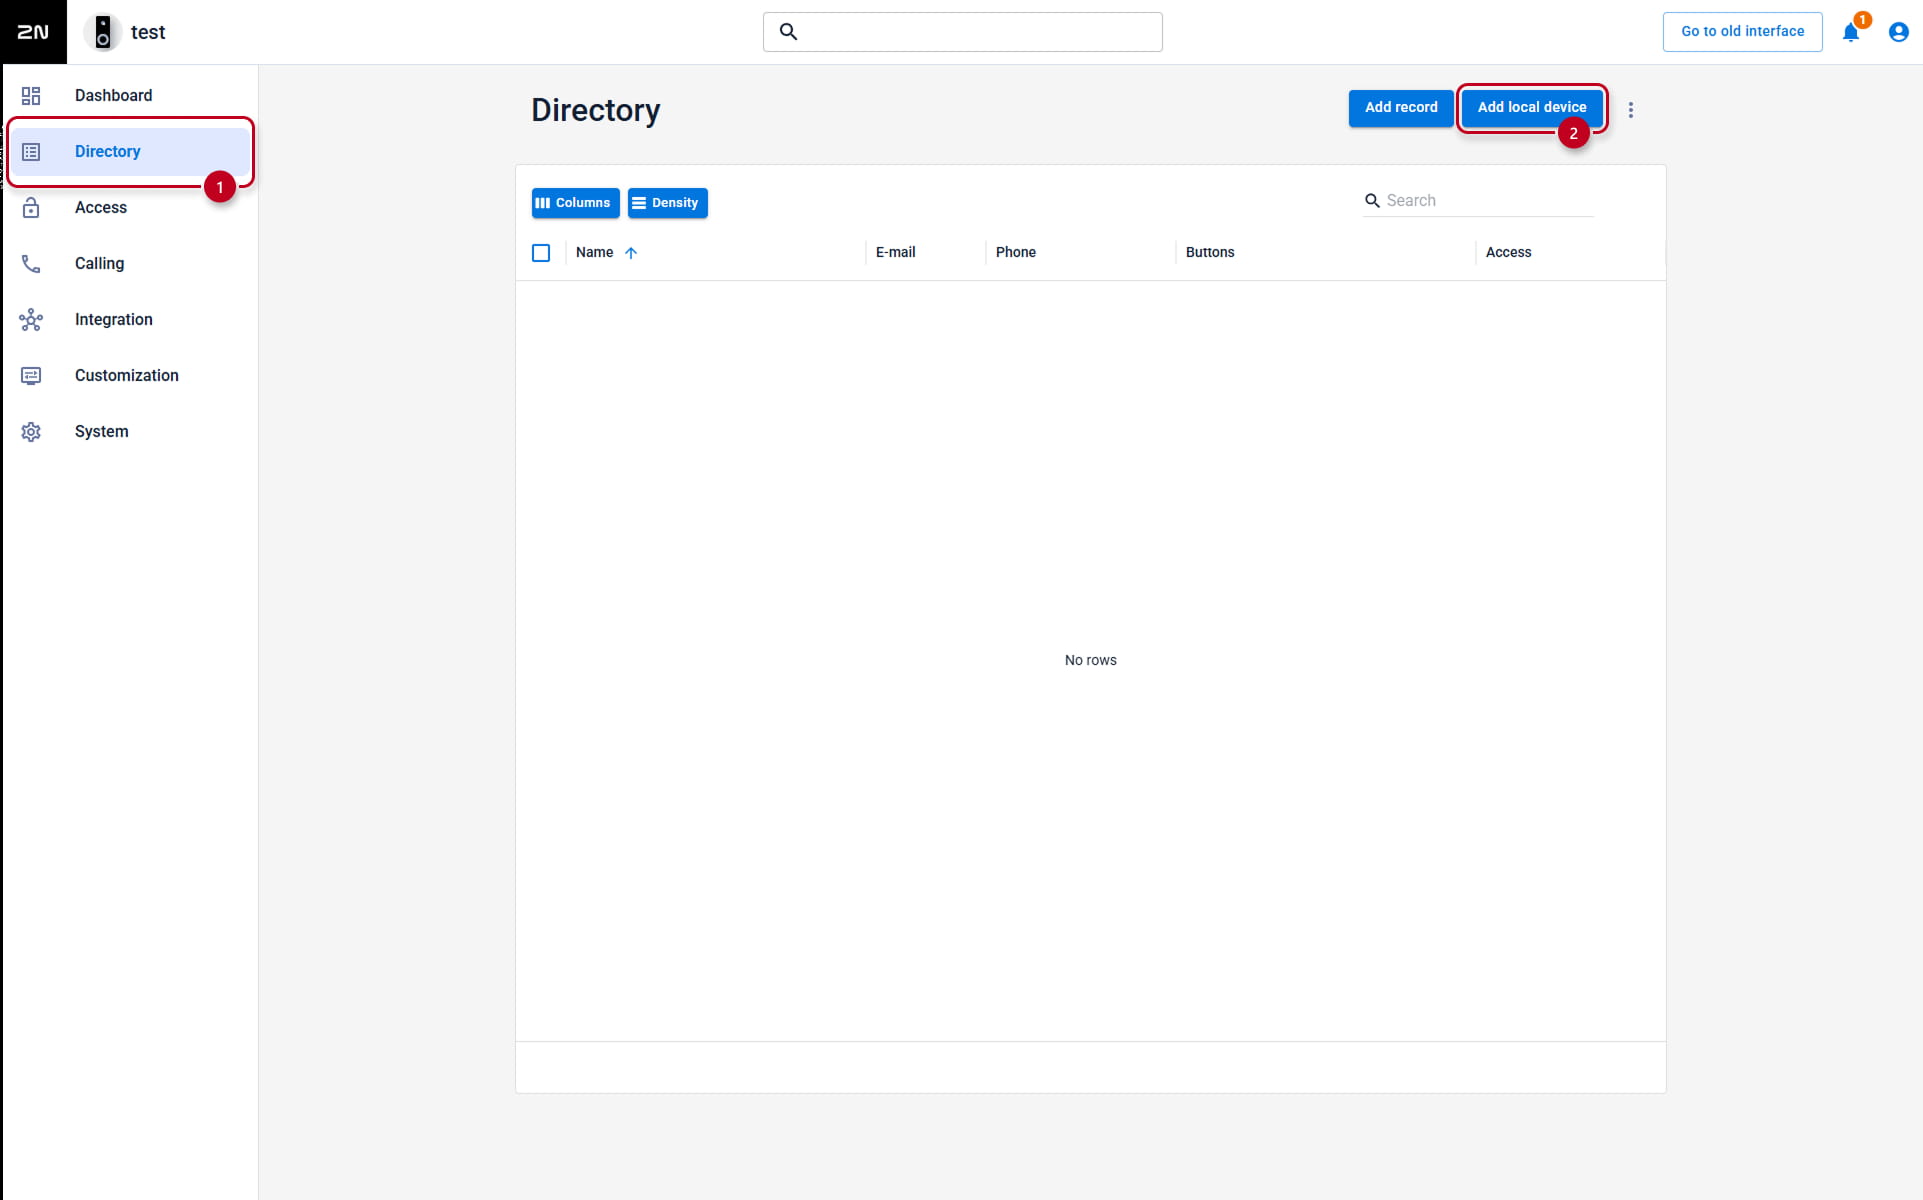
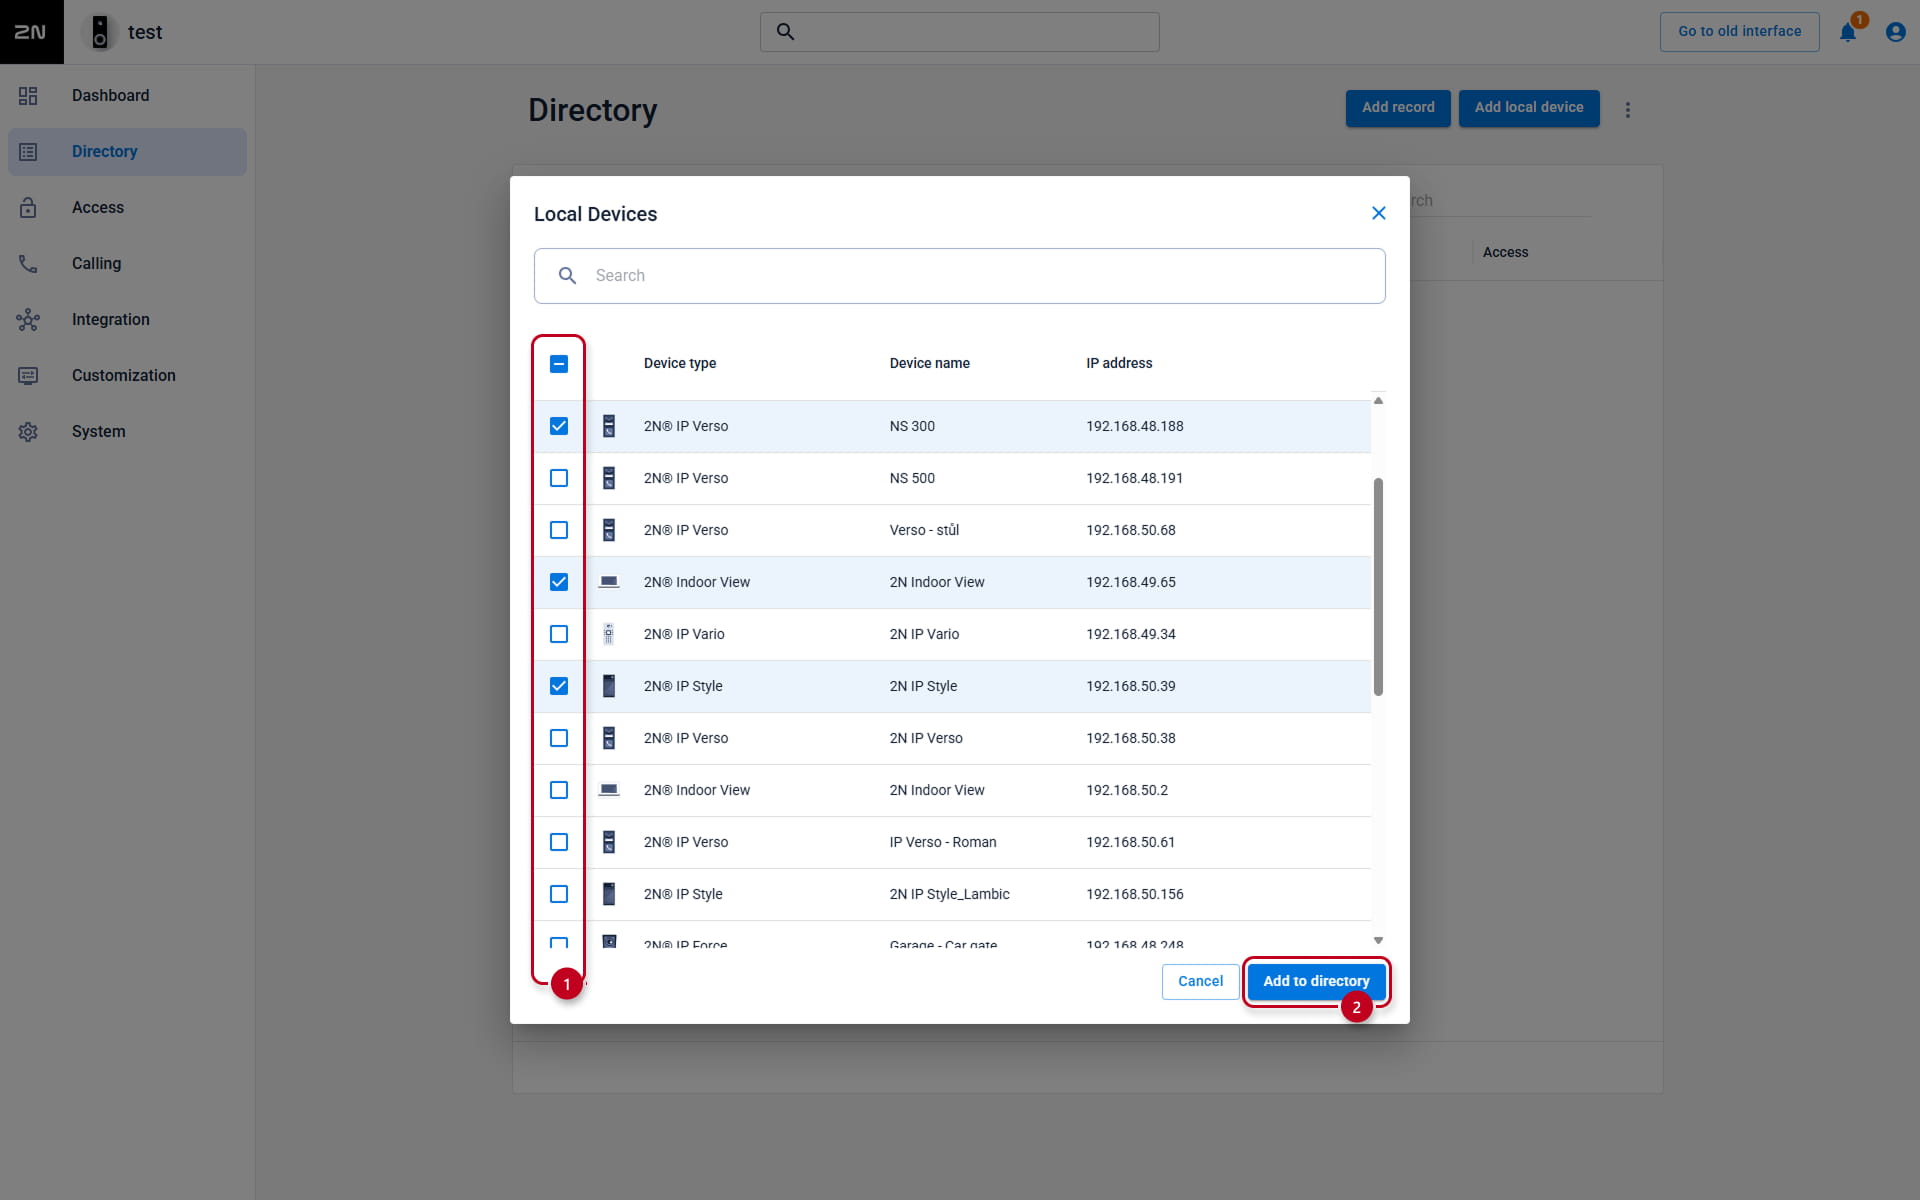
- Go to the calling device web interface, section Directory and click the Add local device button.
- Using inbuilt scanner
-
-
- Select the devices and click the Add to directory button.
-
-
- Set the user manually
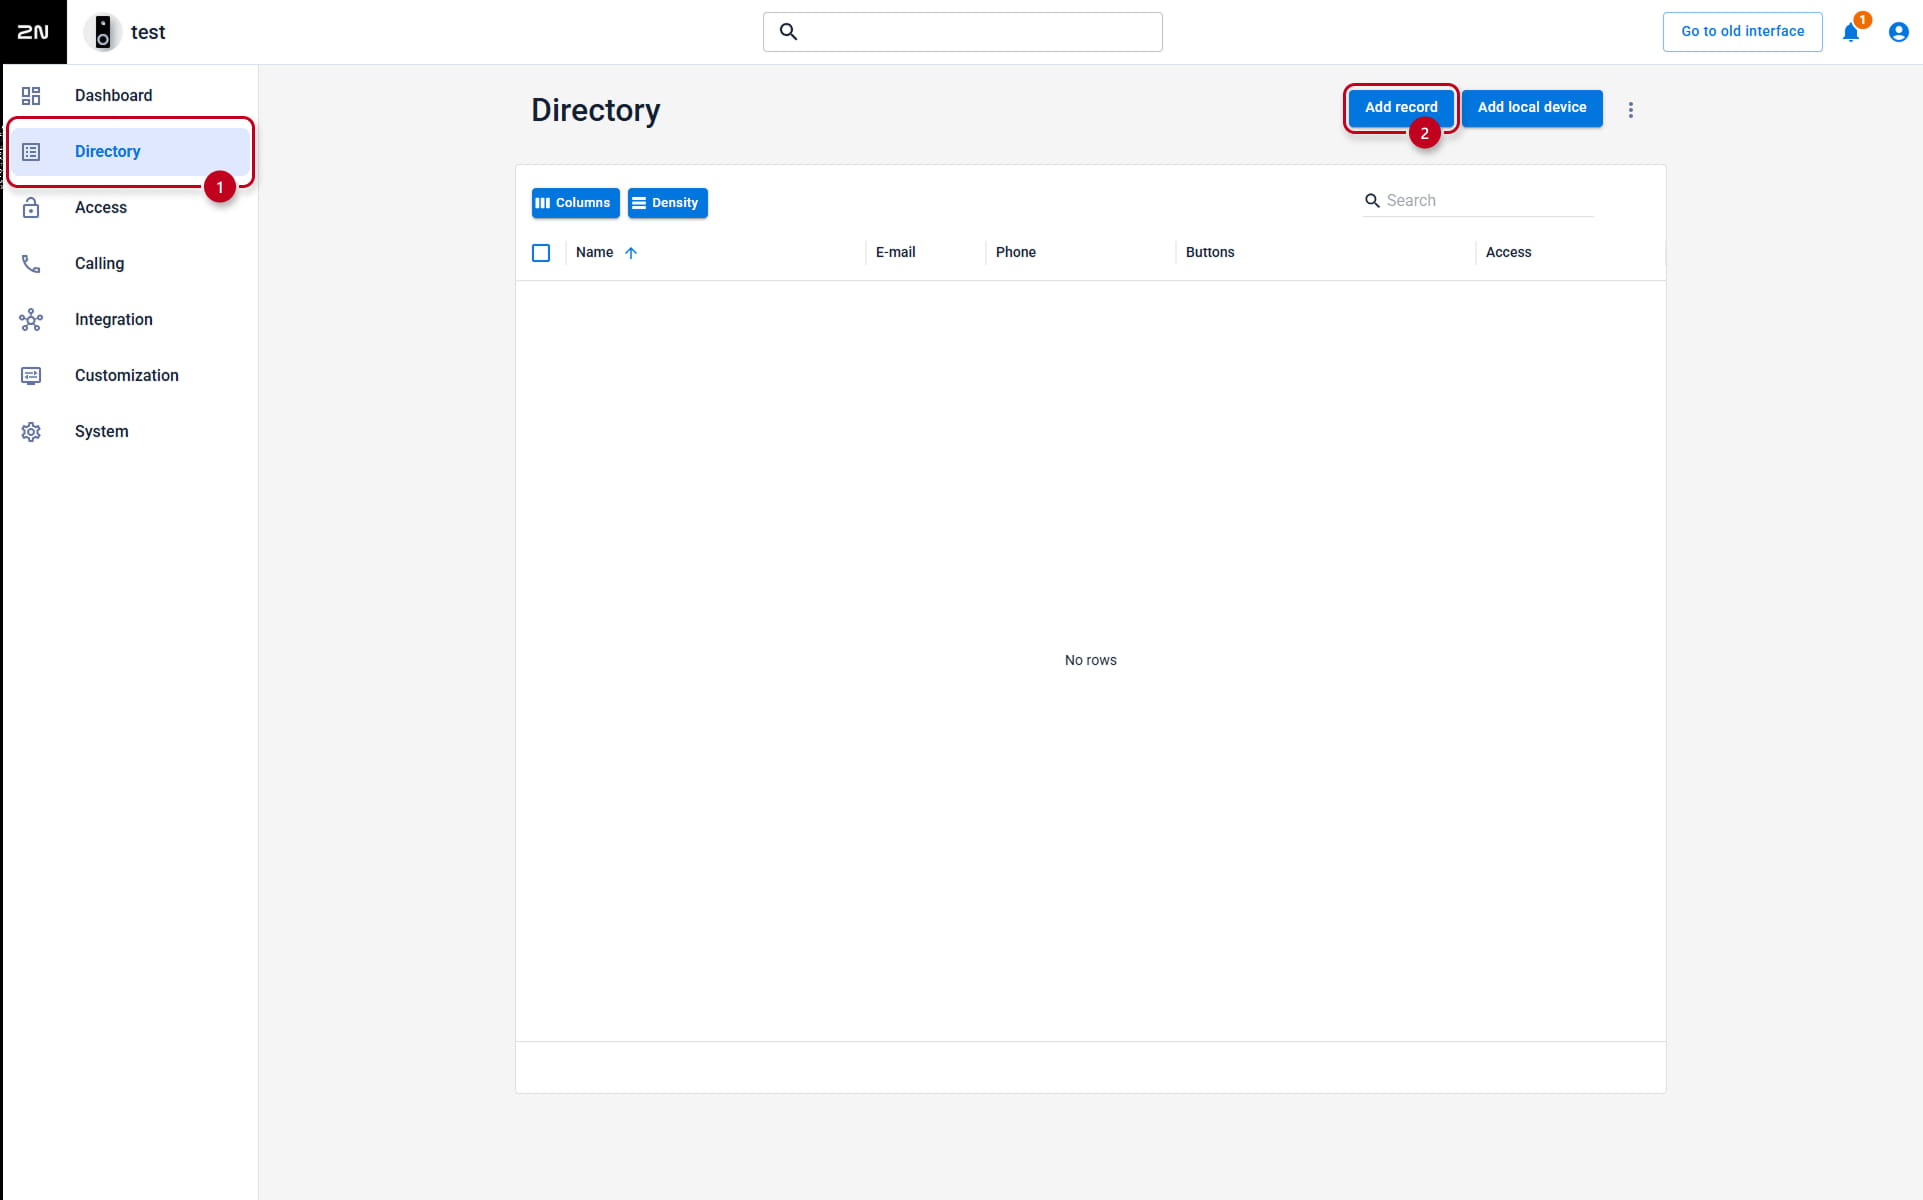
- Go to the calling device web interface, section Directory
and open the existing user or create a new one by clicking the Add record button.
- Go to the calling device web interface, section Directory
- Set the user manually

-
-
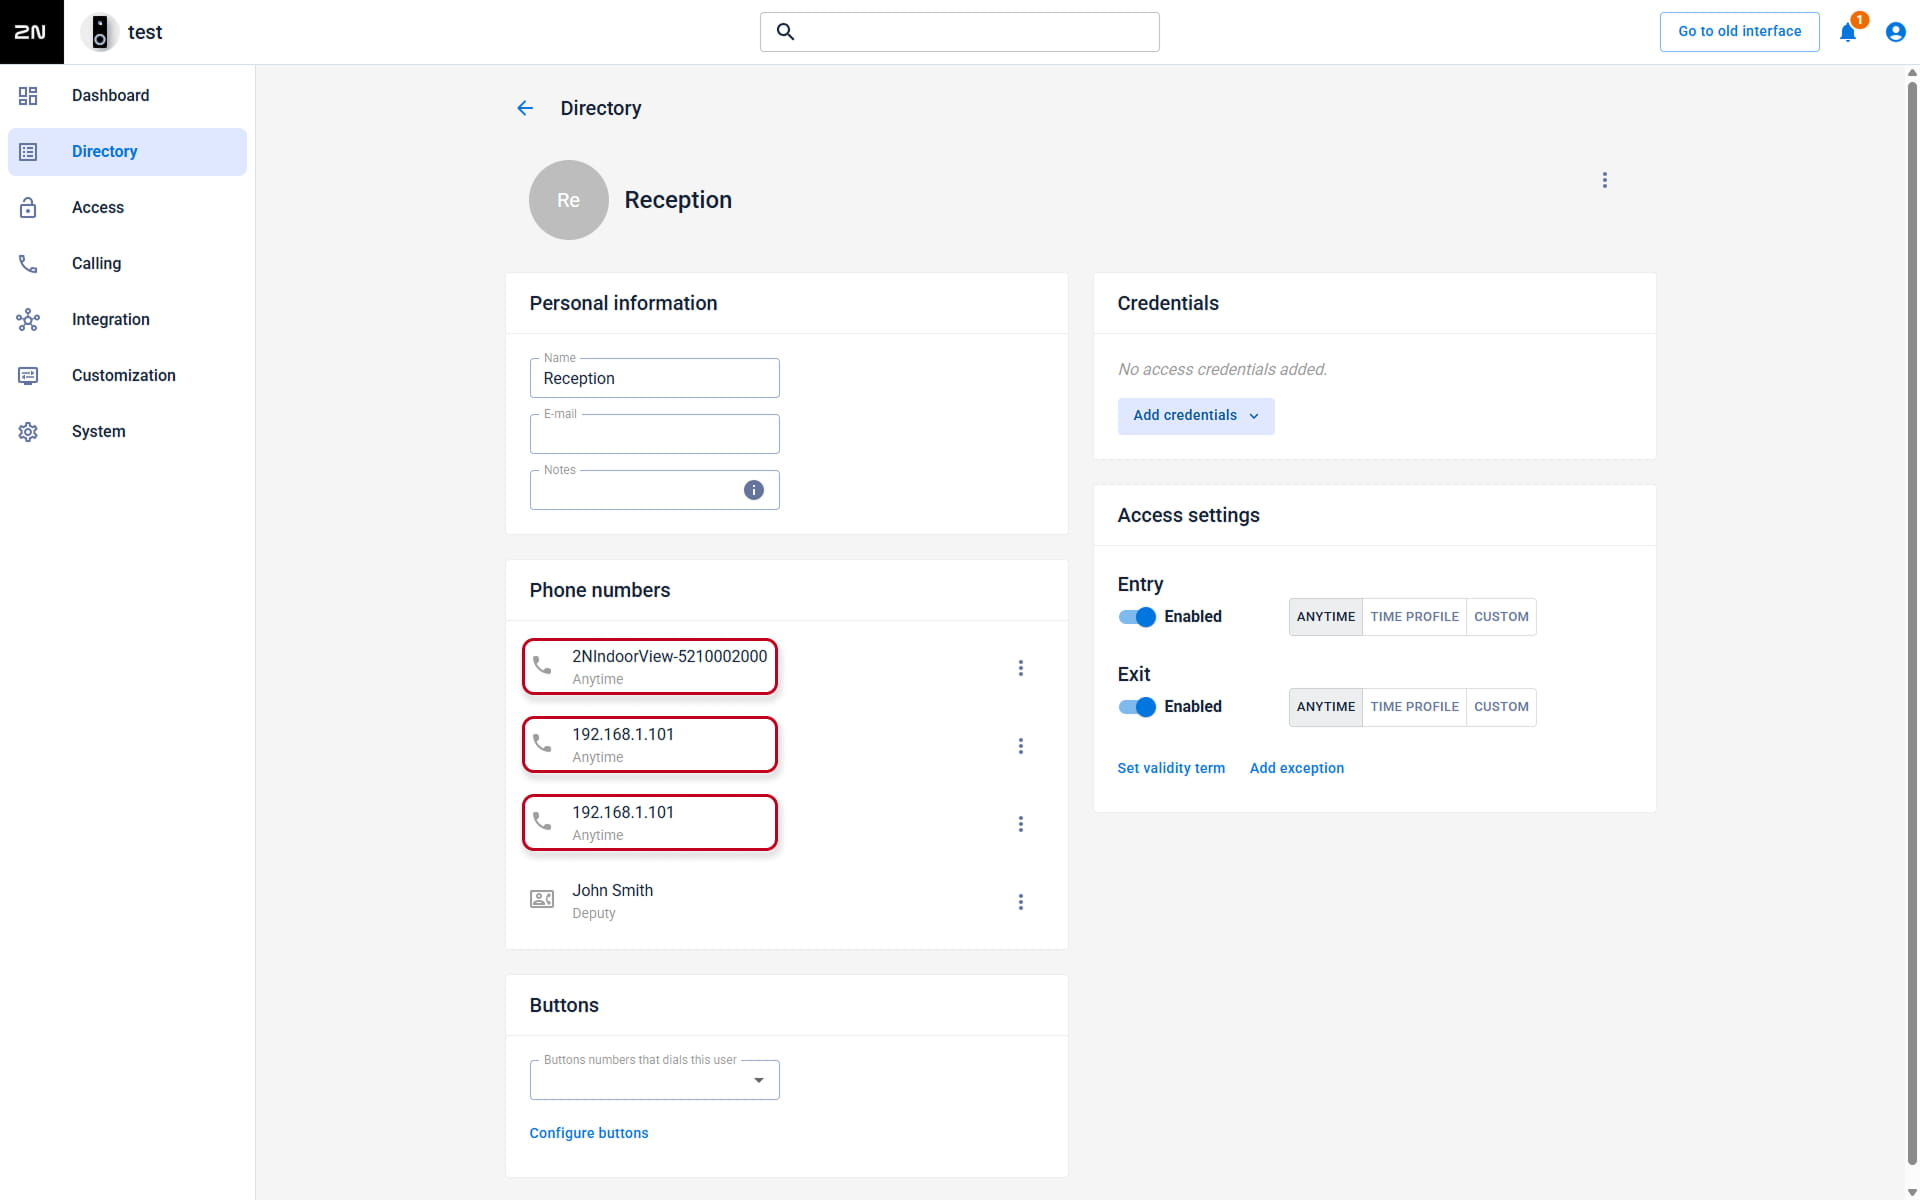
- Find the part User Phone Numbers and fill in the first Phone Number in format device:DeviceID.
-
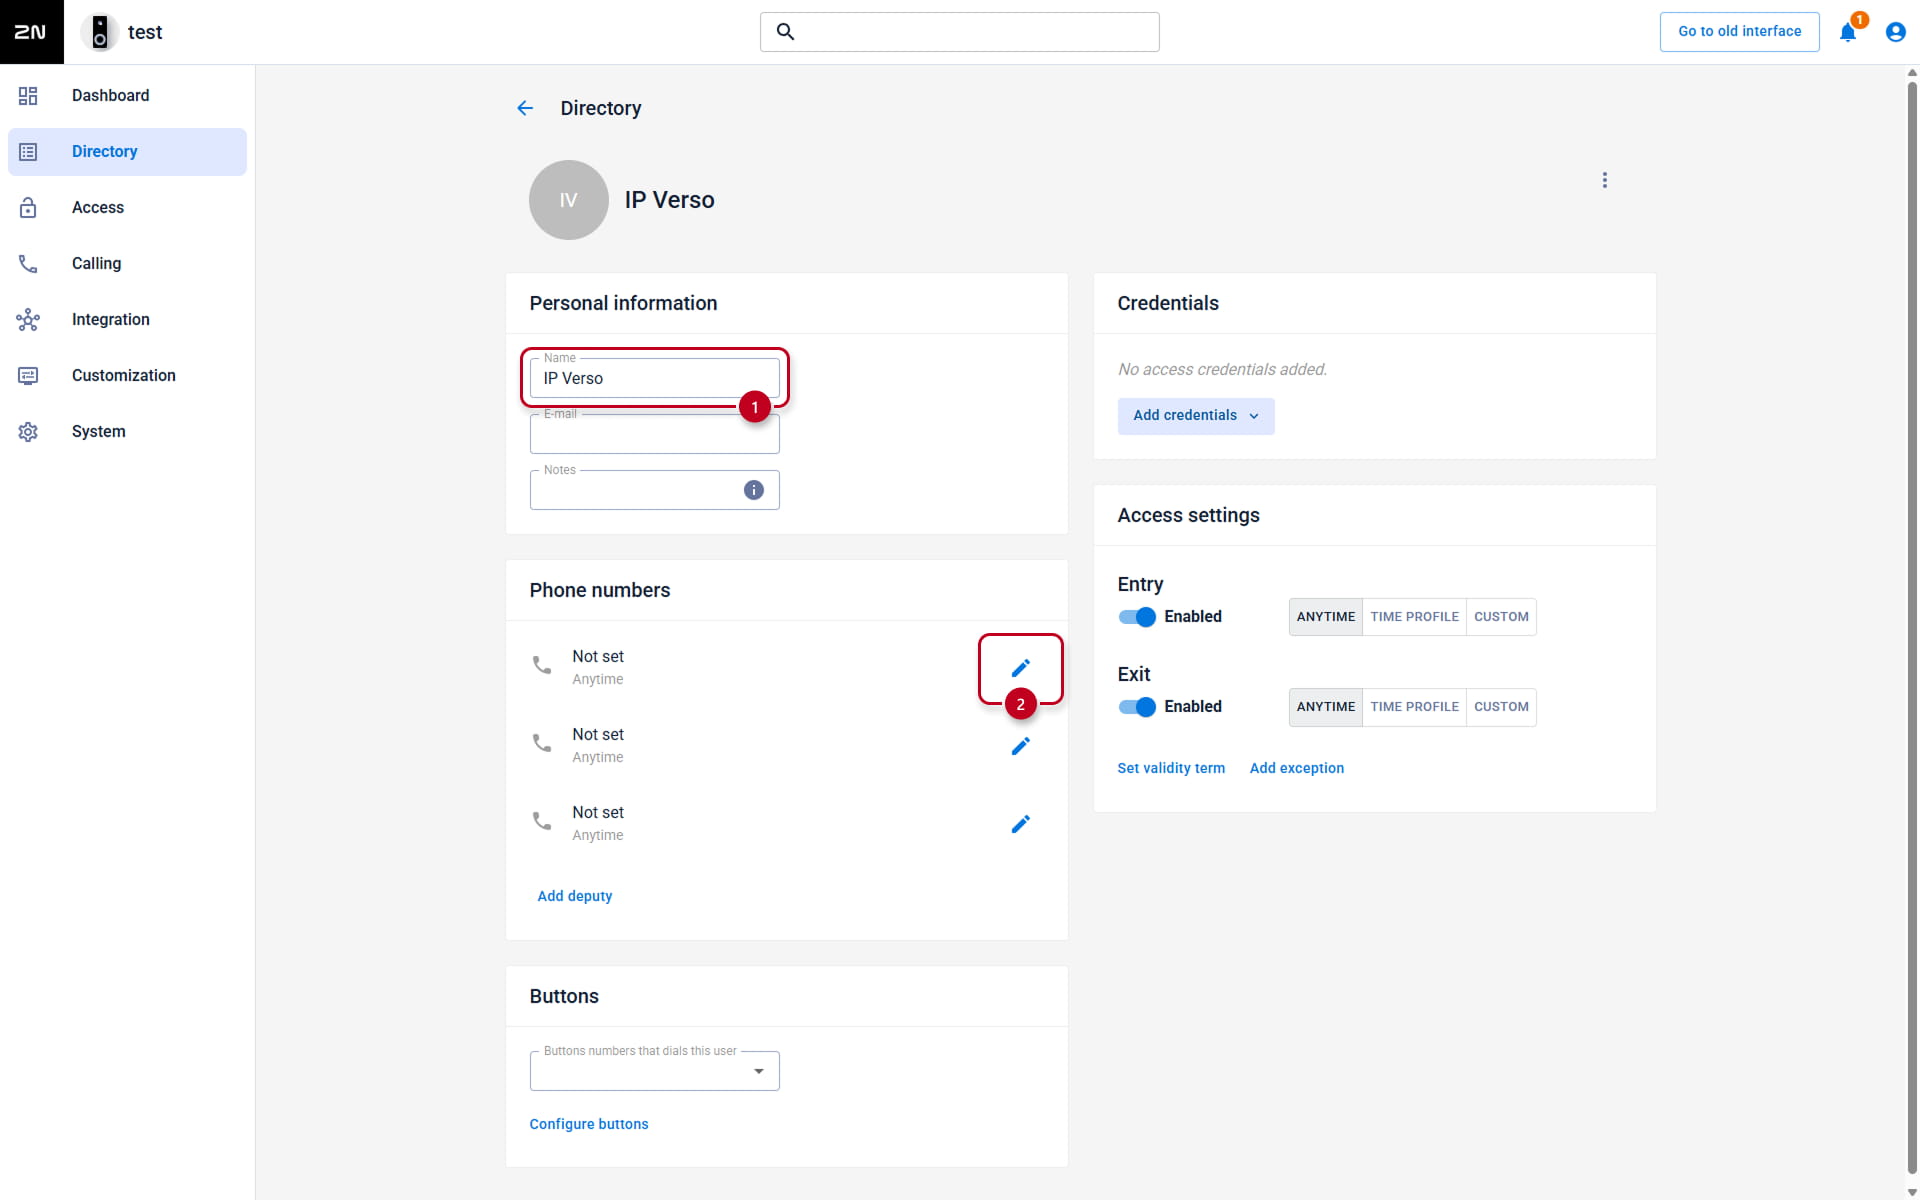

In default, Device ID is in format Model-SN, e.g. 2NIndoorView-5412345678.
In the called device, you can adjust it in the section Calling - Local Calls - Configuration.
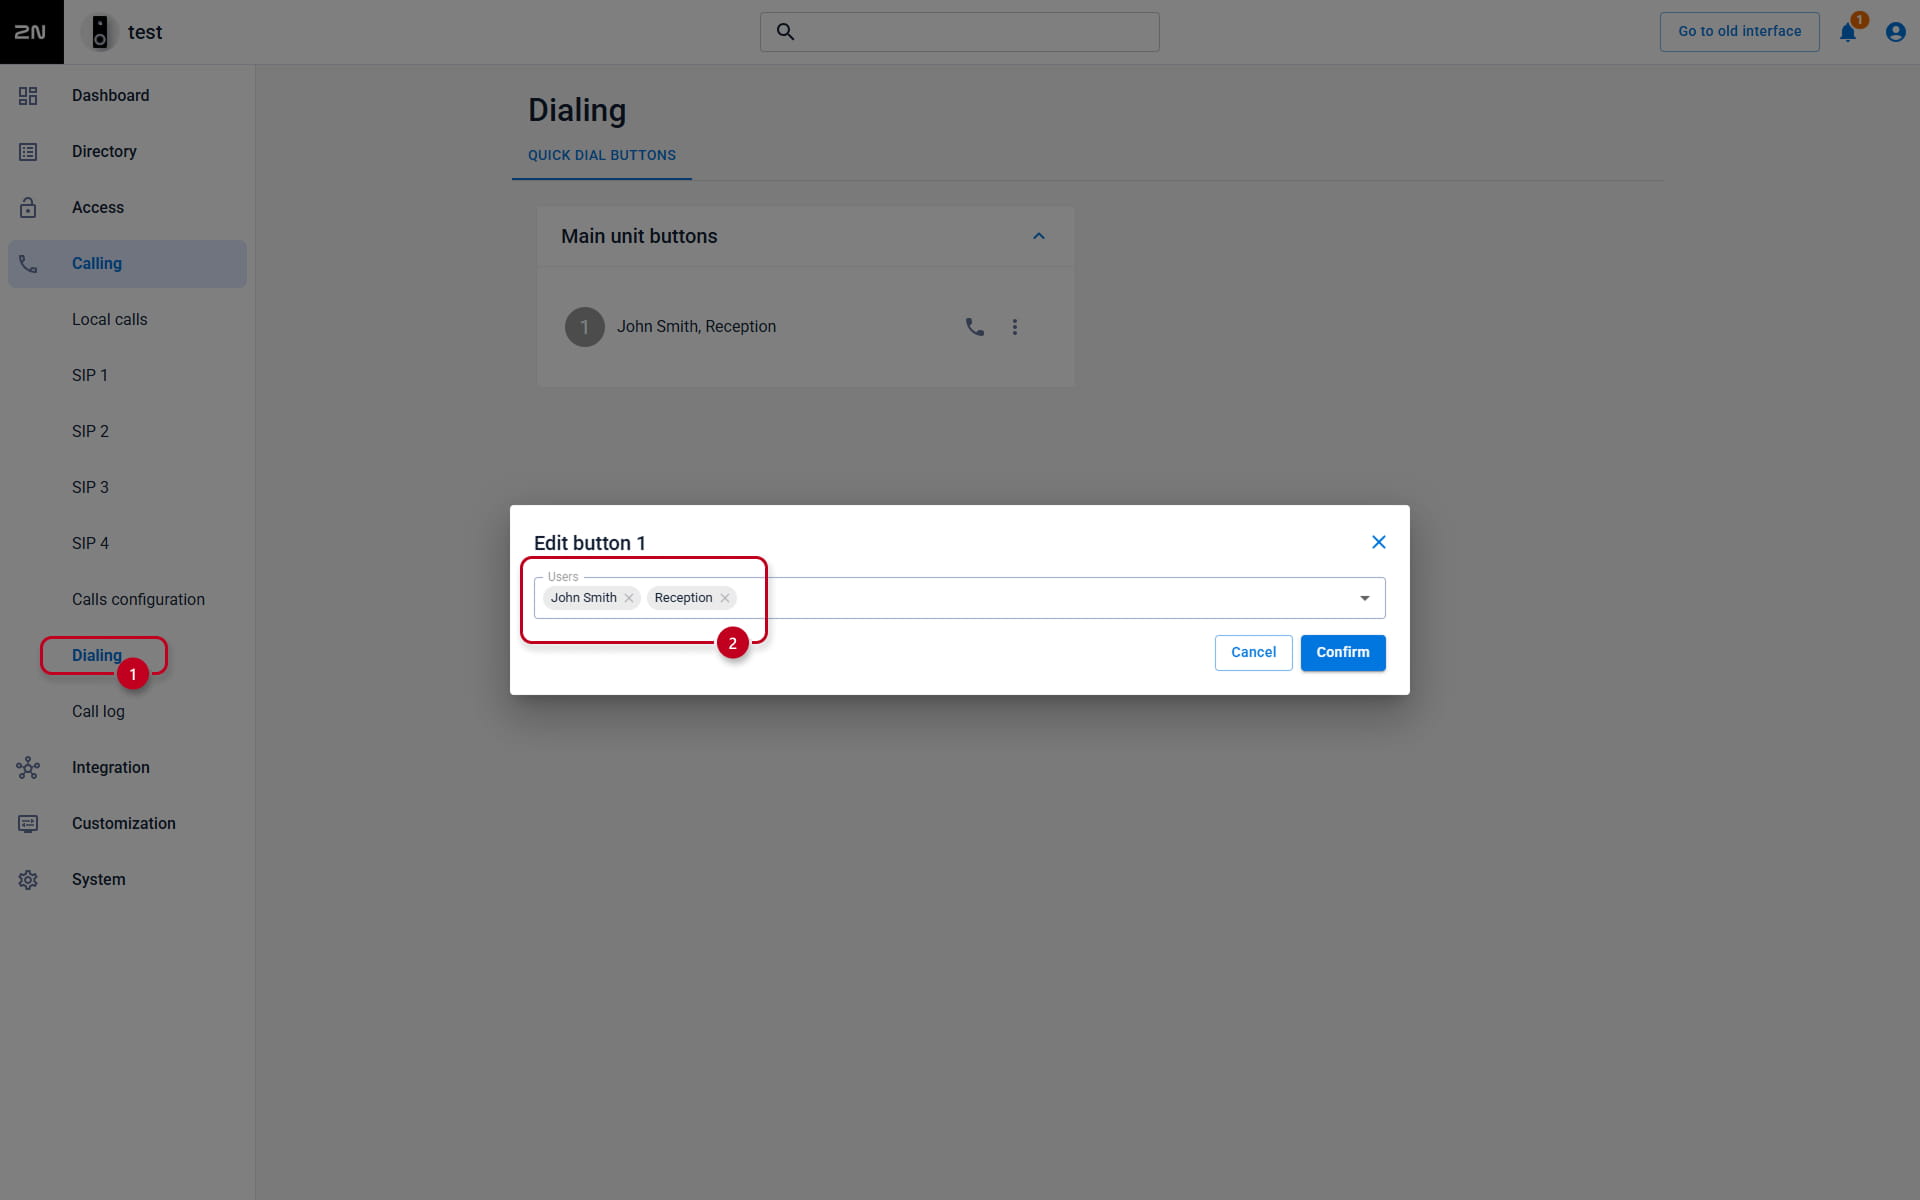
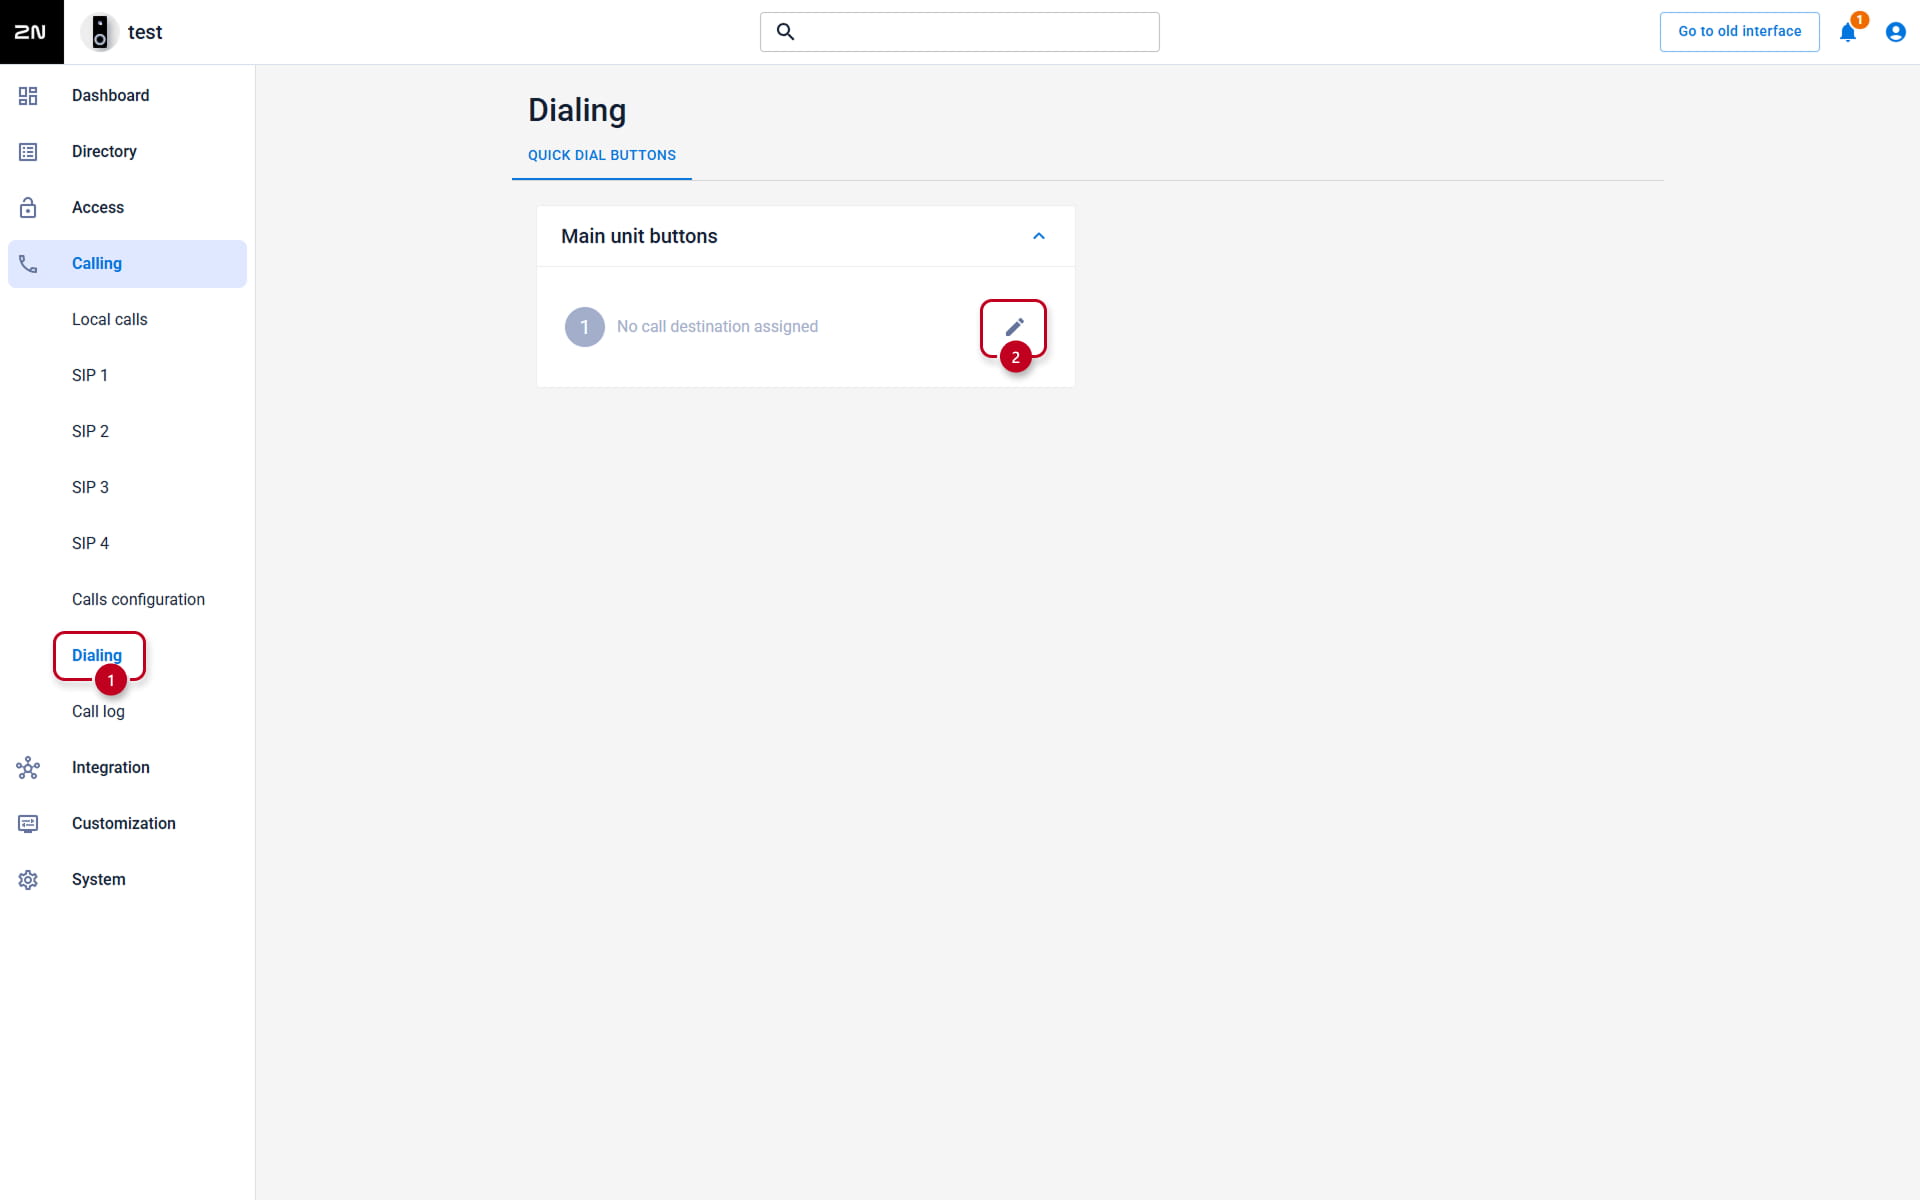
- If you wish to start the call by pressing the button, you need to assign the user to the button
in section Calling - Dialing - Quick Dial Buttons.

any SIP device (2N and also 3rd party)
- Call features are disabled from default.
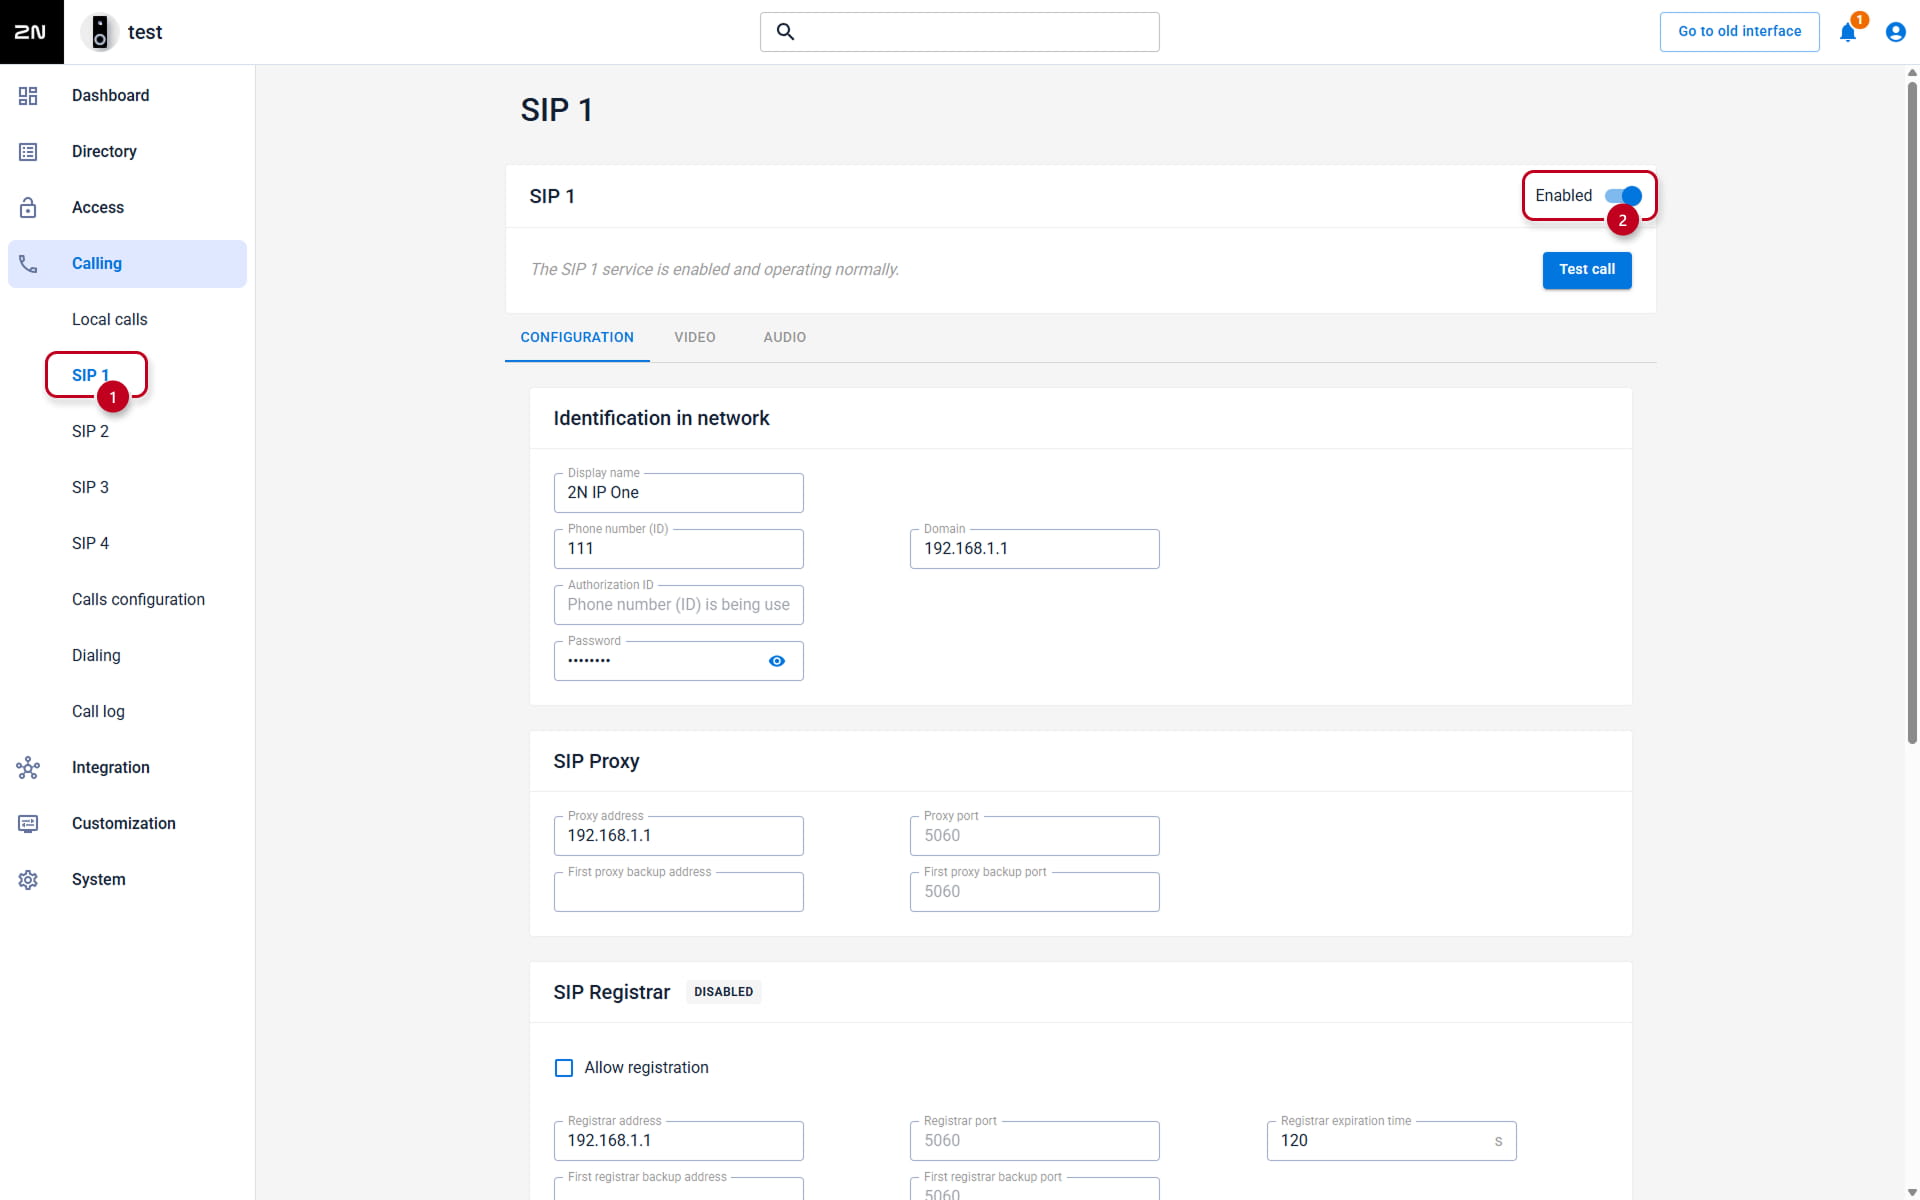
Go to the 2N calling device web interface,
section Calling - SIP 1 - Configuration and enable the feature.
Ensure enabling calling also in the called device.
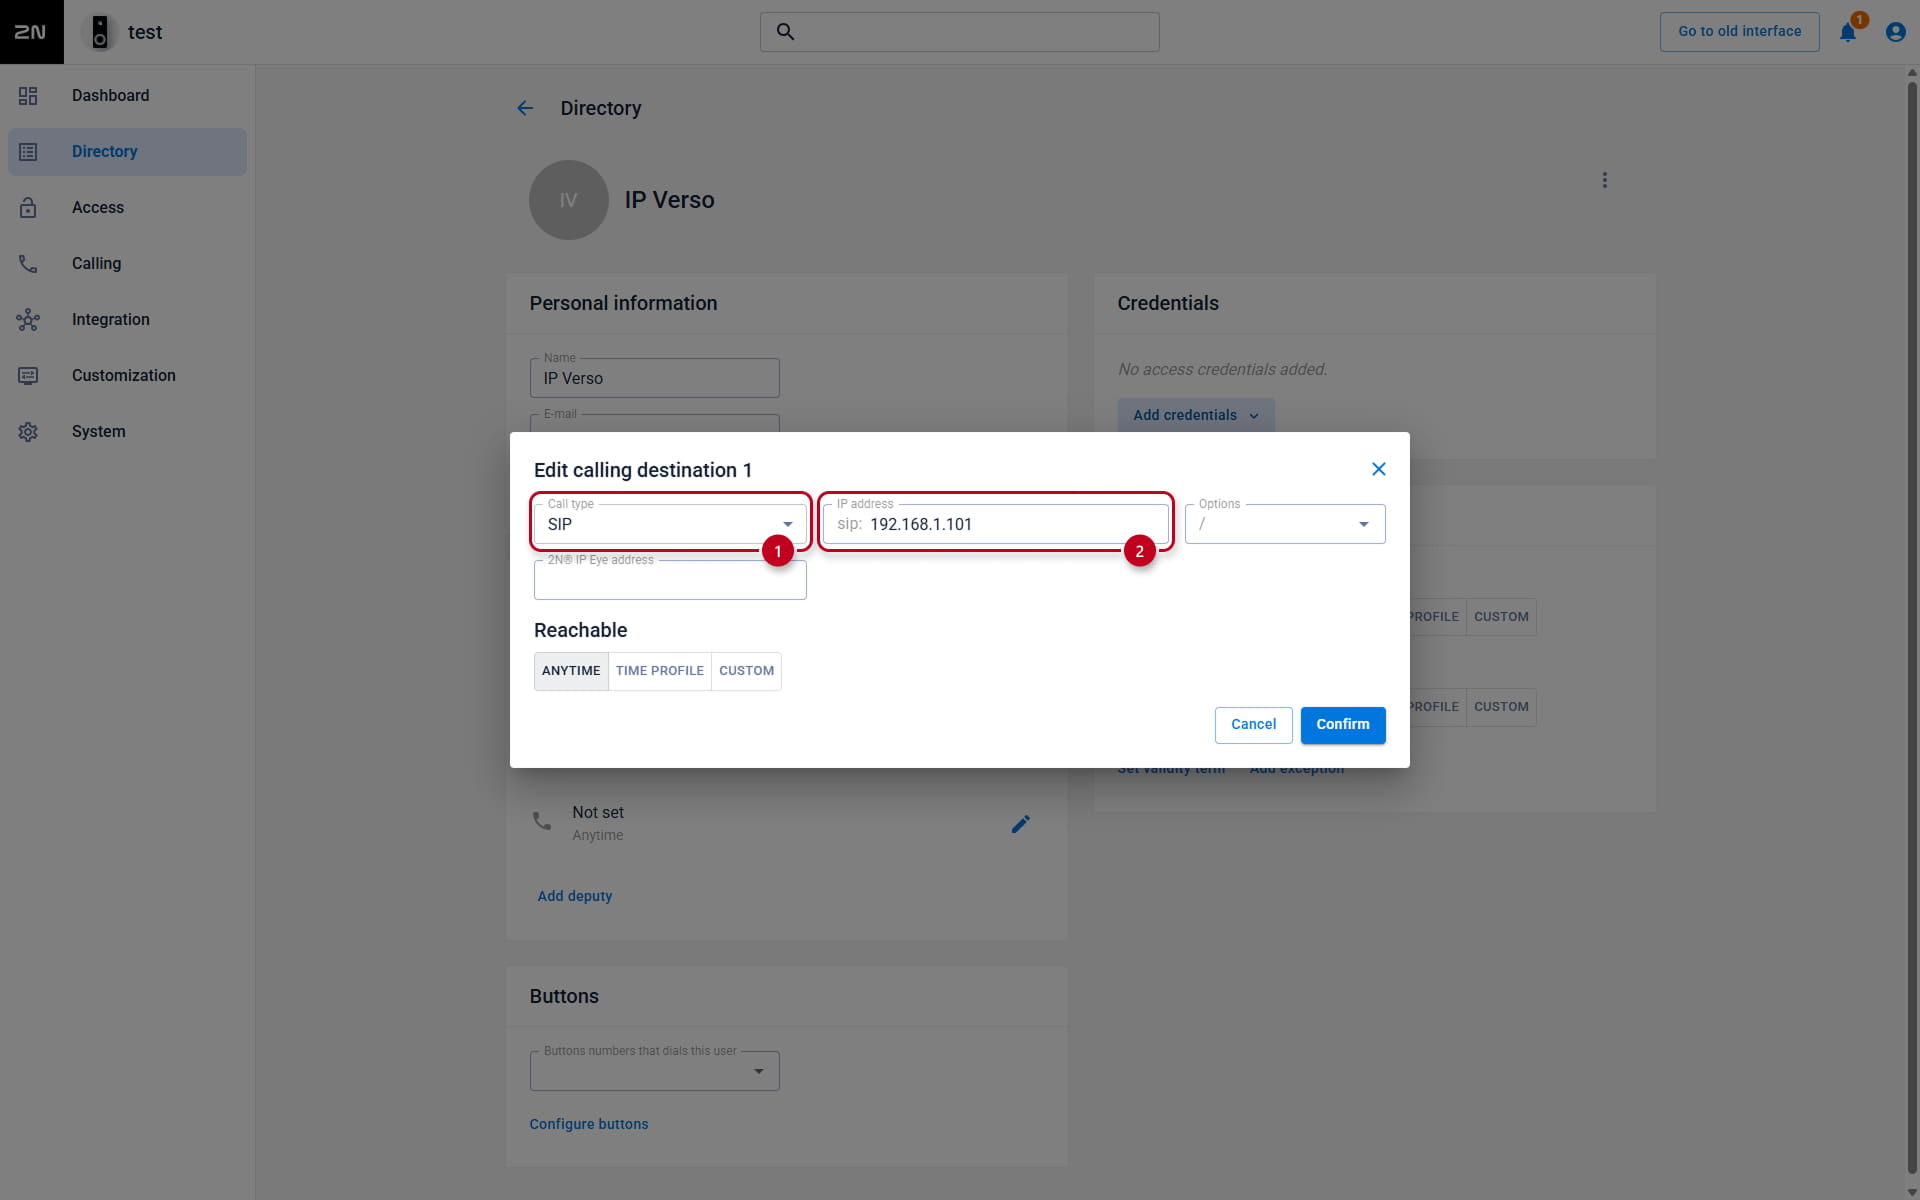
- Set the user
- Go to the 2N calling device web interface, section Directory
and open the existing user or create a new one by clicking the Add record button.
- Go to the 2N calling device web interface, section Directory
-
- Find the part User Phone Numbers and fill in the first Phone Number in format sip:IPaddress (e.g. sip:192.168.1.101).
IPaddress is IP address of the called device. If it is under SIP Proxy and there is no SIP Proxy registration,
you can use also format sip:extension@IPorDomain (e.g. sip:[email protected]).
- Find the part User Phone Numbers and fill in the first Phone Number in format sip:IPaddress (e.g. sip:192.168.1.101).
- If you wish to start the call by pressing the button, you need to assign the user to the button
in section Calling - Dialing - Quick Dial Buttons.
Calling more devices
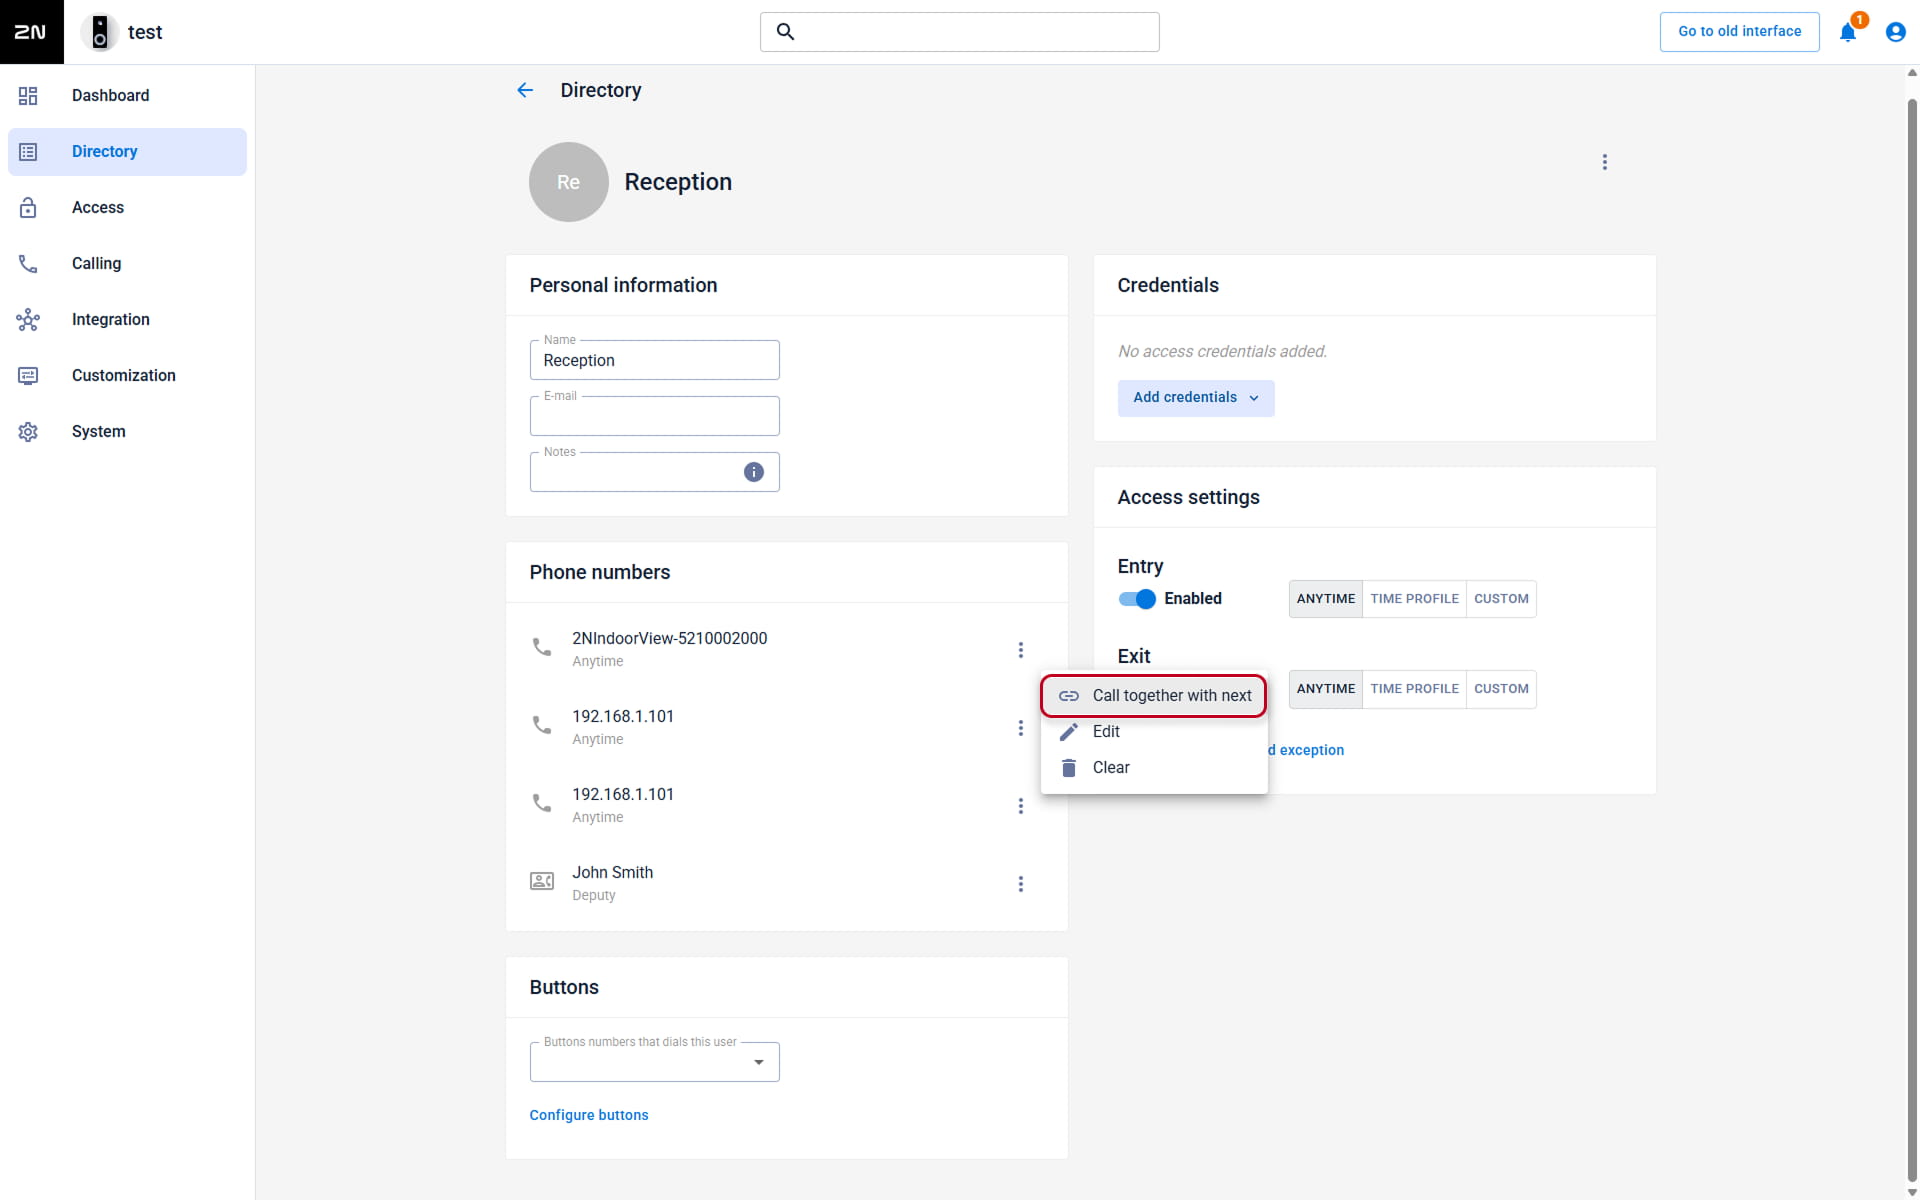
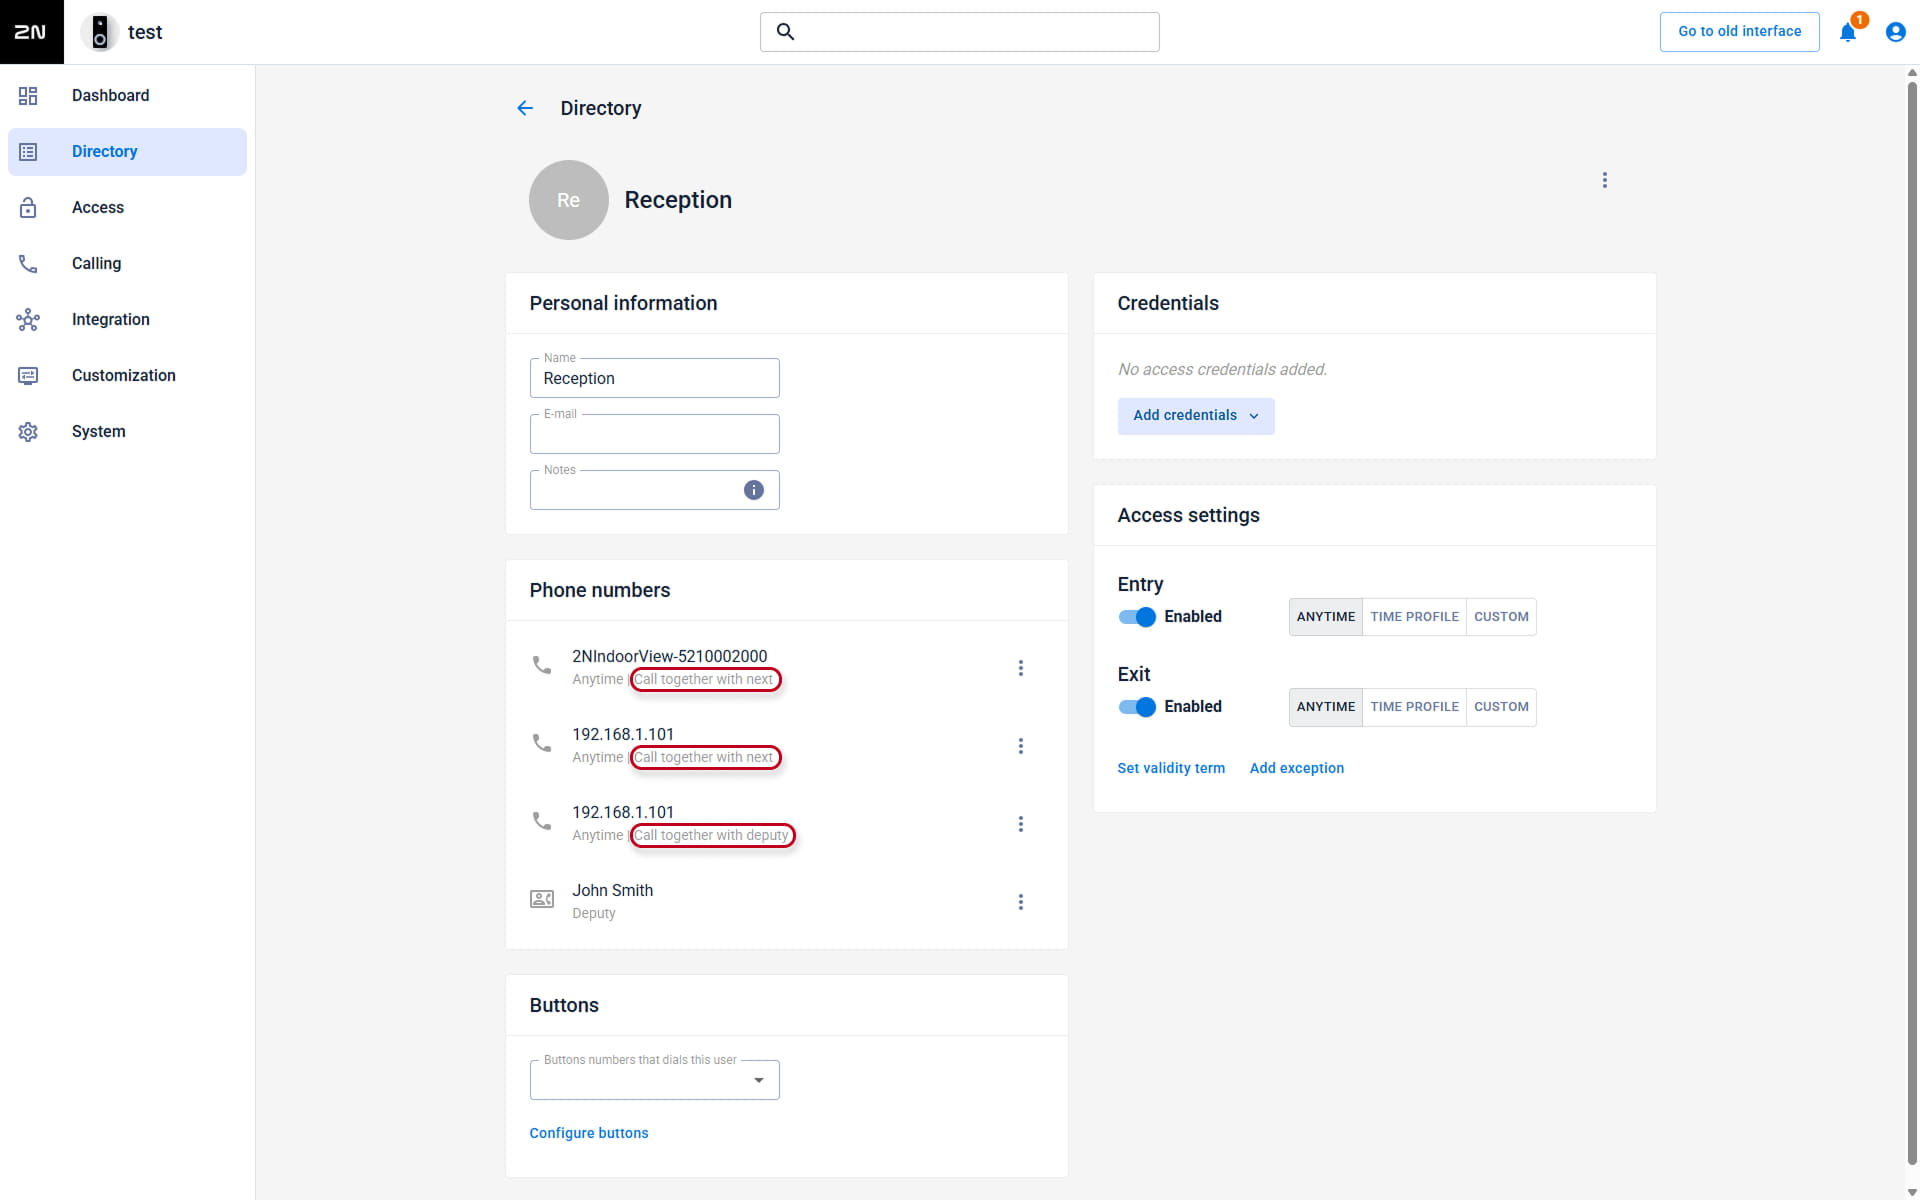
- You can set more devices to the user and call the next device if the previous one is busy.
- You can also assign a deputy user (with another 3 devices) to ensure answering call even if you are busy at all three phone numbers.
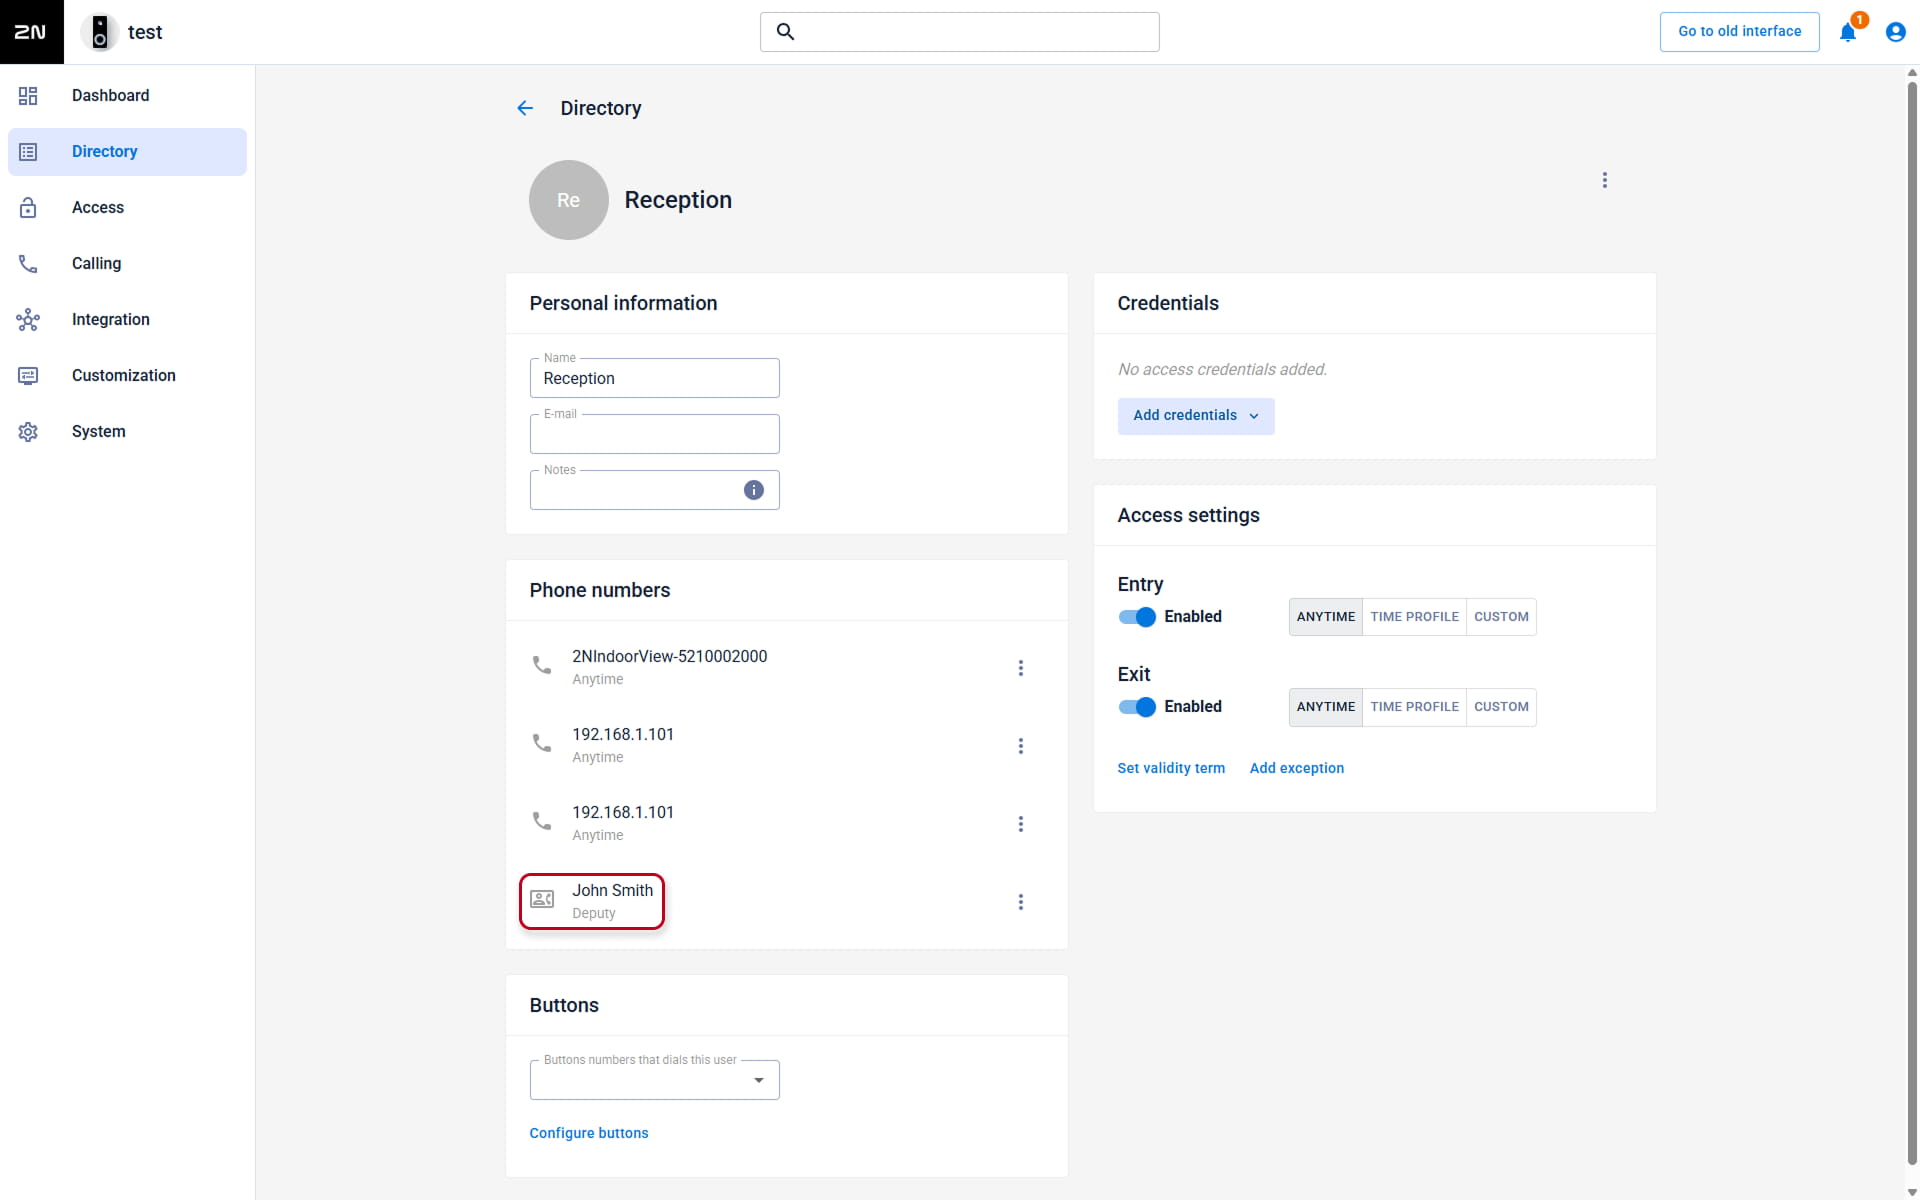
-
If you need to call the devices at once, enable the parameter Call together with next.
Alternatively, you can make multiple users with one or more phone numbers and assign them all to one button.