Use of Cable Bushings
The cable bushings are designed for the following cables:
big bushing: for two cables of the diameter of 5–6 mm (UTP cable), or, upon insert replacement, for one thick cable/tube of the diameter of up to 14 mm
small bushing: for one cable of the diameter of 5–8 mm
Tip
Even a LAN cable including the RJ-45 connector can go through the big bushing. See below for instructions.
How to Pull a RJ-45 Terminated Cable through a Bushing
The cable wiring holes are located on the bottom of the device.
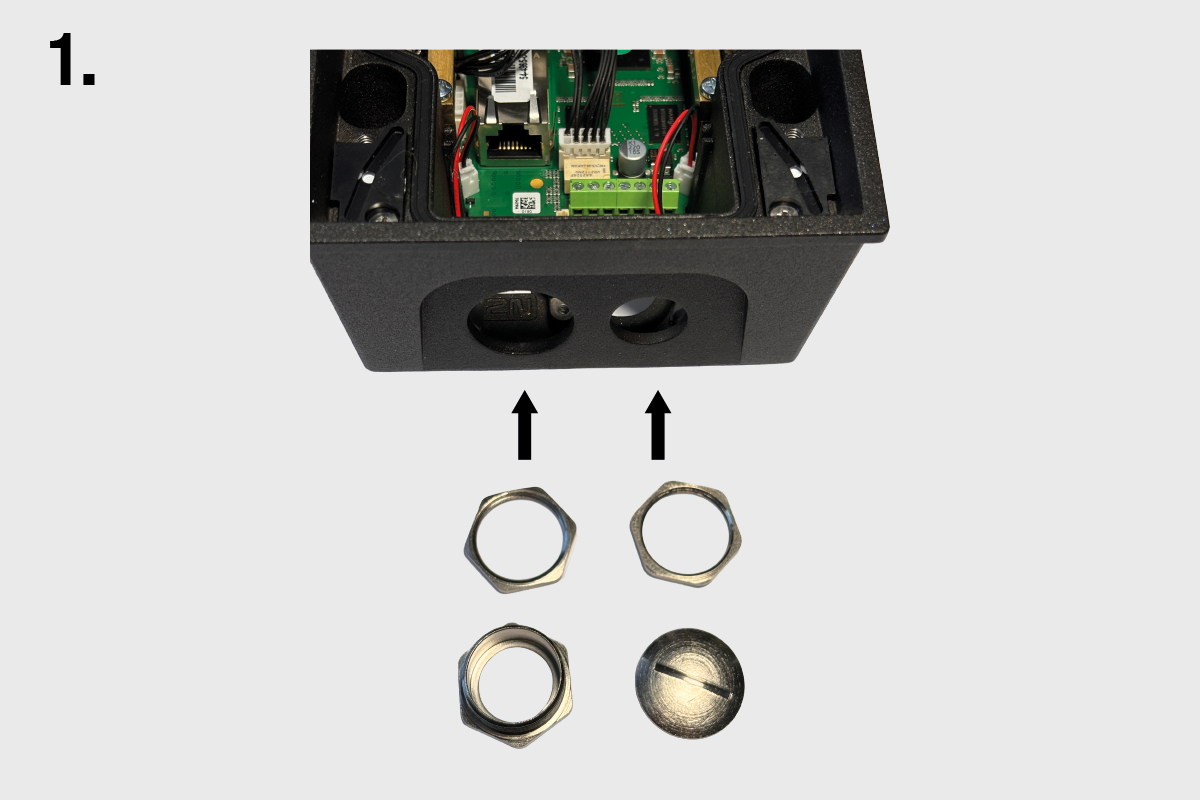
Place the nuts on the inside of the holes.
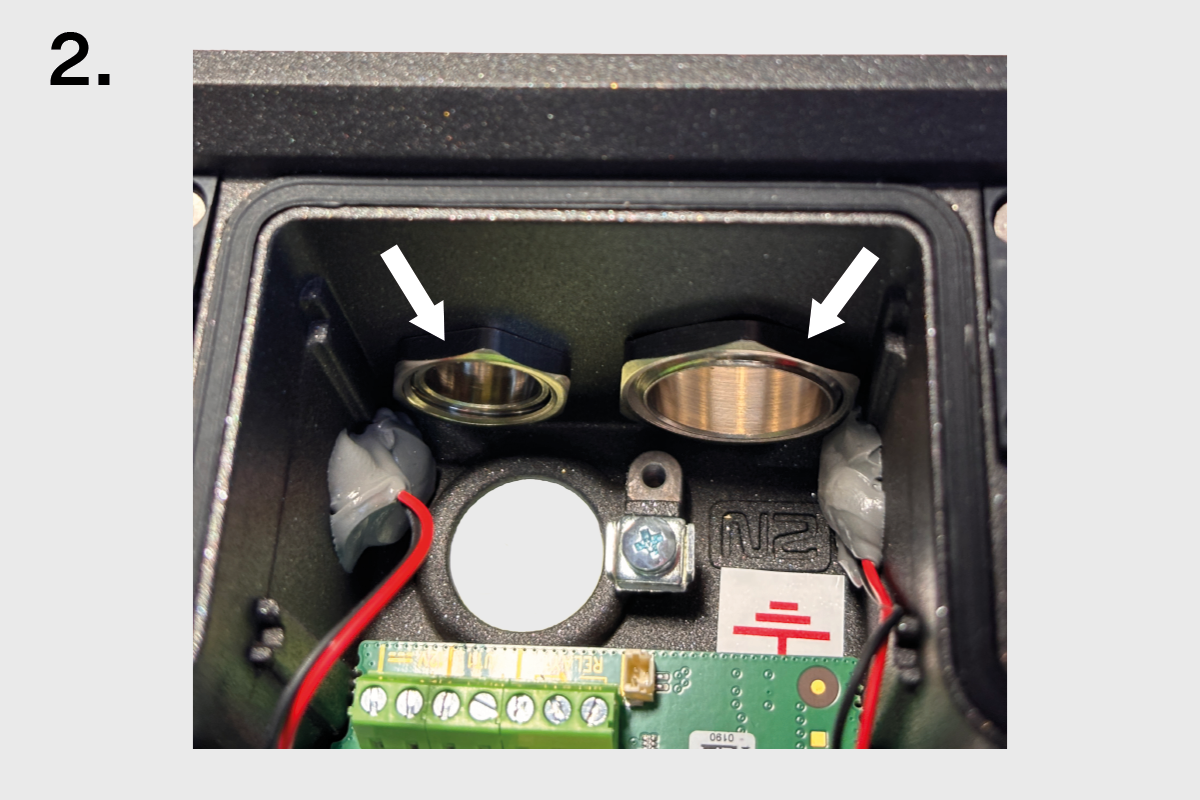
Screw on and tighten the bushing.

Screw on and tighten the blank.
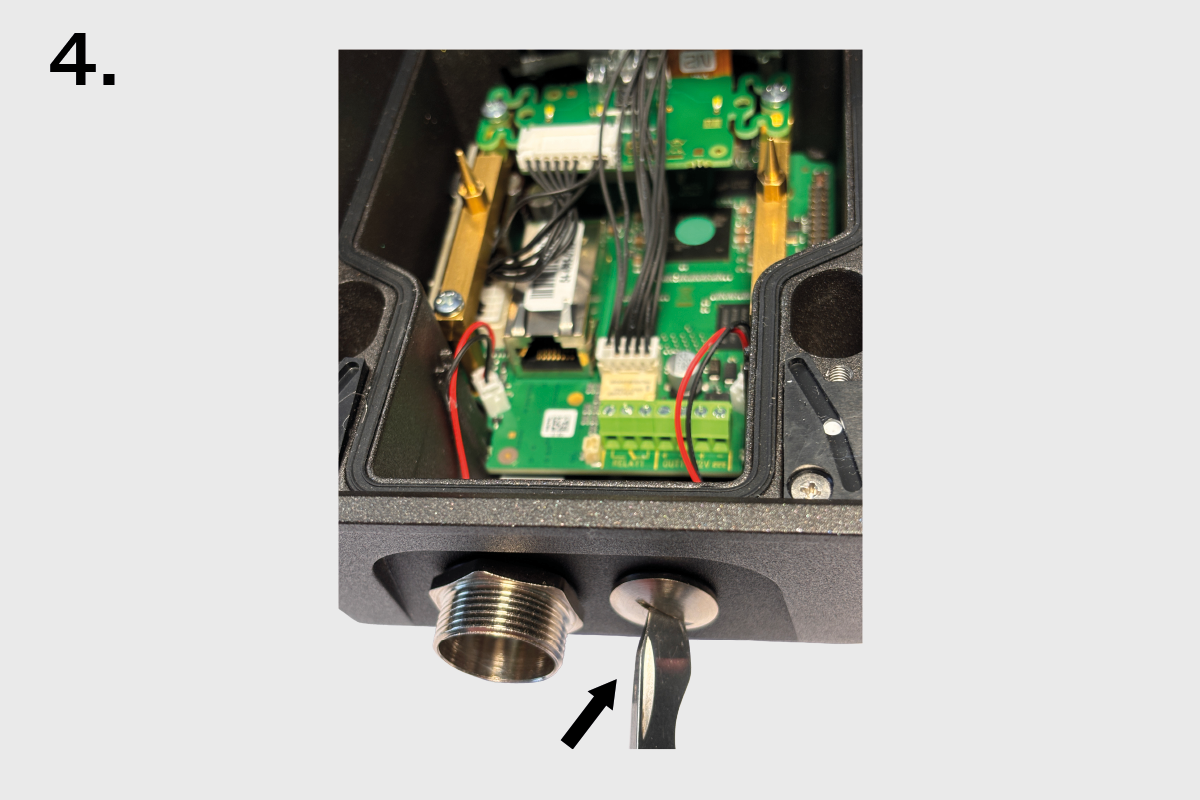
Remove the necessary number of cable glands from the seal.Place the nuts on the inside of the holes. Cut the case as shown.
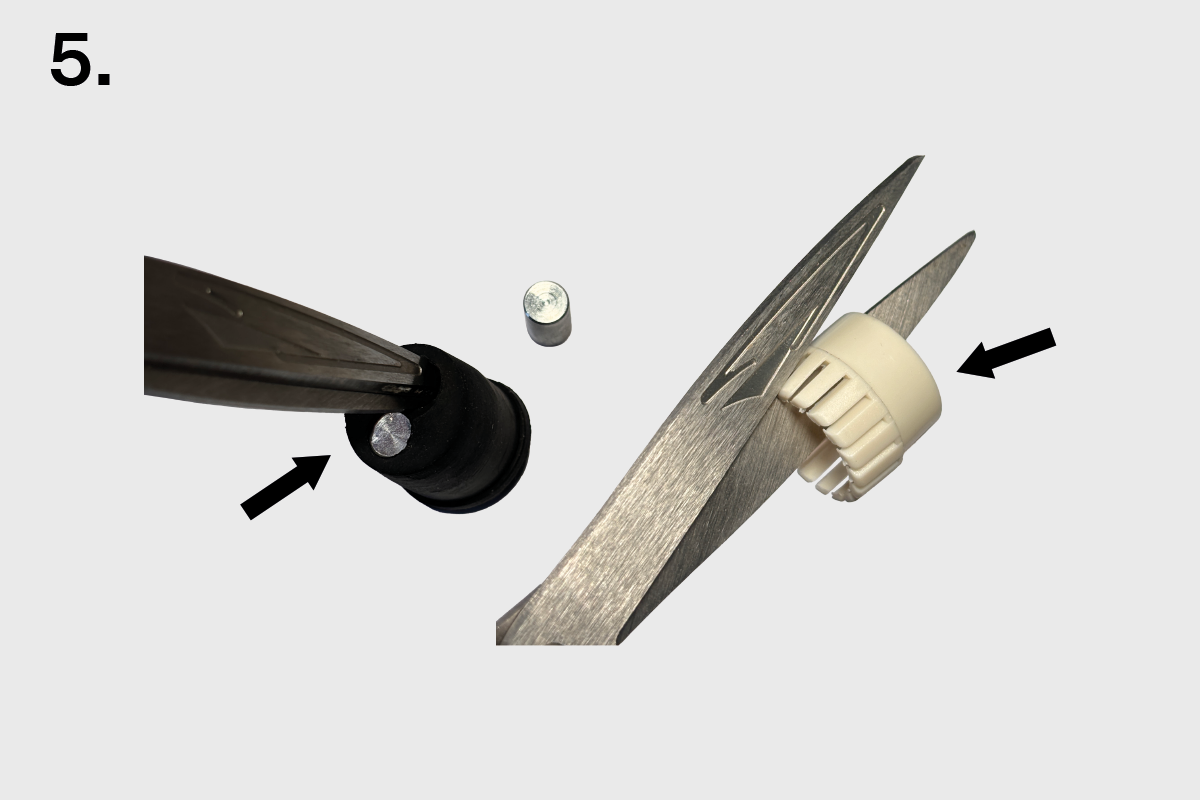
To ensure tightness, follow the correct order and orientation of the case, seal and nut.
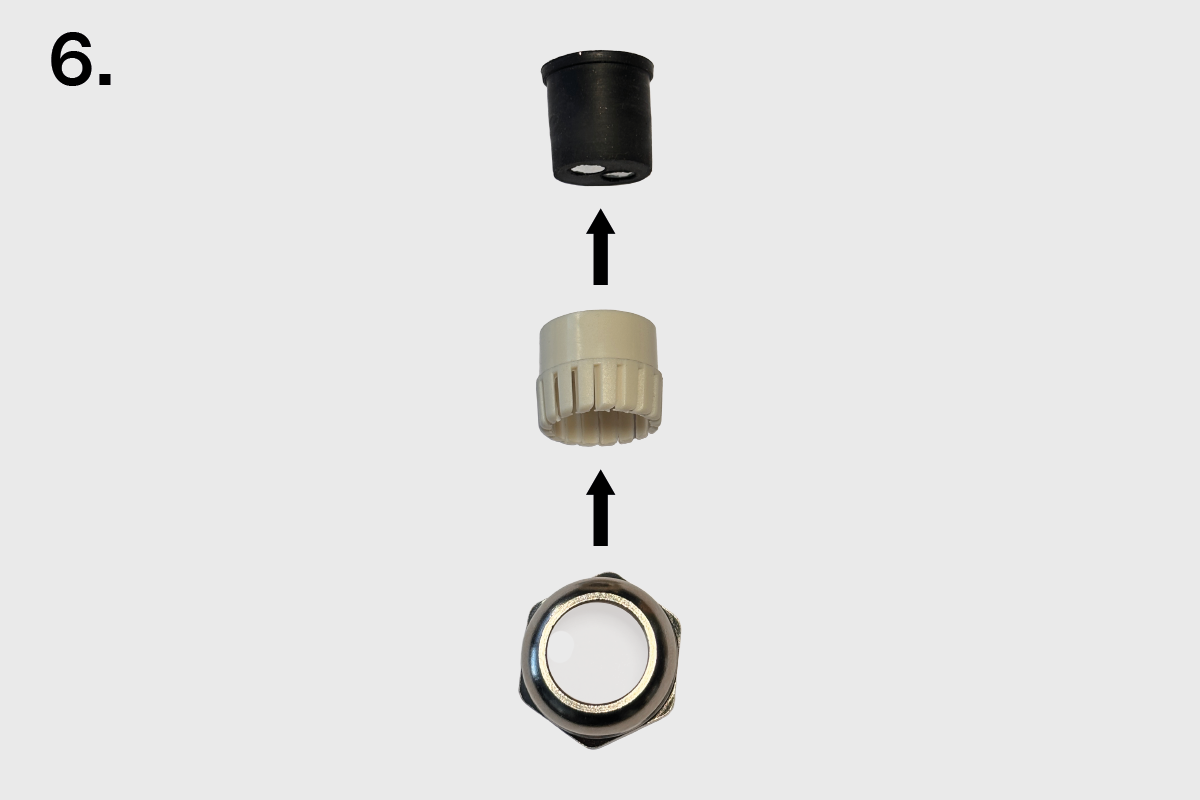
Attach the bushing nut, case and seal to the cable.
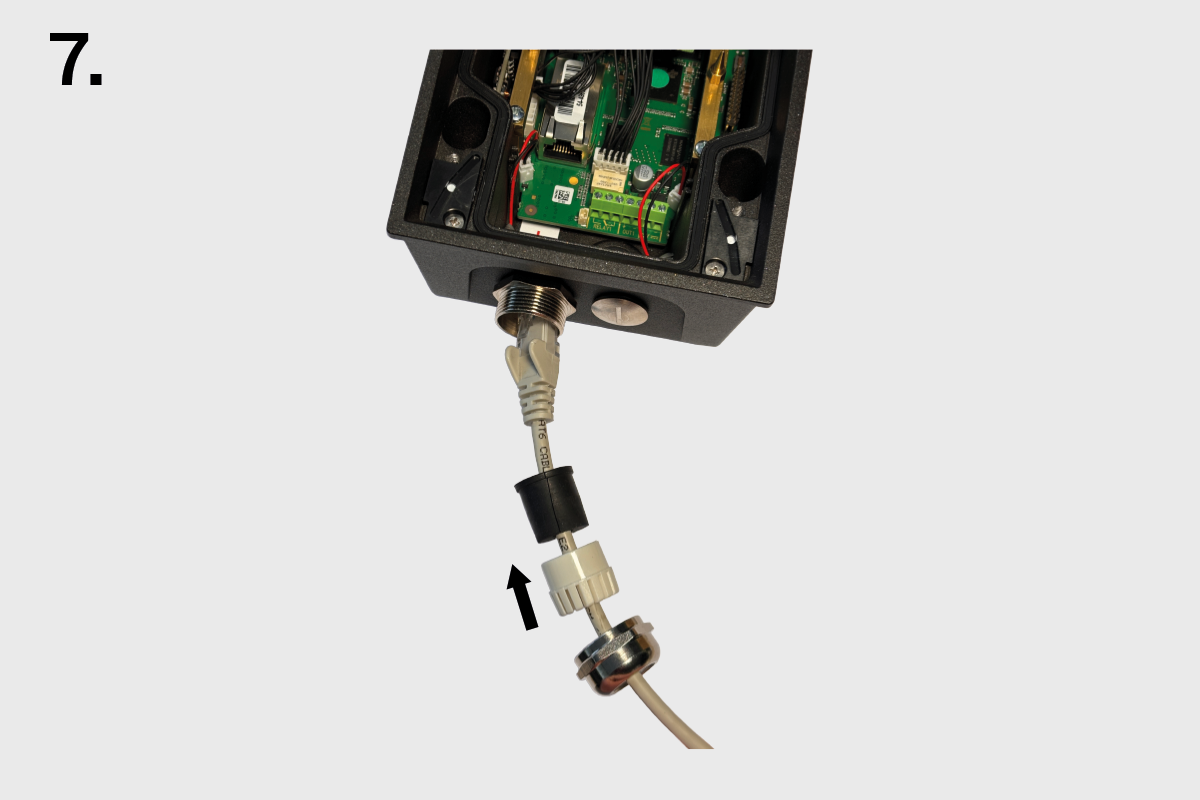
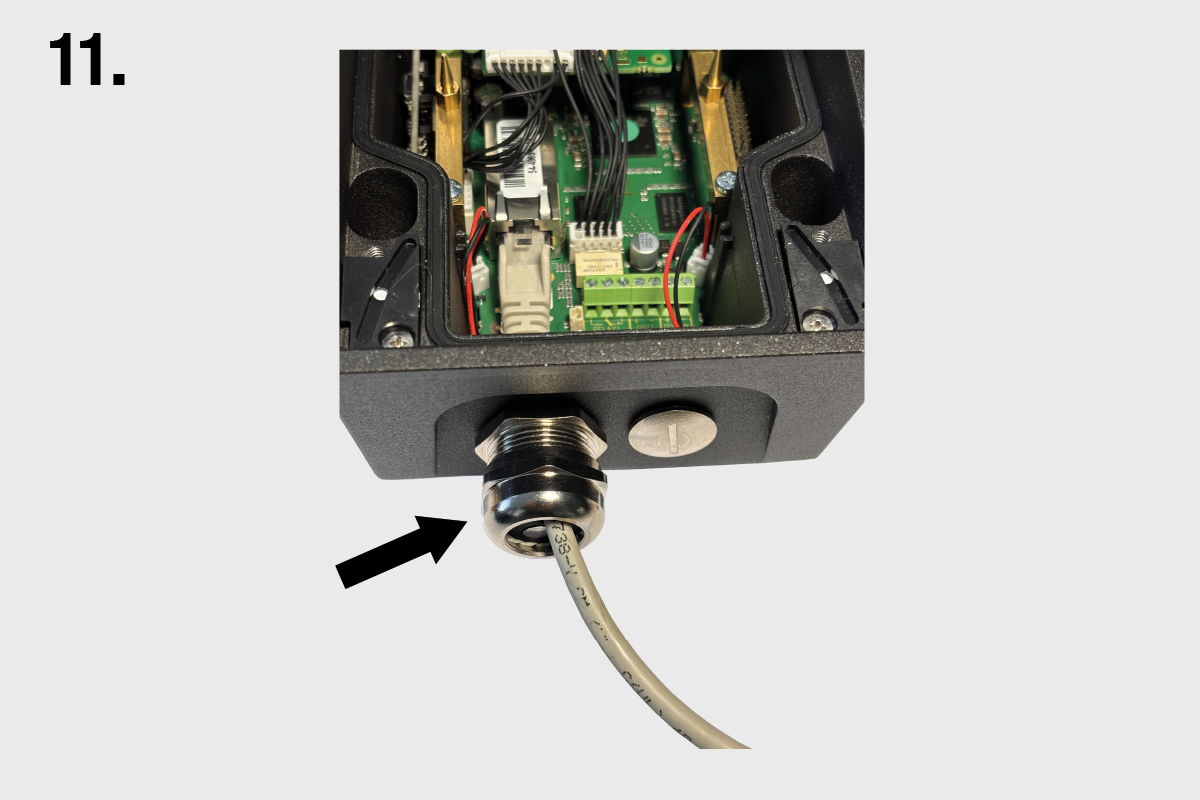
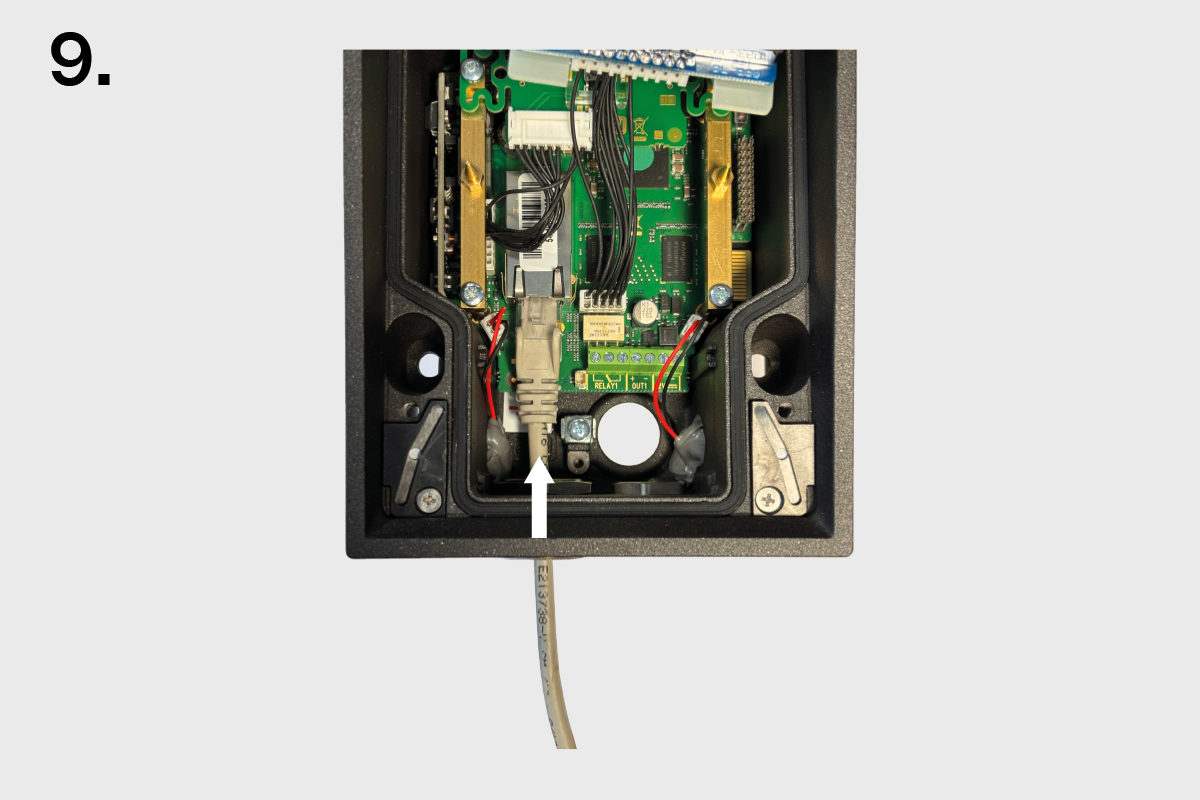
Pull the cable end through the bushing body into the intercom.
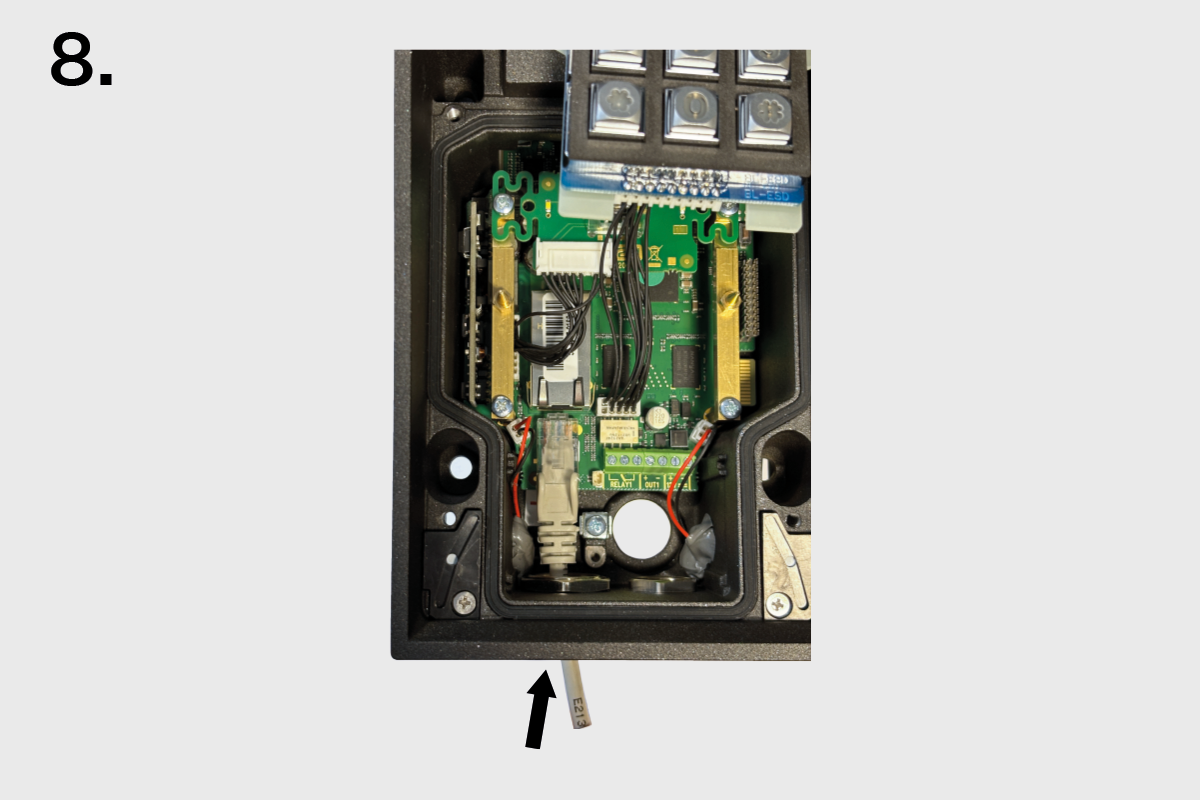
Snap the cable end into the motherboard connector.
Move the sealing including the case along the cable as far as the bushing body.
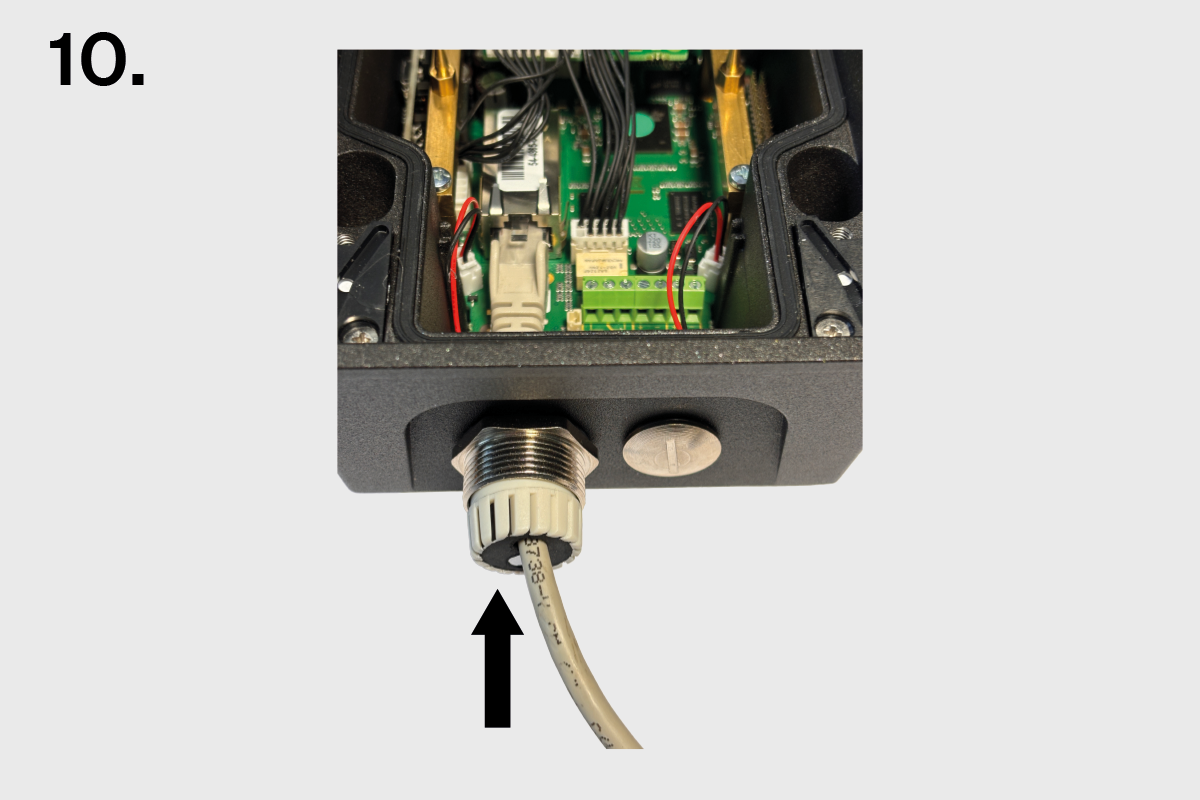
Screw on and tighten the nut.