Wall Mounting Box Installation for Device Wall Mounting
2N Indoor View Wi-Fi can be installed using a wall mounting box. The device display slope is 12% in this type of installation. Use the mounting box (Part No. 91378803), which is not included in the package.
Tip
Download the drilling template from 2N.com.
Refer to Subs. Component Layout for connector layout.
 |  |
 |  |
Drill holes of the diameter of 8 mm for the dowels and screws (included in the package). It is assumed that all the necessary cables of the maximum length of 25 cm will lead to the place.
Fit the wall mounting box into the predrilled holes. Pull the available cables through the box opening. Use a water level for a more precise levelling.
First connect the green power supply/doorbell connector to the device.
For connection via Ethernet.
Connect the LAN connector.
Put the cables carefully in the pre-drilled back slot of the device to prevent them from blocking any horizontal levelling movement during the final installation stage.
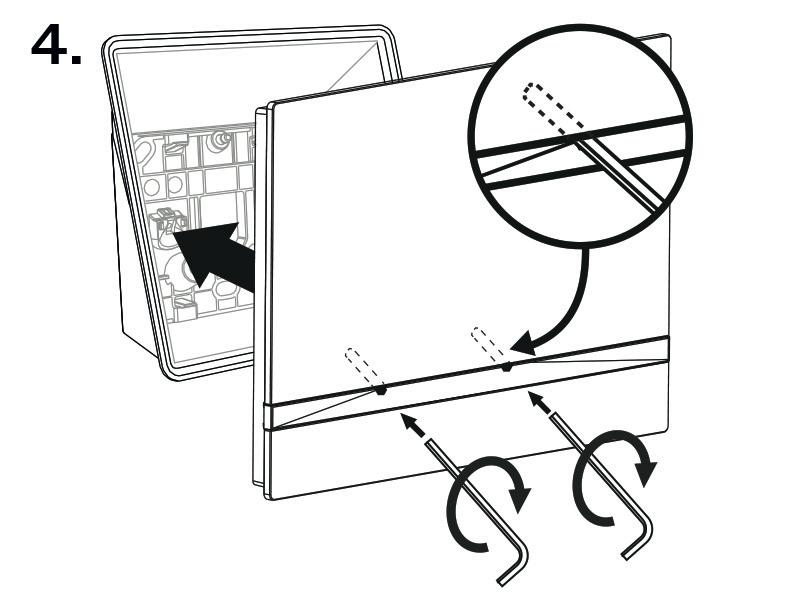
Fit the device screws into the nuts in the box with the hexagon key wrench provided.
Now the device is ready for basic operation. It is necessary to perform software configuration to achieve a full functionality of the device.