Flush Mounting Box Device Installation
Tip
Refer to Subs. Component Layout for connector layout.
 |  |
Remove the cover from the wall-mounted installation box. Take out the pre-prepared cabling, the UTP cable the bell wire (two-wire), power supply.
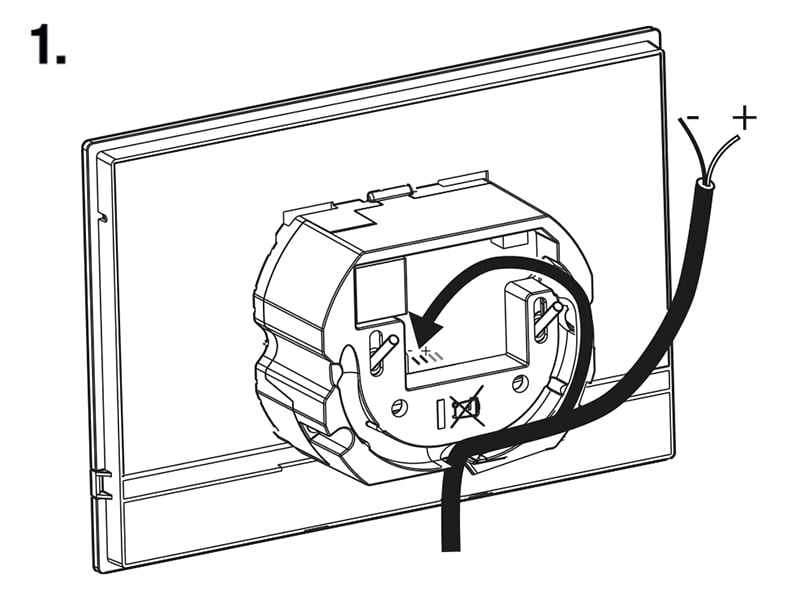
Shorten the cables to 150 mm or less as required. Connect the doorbell twin cable or power supply cable to the connector provided.
For connection via Ethernet.
Crimp the RJ-45 connector onto the UTP cable.
Take the device and lean its bottom edge against the wall below the flush mounting box.
First connect the green power supply/doorbell connector to the device.
For connection via Ethernet.
Connect the LAN connector.
Put the cables carefully in the pre-drilled back slot of the device to prevent them from blocking any horizontal levelling movement during the final installation stage.
Insert the device in the flush mounting box making sure that it clicks onto the centering pins. The pins allow for a 5–6 ° inclination on either side for accurate horizontal levelling of the device.
Now the device is ready for basic operation. It is necessary to perform software configuration to achieve a full functionality of the device.