The My2N Management Platform is a powerful cloud-based platform that makes managing and configuring the devices in your project’s solution more efficient.
My2N cloud includes video calling from an IP intercom to a smartphone or a tablet.
Prerequisites
- 2N IP intercom
- firmware version 2.36 or newer
- Internet connectivity, make sure that the DNS parameter is configured correctly If the static IP address is used
- no additional license is required
- My2N platform account
- For detailed information about how to access My2N and sign up,
please read the following article: My2N cloud - registration and setup
- For detailed information about how to access My2N and sign up,
Locate Serial Number and Security Code
- You can find them on the product ownership card that came with the box of your intercom.

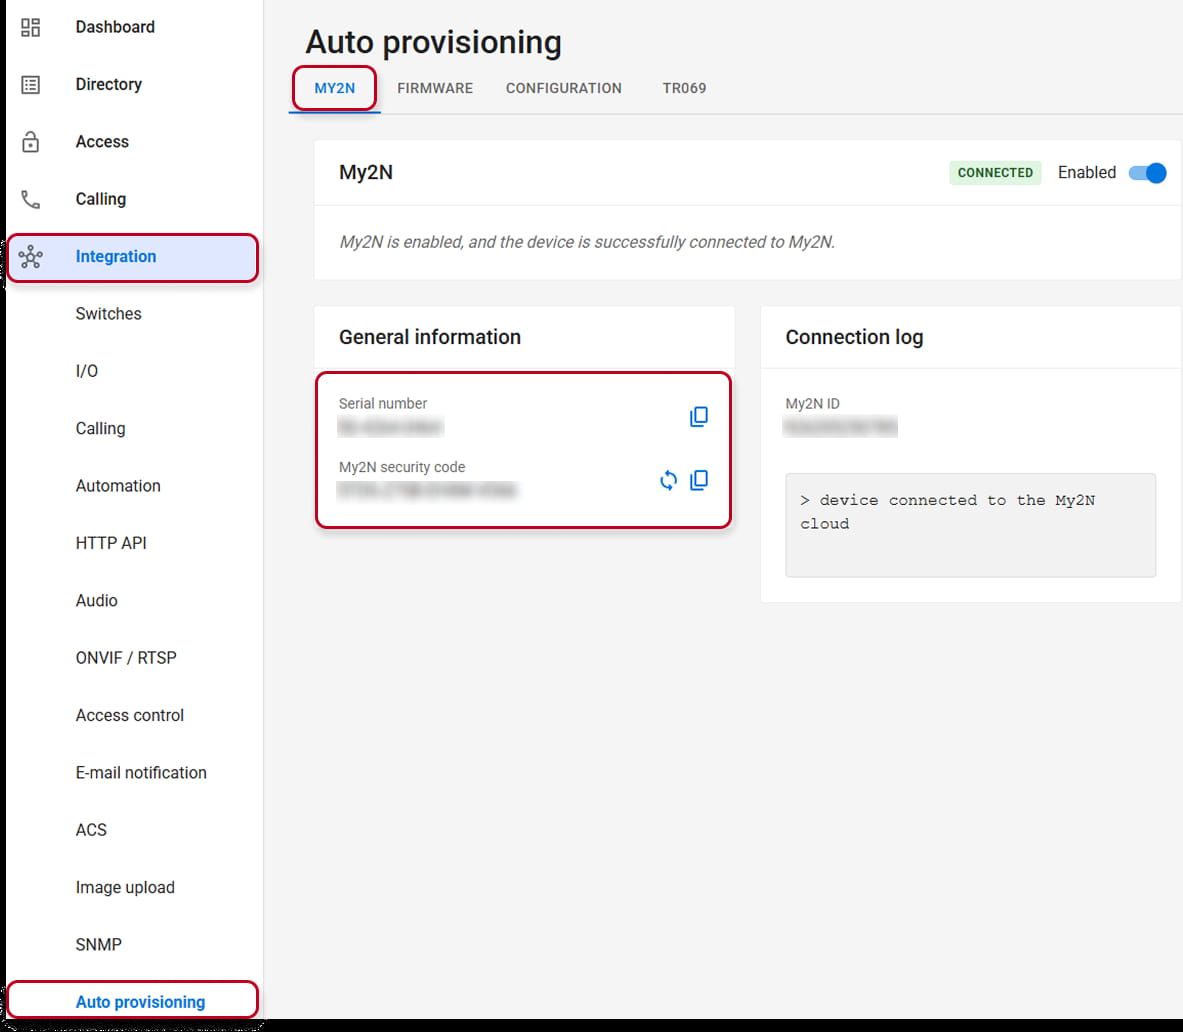
- Or login to the device´s web management and go to the section System - Auto Provisioning - My2N. (in the Old Web Interface)

- Login to the device´s web management and go to the section Integration - Auto Provisioning - My2N (in the New Web Interface)
Add 2N IP intercom into your My2N site
- After login to your My2N site continue to section Devices and then click the ADD DEVICE button.
Choose the 2N Device option.
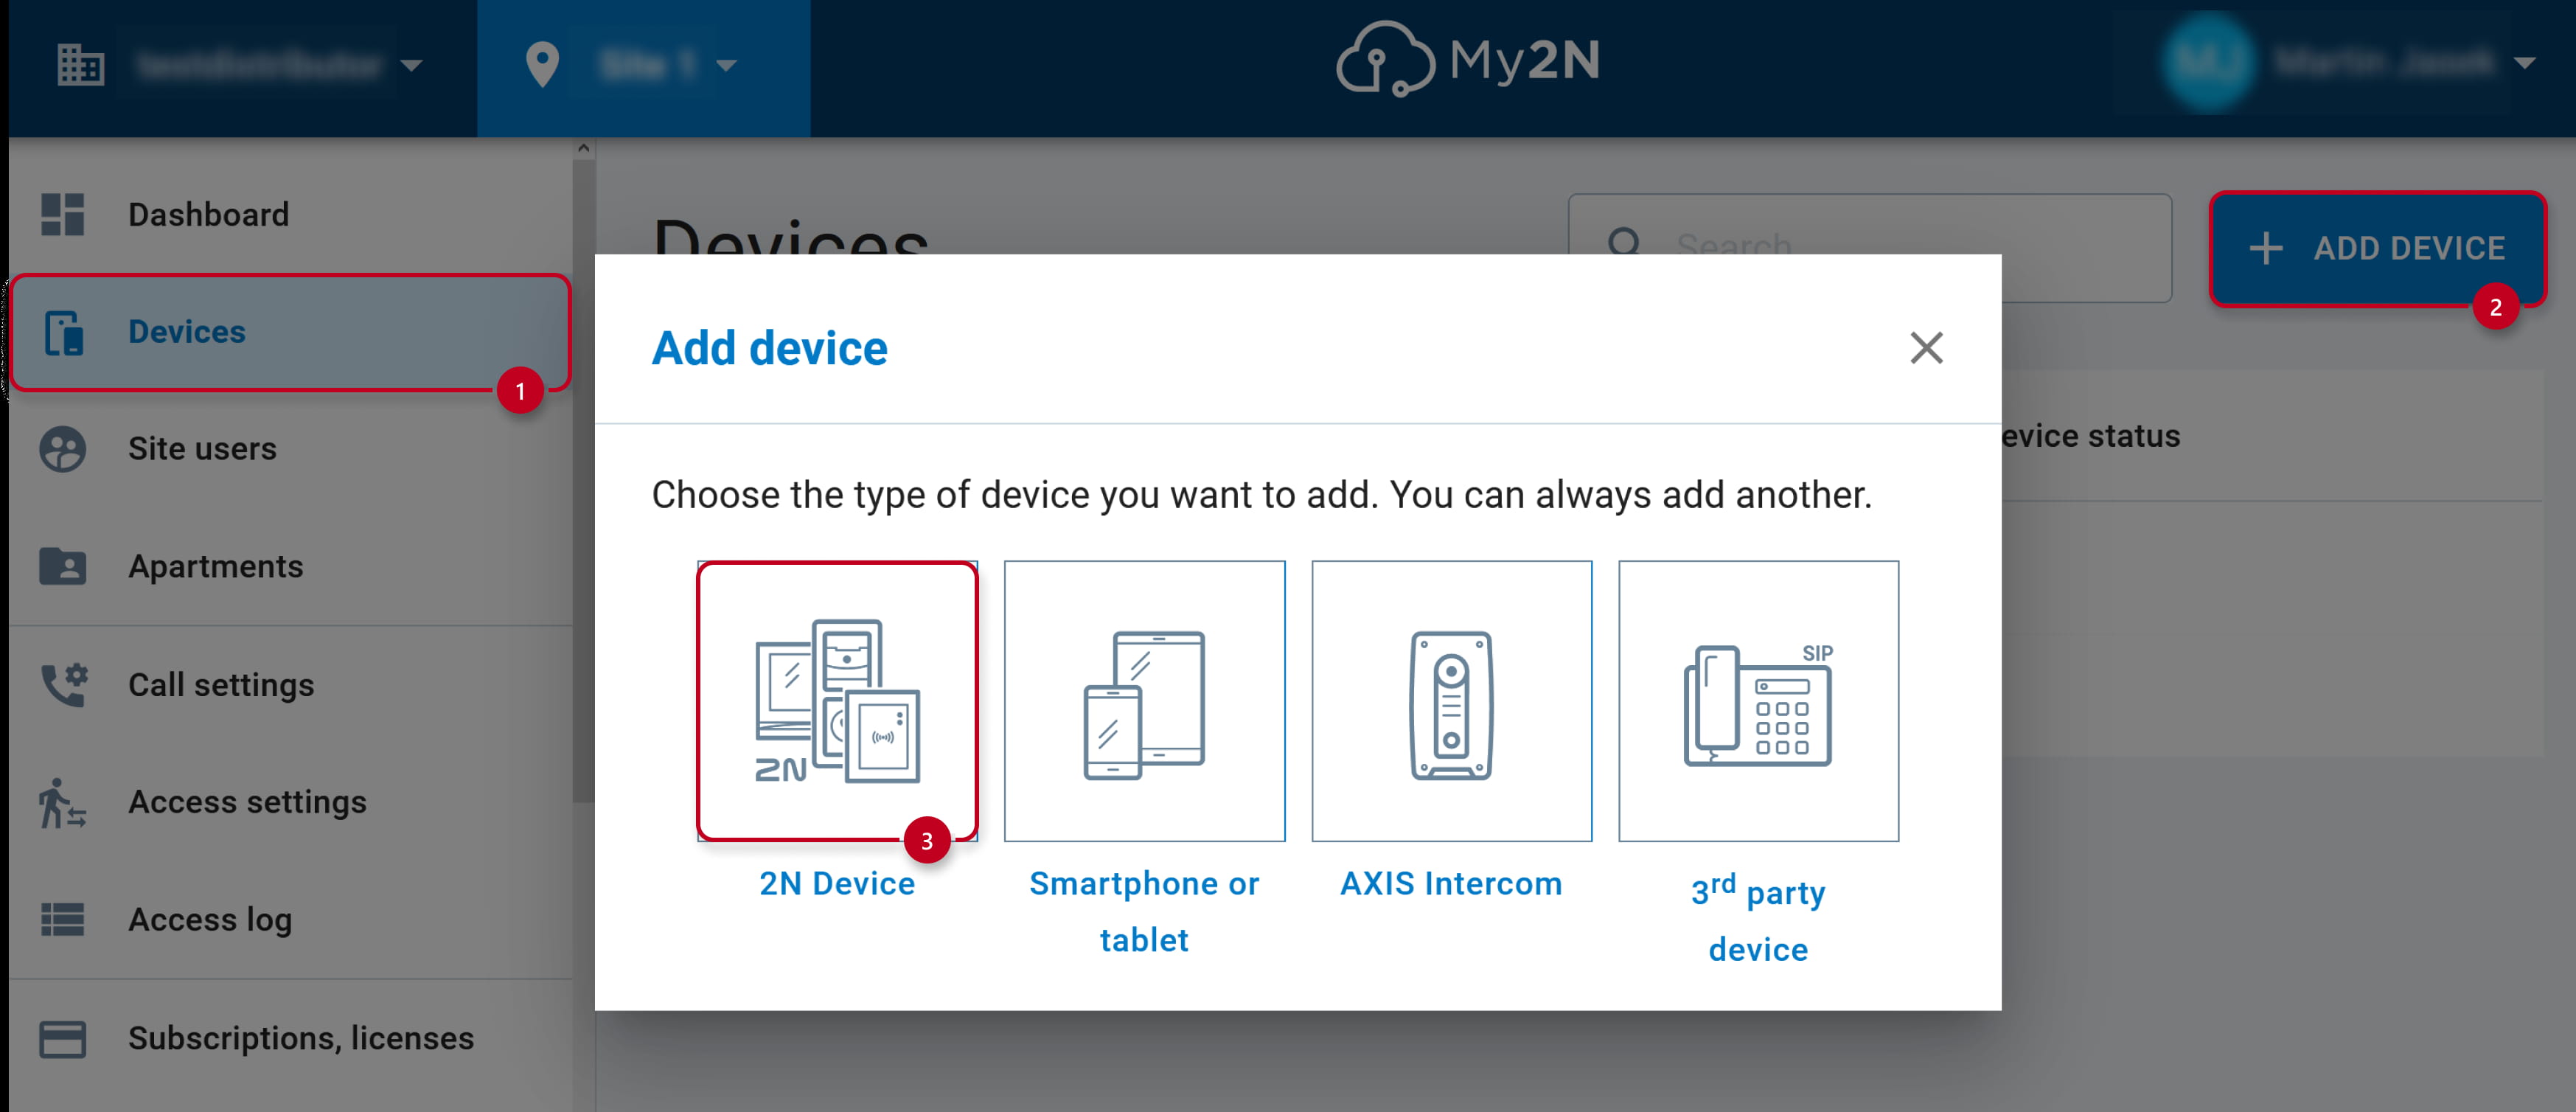
- In a newly opened window, please fill in details about your 2N IP intercom.
- Fill in this device's serial number from its ownership card or its web management.
- Fill in this device's Security code from the same place.
Alternatively you can click on SCAN QR CODE and point the camera of your laptop or phone at the ownership card to easy fill in this two details.
Please note that one device (one serial number) can only be assigned to one My2N account at once.
If you have already registered that intercom to a different My2N account, you need to remove it first. - Tick on Remember security code to allow automatic connectivity back in case of accidental disconectivity.
- Fill in the intercom's name (defined by your requirements in order to easily identify this device).
- Continue to next step.

- We recommend to keep the Automatic configuration mode (set by default) to allow My2N automatically configure the devices. Logging of access is optional feature to see device´s access logs in My2N portal. Now you can finish the process.

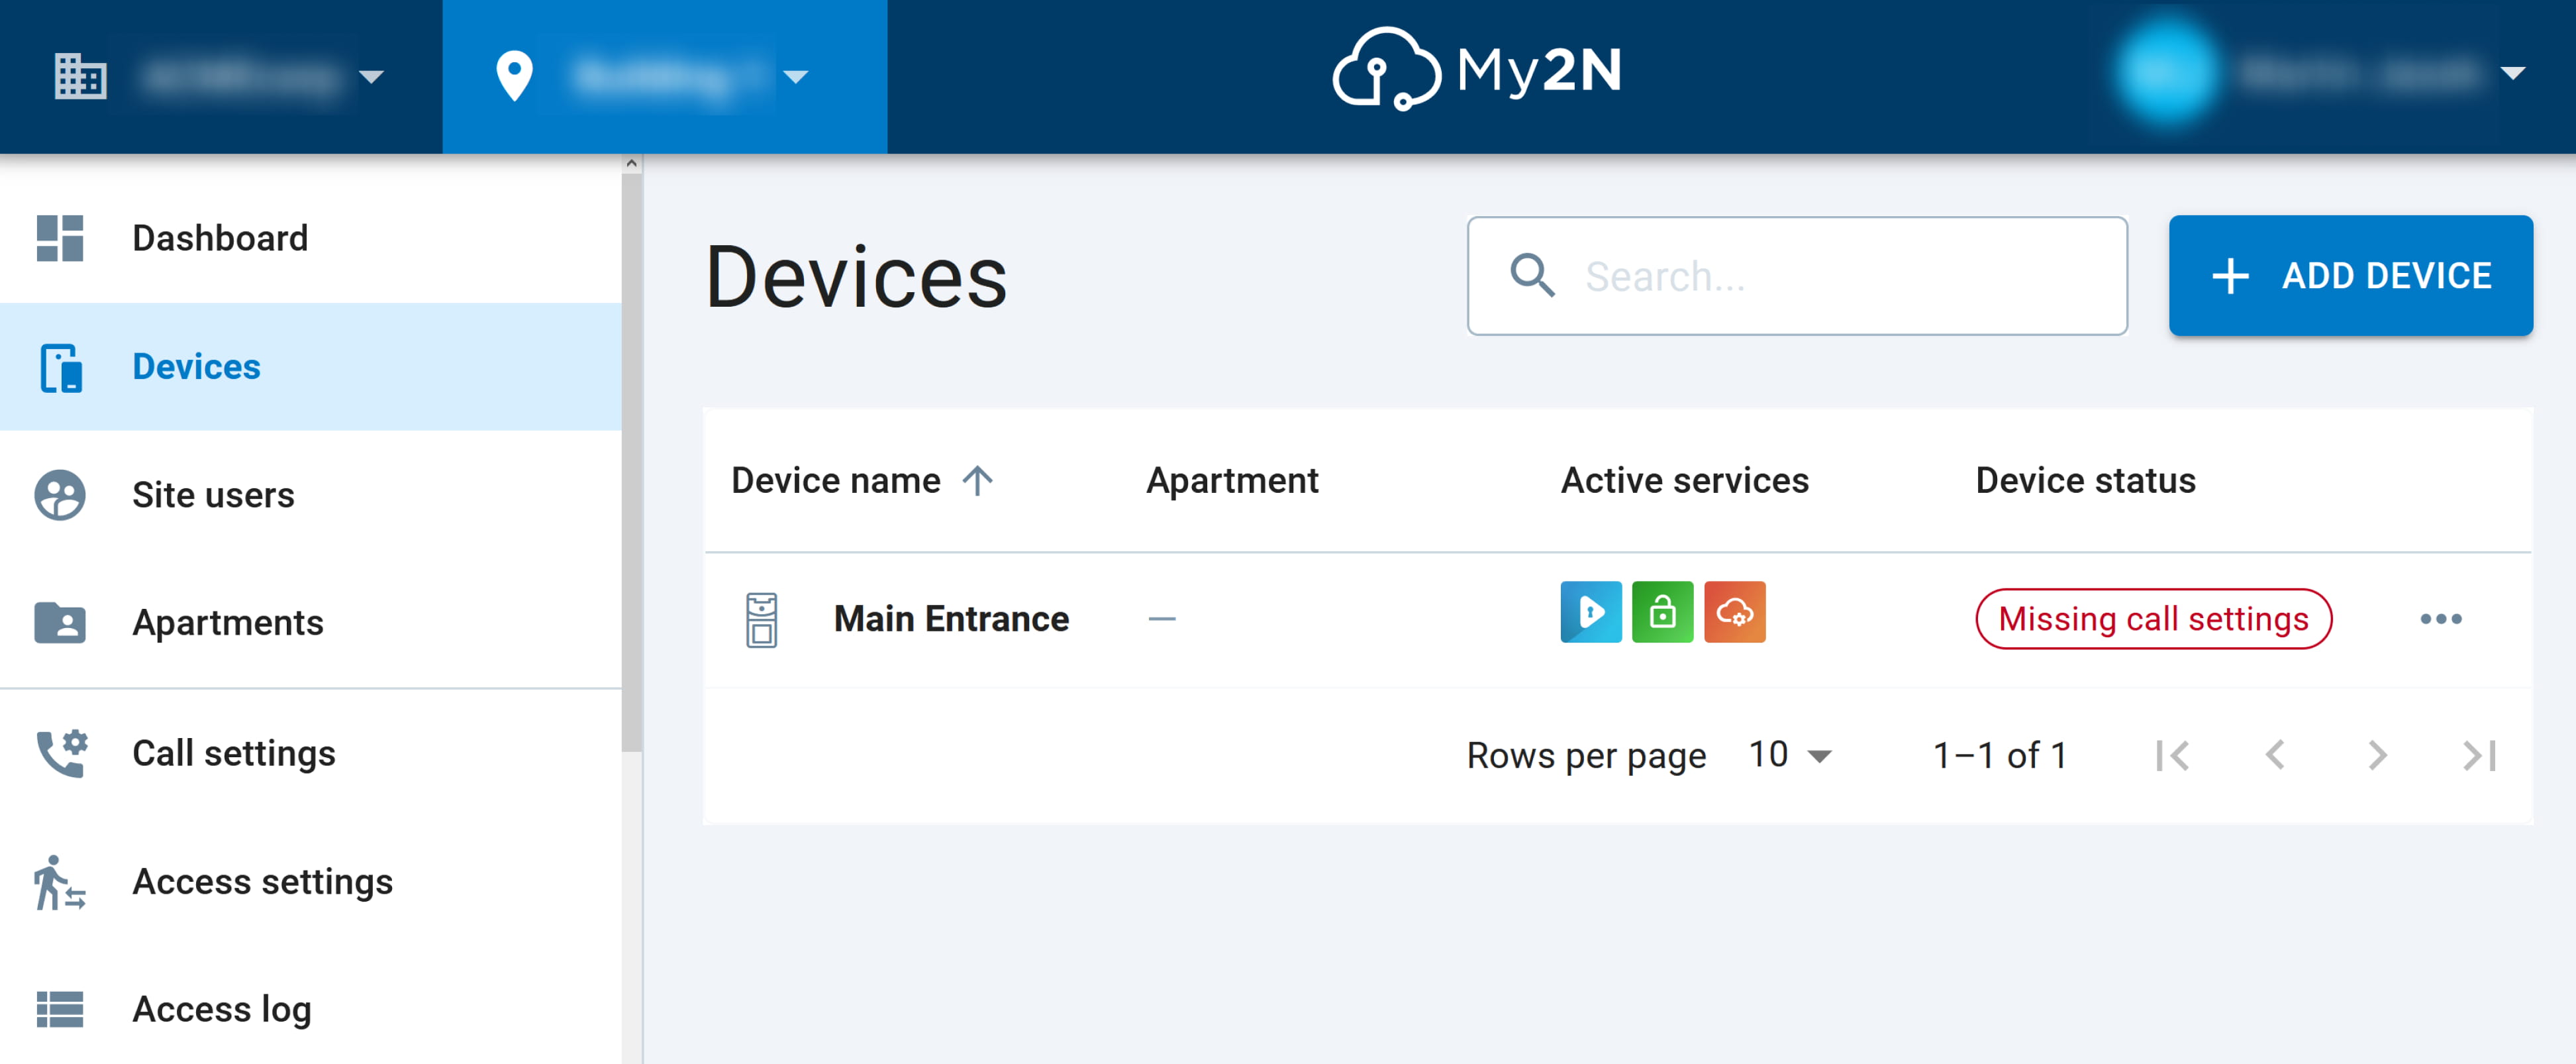
- You have successfully added 2N IP intercom to your My2N site.
Device status is Missing call settings, which means the call feature has not been set yet as described below.
What to do next for call feature
- Add the mobile device you wish to call from your intercom to your My2N account.
You can follow this article: My2N - How to add smartphone or tablet
- In order to make calls from the intercom to mobile devices over My2N,
buttons on the intercom need to be configured to call the correct mobile devices.
You can follow this article: My2N - Call setting