|
Requirements:
|
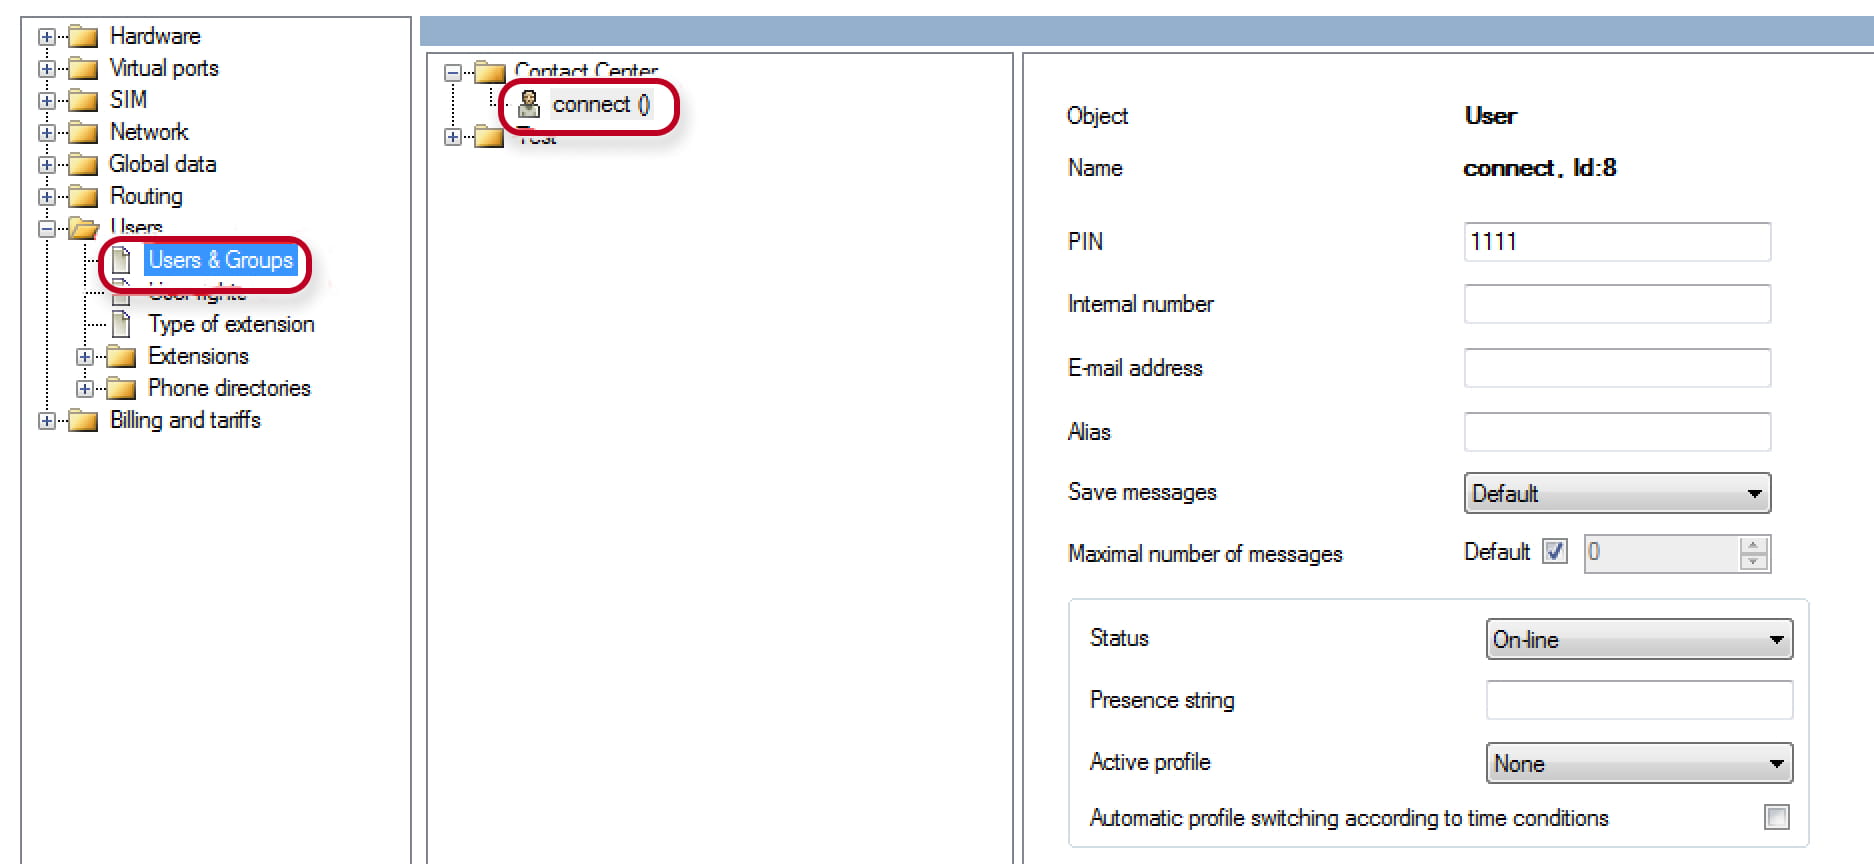
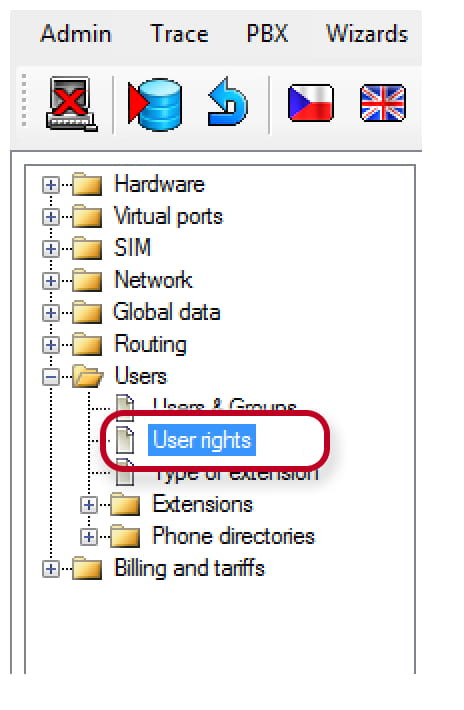
1. Create User in your NetStar (in section User- Users & Groups):
ログイン
新しいアカウントを作成する
地域と言語の選択
|
Requirements:
|
1. Create User in your NetStar (in section User- Users & Groups):
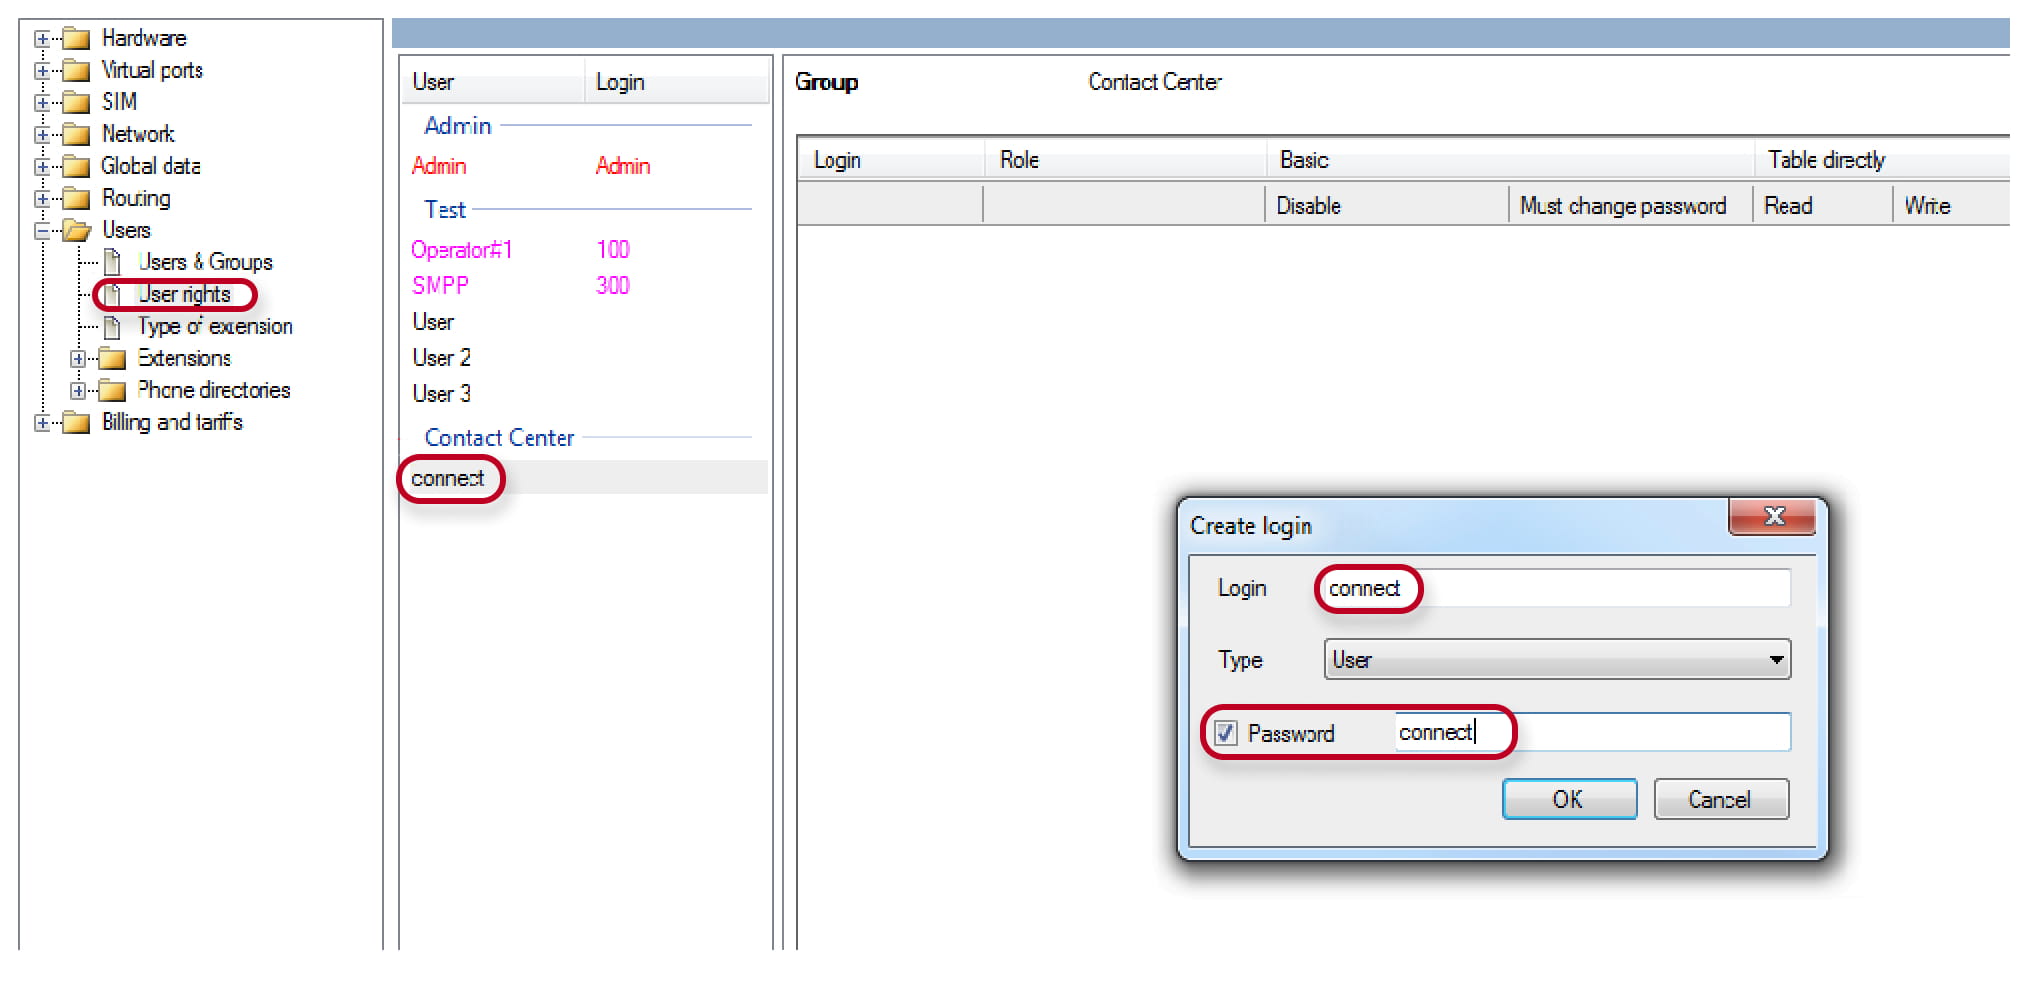
Next, create a login and password to this user
2. Install the 2N Records Manager.
HW requirements are 64bit processor, 2GB RAM, 100GB HDD, processor must support Virtualization technology.
It can be Virtual machine, Server or PC in the same LAN Network as 2N NetStar is! Software is distributed with CentOs 6.4 system – which will be installed as well.
If you are going to install Records Manager on the virtual PC you need to enable virtualization (used as the hardware acceleration) on the BIOS.
Below all the step of installation are described.
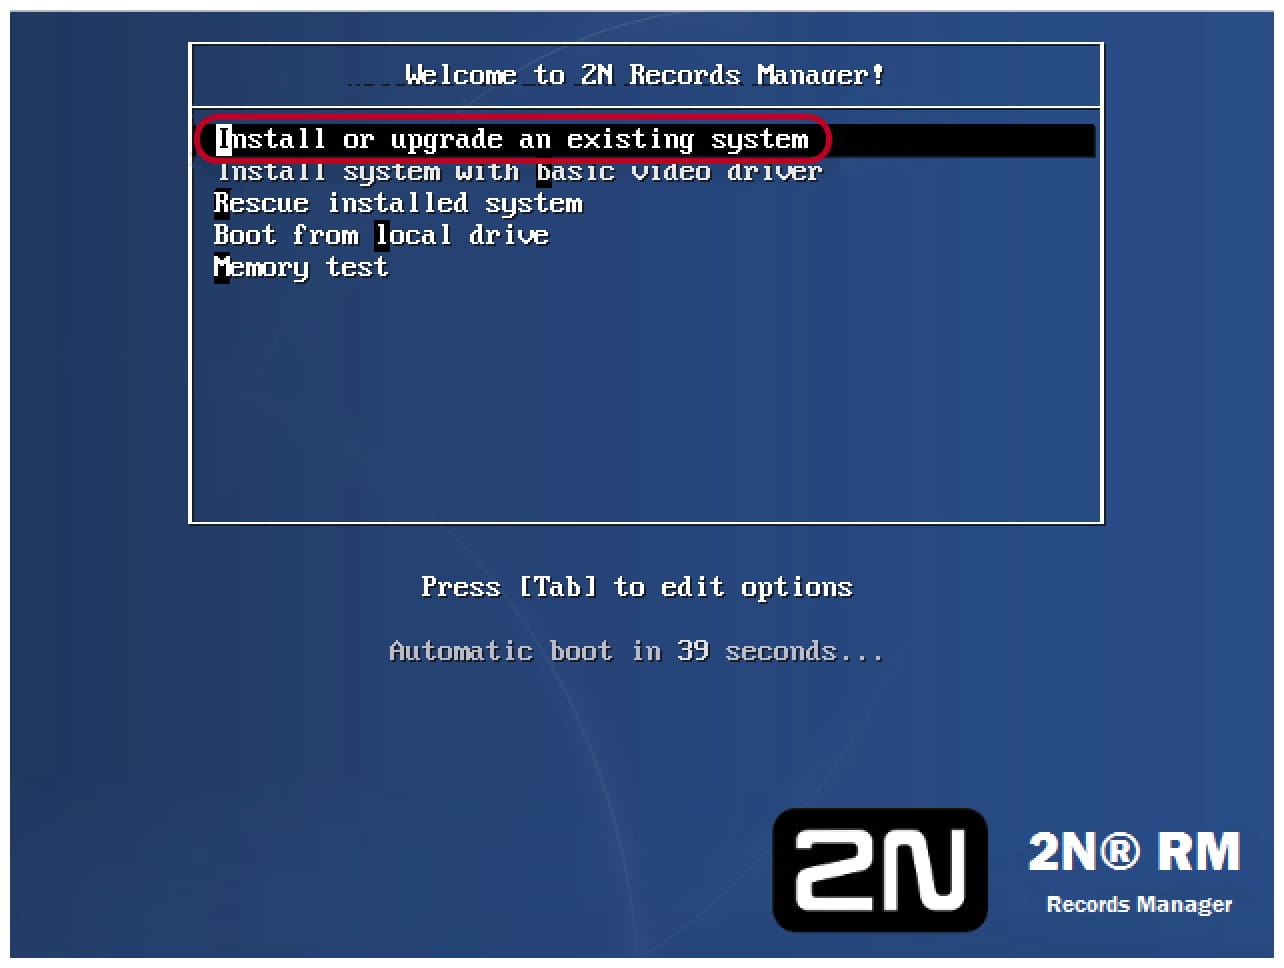
3. Select the first option or just wait.
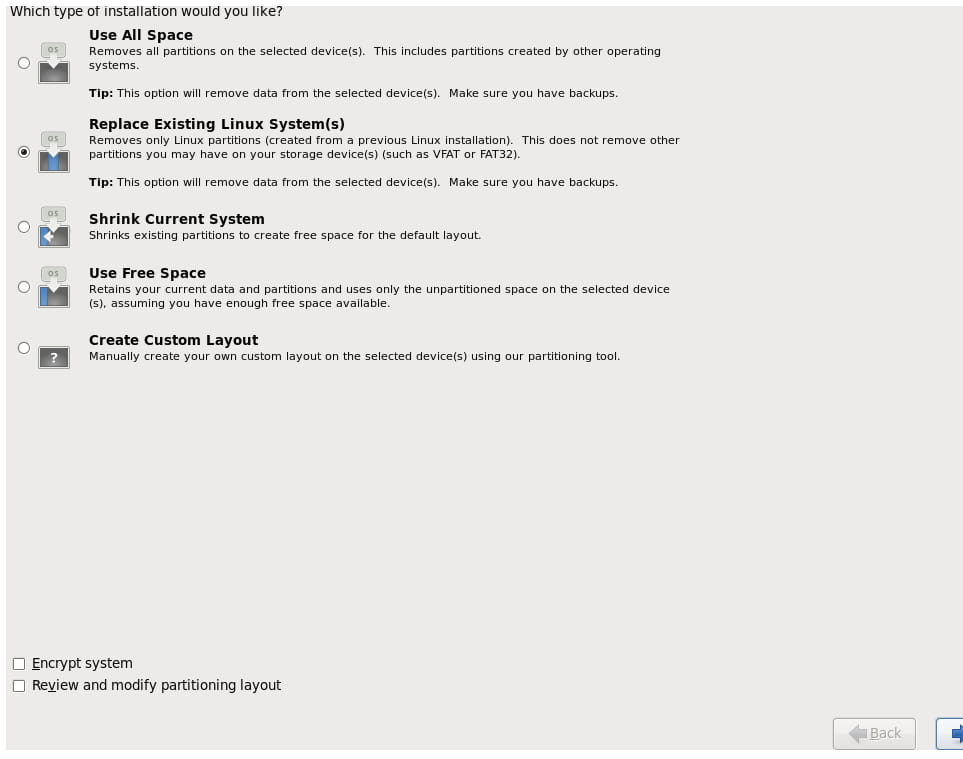
4. Then the system will request to select one of the options below (we recommend option "Use All Space")
5. Installation will take approximately 15 minutes. After the installation is complete you will be requested to reboot the system.

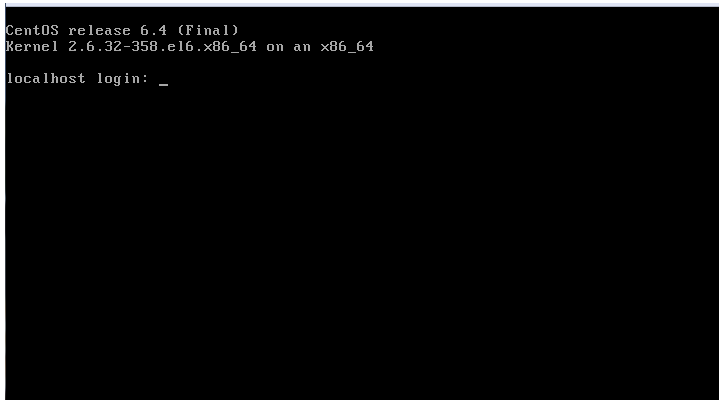
6. Eject installation disk from CD-ROM. Enter login and password. By default login is admin, password is 2n.
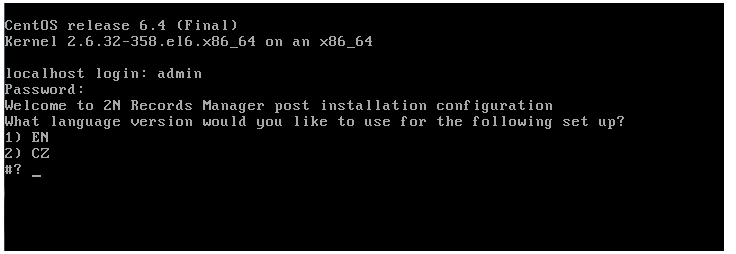
7. Select language and proceed with settings.
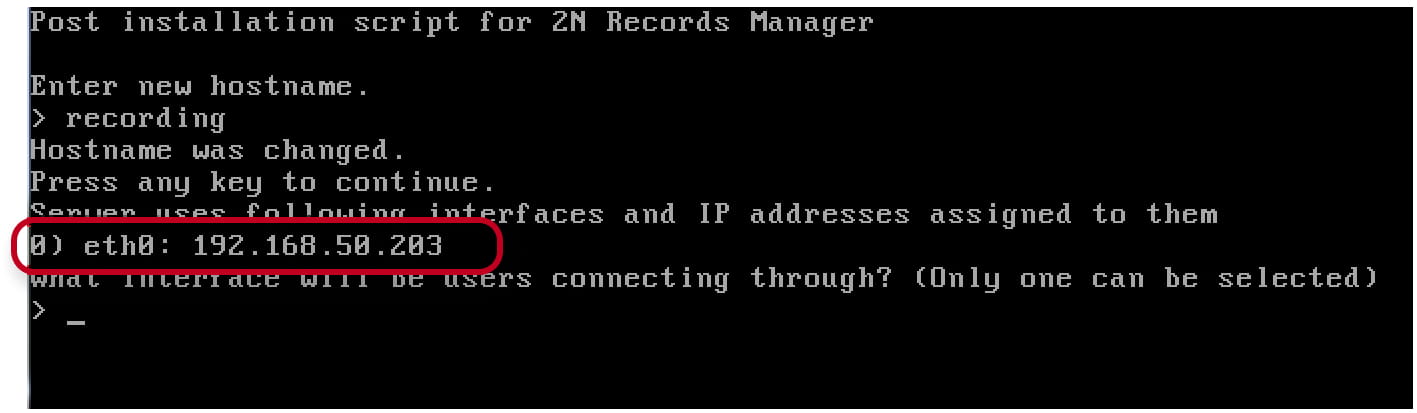
8. Type hostname. It can be any name

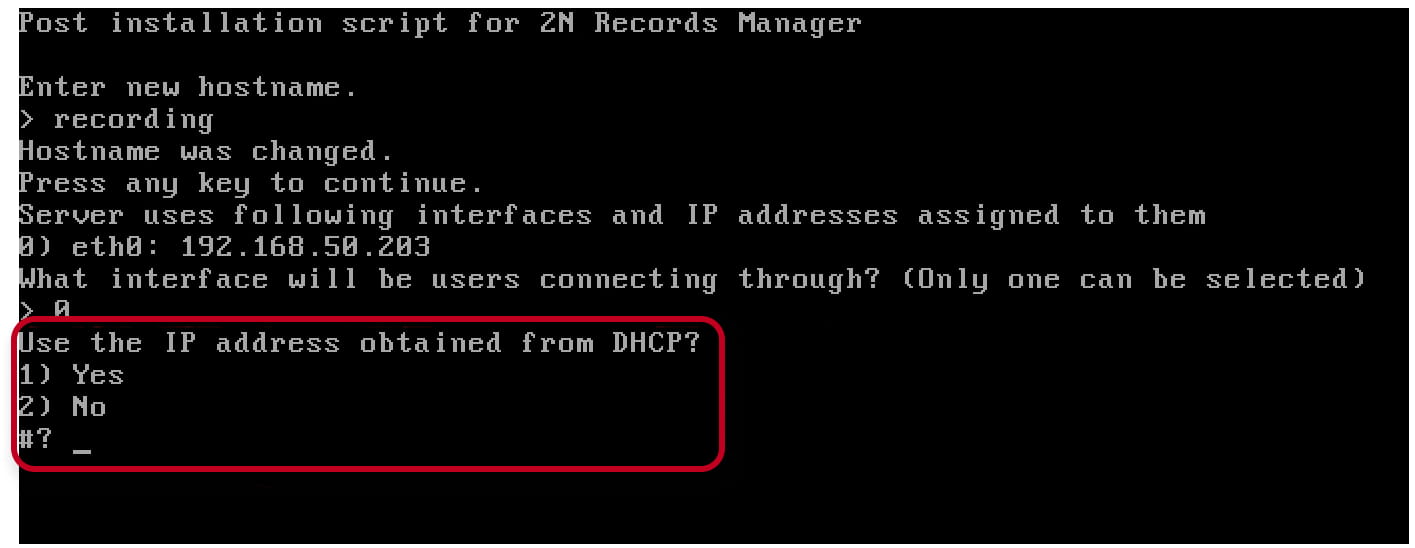
9. Select network interface
10. You can use IP address obtained from DHCP server or configure static
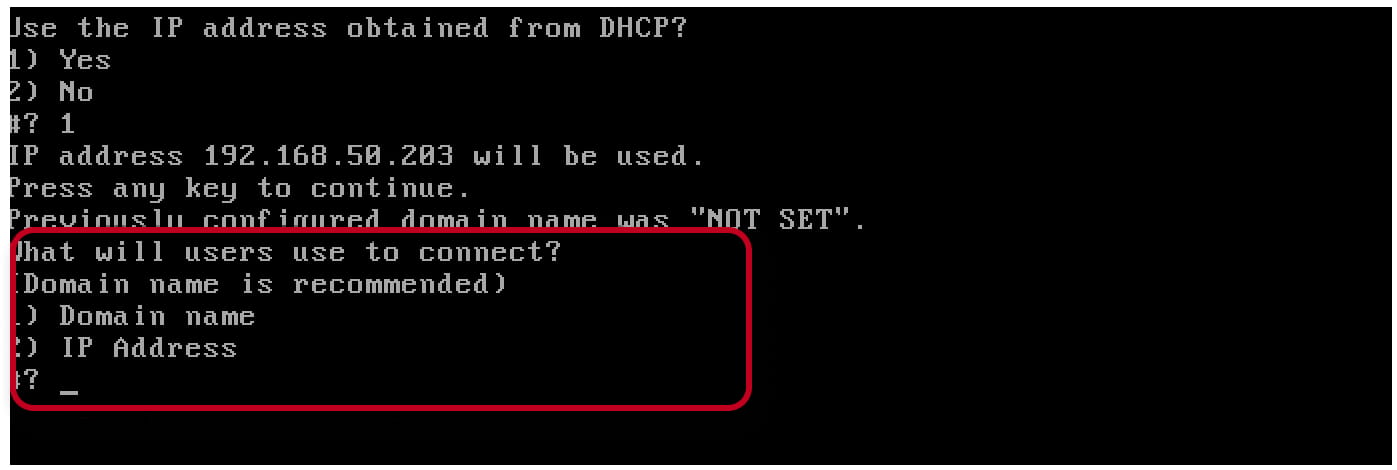
11. To access Records Manager you can use domain name or IP address. If you select domain name as the option, it is also necessary to update your local DNS server with new entry. Domain name must look like records.company.com
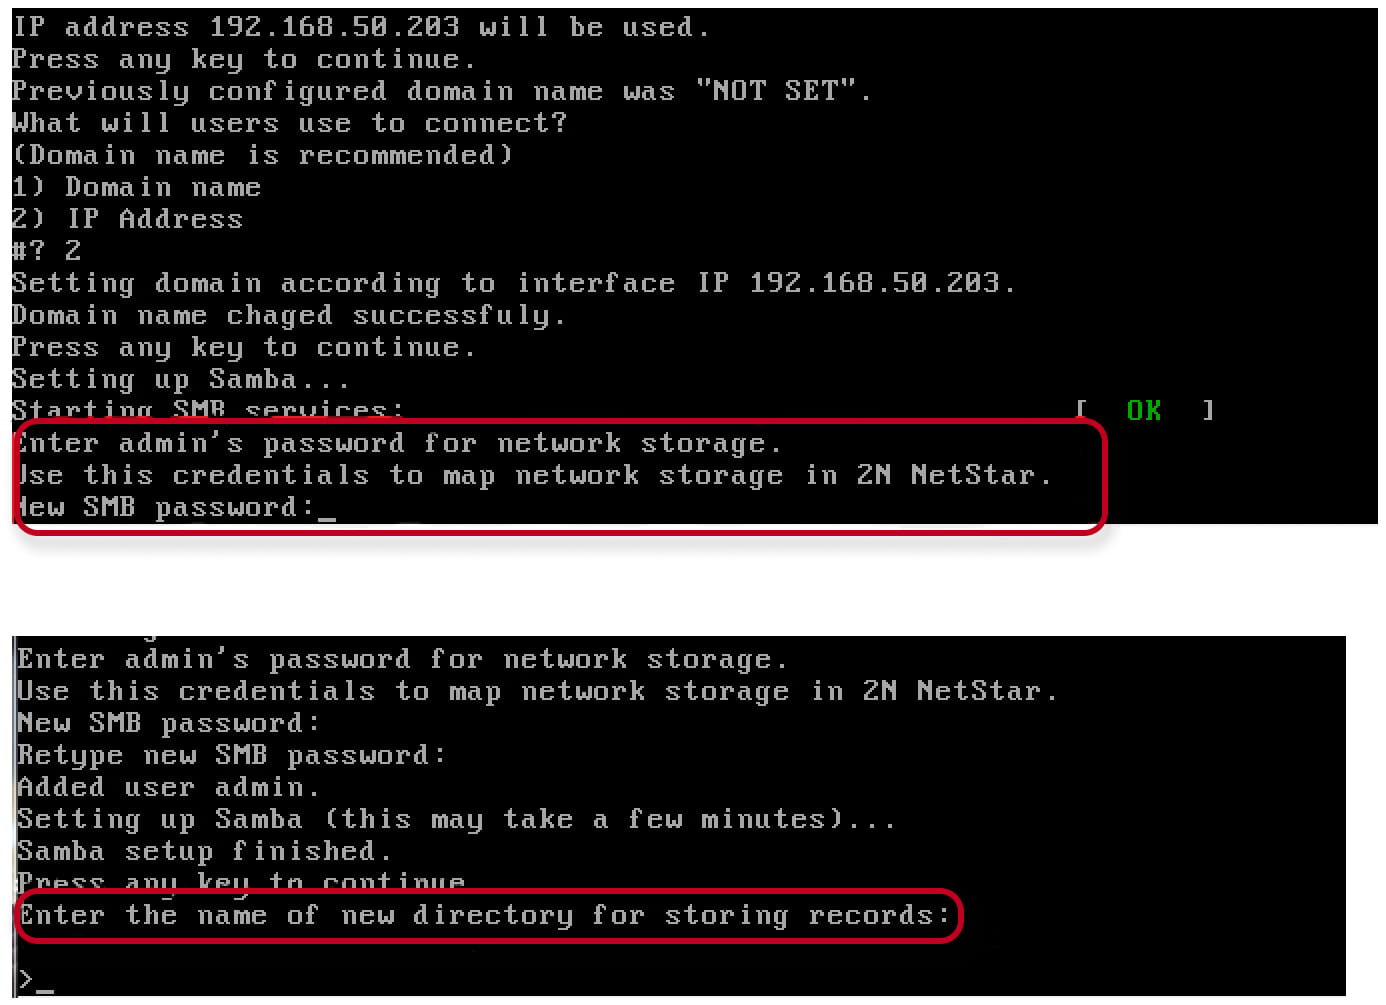
12. The wizard will create a storage folder where all the records will be saved. Wizard will request a password to access given directory from Netstar. After you enter the password you will be requested to enter name of folder where all the records will be stored:
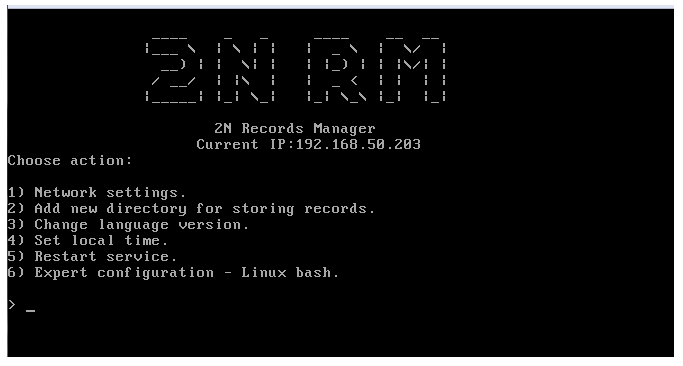
13. After you finish system setup there will appear a window with the following options:
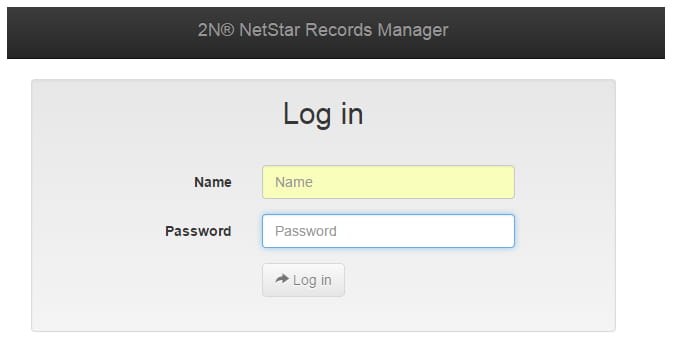
14. Now system is set. Run any web browser and type IP address/domain name of installed Records Manager. Default login is superadmin, password is 2n
15. Upload the license file which you got from Technical Support
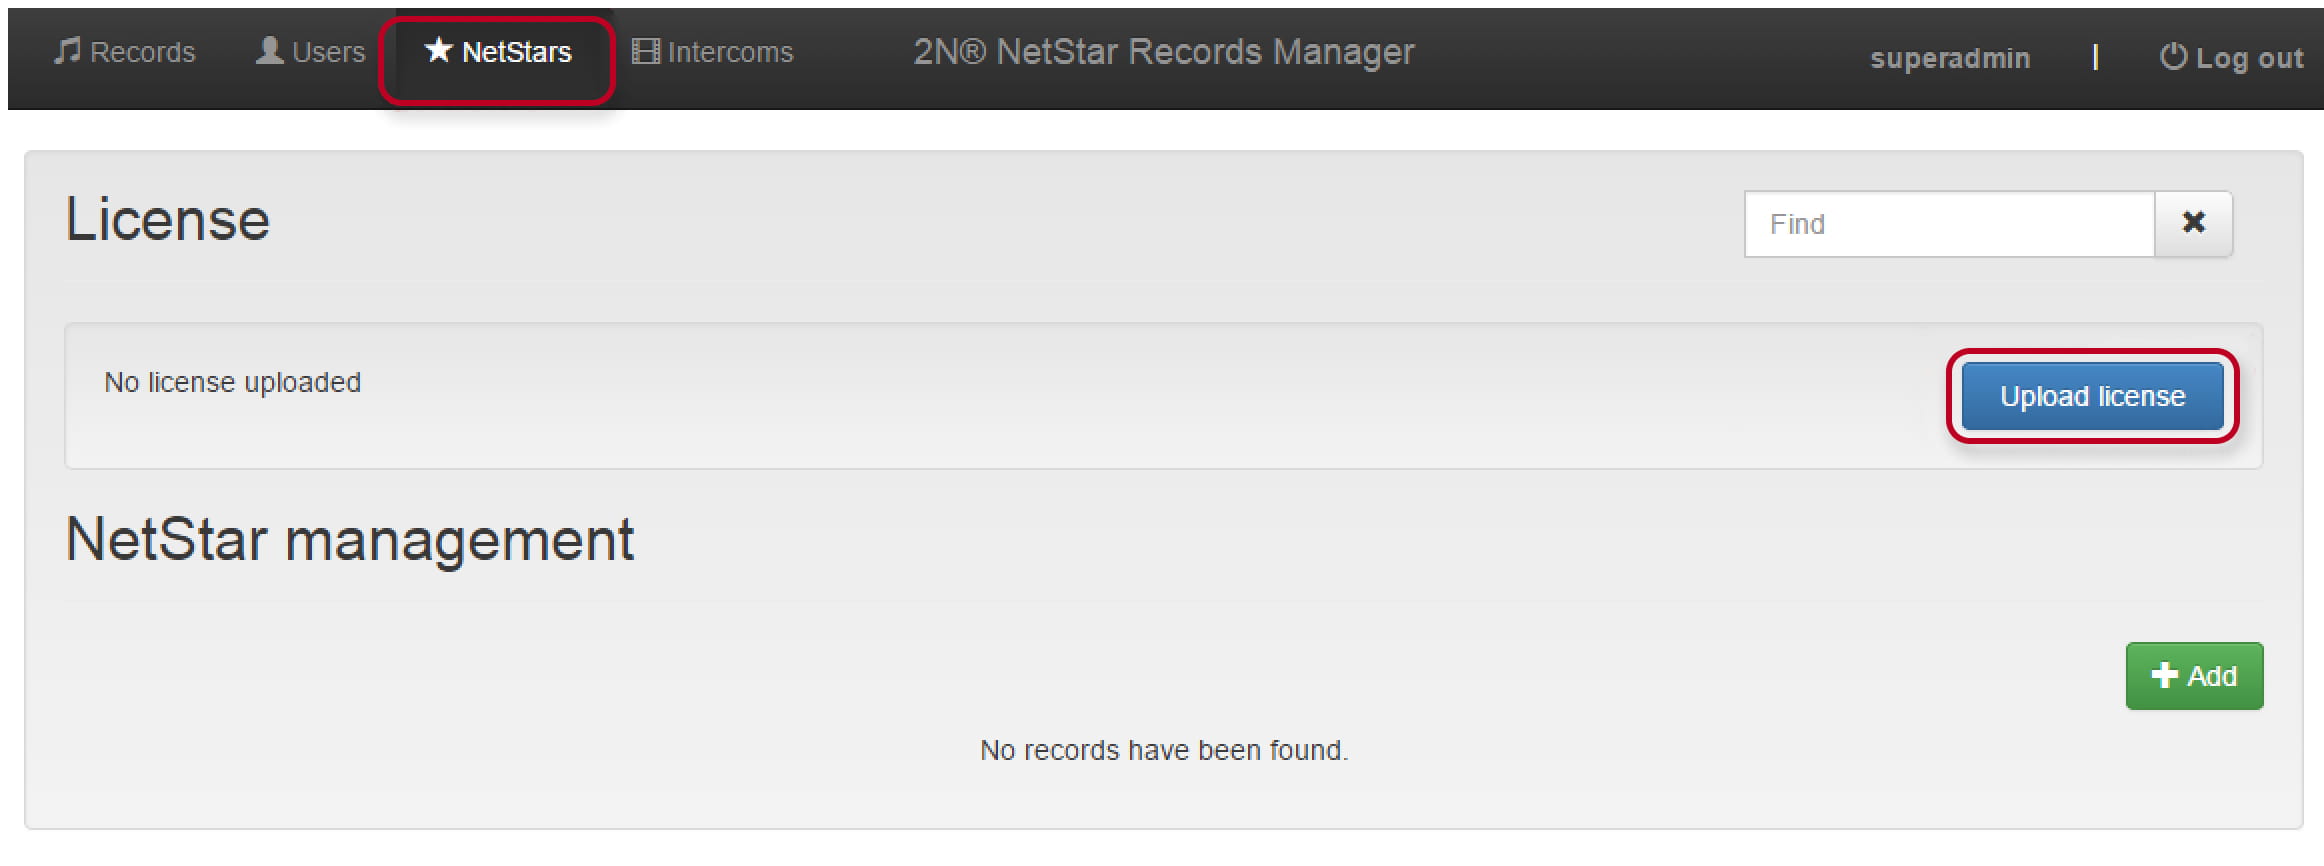
16. Then add new NetStar to the system and fill in required information and add created folder for storing records
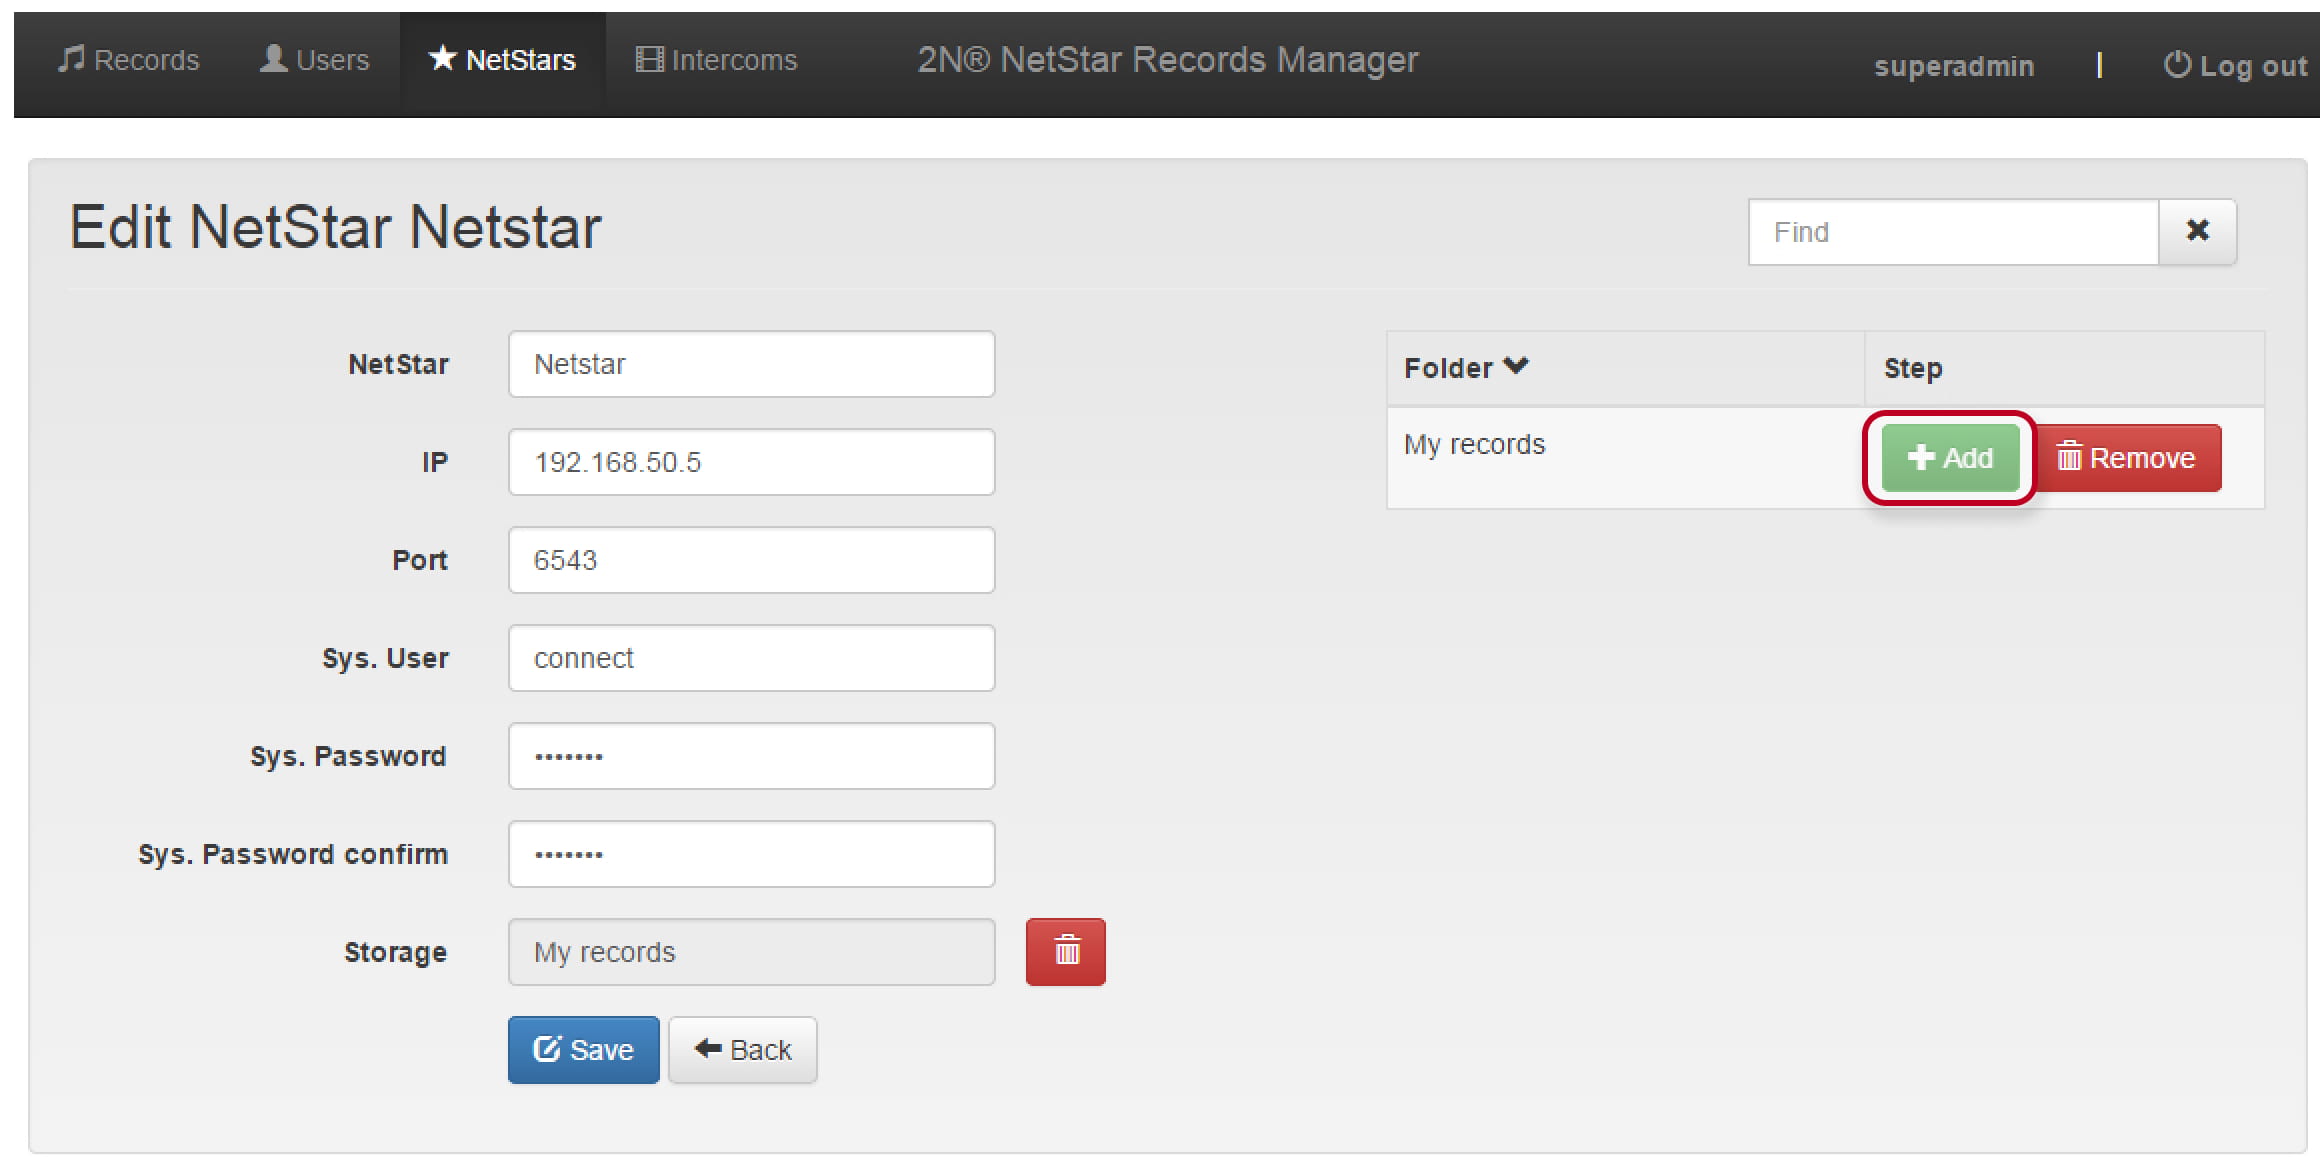
IMPORTANT! The communication port is always 6543, Sys. user is the user which was created in NetStar in the beginning of this manual.
17. Now all the users of NetStar are visible in Records Manager. There are 3 roles available for given users
Admin - can manage all the users and managers. He is not able to configure NetStar in Records Manager.
Manager - can see all the records of his users. For example, it can be manager of department who has certain amount of employees.
Agent - employee. He can see and manage his own records.
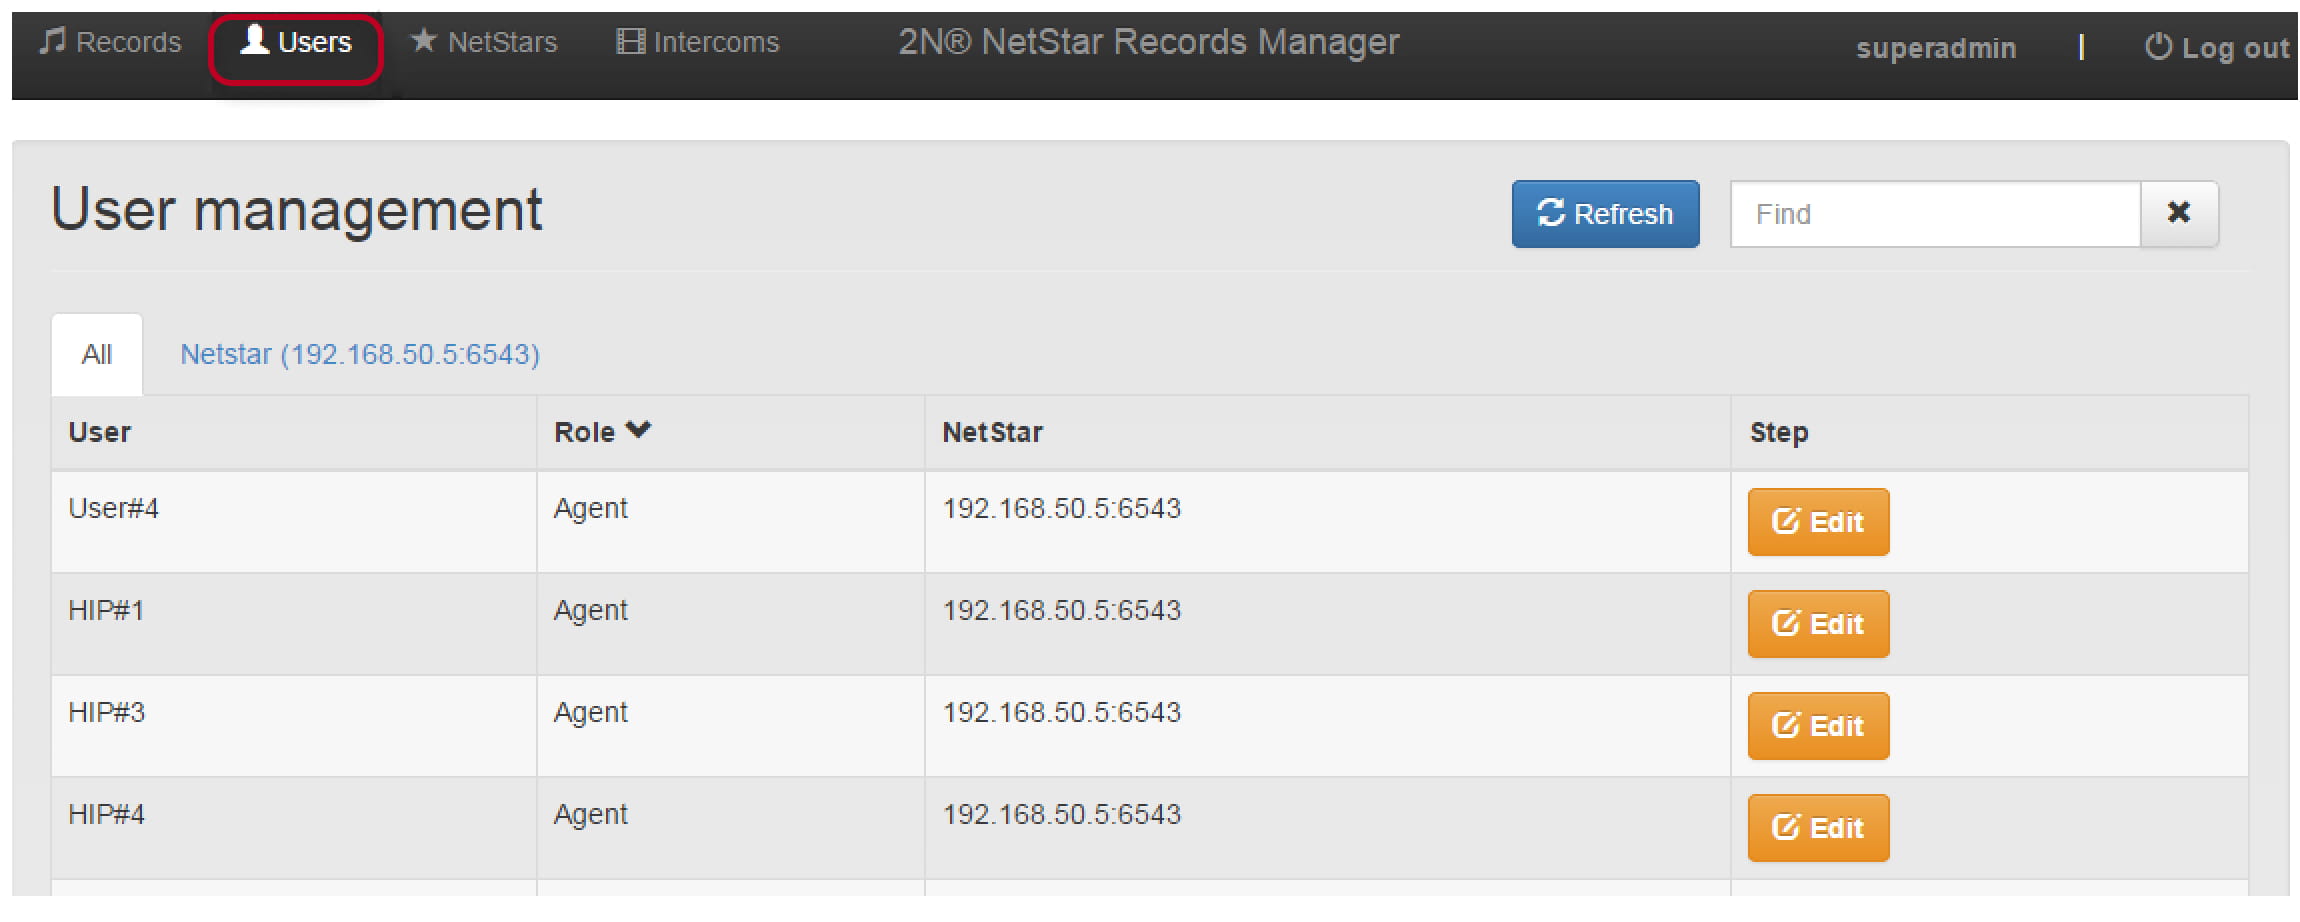
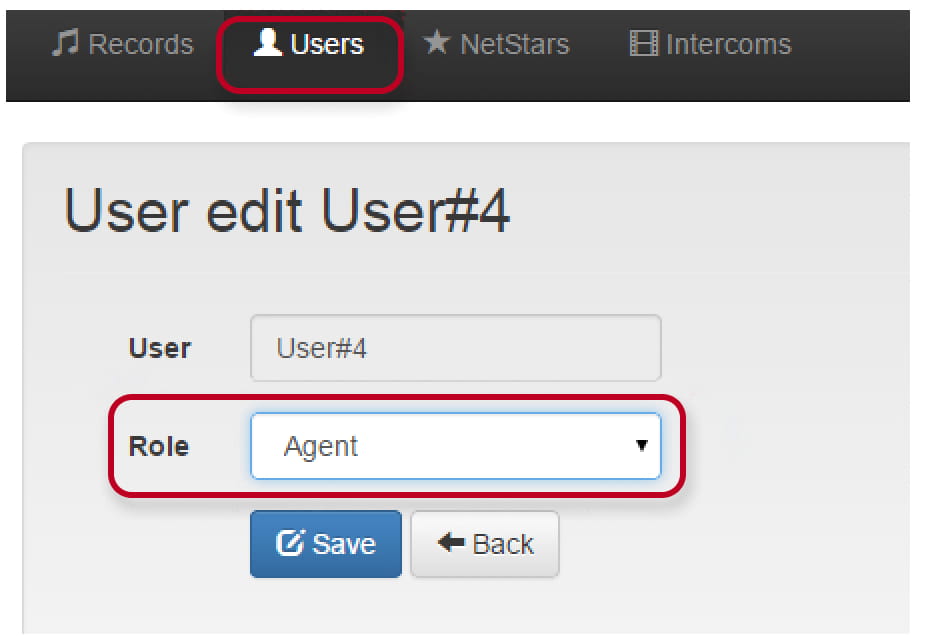
All the users are able to access Records Manager via web browser using their credentials which can be set in NetStar
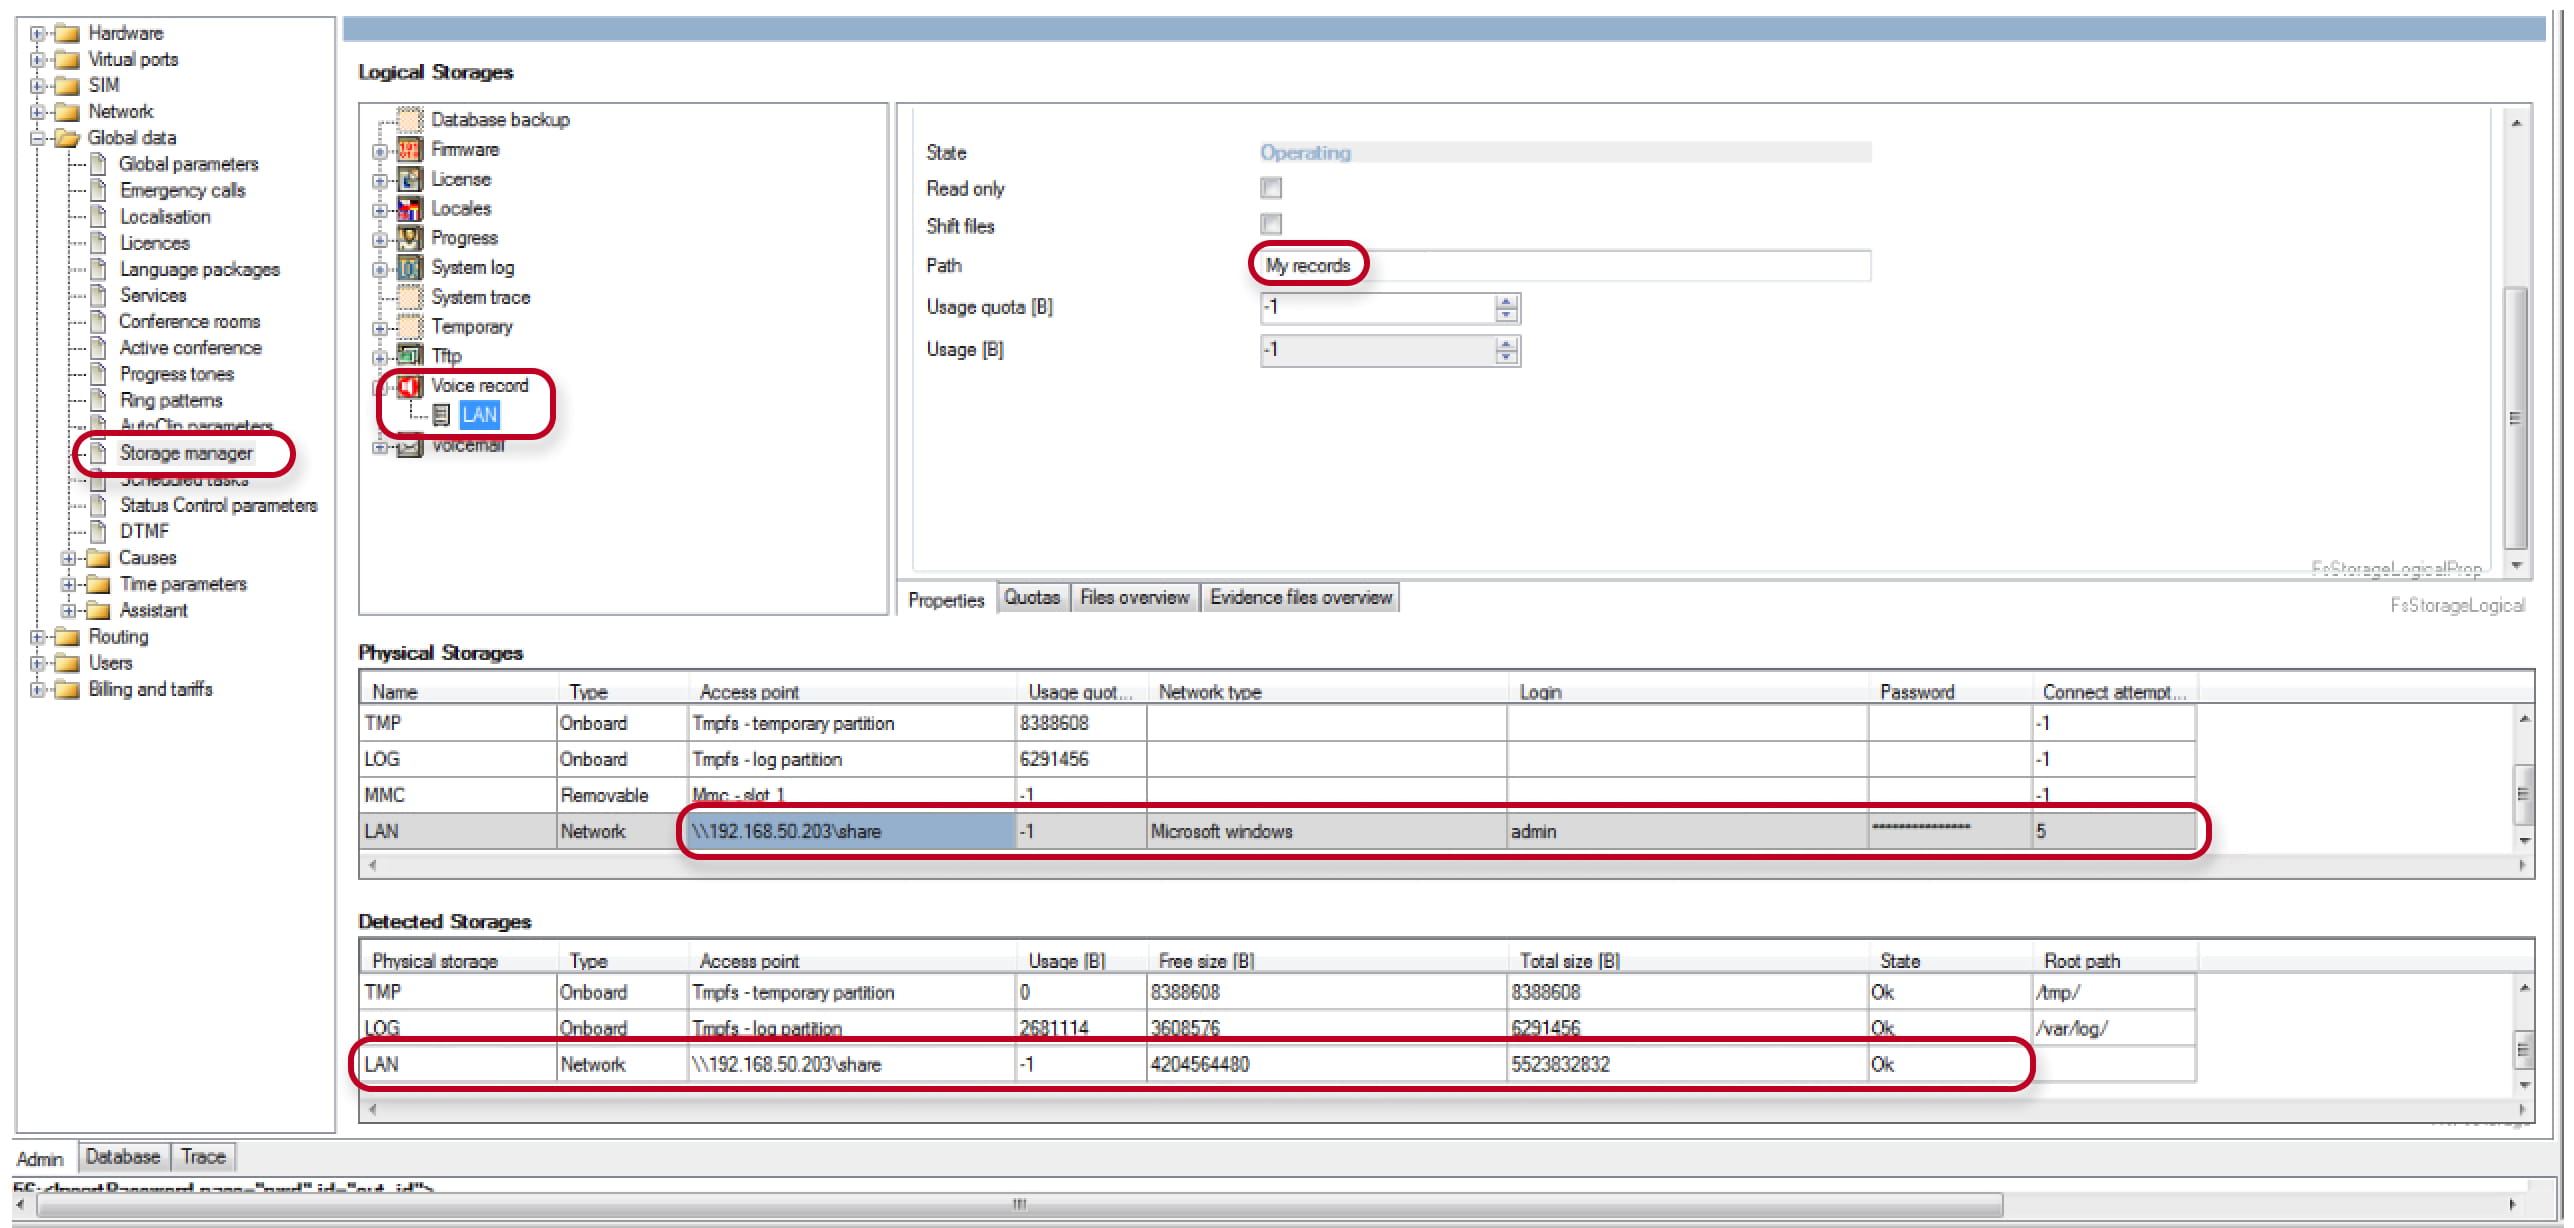
18. Configuration of Records Manager is completed. Now configure Storage Manager in NetStar. Create new LAN physical storage and fill in IP address of Records Manager, user name/password (it was set in point 13 of given manual, login is always admin) and storing folder