The 2N IP Mobile application in 2N Indoor Touch 1.0 and 2N Indoor Touch 2.0 can communicate with all 2N IP Intercoms in the local network (and vice versa) by default.
In order to increase basic security of the installation for certain scenarios we have implemented an optional access authentication for the 2N IP Mobile application in 2N IP Intercoms by an adjustable Access Key.
Thanks to the Access key settings, only selected mobile applications with the key set in the Group Authentication field of the application can detect the intercom connected in the same network.
How to set the Access Key in the 2N Intercom
- Navigate to the section Calling (1), Local Calls (2), Configuration - Connection to answering units (3)
- Fill in the "Access Key" field, to enable authentication for the 2N Helios IP Mobile application.
- You can add up to 3 Access Keys as shown below:

How to set the Access Key in the 2N Indoor Touch 1.0
Once the 2N Indoor Touch 1.0 is connected to the local network and powered (over PoE or using an external 12V DC/2A power supply) it will boot up and you see its initial screen (launcher).
- By clicking on the 2N Helios IP Mobile application icon in the right upper corner you can open it and access its settings:

To be able to detect and add a key protected 2N IP Intercom in the local network, you need to set the same Access Key in the application first.
- Go to the section Settings (2), enter the Indoor Touch Settings (3) and set the same key as set on the intercom side, see the pictures below:

- Fill out the Access Key (4) with the same value as you have set in the Intercom:

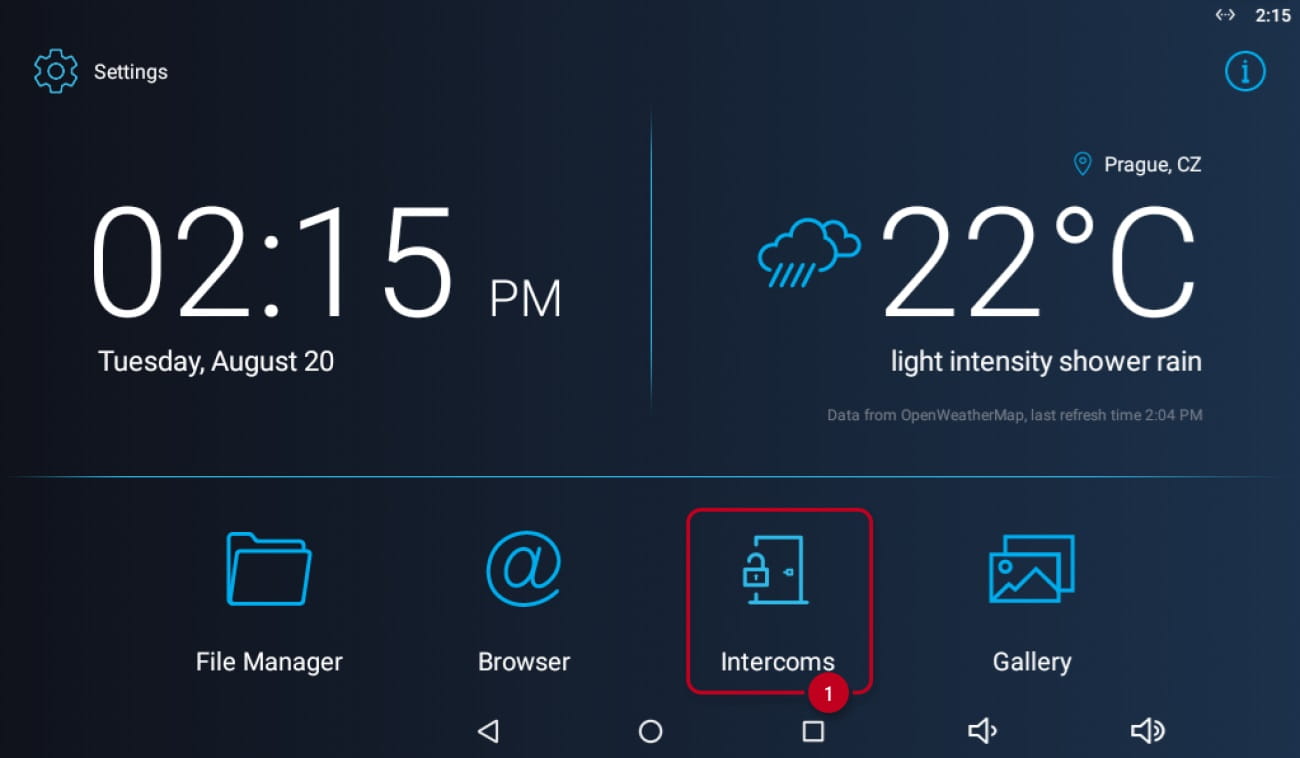
How to set the Access Key in the 2N Indoor Touch 2.0
Once the 2N Indoor Touch 2.0 is connected to the local network and powered (over PoE or using an external 12V DC/2A power supply) it will boot up and you see its initial screen (launcher).
- By clicking on the "Intercoms" application icon in the right upper corner you can open it and access its settings:
To be able to detect and add a key protected 2N IP Intercom in the local network, you need to set the same Access Key in the application first.
- Go to the section Settings (2):

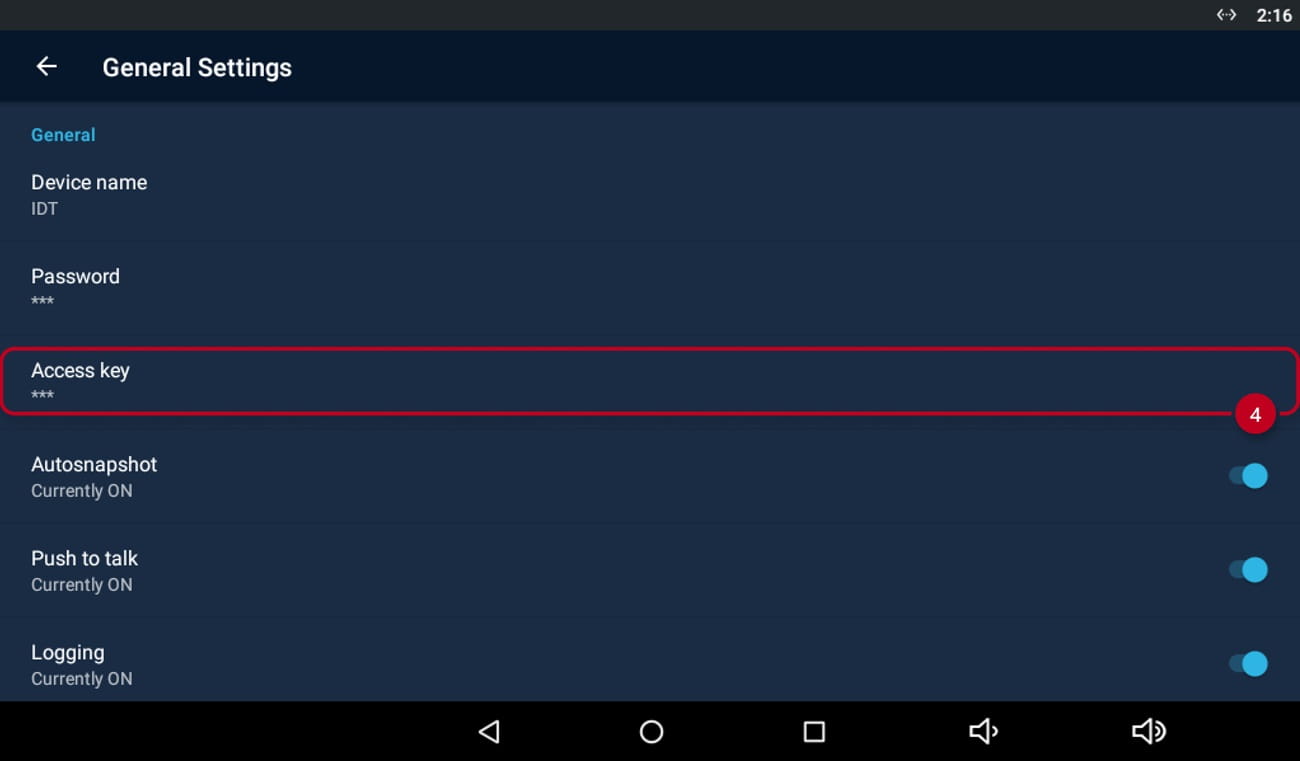
- Enter the 2N IP Mobile Settings (3) and set the same key as set on the intercom side, see the pictures below:

- Fill out the Access Key (4) with the same value as you have set in the Intercom:
How to add Intercom units to the Indoor Touch device
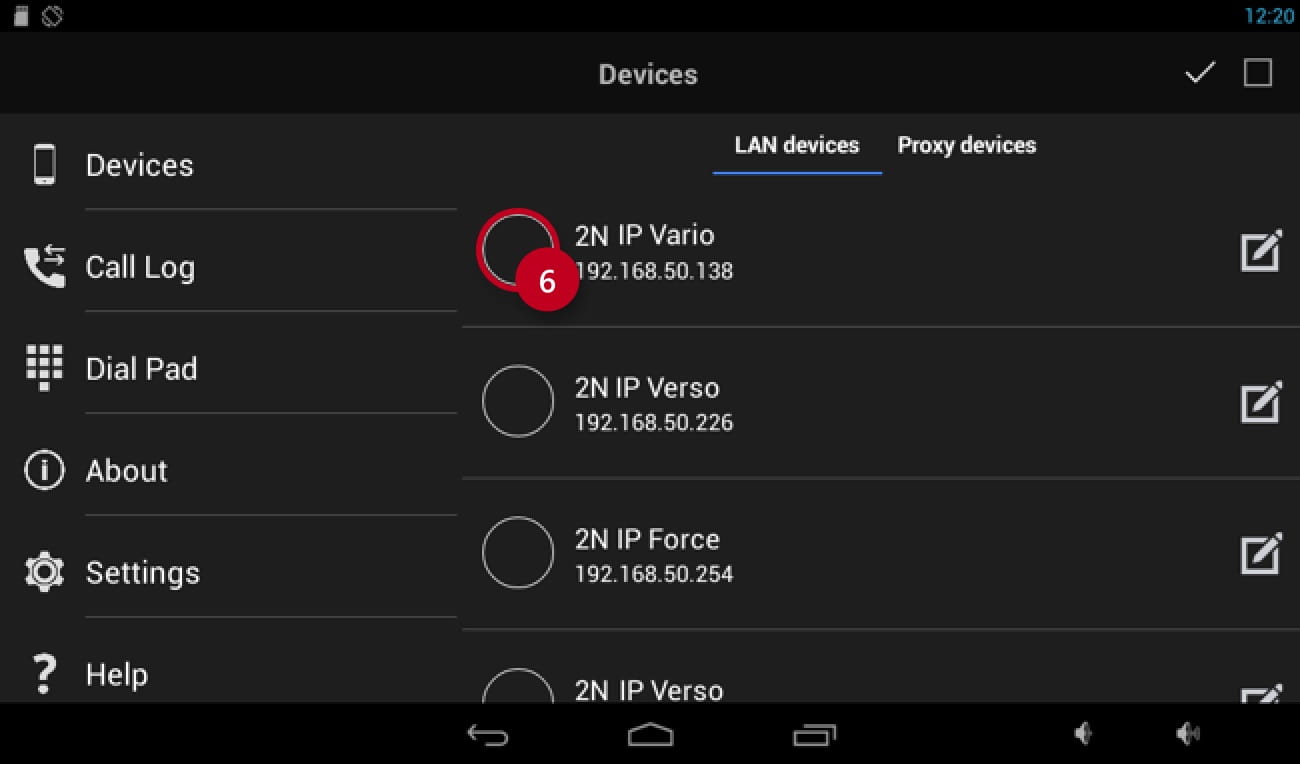
The application automatically scans your LAN network and searches for all connected 2N IP Intercoms with the same Access Key.
- You can easily add them in the "Devices" section by clicking on the "+" button (5).

- By clicking on the specific row in the LAN devices list you can add selected intercoms (6):
- By clicking on the checkbox in the right upper corner you can add all of them at once:

- By clicking on the confirmation button (7) you have just added the desired local devices to the list:

- The application is ready to call:
