Calling locally between 2N IP intercom and 2N IP Phone D7A
The steps in this article require using the web interface of a 2N device. Please follow this manual in case this is your first time using the web interface.
This article explains how to make local calls and open door between 2N IP intercom and 2N IP Phone D7A.
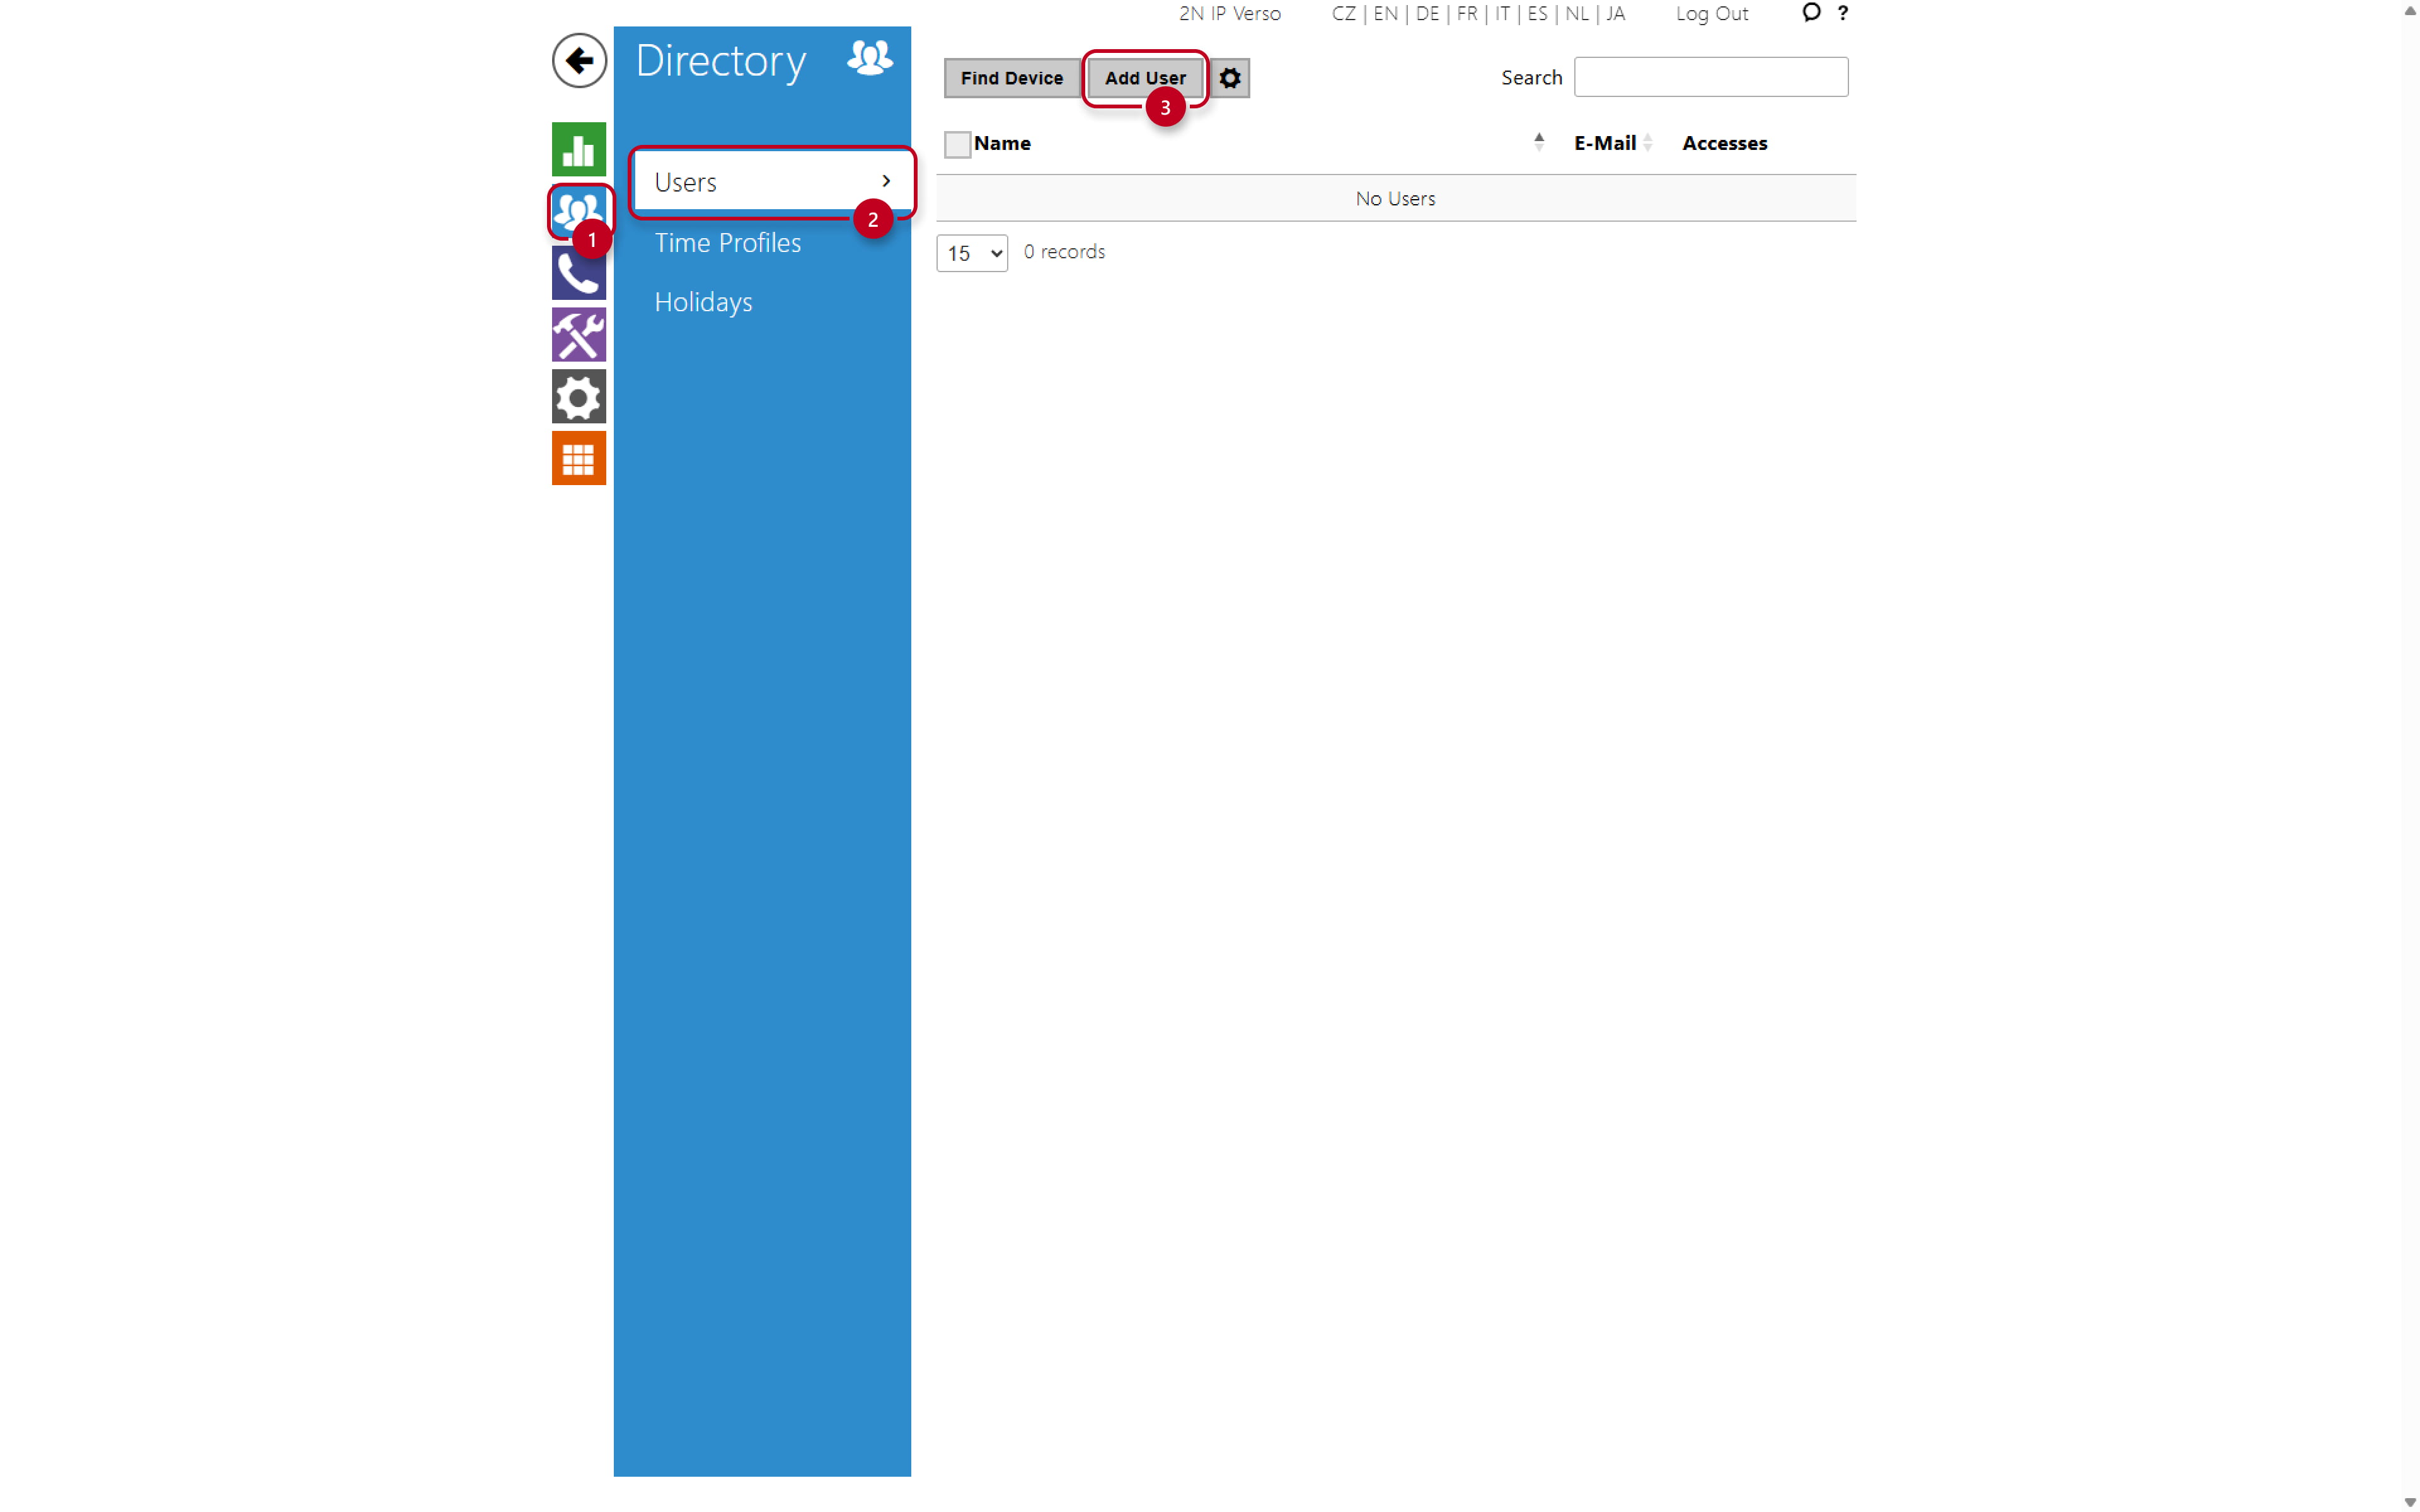
- In the 2N IP intercom's web interface, go to Directory -> Users -> Add User.
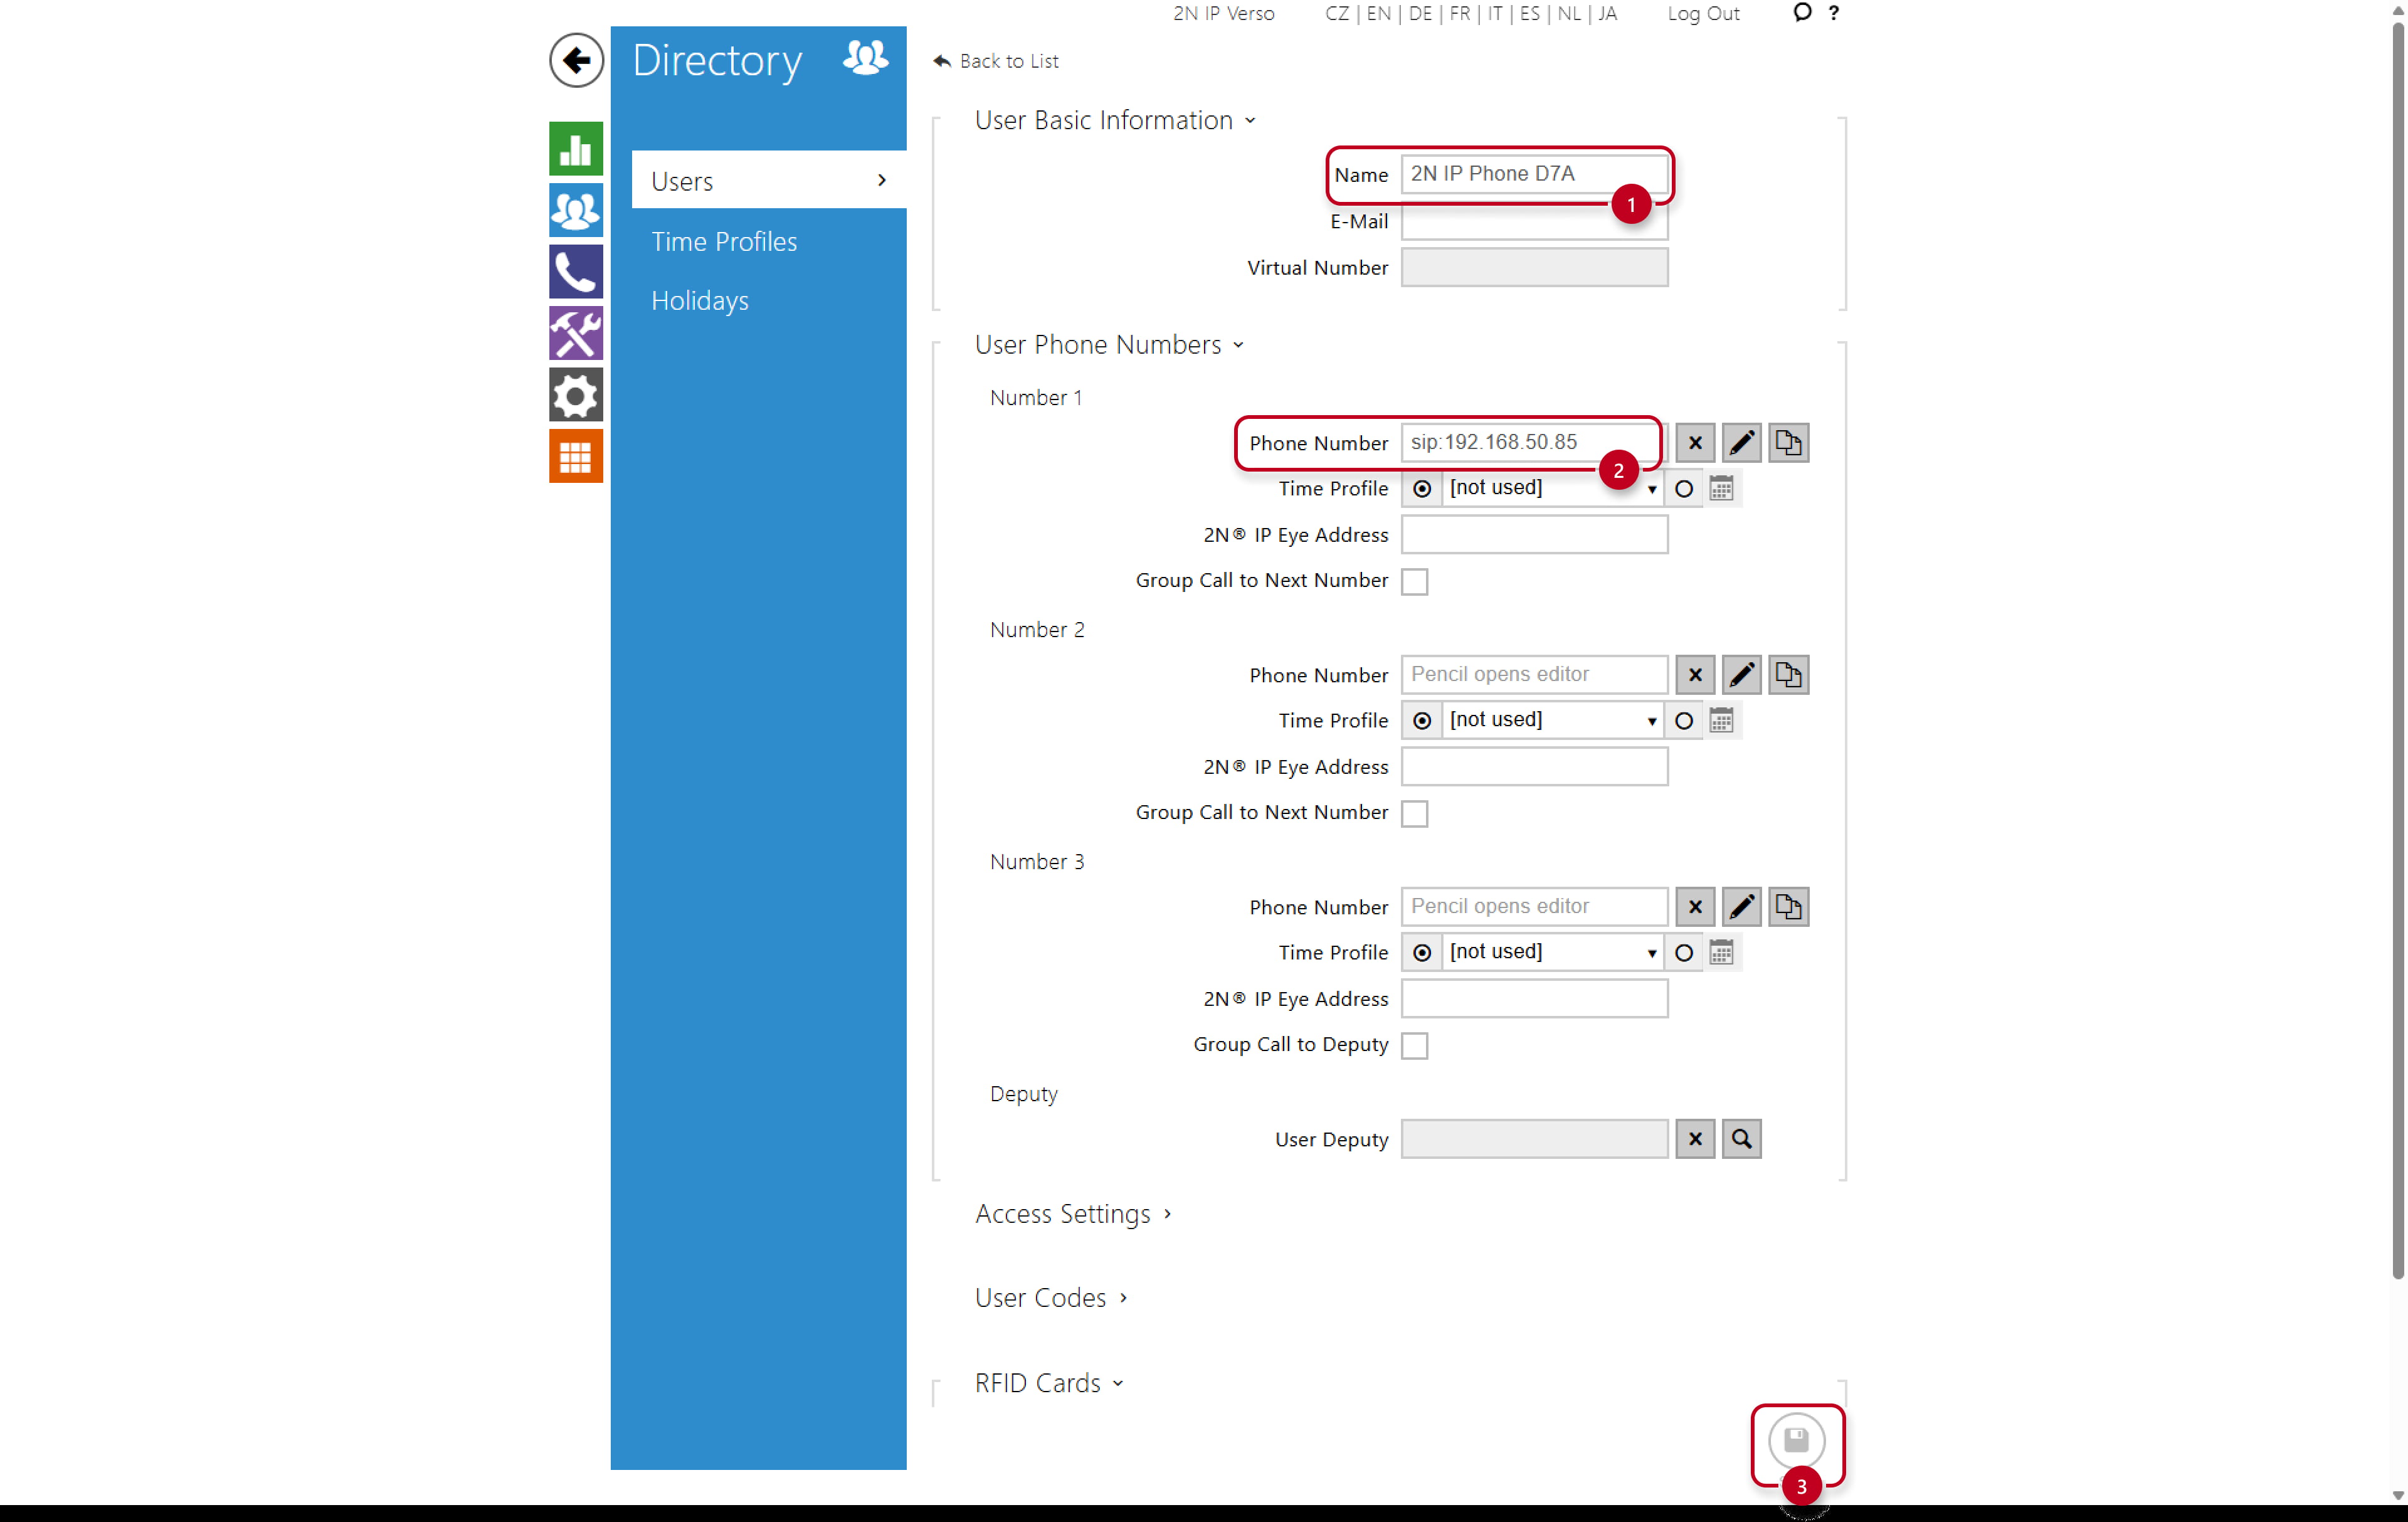
- Name the User and enter the phone number. The phone number is in format sip:IP_address, where IP address is the local IP address of the D7A phone. Save the settings afterwards.
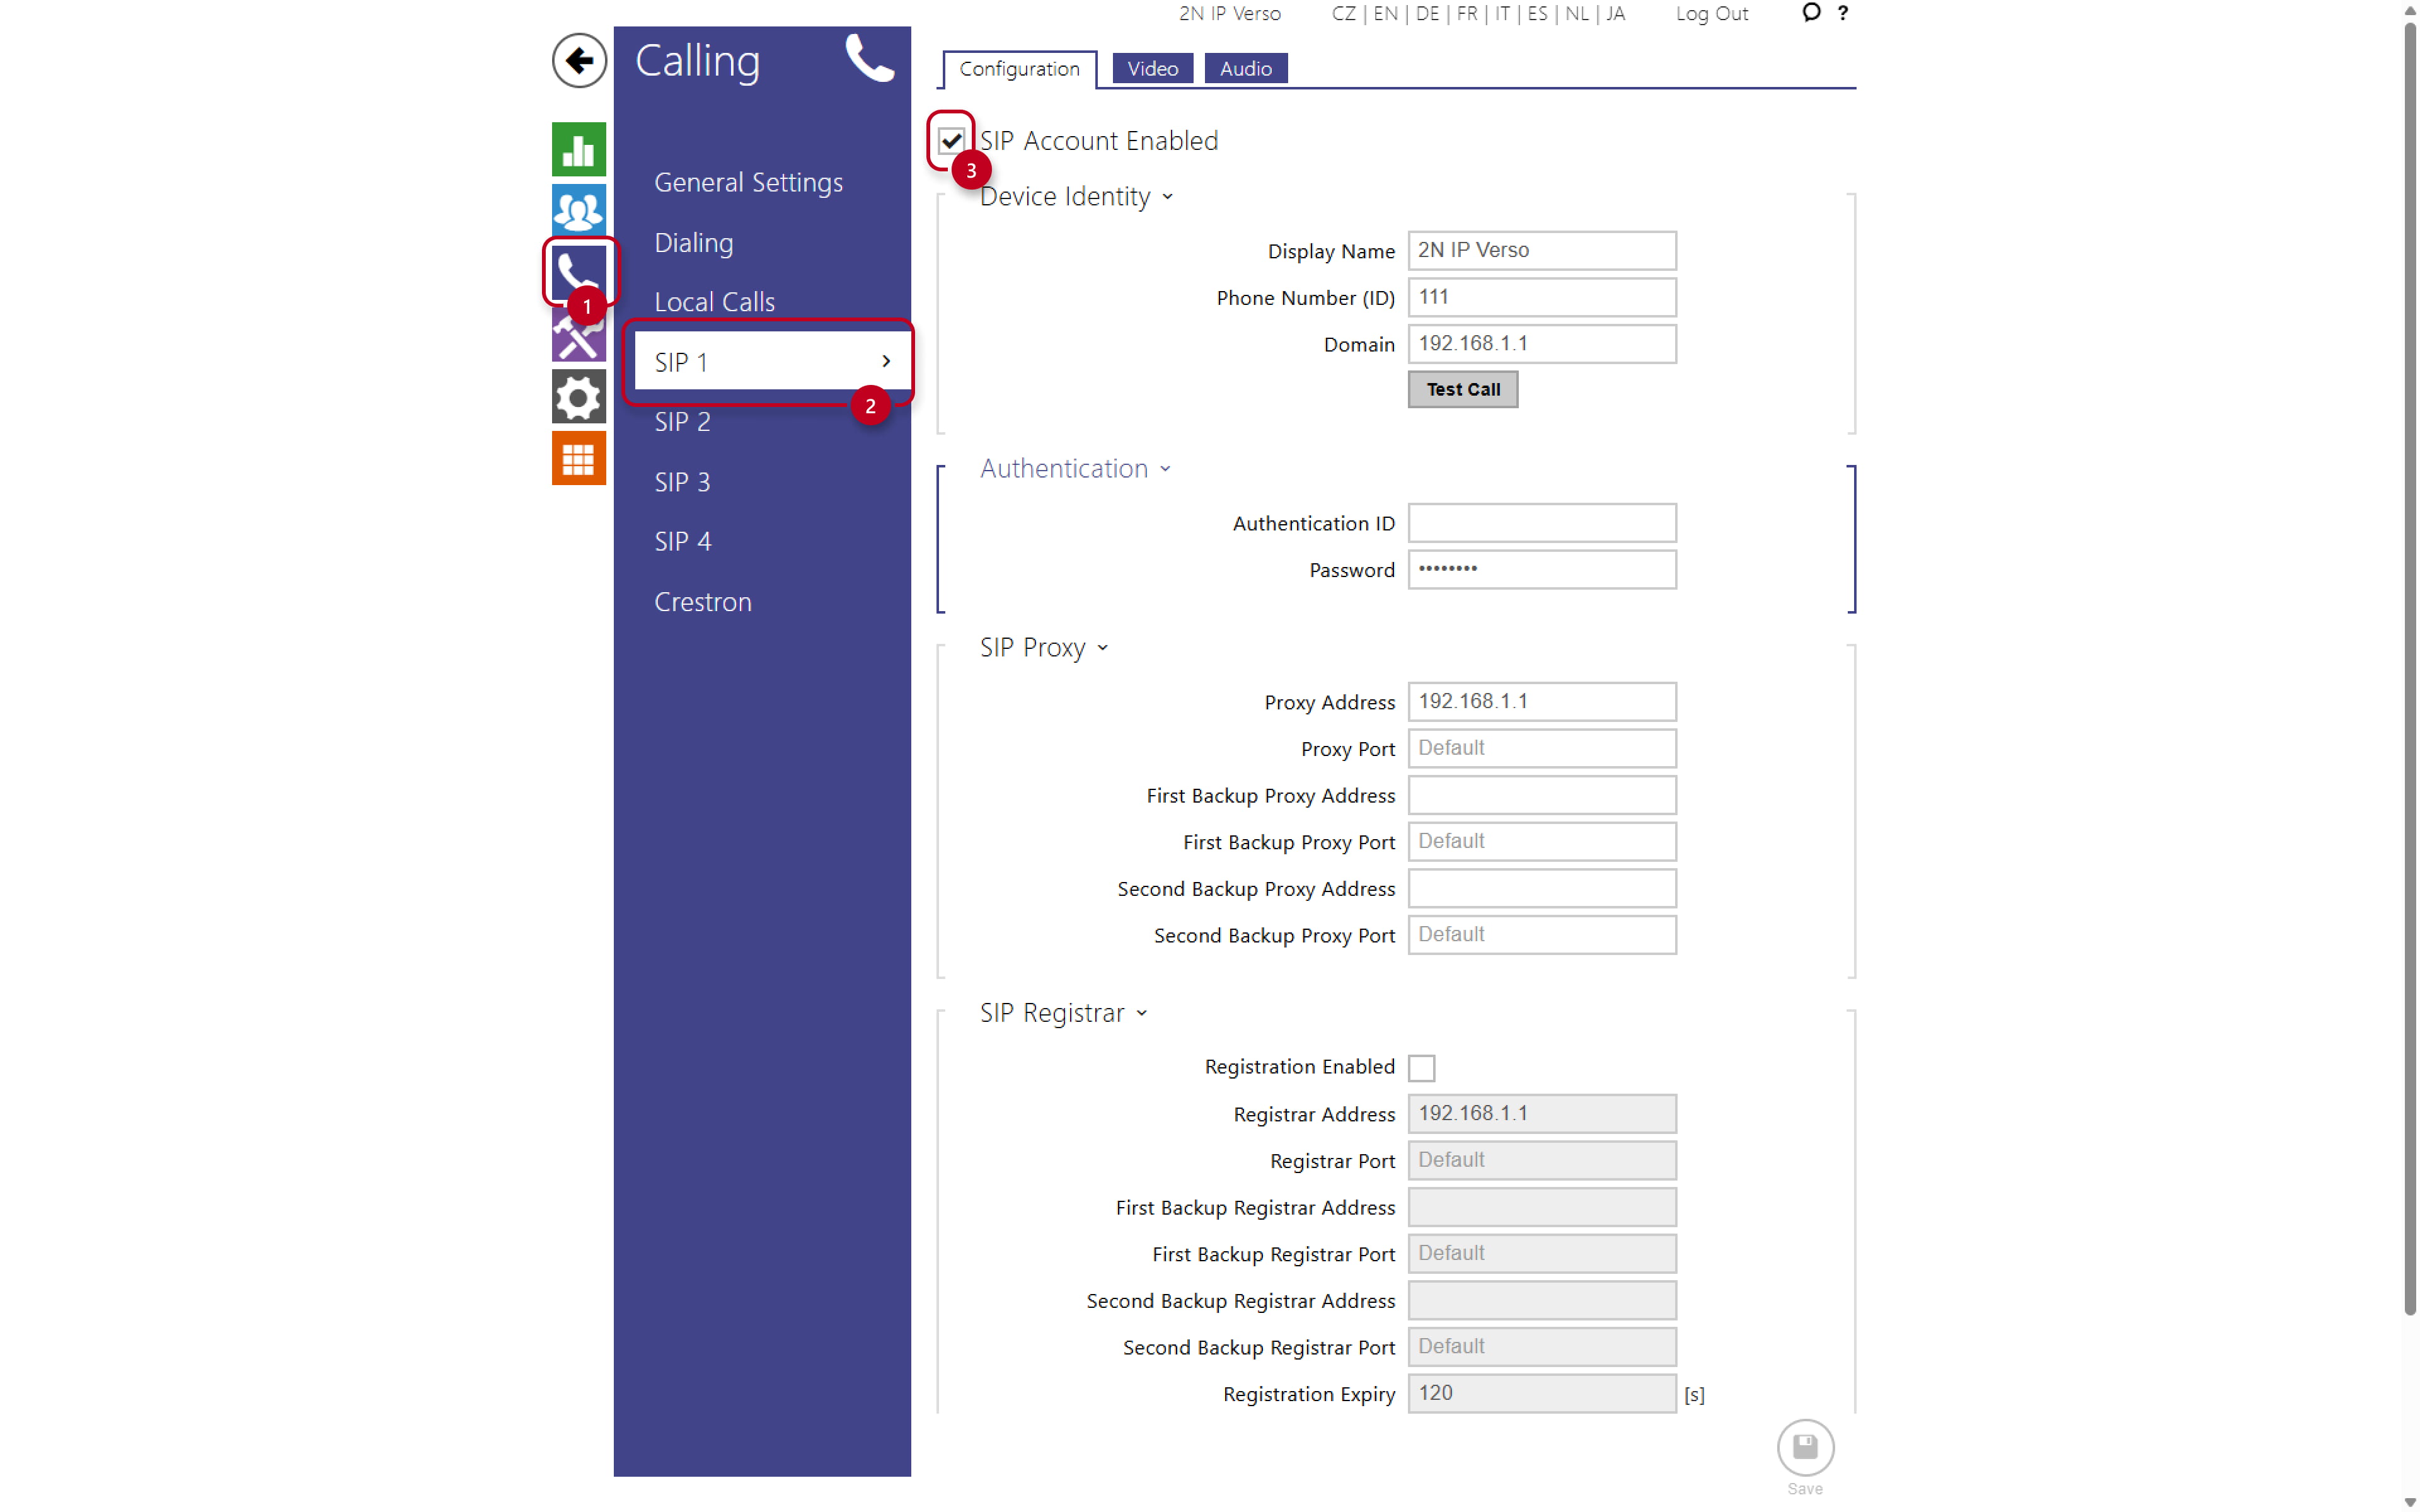
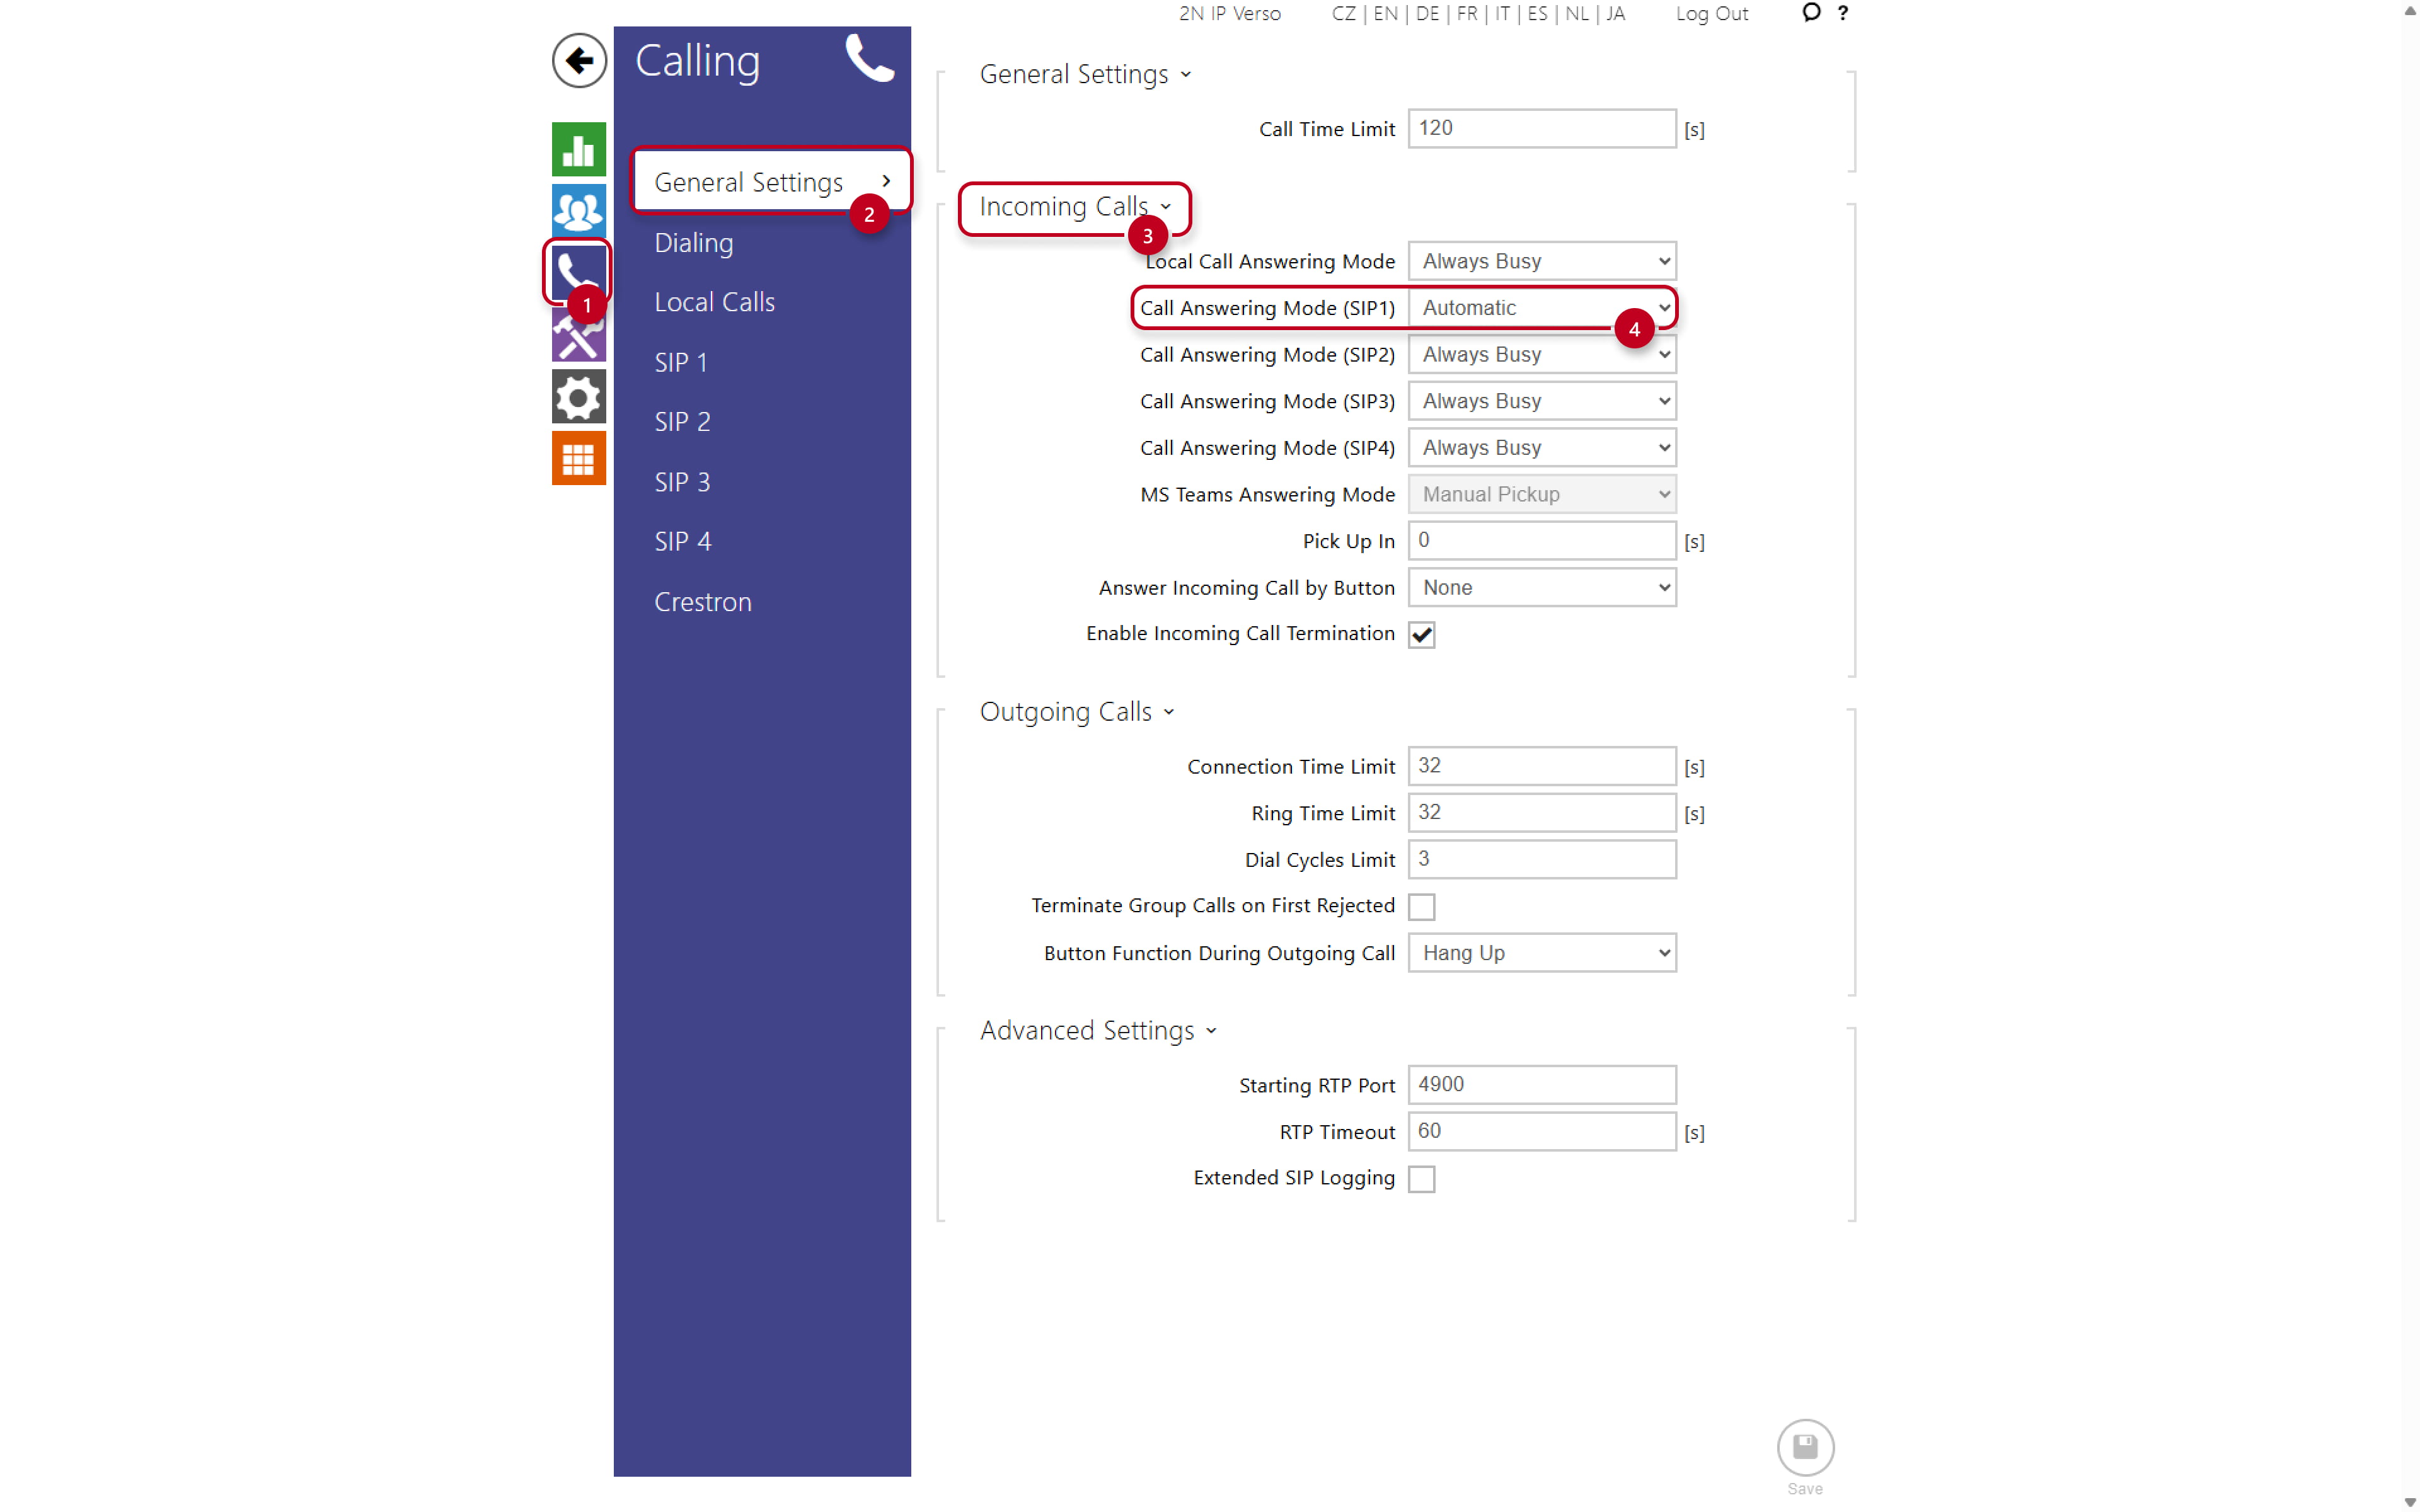
- Go to Calling -> SIP1 -> make sure the SIP1 account is enabled. Do not change any other parameters here.
- Go to Calling -> General Settings -> set the Answering Mode for SIP1 to Automatic or Manual pickup, depending on how you wish to manage the incoming calls to the intercom.
- Now go to Hardware -> Switches ->Switch 1 -> Activation codes -> copy the code, this code will be used in the D7A's settings for door opening.

LOCAL SIP CALLS: In firmware 150.87.57.3, local calls are disabled by default. If you updated your D7A from an earlier version, or if you are trying to set up SIP calls on a local network, you need to enable IP Calls In and disable Accept SIP Trusted Server in Features > General Information.

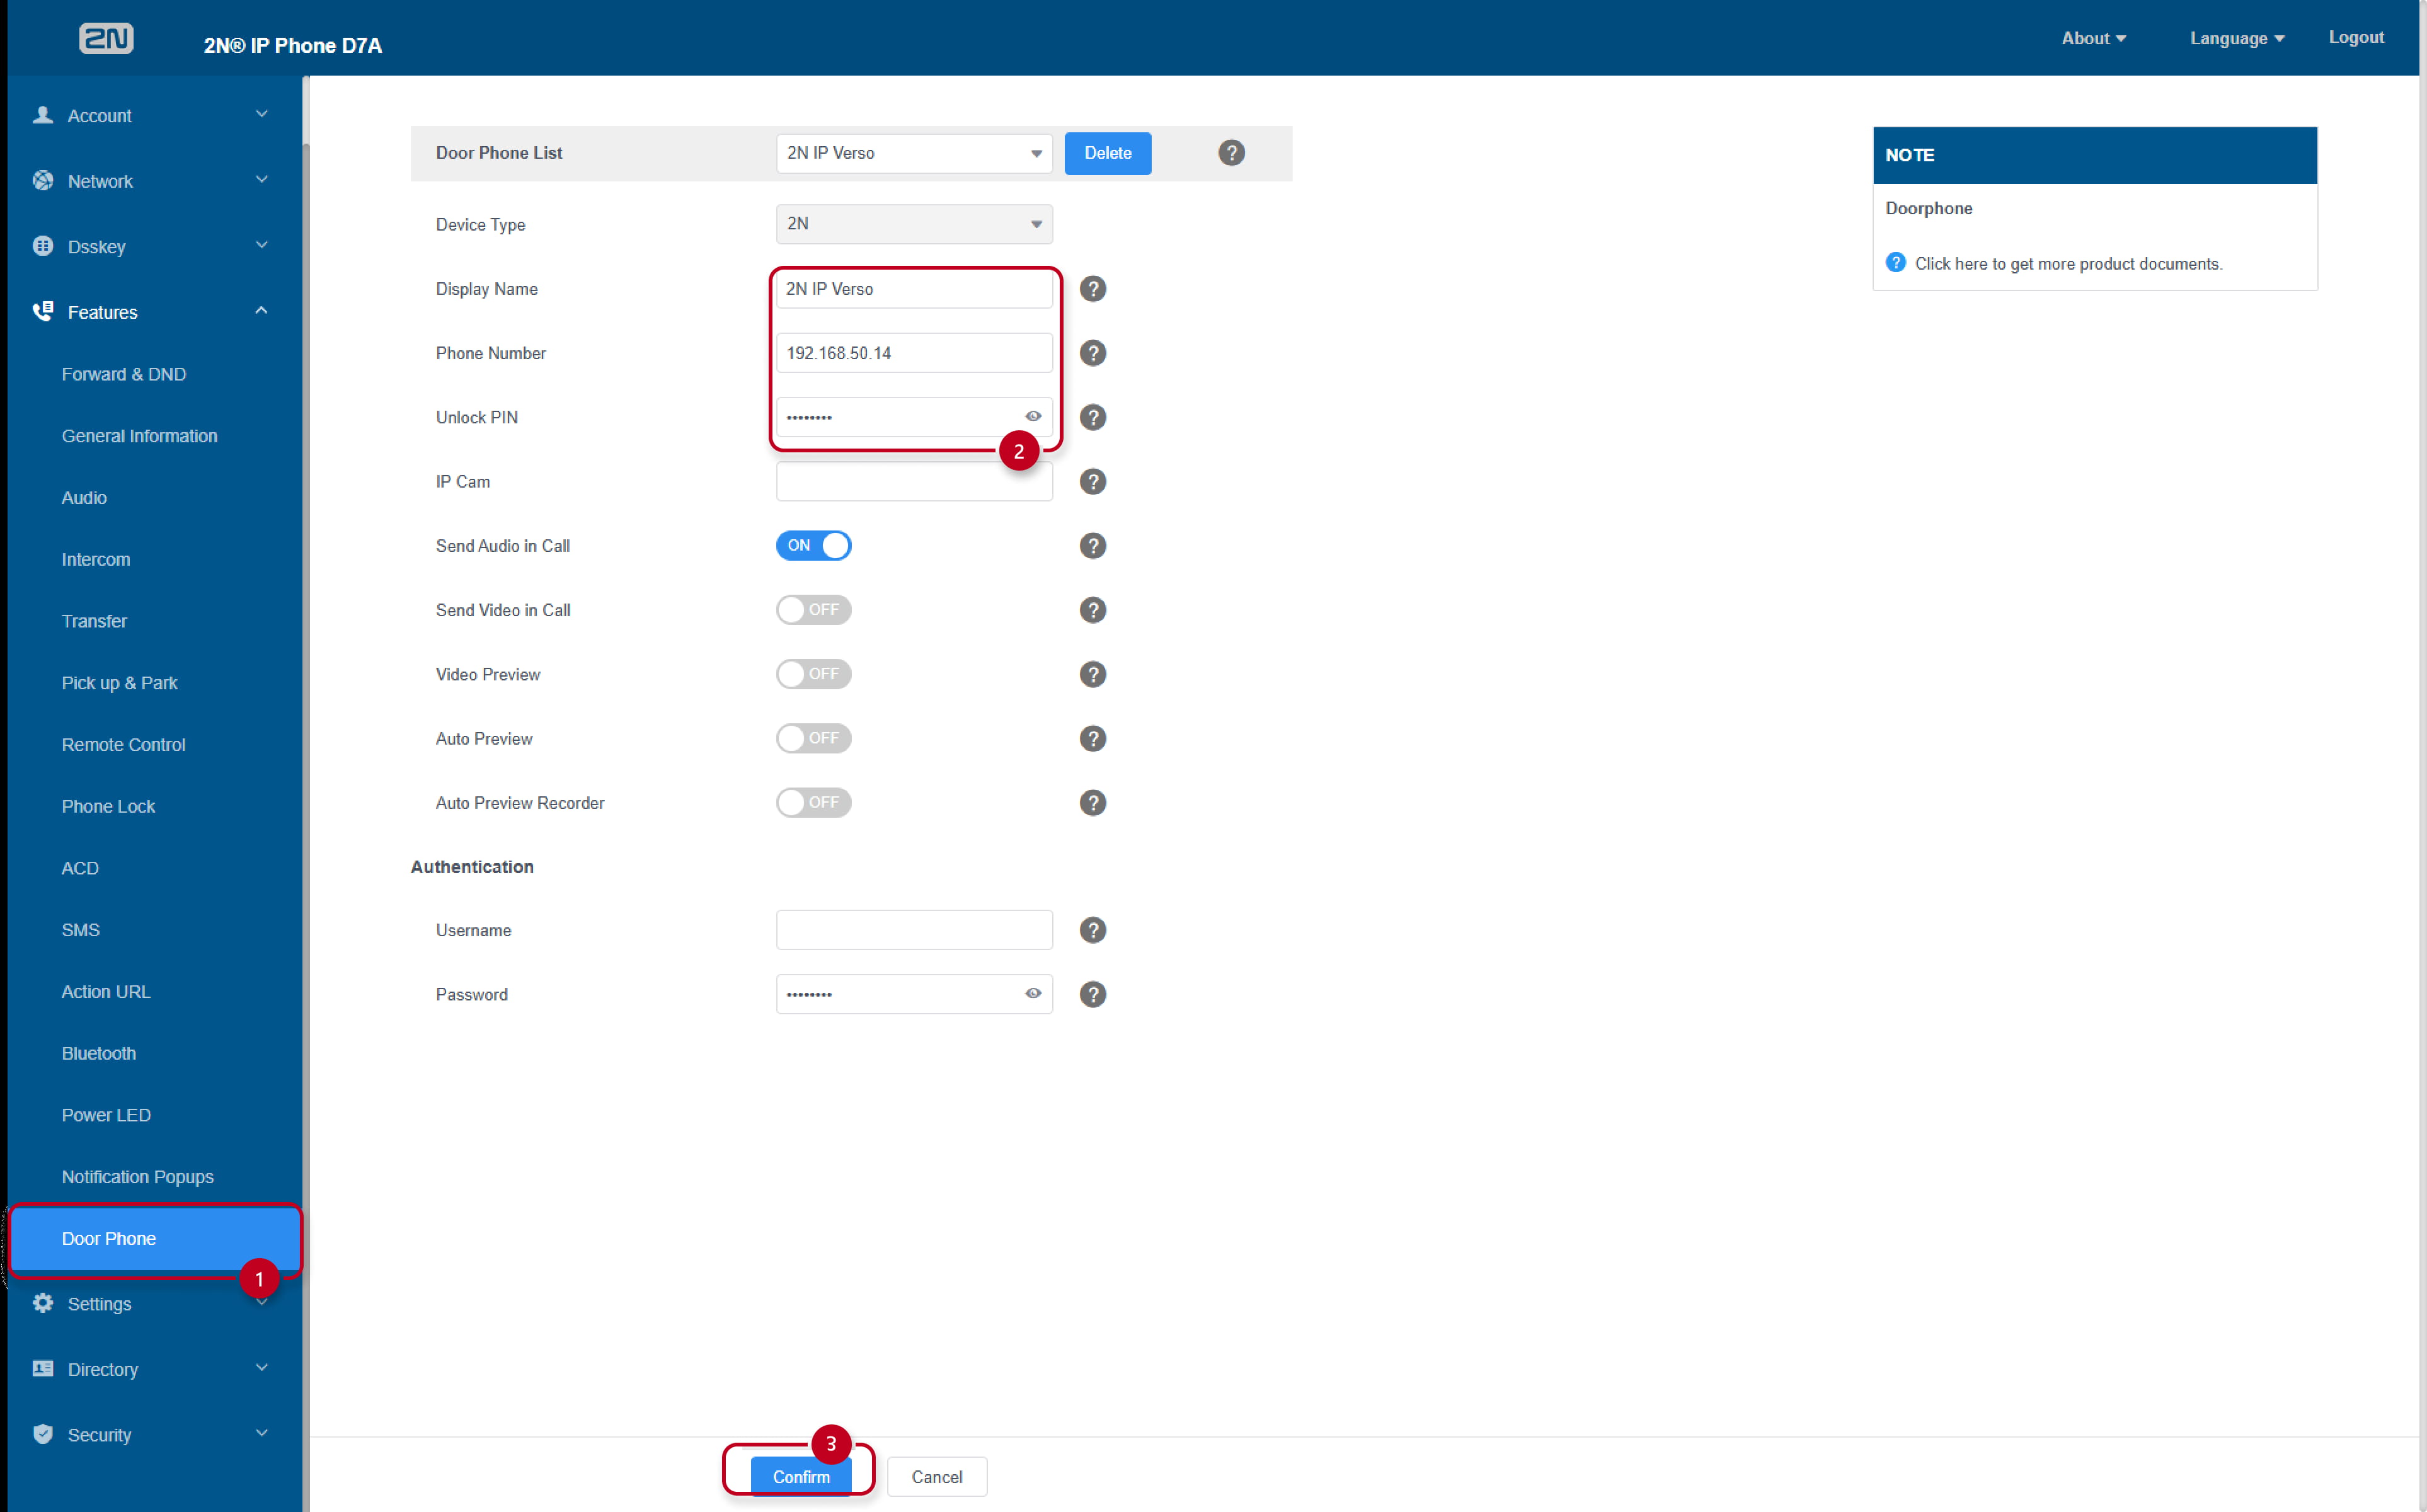
- To set the door opening button on the In D7A's ongoing call display, go to Features -> Door Phone -> name the Door Phone -> enter 2N IP intercom's IP address into the Phone Number field -> enter the unlock code copied from the intercom's web interface. It is needed to add star (*) behinf the code. In this example it would be "00*".
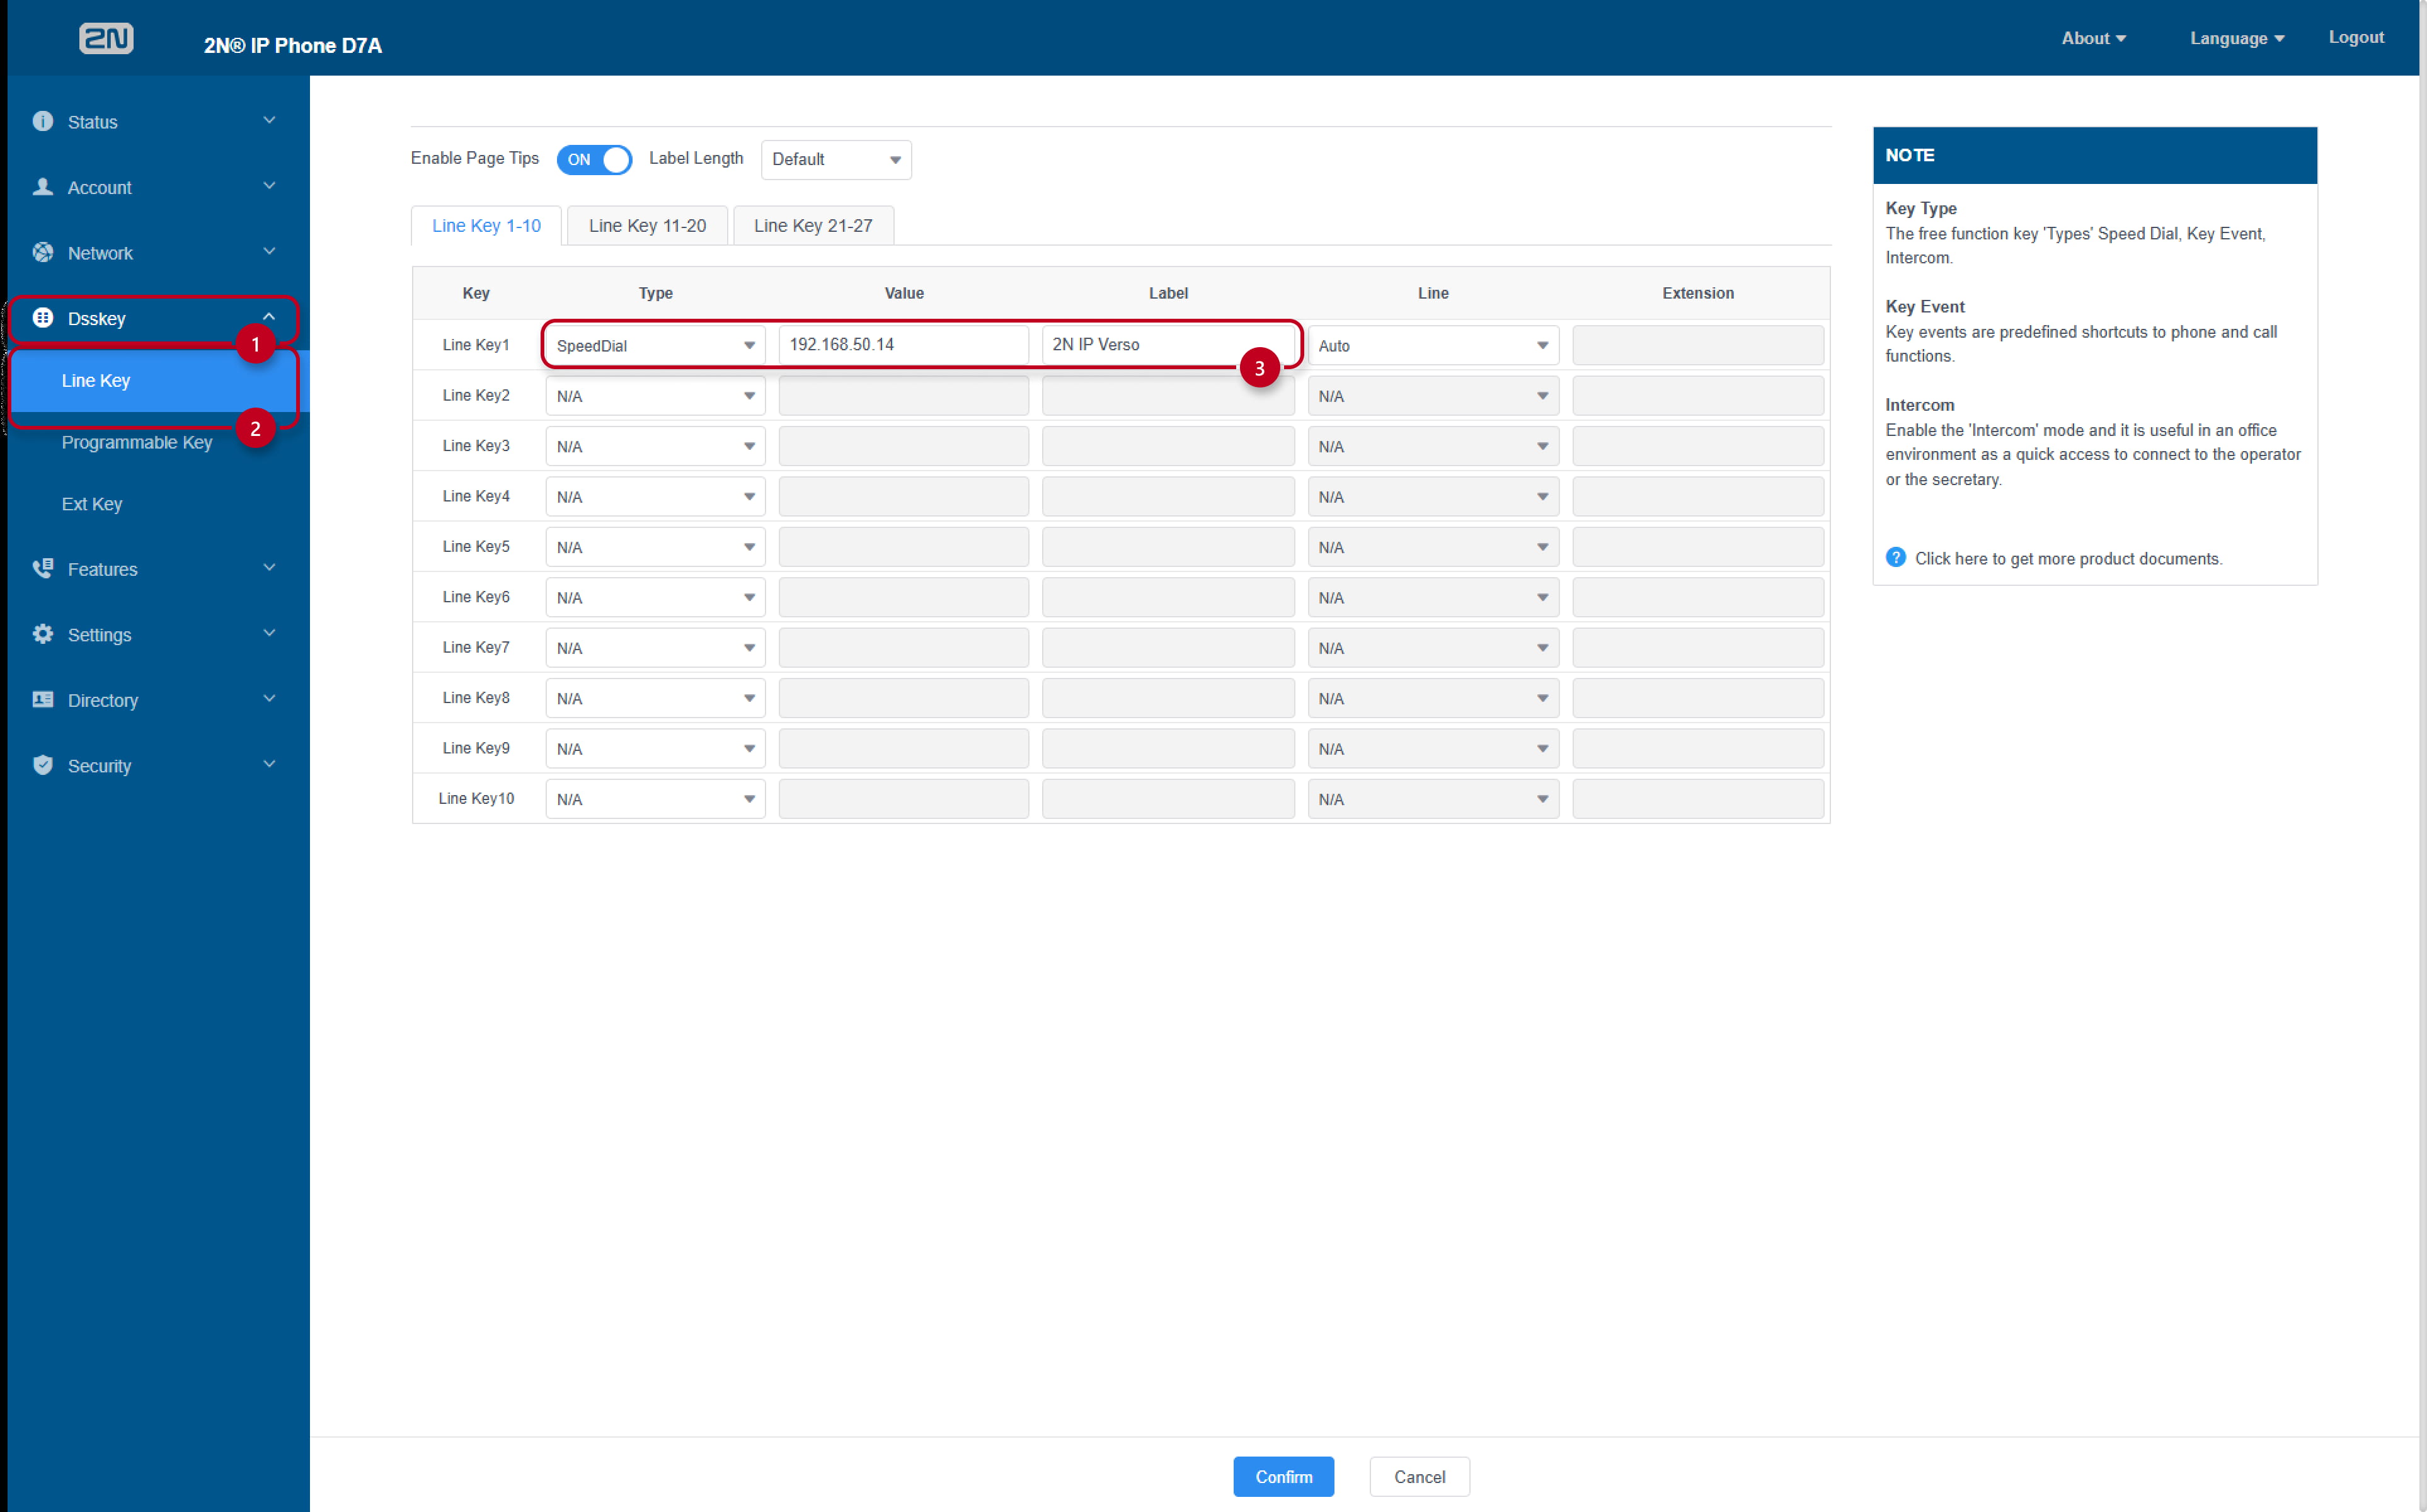
- To create a button for calling the intercom on the D7A's display, go to Dsskey -> Line Key -> Line Key1 -> enter the Intercom's IP address in Value and name it in Label. Leave Line as Auto.