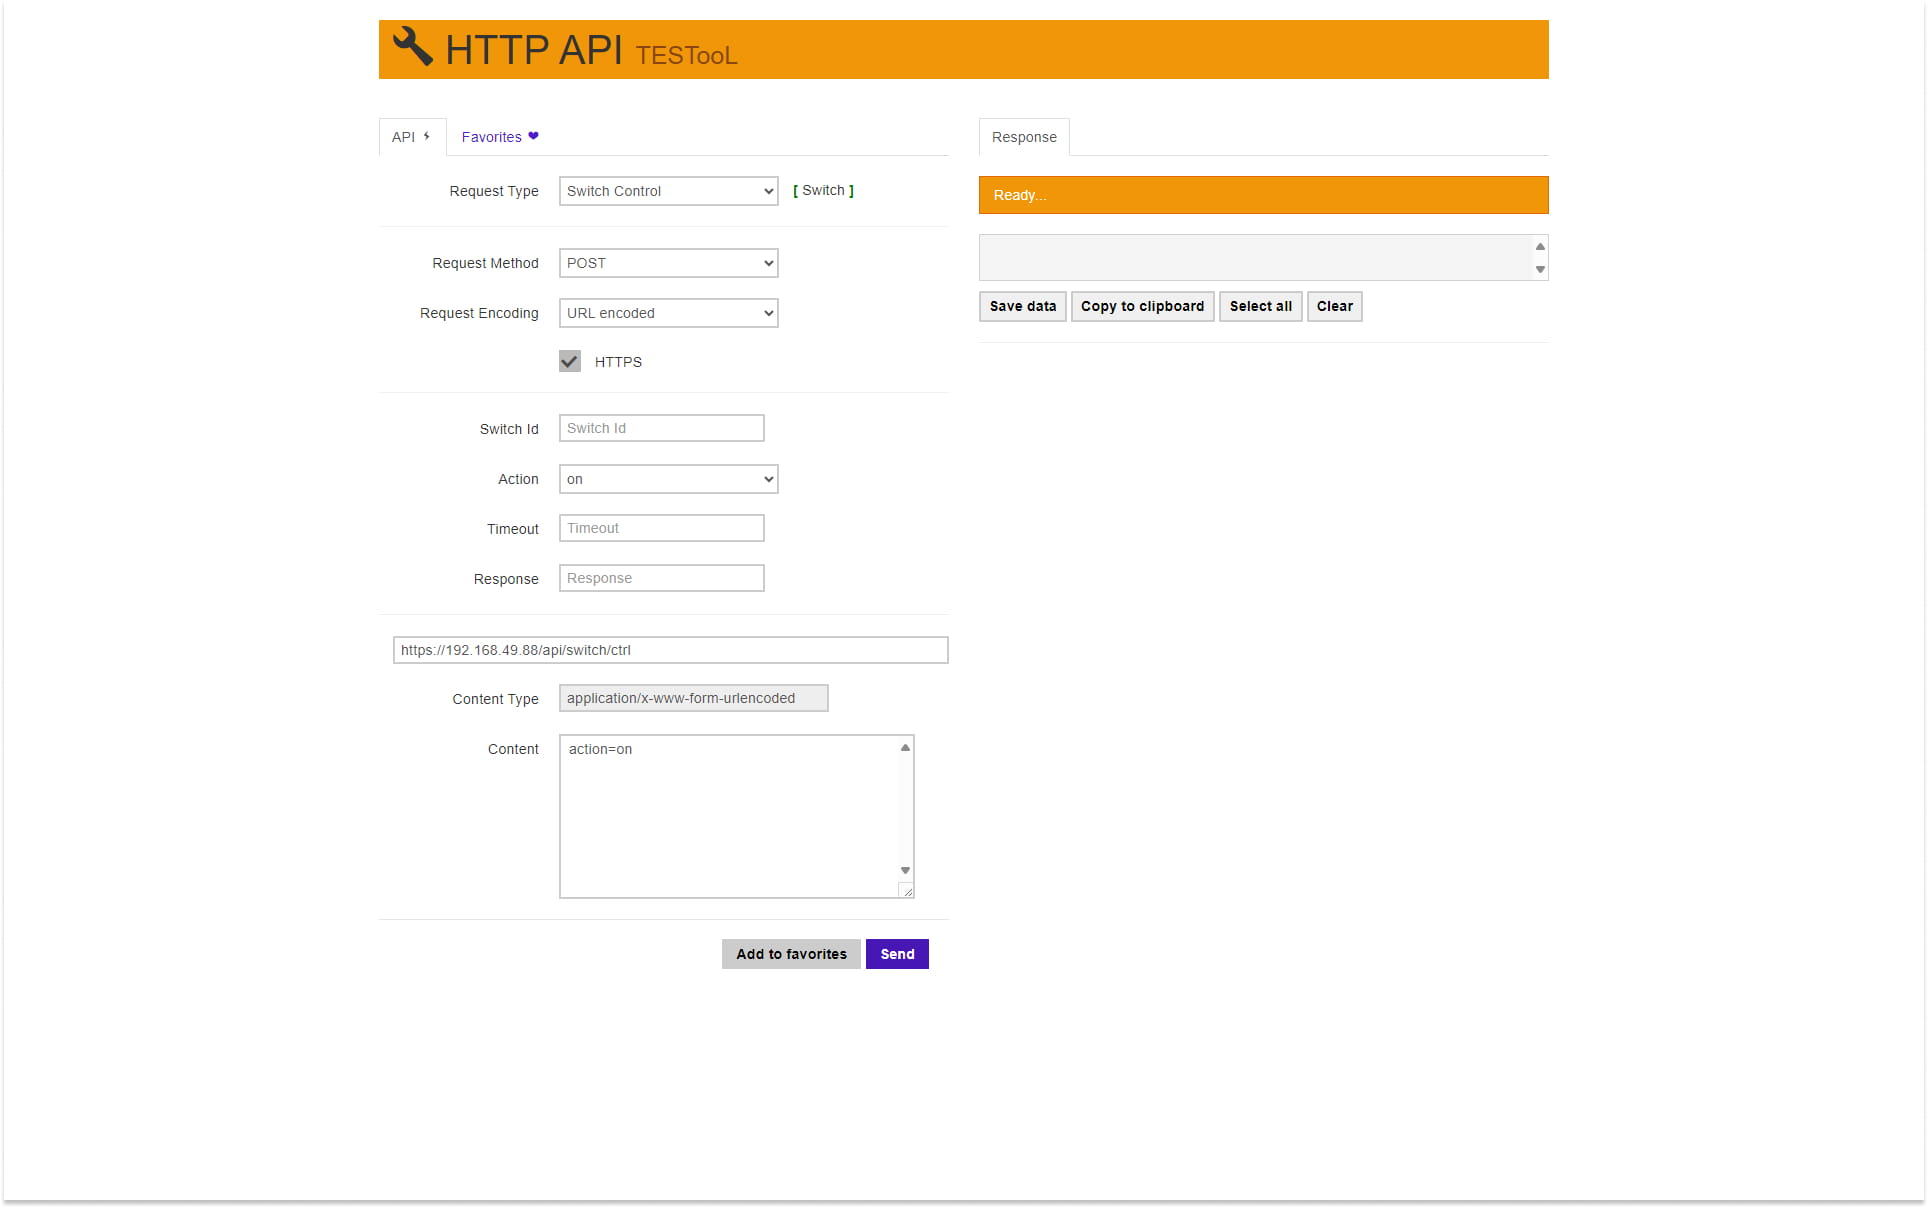
HTTP API TESTool
You can find the HTTP commands in the HTTP API manual or by accessing the HTTP API TESTool which is part of every 2N IP Intercom and can help you create valid HTTP commands for the desired request type.
-
You can access the TESTool by entering the intercom’s IP address and writing /apitest.html at the end (for example https://192.168.49.88/apitest.html)
-
The HTTP command for triggering Switch 1 on the 2N IP Intercom is https://IP_address/api/switch/ctrl?switch=1&action=on
Intercom Setup
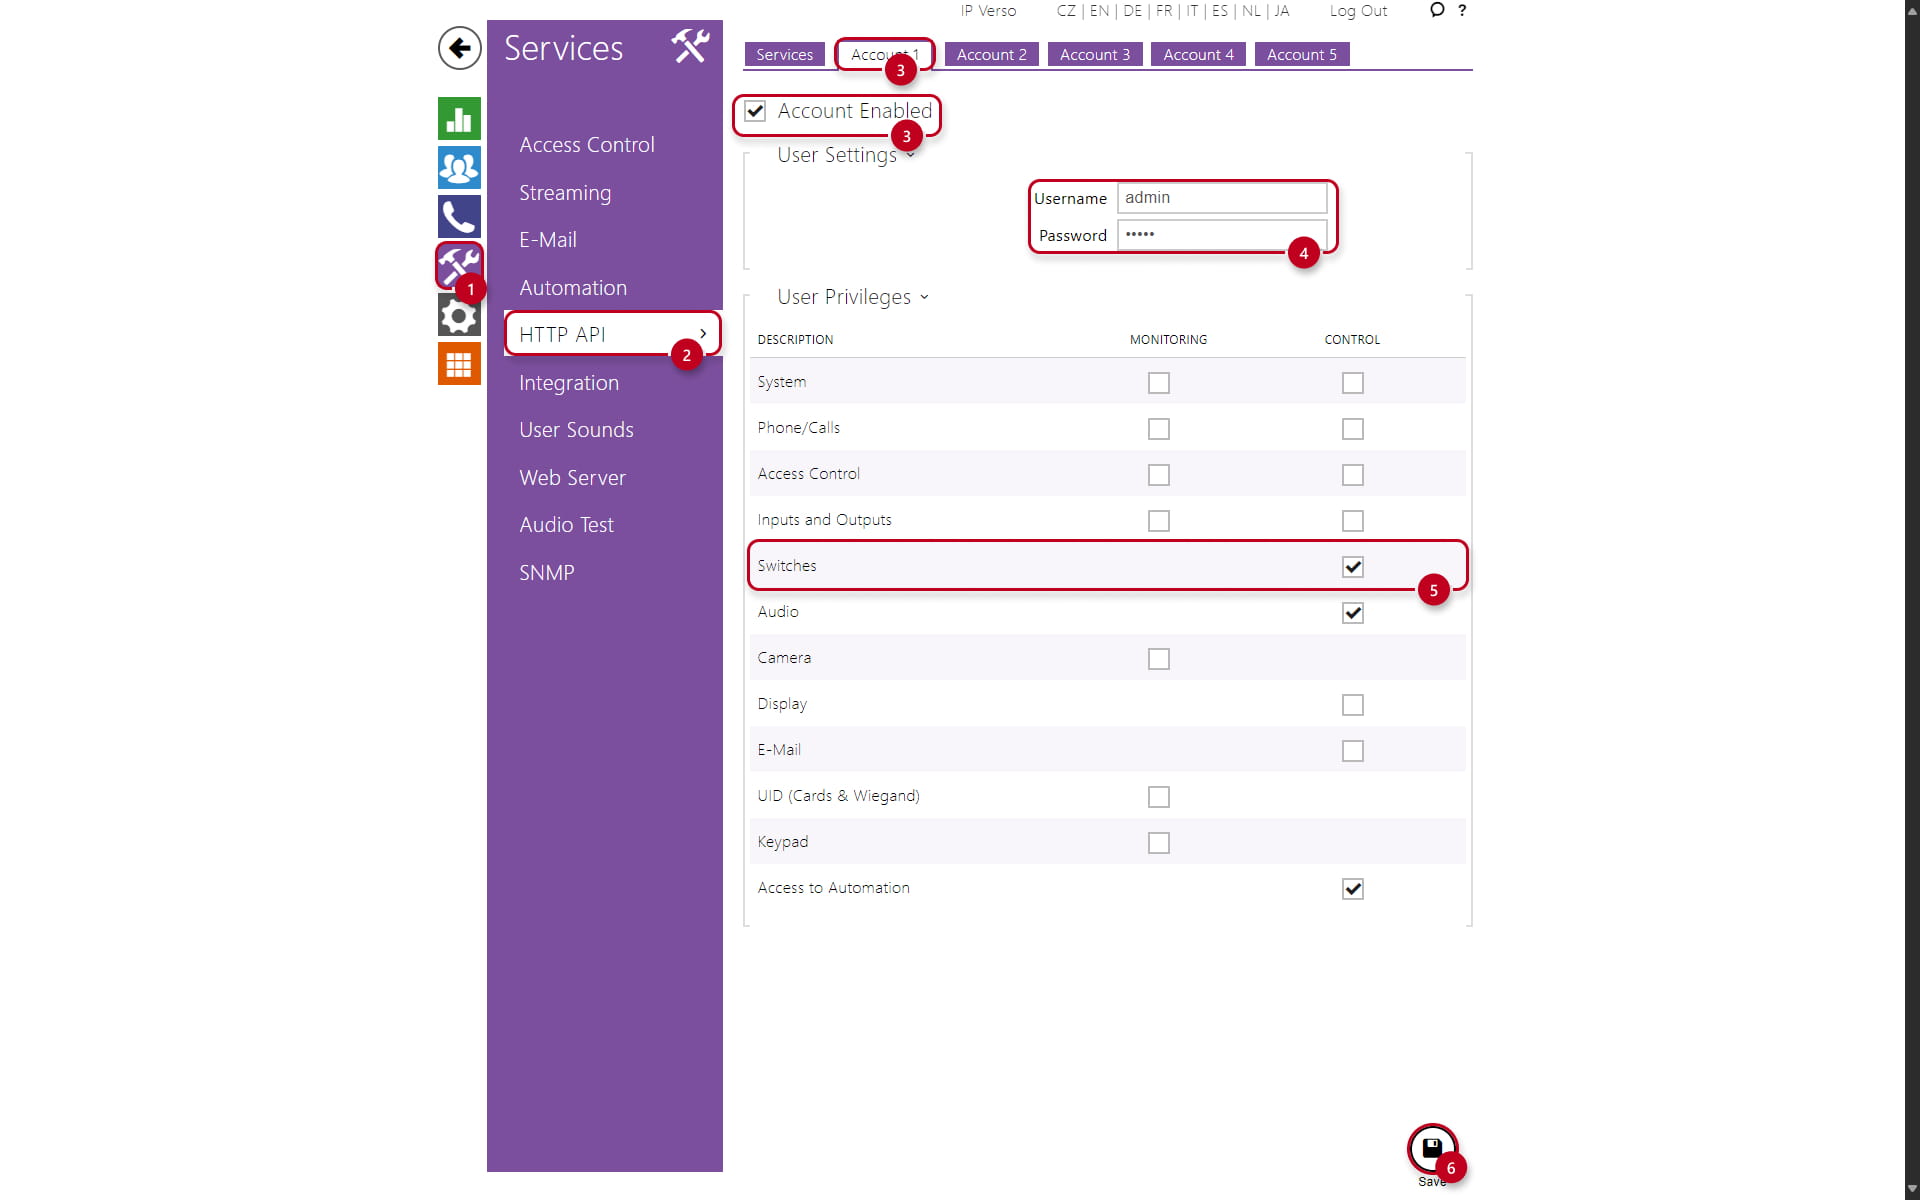
First, configure the HTTP API Account in the 2N IP Intercom or 2N Access Unit:
-
Click on "Services" (1), then select "HTTP API" (2)
-
Make sure the HTTP Account is enabled (3)
-
Next, fill out the "Username" and "Password" (4)
-
Next, select the desired function (5) you wish to allow to be monitored/controlled with selected HTTP API Account
-
Lastly, save (6)
Indoor Talk
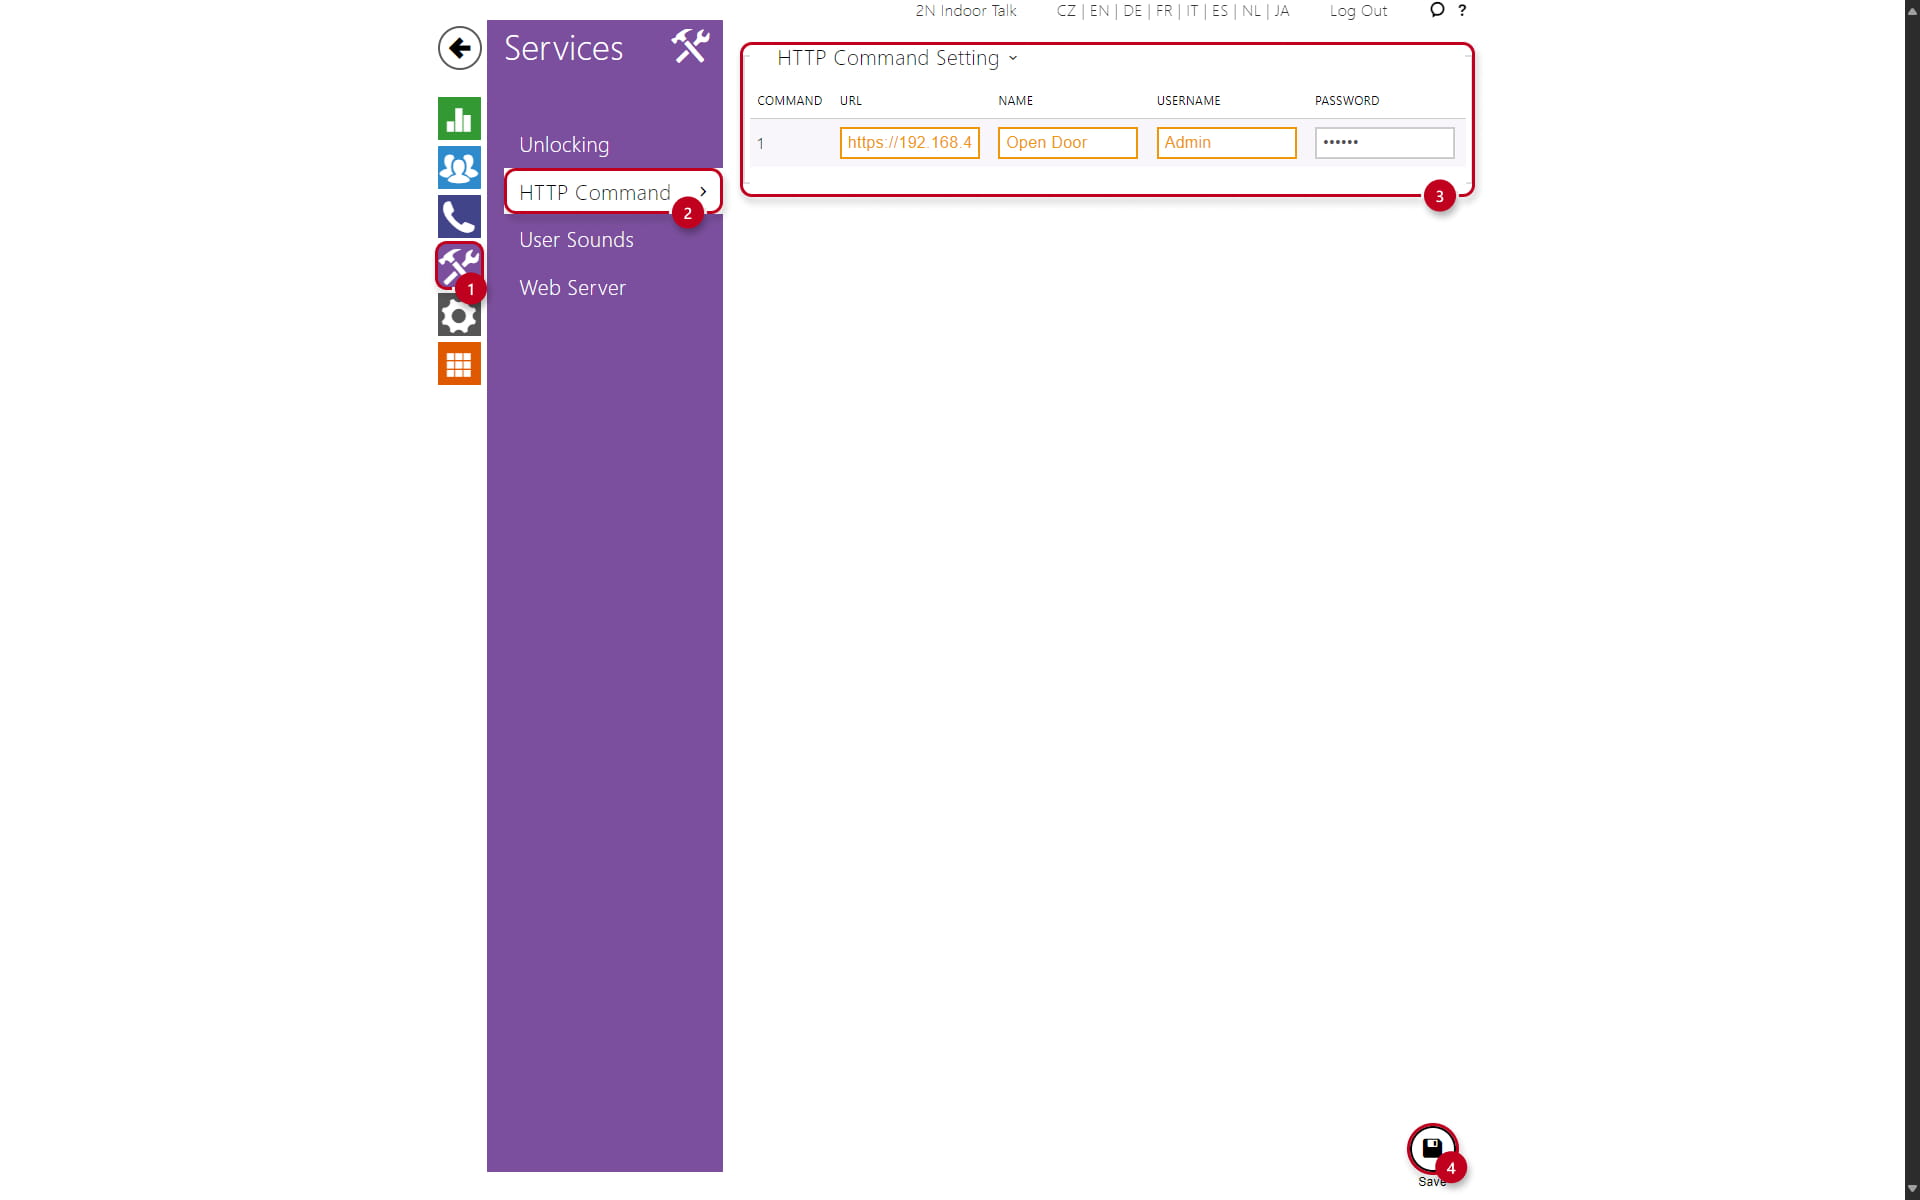
Indoor Talk does allow only for one HTTP Command, by long-pressing on the unlock button:
-
Click on "Services" (1), then select "HTTP Command" (2)
-
Under the "HTTP Command Setting" - fill out the "URL", "NAME", "USERNAME" and "PASSWORD" (3):
-
URL - In this example "https://192.168.49.88/api/switch/ctrl?switch=1&action=on"
-
NAME - In this example called "Open Door"
-
USERNAME - Input the Username of the HTTP API Account created in the IP Intercom
-
PASSWORD - Input the Password of the HTTP API Account created in the IP Intercom
-
- Lastly, save (4)
Indoor Compact
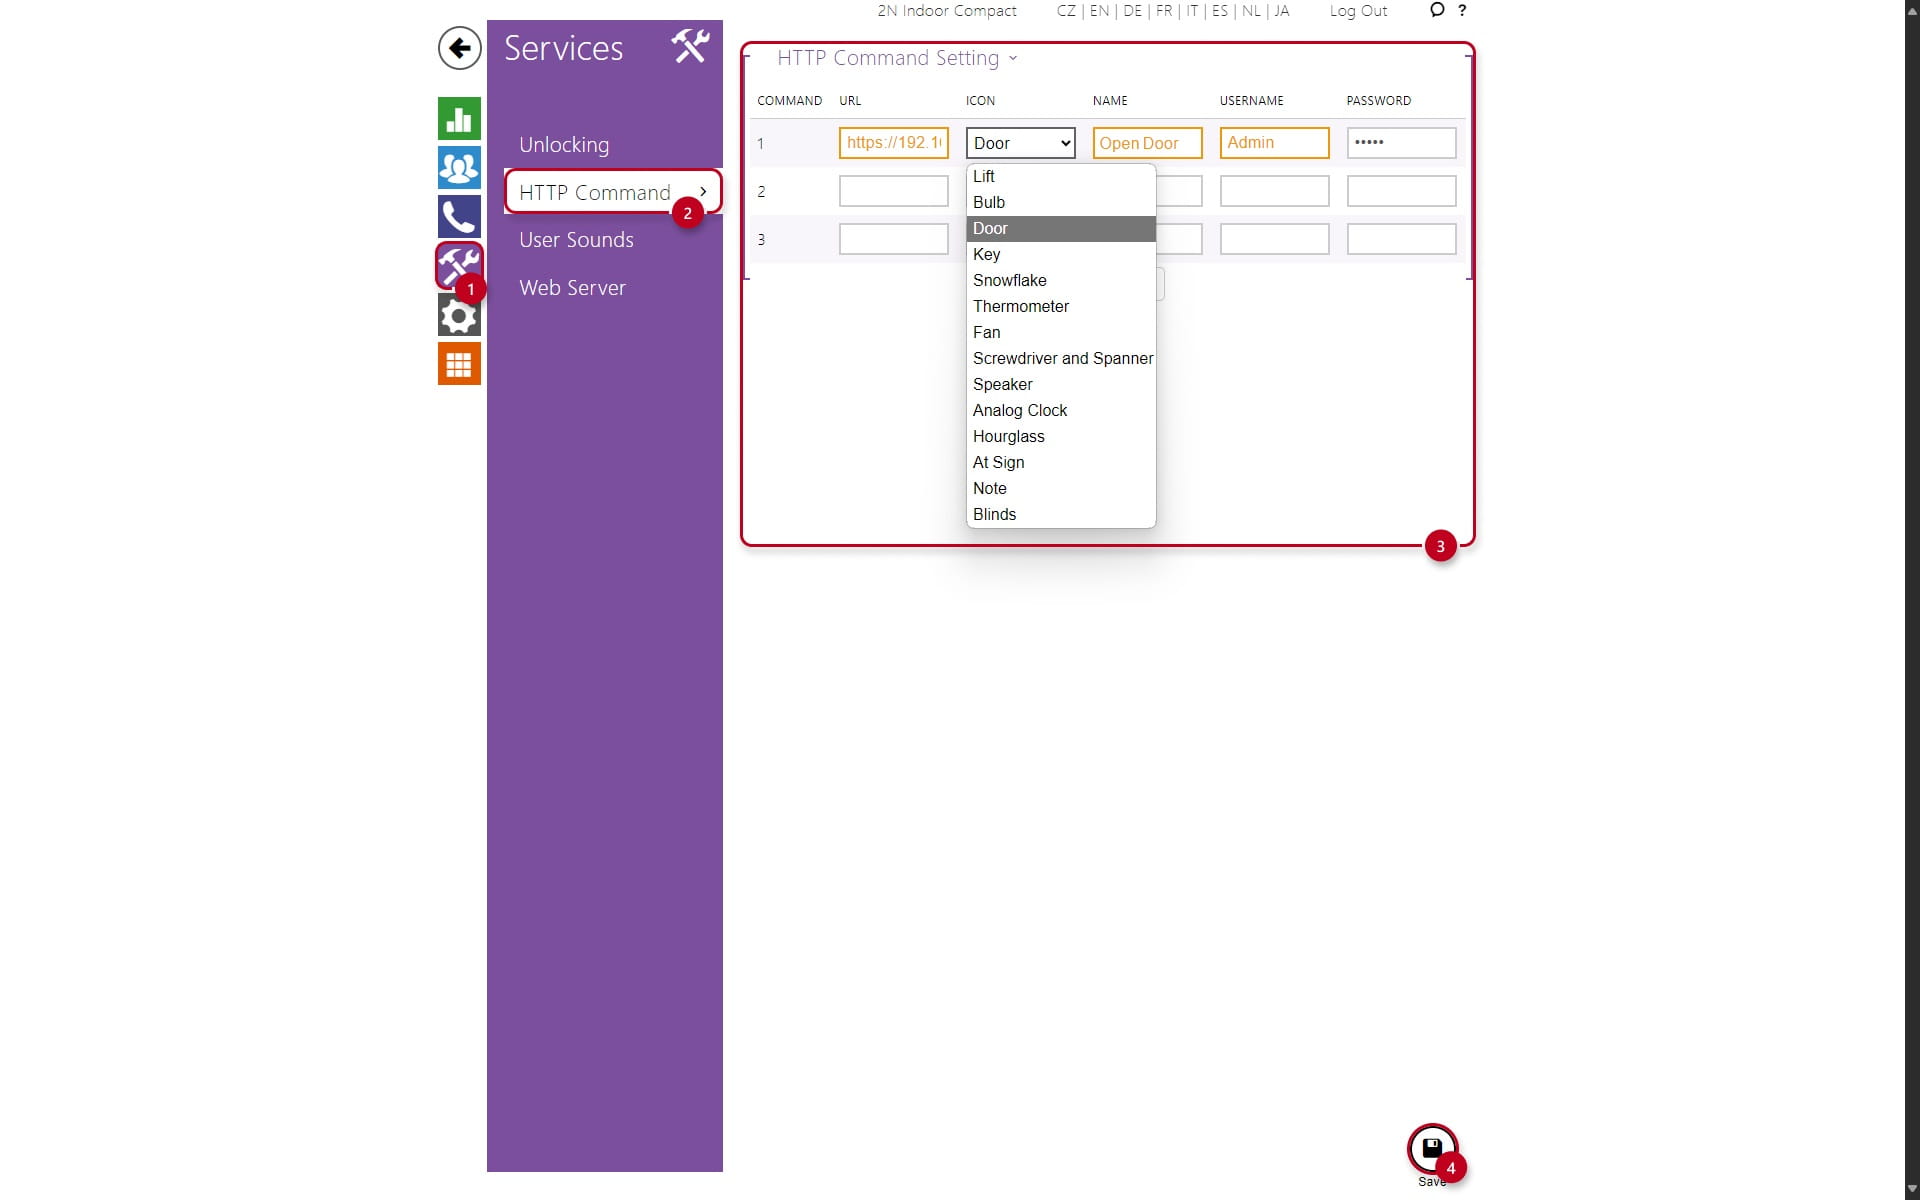
Indoor Compact does allow up to three HTTP Commands, with selectable Icons that will show up on the display:
-
Click on "Services" (1), then select "HTTP Command" (2)
-
Under the "HTTP Command Setting" - fill out the "URL", "ICON", "NAME", "USERNAME" and "PASSWORD" (3):
-
URL - In this example "https://192.168.49.88/api/switch/ctrl?switch=1&action=on"
- ICON - In this example an icon of a "Door" is selected
-
NAME - In this example called "Open Door"
-
USERNAME - Input the Username of the HTTP API Account created in the IP Intercom
-
PASSWORD - Input the Password of the HTTP API Account created in the IP Intercom
-
- Lastly, save (4)
Indoor View
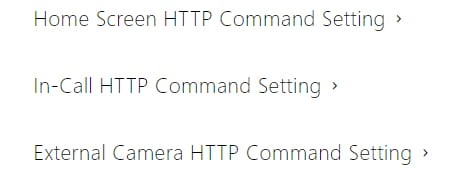
Indoor View does allow up to three HTTP Commands with selectable Icons, per multiple categories of the commands:
-
Home Screen HTTP Command Setting - HTTP Triggers accessible from the homescreen display
-
In-Call HTTP Setting - HTTP Triggers accessible during a call
-
External Camera HTTP Command Setting - HTTP Triggers accessible while viewing an external camera
To configure the HTTP Command for the homescreen in Indoor View:
-
Click on "Services" (1), then select "HTTP Command" (2)
-
Under the "HTTP Command Setting" - fill out the "URL", "ICON", "NAME", "USERNAME" and "PASSWORD" (3):
-
URL - In this example "https://192.168.49.88/api/switch/ctrl?switch=1&action=on"
- ICON - In this example an icon of a "Door" is selected
-
NAME - In this example called "Open Door"
-
USERNAME - Input the Username of the HTTP API Account created in the IP Intercom
-
PASSWORD - Input the Password of the HTTP API Account created in the IP Intercom
-
- Lastly, save (4)
