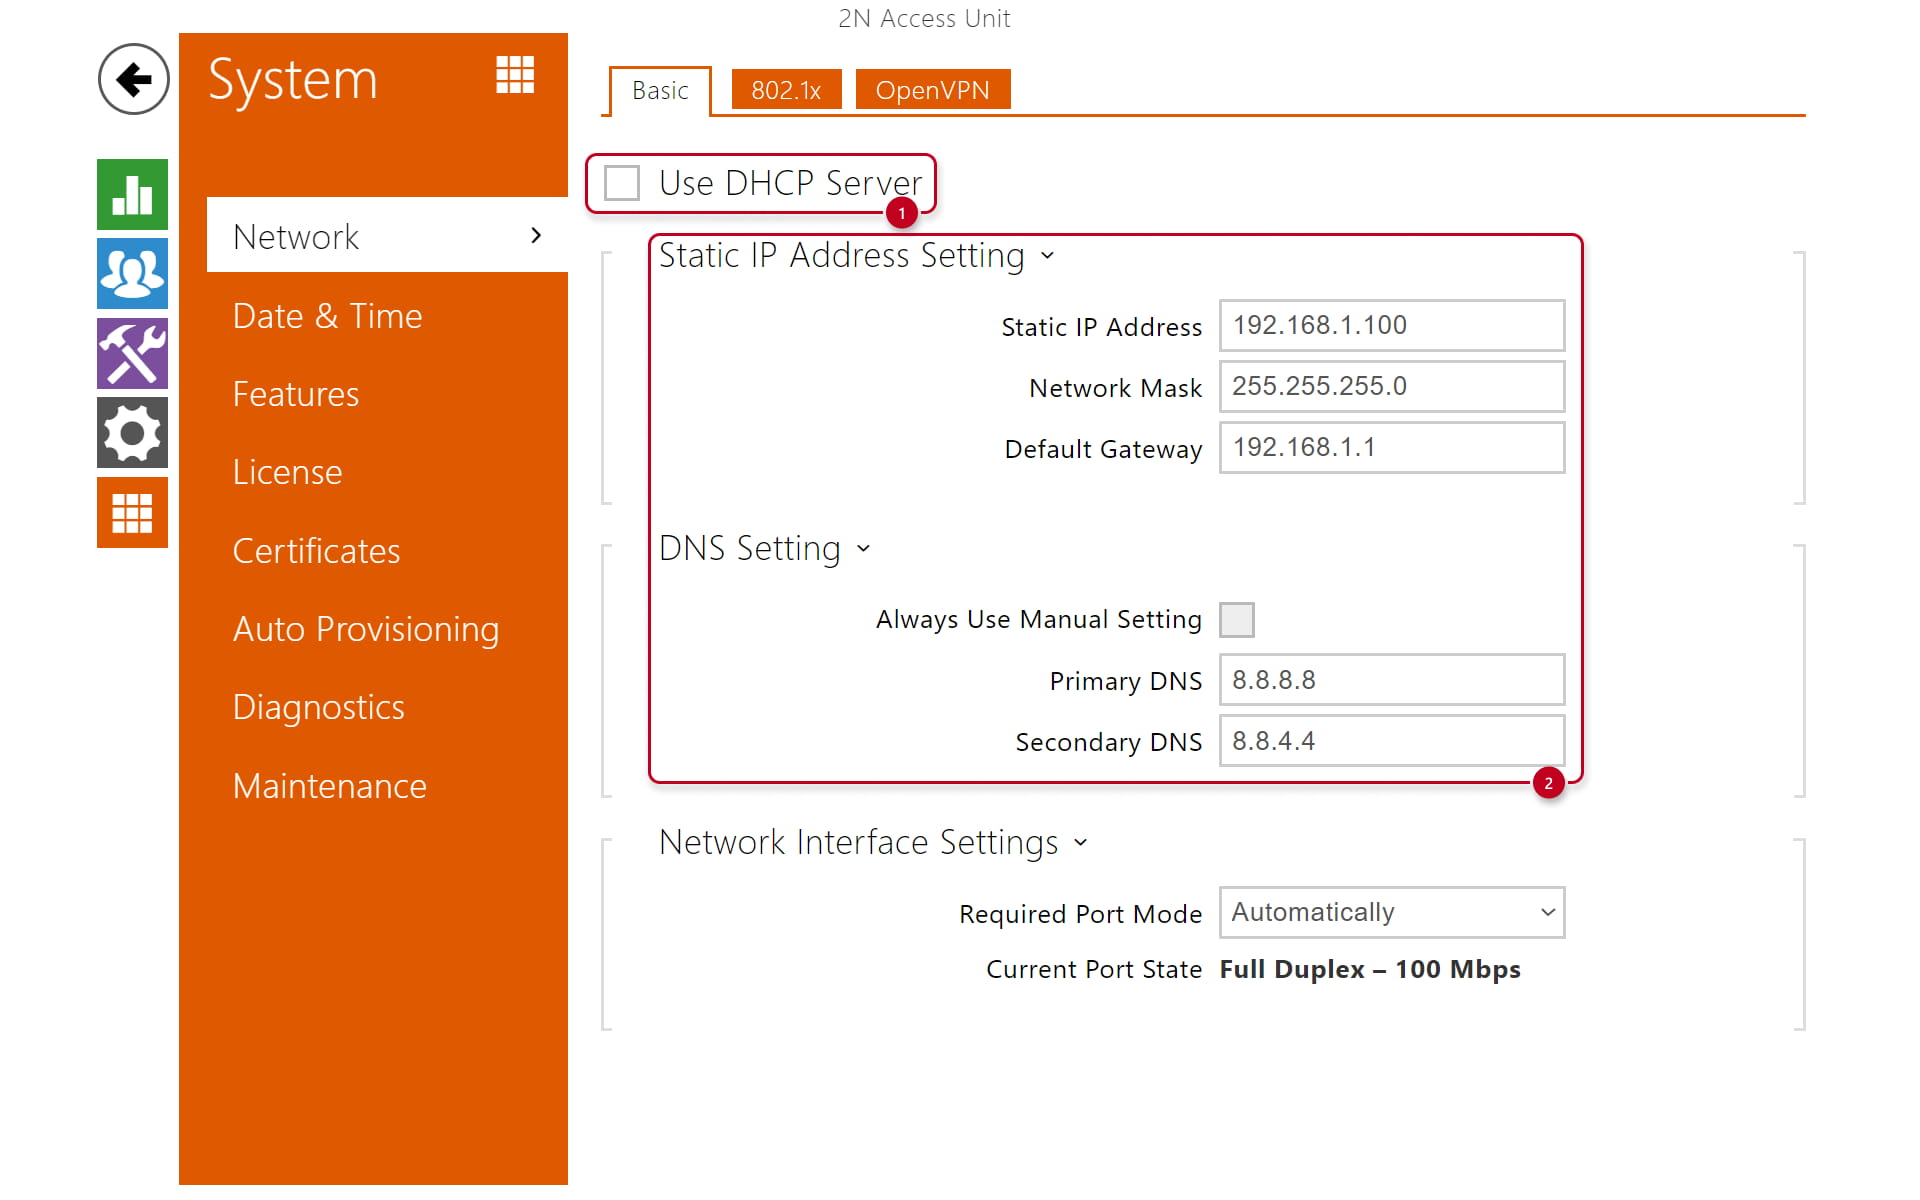
A) Web interface
-
Enter the IP address of a 2N Access Unit to your browser
-
Go to System - Network - Basic
-
Fill in IP addresses and save settings
This procedure can be applied to:
-
2N Access Unit
-
2N Access Unit 2.0
-
2N Access Unit M
- Access Unit QR
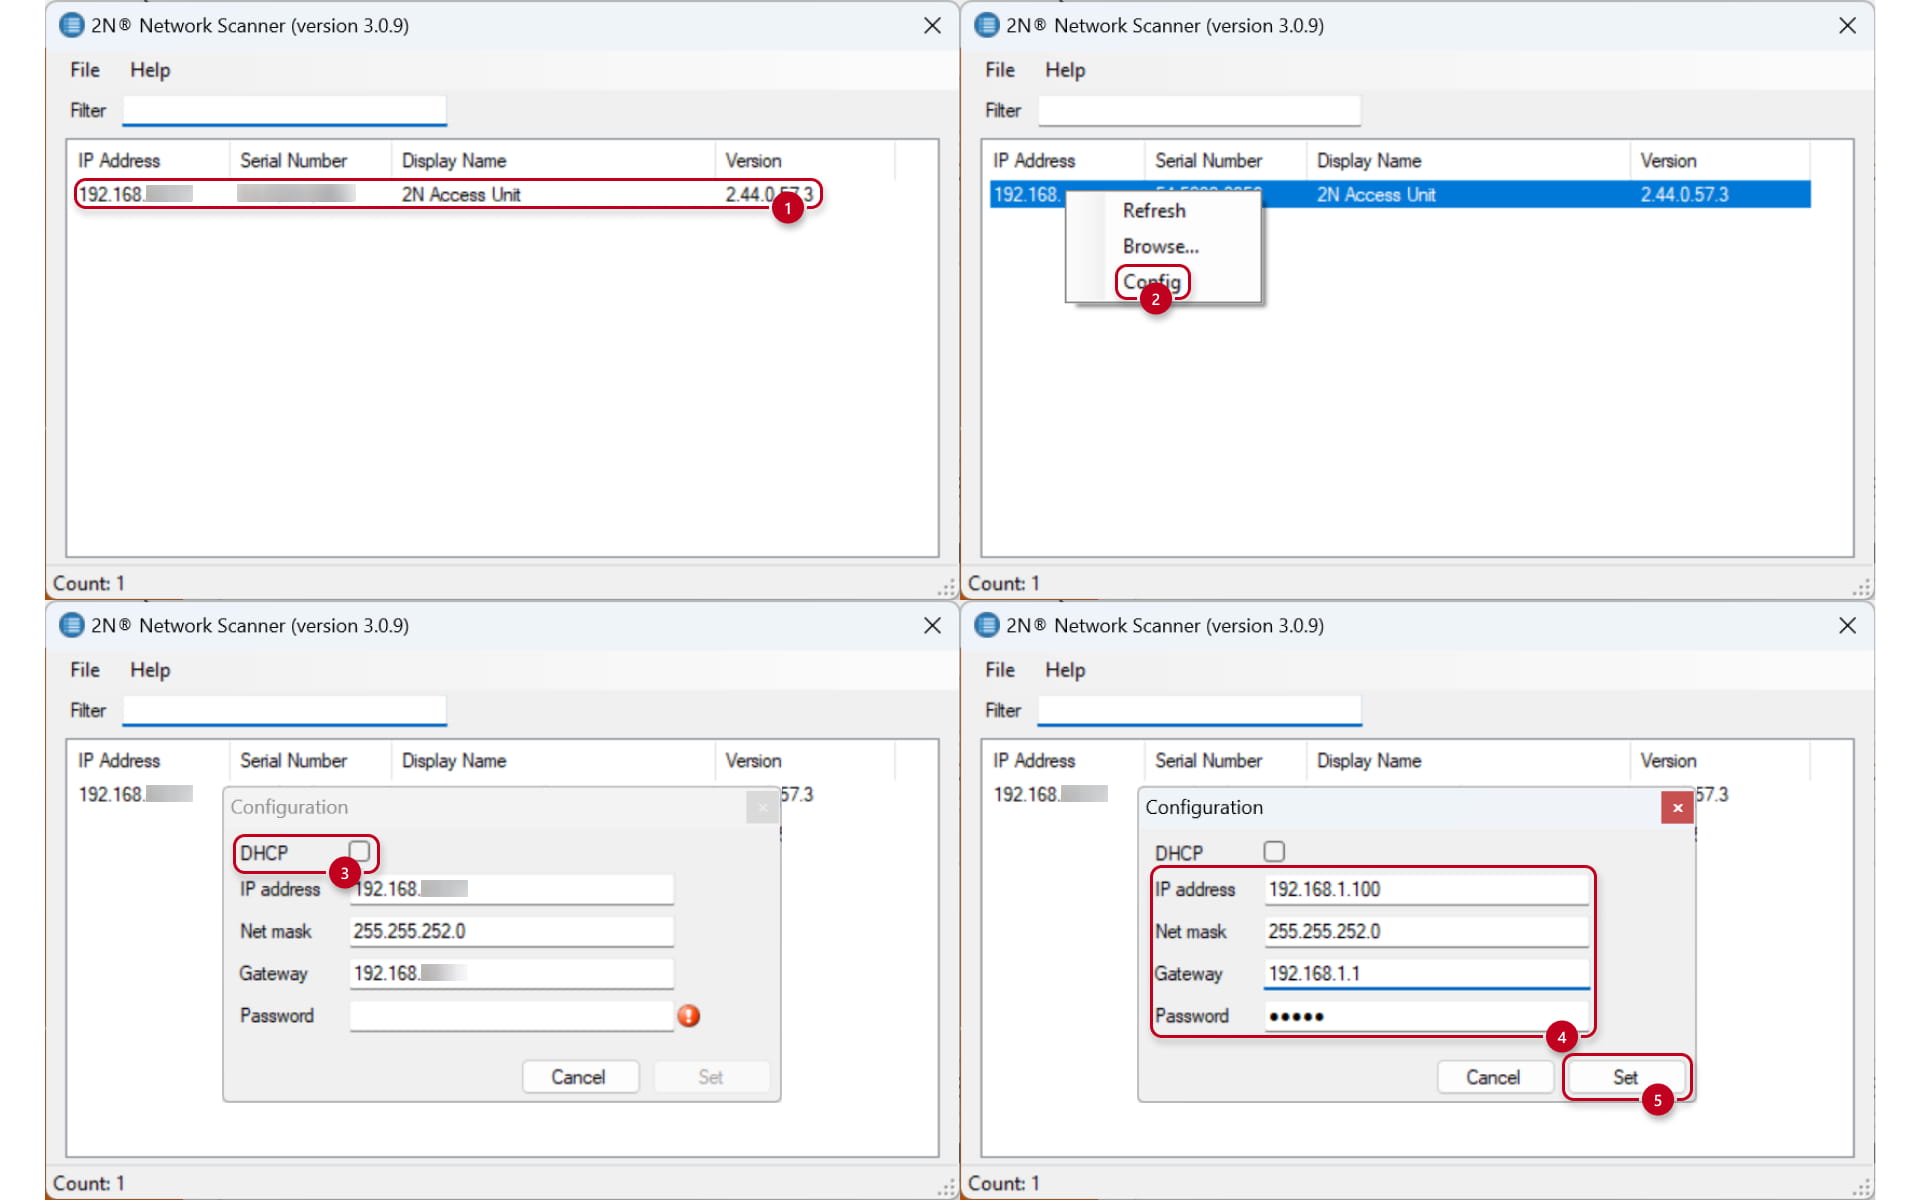
B) 2N Network Scanner
You can set the Static IP (or DHCP) in the 2N Network Scanner tool (you can download it here).
-
Right-click on the device in the device list
-
Click Config
-
Field Password needs the password to the device's web interface.
This procedure can be applied to:
-
2N Access Unit
-
2N Access Unit 2.0
-
2N Access Unit M
- Access Unit QR
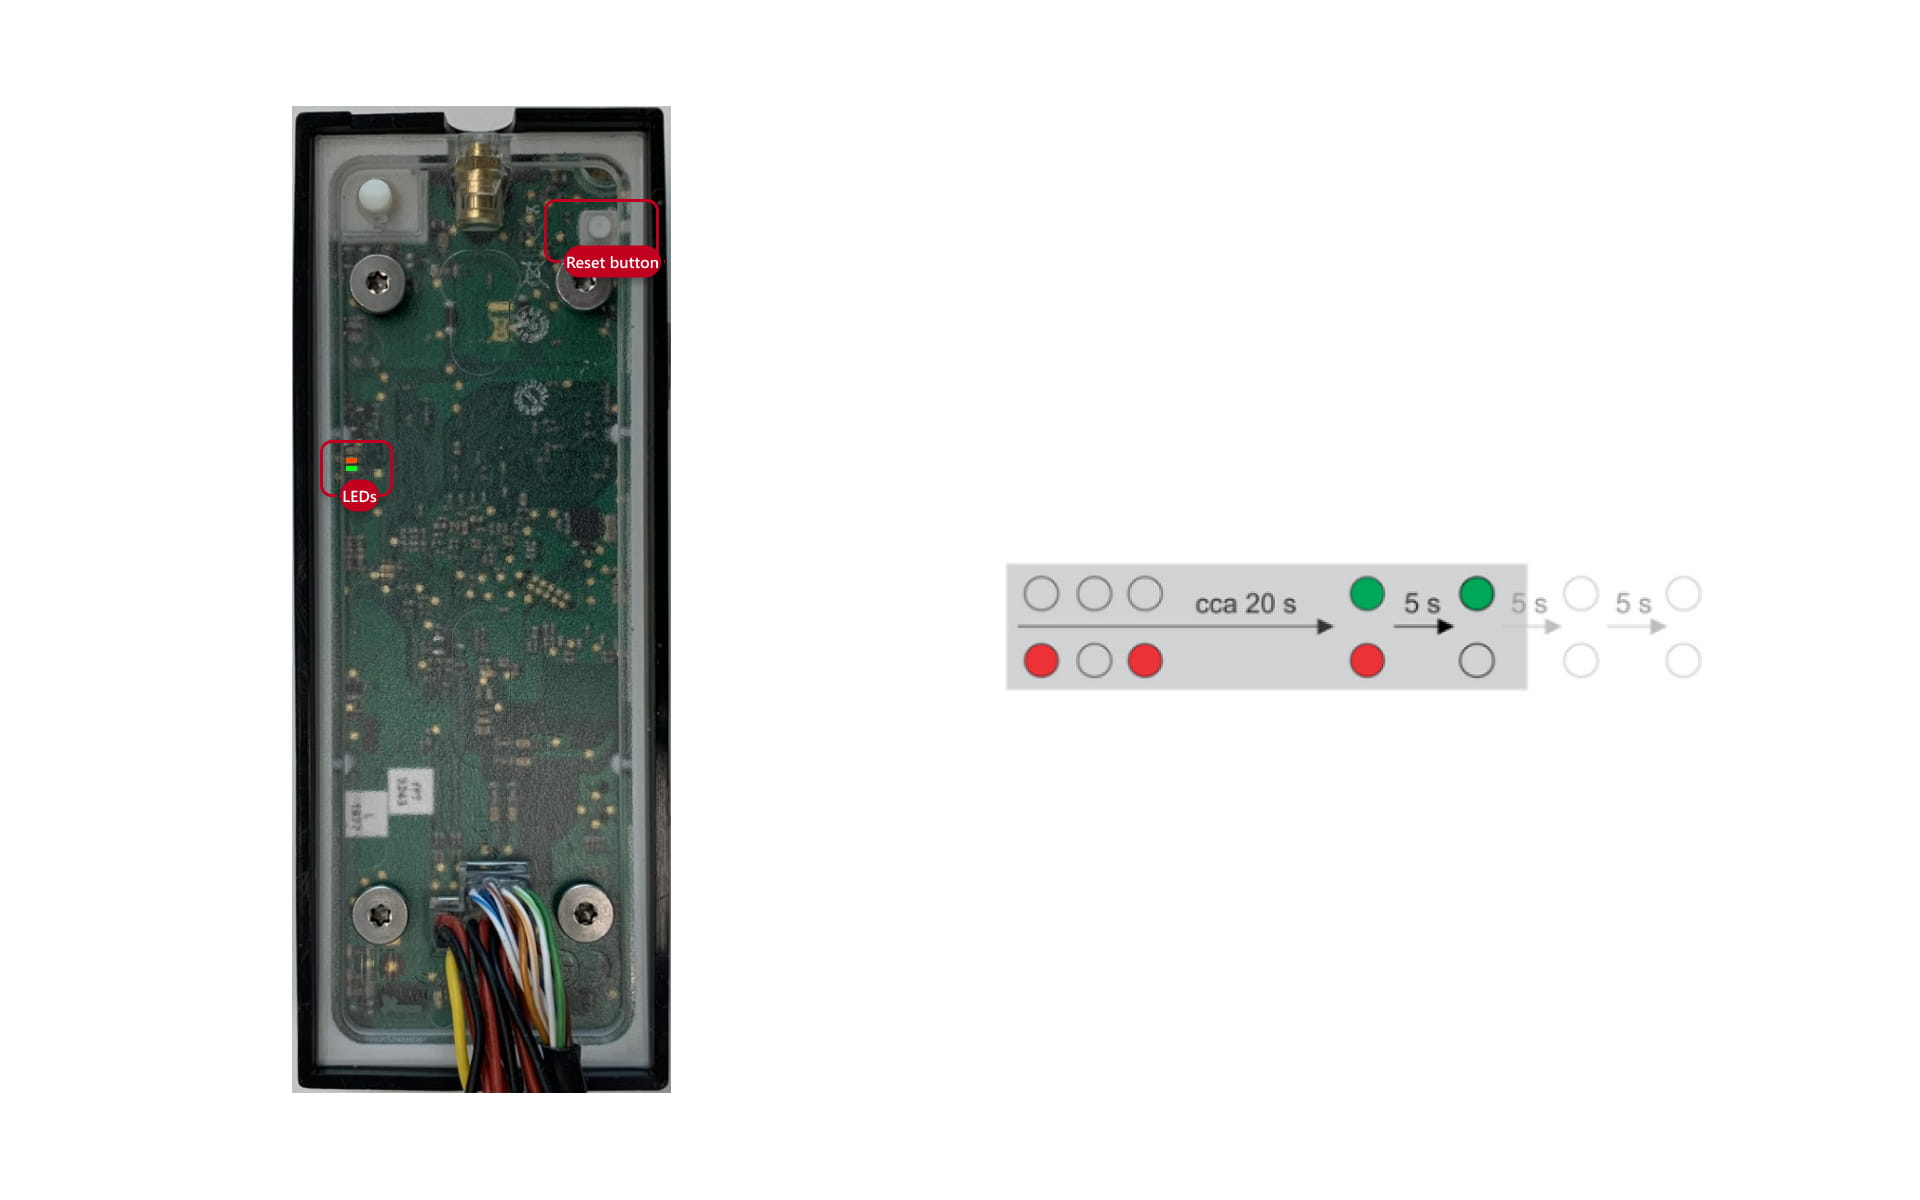
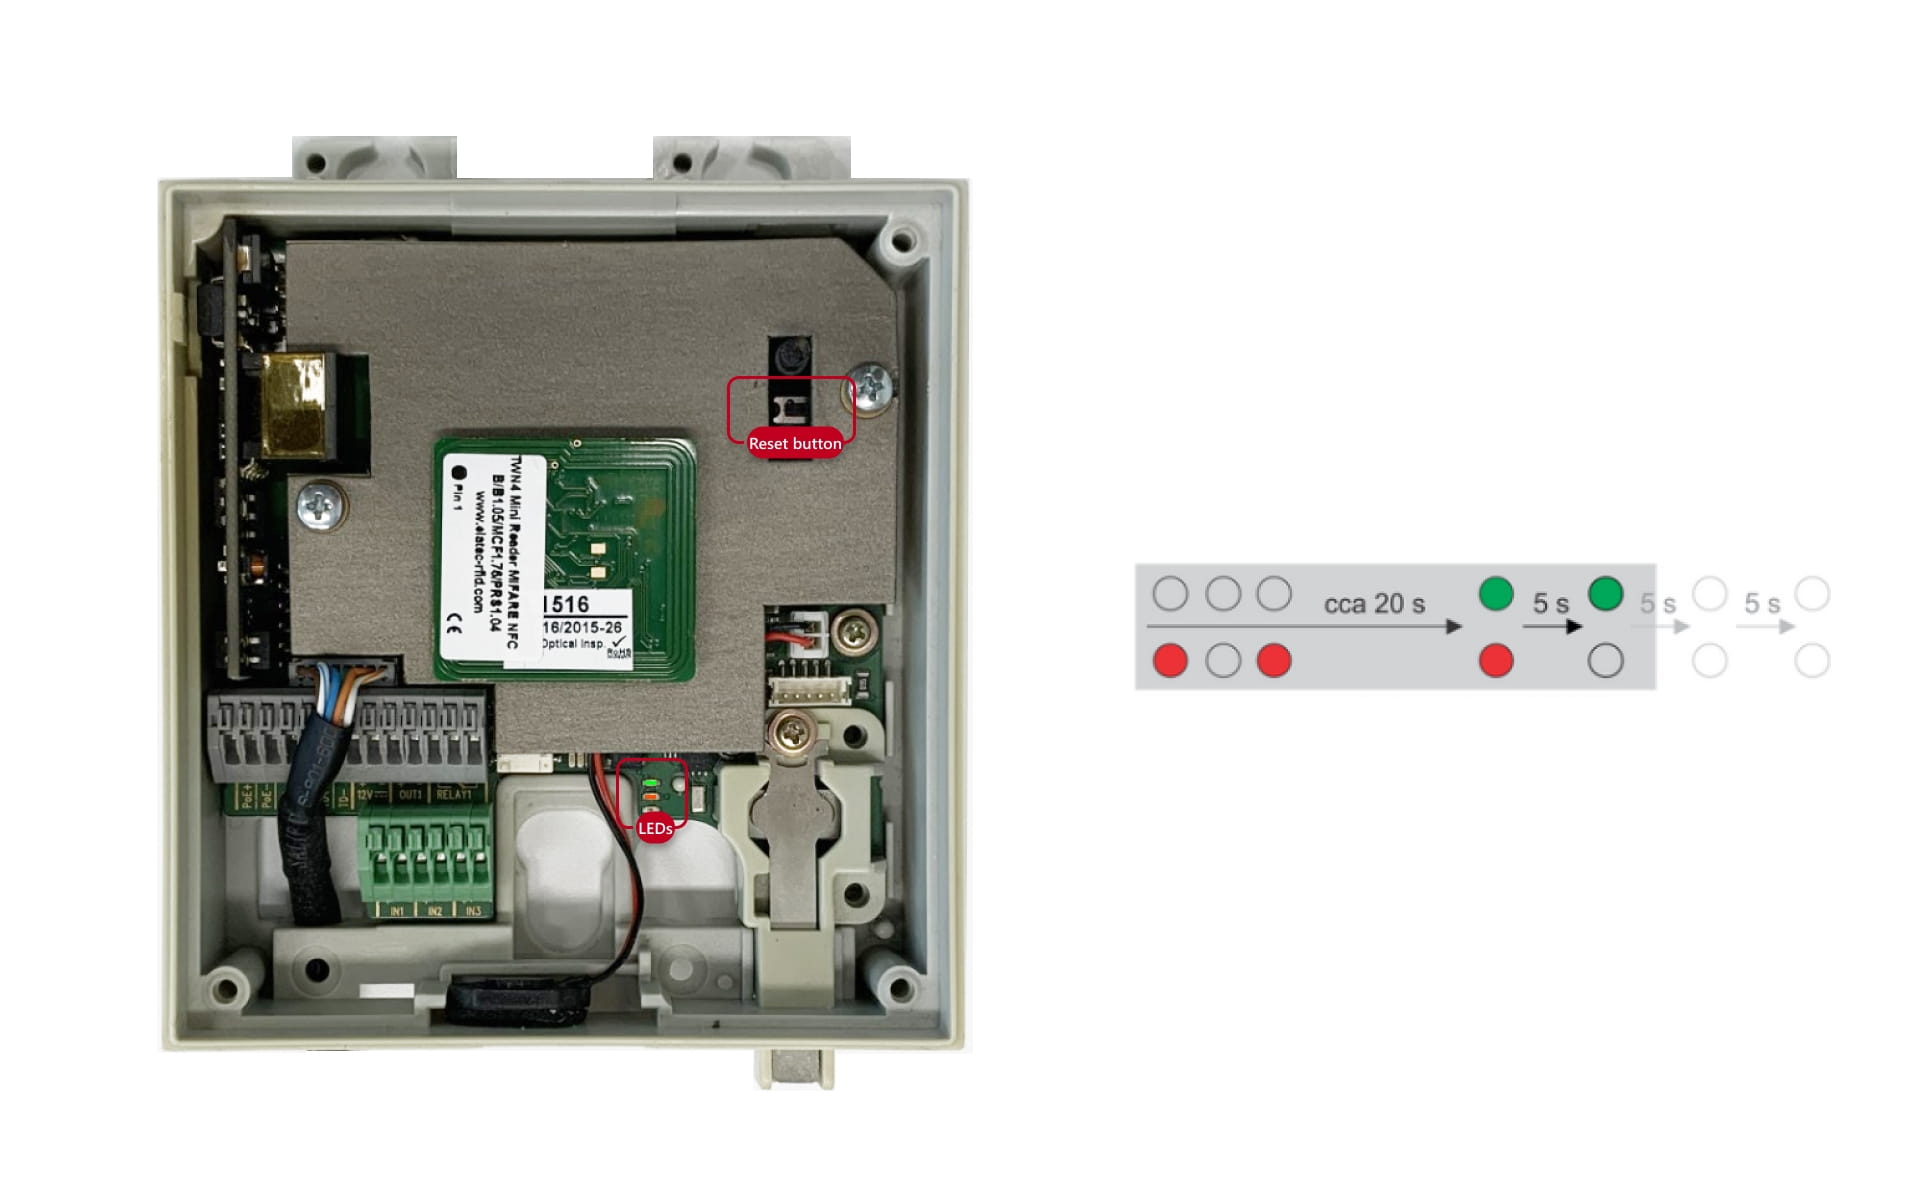
C) Reset button
To switch on the static IP address mode (DHCP OFF), follow the instructions below:
-
Press and hold the RESET button.
-
Wait until the red and green LEDs in the right-hand bottom part of the motherboard shine simultaneously (approx. 20 s).
-
Wait until the red LED goes off (approx. 5 s).
-
Release the RESET button.
The following network parameters will be set after restart:
-
IP address: 192.168.1.100
-
Network mask: 255.255.255.0
-
Default gateway: 192.168.1.1
This procedure can be applied to:
-
2N Access Unit
-
2N Access Unit 2.0
-
2N Access Unit M
This procedure does not apply to Access Unit QR
2N Access Unit
2N Access Unit 2.0

2N Access Unit M