Dormakaba locks - How to integrate one or more in your My2N site
| Since we are able to make communicate My2N cloud with Dormakaba cloud, you will be able to integrate Dormakaba locks on your My2N site and manage them. Only Saffire EVO LZ Series locks are supported |
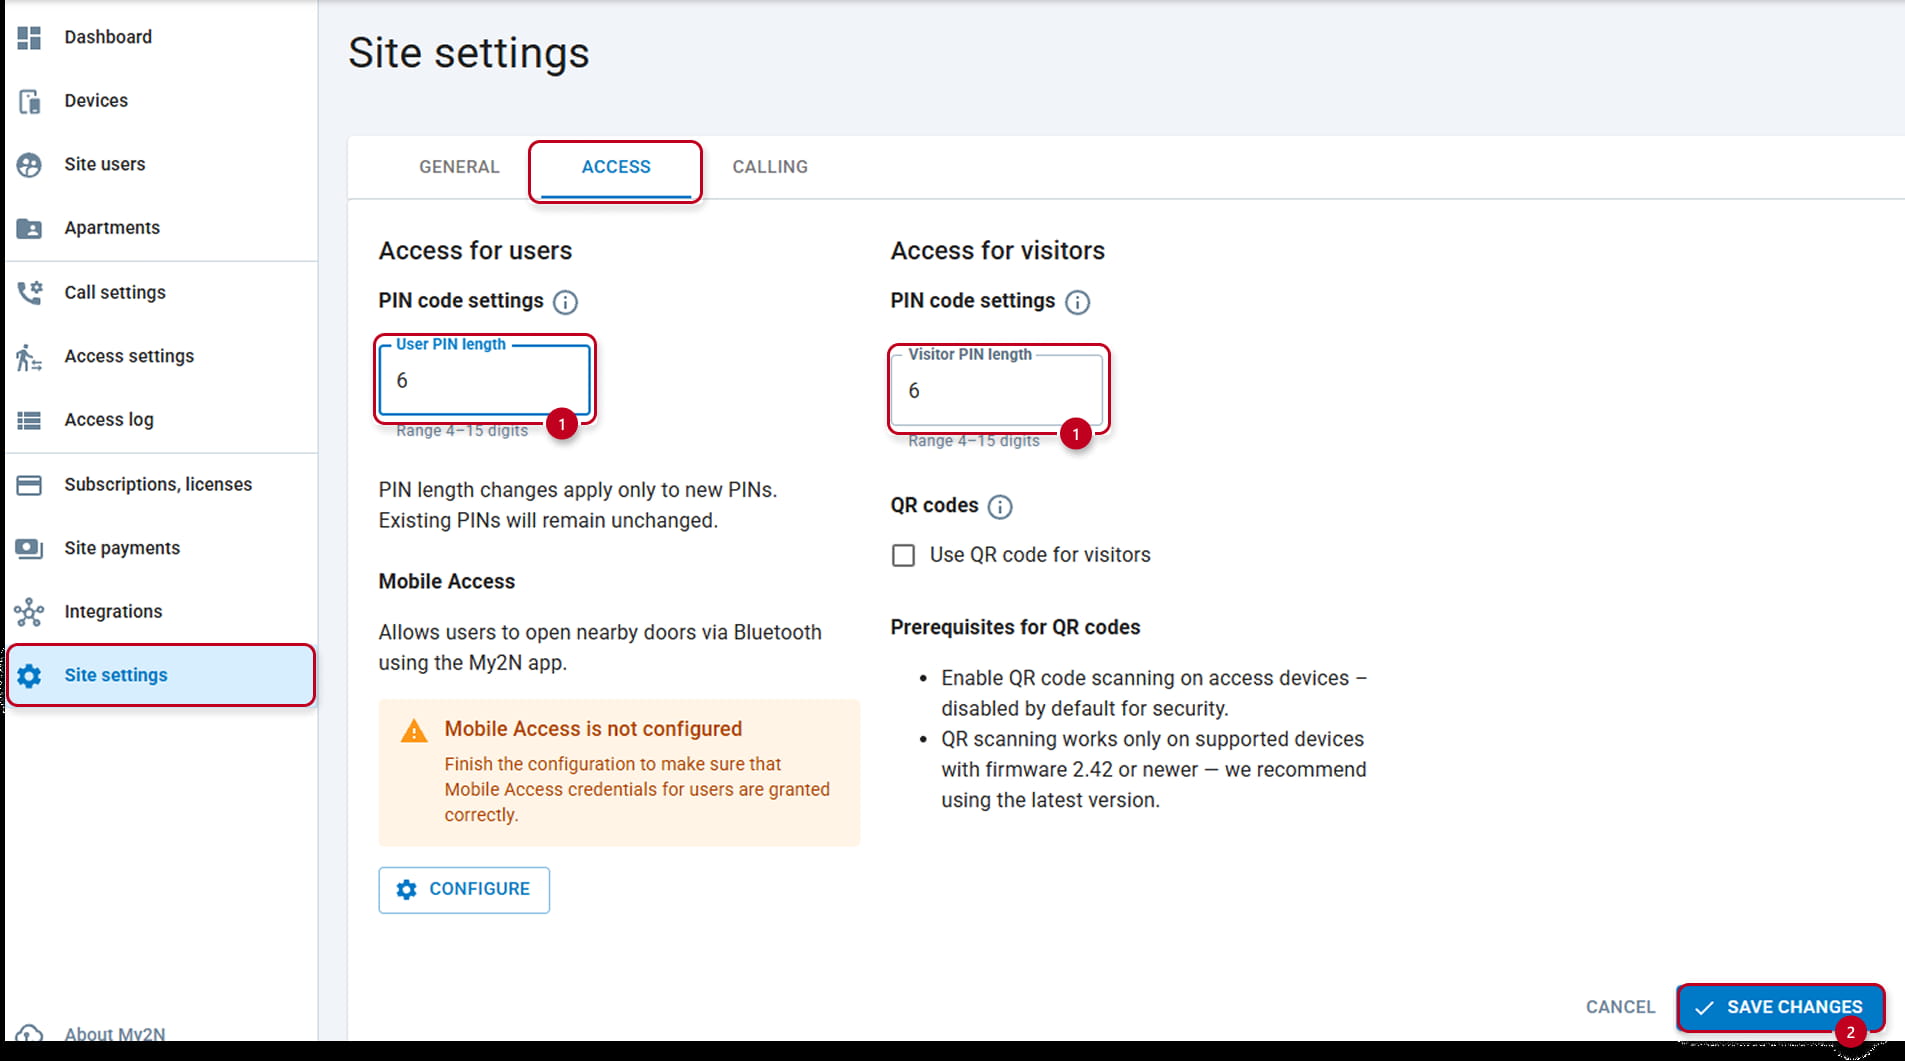
You can use an existing site or create a new site for that. Both models are eligible for the integration. Dormakaba requires a 6 Digits PIN, so, if you are using an existing site make sure that you modify the default digits number in the My2N settings to 6 (1) :
The integration by itself has 3 distinct phases:
- Activate the integration on My2N
- Pair the integrated devices in your site
- Provide access to dedicated users
Activate the integration on My2N and Dormakaba sides :
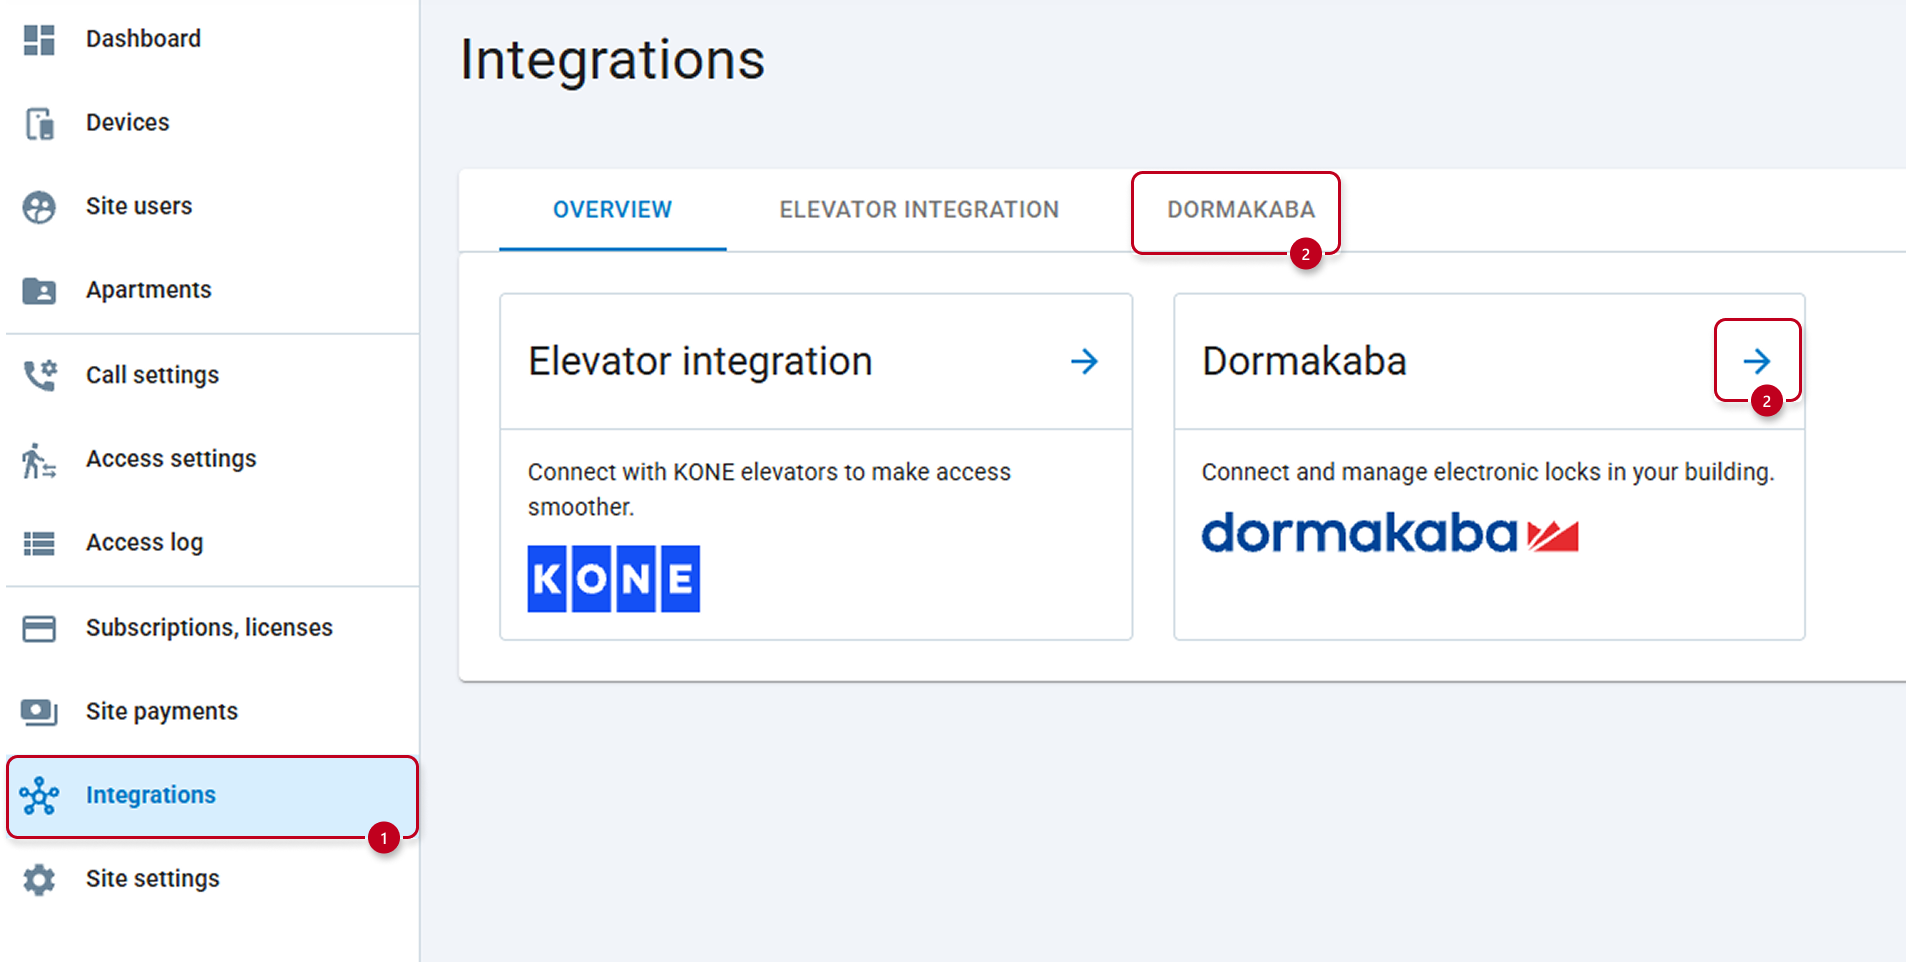
The first step will be to start the Activation. Go to Integration (1) section and Click on the DORMAKABA (2) name or the Arrow (2) on the Dormakaba inset :
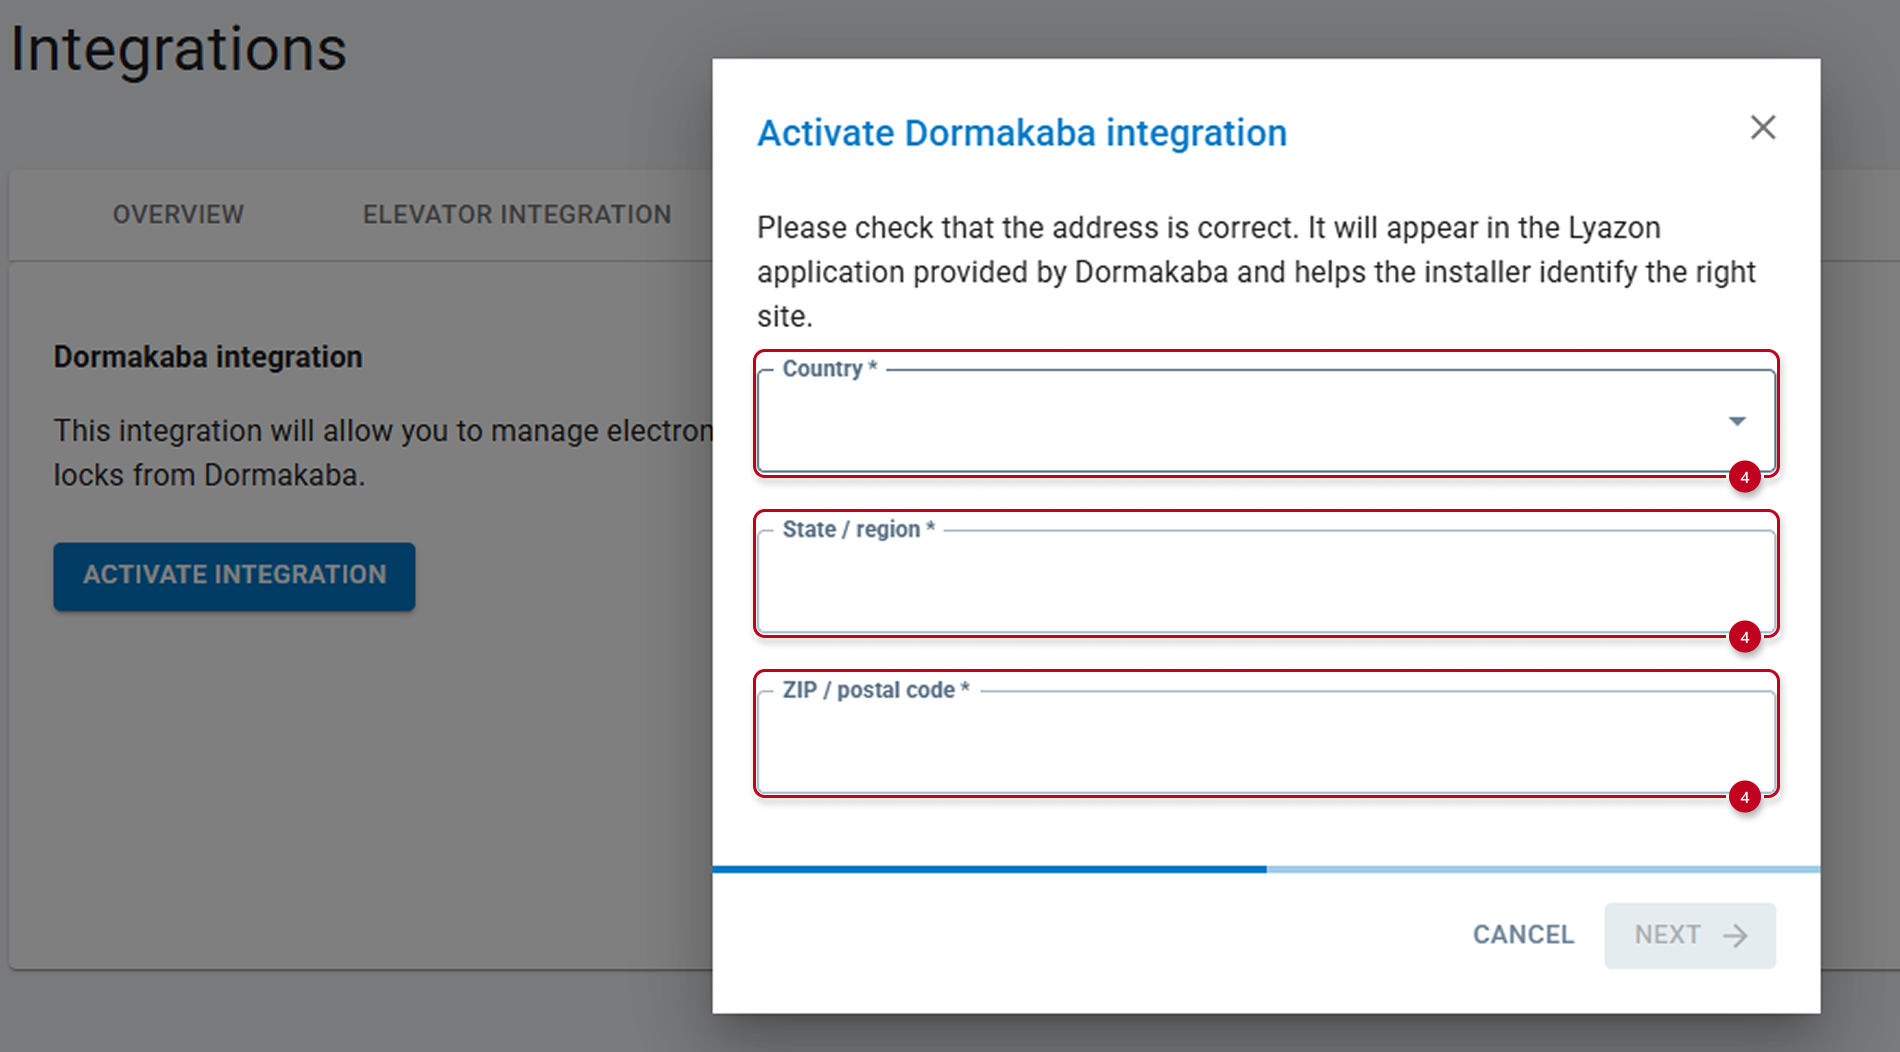
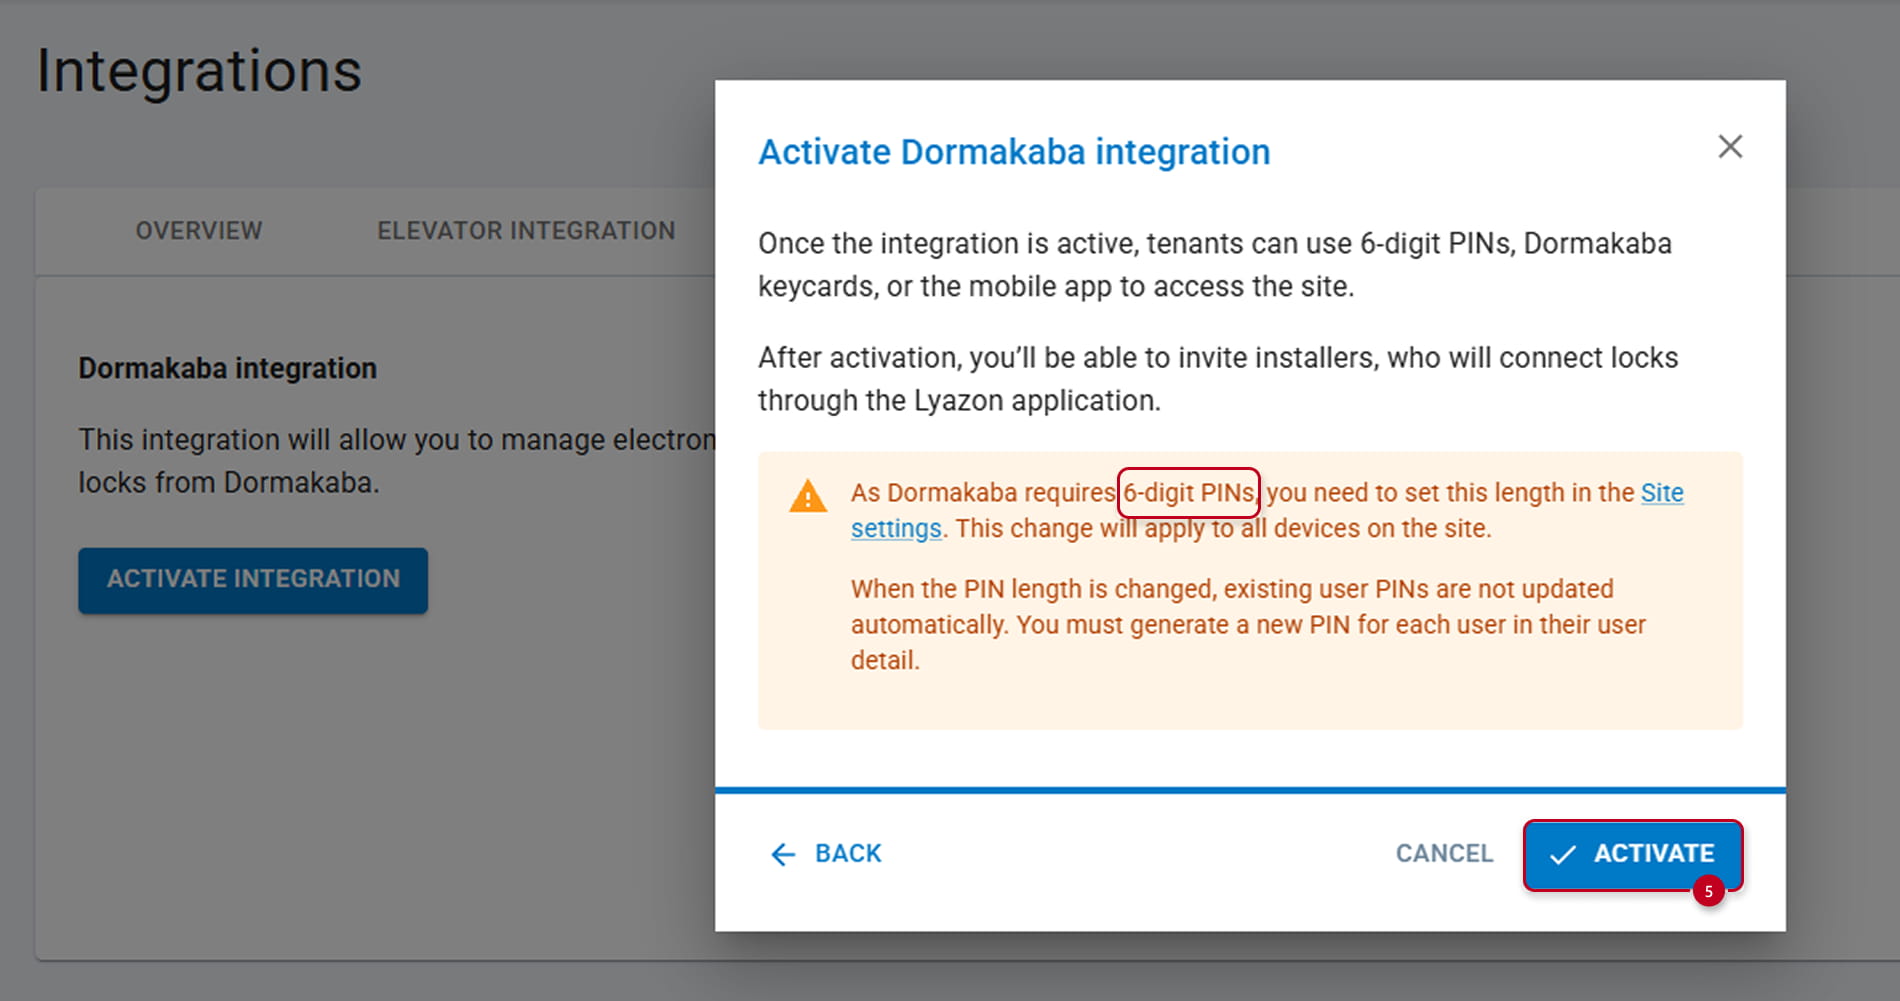
Then, press on ACTIVATE INTEGRATION (3):

In order to activate the Dormakaba integration, you will have to provide some administrative details regarding your installation as Country (4), State or Region (4) and ZIP or Postal code (4):
You are ready to ACTIVATE (5):
Pair the integrated devices in your site:
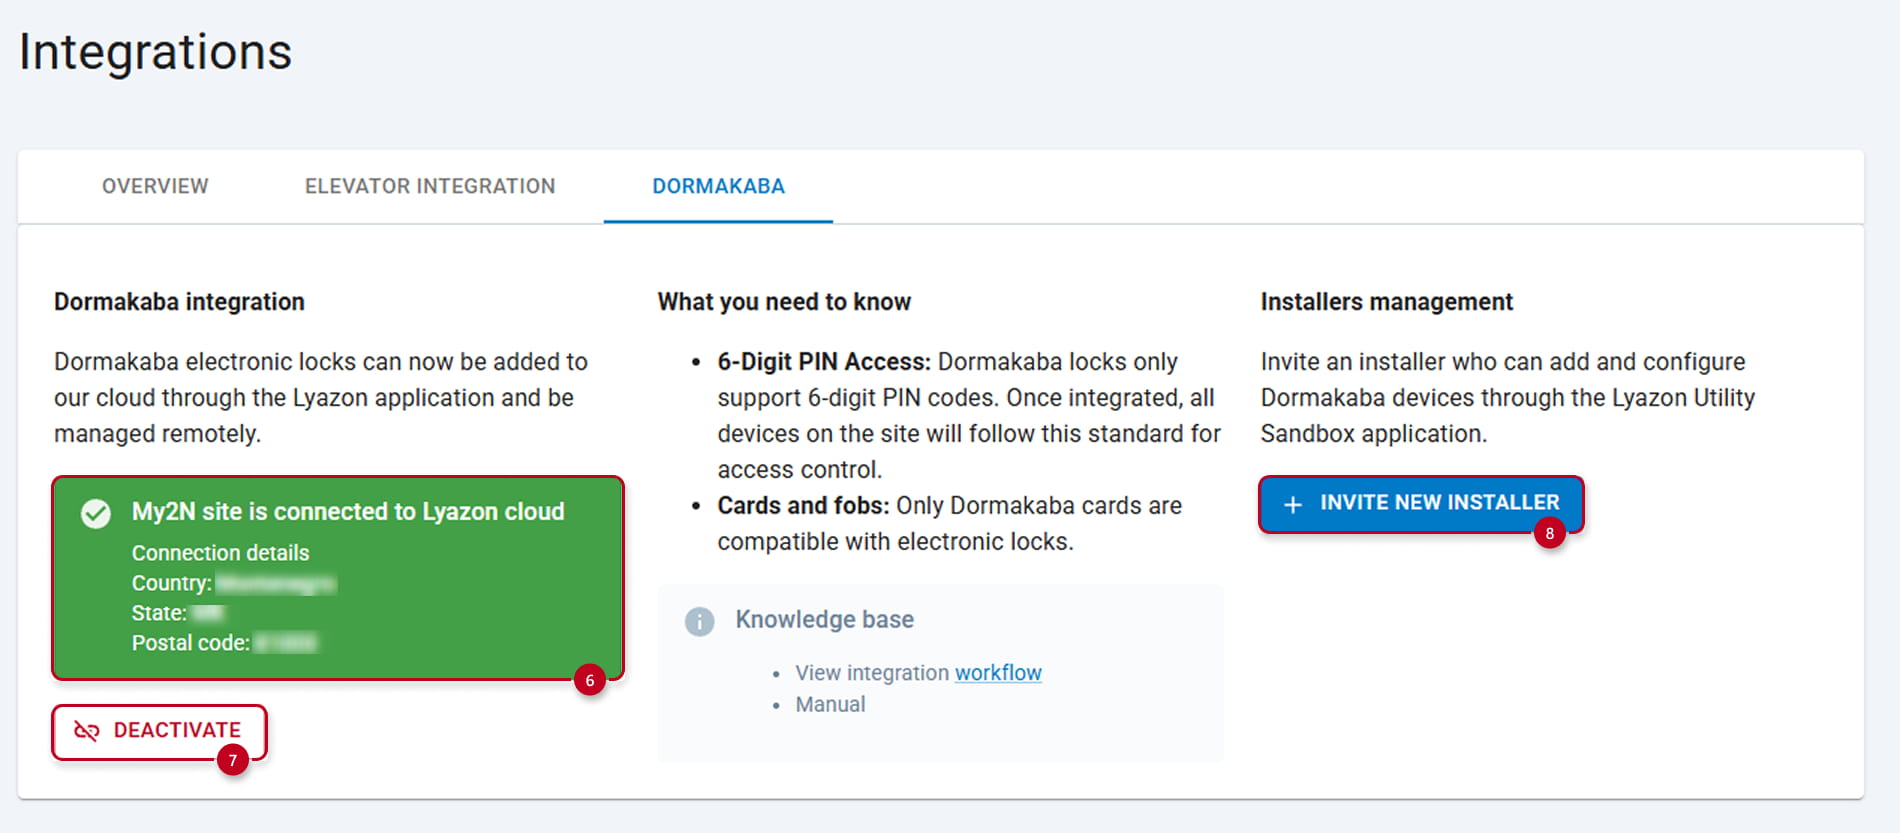
You have now, activated the integration. You can see an inset with all administrative details you just filled and confirmation that you are connected to Lyazon cloud (6). Lyazon cloud is the Dormakaba's cloud name.
You can at any moment DEACTIVATE (7) the integration, but it is not recommended as you will lose all configuration and accesses.
And you finally can INVITE a NEW INSTALLER (8) for working on the Dormakaba side. The installer is somebody who will have access to Dormakaba cloud and knows how to pair devices in it :
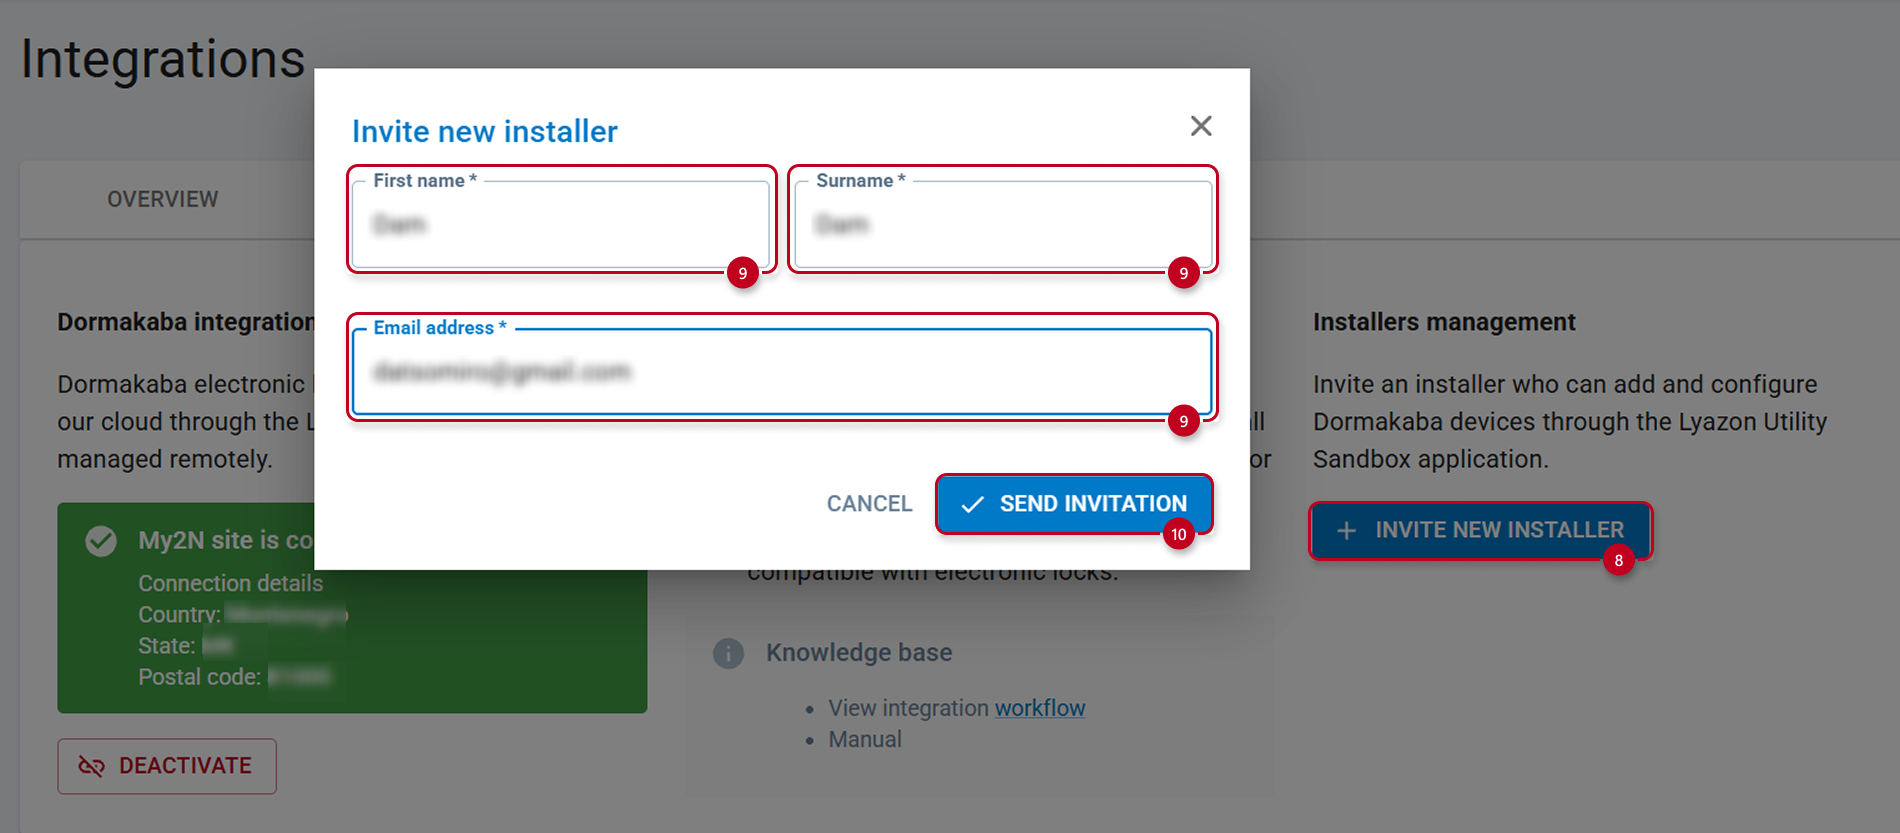
When you invite the installer, you will need to provide his Name and Surname, Email address (9) and SEND the INVITATION (10):
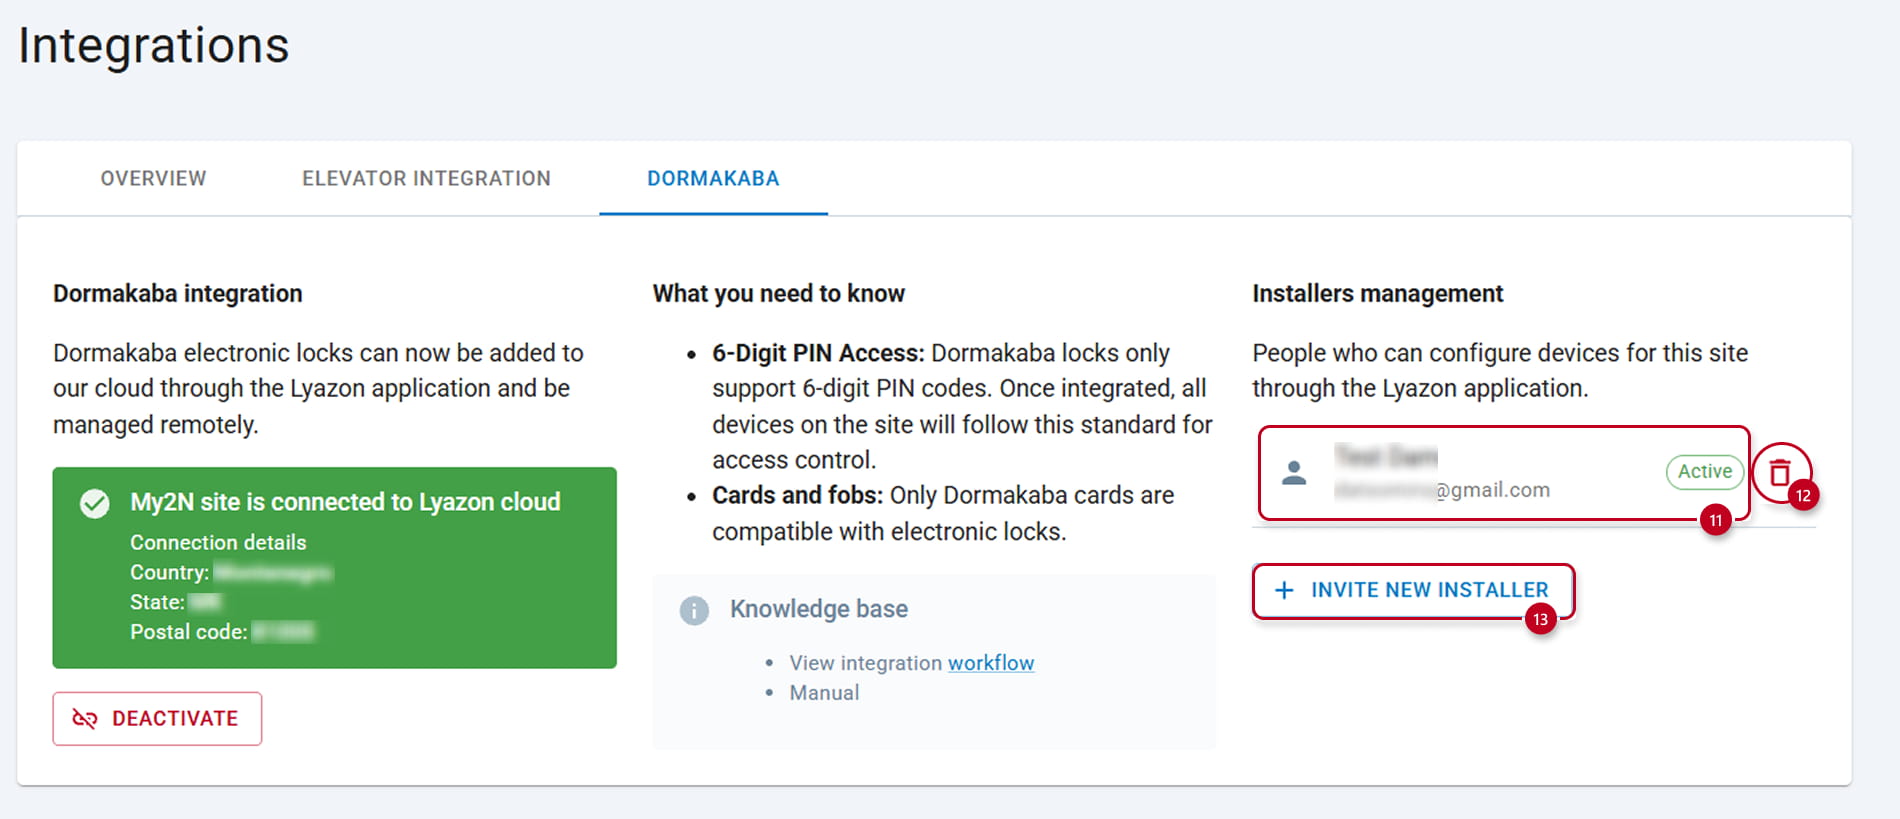
You will get confirmation that the invitation has been sent and that the request is active (11), you can cancel the invitation (12) at any moment and Invite a new installer (13) if needed (It is recommended not to forget removing the installer after the installation) :
When you sent the invite, the installer will receive an email from Lyazon Onboarding team :
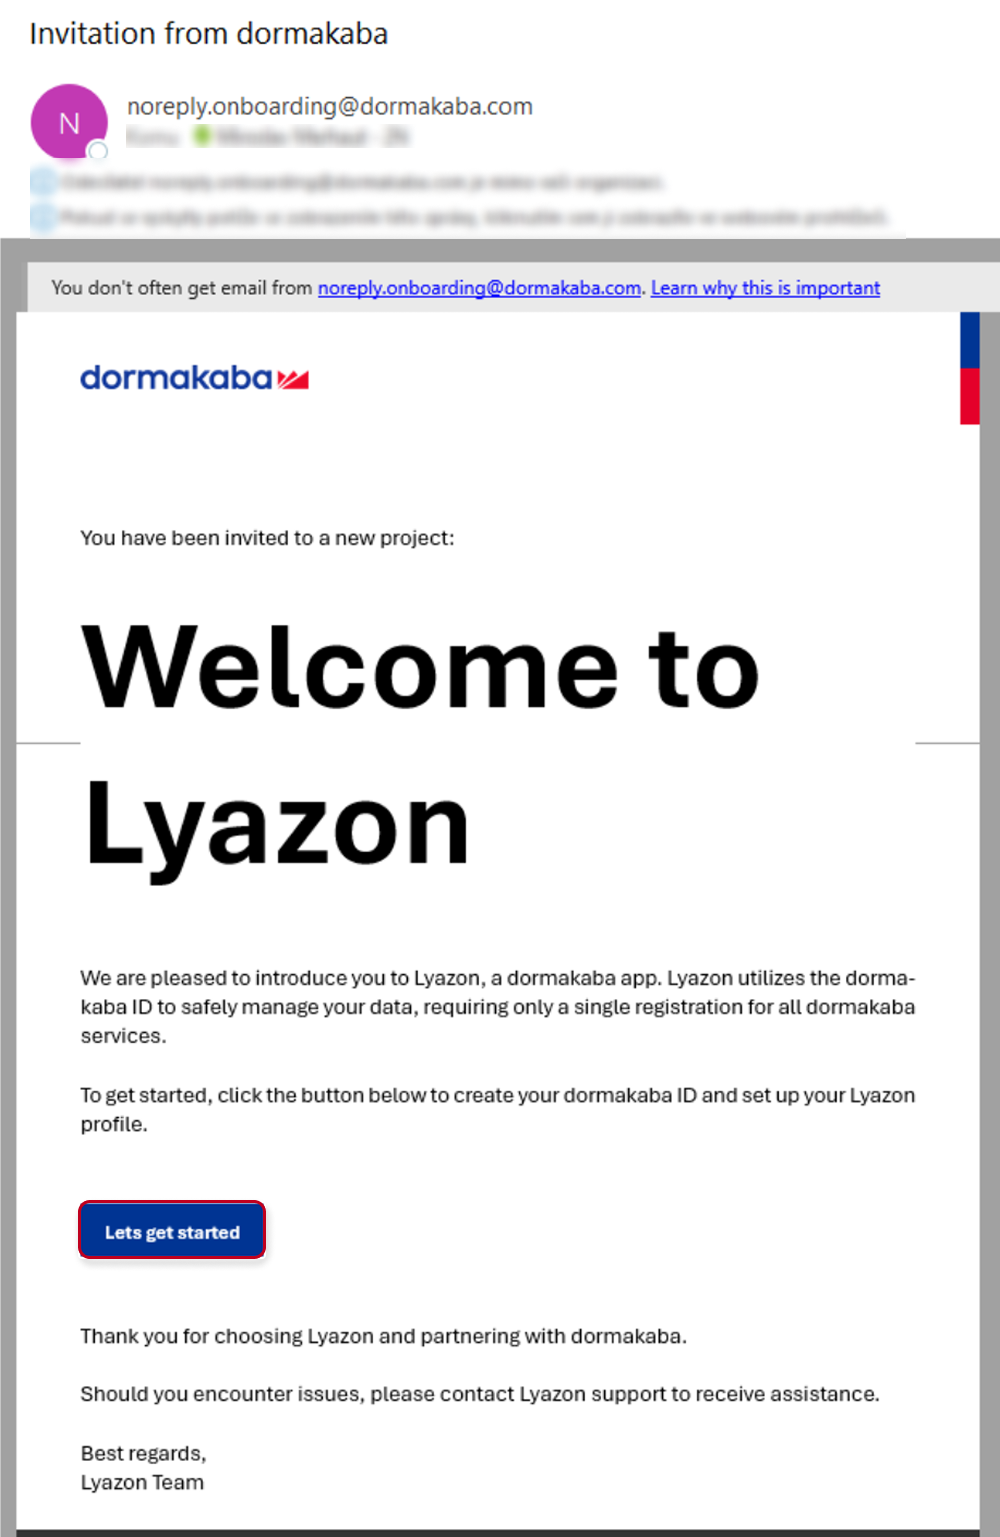
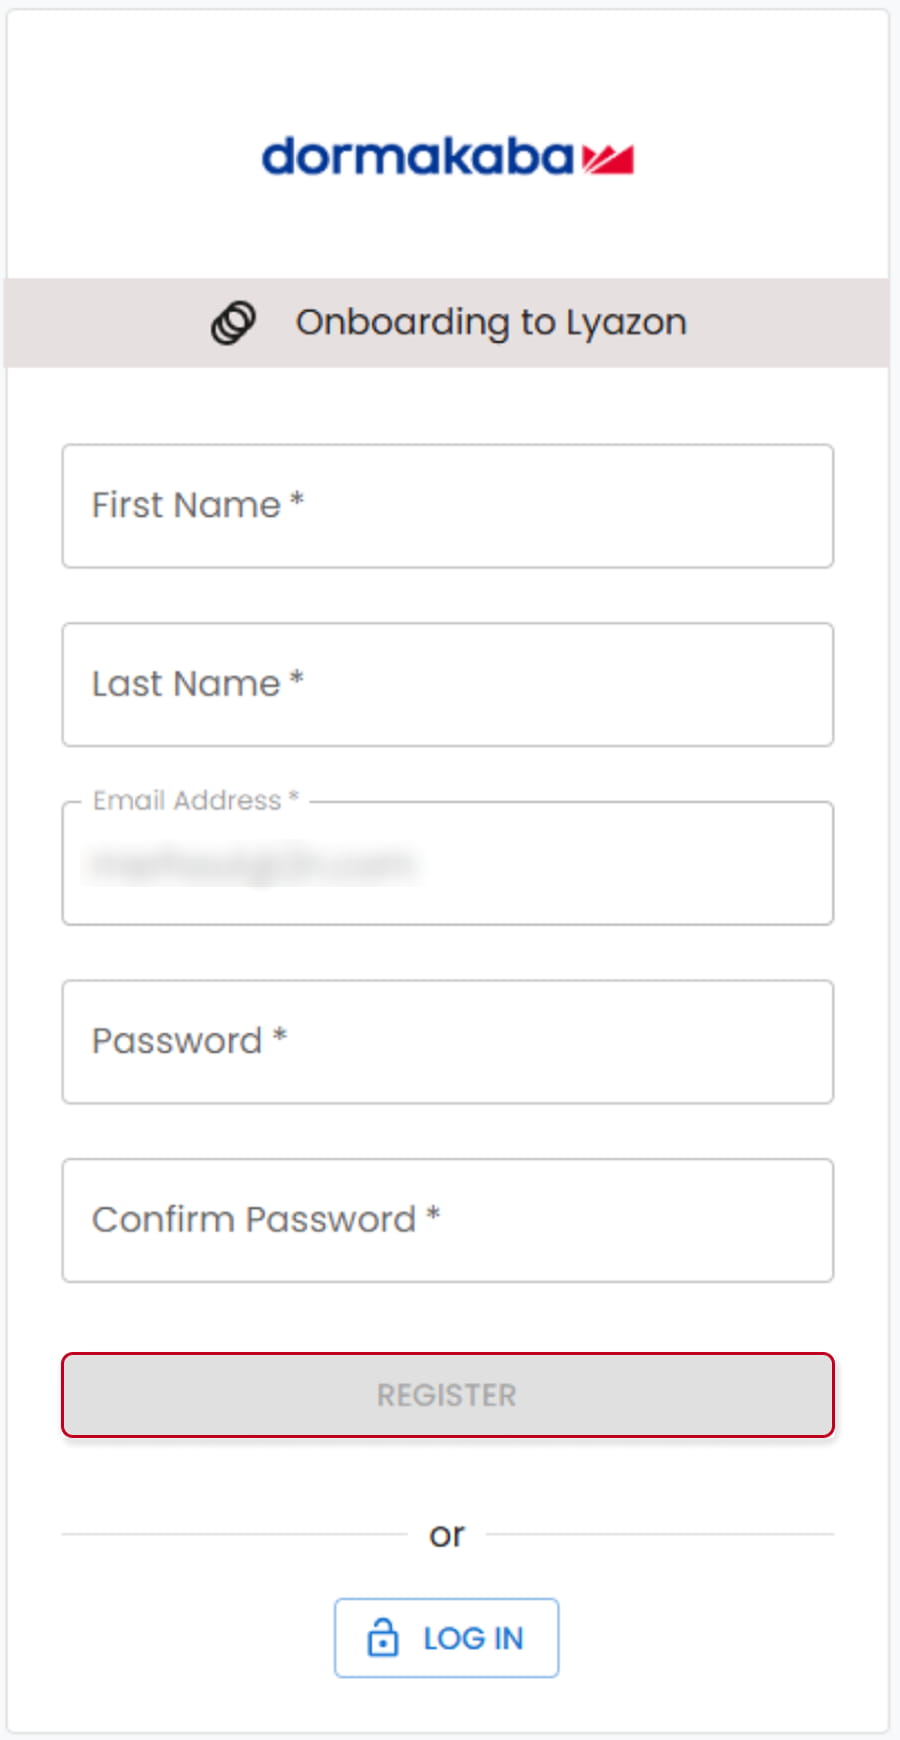
He will have to presson the Let's get started button and Sign up:
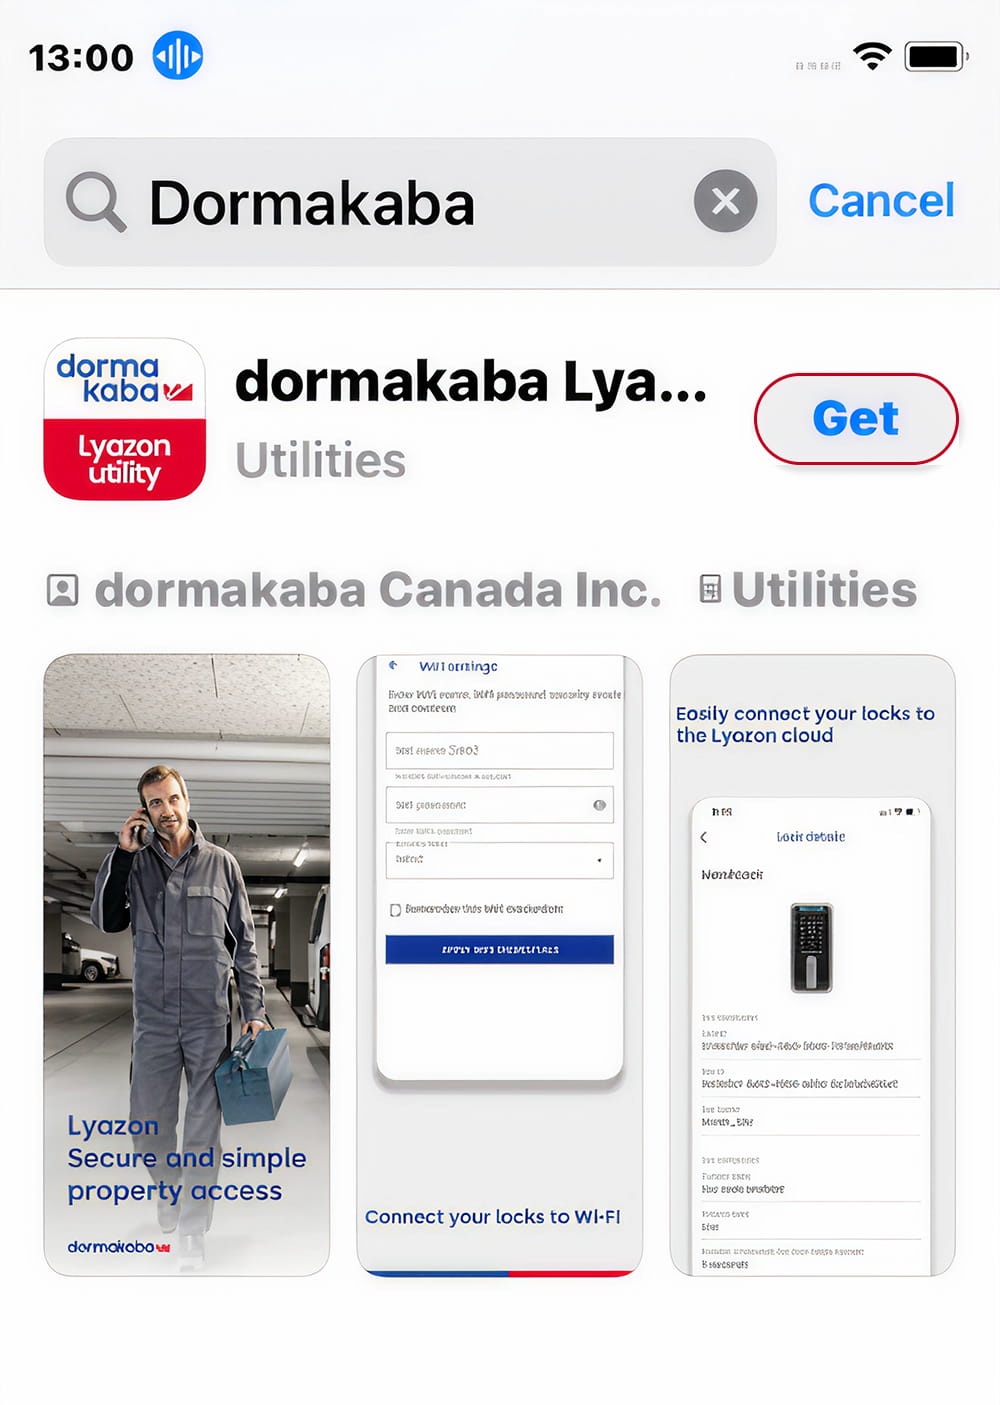
Then, this installer will have to download in Apple Store or in Google play the App Dormakaba Lyazon Utility:
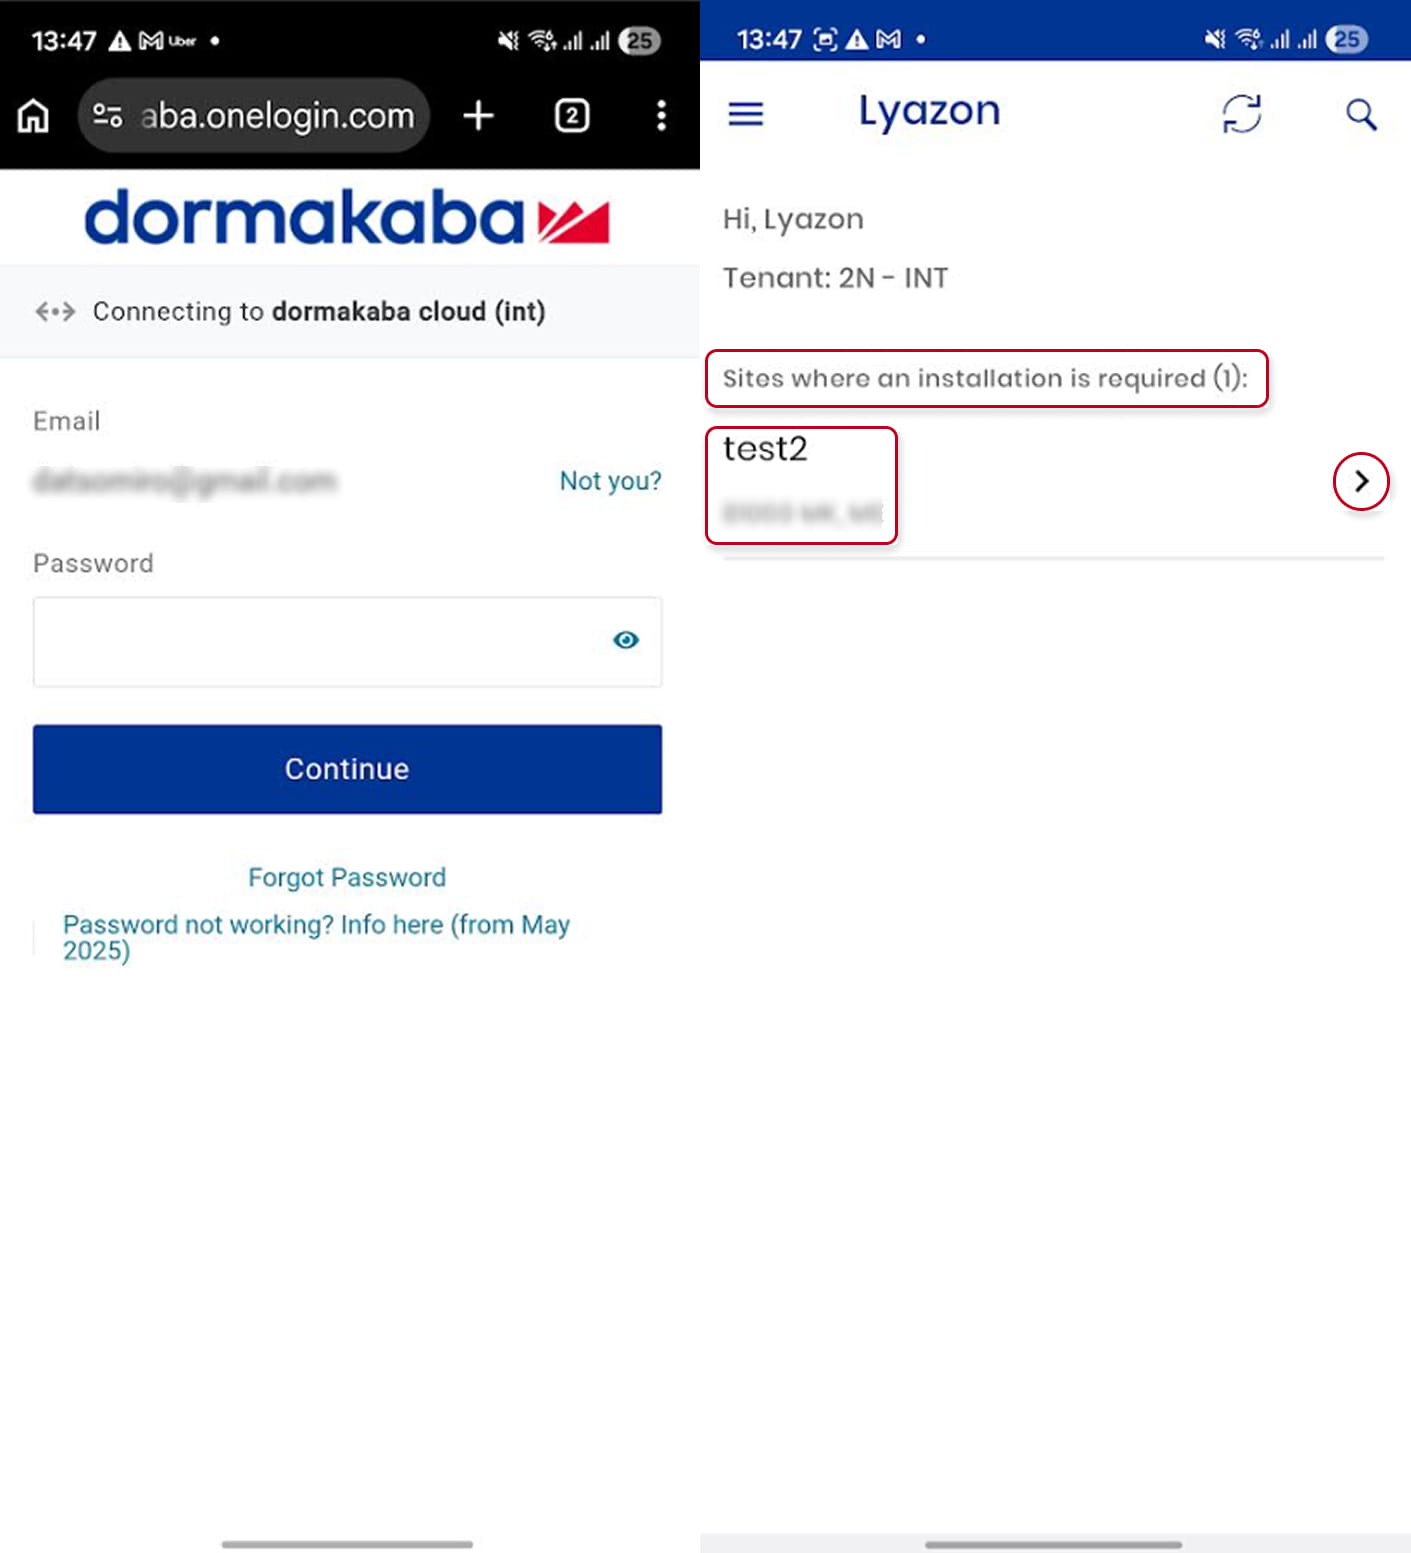
Next, he can open the App and login with the just created Username and Password. He will see the list of 2N sites where he is expected to pair devices. He will press on the Arrow in order to continue:
From now, the Installer might need to factory reset the lock :
- Remove one battery from the lock and wait at least 10 seconds
- Reinstall the battery
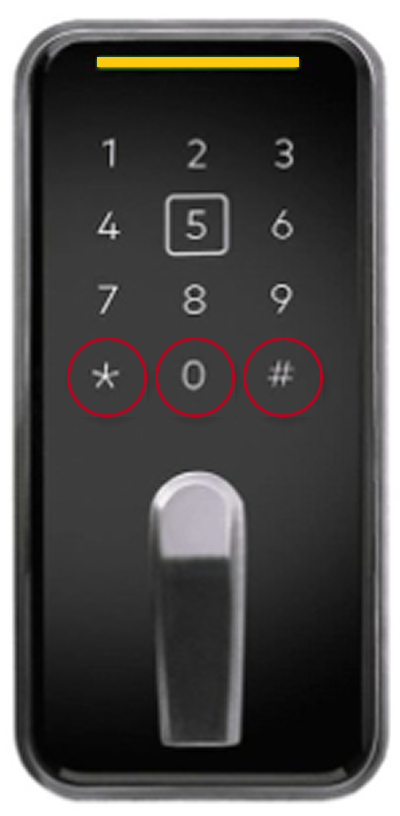
- As soon as you hear the clutch motor “whir” and see a blue LED, immediately perform the following: Long-press the white square on the front of the lock and enter the keypad command: * # 0 #
- The lock should flash a yellow LED, confirming the reset command was accepted
- Wait about 30–45 seconds for the lock to restart
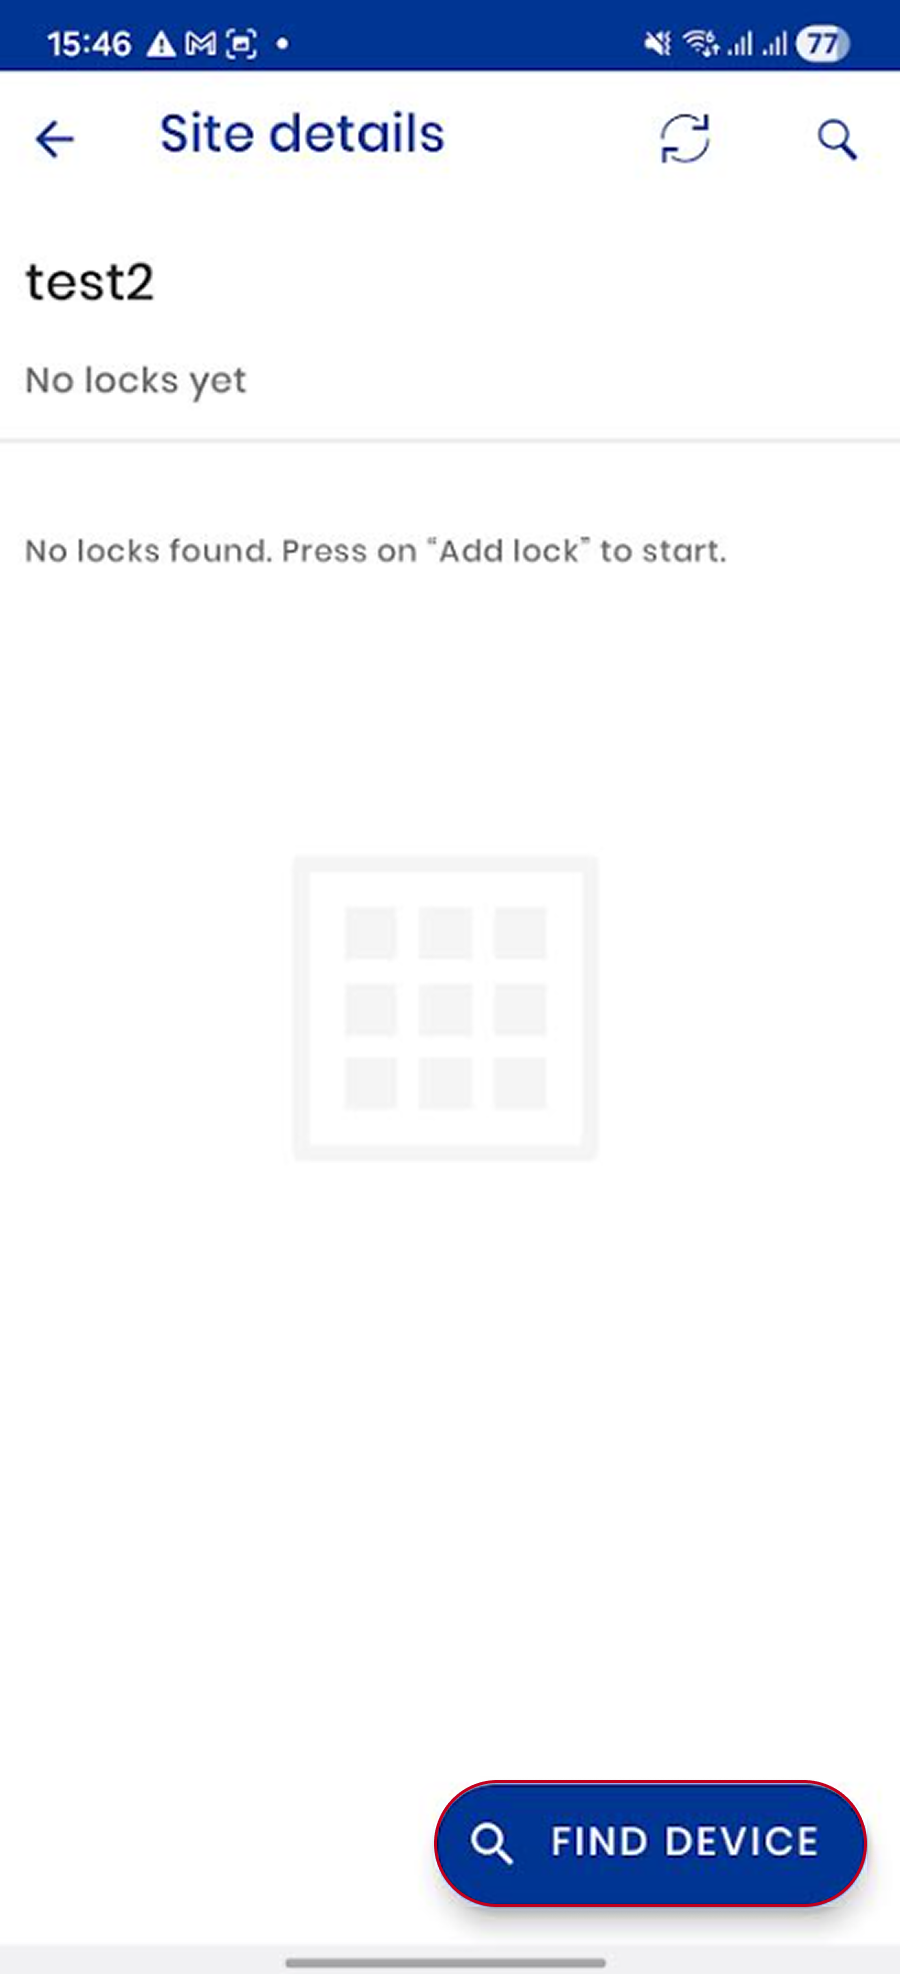
After that, on the Lyazon App, he has to click on Find device which are ready to pair:
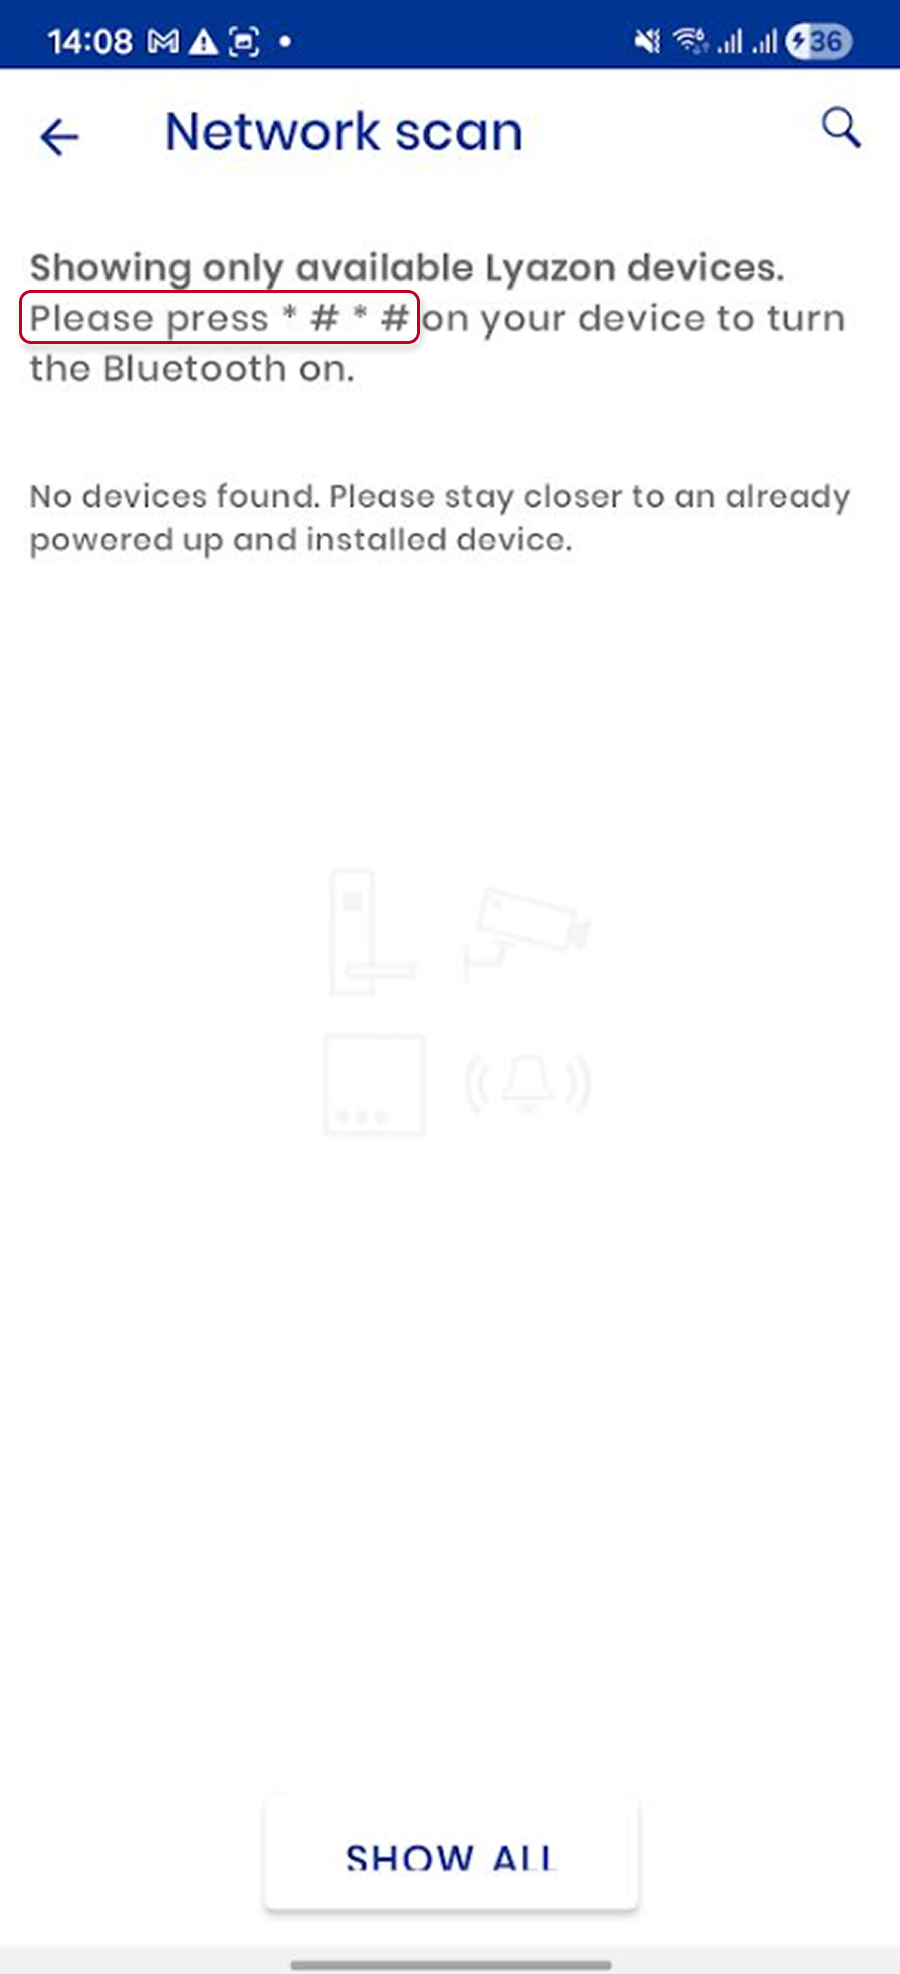
 Quickly, he should be able to see at least one device after he entered the code: * # * #
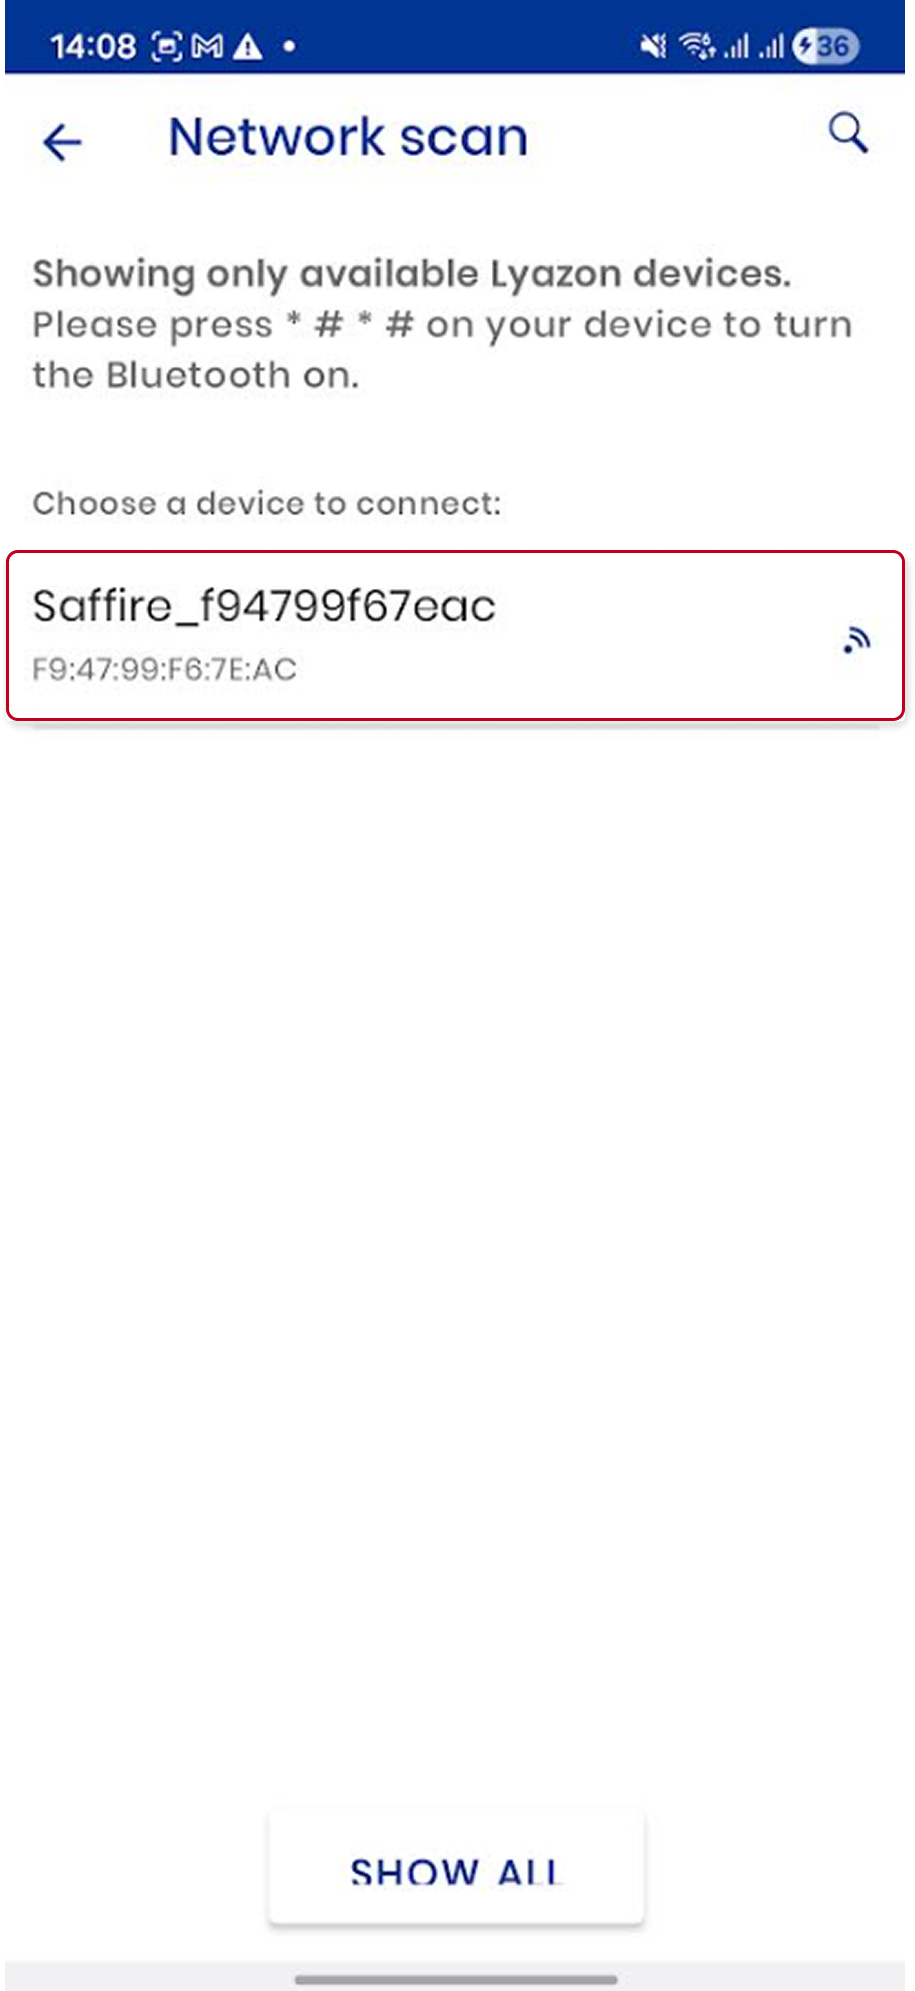
Afterward, he will press on the device name or model at this point and a serie of different screens will appear:
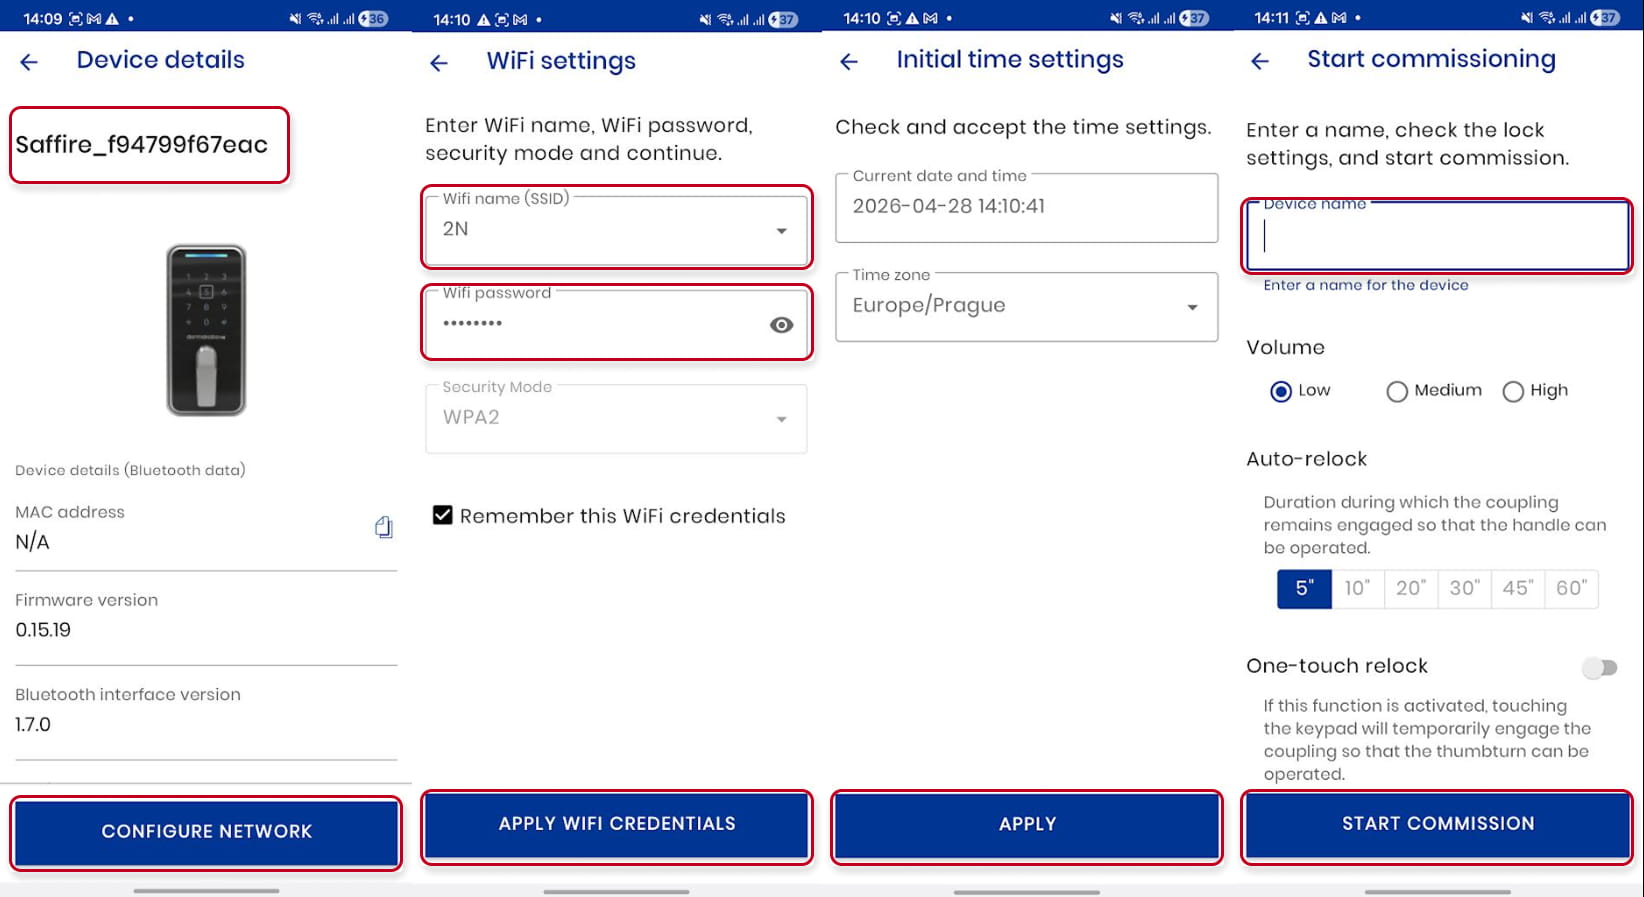
- And he will see the default device name and different details and press on Configure Network
- He will have to enter the wifi's name to be used and its Password, and press on Apply WIFI Credentials
- Check the time settings and press on Apply
- Choose a name for the device and press on Start Commission
We are supporting the Dormakaba Saffire EVO LZ Serie. the Saffire™ EVO LZ-M which is part of it, offers 2 locking modes, the Normal and the Toggle modes:
Normal Mode automatically secures the door behind you every time it closes, requiring an access credential to re-enter (for all locks). Toggle Mode allows the door to alternate between locked and unlocked states, letting users leave it freely open and locked only when manually secured:

The important thing, is now, to choose the appropriate mode to integrate to commission the lock. Two options are offered but it is important to choose ONLINE mode exclusively, the Offline mode not being supported:

Finally, we will have the confirmation that on the site Test2, 1 lock has been commissionned, and that its name is Test Office. You can also search for another lock to commission (As rthe name chosen will be the same that the one showing in the App, it is recommended to :
 Now, the device is visible on the My2N site and you can see and modify some details:
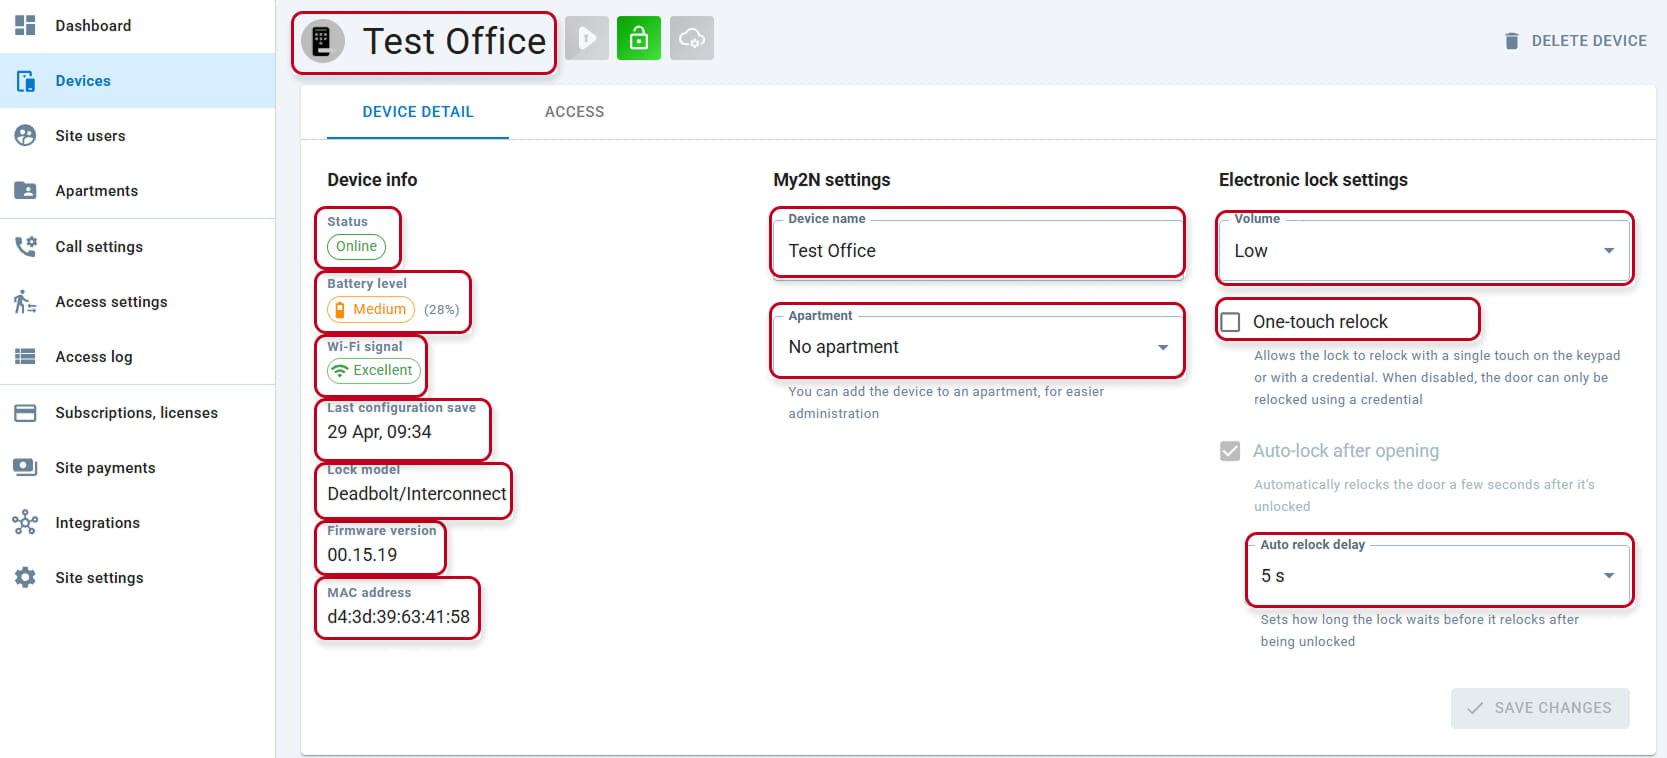
You can see:
- Status ONLINE/OFFLINE
- Battery Level
- Wi-Fi signal Strength
- Last configuration date
- Lock Model
- Firmware version
- MAC address
To modify if needed:
- Device Name (The Device's name will be the one which will be visible on the App, therefore, it should be as clear as possible in order to avoid any confusion. It might be worth naming it accordingly with the Apartment it is tied with)
- Apartment where it belongs, by default no appartment
- Volume of the sound emitted by the lock while used
- One touch relock which will, if activated allows the lock to relock with a single touch on the keypad
- The auto relock delay (5s by default)
Provide access to dedicated users:
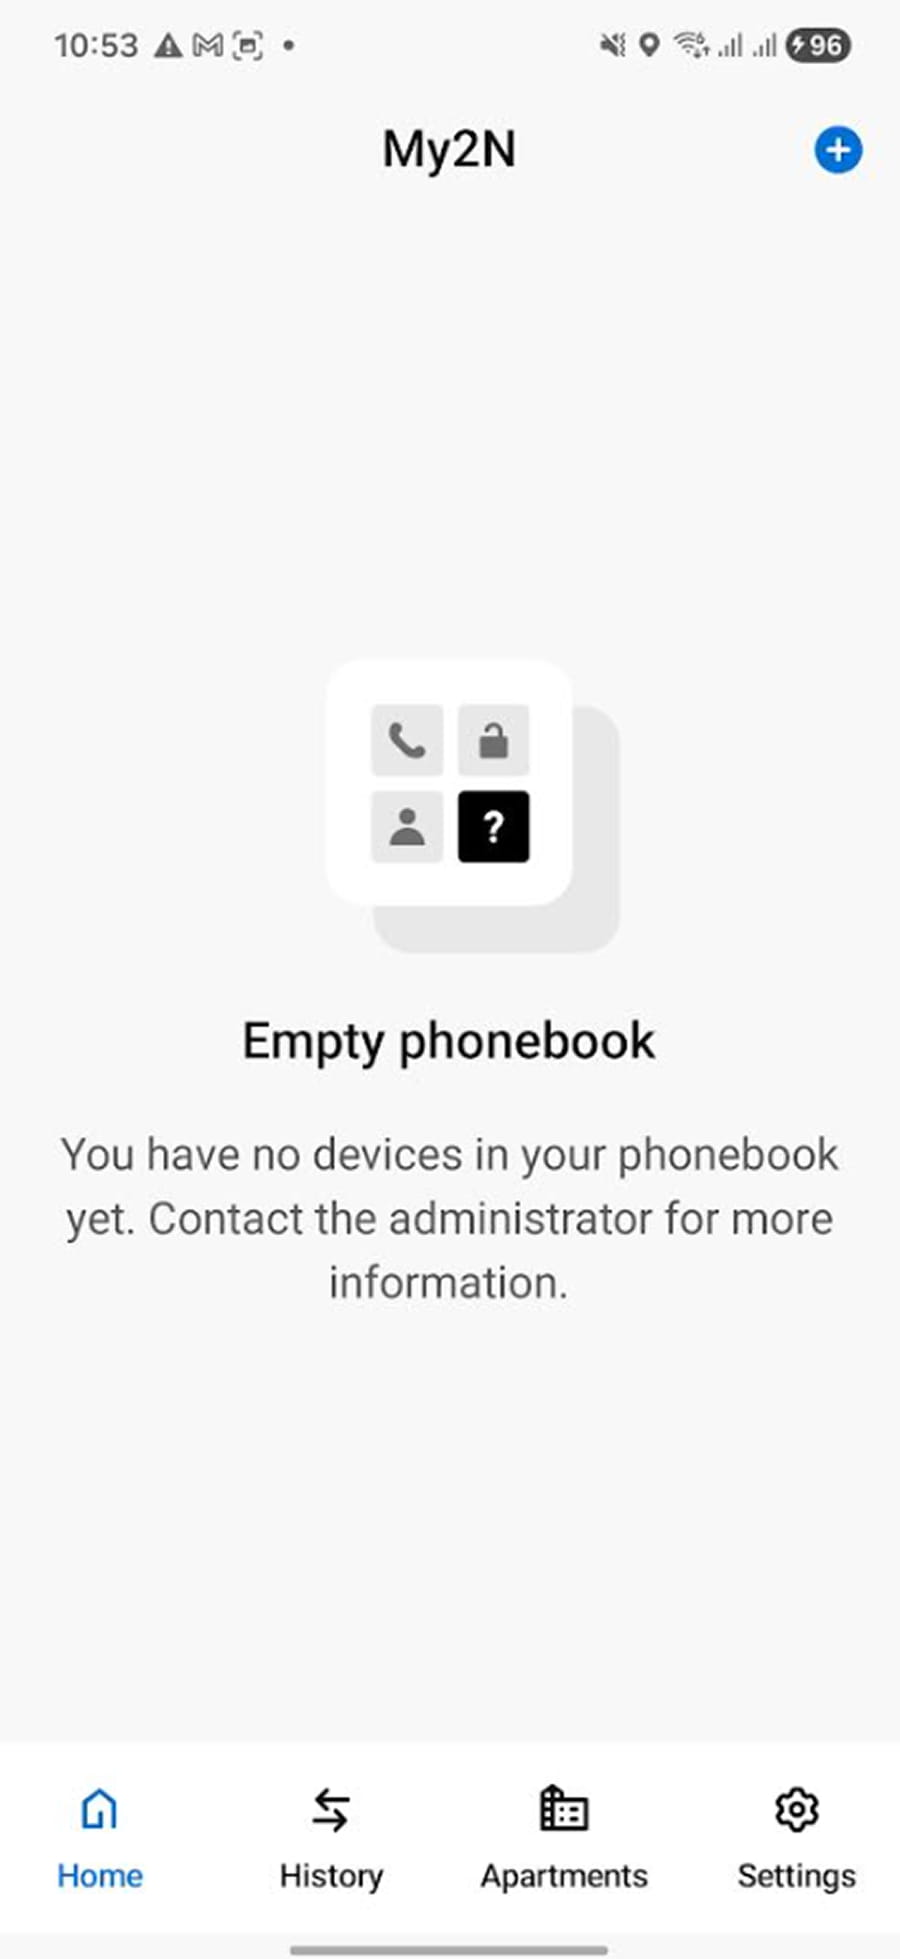
Now, you have integrated the Dormakaba lock to your My2N site. But it is still not visible for any user, and they cannot use it from their My2N App:
To make it visible, you will have to set the Access Group as per our other Access Units. As the user needs to be able to access the device under the calling section, the site requires an active Mobile Video subscription for his mobile or his apartment. Again, in order to avoid any confusion, it is worth setting the Access group with the full Apartment and not just with a single user)
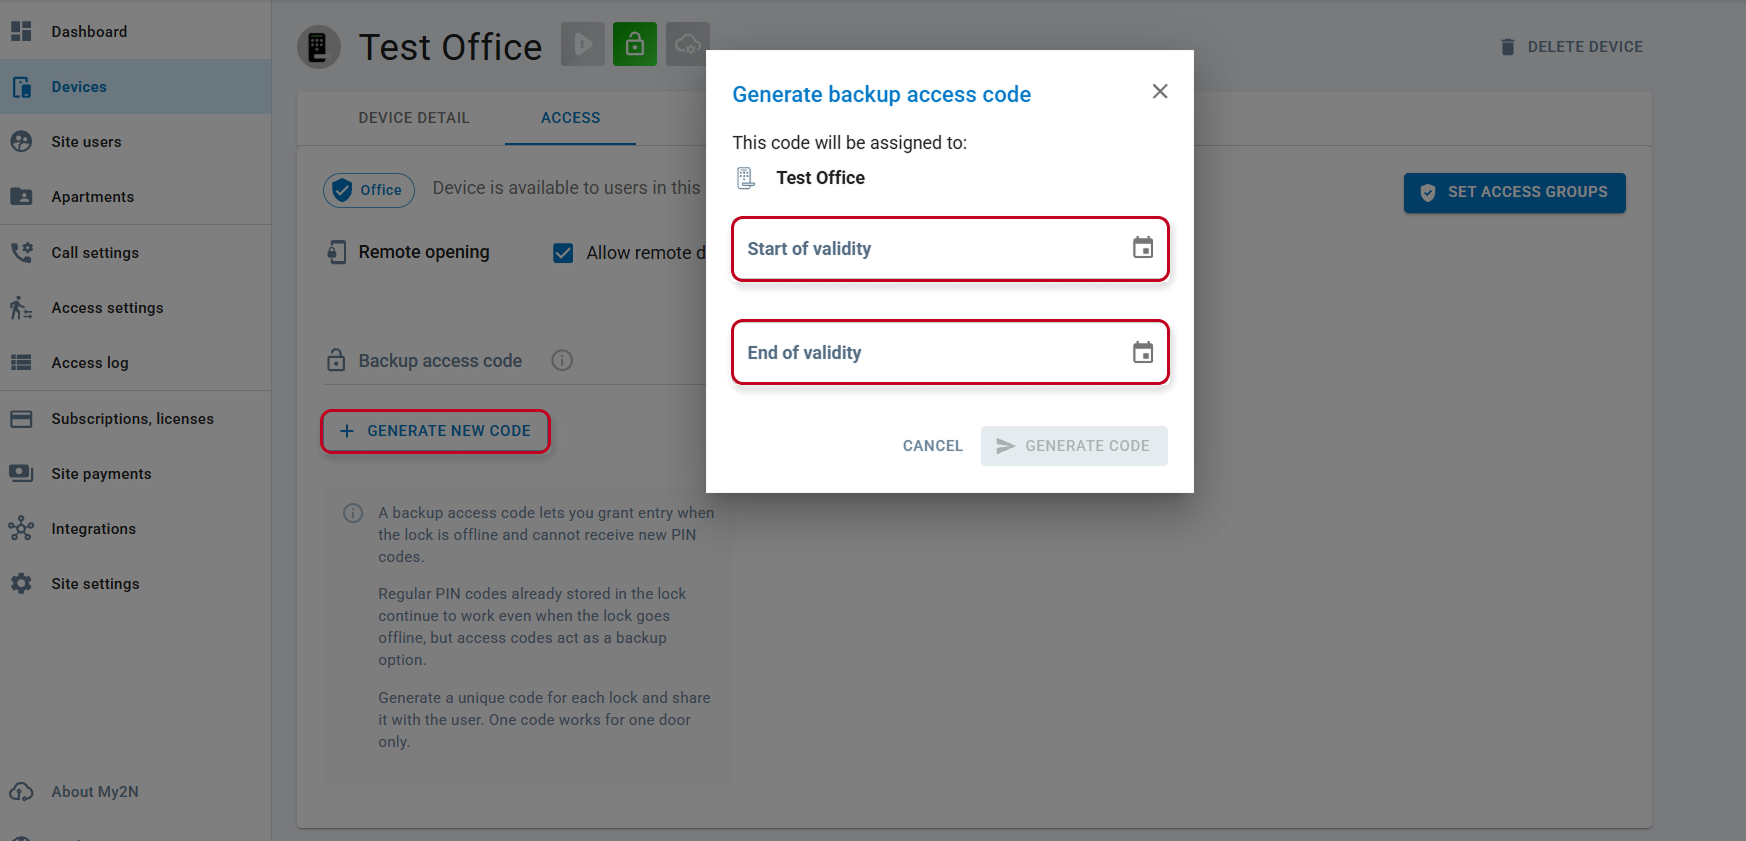
Additionaly, in My2N platform from the Access Section, there is the possibility to generate a PIN code which will authorize to grant access to additional user(s) despite the device gets offline and will not be able to communicate wih the cloud. For that it is just needed to Generate it and set a validity time. Once set, the PIN code cannot be changed or deleted until the validity time is expired. this is why, it is recommended to set the validity period as short as possible. Everybody using this code will get access through the door: