There are two modes of the SIP registration of the 2N Indoor Touch unit to the My2N portal:
-
Local - this mode is free of charge and allows you to use the 2N Indoor Touch in your local network. The reason why you can choose this mode is to make the configuration of the intercom easier so it is not necessary for you to disable the automatic configuration and you can just simply add the 2N Indoor Touch in your local mode and the intercom will be configured automatically. In this mode the 2N Indoor Touch has to be placed in the same LAN as the intercom.
-
Cloud - this mode allows you to make the calls from the 2N Indoor Touch to the 2N Mobile Video application and vice versa. You can use this mode in the situations where the unit is placed in a different LAN than the intercom.
1. Local mode
-
You can add the 2N Indoor Touch by clicking on the Devices button and then the ADD DEVICE button. Then choose 2N Device option.
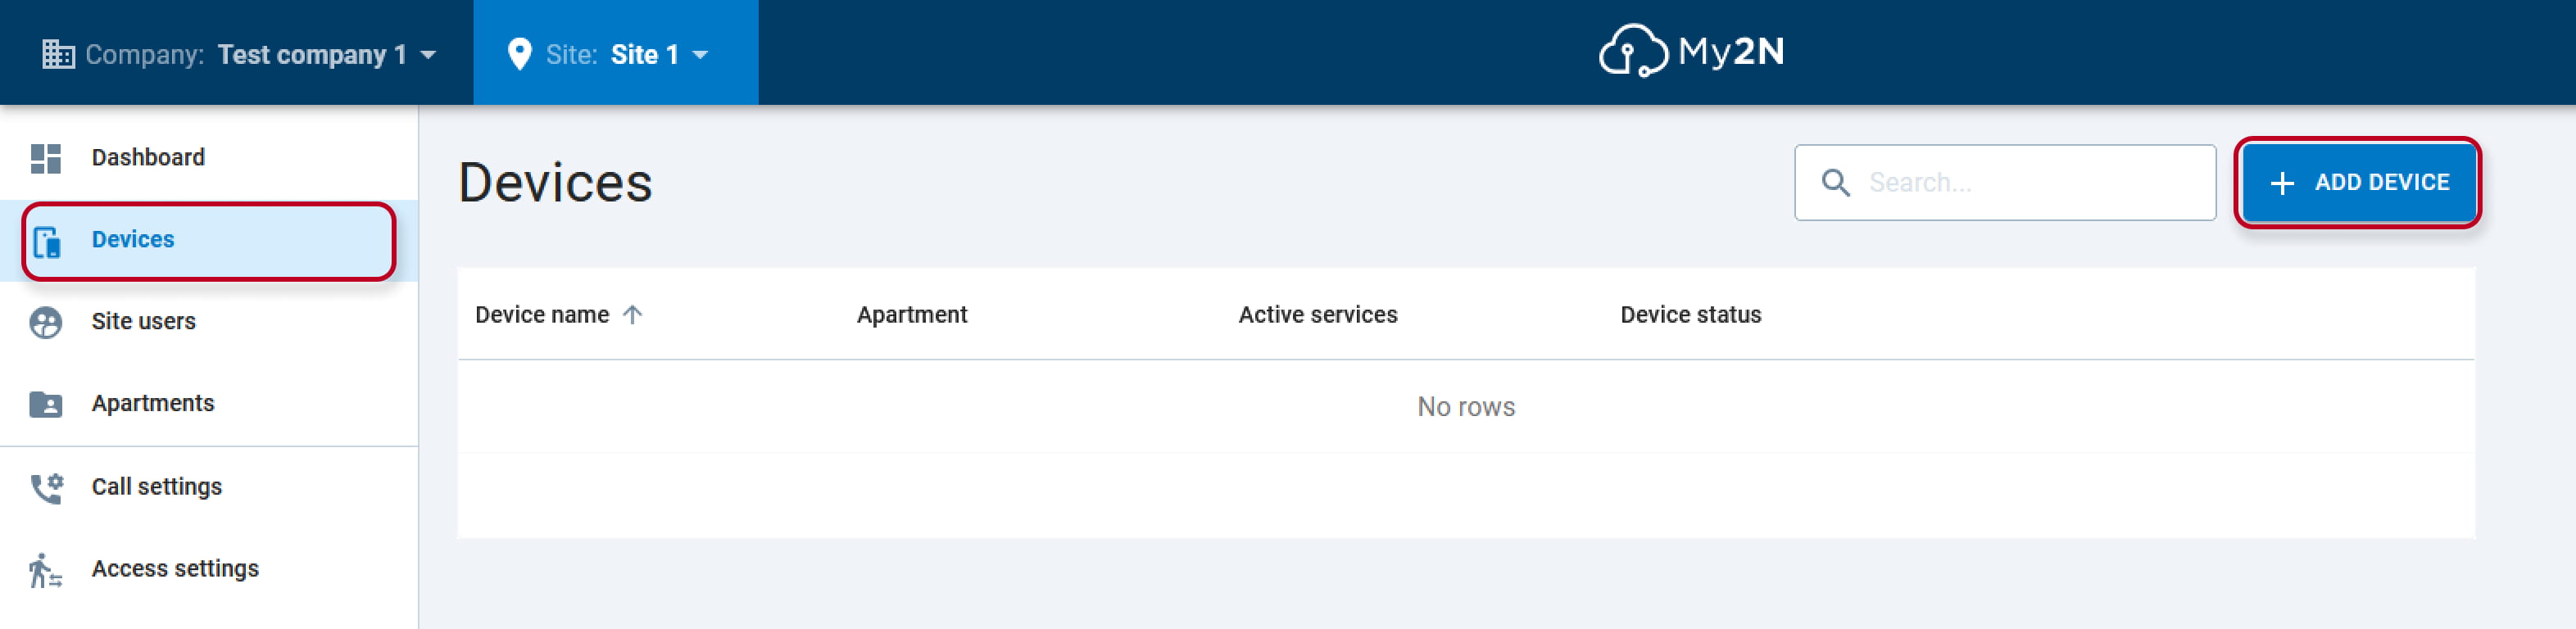
Figure 1: add new device
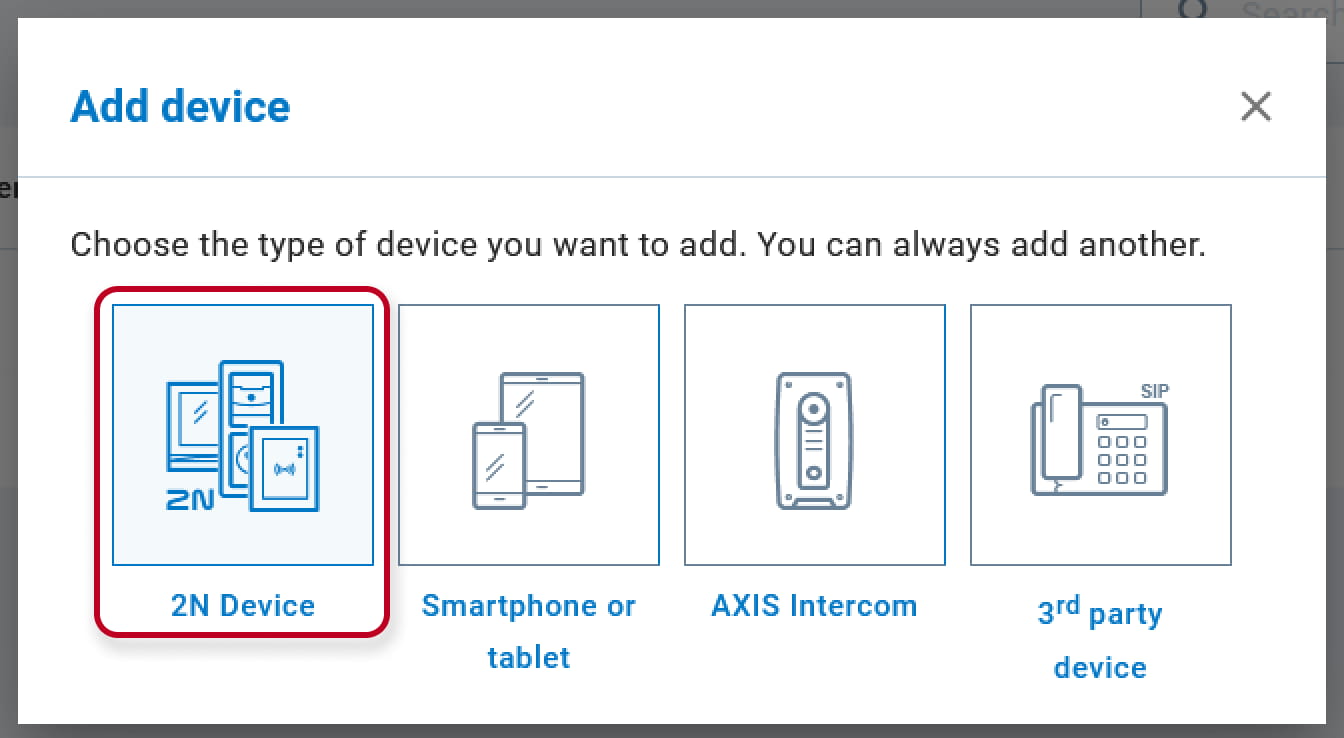
Figure 2: choose 2N device
-
In the next step you will be asked for putting of the serial number of the device and then you will name it.
Finally you will confirm it by clicking on Next below right. Indoor Touch devices do not have security code.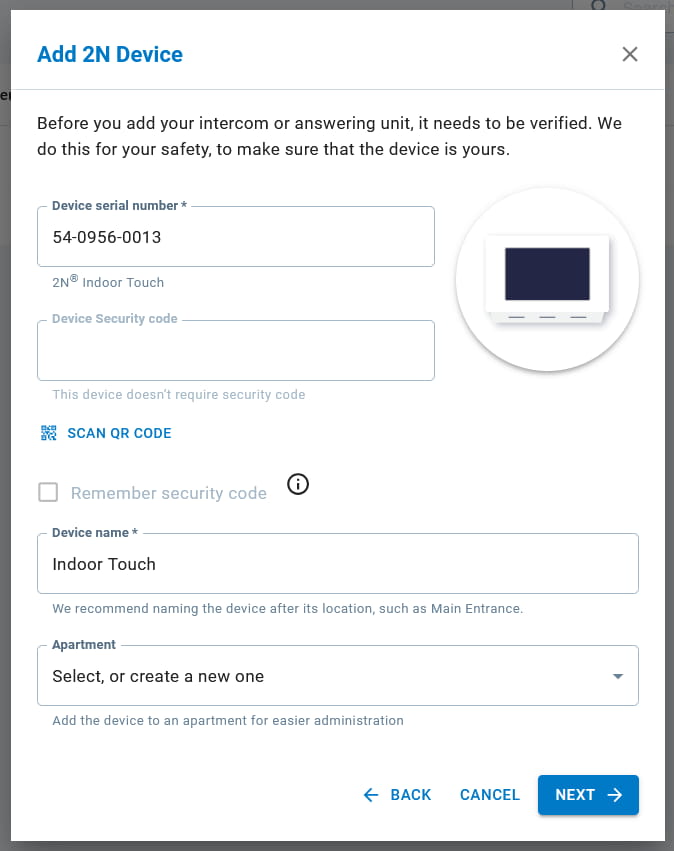
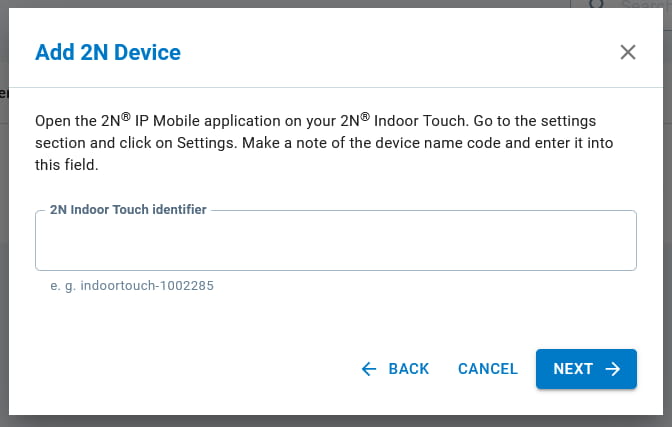
Figure 3: add device serial number and 2N Indoor Touch identifier
Name the device - this is a name which will be shown in your My2N account (in this example the name of the device is Entry Hall)
2N Indoor Touch identifier - this is the device name of the 2N Indoor Touch - see the picture below for the location of the Identifier (in this example the identifier is 2NIndoorTouch-540956
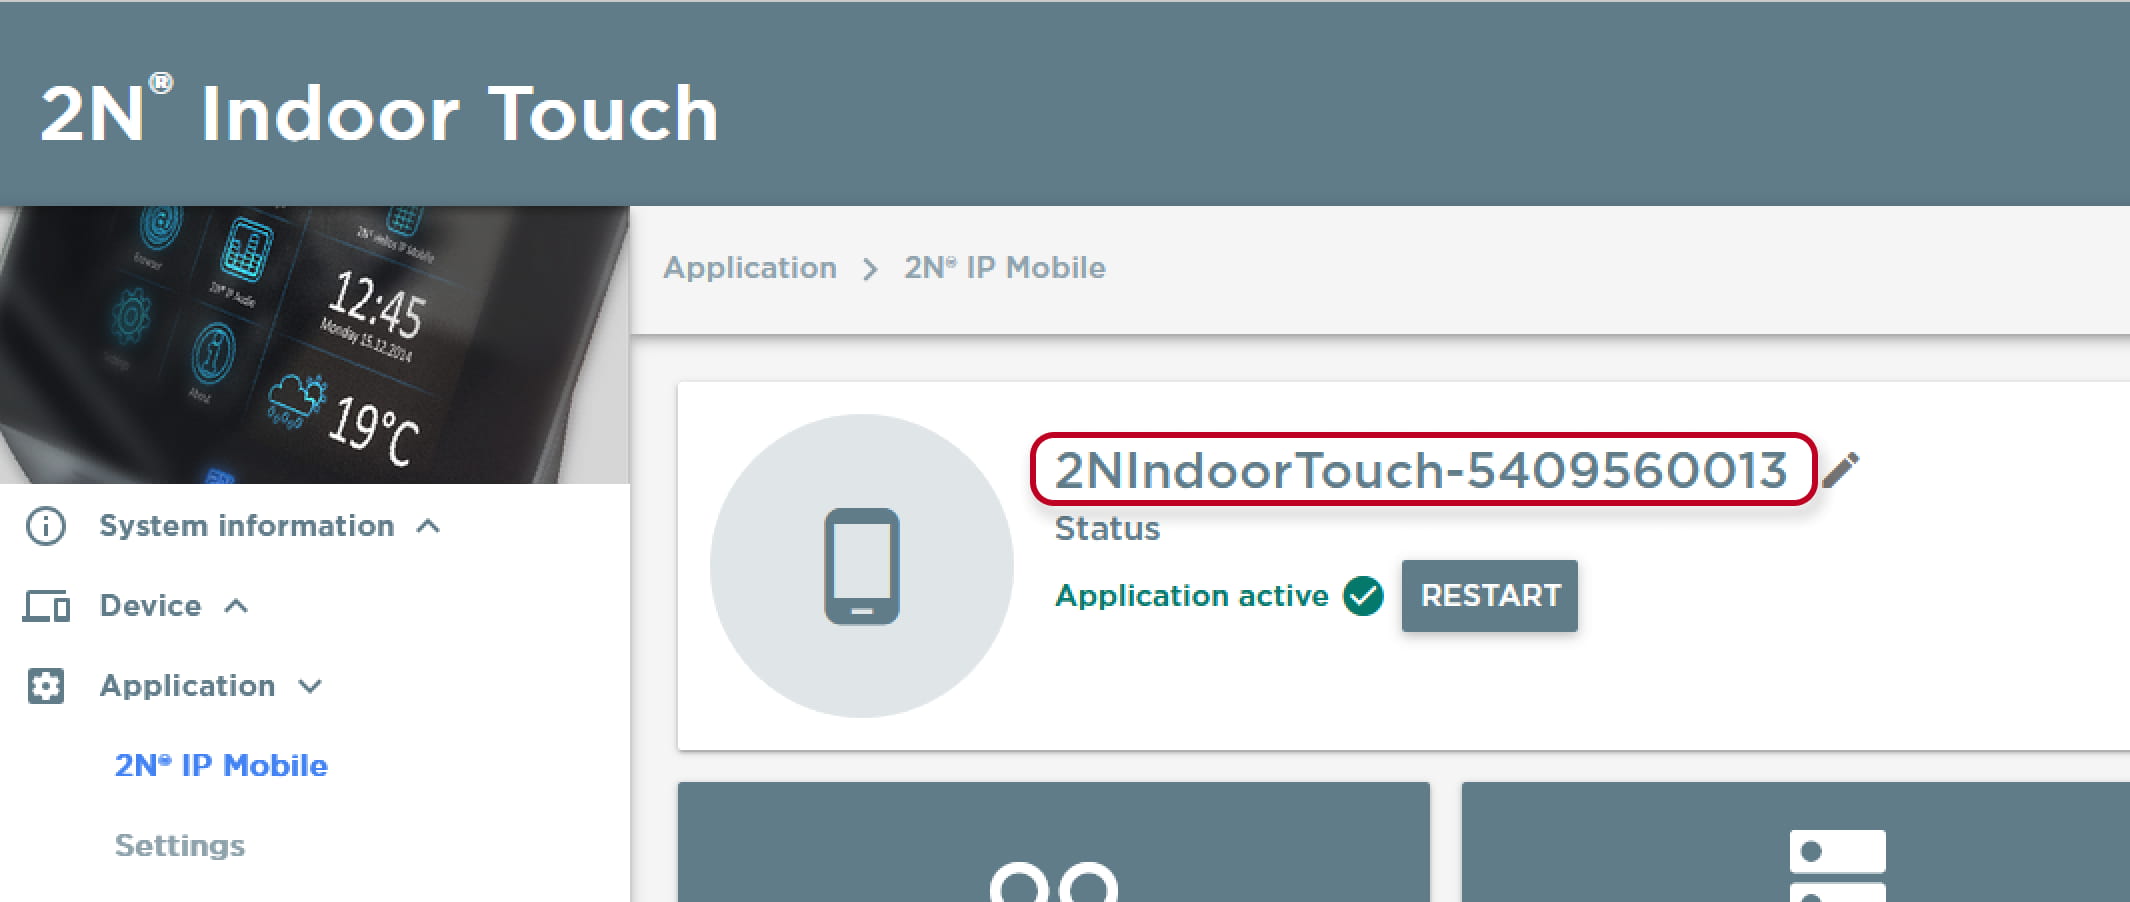
Figure 4: 2N Indoor Touch identifier
2. Cloud mode
In My2N press button Devices in order to see your devices. Find your 2N Indoor Touch you wish to manually register to My2N.
Press Details button (right arrow icon) to edit details of your 2N Indoor Touch unit.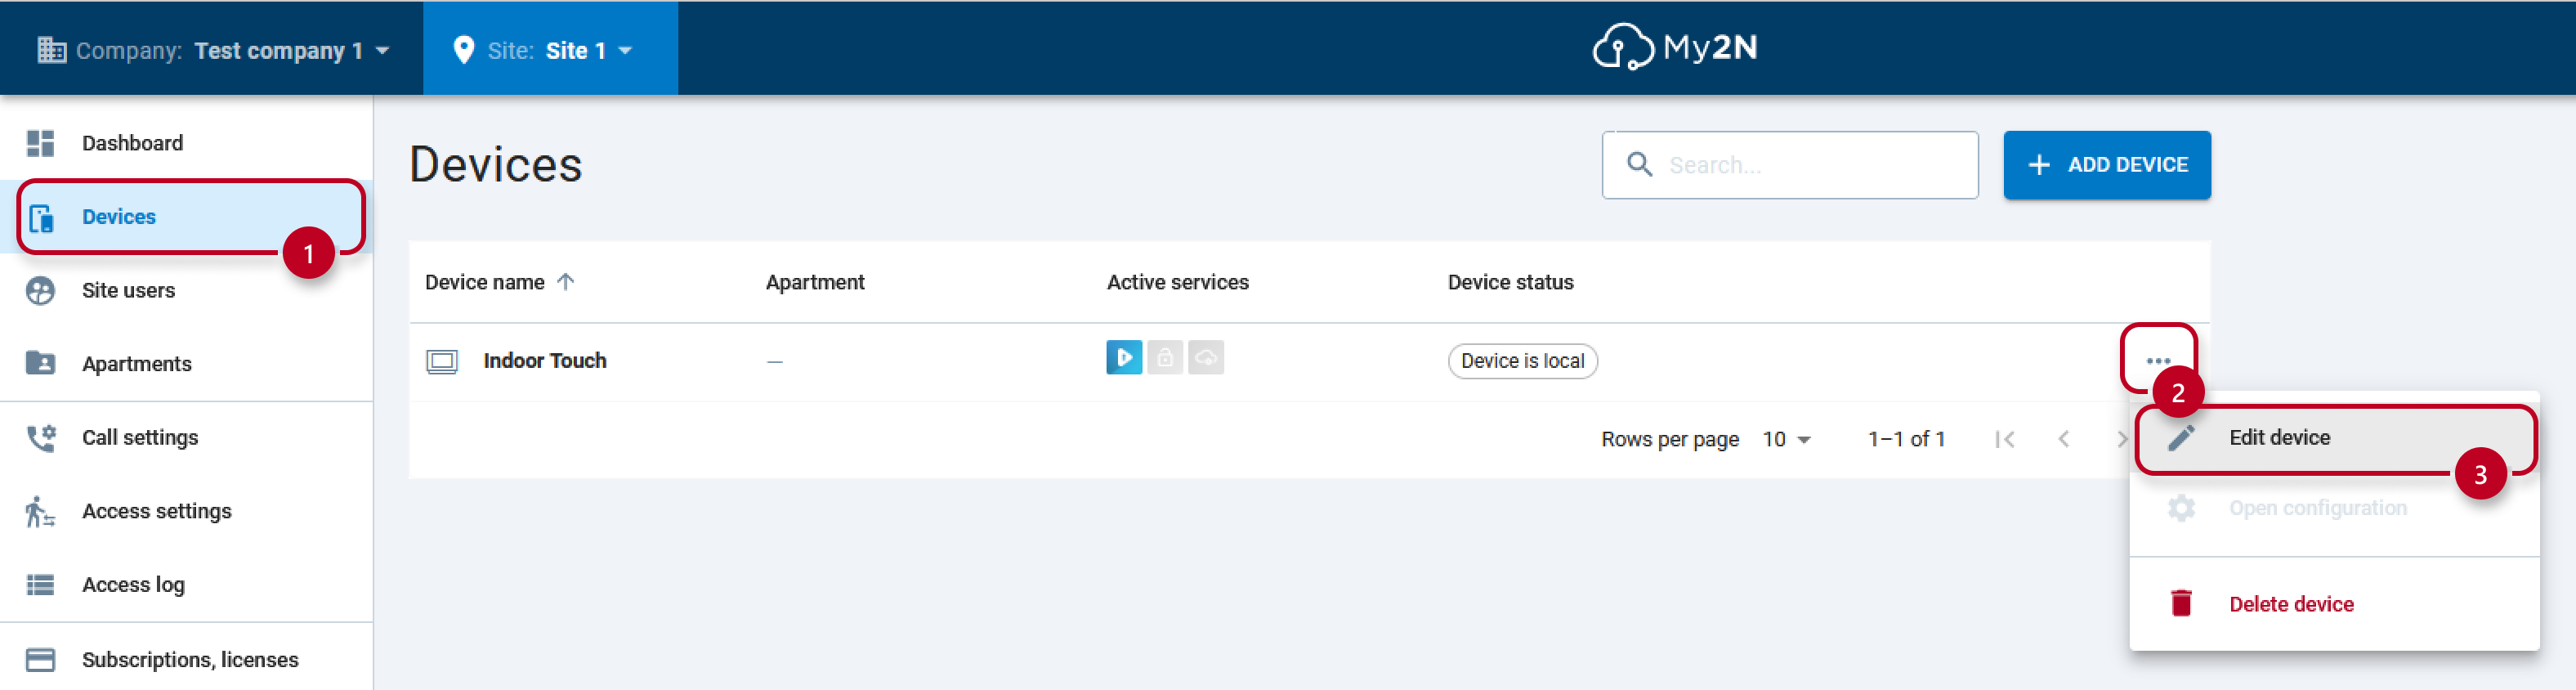
Figure 5: Cloud registration
In device details, switch Connection mode to Cloud by clicking on it.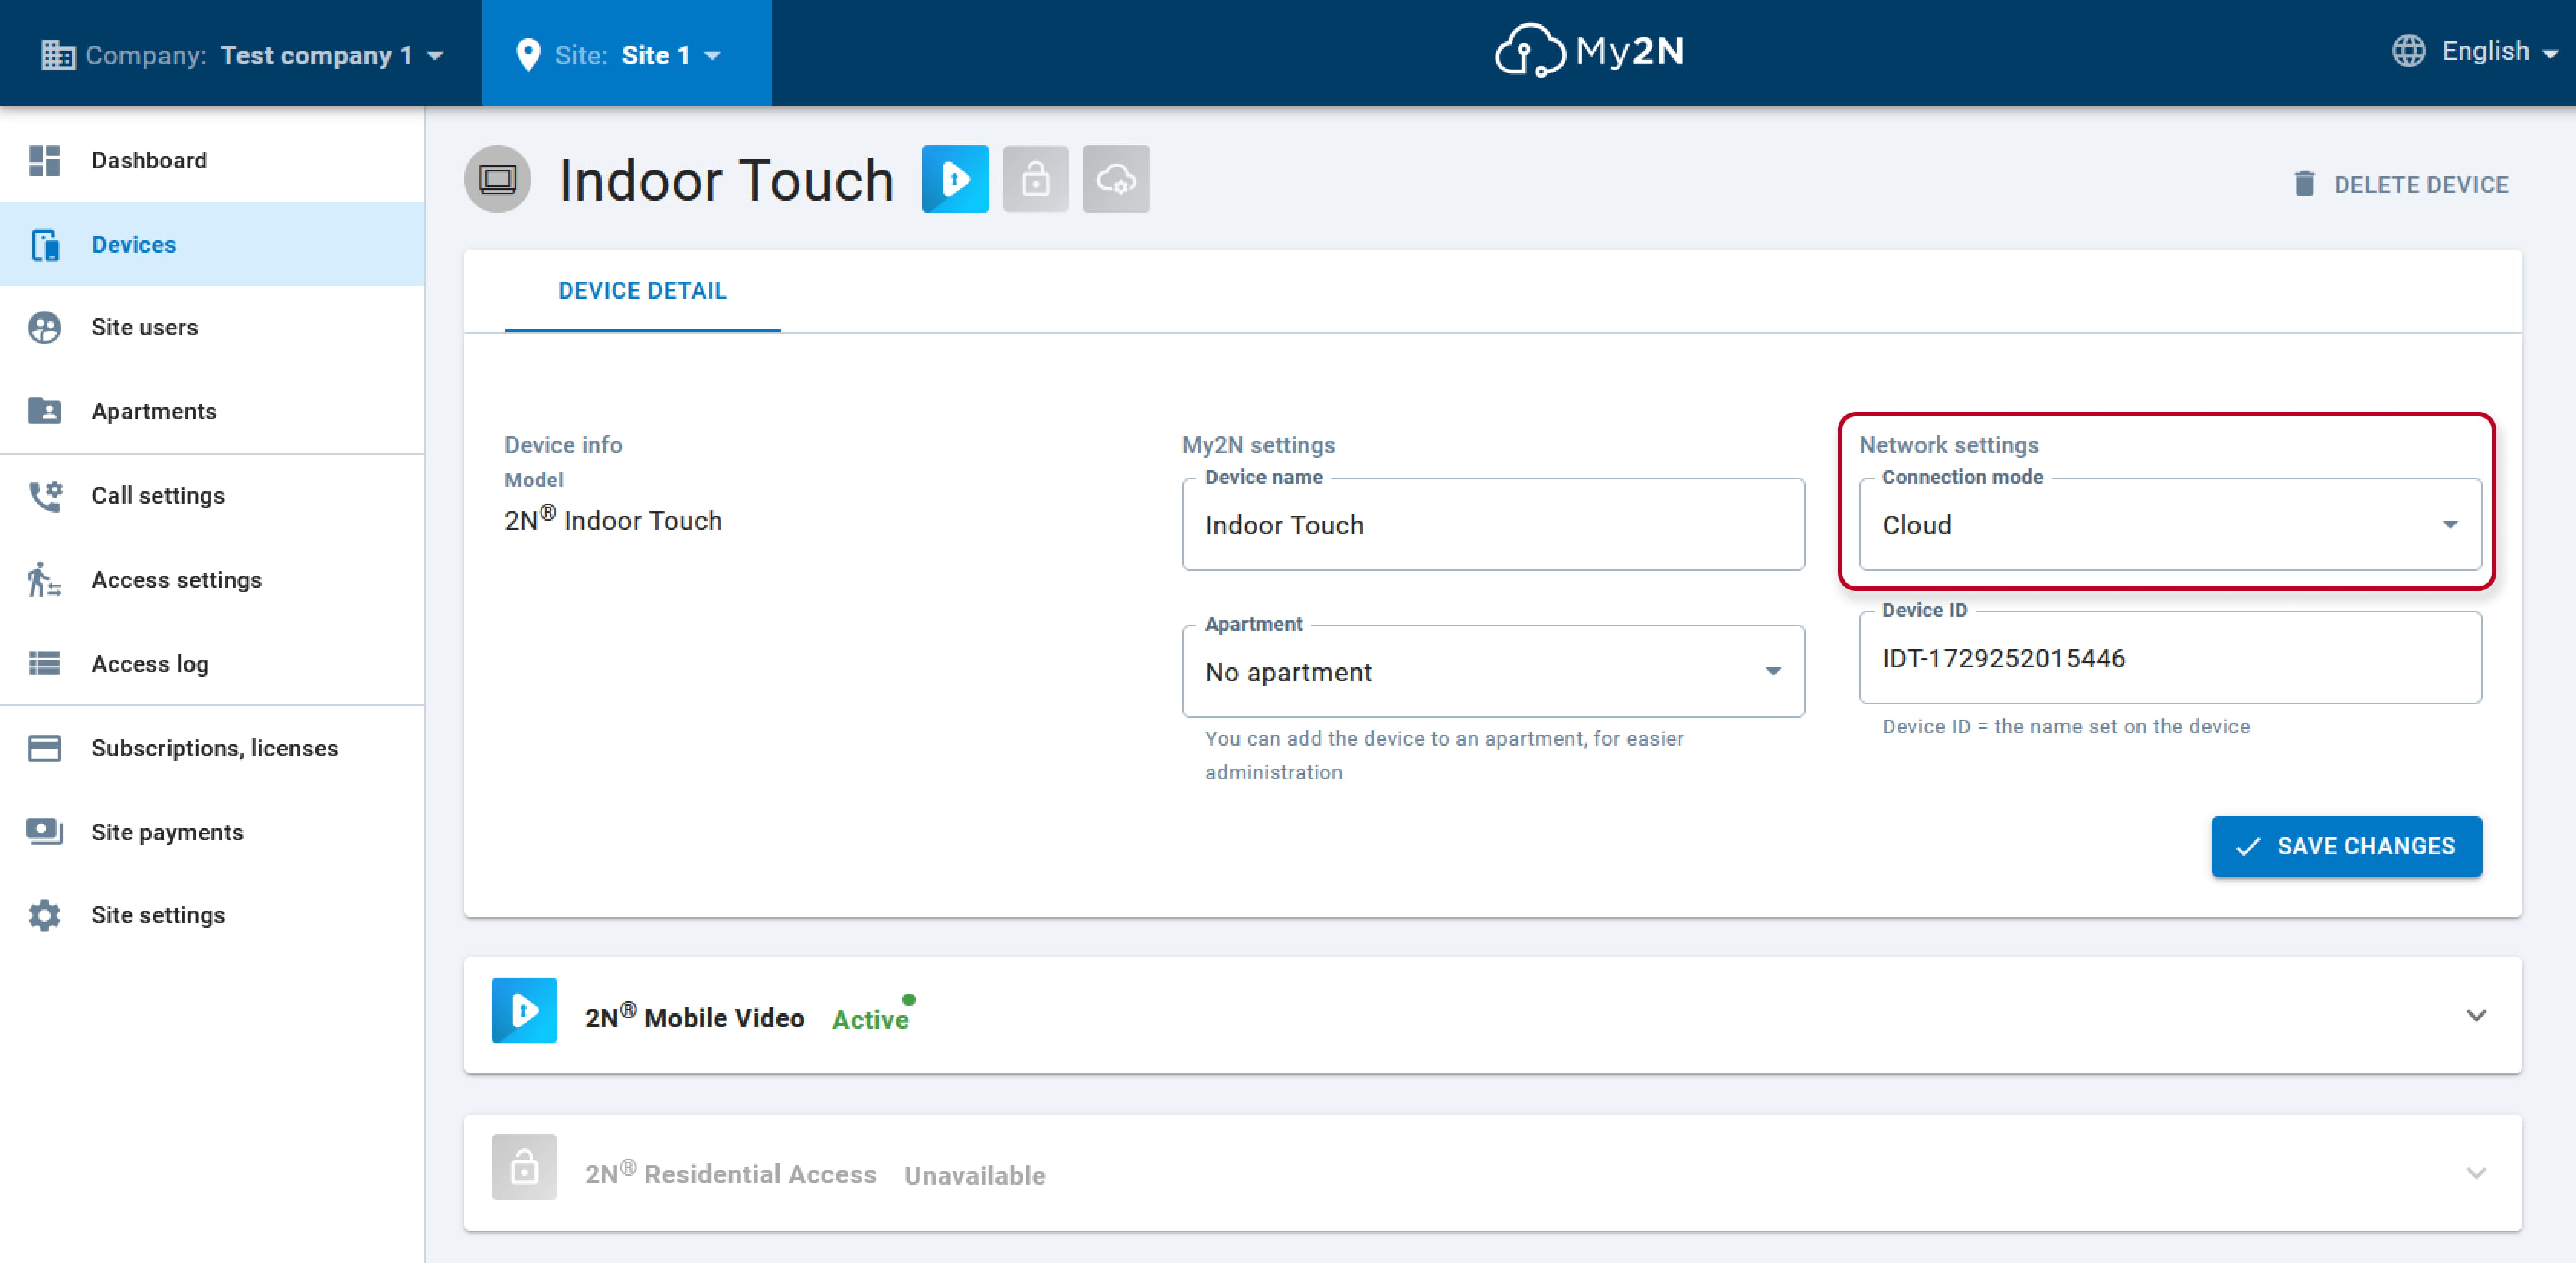
Figure 6: Cloud registration
The SIP registration details can be obtained in the 2N Indoor Touch device detail setting in your account (refer to Figure 4). In device detail, click on the arrow on the right to the "2N Mobile Video" section and then you will see the SIP Proxy credentials.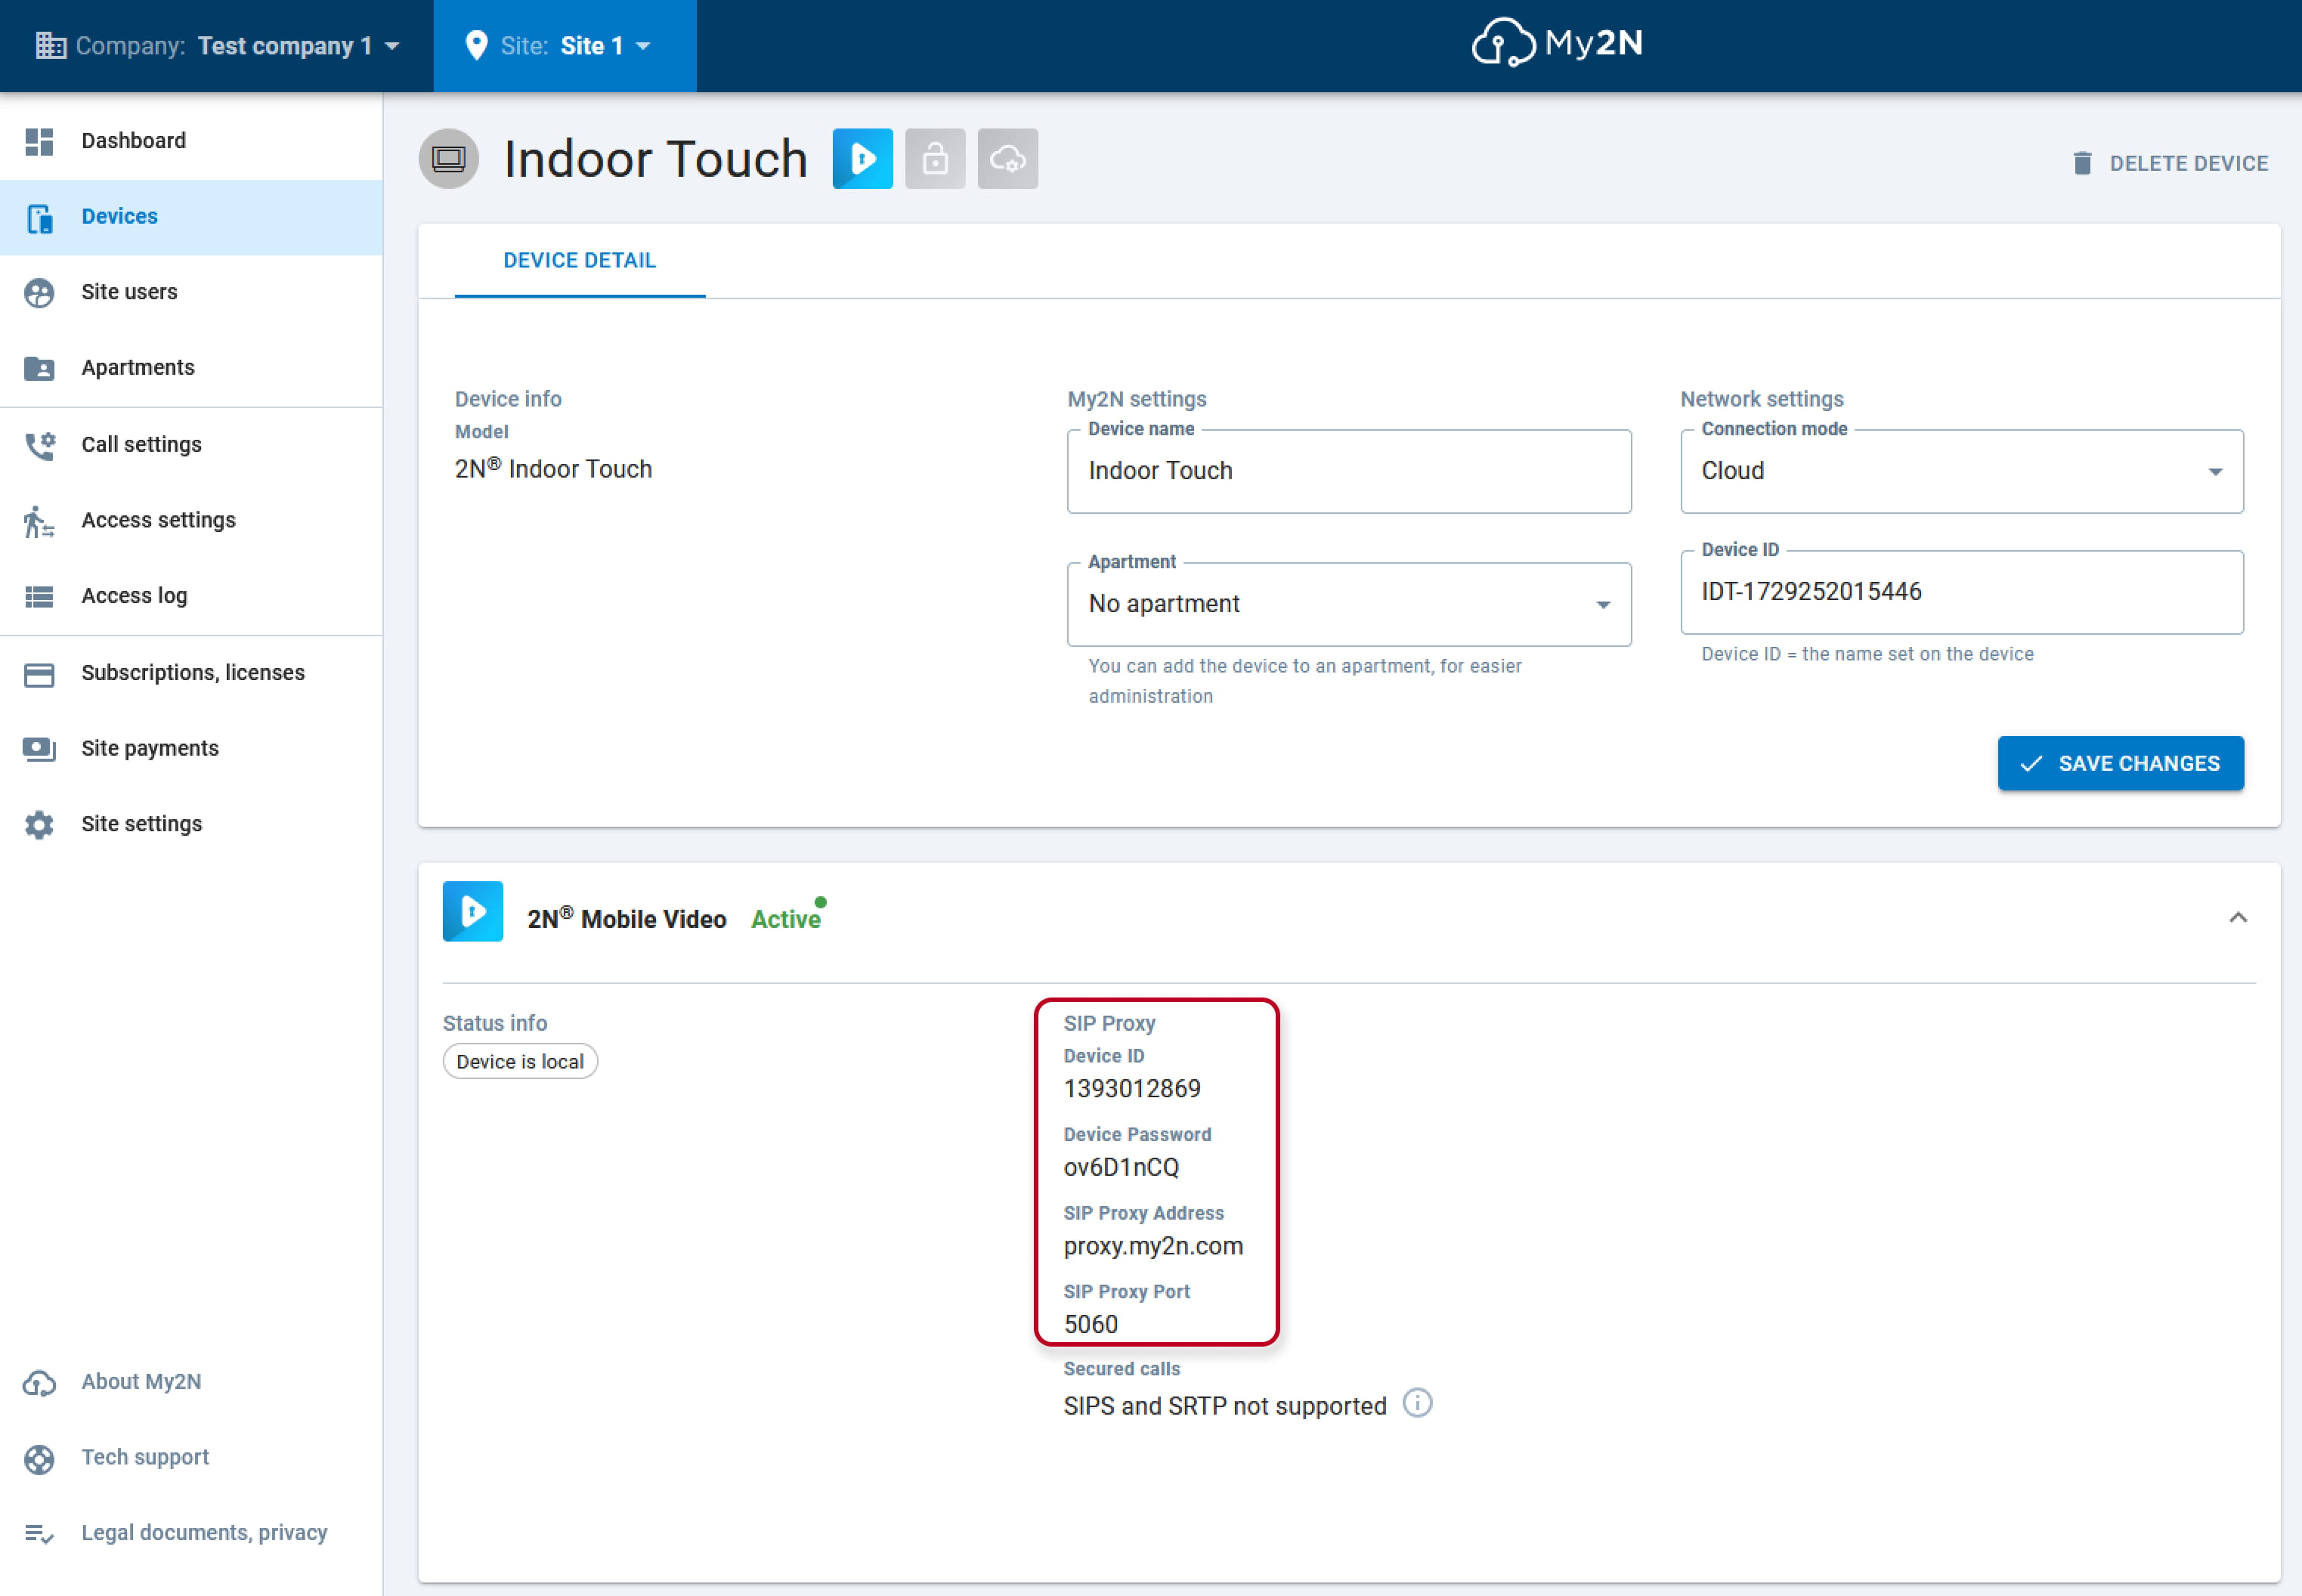
Figure 7: SIP proxy details
Now, you need to enter the SIP details to the 2N Indoor Touch unit, either locally or over its web configuration interface. Locally - tap on the 2N IP Mobile icon.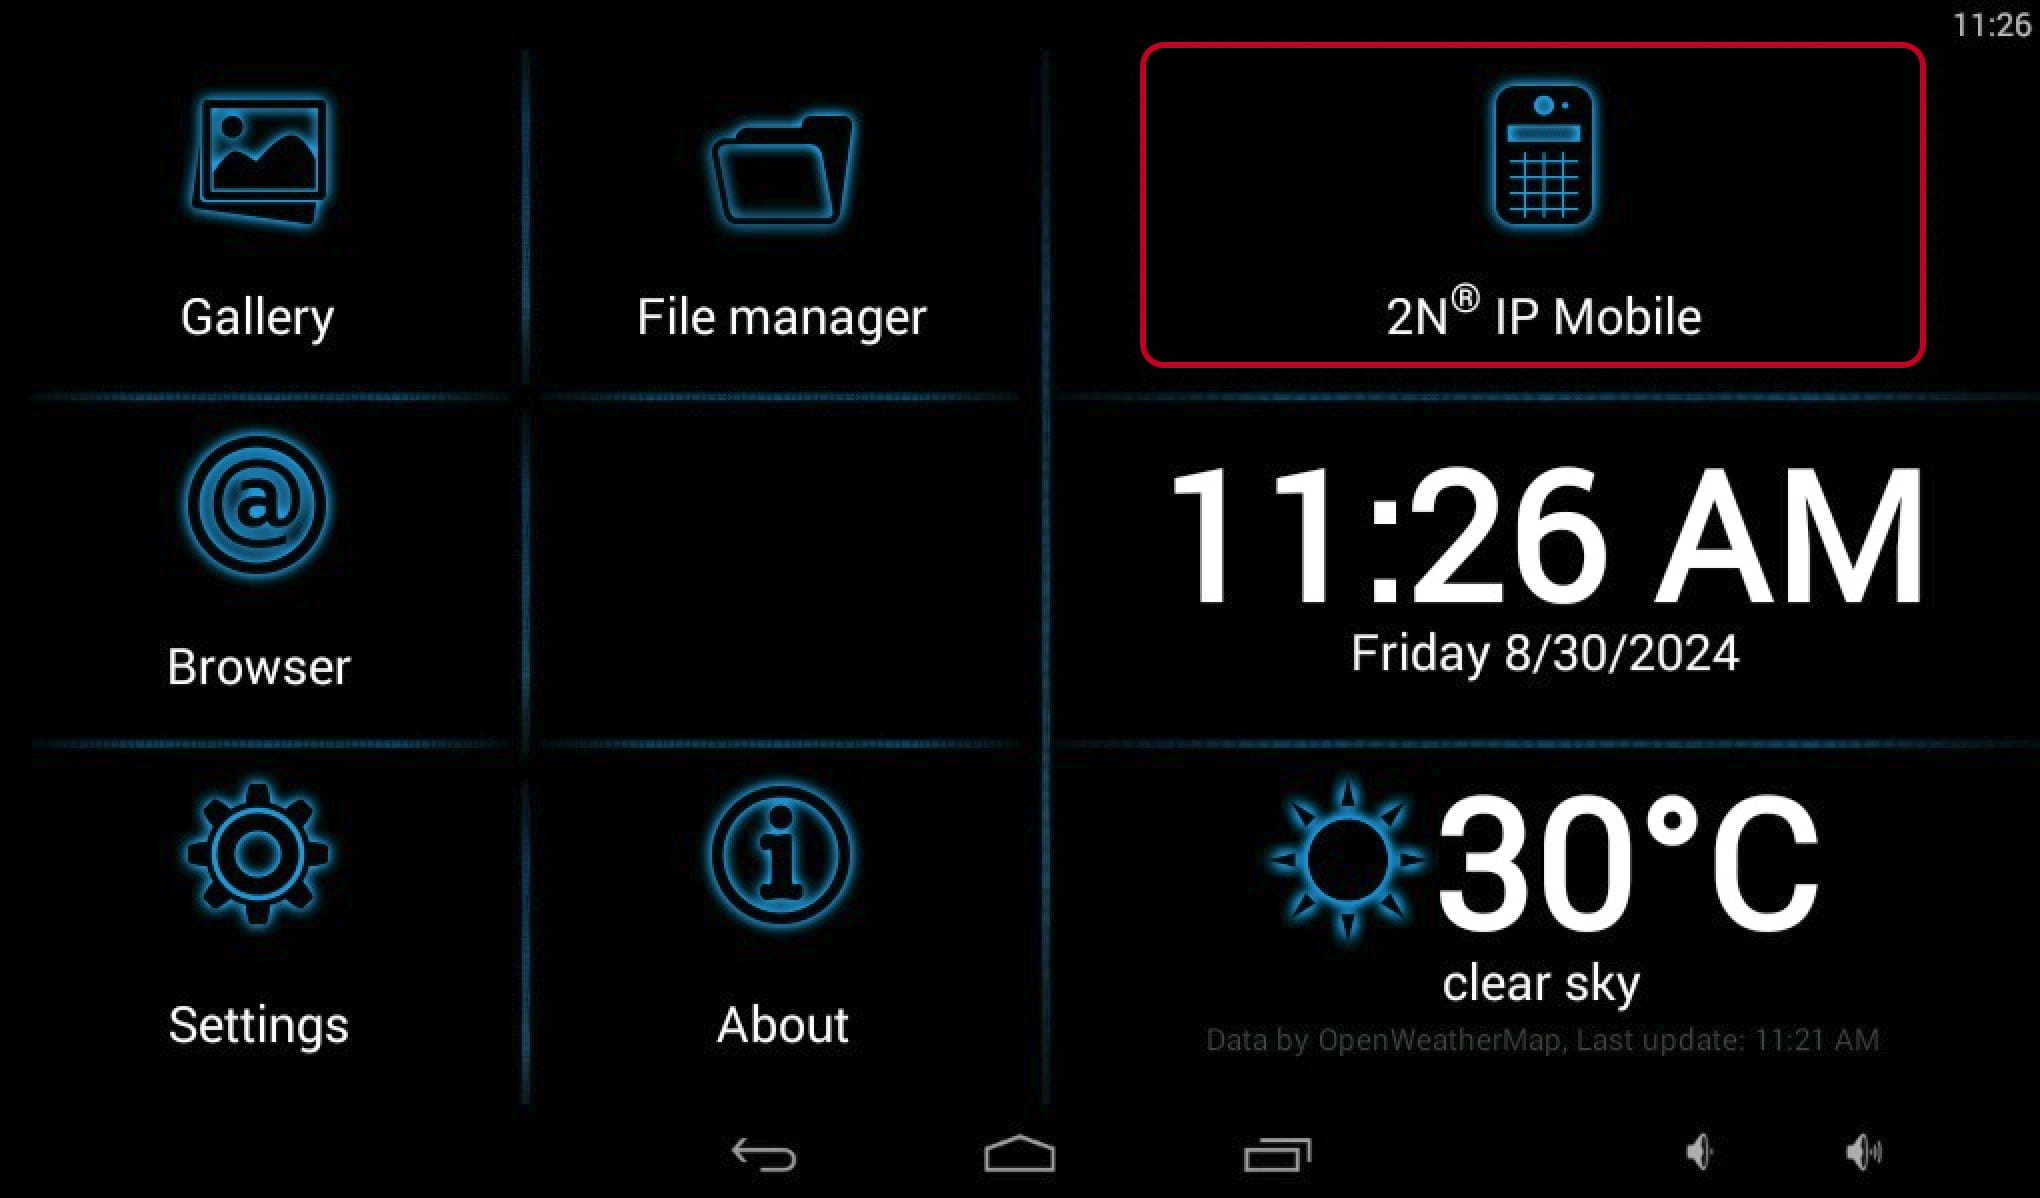
Figure 8: 2N Indoor Touch cloud registration
In app please tap on My2N Mobile Video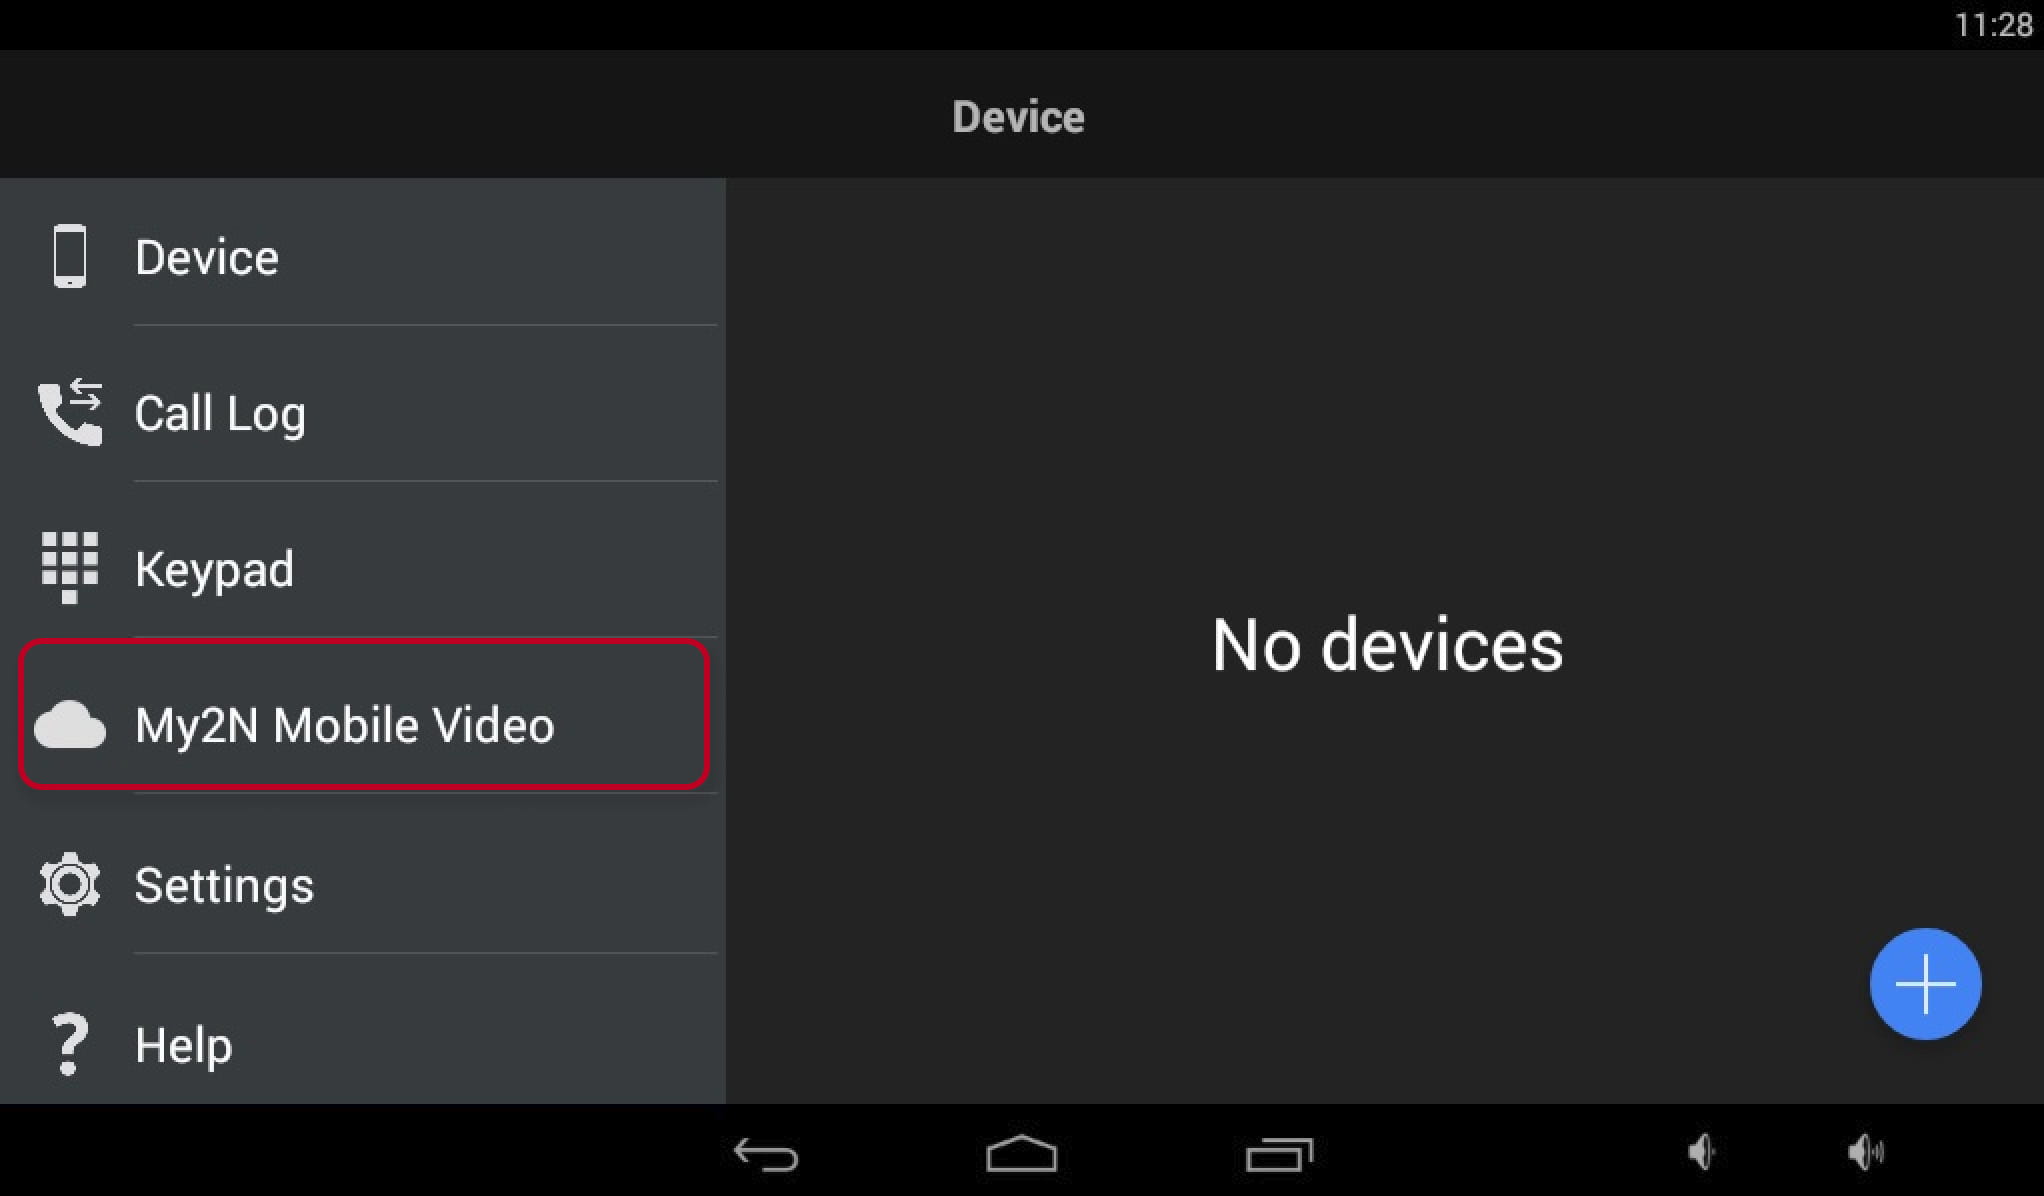
Figure 9: 2N Indoor Touch cloud registration
On next screen activate My2N Mobile Video
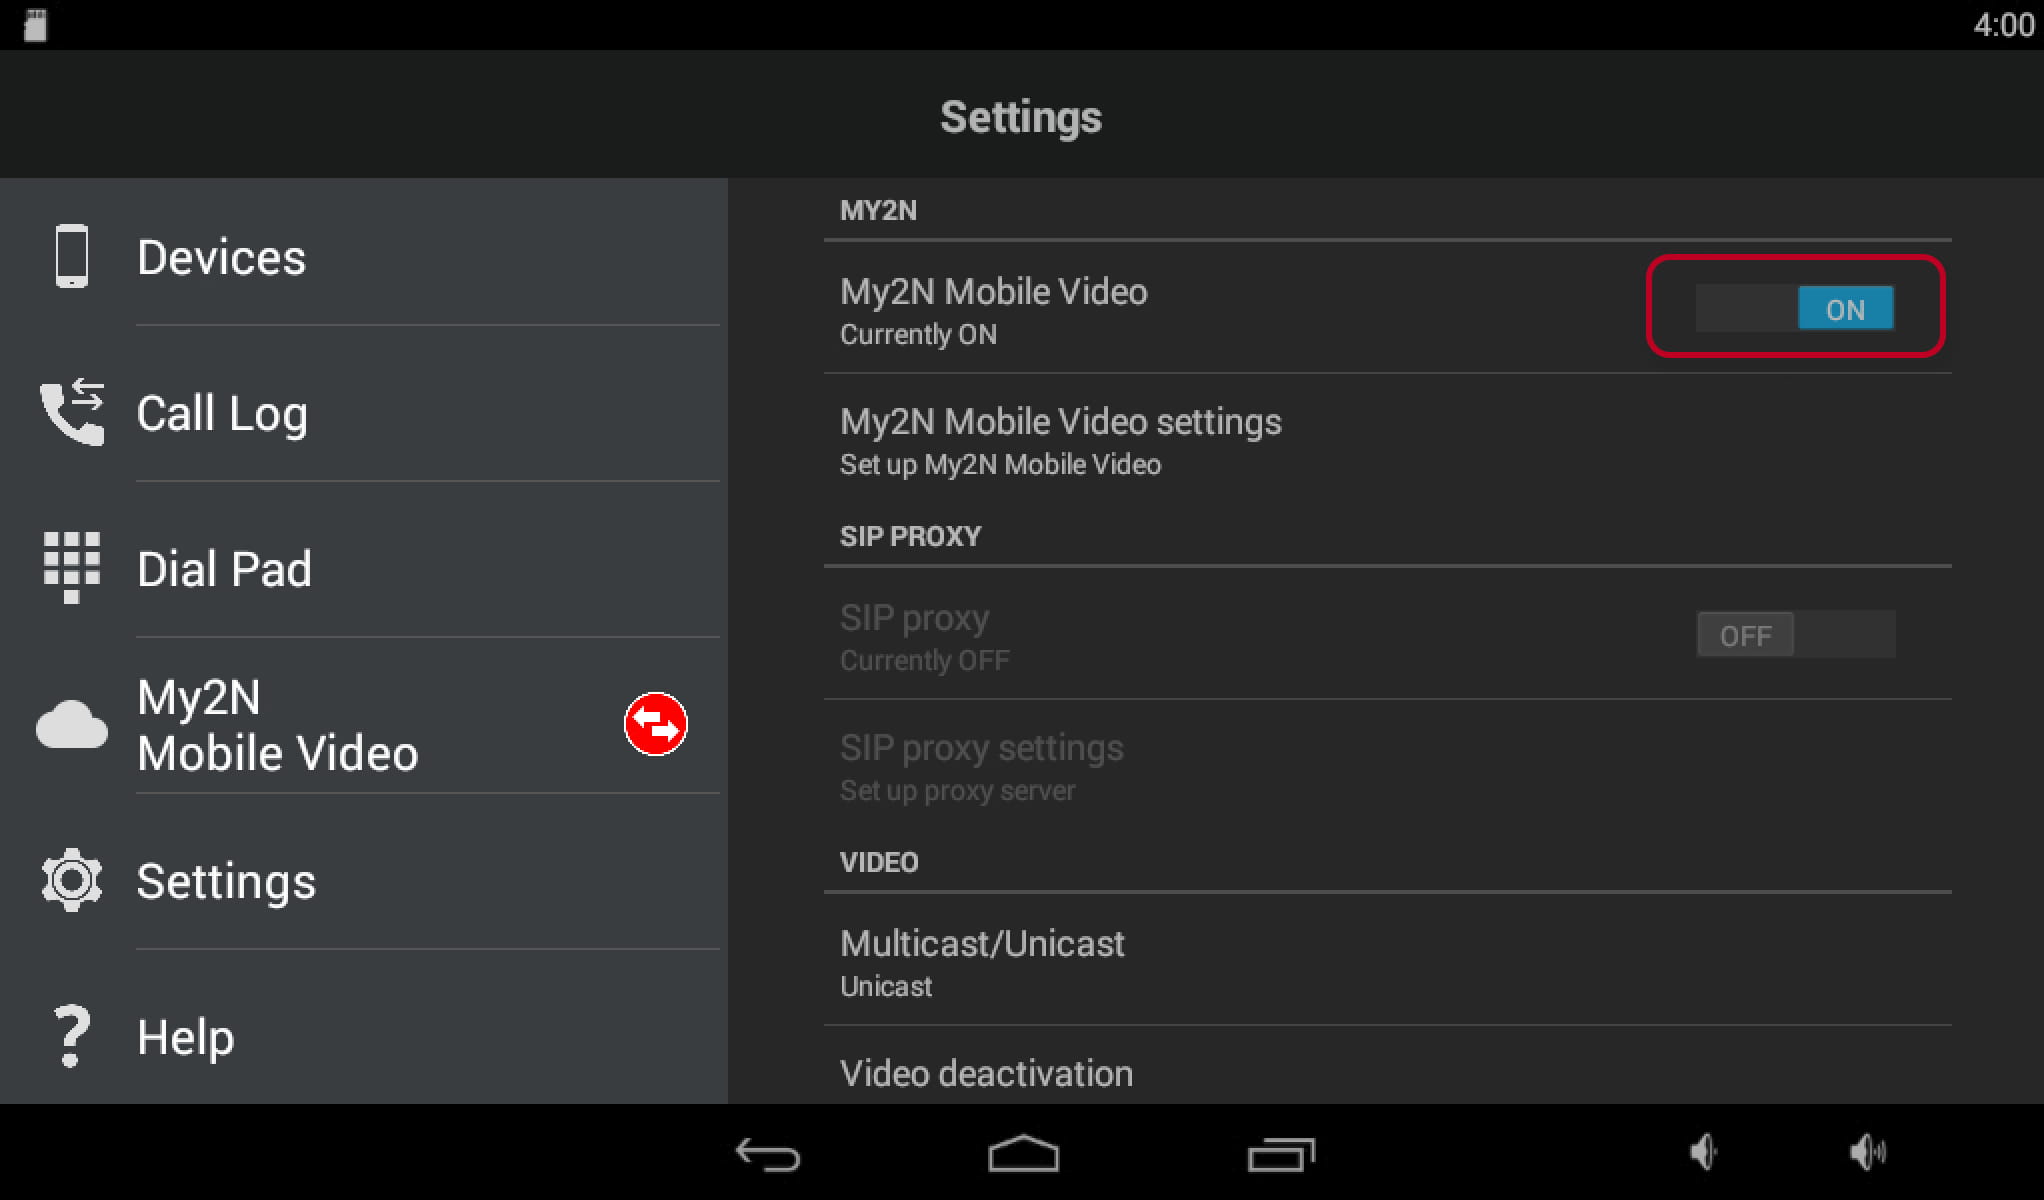
Figure 10: 2N Indoor Touch cloud registration
On next screen, insert login details for your device obtained from My2N ( please use device details from your My2N account ) and press Login button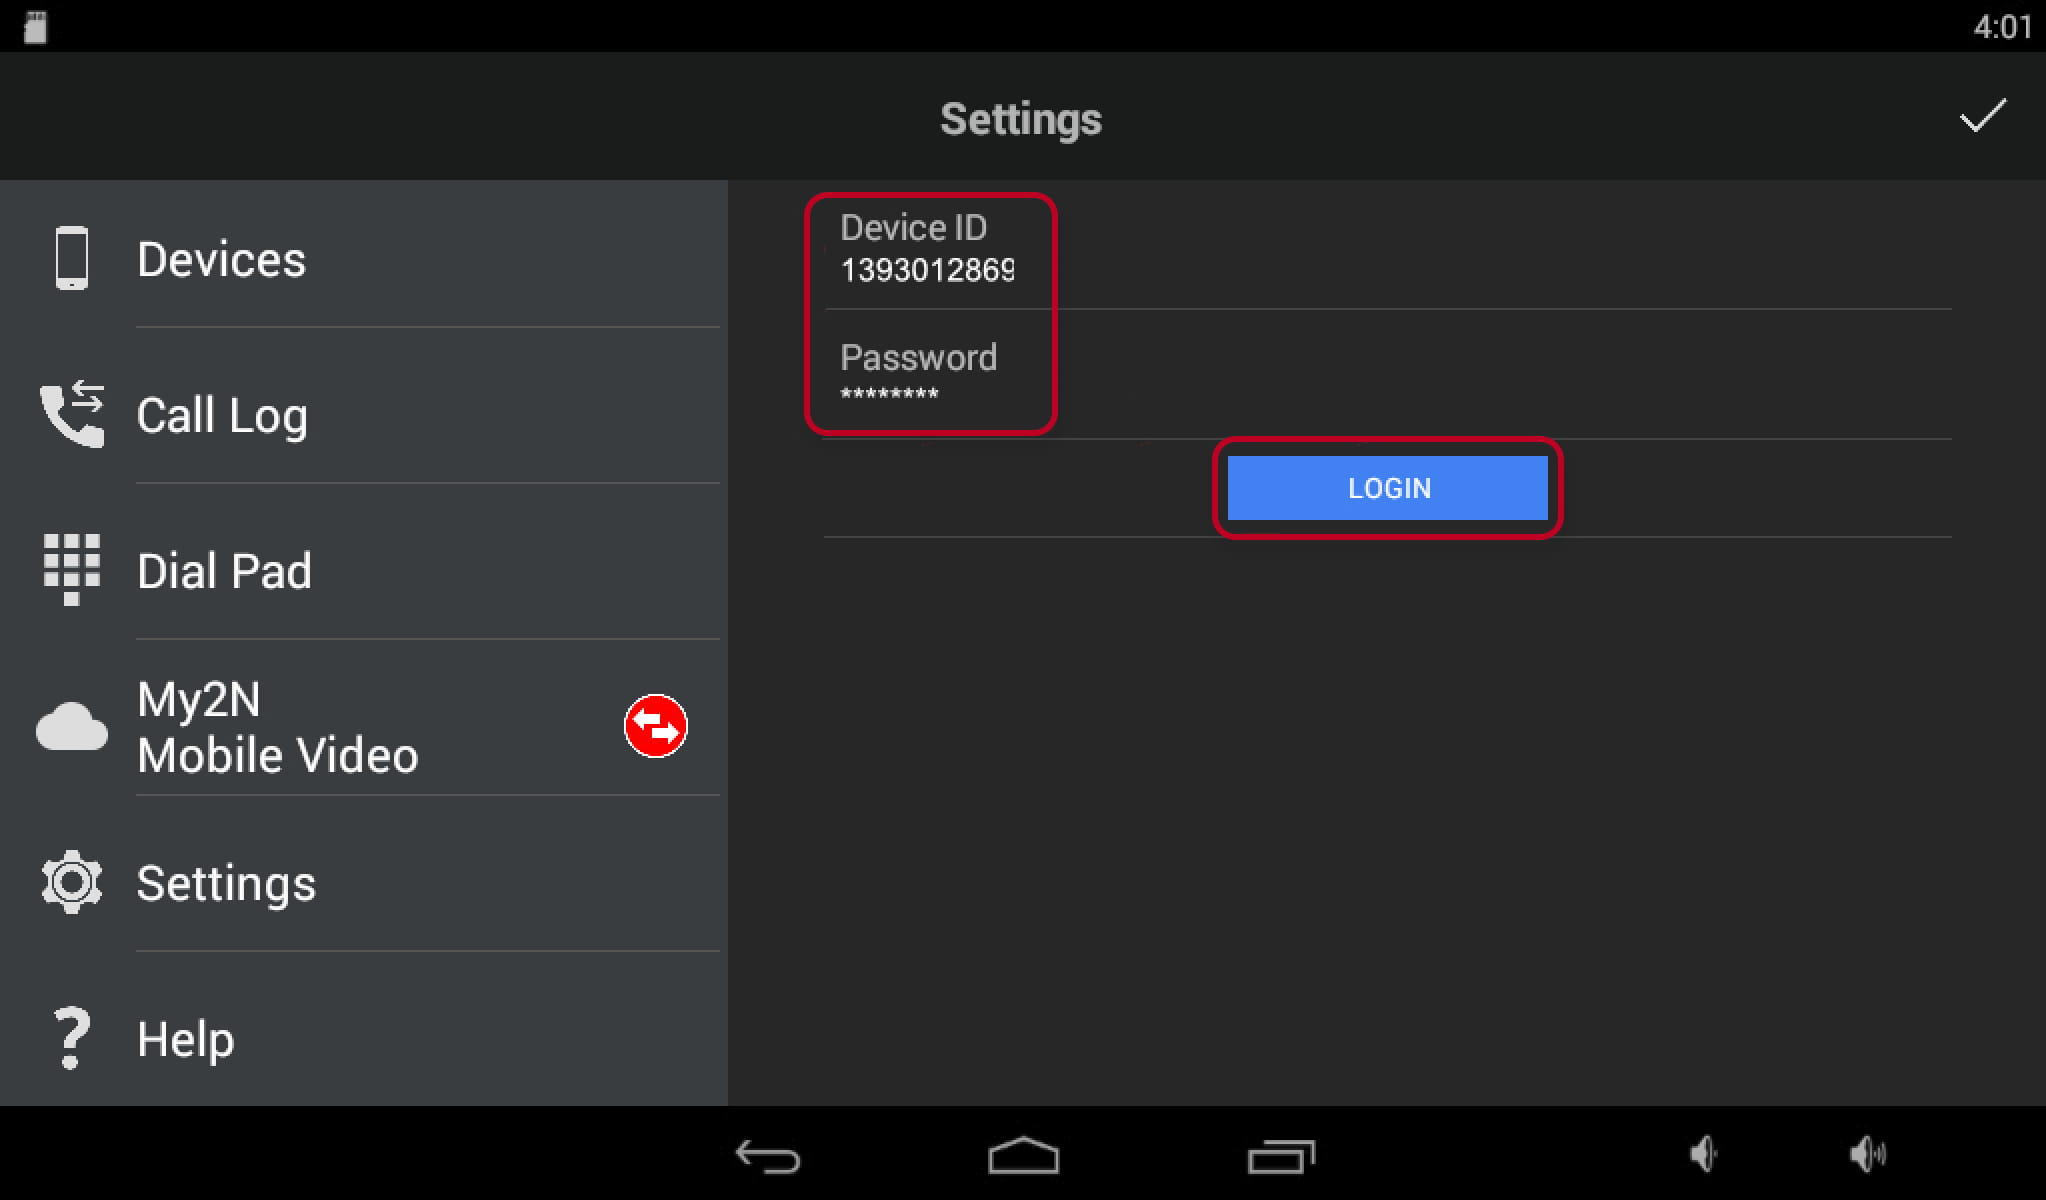
Figure 11: 2N Indoor Touch cloud registration
If you entered correct details, your 2N Indoor Touch successfully registers to My2N.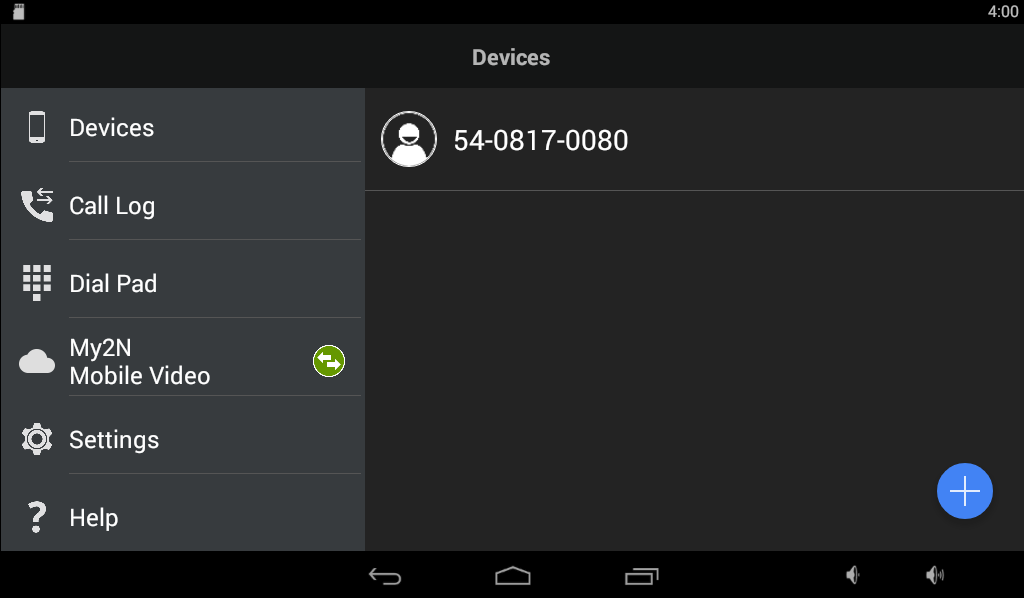
Figure 12: 2N Indoor Touch cloud registration
What to do next:
Once you configure all your devices, please see below which step needs to be taken next.
- Please set intercom's buttons in order to point them to mobile device you wish to call from intercom to.
|
In order to make calls from intercom to 2N Indoor Touch devices, buttons on intercom needs to be configured to call correct 2N Indoor Touch devices. For detailed information how to set buttons, please visit following article: |