Explanation of IP Telephony Terms
-
SIP (Session Initiation Protocol)
A phone call signalling transmission protocol used in IP telephony. It is primarily used for setting up, terminating and forwarding calls between two SIP devices (the intercom and another IP phone in this case). SIP devices can establish connections directly with each other (Direct SIP Call) or, typically, via one or more servers: SIP Proxy and SIP Registrar.
2N IP Intercoms support three ways of SIP signalling:-
User Datagram Protocol (UDP),
the most frequently used unsecured signalling method. -
Transmission Control Protocol (TCP),
less frequent, yet recommended unsecured signalling method. -
Transaction Layer Security (TLS),
where SIP messages are secured against third party monitoring and modification.
-
-
SIP Proxy
IP network server responsible for call routing (call transfer to another entity closer to the destination). There can be one or more SIP Proxy units between the users. -
SIP Registrar
An IP network server responsible for user registration in a certain network section. As a rule, SIP device registration is necessary for a user to be accessible to the others on a certain phone number. SIP Registrar and SIP Proxy are often installed on one and the same server. -
RTP (Real-Time Transport Protocol)
A protocol defining the standard packet format for audio and video transmission in IP networks. 2N IP Intercom uses the RTP for audio and video stream transmission during a call. The stream parameters (port numbers, protocols and codecs) are defined and negotiated via the SDP (Session Description Protocol).
Click here for instructions for firmware 3.0 and newer
Read more about the differences in long-term support and active track 2N OS.
Firmware 2.50 and older (LTS)
SIP Proxy registration
2N IP Intercom allows two independent SIP accounts to be configured. Thus, it can be registered under two extension numbers, with two different SIP exchanges and so on. Both the SIP accounts process incoming calls equivalently. Outgoing calls are primarily processed by account 1, or, if account 1 is not registered (due to SIP exchange error, e.g.), by account 2. You can also select the preferred account number for outgoing calls in the user settings.
- Go to 2N IP Intercom web interface, section Calling - SIP 1 (or SIP 2) - Configuration.
- Enable SIP Account.
- Fill in Device Identity.
- Display Name ... name to be displayed on the called party´s phone.
- Phone Number (ID) ... unique identification (extension) under SIP Proxy.
- Domain ... domain name of the registration service, typically the same as SIP Proxy and Registrar address.
- Fill in Authentication.
- Authentication ID ... alternative user ID for the authentication; if empty, Phone Number (ID) will be used.
- Password ... the password for authentication under PBX.
- Authentication ID ... alternative user ID for the authentication; if empty, Phone Number (ID) will be used.
- Fill in SIP Proxy.
- Proxy Address ... SIP Proxy IP address or domain name.
- Proxy Port ... SIP Proxy port, in default using 5060 (for UDP, TCP) or 5061 (for TLS).
- Backup Proxy Address ... SIP Proxy IP address or domain name when the main proxy fails to respond.
- Backup Proxy Port ... backup SIP Proxy port, in default using 5060 (for UDP, TCP) or 5061 (for TLS).
- Proxy Address ... SIP Proxy IP address or domain name.
- Fill in SIP Registrar.
- Registration Enabled ... enable intercom registration with the set SIP Registrar.
- Registrar Address ... the SIP Registrar IP address or domain name.
- Registrar Port ... SIP Registrar port, in default using 5060 (for UDP, TCP) or 5061 (for TLS).
- Backup Registrar Address ... SIP Registrar IP address or domain name when the main proxy fails to respond.
- Backup Registrar Port ... backup SIP Registrar port, in default using 5060 (for UDP, TCP) or 5061 (for TLS).
- Registration Expiry ... the registration expiry affecting periodically sent registration requirements.
- Registration State – see the current registration state (unregistered, registering..., registered, unregistering...).
- If needed, there are also other advanced parameters, incl. SIP Transport Protocol selection.
- Enable SIP Account.

Assign the called device to the user
We can now assign an extension to the user according to a dialling plan of the SIP Proxy server.
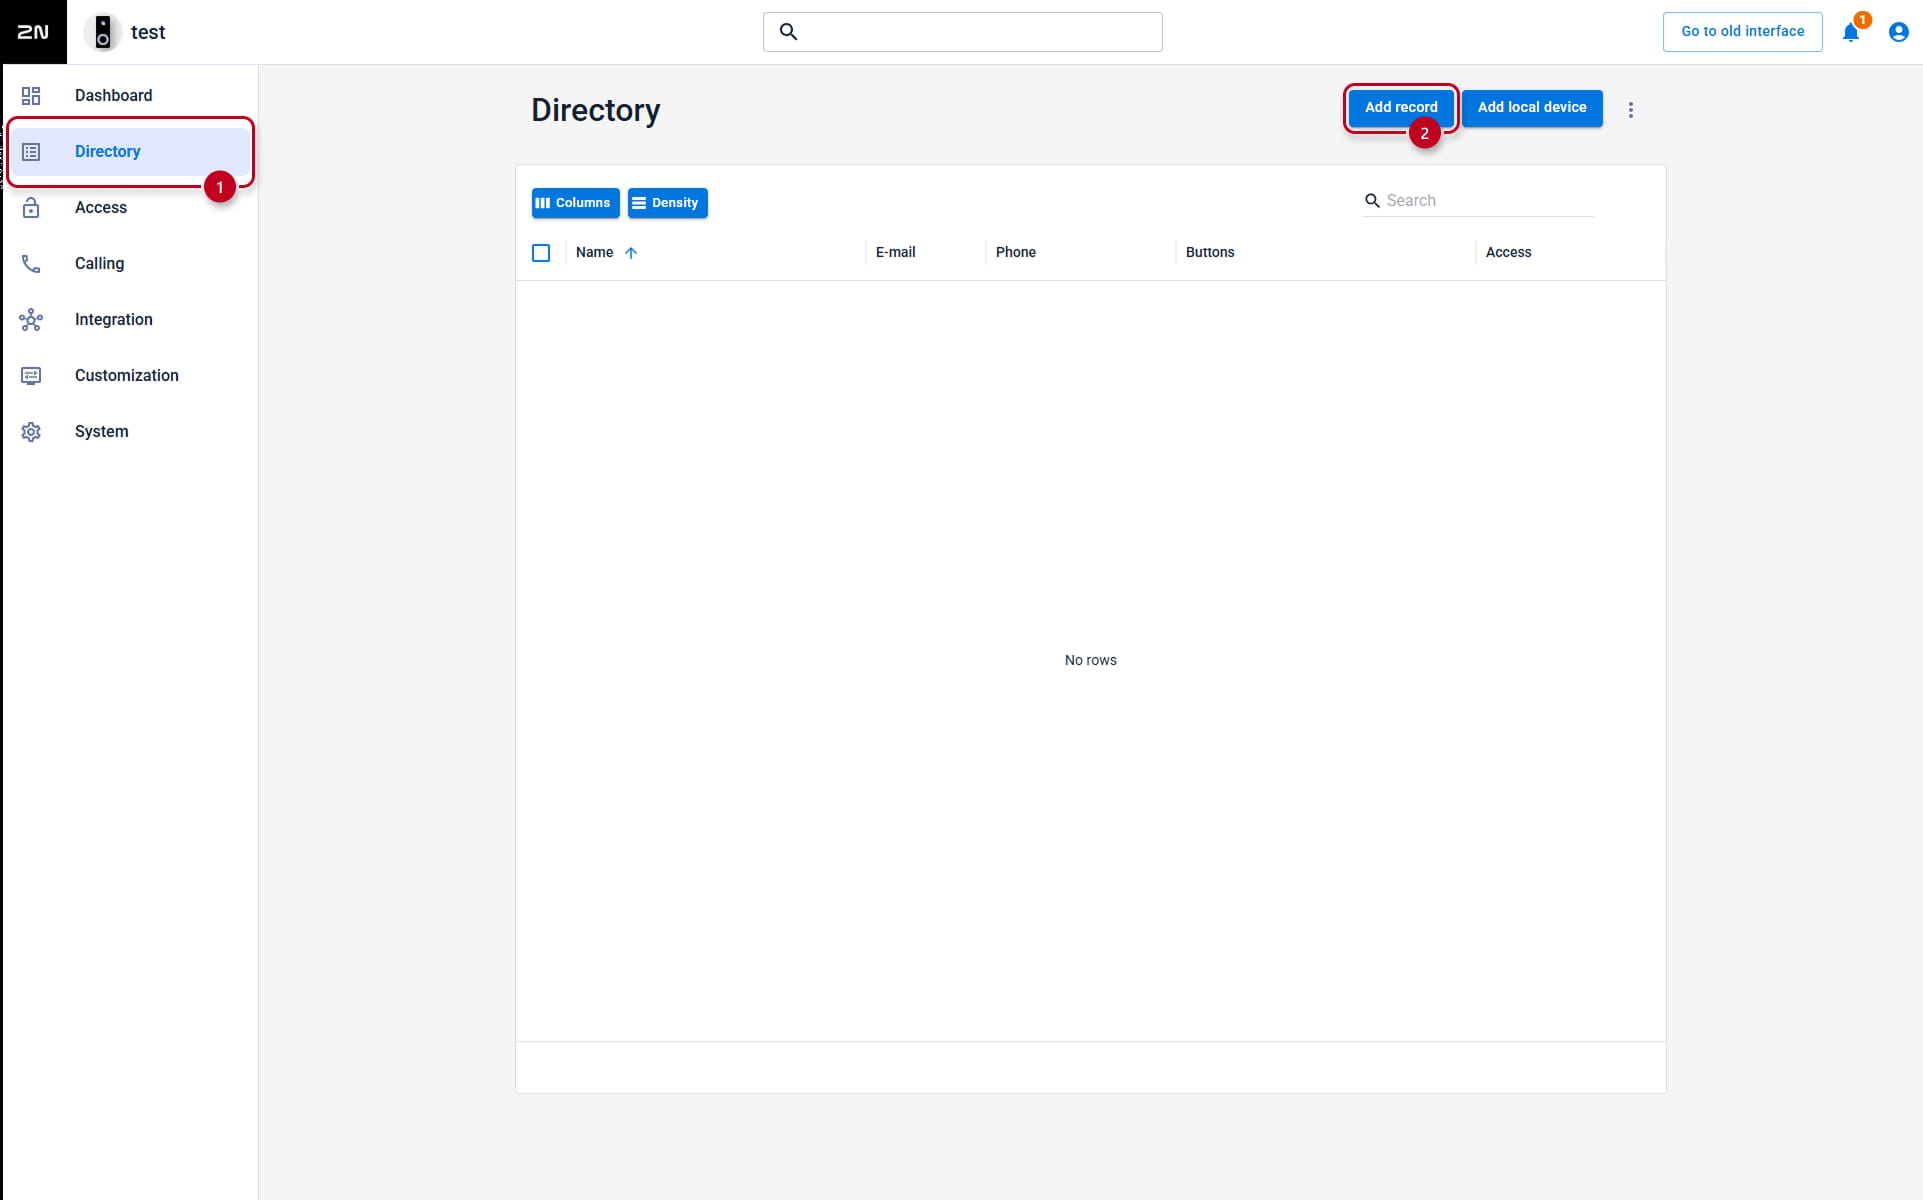
- Go to the 2N IP Intercom web interface, section Directory - Users
and open the existing user or create a new one by clicking the Add User button.

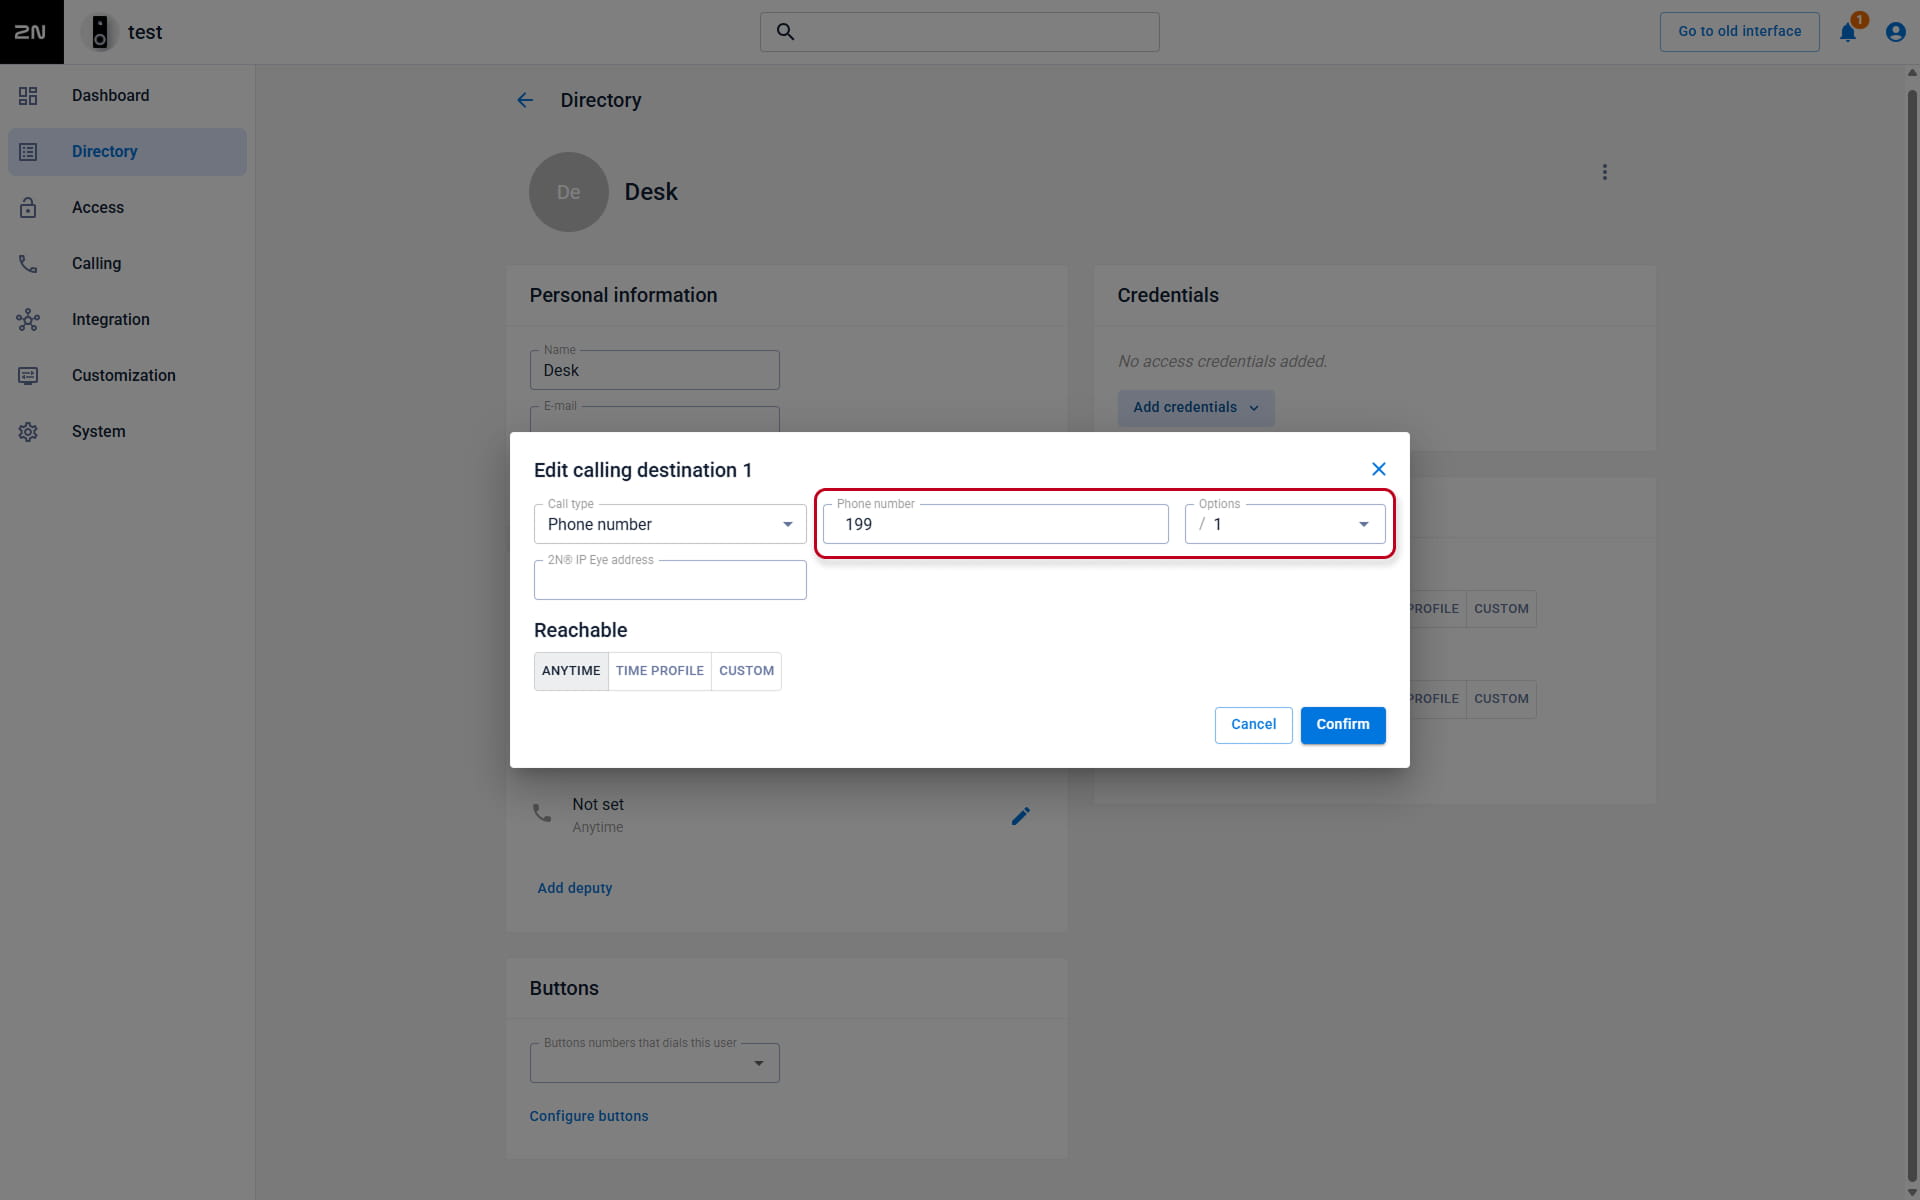
- Find the section User Phone Numbers and fill in the Phone Number parameter
by the extension number of the called device in format extension/used SIP account.
Examples:- 199/1 to call 199 by SIP 1 account
- 199/2 to call 199 by SIP 2 account