Before you start
Check whether you have license for voicemail in your 2N Netstar!
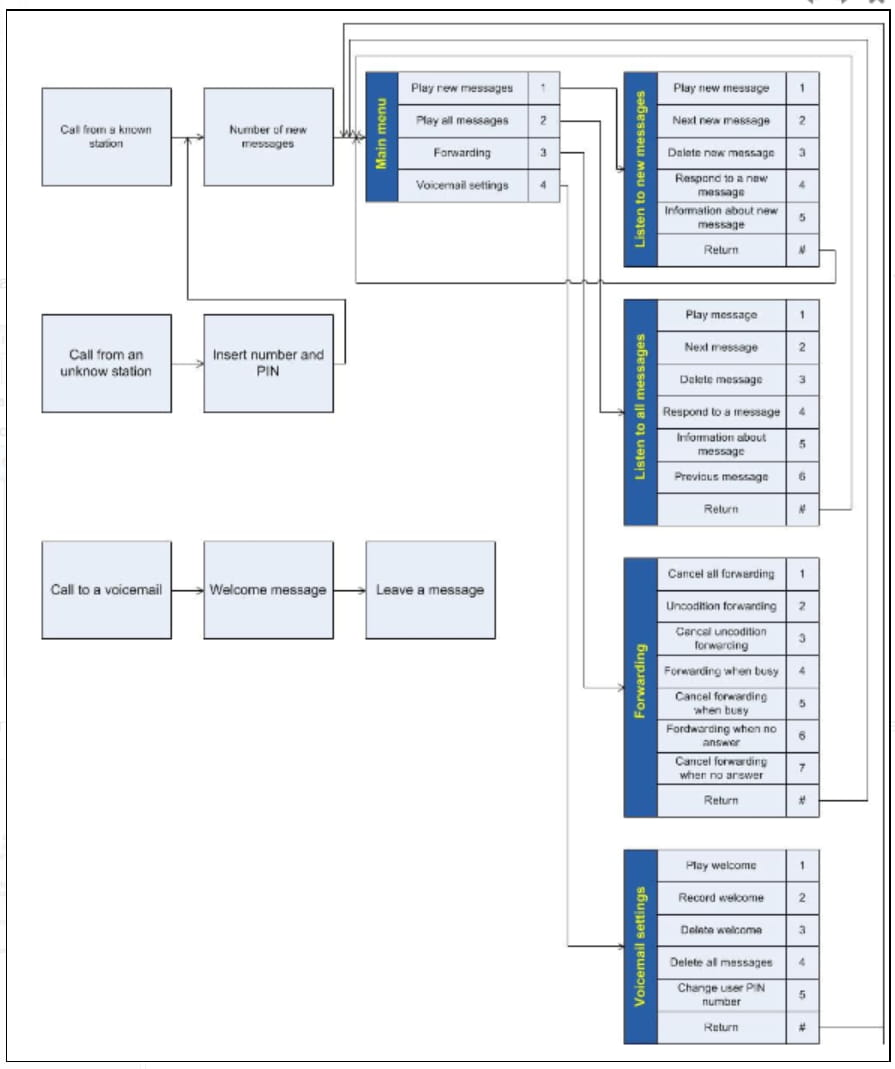
Operating principle
Entry to voicemail
Enter in your voicemail where you can listen or manage recorded messages (dial *37)

Example: Lift the user station handset and dial the service access code *37. The user will get access to voicemail management.
Authorized entry to voicemail
Enter in your voicemail where you can listen or manage recorded messages. This service enables users to get access from an unknown station (dial *38)

Example: Lift the user station handset and dial the service access code *38. The user will be prompted to input user number and PIN code. After successful authentication the user will get access to voicemail management.
Voicemail structure
Settings
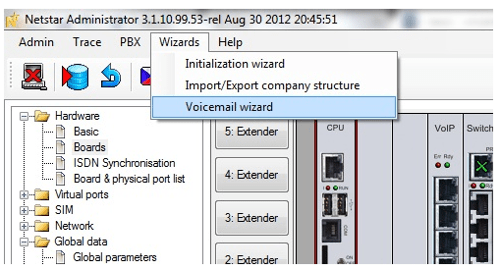
In order to use classic voicemail features you have to create routers and DISA messages which will be used for this purpose. You can do it very simply just by going to "Wizards -> Voicemail wizard".
When the Voicemail wizard window appear, press button "Save" and all routers and DISA messages will be created automatically!
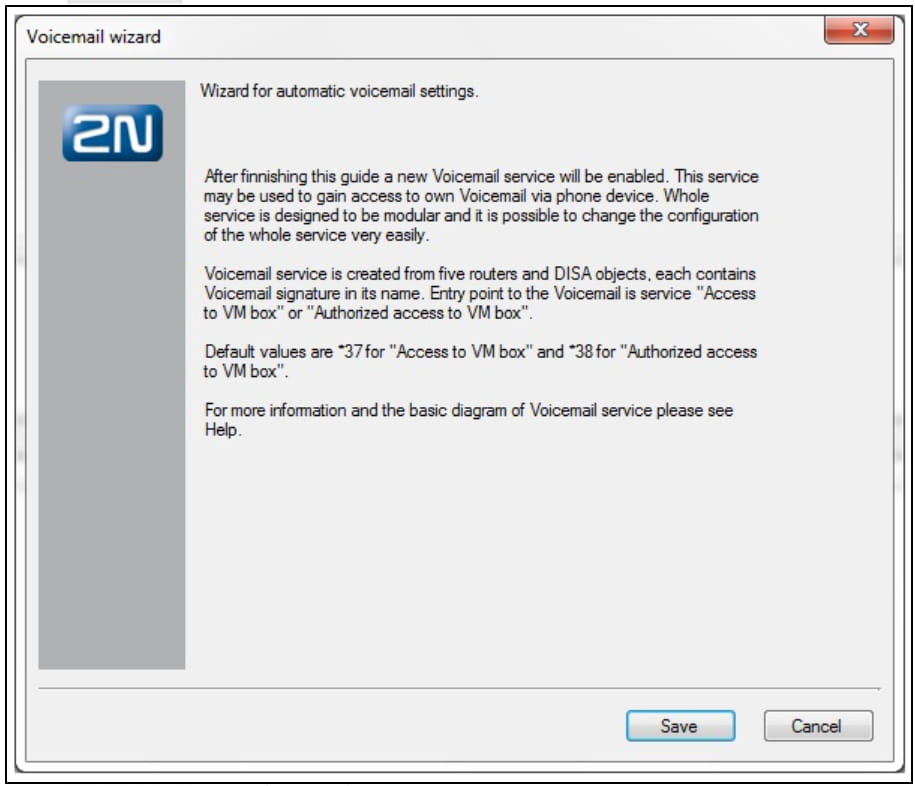
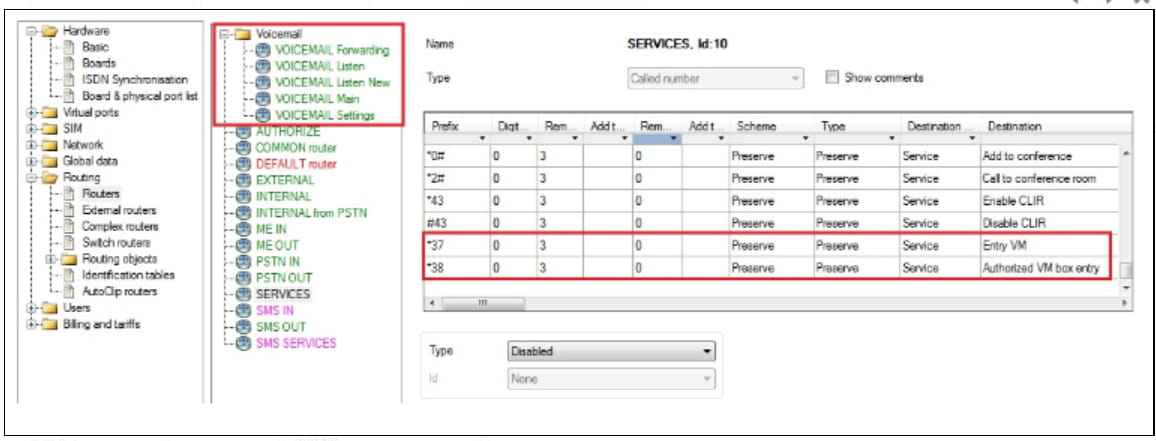
If you will go to section "Routing -> Routers", you can check that the routers have been created and new services *37 and *38 have been added to router SERVICES.
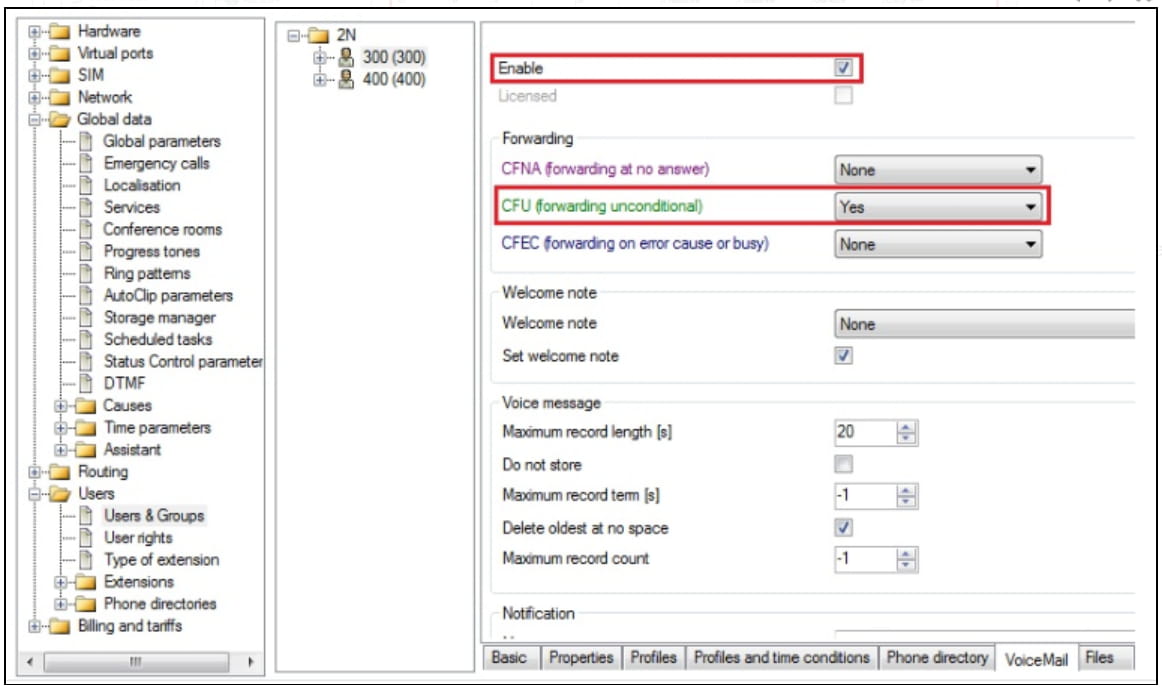
As a last step go to the user to whom you want to activate VoiceMail and in tab "VoiceMail" enable this service. Also specify if you want to forward a call to voicemail unconditionally or after some time.