External Axis IP camera connection to LiftIP 2.0
The steps in this article require using the web interface of a 2N device. Please follow this manual in case this is your first time using the web interface.
You can add an external Axis IP camera to the 2N LiftIP 2.0 to see a video stream during a call to the 2N IP Phone D7A. This article describes the necessary steps to configure video calls with an external Axis IP camera.
Prerequisities
- 2N LiftIP 2.0 with the latest firmware
- 2N IP Phone D7A
- Axis IP camera providing RTSP stream
- Already tested IP cameras: 2N® IP Interoperability / IP Cameras
- Common network
- All the devices must see each other - connect them in one Local Area Network
- Ports used for communication (SIP, RTP, HTTPS) must be open. See the list of used ports here: Used Ports - Configuration manual for 2N IP intercoms
Adding an external Axis IP camera to 2N LiftIP 2.0
- Change the root password of your Axis IP camera. There are two options.
-
-
- Change the password upon the first login.
- Change the password in Settings - System - Users.
-
-

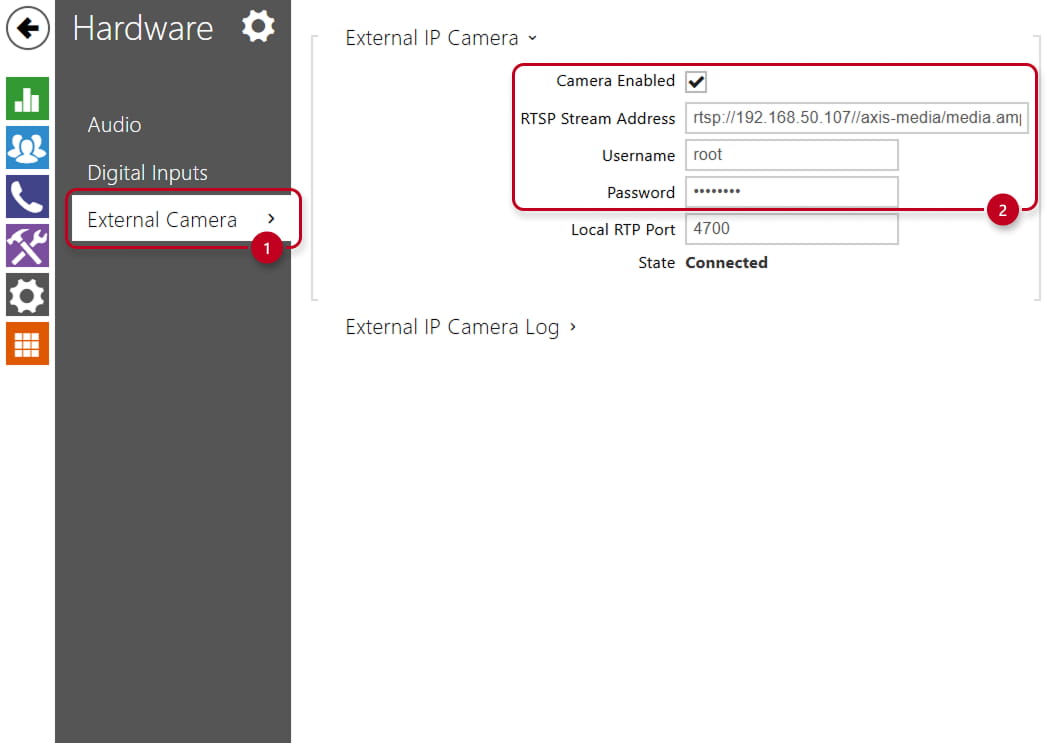
- Go to the web interface of your 2N LiftIP 2.0, section Hardware - External Camera, and enable the feature.
- Fill in RTSP stream address in following format: rtsp://CAMERA-IP/axis-media/media.amp?resolution=VGA&h264profile=main
- Fill in the username and password of the external Axis IP camera.
- After saving, you should be able to see State Connected if you configured everything correctly.
- Common issues you can meet:
- State: Connected > Unsupported resolution
Reason: Resolution is higher than 640 x 480 px or not in the aspect ratio 4:3
- State: Connected > Unsupported resolution
-
- State: Network error
Reason: Wrong format of RTSP stream address, e.g., invalid IP address.
- State: Network error
-
-
- State: Unauthorized
Reason: Invalid username or password
-
Configuration of calling 2N IP Phone D7A
- Go to Directory in the 2N LiftIP 2.0 and create a user. Fill in the name and phone number in the following format: sip:PhoneIPaddress

- Go to Calling - SIP1 and enable the account.
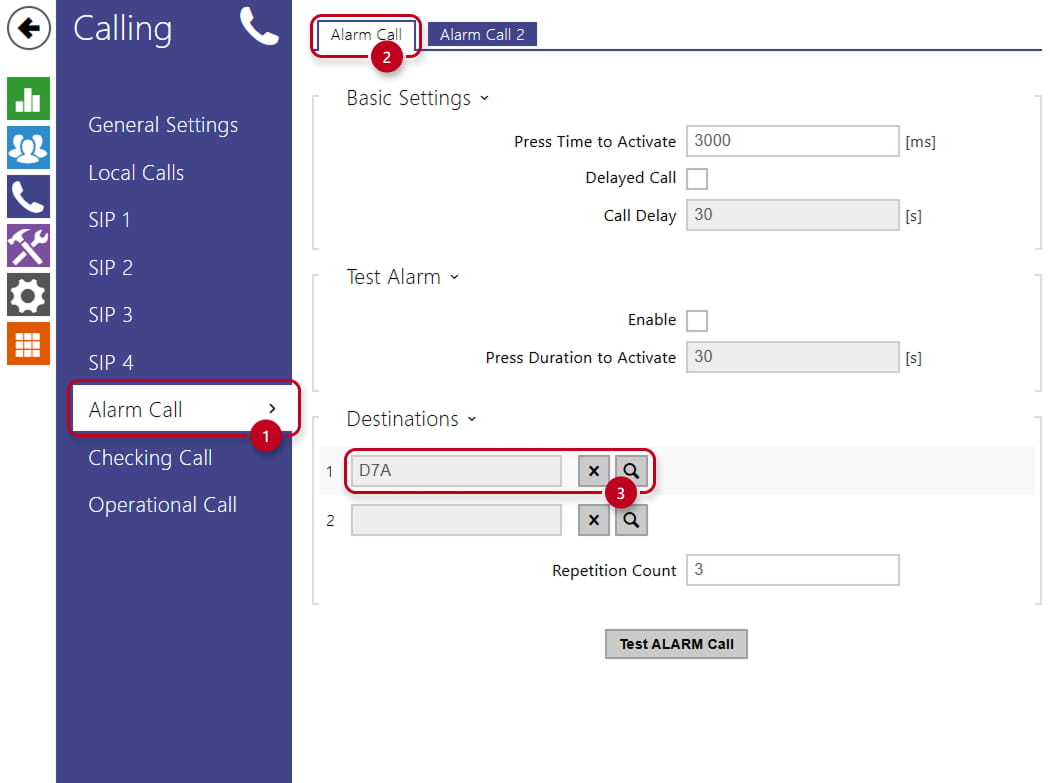
- Go to Calling - Alarm call and select the user.
- If you completed all the steps above, video calls from 2N LiftIP 2.0 to 2N IP Phone D7A are now configured. When the IP phone is called, the video stream from your Axis IP camera will pop up on the display.
Optional: Changing the IP address of the external Axis IP camera to a static IP address
- You can use 2N LiftGate, which is able to assign the IP address based on the MAC address.
- You can also change the IP address of the camera to a static IP address.
- The IP address can be changed to static in Settings - System - TCP/IP.

- Alternatively, you can use AXIS IP Utility. It is free for download at the AXIS website. This tool will find and display all Axis devices in the network. Click the line with the device to roll down the options. Continue to IP Settings. If a warning message about an untrusted certificate appears, you can click "Continue anyway", because it is caused by the use of a self-signed certificate, and it is safe to proceed. Log in with the username and password. Untick "Automatic (HDCP)" and edit the IP address.
