Finding devices in the network
You need to know the IP address or domain name of the device for access to the interface. Make sure that the device is connected to the local IP network and powered.
Domain Name
To access the web configuration interface, you can enter the domain name into the browser in the format “hostname.local” instead of the IP address. The hostname of a new device consists of the product name and serial number of the device. While entering a hostname, use only letters and digits; do not use spaces, periods, dashes, or other special characters.
Default domain name 2N Clip: 2NClip-{serial number without dashes}.local (e.g.: “2NClip-0000000001.local”)
The format of the device name is specified in the Installation Manual for the specific product in the Domain Name subsection.
Tip
You can change the hostname later in the web configuration interface at .
Login based on a domain name is advantageous if the dynamic IP address is used. While the dynamic IP address changes, the domain name remains the same. It is possible to generate certificates signed by a trusted certification authority for the domain name.
Device IP Address
By factory default, 2N Clip uses a dynamic IP address assigned by the DHCP server.
The 2N IP Utility application helps find the 2N device IP address in the LAN. Download 2N IP Utility from the 2N.com website. Make sure that Microsoft .NET Framework 4.7.2 is installed for successful app installation.
Depending on the capabilities of the device, you can also retrieve the IP address in one of the following ways:
with the RESET button
on the device display (see the product Installation Manual for the procedure)
IP Address Retrieval Using 2N IP Utility
The 2N IP Utility application helps find the 2N device IP address in the LAN. Download 2N IP Utility from the 2N.com website. Make sure that Microsoft .NET Framework 4.7.2 is installed for successful app installation.
Run the 2N IP Utility installer.
The Installation Wizard will help you with the installation.
Having installed 2N IP Utility, start the application using the Microsoft Windows Start menu.
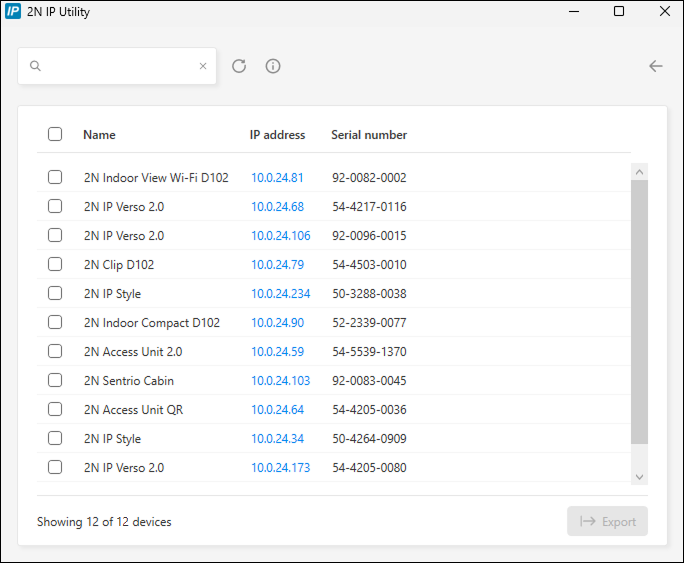
Once started, the application begins to automatically search the LAN for all the 2N and AXIS devices which have been DHCP/statically assigned IP addresses. These devices are then shown in a table.
Select the device to be configured and left-click it. This opens the right-hand part of the web configuration interface window.
Tip
Access to the web configuration interface is also possible via the Open in external browser button, which opens the interface in a separate browser window.
Click a device in the list to display detailed information. Click the IP settings button to change the IP address by entering the required static IP address or activating DHCP.
The application also allows you to export selected devices into a CSV file. First select a device by ticking the boxes in the list, then use the Export button that appears at the bottom of the window. The exported file shall include the names, IP addresses and serial numbers of the selected devices.
The default login data are:
Username: Admin
Password: 2n
It is necessary to change the password immediately upon the first login.
Tip
It is recommended that a password is used that is difficult to break. It is not recommended that names, places or things, especially those closely related to the user, are used in the password.
For increased password security, it is recommended that:
the random password generator is used,
the password length is 12 characters at least,
various characters from different character sets are combined (small/capital letters, digits, special characters, etc.).
IP Address Retrieval Using the RESET button
Follow the instructions below to retrieve the current IP address:
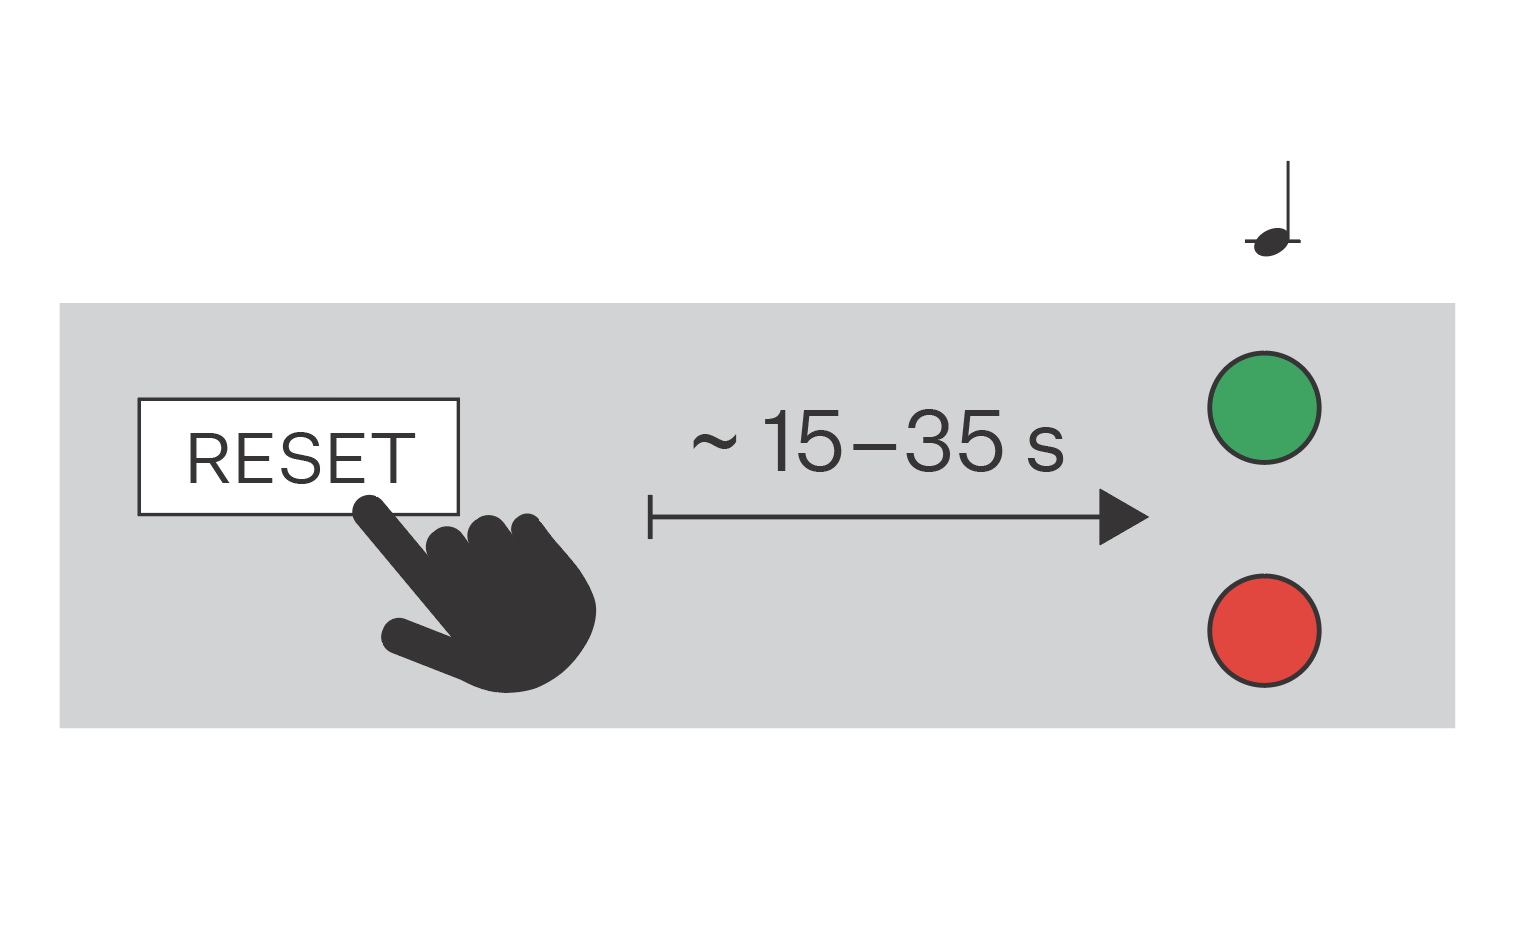
Press the button RESET and keep it pressed.
Wait until the red and green LEDs go on simultaneously on the device and the acoustic signal can be heard
 (approx. 15–35 s).
Release the RESET button.
The device announces the current IP address via the speaker automatically.
Note
The delay after pressing RESET till the first light and sound signaling is set to 15–35 s depending on the device model used.