Flush mounting – into plasterboard
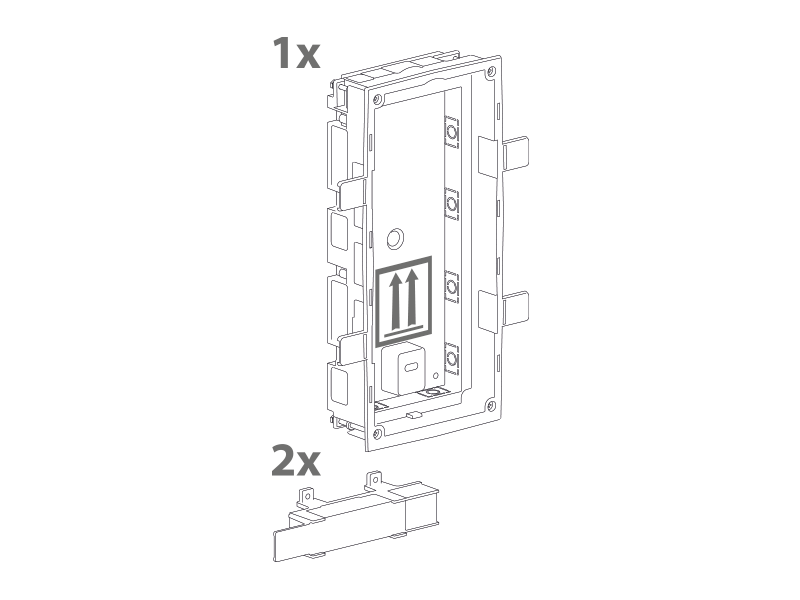
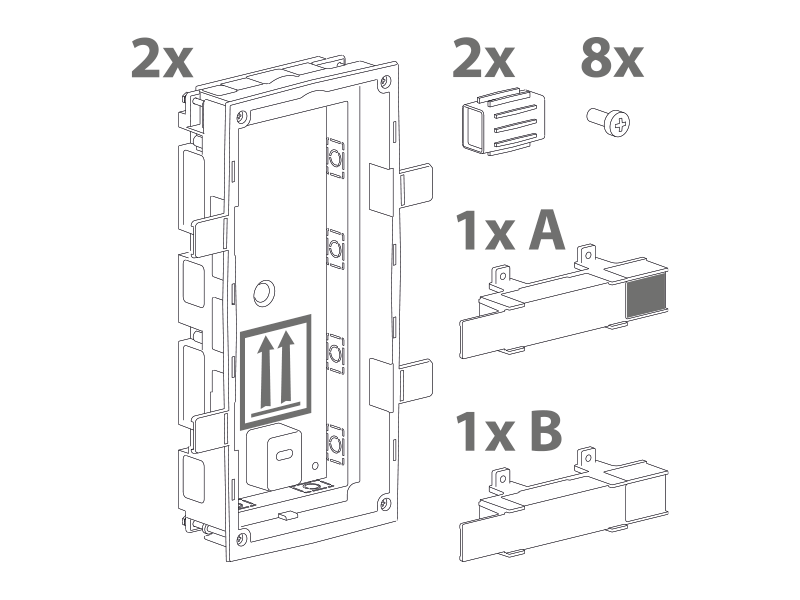
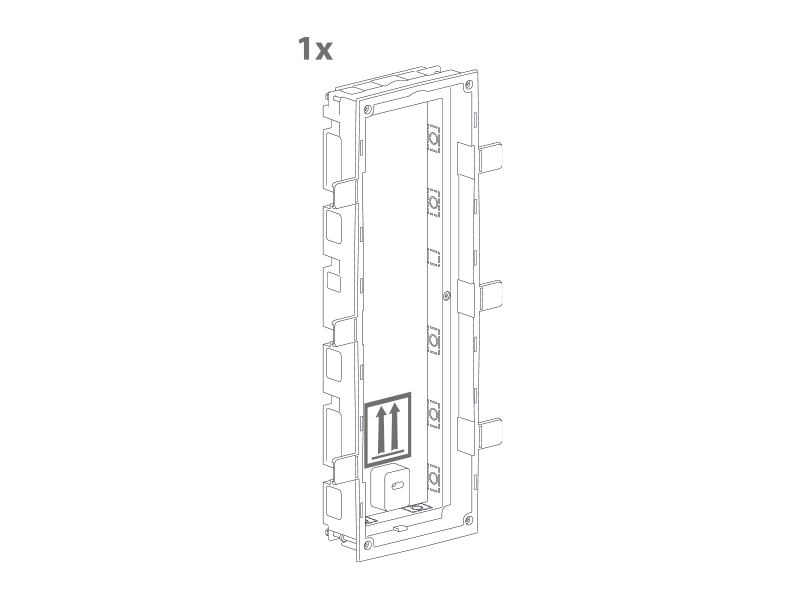
What you need for mounting:
|
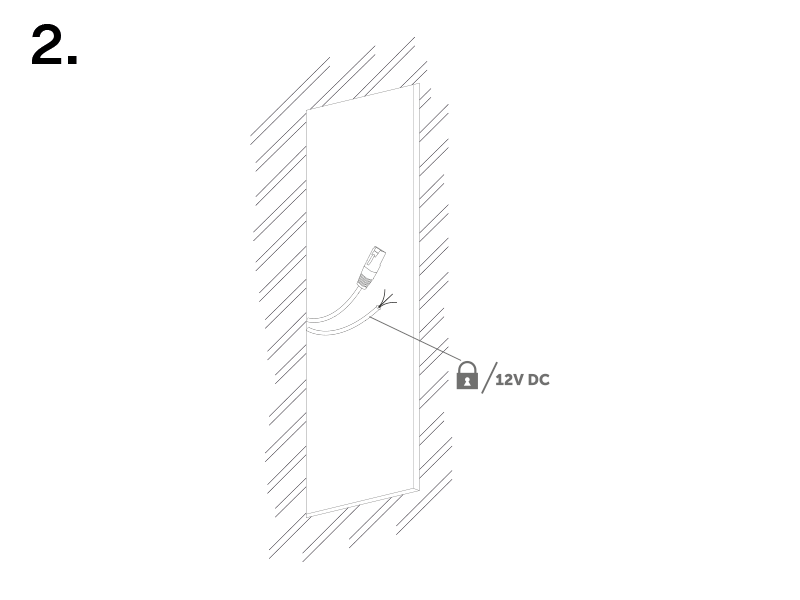
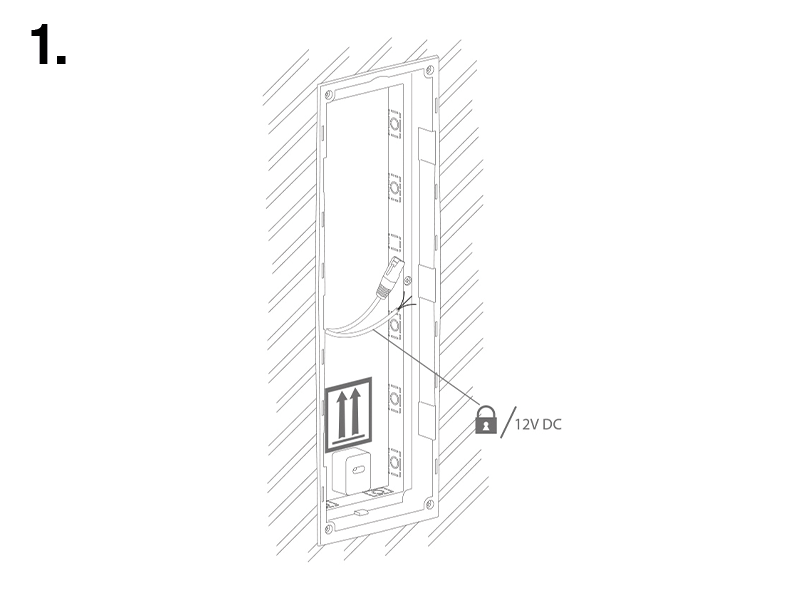
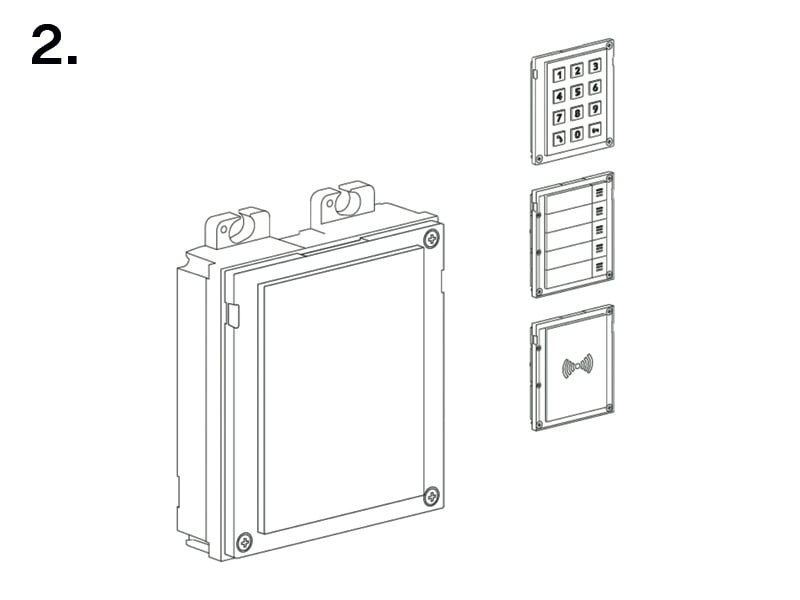
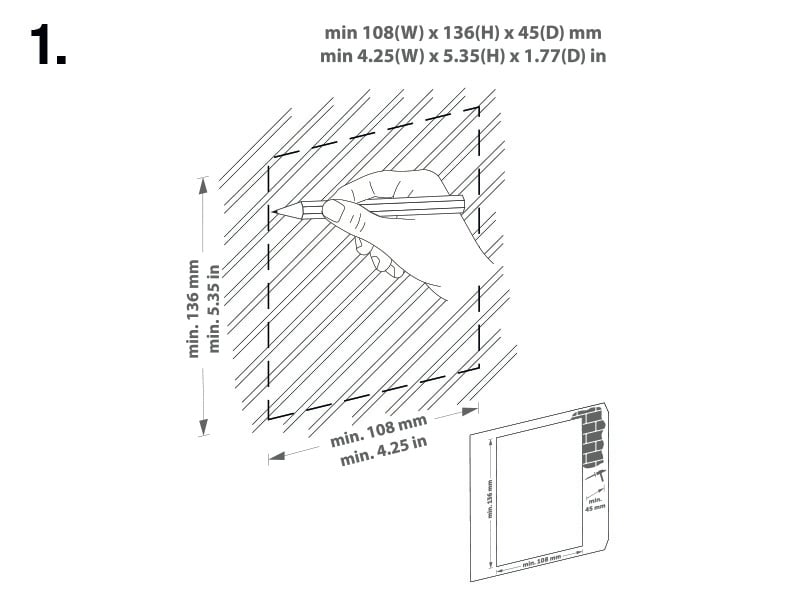
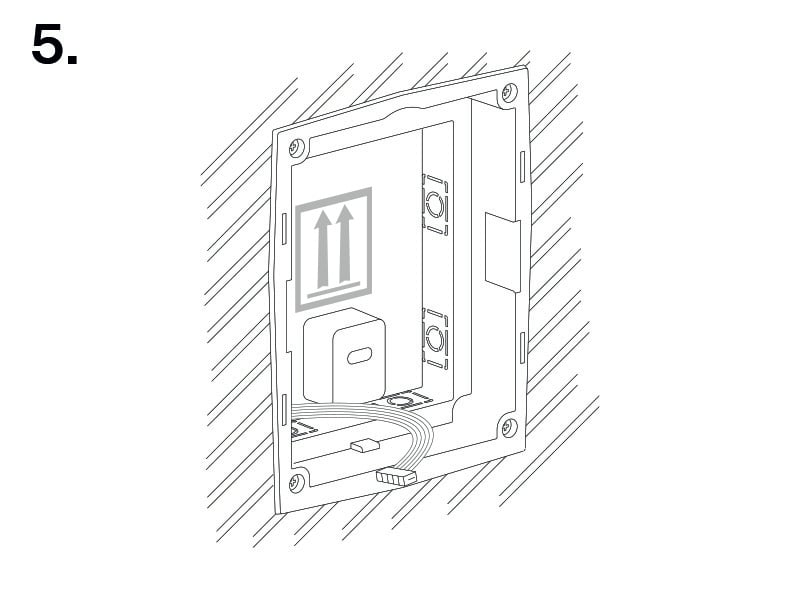
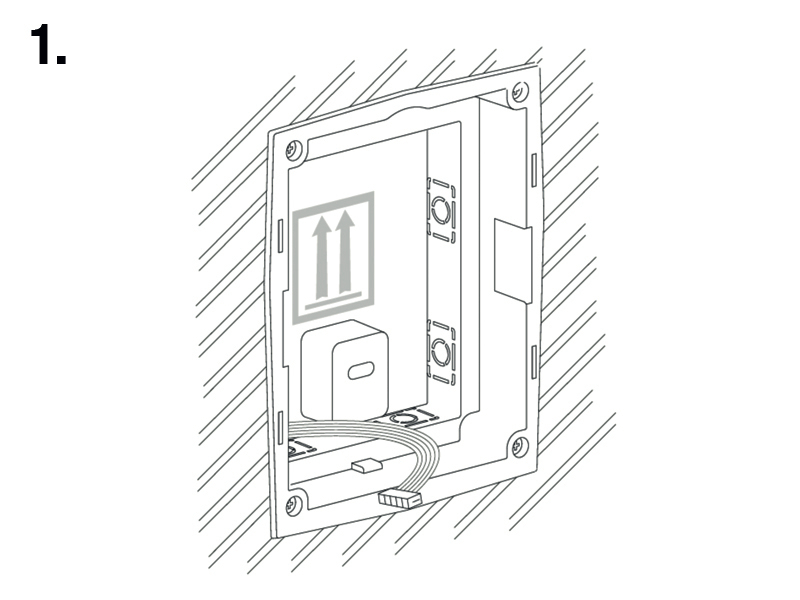
To install a device 2N Access Unit 2.0 into a wall, mount the flush mounting box first. Then install the device into it.
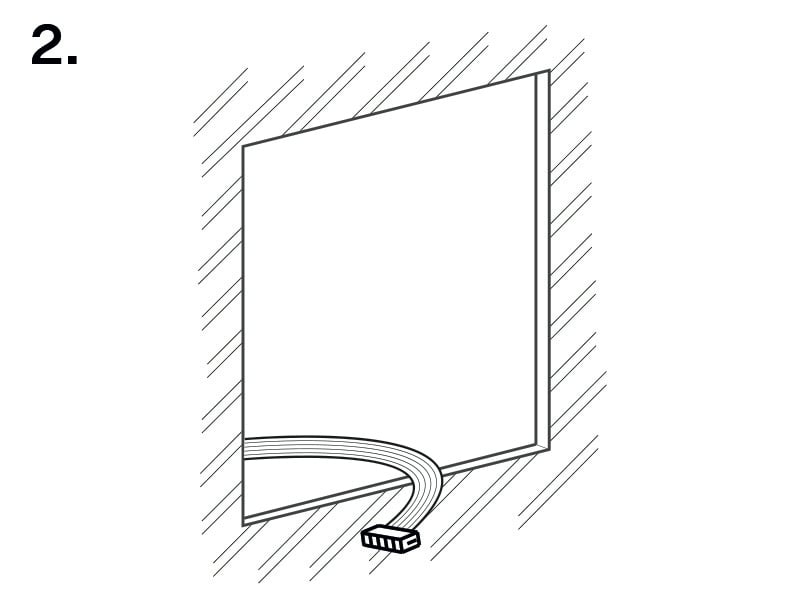
2-Module Installation
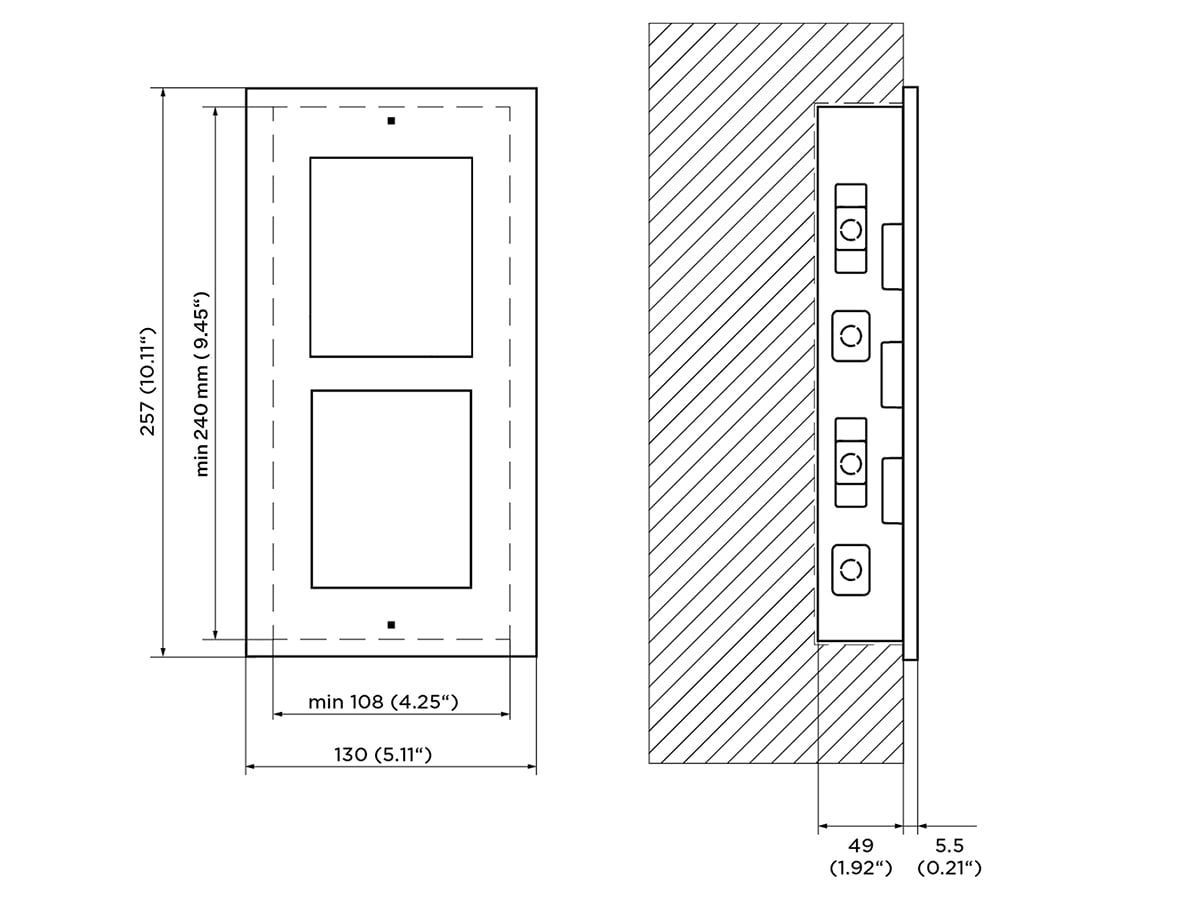
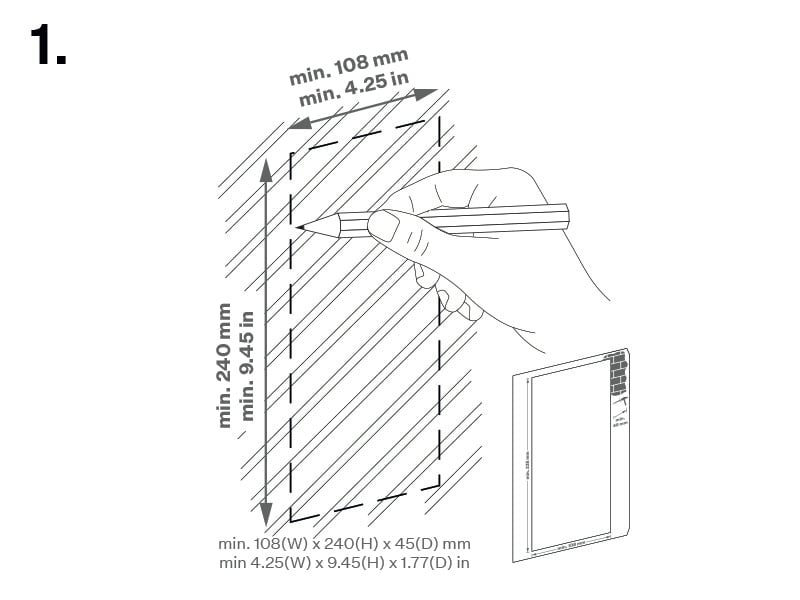
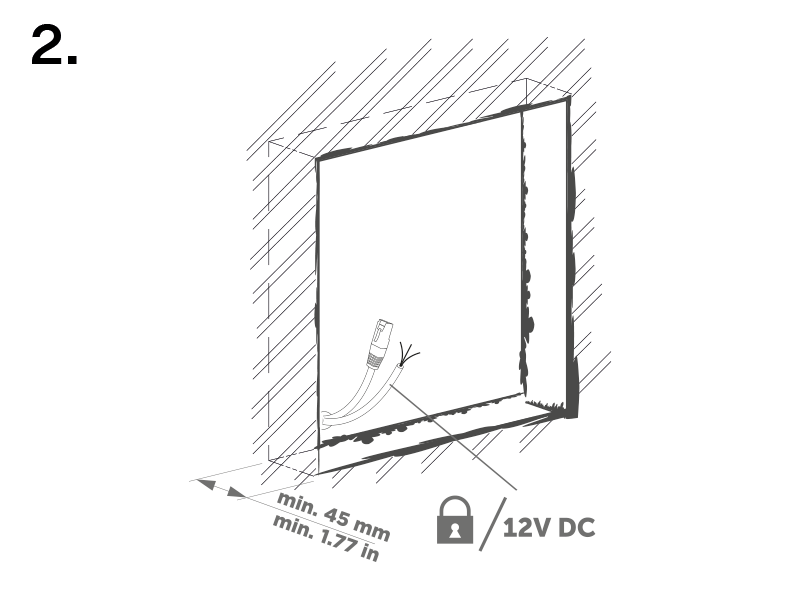
Box Installation
 |  |
 |  |
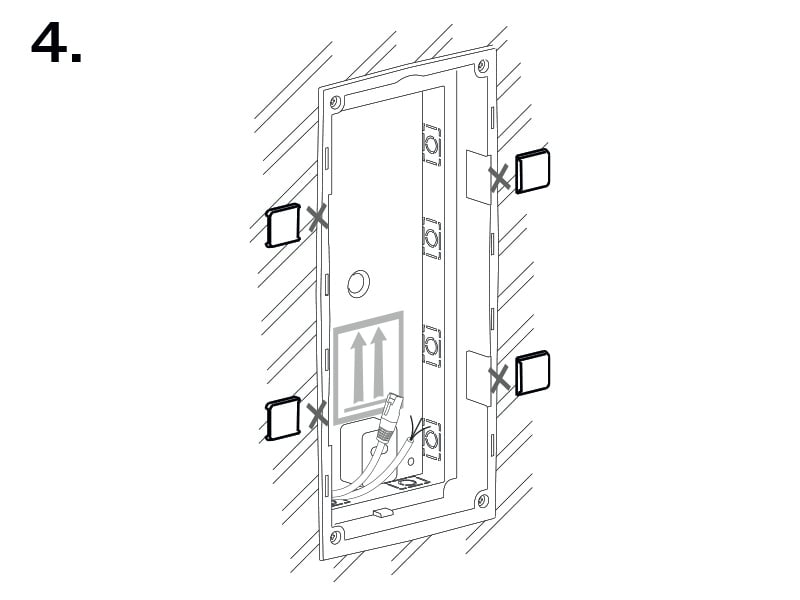 |  |
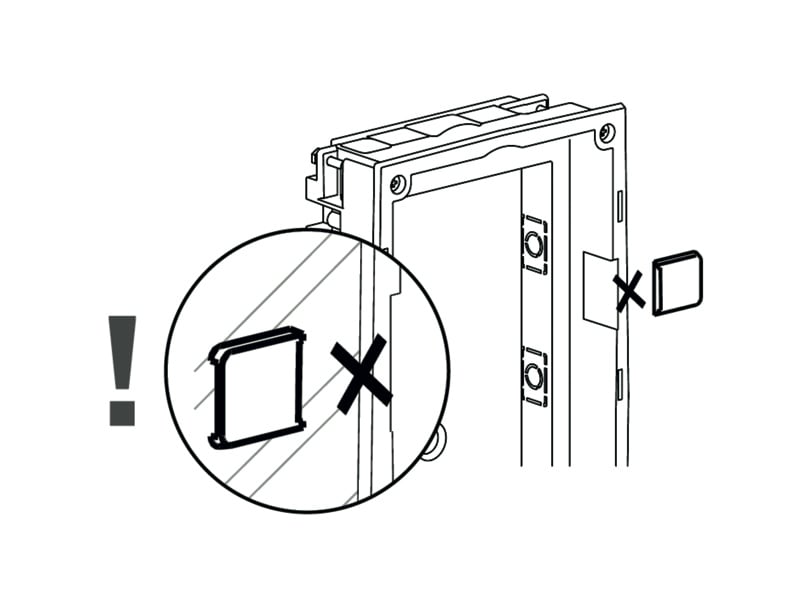
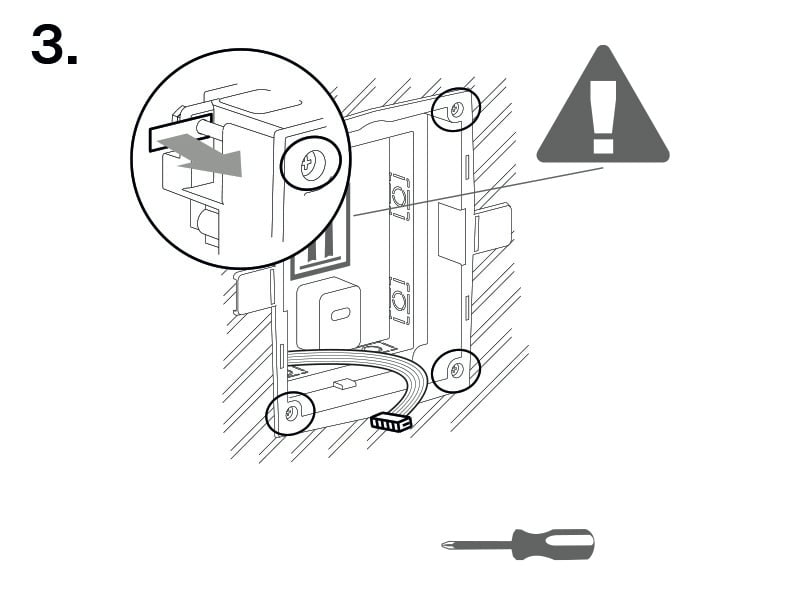
Warning
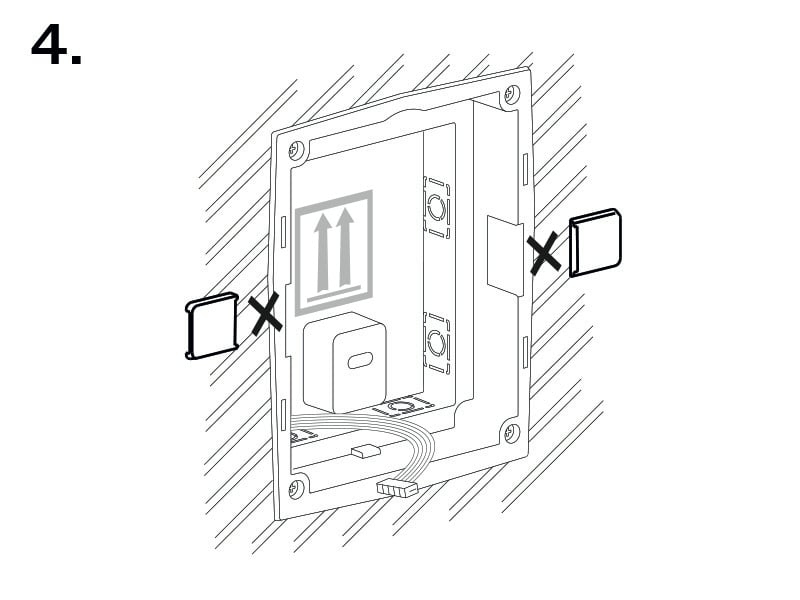
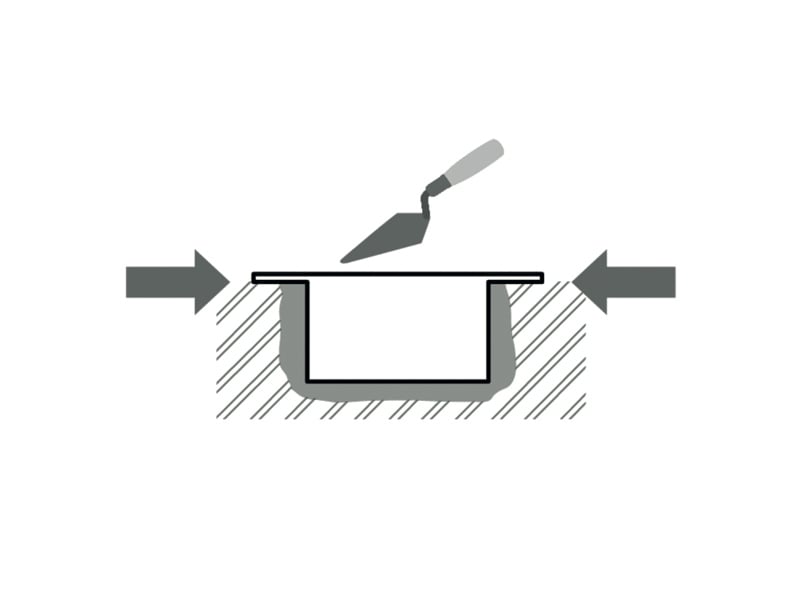 | Make sure that the flush mounting box edges are not aligned with the wall but overlap the wall surface. When the proper box installation instructions are not met, water might get in and destroy the device installed. Side stops are used for a correct wall position. |
Caution
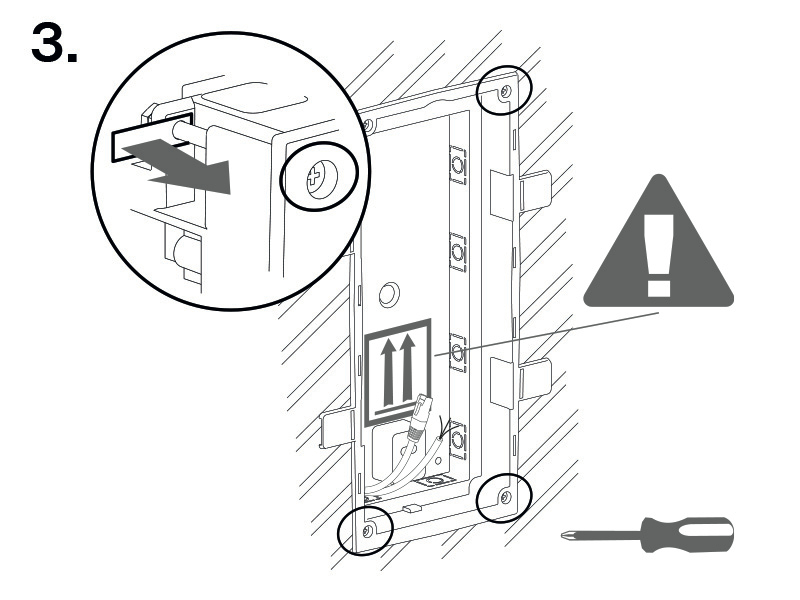
 | When the walling material has hardened, break off the side stops. |
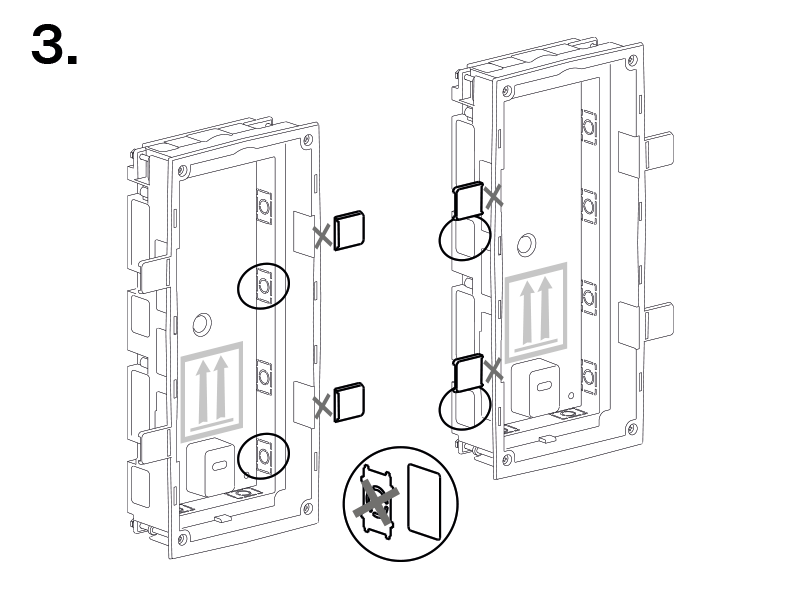
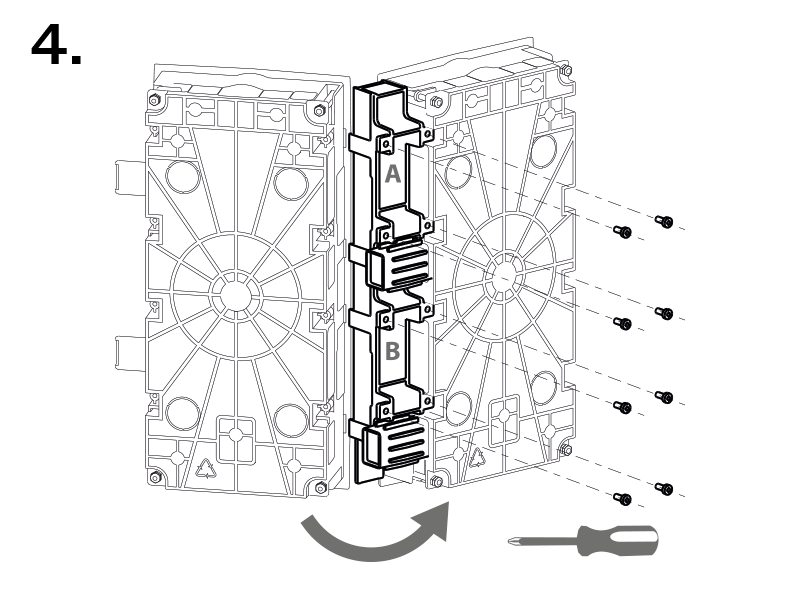
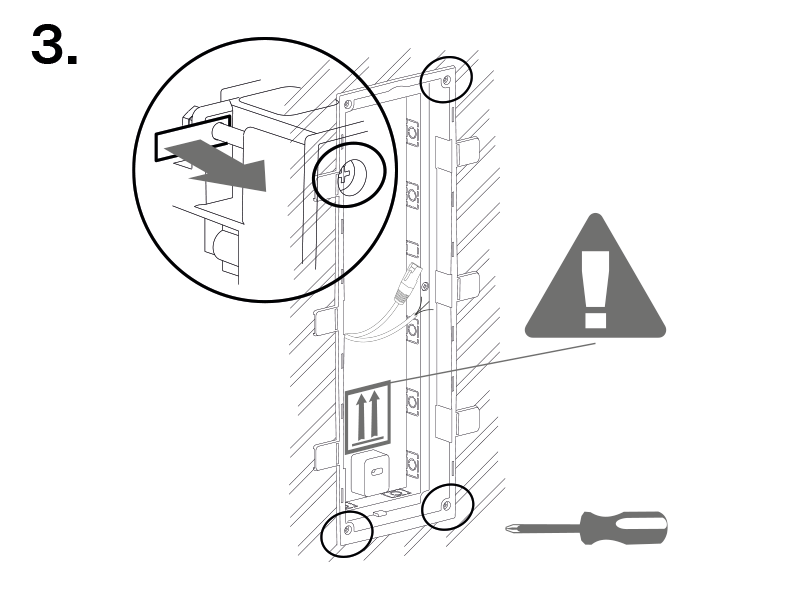
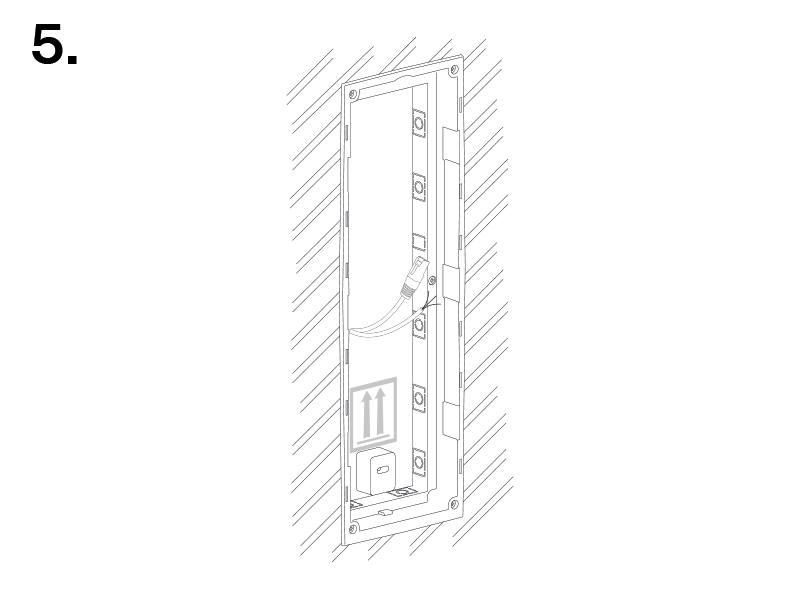
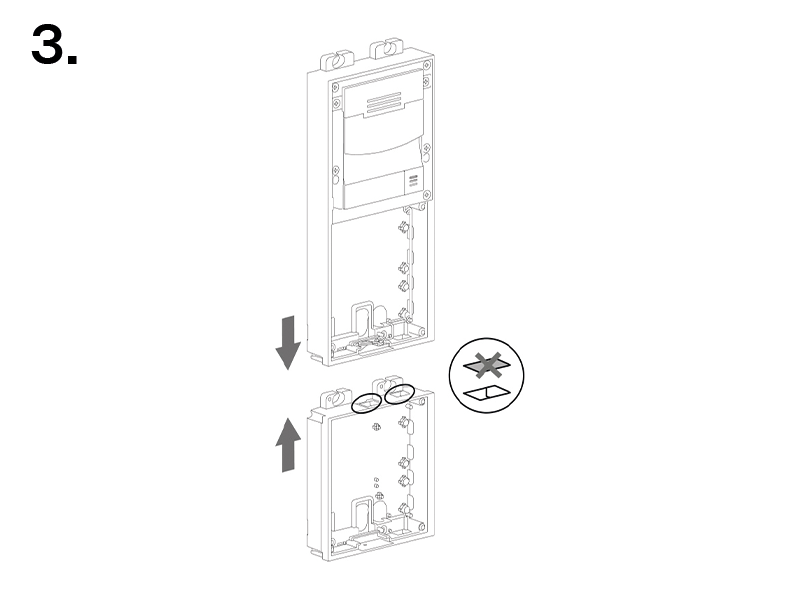
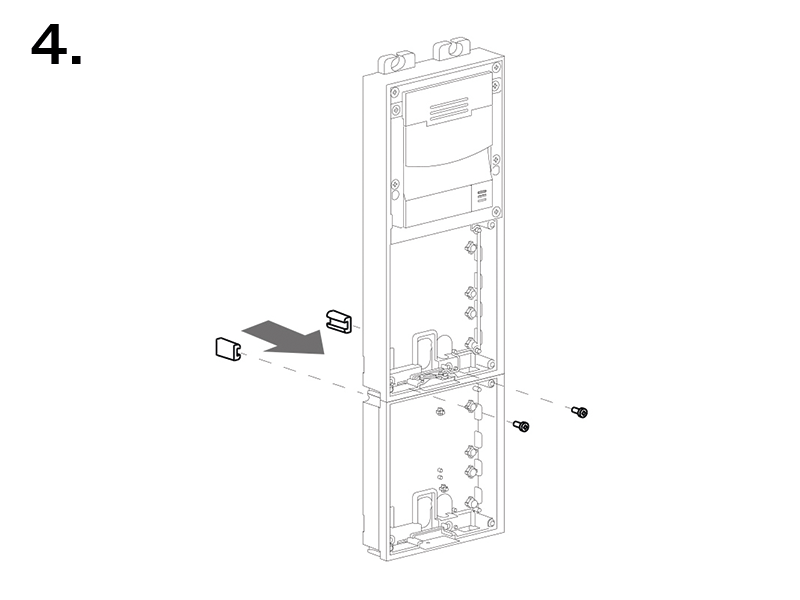
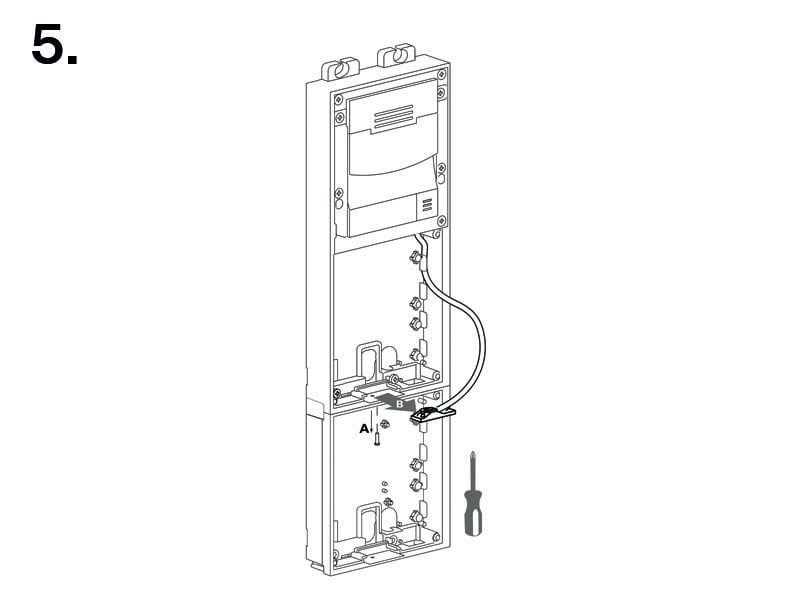
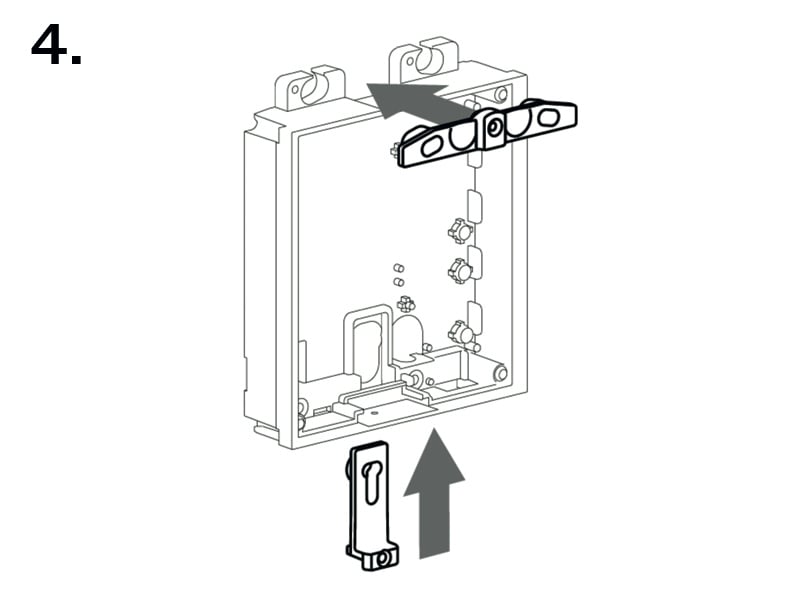
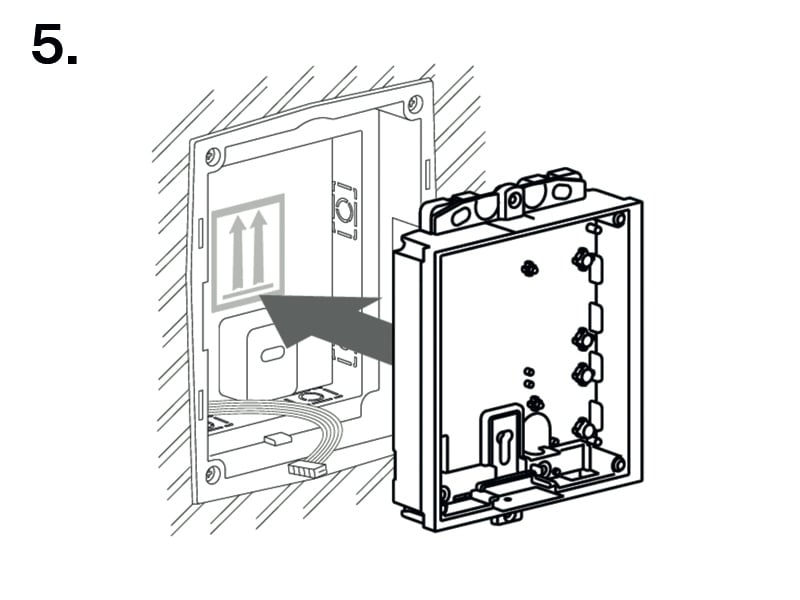
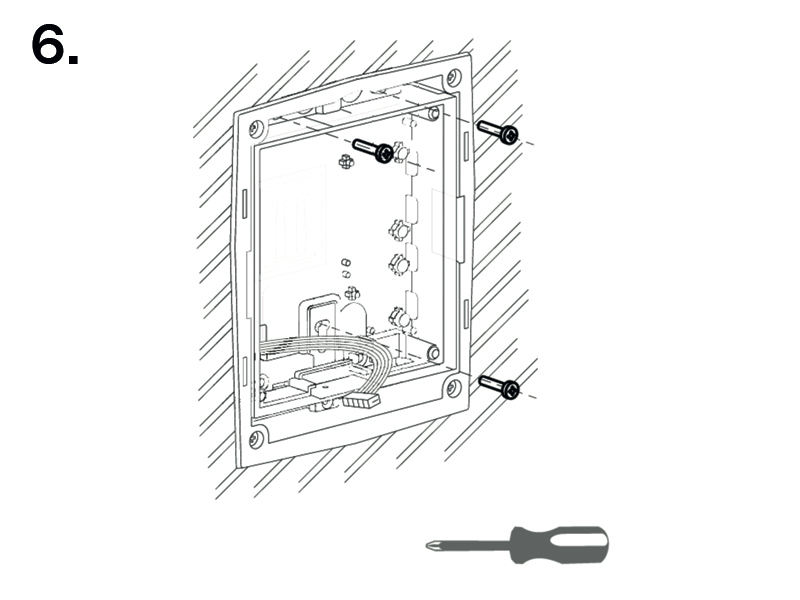
2-Module Installation into Box
 |  |
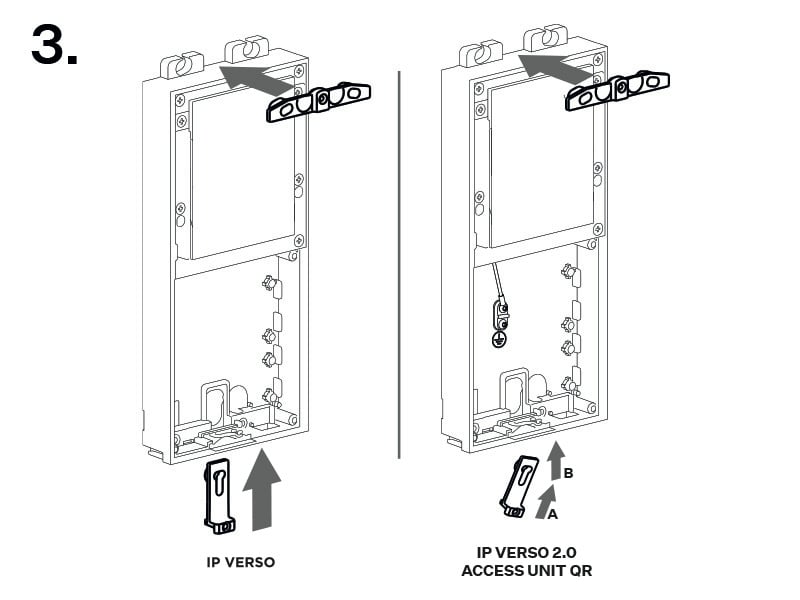 | 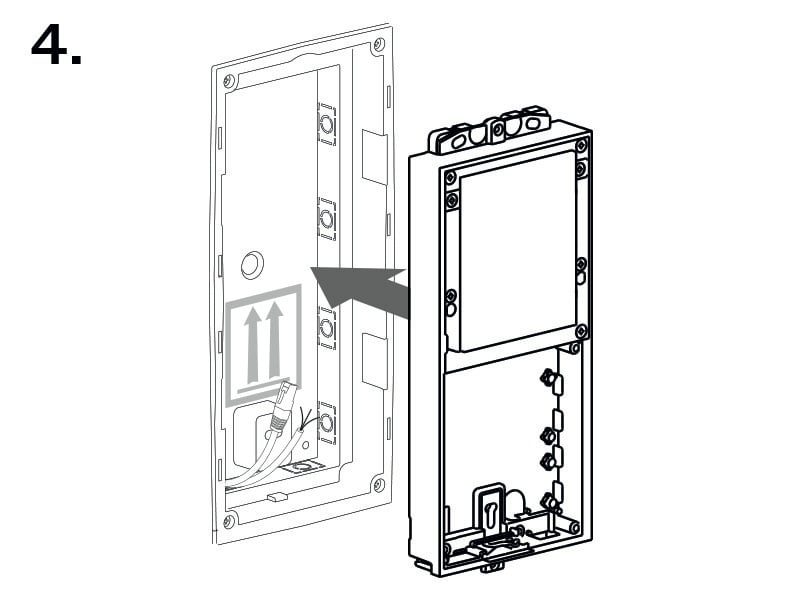 |
 | 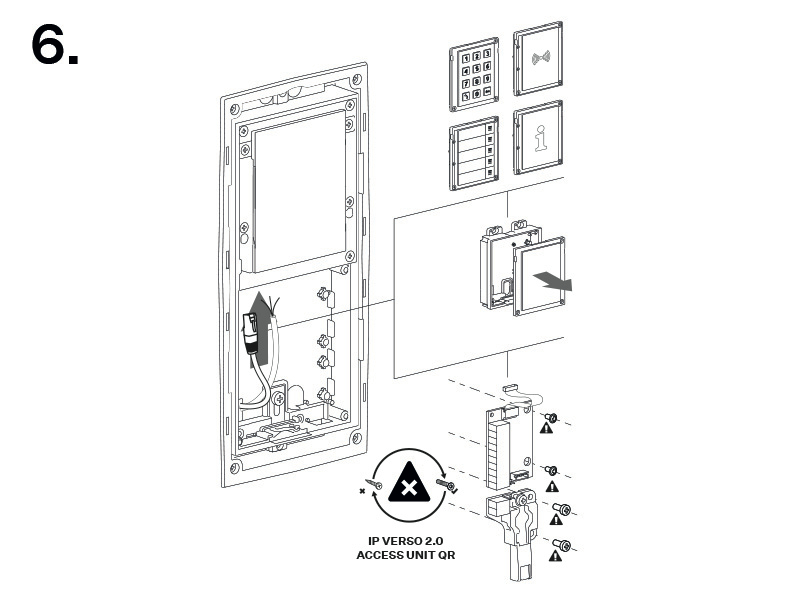 |
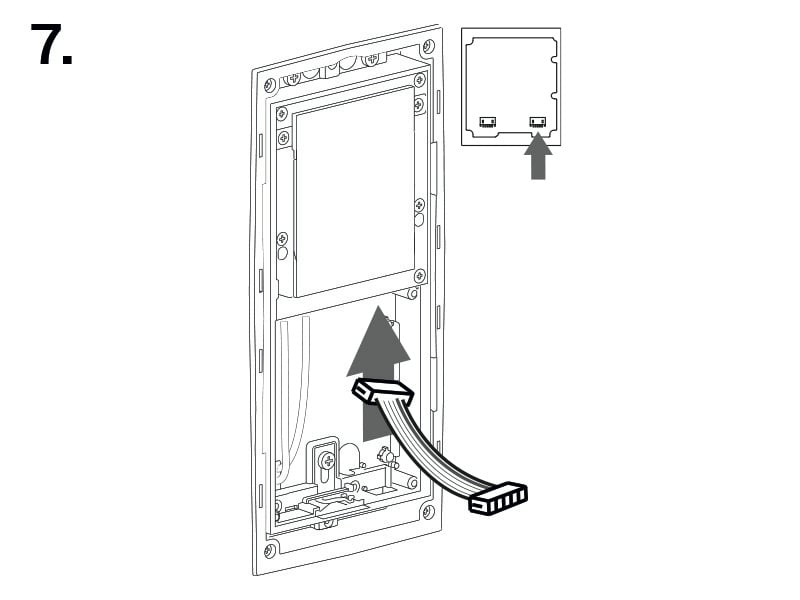 | 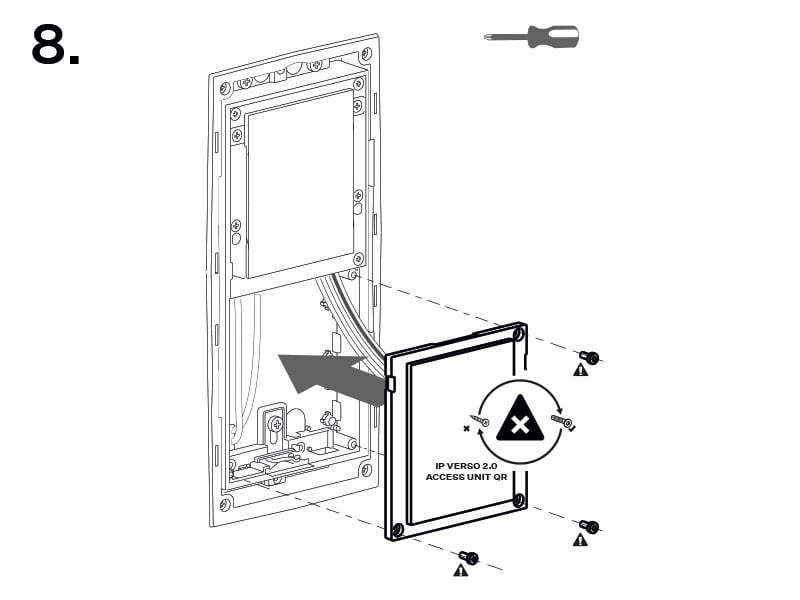 |
 | 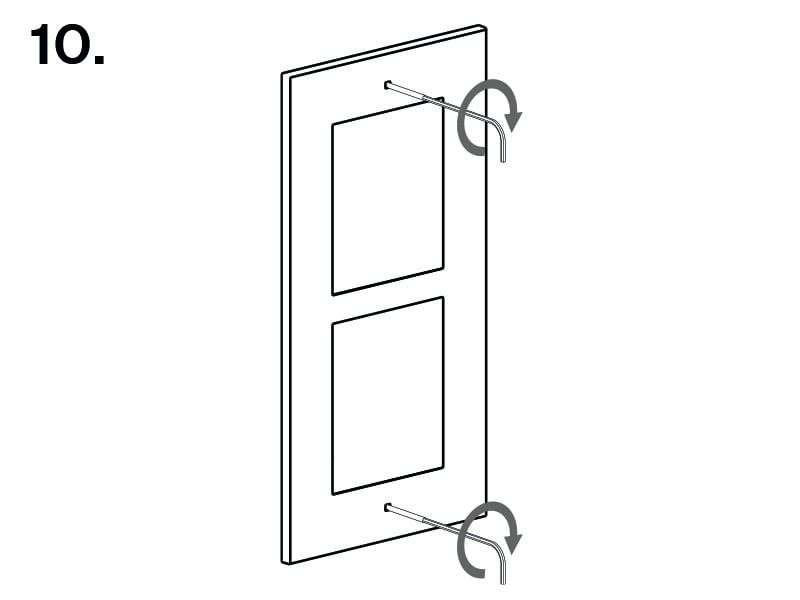 |
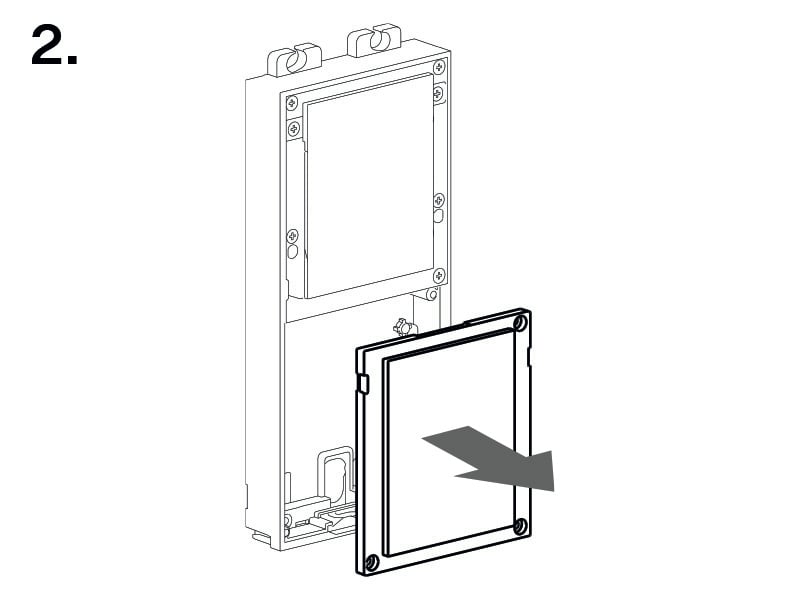
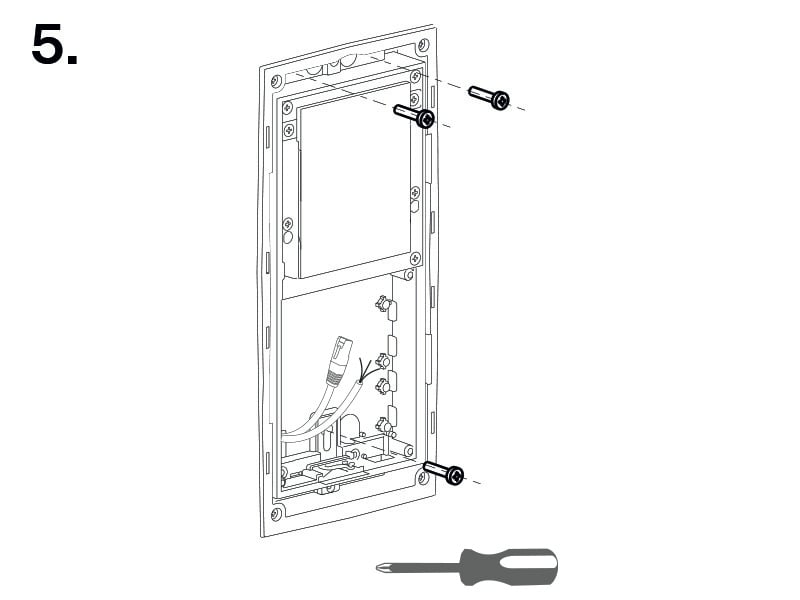
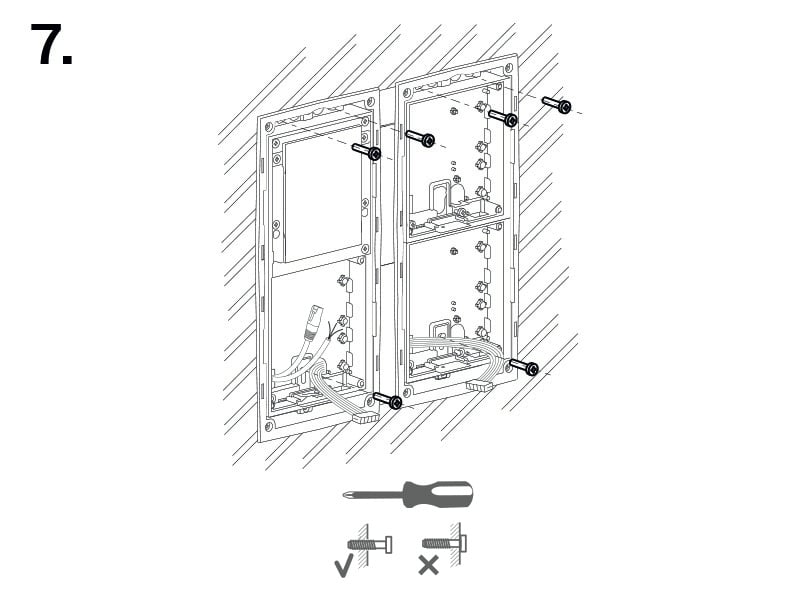
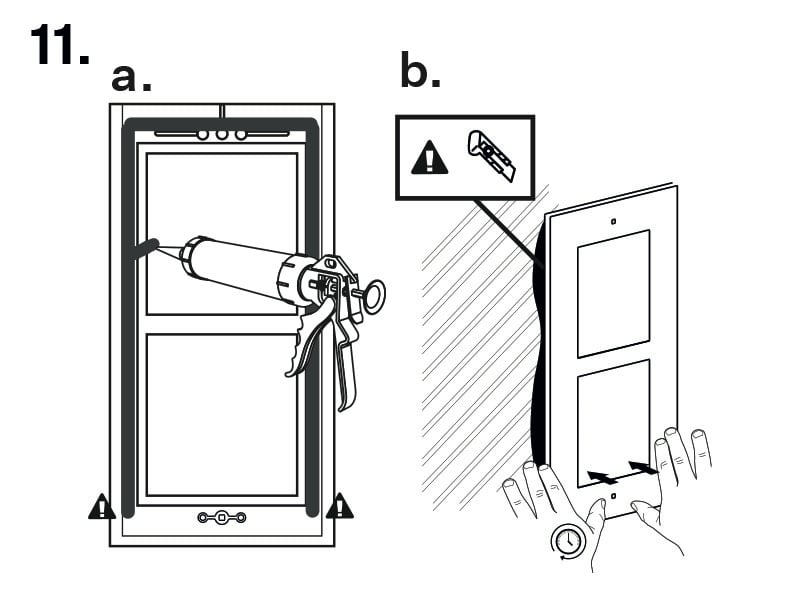
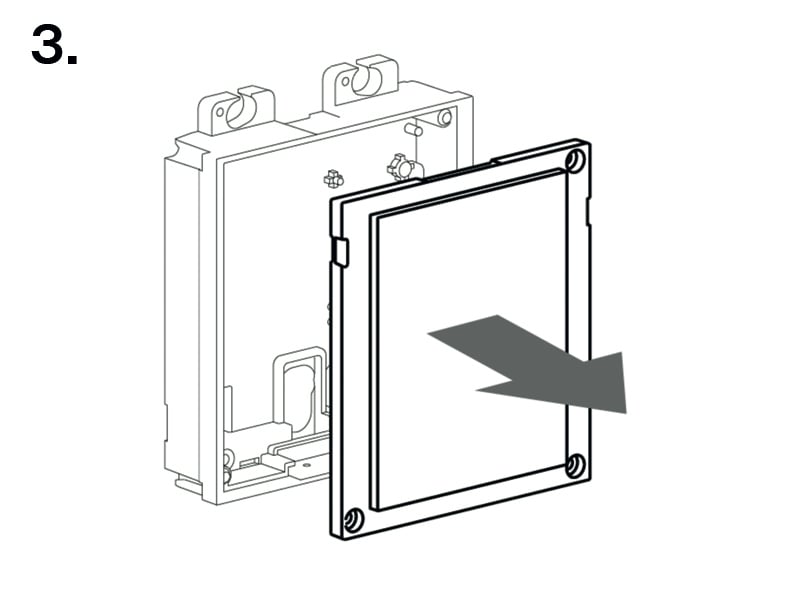
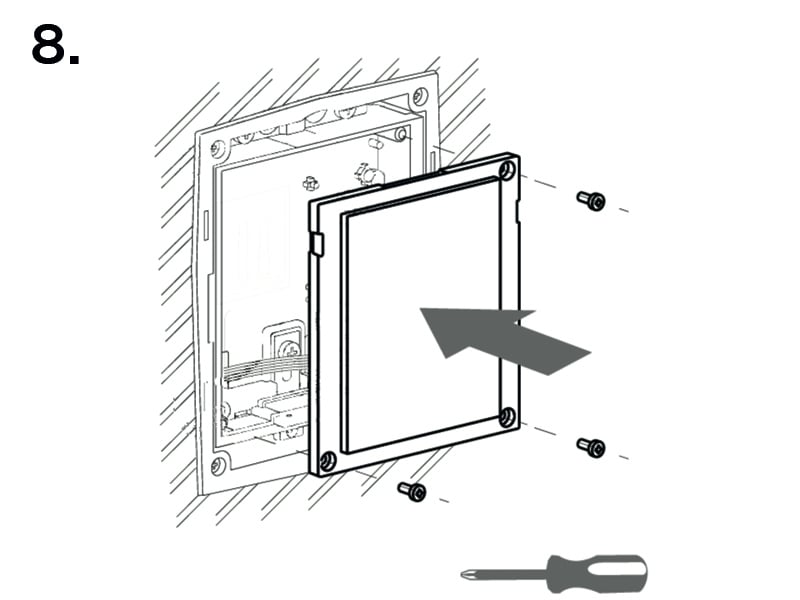
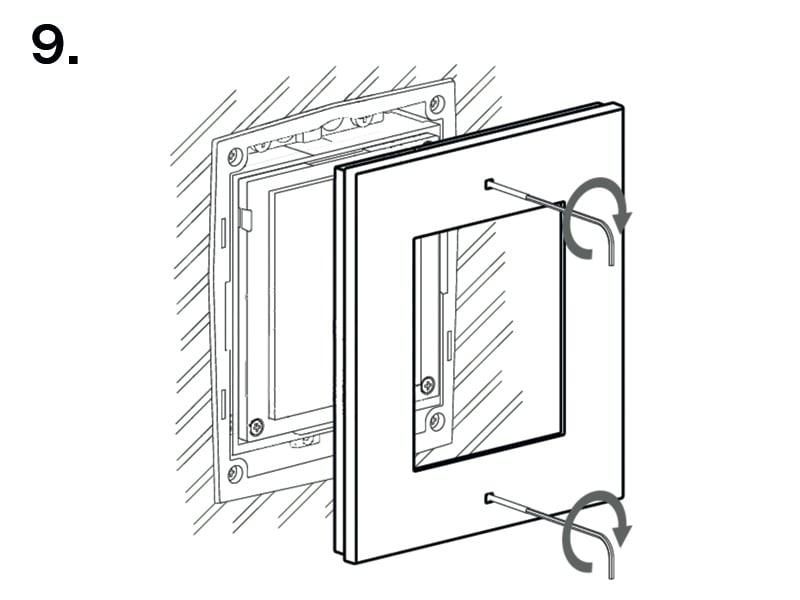
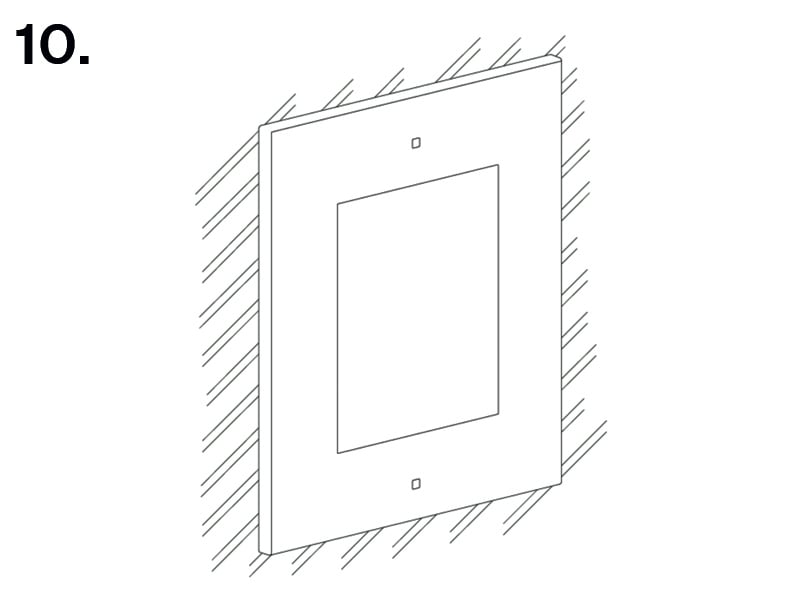
Frame Attachment
Check the frame sealing before fitting the frame.
Screw the flush mounting frame in the upper and bottom parts.
Hang the surface mounting frame on the hook in the upper part and then screw it tight in the bottom part.
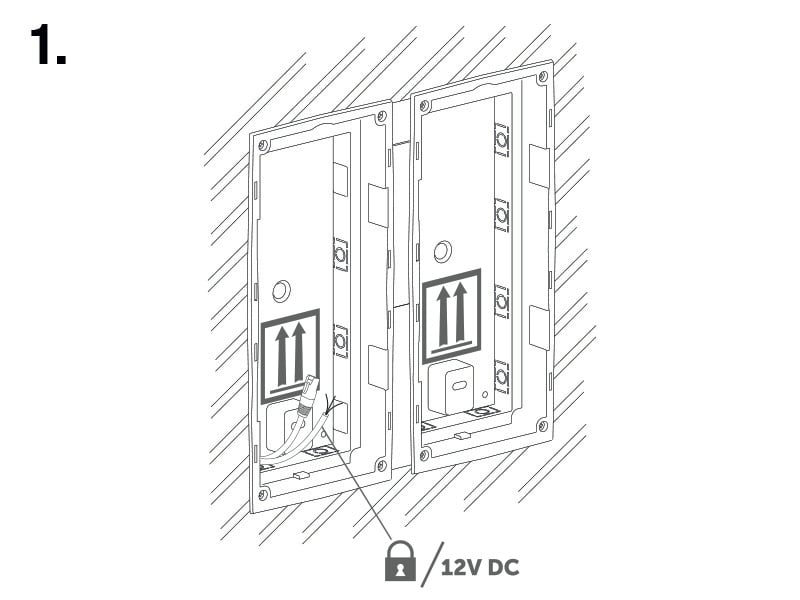
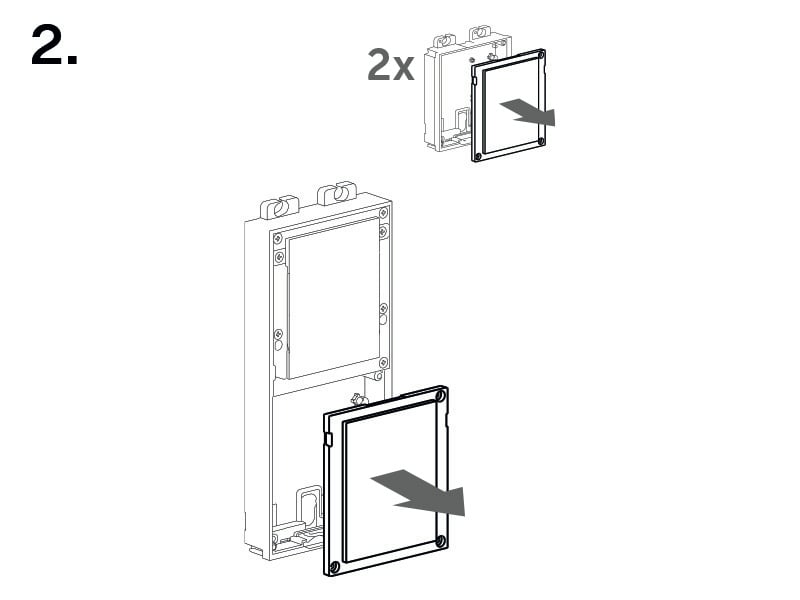
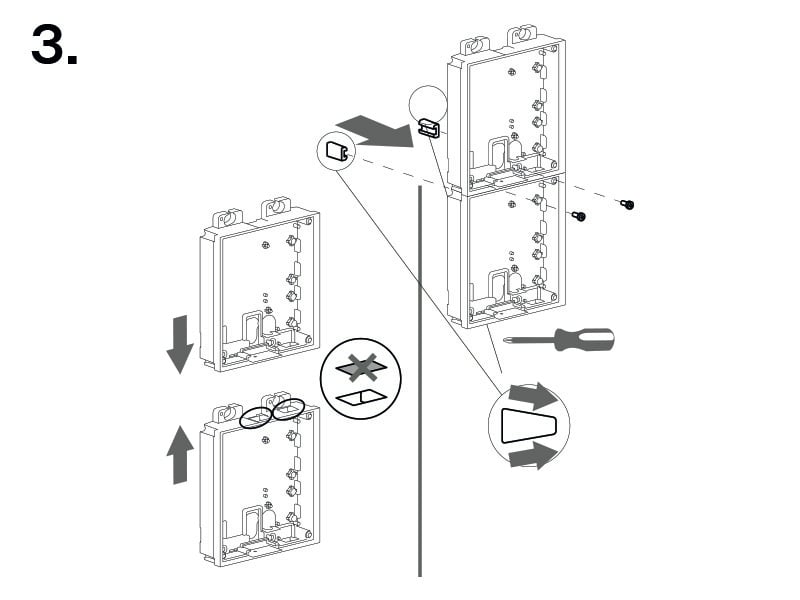
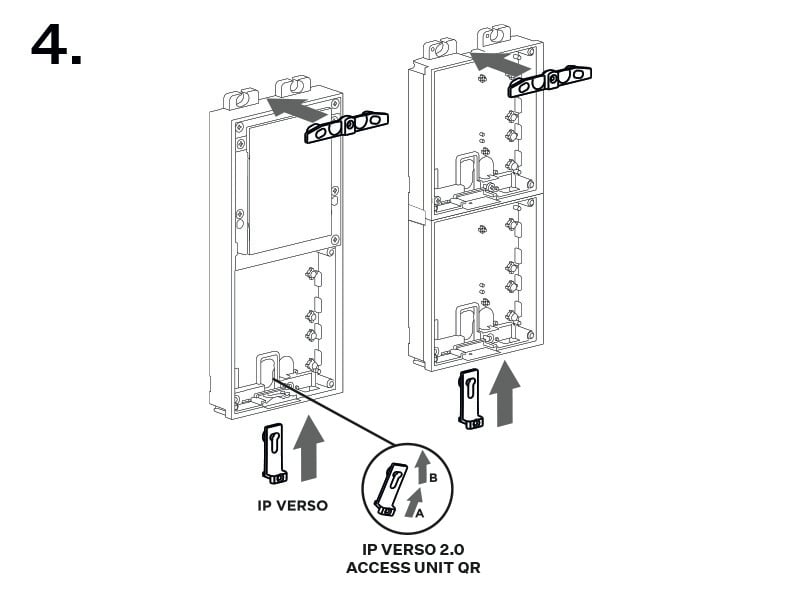
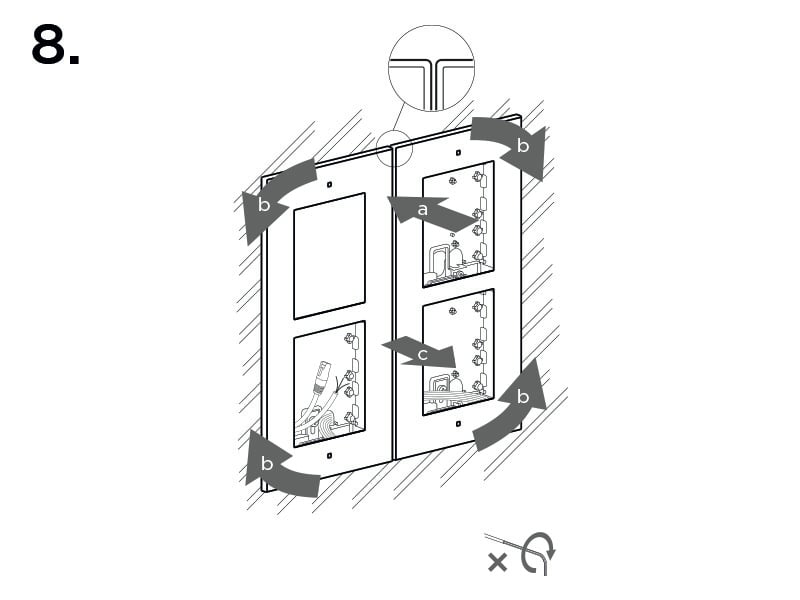
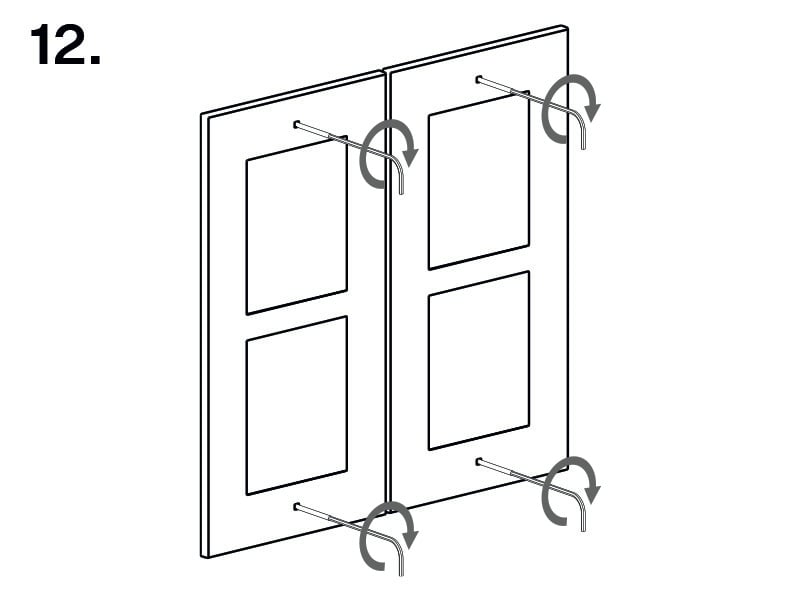
Installation of Multiple 2-Module Boxes Next to Each Other
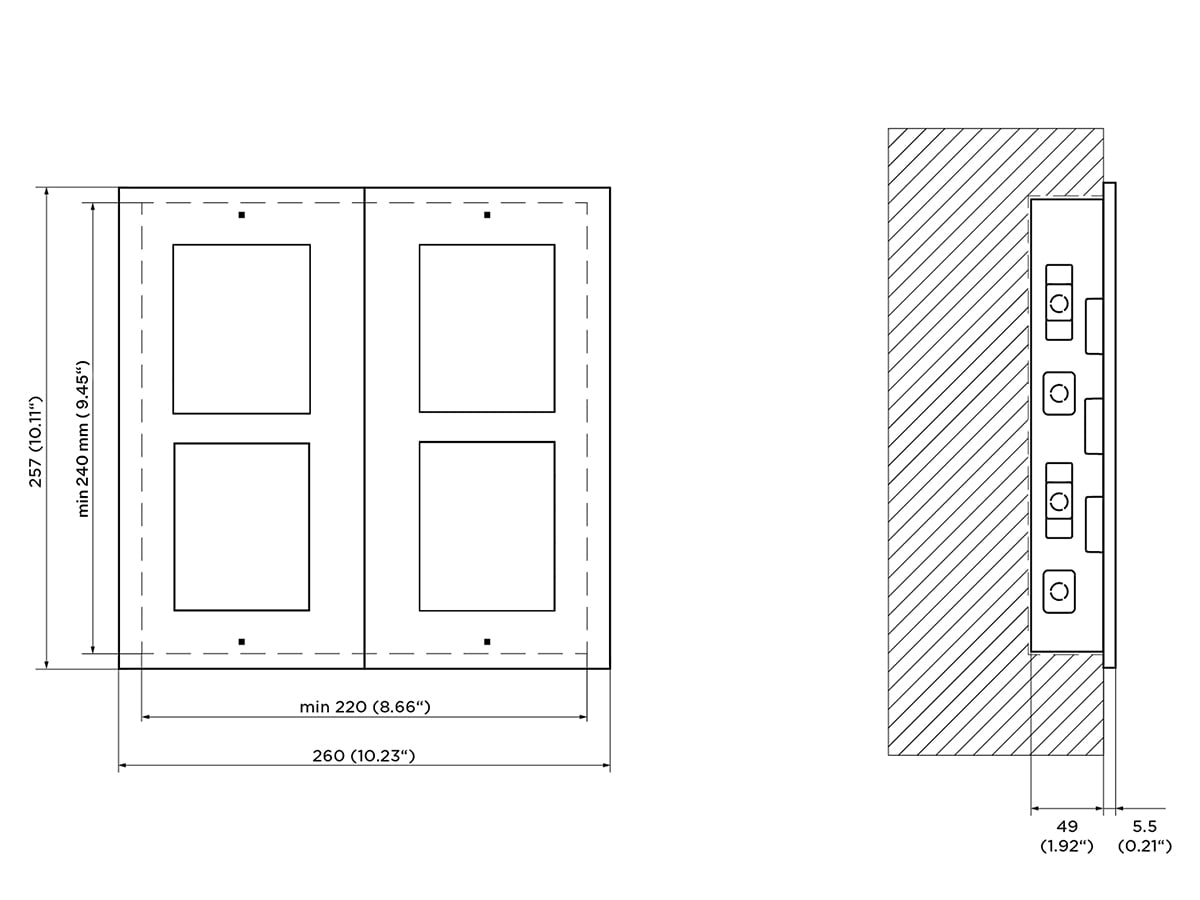
 |  |
 |  |
 |  |
 | 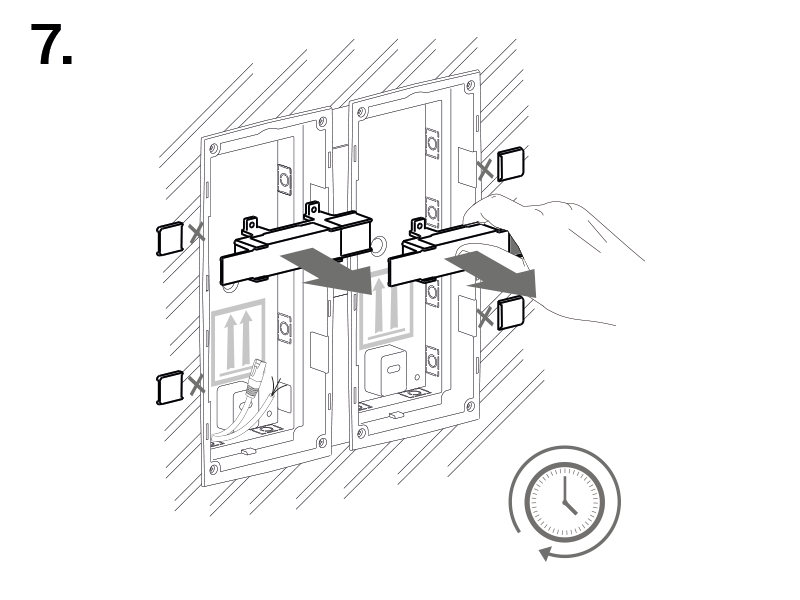 |
Warning
| Make sure that the flush mounting box edges are not aligned with the wall but overlap the wall surface. When the proper box installation instructions are not met, water might get in and destroy the device installed. Side stops are used for a correct wall position. |
Caution
| When the walling material has hardened, break off the side stops. |
Installation of Multiple 2-Modules into Box
 |  |
 |  |
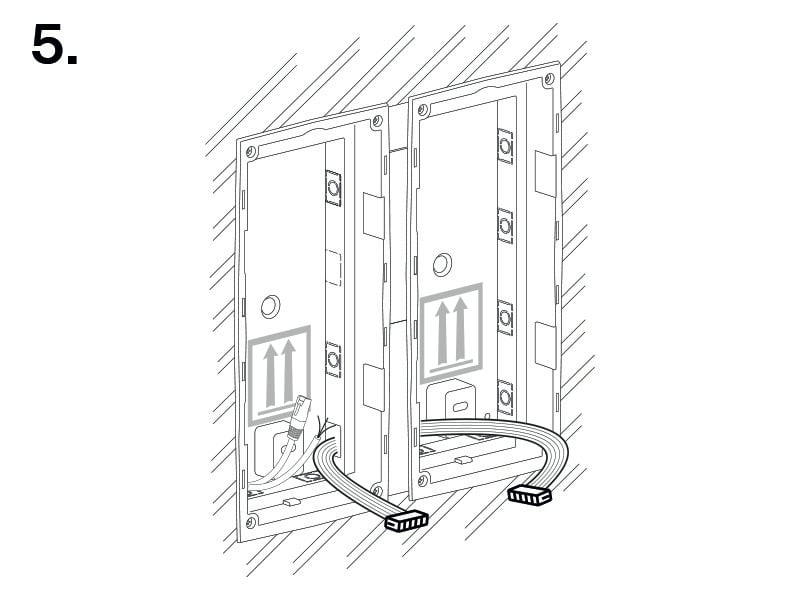 | 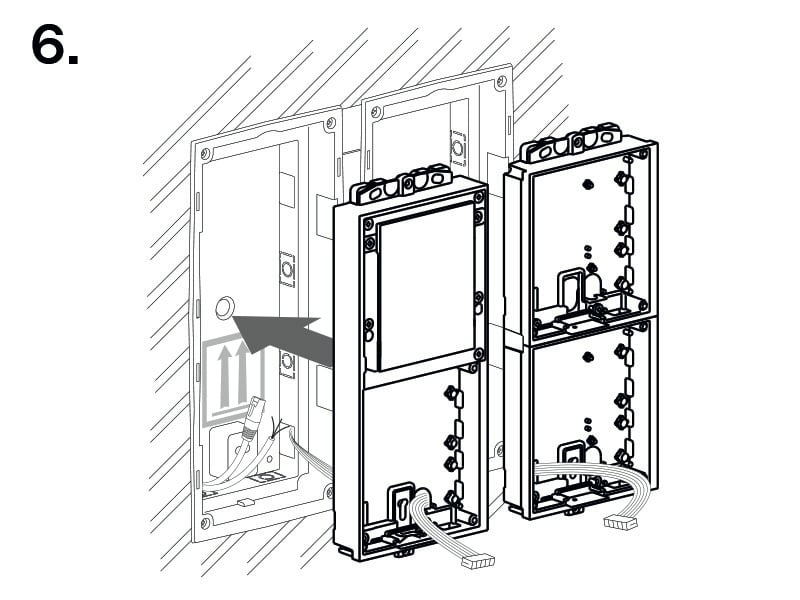 |
 |  |
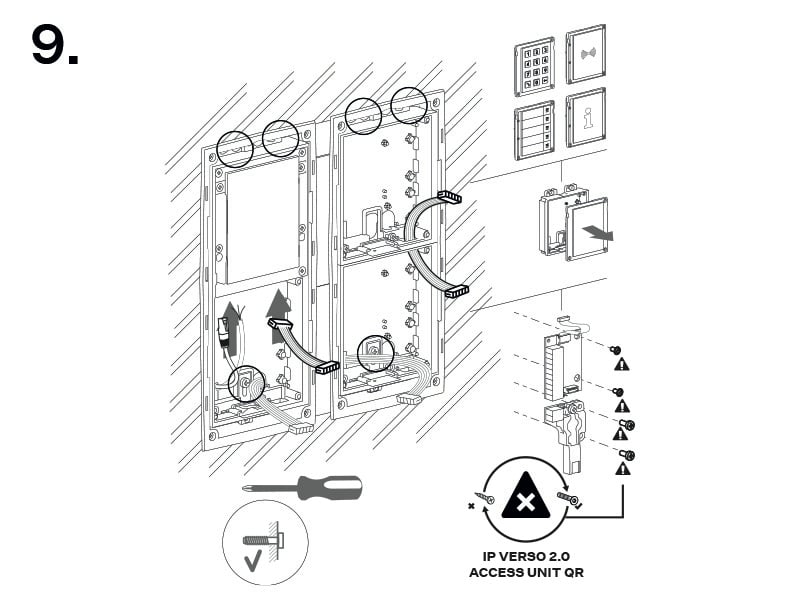 | 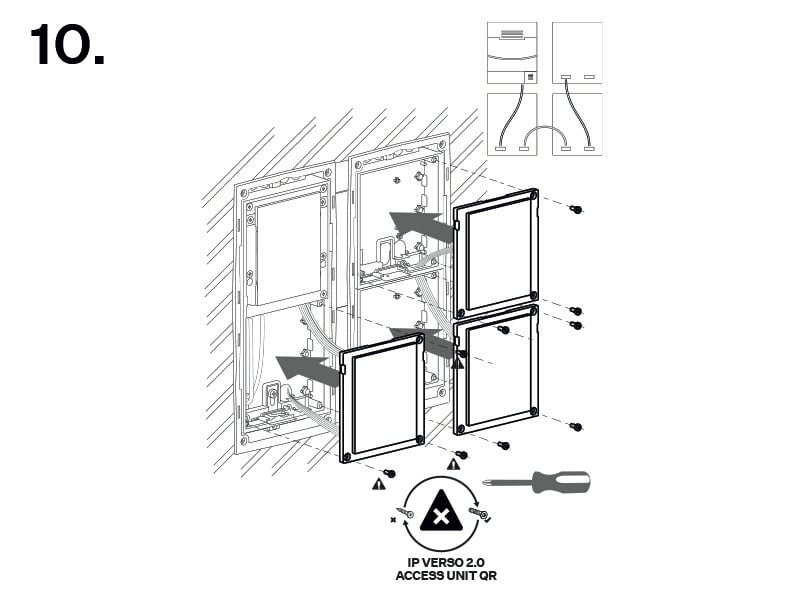 |
 |  |
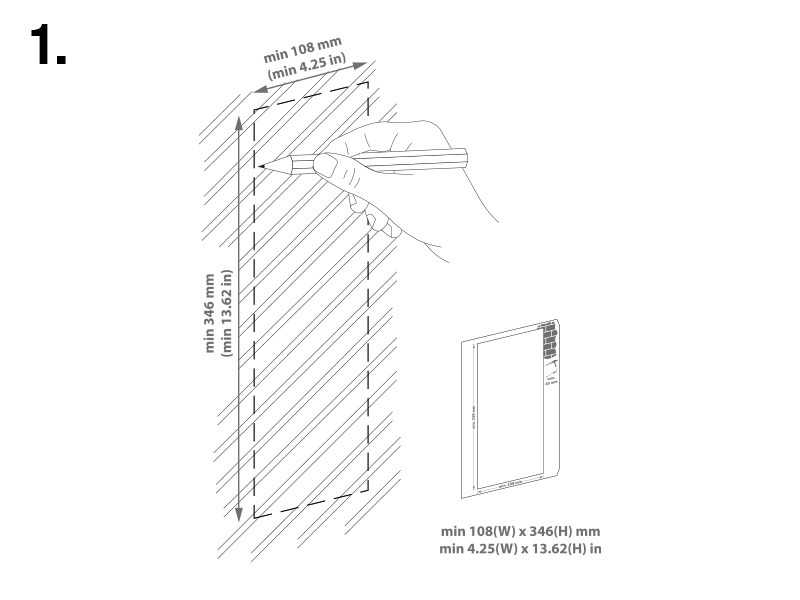
3-Module Installation
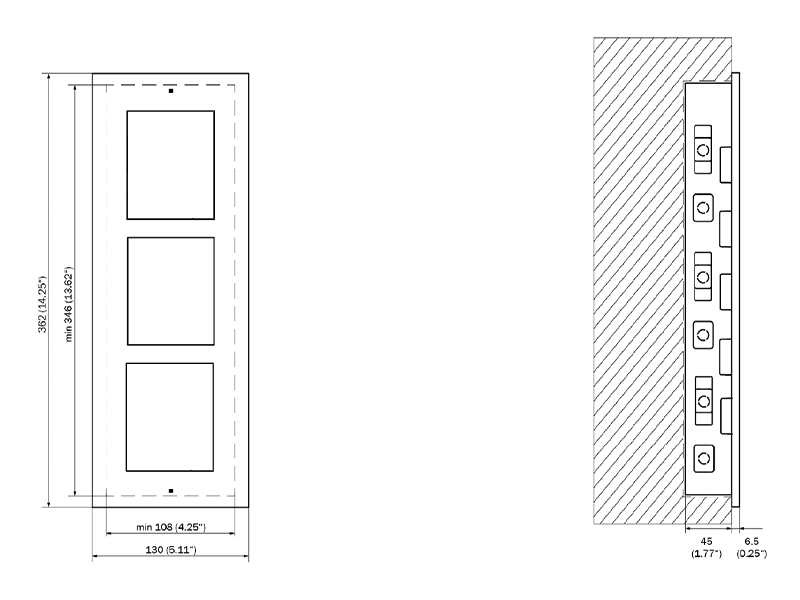
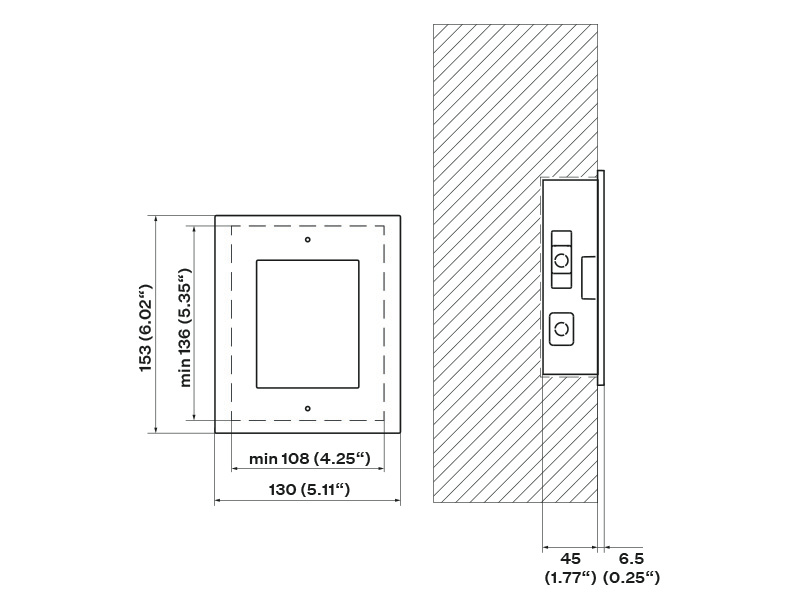
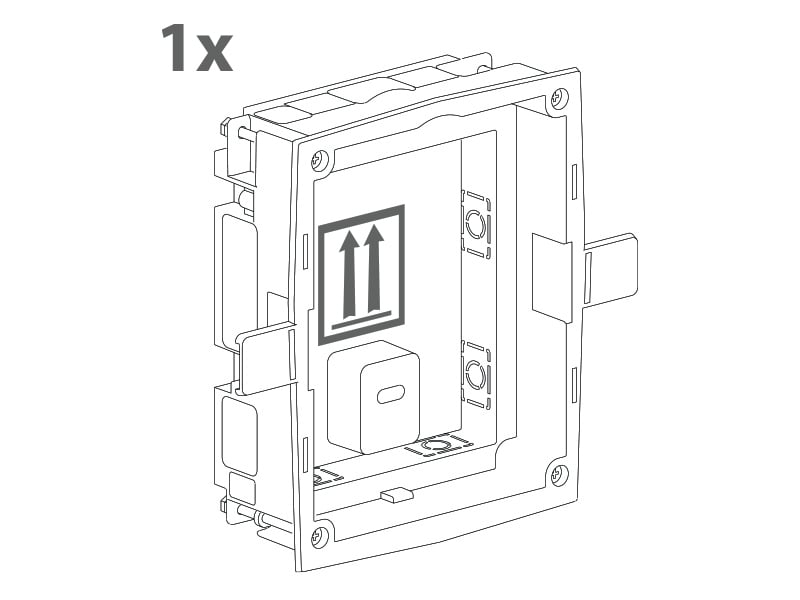
Box Installation
 |  |
 |  |
 |  |
Warning
| Make sure that the flush mounting box edges are not aligned with the wall but overlap the wall surface. When the proper box installation instructions are not met, water might get in and destroy the device installed. Side stops are used for a correct wall position. |
Caution
| When the walling material has hardened, break off the side stops. |
3-Module Installation into Box
 |  |
 |  |
 | 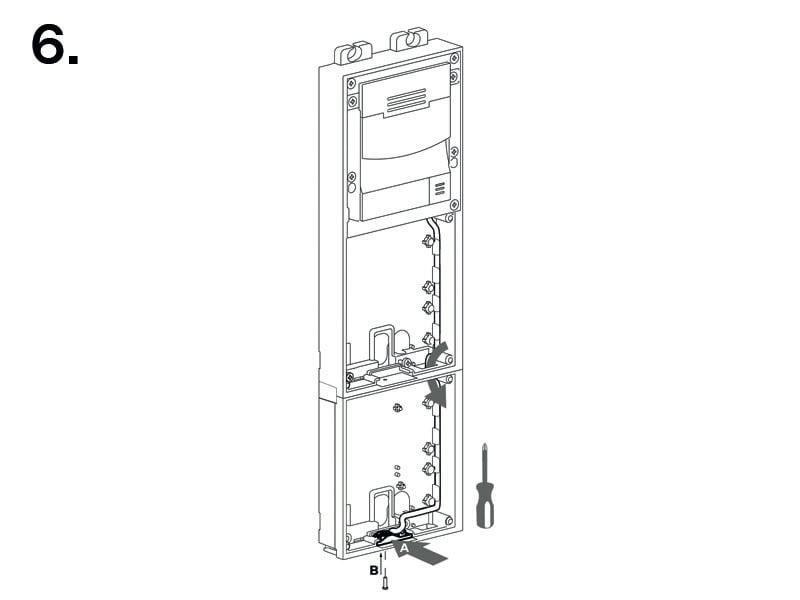 |
 | 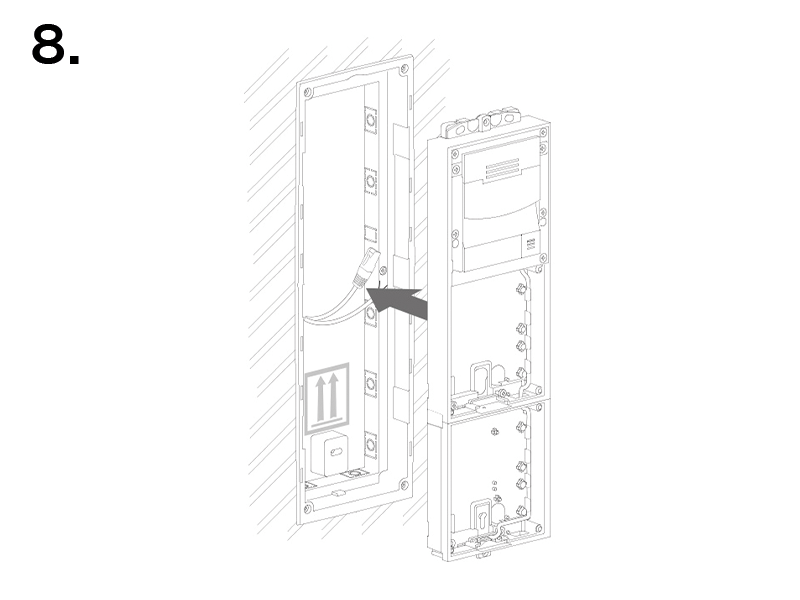 |
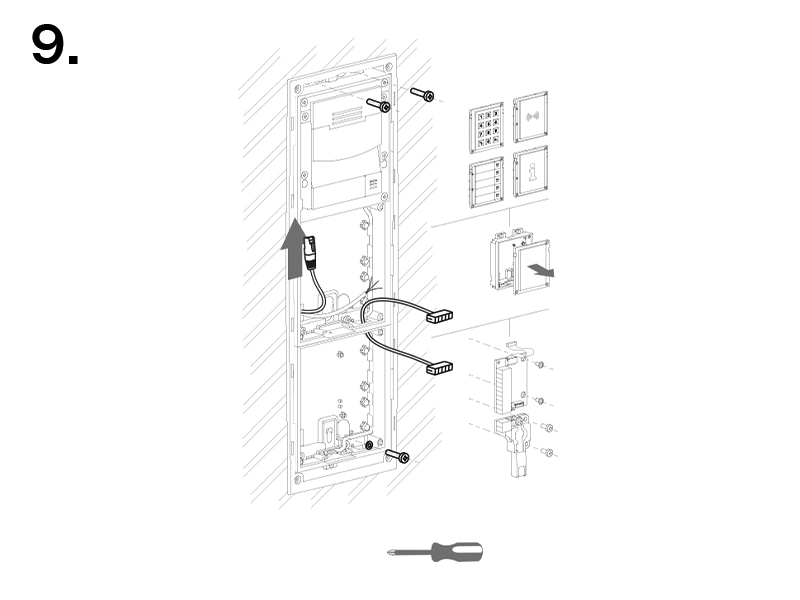 | 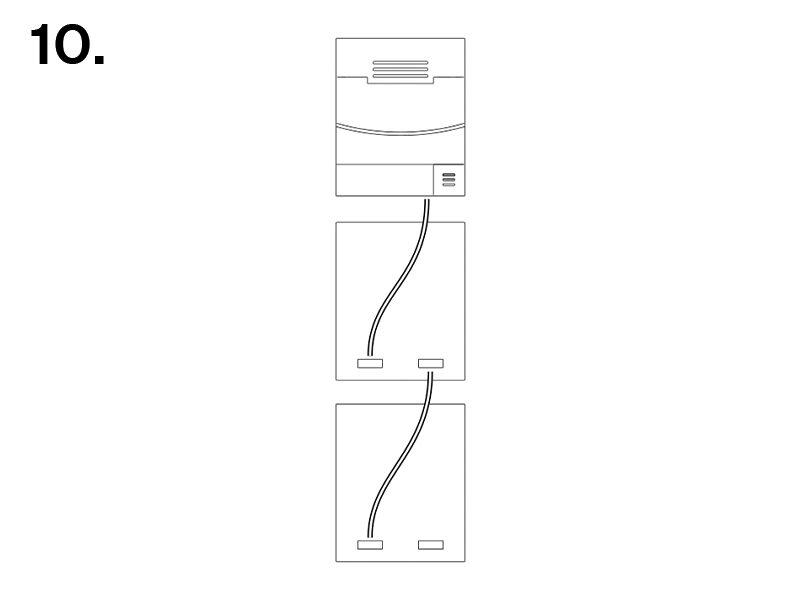 |
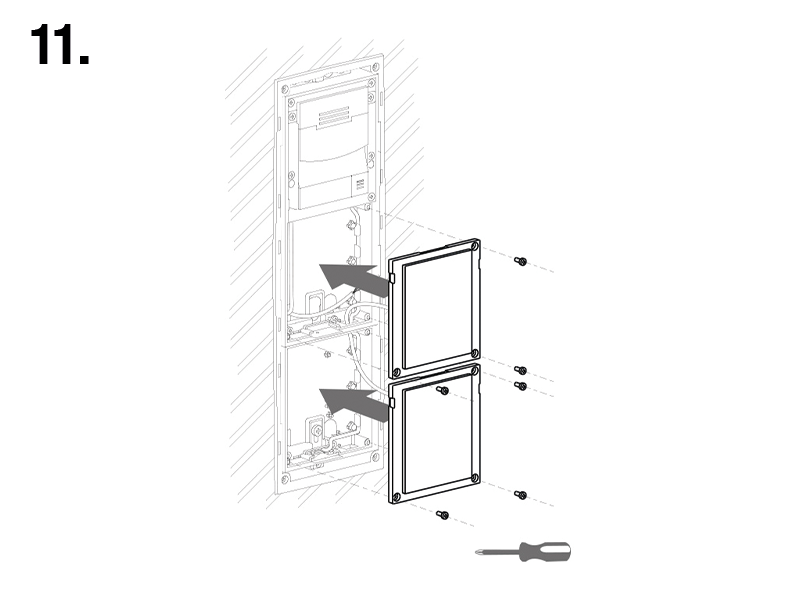 | 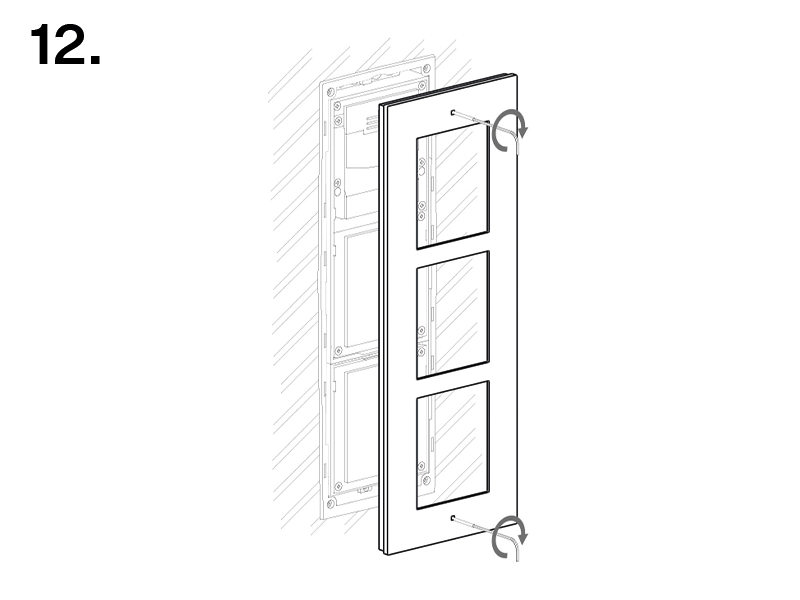 |
Frame Attachment
Check the frame sealing before fitting the frame.
Screw the flush mounting frame in the upper and bottom parts.
Hang the surface mounting frame on the hook in the upper part and then screw it tight in the bottom part.
1-Module Installation
Box Installation
 |  |
 |  |
 |  |
Warning
| Make sure that the flush mounting box edges are not aligned with the wall but overlap the wall surface. When the proper box installation instructions are not met, water might get in and destroy the device installed. Side stops are used for a correct wall position. |
Caution
| When the walling material has hardened, break off the side stops. |
1-Module Installation into Box
 | |
 |  |
 |  |
 |  |
 |  |
Frame Attachment
Check the frame sealing before fitting the frame.
Screw the flush mounting frame in the upper and bottom parts.
Hang the surface mounting frame on the hook in the upper part and then screw it tight in the bottom part.