Milestone XProtect - Video Pop-up on 2N Device's Action
The steps in this article require using the web interface of a 2N device. Please follow this manual in case this is your first time using the web interface.
After adding 2N IP devices as an ONVIF camera into Milestone XProtect and integrating Milestone XProtect with the 2N Access Commander (Milestone integration - How to set up with 2N Access Commander), it is possible to set up a video pop-up window in response to a specific action on the 2N IP device.
This function utilises the ONVIF virtual inputs, which need to be set up in the 2N device's automation function and in Milestone XProtect Management Client's rules and access notifications sections.
With the video pop-up window, it is possible to display a video from the 2N IP device, listen to the audio, and utilise the push-to-talk function if the computer with the Milestone XProtect Smart Client has a microphone connected.
This article applies to the following products and licenses:
-
2N Access Commander (version 3.4.2 or higher)
-
XProtect Access license for Milestone XProtect (information on added licenses can be seen in: Milestone XProtect Management Client > Basics > License Information), provided by Milestone Systems A/S (XProtect variants)
-
2N plugin for Xprotect Access (version 1.6.0.113 or higher)
-
2N Gold license should be installed on a 2N IP Intercom to ensure faultless operation of the plugin
- Trial Gold license on 2N IP Intercom can be enabled for approximately 30 days
- 2N IP device configuration
- ONVIF virtual inputs mapping
- Milestone XProtect Management configuration
- Video pop-up window
2N IP device configuration
In the "Services -> Automation" section of the 2N IP device's web interface, it is necessary to create a function based on which action should trigger the ONVIF virtual output.
Here's an example where the ONVIF output is triggered by the first call button.
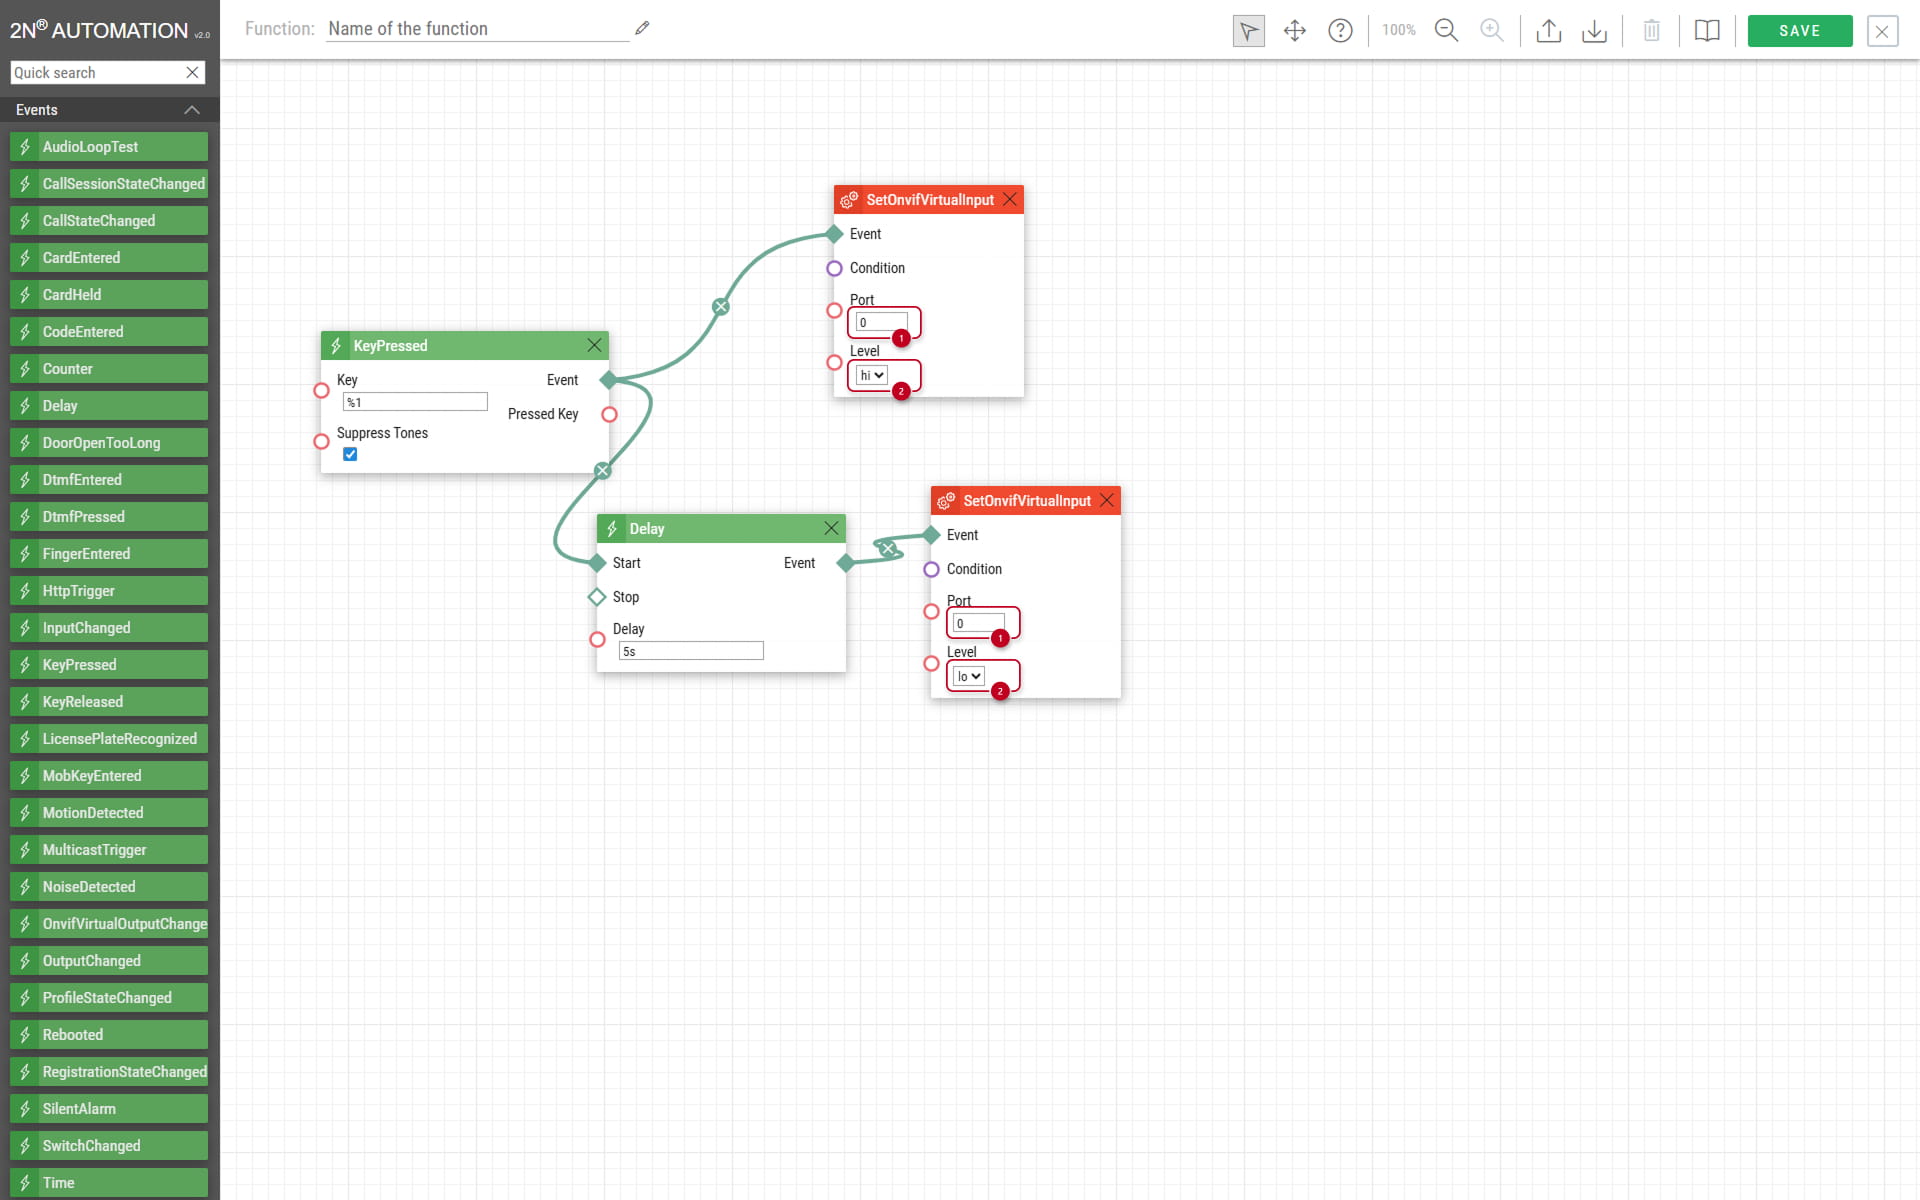
Please note that the port (1) may differ from 2N models (more about port mapping later).
We also recommend changing the ONVIF virtual input event's level to "low" with a delay after a few seconds (2).
ONVIF virtual inputs mapping
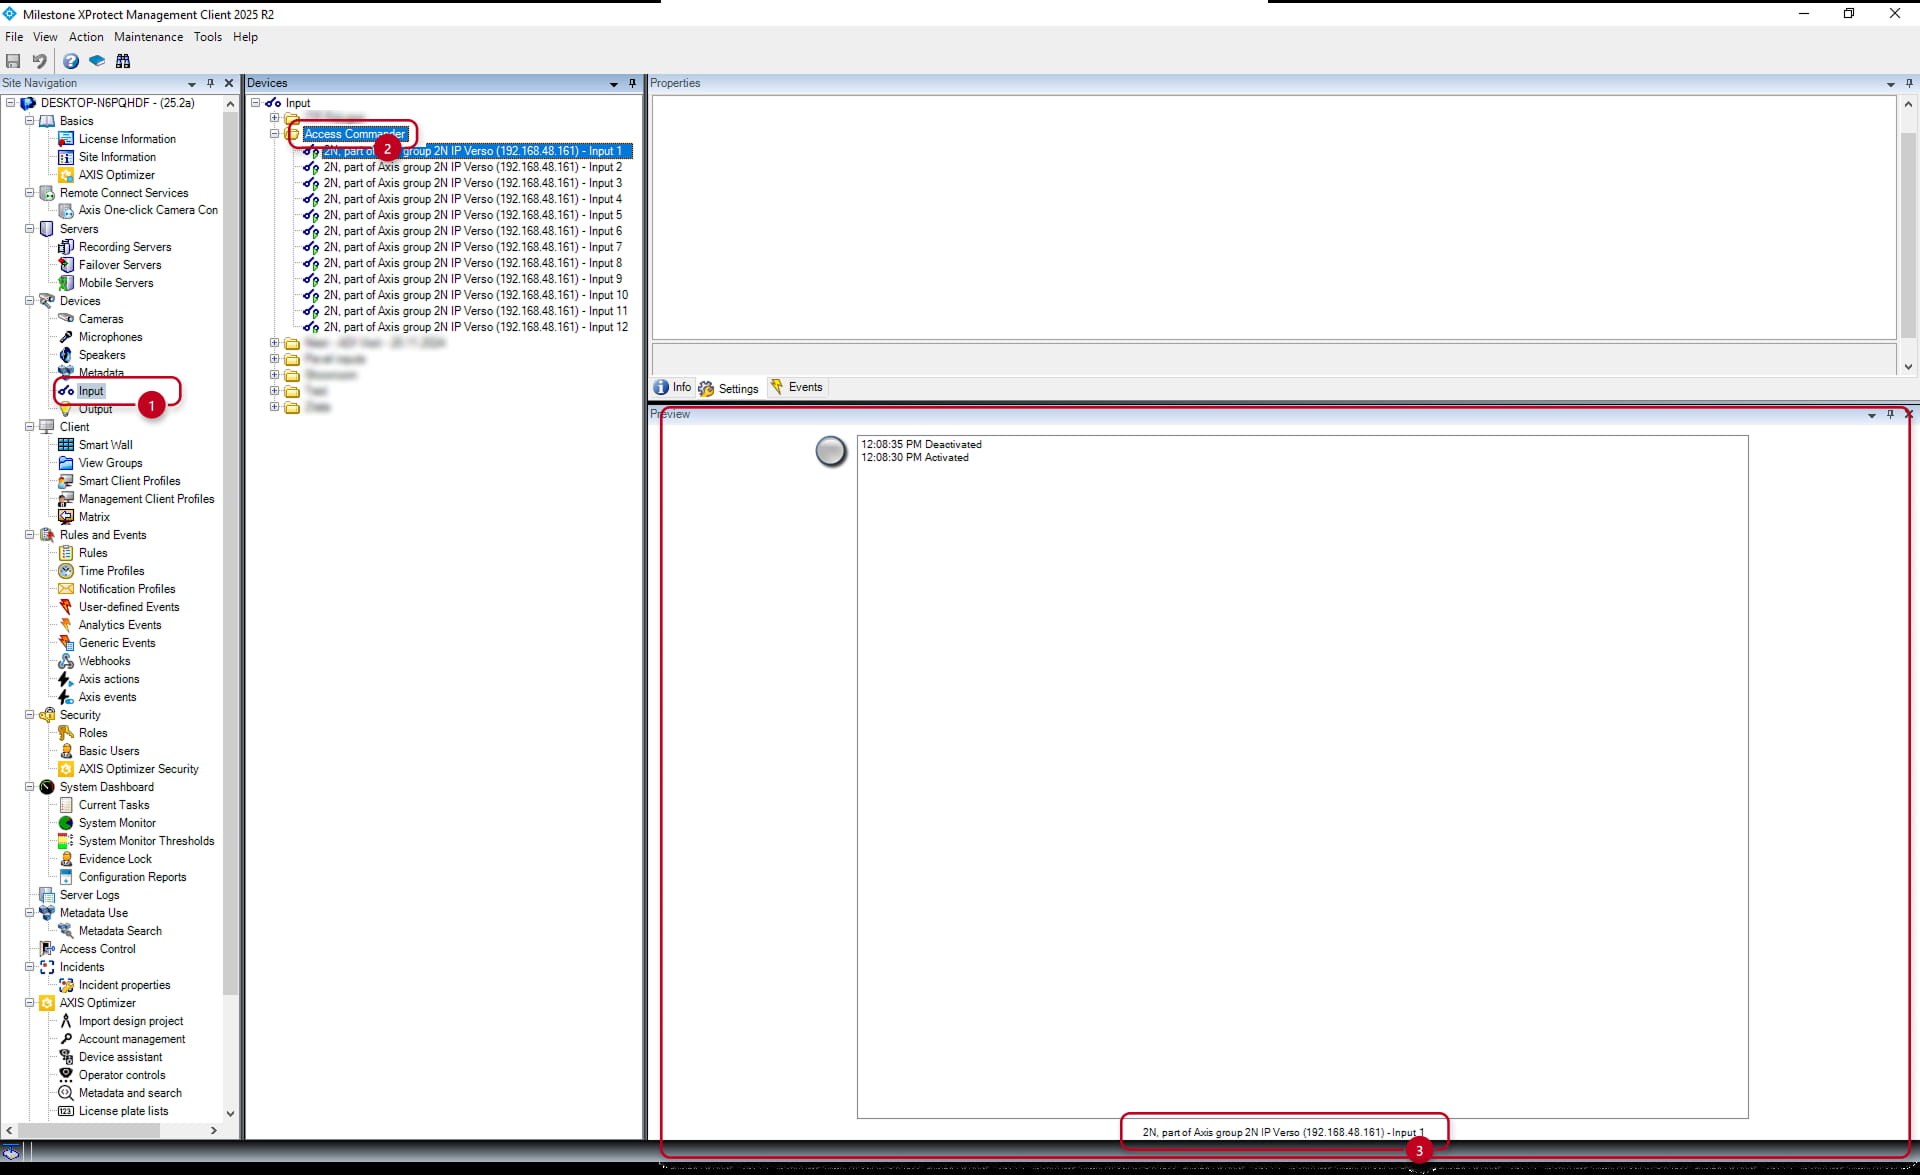
In the "Devices -> Inputs -> Project folder" section of the Milestone XProtect Management Client, it is possible to see all available inputs.
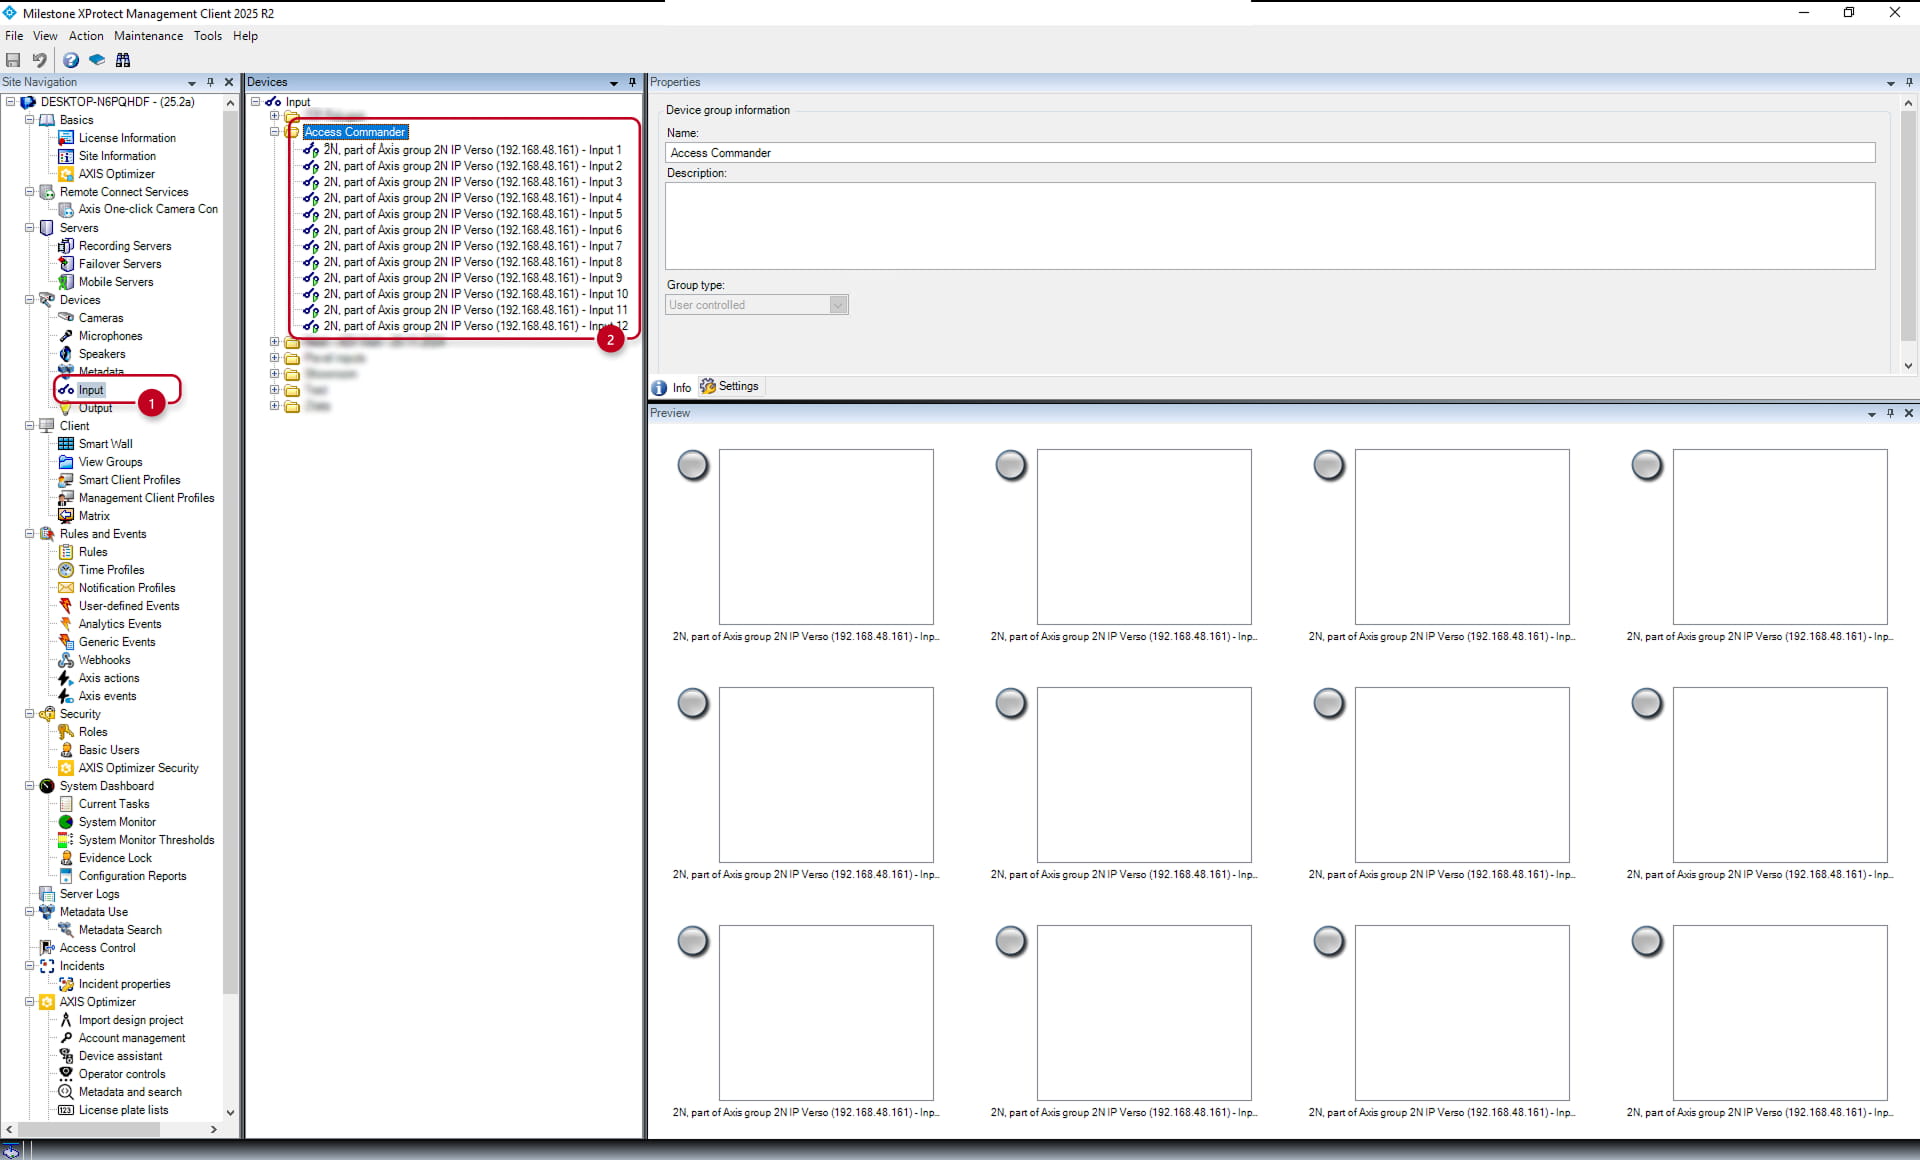
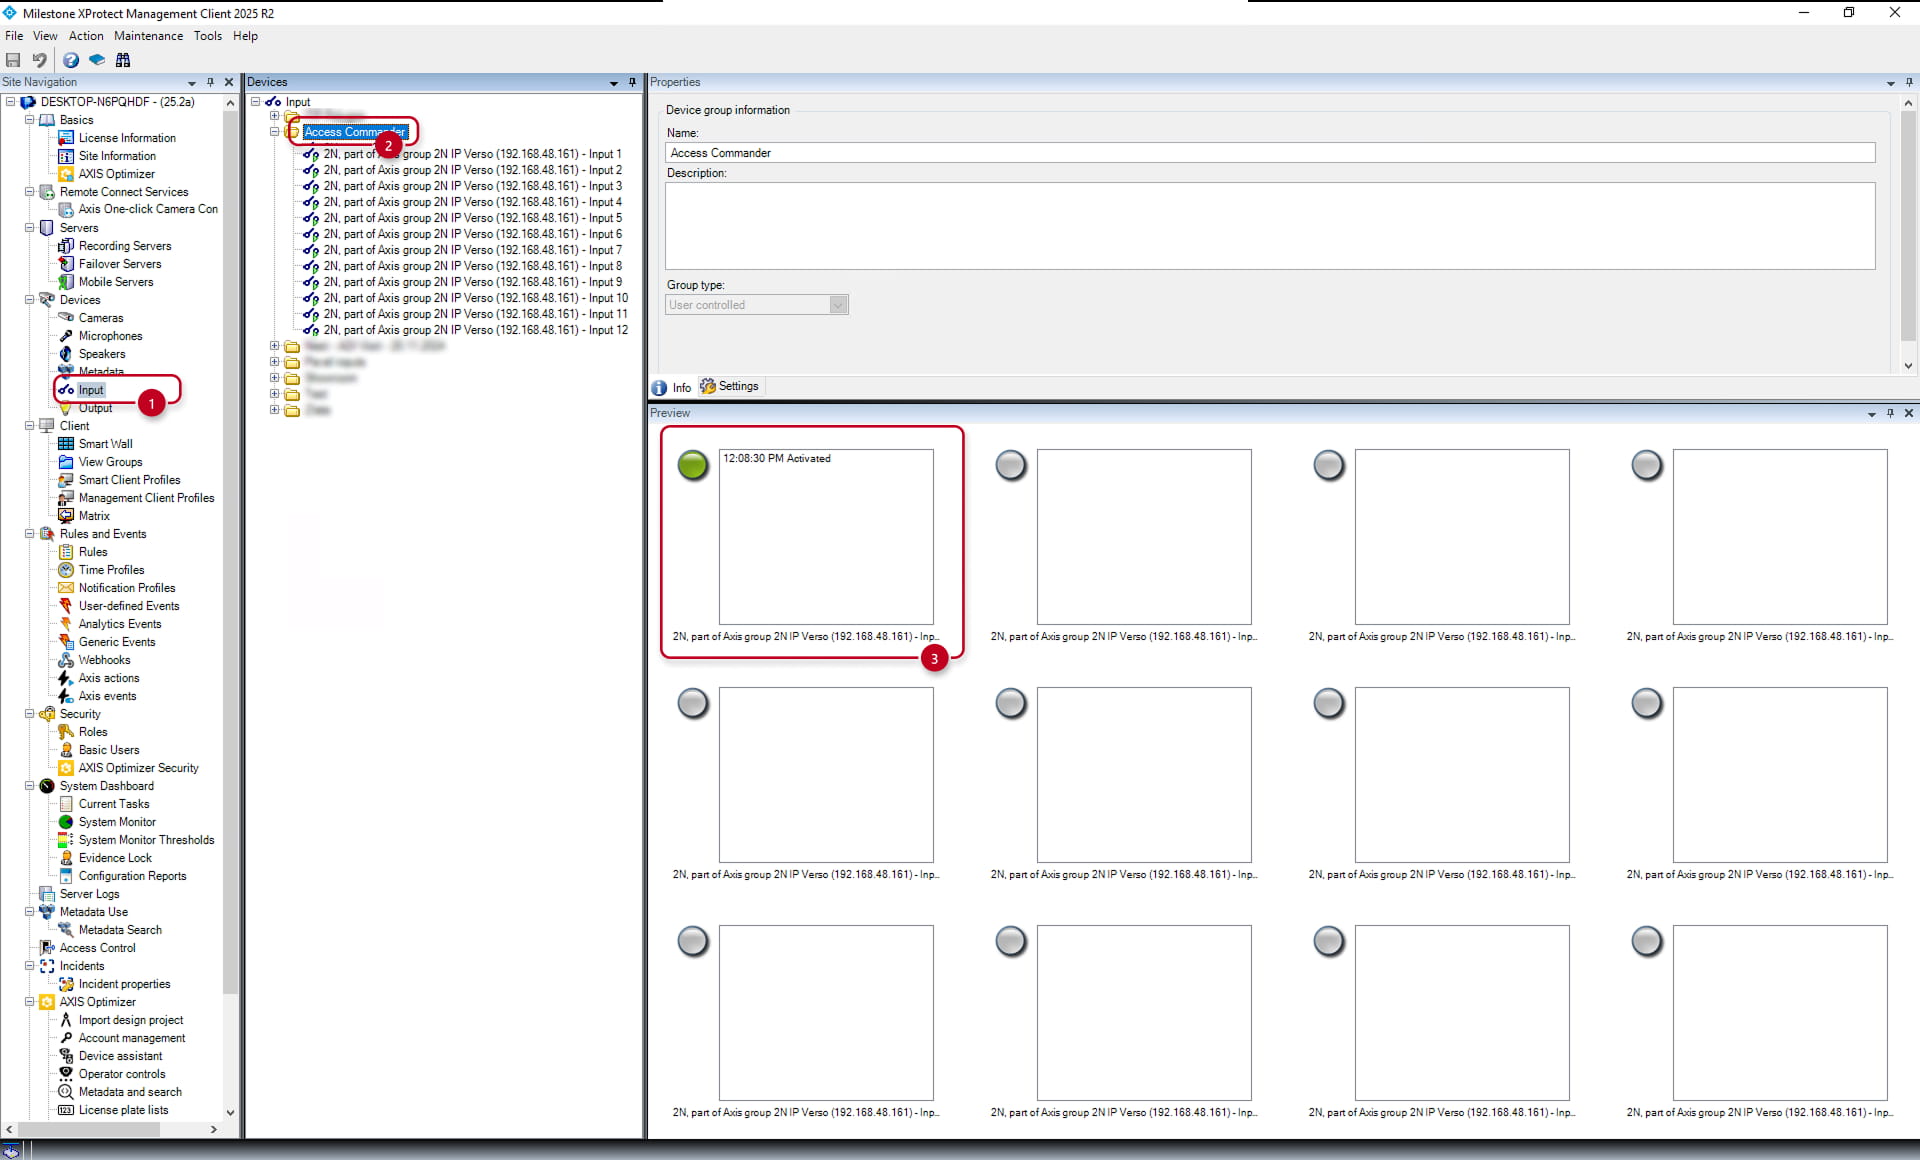
To find out which input of the connected 2N IP device in the Milestone XProtect Management Client is triggered by the port from the automation function, select the folder containing the inputs, perform the action which should trigger the ONVIF virtual input, and watch which input in the "Info" section (3) gets triggered. You will need the information later when configuring rules.
Milestone XProtect Management configuration
In the Milestone XProtect Management Client, we will need to create an access control notification and then run it based on a received action with a rule.
Access Request Notification
Go to the "Access Control -> "Connected Access Commander" -> Access Request Notification" section and add a new Access Request notification and create a name for it (4).
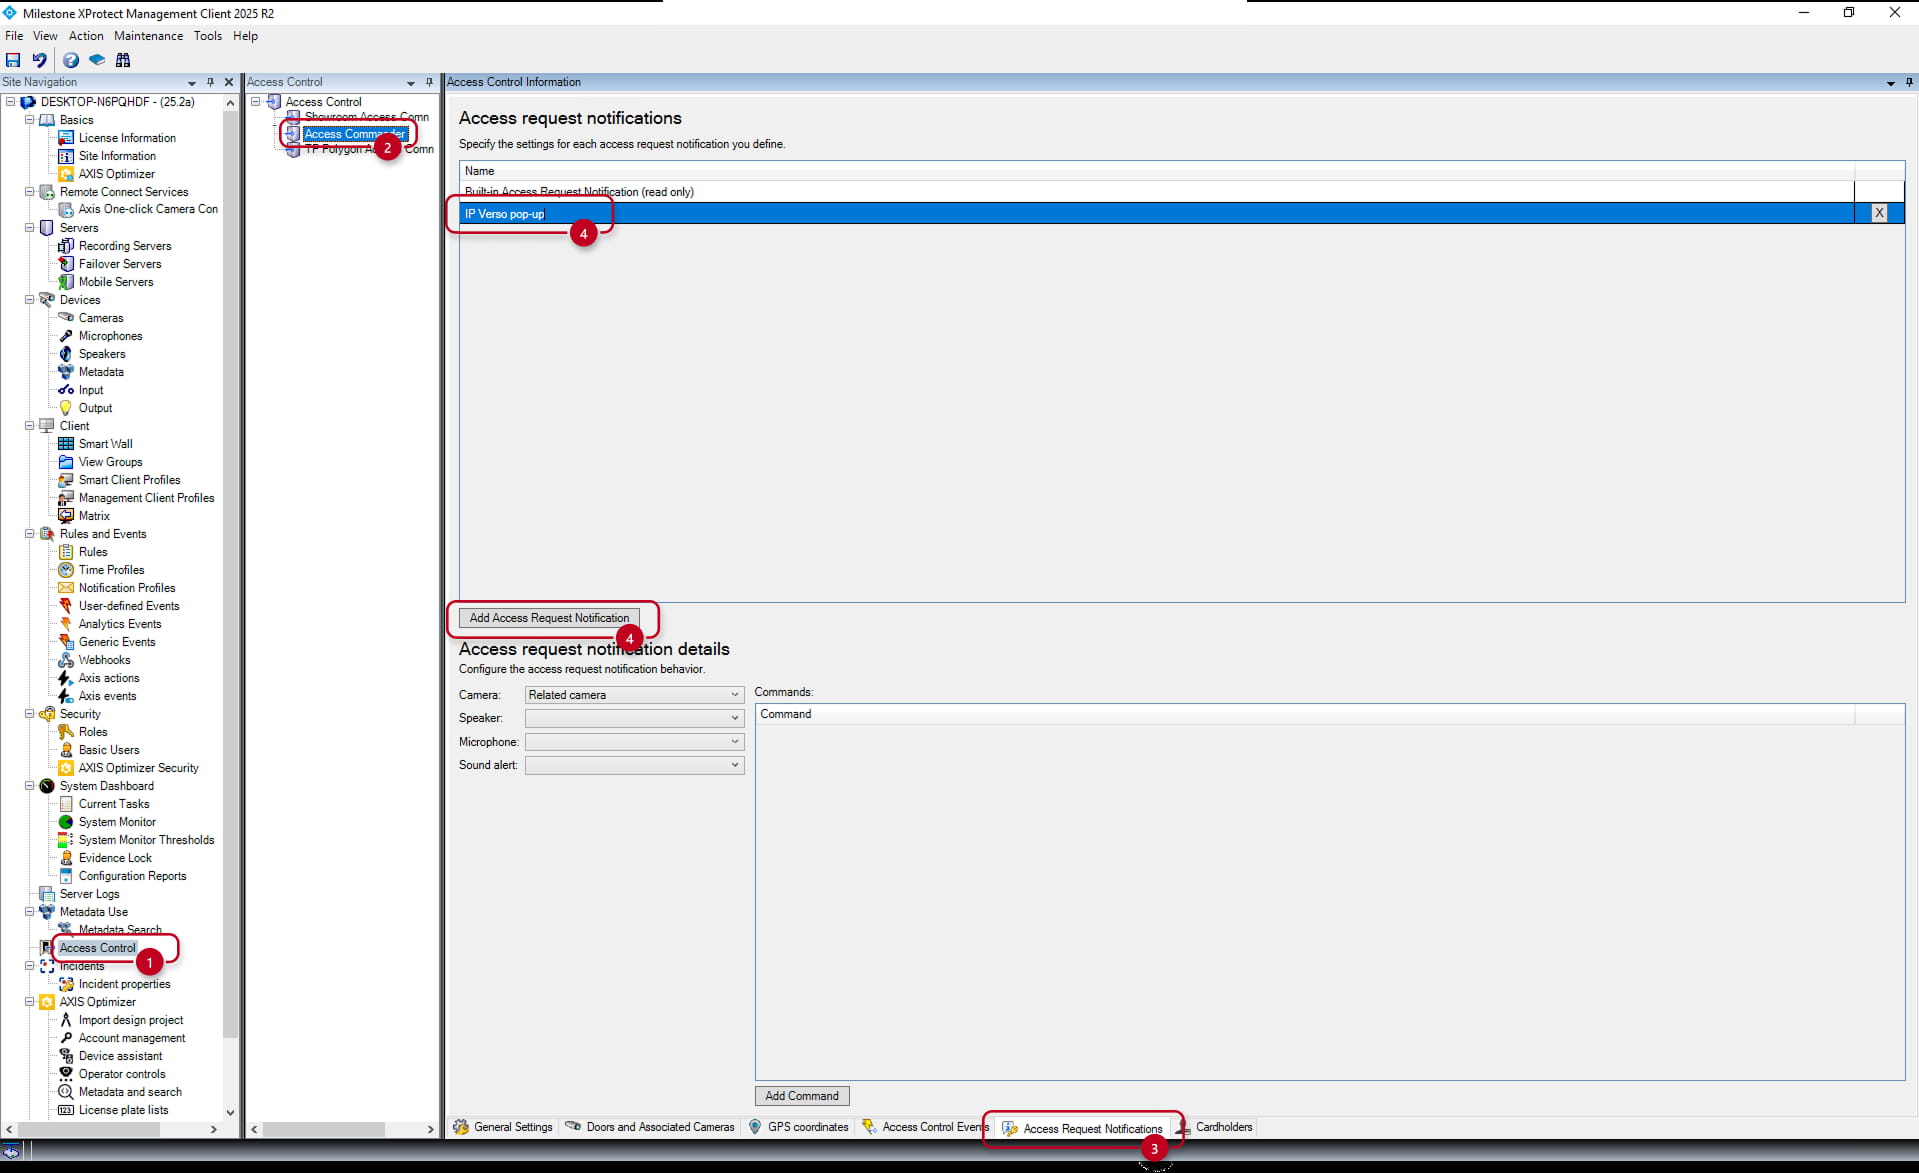
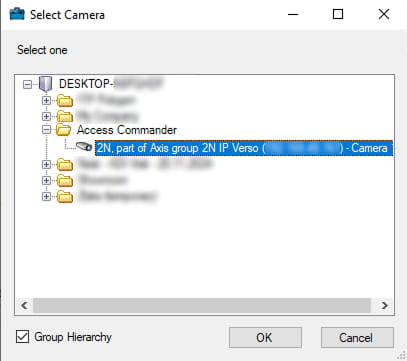
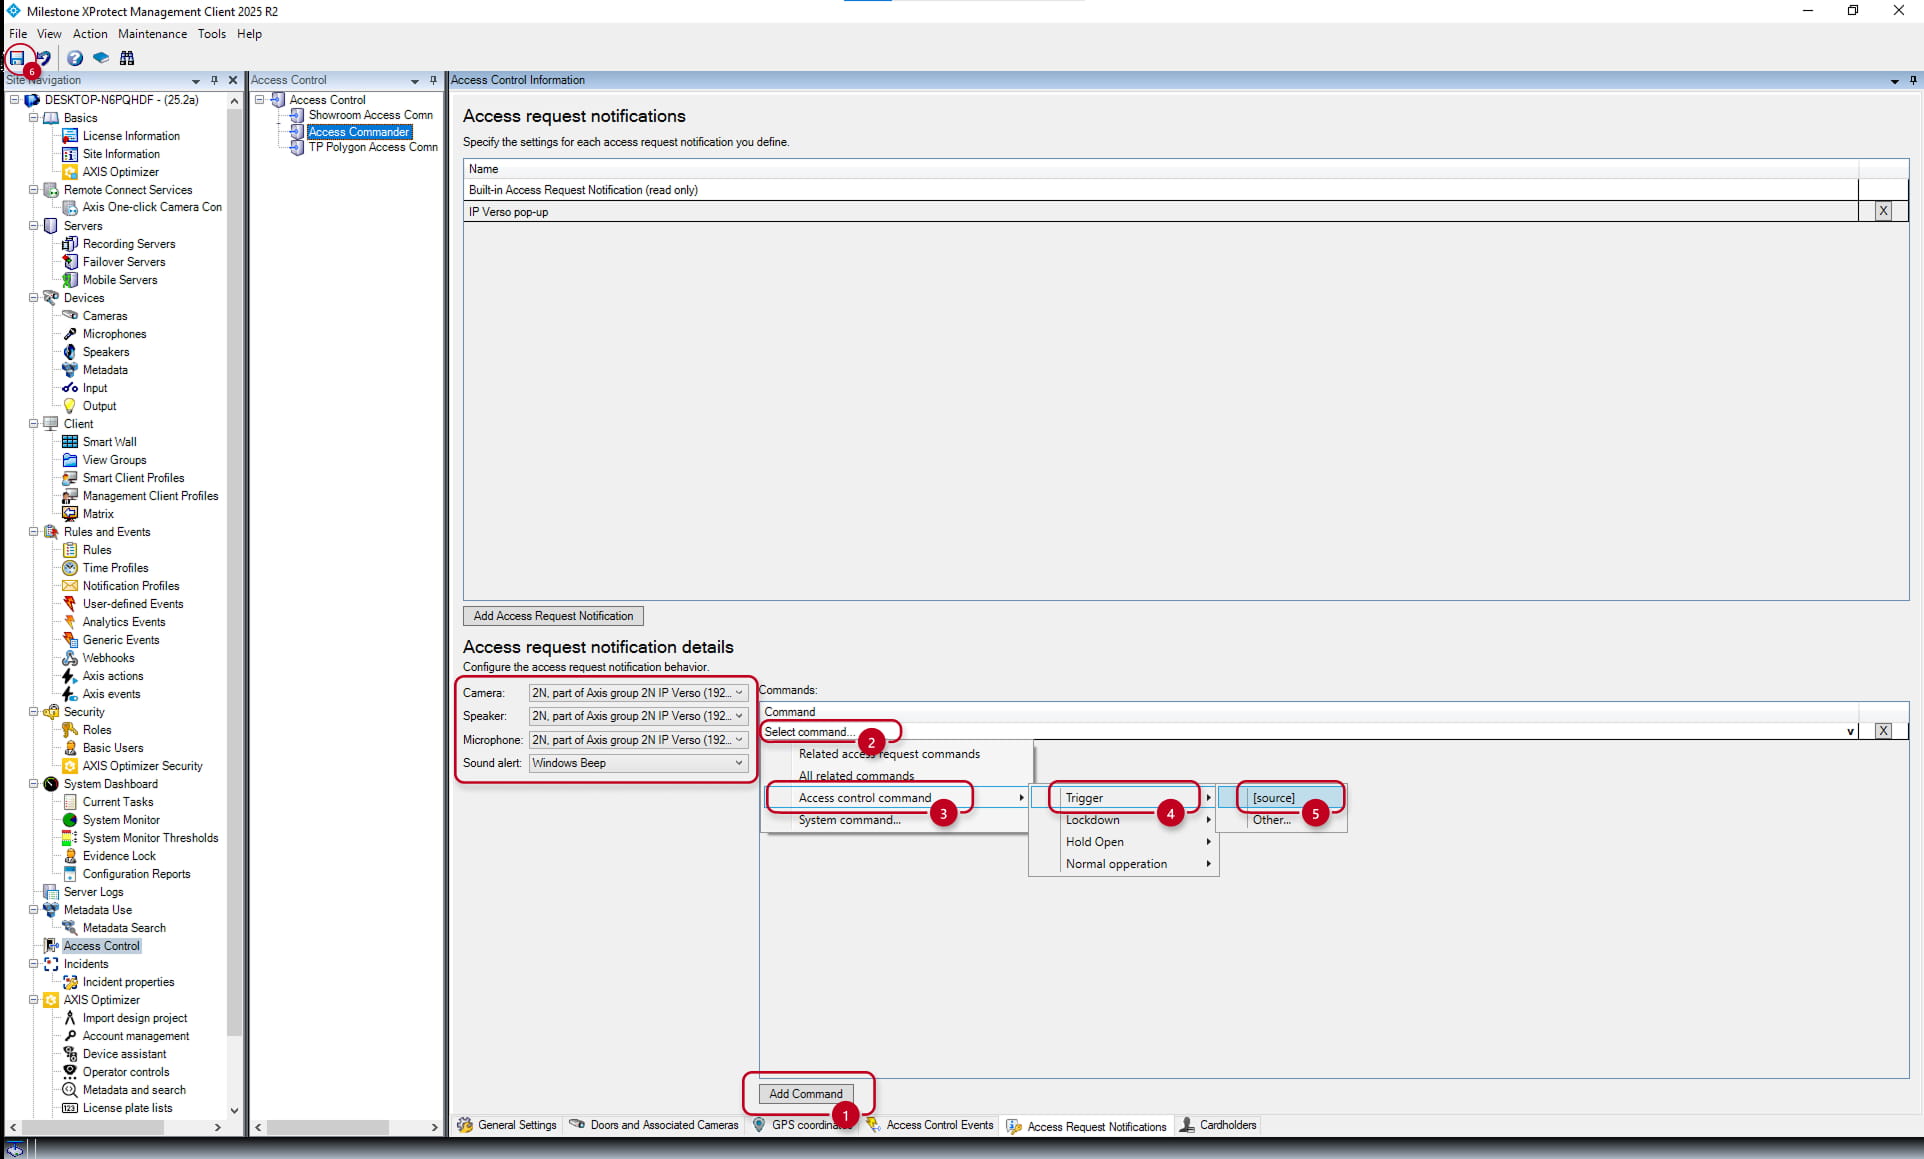
Assign the hardware components, such as camera, speaker and microphone, by selecting the components of the 2N IP device, and select a sound alert.

After selecting the 2N device's components, add a command, select the Trigger [source] and save the configuration with the save button in the top left corner (6).
Rule creation
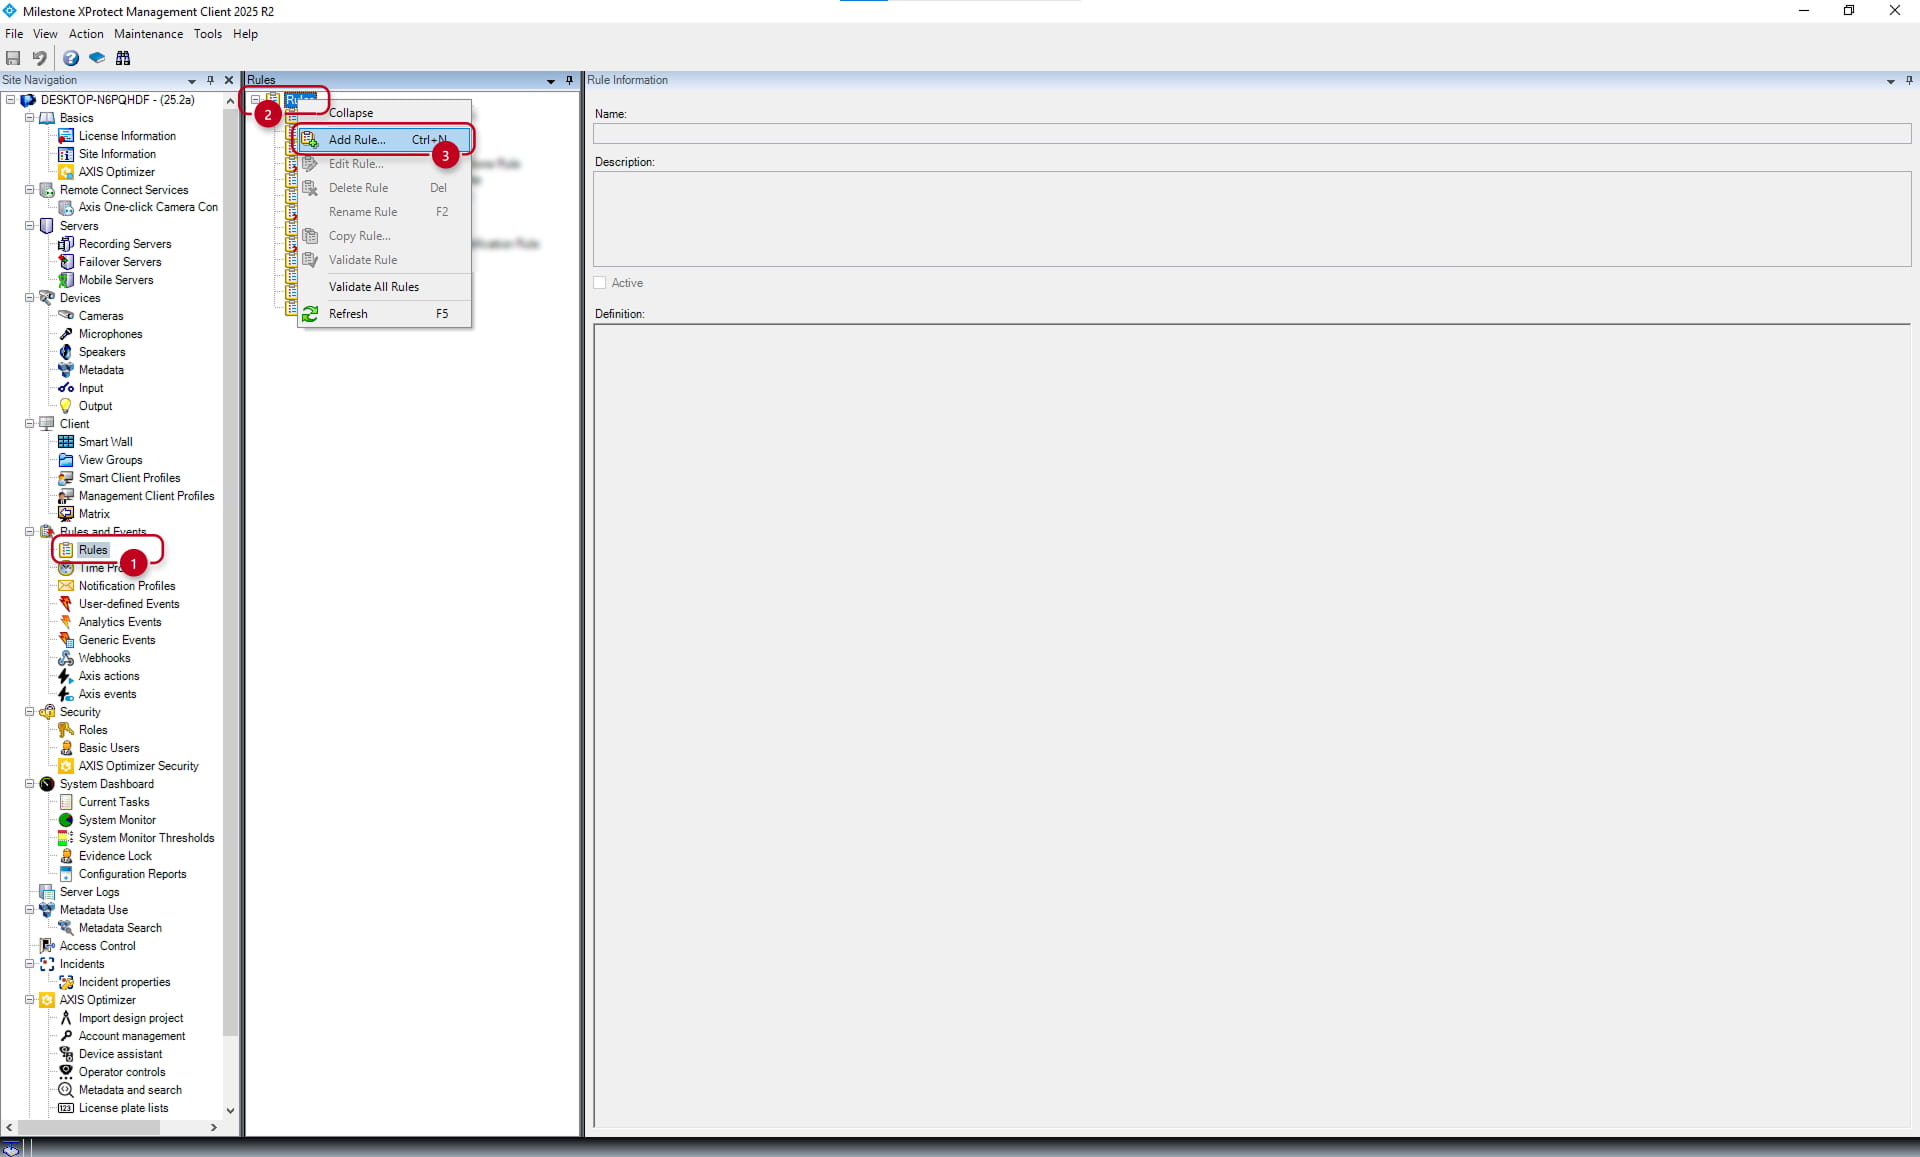
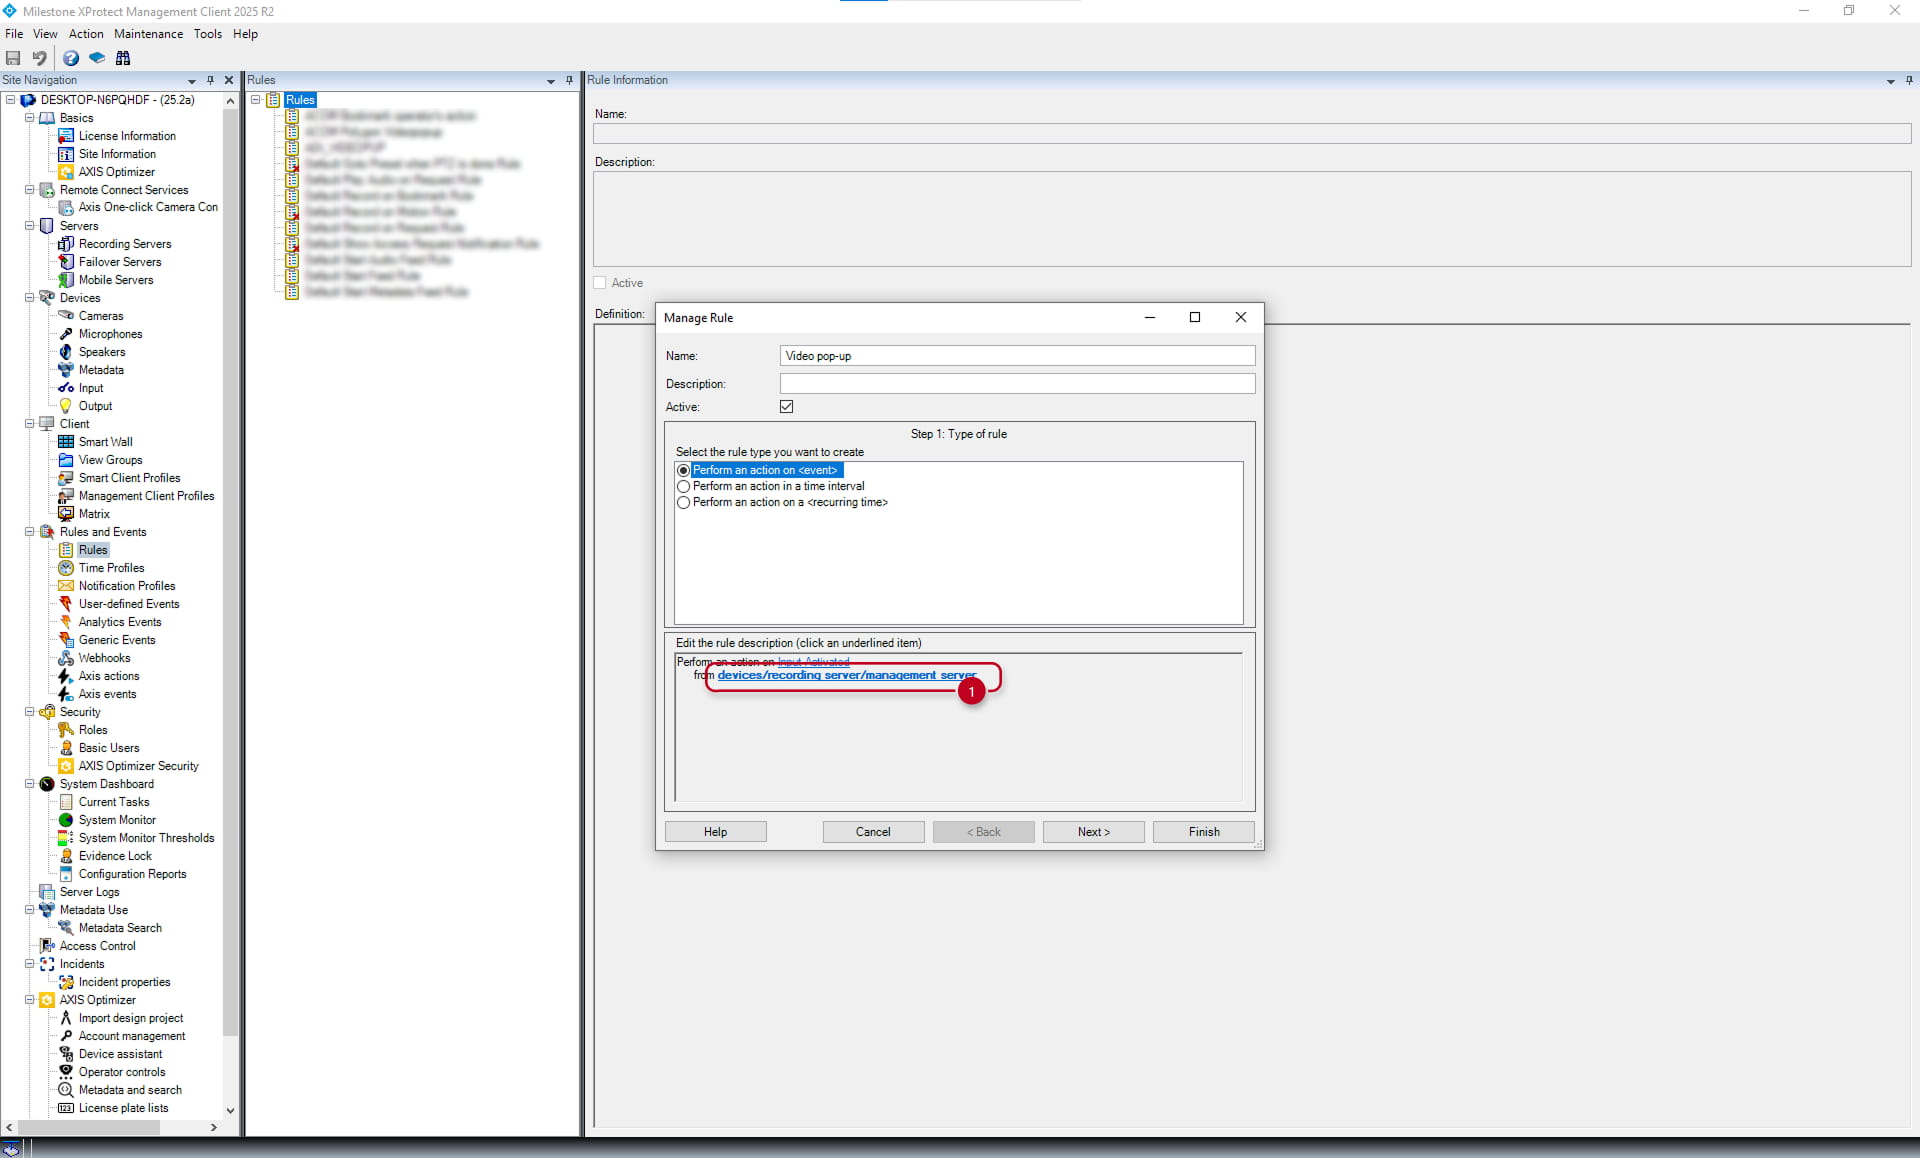
Go to the "Rules" section, right-click on the Rules (2) and select "Add Rule" from the menu. A new window will be opened where the event and action will need to be selected.
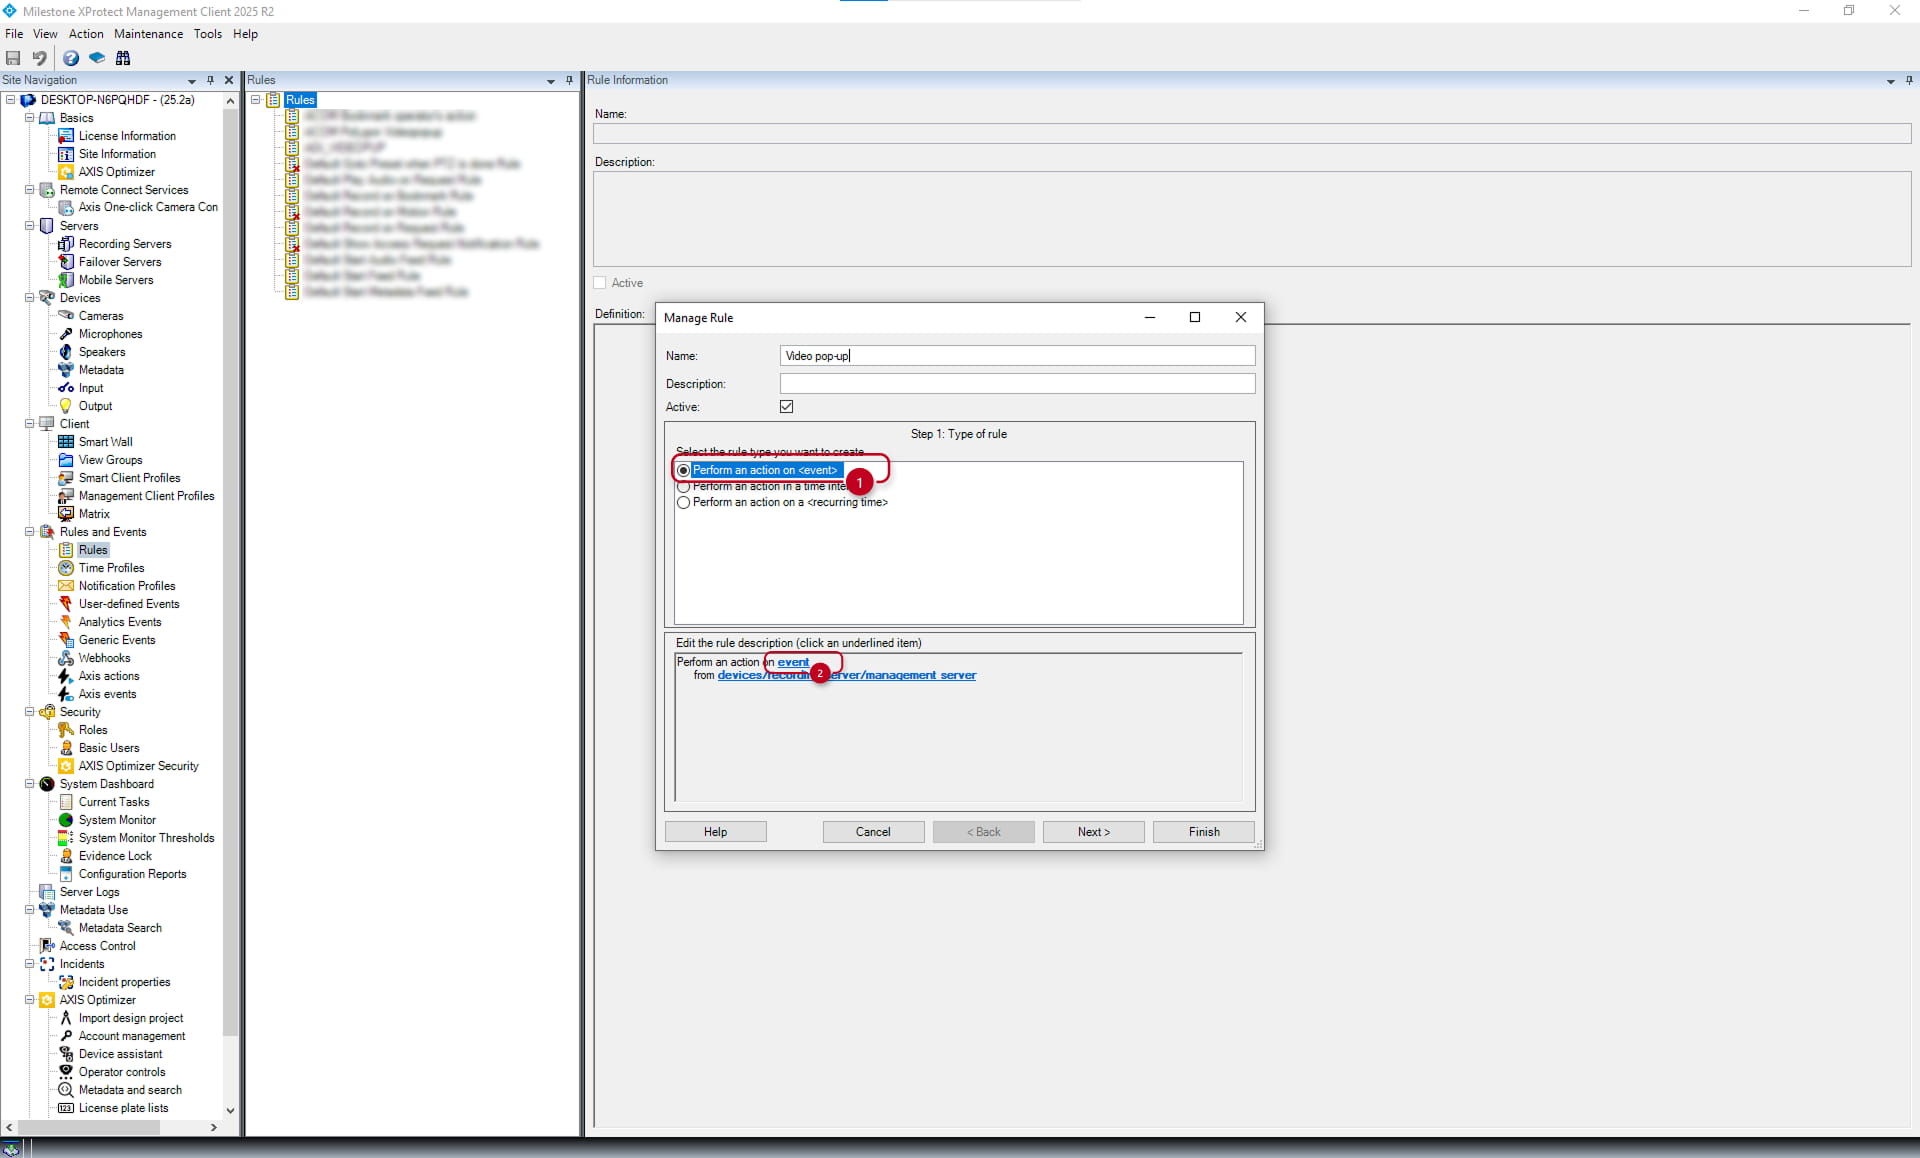
In the new window, name the rule, select "Perform an action on <event>" (1) in the "Rule type" section and click on the bold event (2) in the "Edit rule description" section.
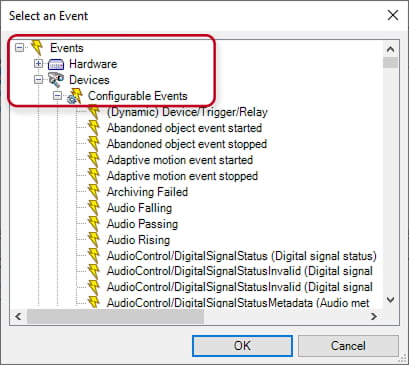
A new window will be opened, where the event "Input Activated" needs to be selected in the "Events -> Devices -> Configurable Events" section.
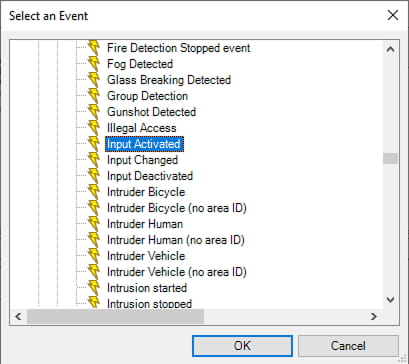
Then, it is necessary to select the input of the 2N IP device.
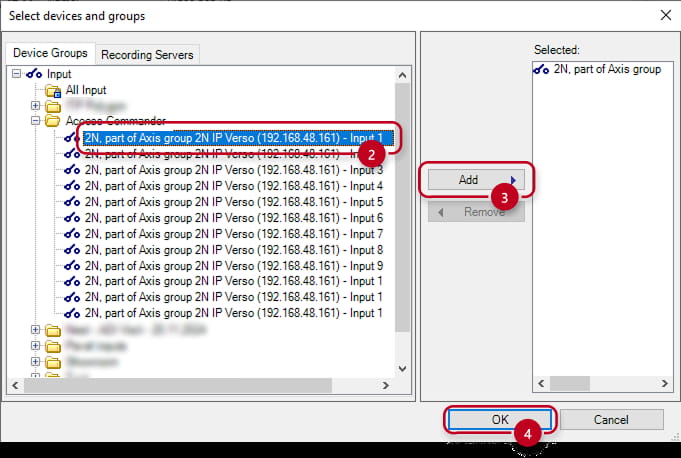
Click on the bold devices/recording server/management server (1) in the "Edit rule description" section and select the input of the 2N IP device in the newly opened window, and confirm it by clicking on the "OK" button.
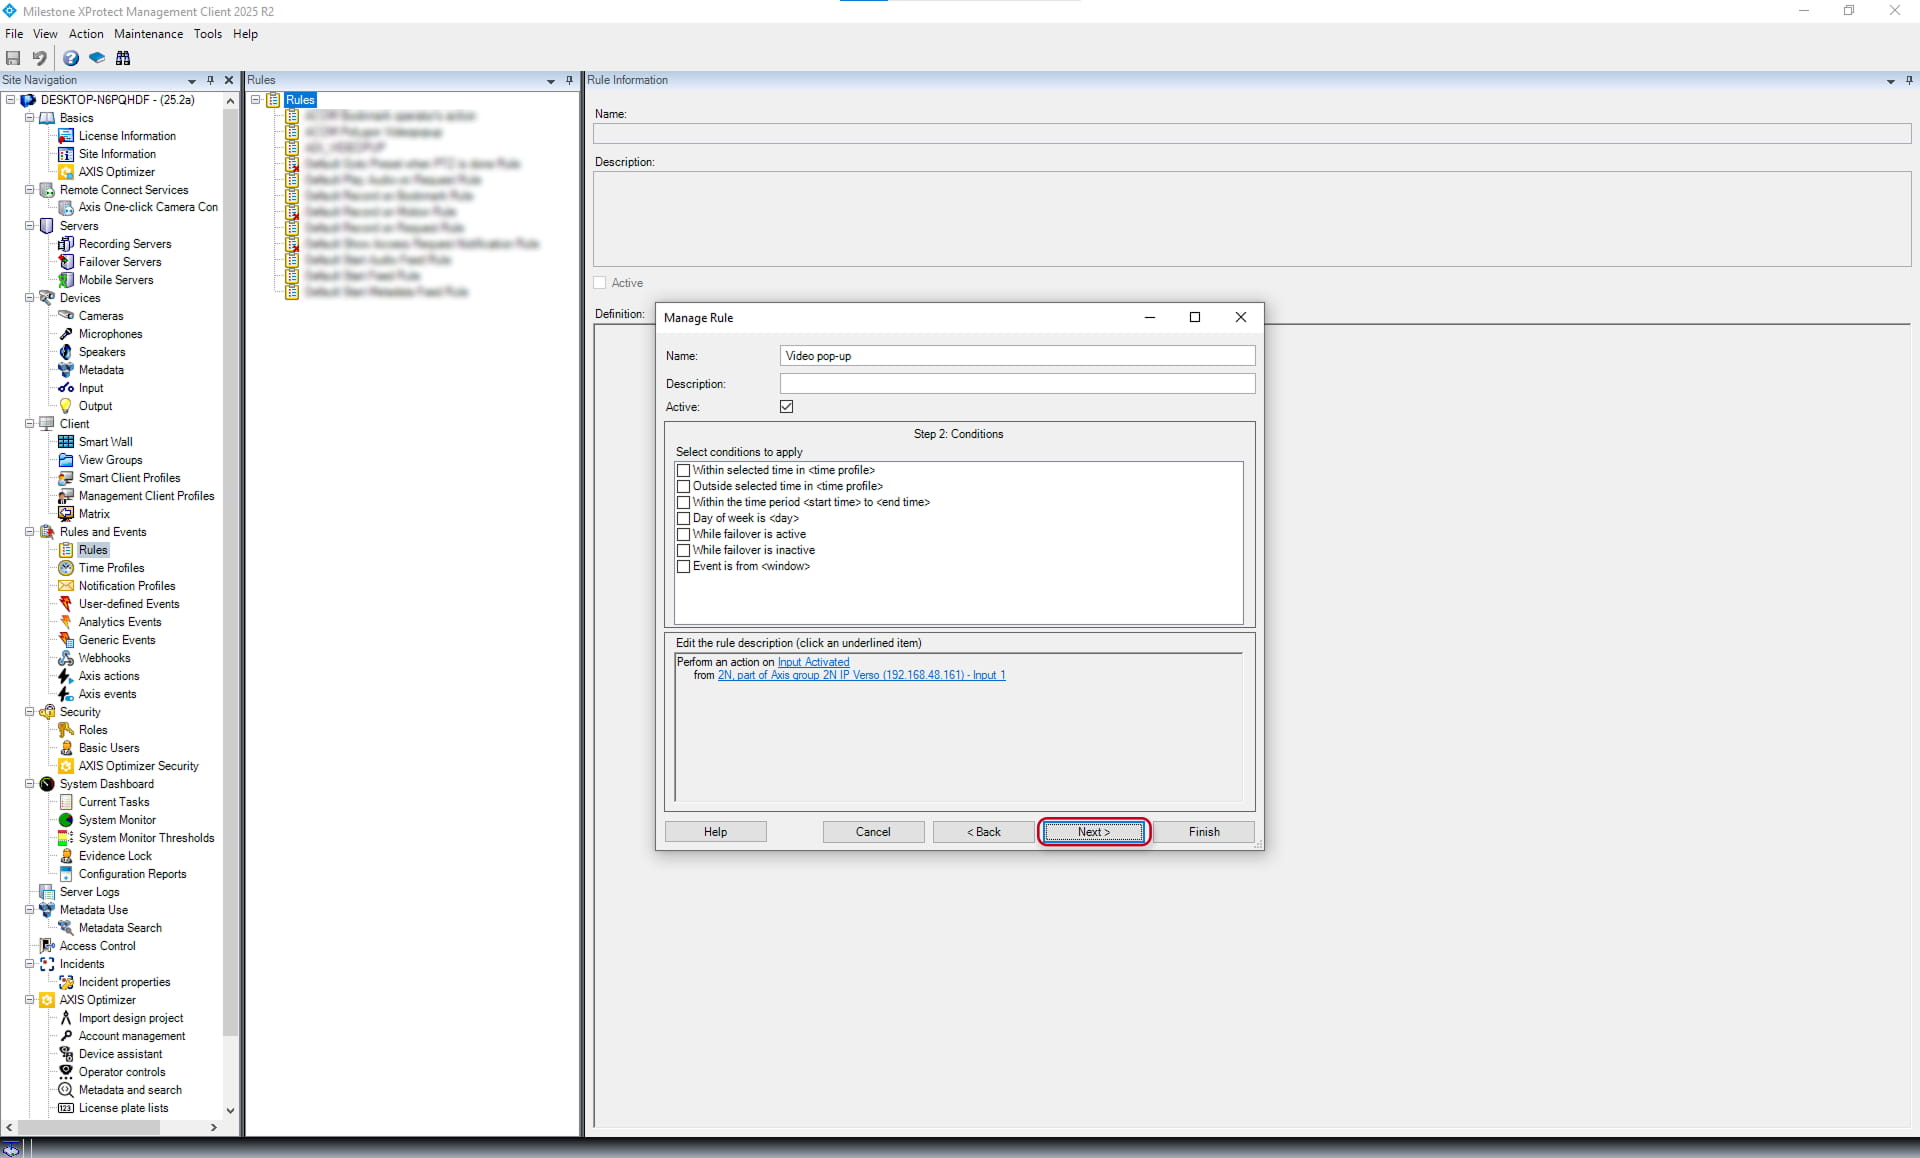
Now you can proceed by clicking on the "Next" button, which will show the available conditions that can be added if needed (not the case in this example).
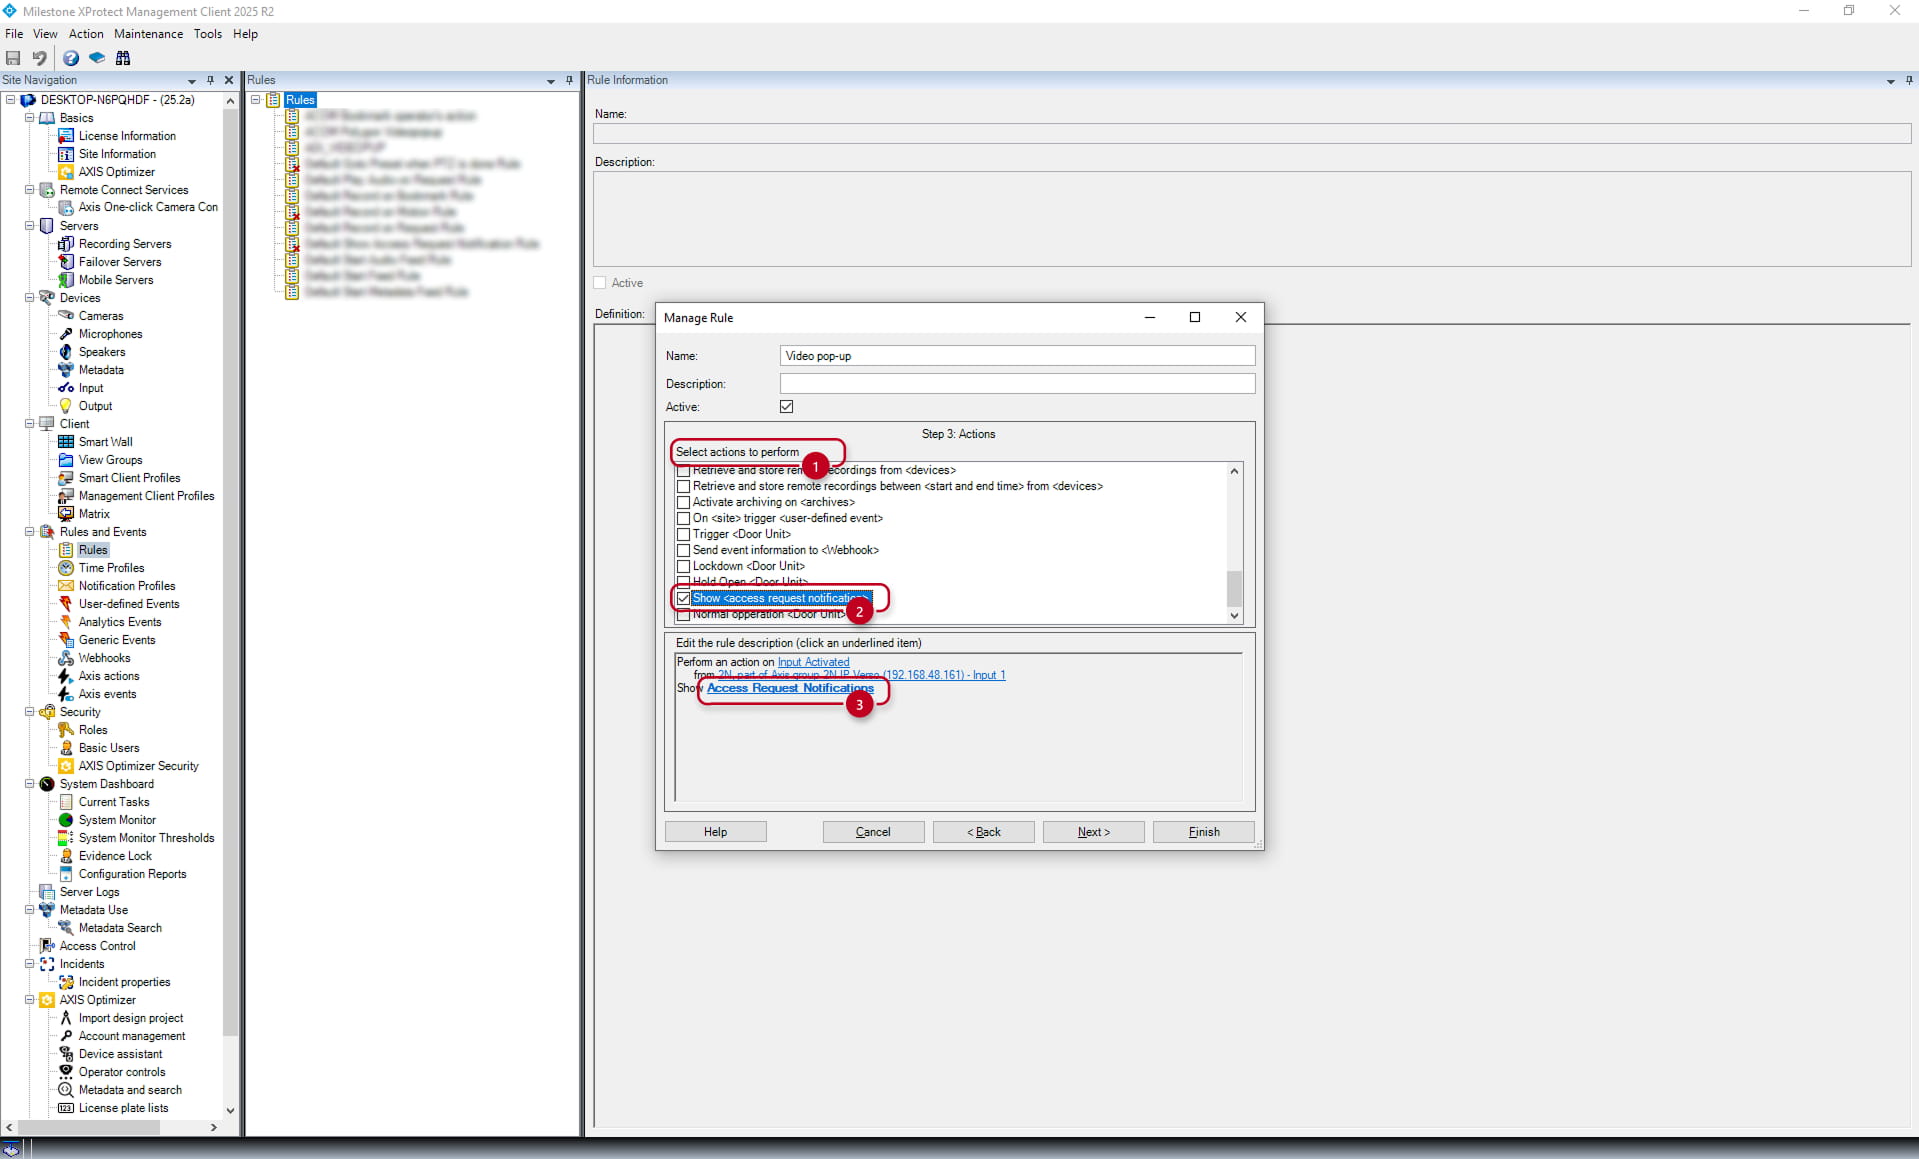
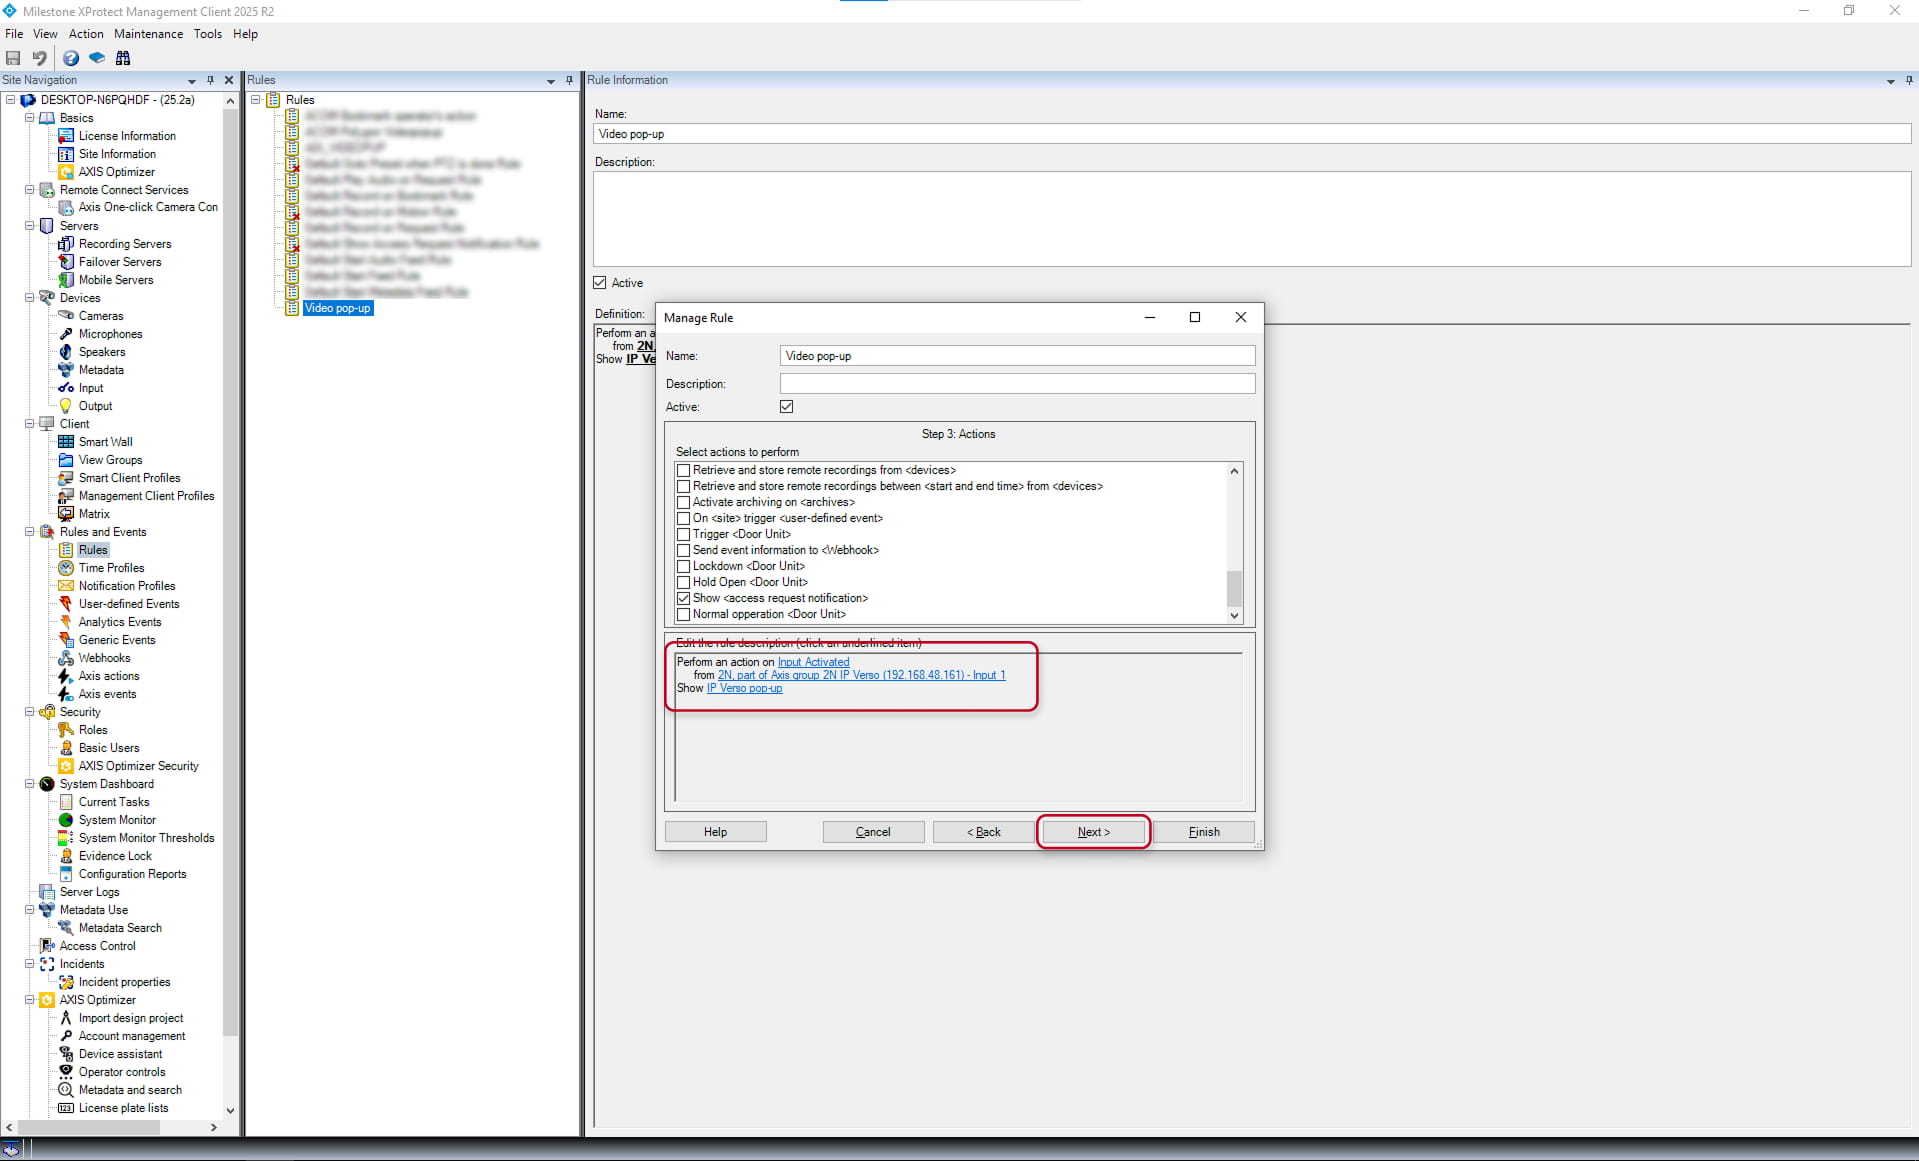
Then click on "Next" to get to the window with "Select actions to perform" (1).
In this section, select the "Show <access request notification>" (2), which will add the Show parameter of the Rule. Then click on the bold Access Request Notifications (3).
A new window will appear, where it is necessary to select the previously created access request notification.

After selecting the access request notification, you can notice the rule description being configured.
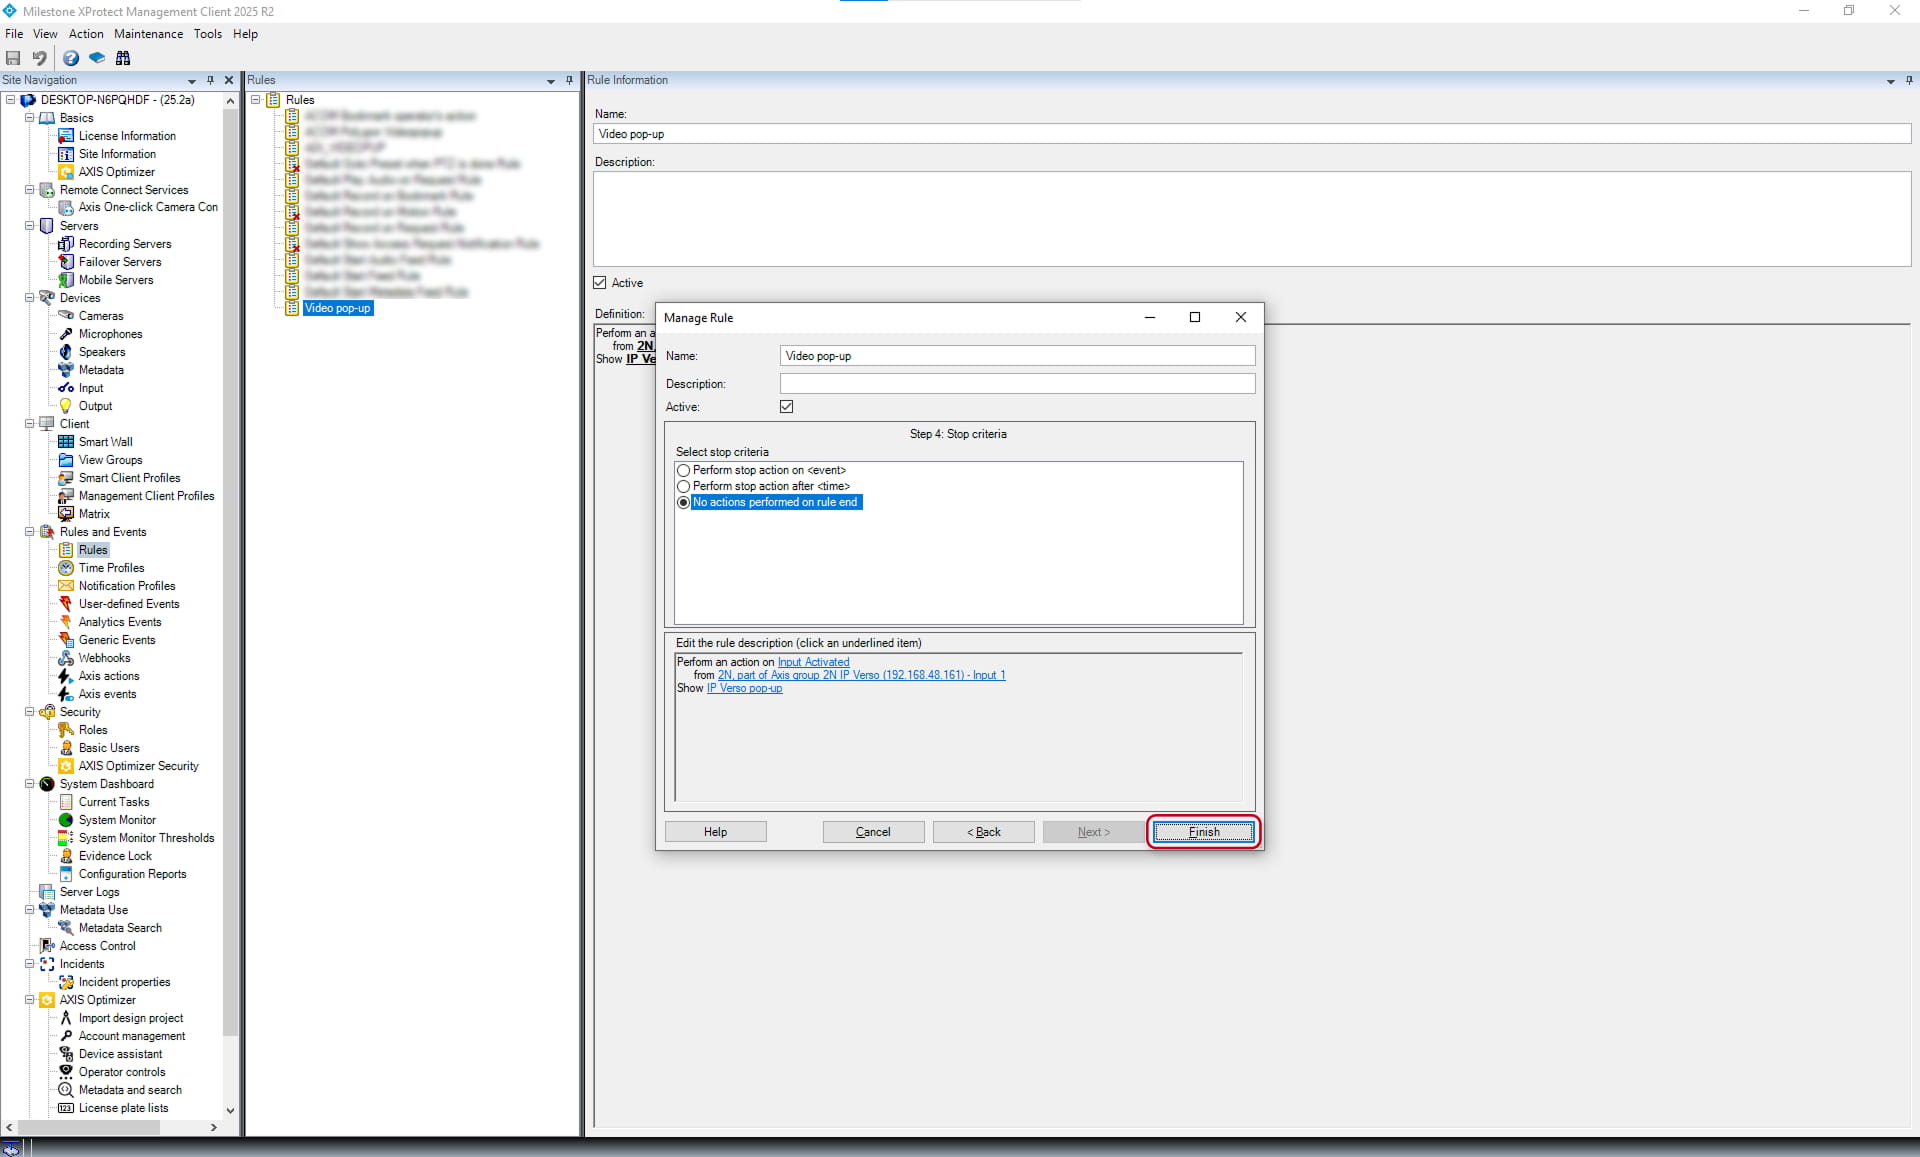
You may proceed by clicking on the "Next" and then the "Finish" button.
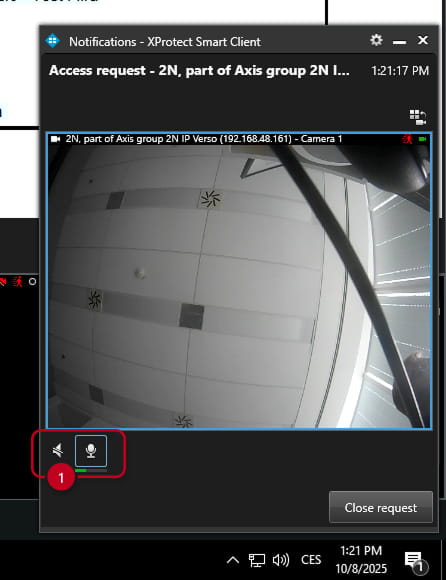
Video pop-up window
By performing the event (KeyPressed in this case) selected in the 2N IP device's automation, the video pop-up window is displayed based on the Access Request Notification and the Rule.
It is possible to listen to the audio and speak by using the push-to-talk buttons (1).