In this article, we will explain what a site model is suitable for what type of installation and how it works.
-
Note - Once the site type is selected, it cannot be changed. You will have to create a new site with correct model selected.
-
If an incorrect site type is selected, you may need to delete the devices registered within and add them into the correct site instead.
-
Site type overview
When creating a new site on your My2N account and choosing a name for your site:
-
There are 3 site models to choose from following types - "Family home" (Single Villa), "Apartment building" (MDU) and "Other" (office, retail, special-purpose)
-
Note - Once the site type is selected, it cannot be changed. You will have to create a new site with correct model selected
- If an incorrect site type is selected, you may need to delete the devices registered within and add them into the correct site instead

Family home (Single Villa)
When you select the "Family home" site model, you will see all the details about the site type (what is the Family home type good for, payment information, limits of the site type):
-
The Family home site type is self-explained
-
It is suitable for a home with 2-3 living units

Apartment Building (MDU)
When you select the "Apartment building" site model you will see all the details about the site type (payment model, administration, limits):
-
The device limit per apartment is 4 smartphones or 3rd party devices, to which the site admin needs to purchase the subscription
- Every answering unit (2N answering unit, smartphone or 3rd party device) must be assigned to an apartment
-
The 2N answering units are free of charge

Other (office, retail , special-purpose)
When you select the "Other" site model you will see all the details about the site type (what is the Other site type good for, payment information, limits of the site type):
-
The Other site type can be used for some office buildings or warehouse places with some gatehouses
-
This option supports up to 500 devices

Examples
Family home (Single Villa)
In this example of a family with 1 Intercom at the door (2N IP Base), 1 Indoor answering unit (2N Indoor View) and 2 Smartphone devices.
Creating a User/Smartphone Device
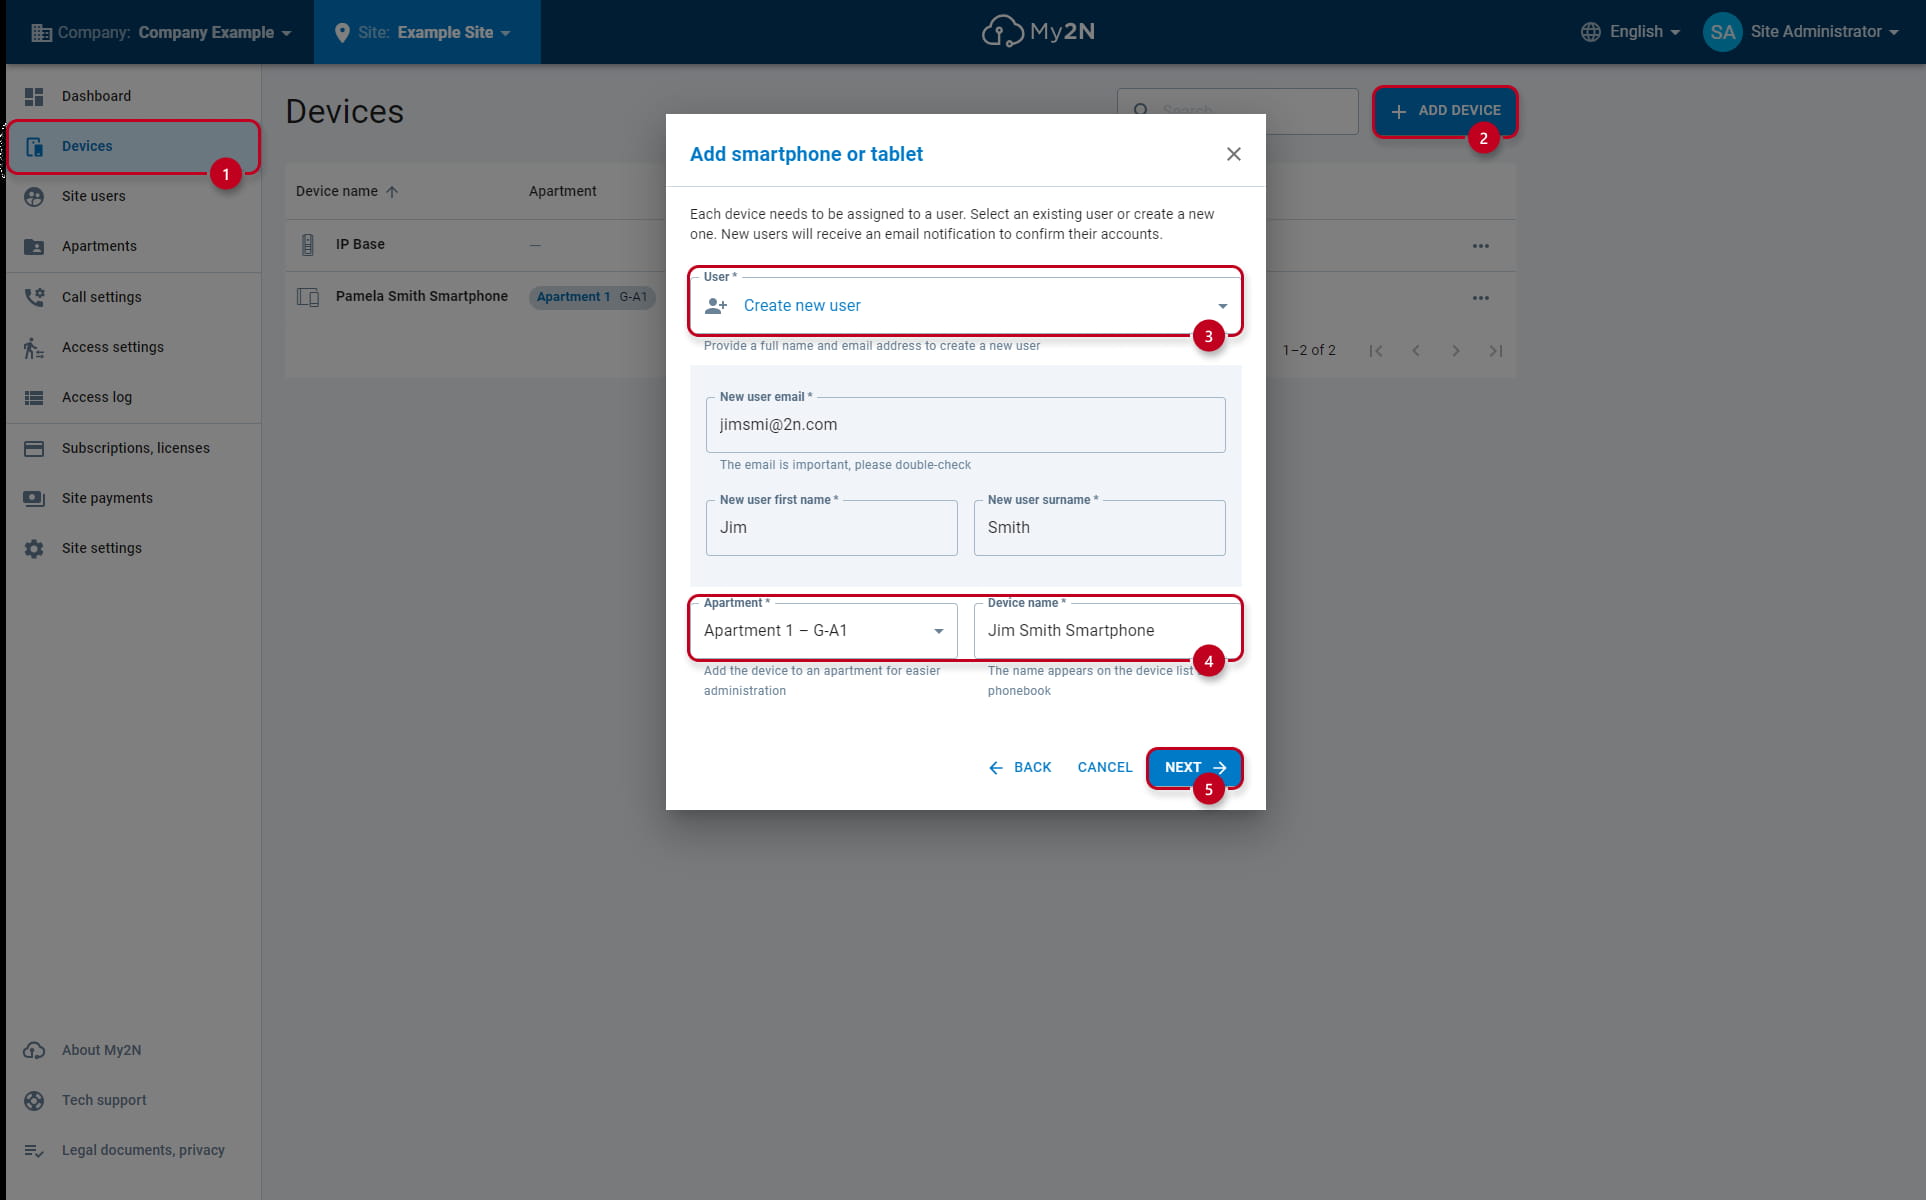
After adding the Intercom and the Answering unit you can add the Smartphones:
-
When adding the smartphone, you can assign them to specific users or you can create the users along the device itself
-
In our example, we will create Pamela Smith and Jim Smith along their respective smartphone devices


Site role settings
You can setup various user roles under the User Detail:
-
As a Company Admin, you can create other Company Admins, Site Admins, Site users and change the priviledges of already existing users
-
As a Site Admin, you can create other Site Admins, Site users and change the priviledges of already existing users
-
As a Site User, you have no priviledges to configure the My2N Company/Site and devices
To setup the user roles of invididual user:
-
Go under "Site users" (1), select the user (in this example Pamela Smith)
-
Click on "User Details" (2) and select the "User role" (3) from the drop down menu

Intercom Call Settings
In order for the Intercom to reach the added devices, you will have to configure the Call settings in on the Intercoms device page:
-
Select the Intercom unit from "Devices" (1) tab
-
Click on "Call Settings" (2) on the top
-
Enter a name of the call button (3)
-
In this example, the Indoor View device has been added before, next we selected the Jim Smith Smartphone (4) and also Pamela Smith Smartphone (4) from the selection
-
Lastly save the changes made, by clicking on the "SAVE" (5)

Intercom Switch Codes
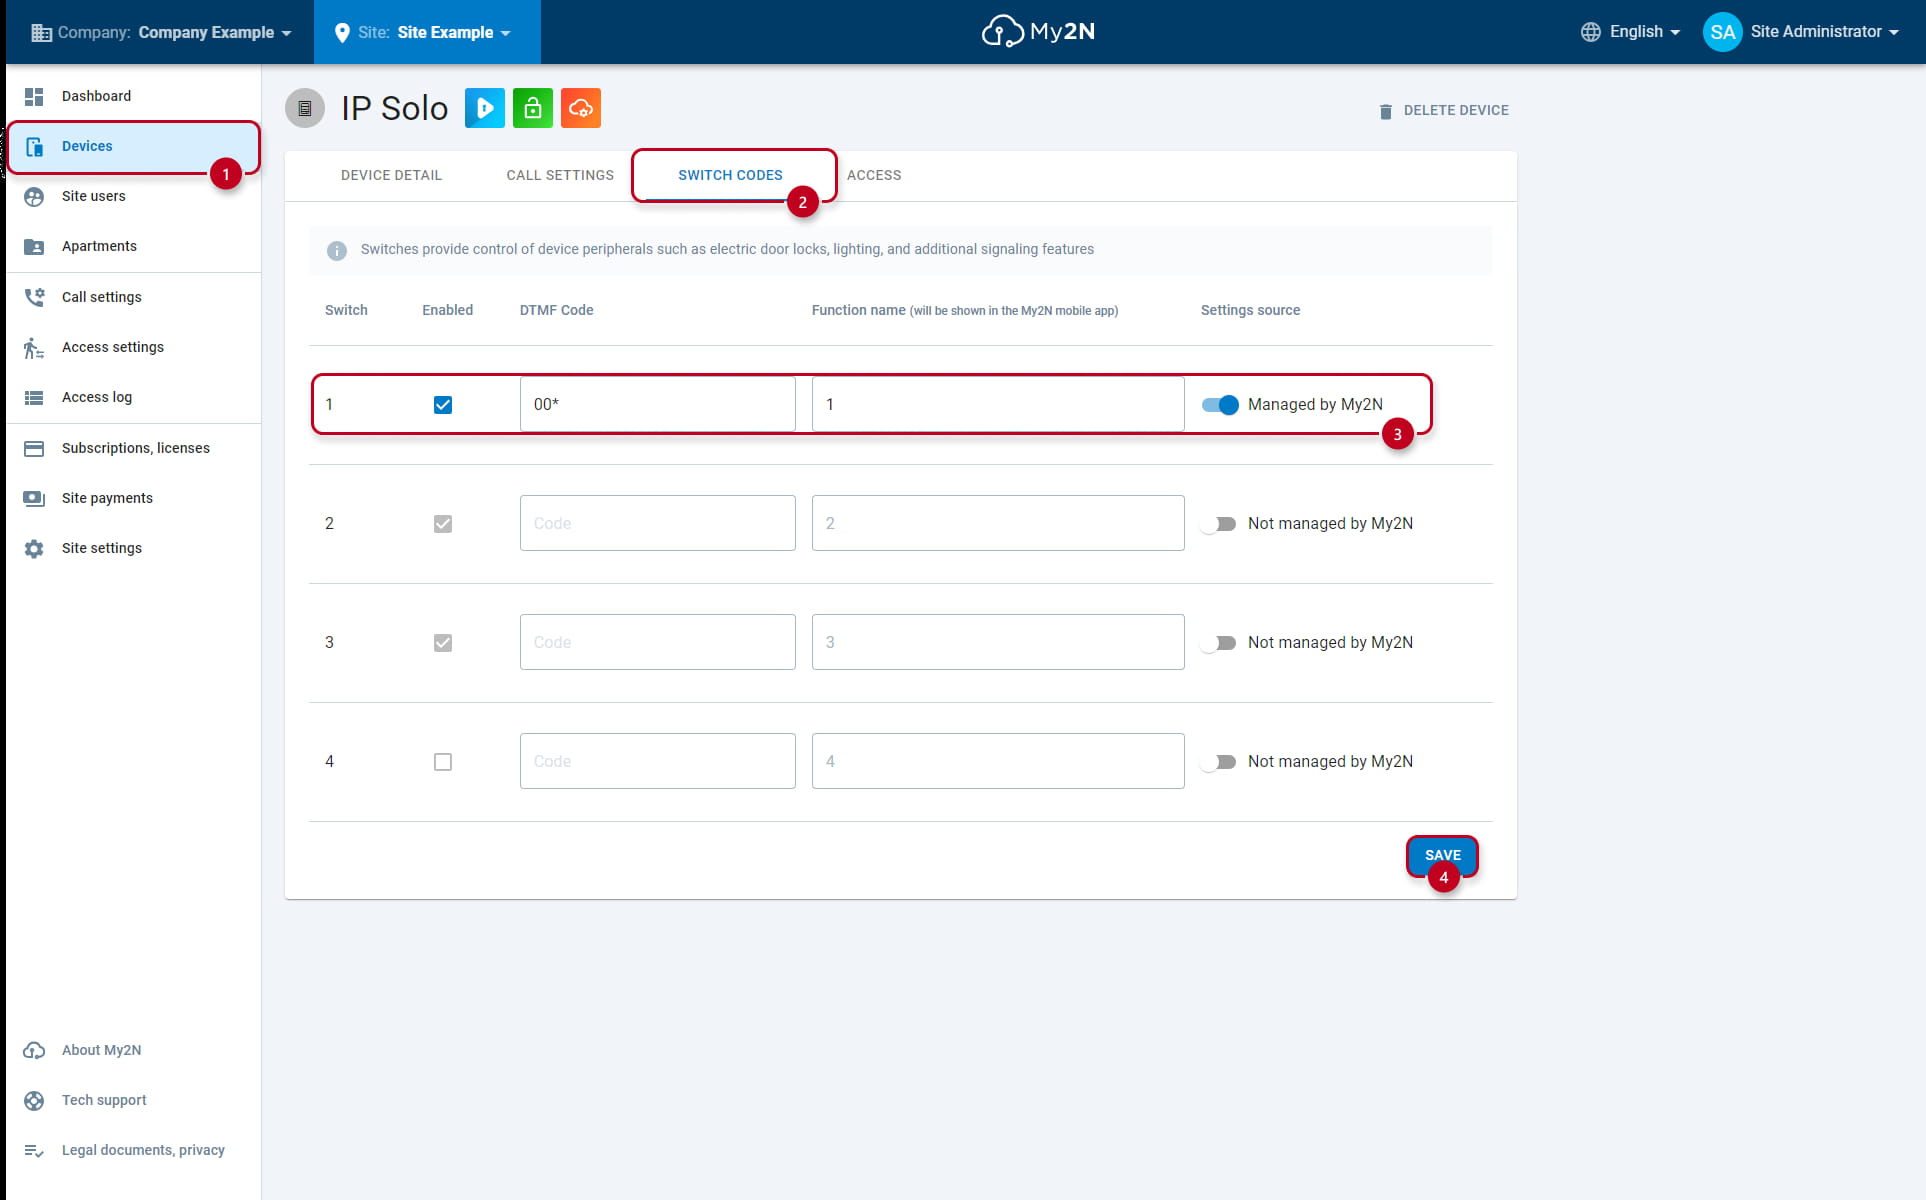
You can also set the switch codes which will appear in the My2N app:
-
In this case we have configured additional buttons -
-
Click on the "Devices" (1) tab and select the Intercom unit (in this example IP Base)
-
On the top, select the "Switch codes" (2)
-
Next, enable the switch by turning on "Managed by My2N", enter DTMF code and name (3) of the unlock button ("Front Gate" and "Main Door")
-
In My2N app, locate the Intercom unit, tap and hold on the unlock button for a moment - Two unlocking buttons will appear