The steps in this article require using the web interface of a 2N device. Please follow this manual in case this is your first time using the web interface.
MicroSIP is open source portable SIP softphone for Windows OS allowing you to provide high quality VoIP calls via open SIP protocol.
Prerequisites
- 2N IP Intercom with the latest firmware,
no additional license is required - MicroSIP softphone the latest version (https://www.microsip.org)
installed on your computer with Windows OS
2N IP Intercom configuration
- In the web interface, go to the Directory - Users section and add a new user.

- In the new user details, fill in the name and Phone Number in format "sip:PC_IP_ADDRESS" and save.
Instead of "PC_IP_ADDRESS" use IP address of your computer.
If you don´t know, how to find it, open a Windows command line and enter the "ipconfig" command.

- Go to the Calling - Dialing section and add the new user to the quick dial button and save.


- Go to the Calling - SIP 1 section and enable SIP account to activate calling feature.

- Stay in the same section, go to the Device Identity part, make a note of the Phone Number (ID) value, then enter the IP Intercom IP address in the Domain field and make a note of it as well.
Go to the Advanced Settings part, set the SIP Transport Protocol to UDP and save.

- In the Video tab, go to Extended Codec Settings and enable H.264 Constrained Baseline Profile, Packetization Mode 1, this is the video Codec which is used by MicroSip to call outside, and then, go to the Advanced SDP Settings part and enable the "Use sendrecv Attribute for Video" parameter and save.
This setting is necessary only in case you will use video calls.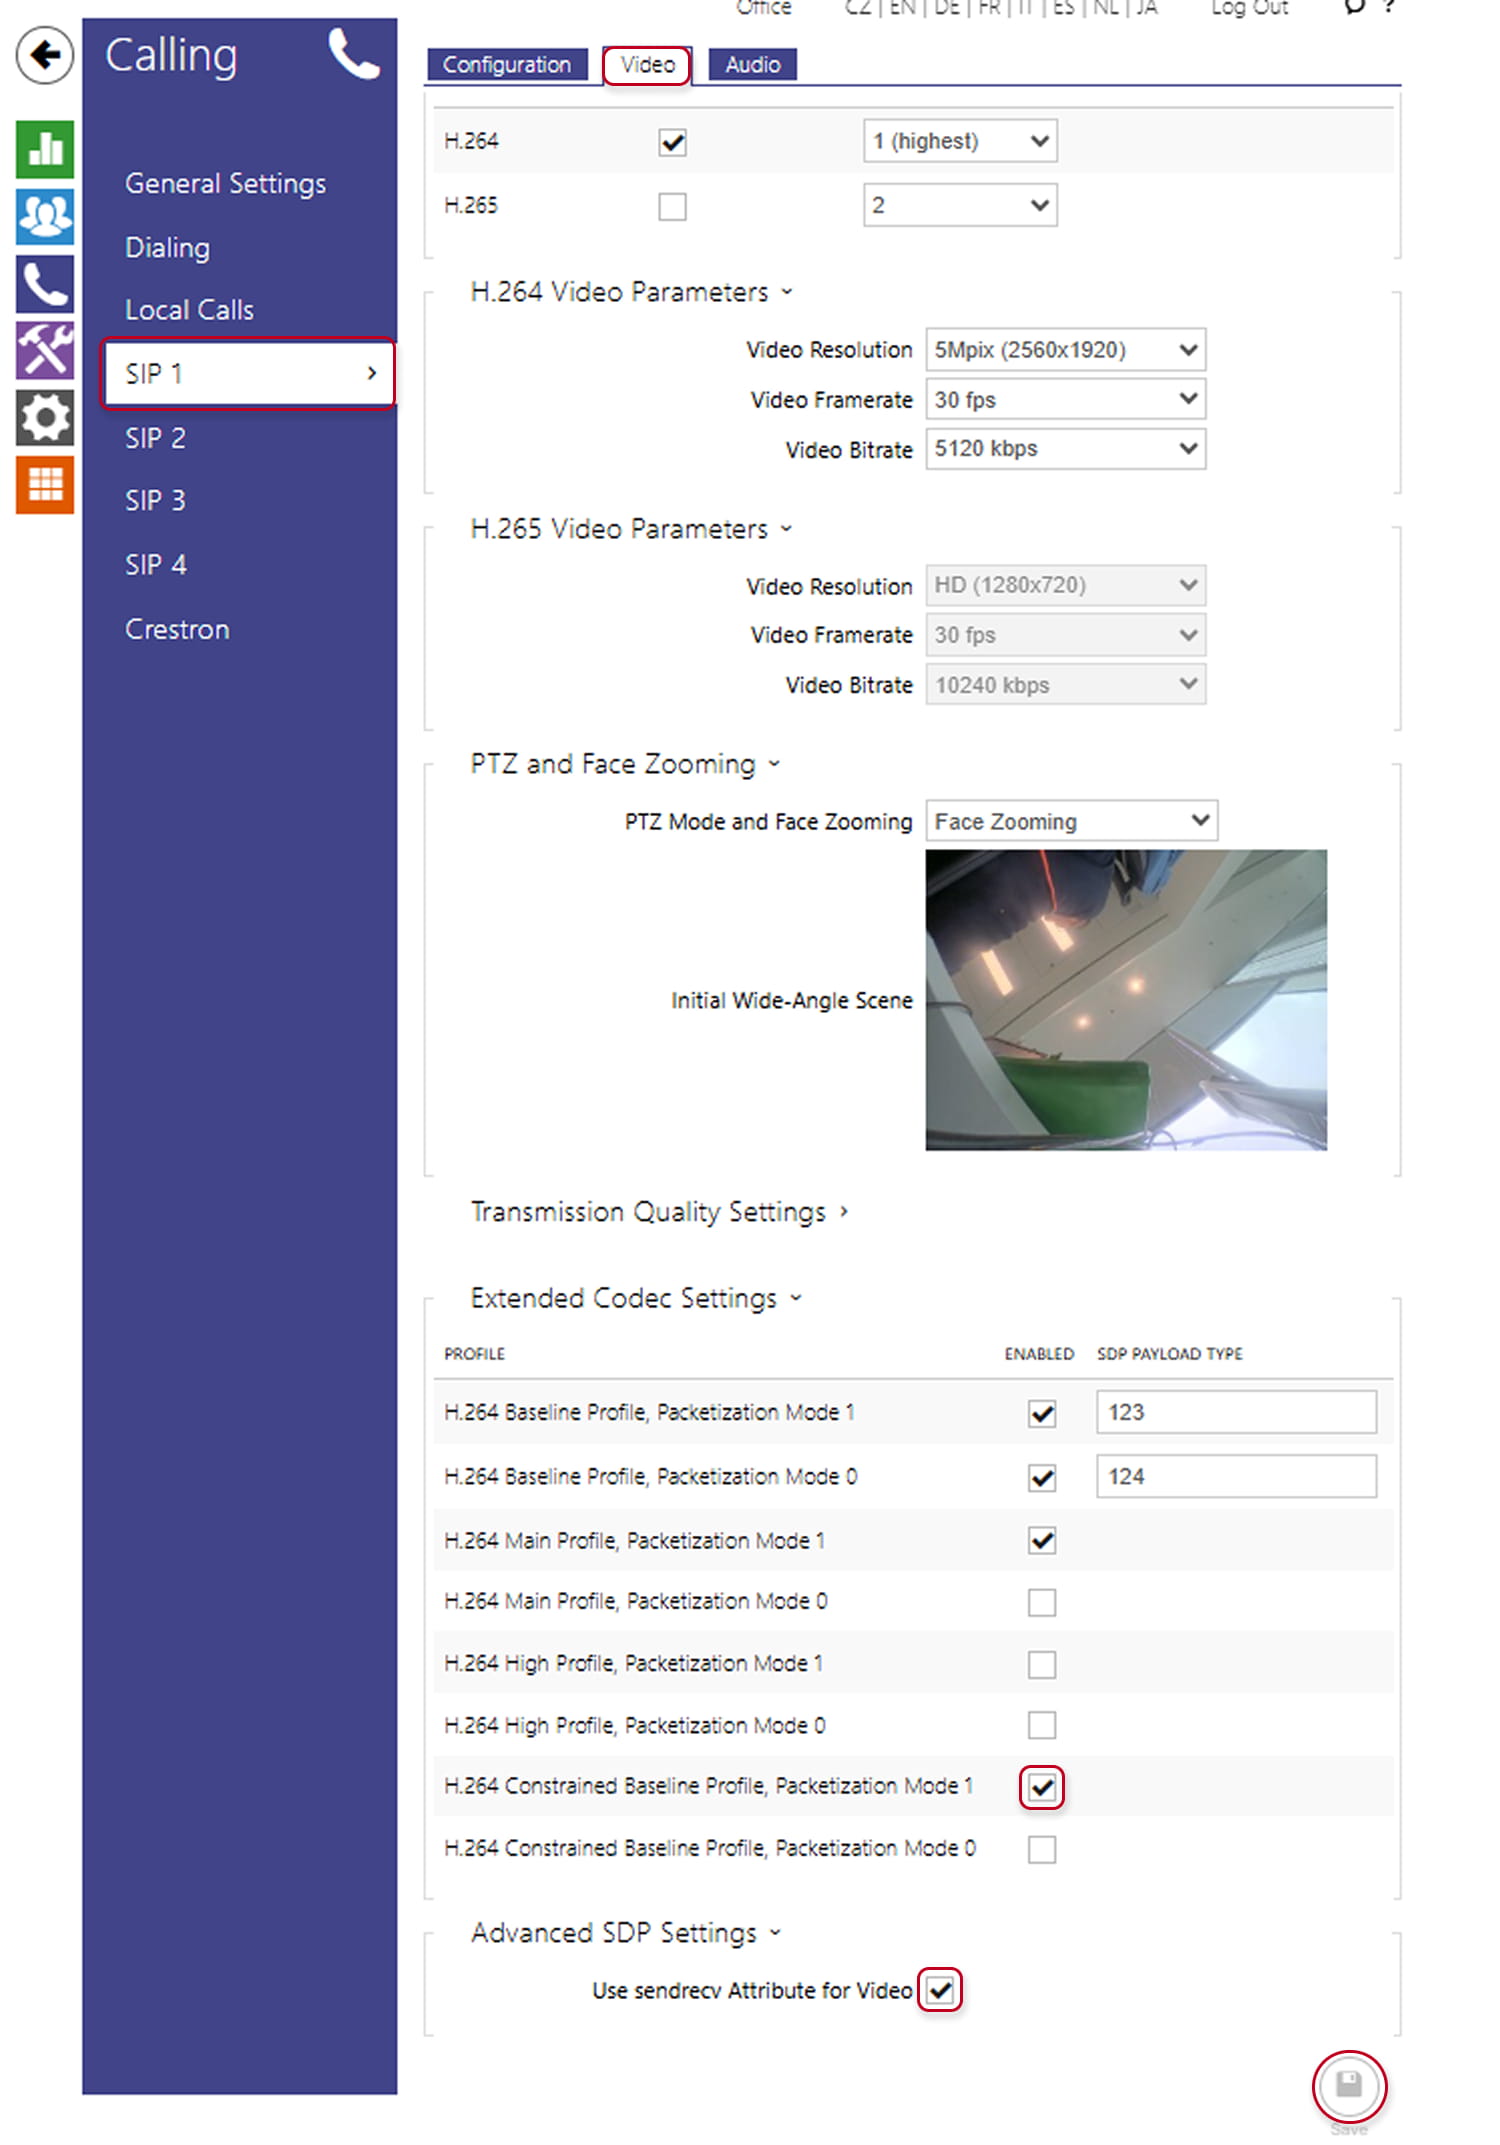
- In case you need to have bidirectional video with 2N IP style or Third Party devices, don't forget to activate it.

- Go to the Calling - General Settings section, in the Incoming Calls part,
set the Call Answering Mode (SIP1) to Automatic and save.
This setting is necessary only in case you will need to call from MicroSIP to the IP Intercom.

- To be able to open door during call, go to Hardware - Switches section
and verify proper configuration for your scenario.
Make a note of set Activation Code with DTMF accessibility.

MicroSIP configuration and usage
-
Go to MicroSIP Settings.

- In Settings, be sure that necessary audio and video codecs are enabled.

- In Settings, enable Local Account and Save.

- Let´s try the IP Intercom call.


- During the call, you can open the door by dialing the switch activation code, confirmed by * .
In our case, dial 00* .

- Let´s try call from MicroSIP to the IP Intercom.
Enter the IP Intercom identity details (noted from its web interface) in format ID@Domain,
in our case [email protected] , and start the audio or video call.

- Now we will make calling from MicroSIP and dialing switch activation codes much easier using the shortcut buttons.


