|
INFO: This FAQ describes, how to connect Legacy intercom to 2N Access Unit with 2N IP Security Relay. If you are using an External RFID Card Reader 125kHz + 13.56MHz with NFC (USB)
We strongly recommend using 2N Access Unit with the latest firmware
|
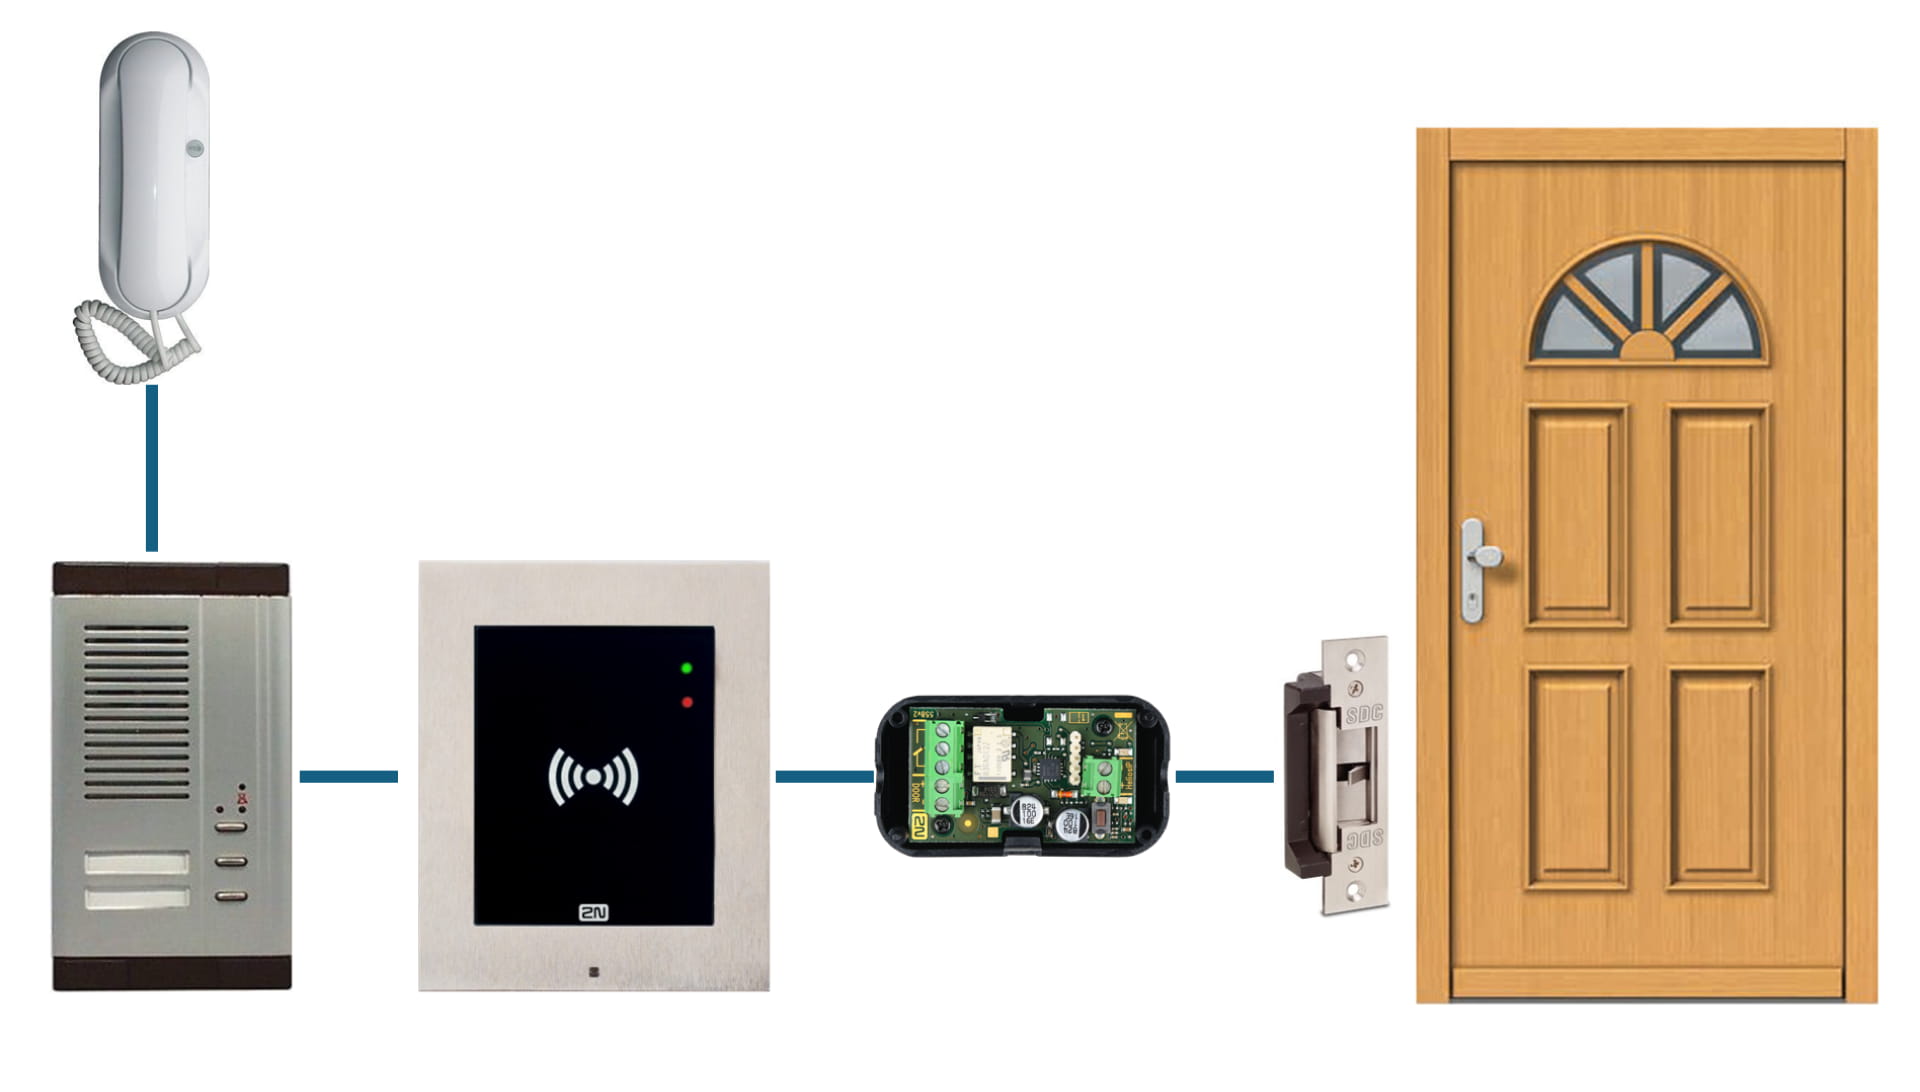
Connecting an old intercom to 2N Access Unit along with 2N IP Security Relay and configure it
Electrical Connection
-
In first step simply connect output from your Legacy intercom to one of the inputs on 2N Access Unit via two wires we will use input marked IN1.
-
Connect two wires from OUT1 on 2N Access Unit to input on the 2N IP Security Relay
Why to use an 2N IP Security Relay
2N IP Security Relay
-
It significantly enhances security of the connected electric lock because it prevents the lock from opening by forced intercom or Acces Unit tampering.
-
It is a small device installed between 2N Access Unit which is placed outside the secured area and the electric lock installed inside the secured area.
-
It includes a relay that can only be activated if the valid opening code is received from the Acces Unit.
-
It is designed for any 2N Access Unit or 2N IP Intercom model with firmware versions 1.15 and higher.
-
Configuration
-
Connect to IP address of 2N Access Unit and go to section "Hardware-> Switches"
Controlled Output: Output1 - the output we use to connect unit with 2N IP Security Relay
Output Type: Security - this is needed for the 2N IP Security Relay to work correctly
- Go to section "Services-> Automation"

3. Create an automation as shown below

4. In this step we will add the RFID card entry.
If you have External RFID Card Reader 125kHz + 13.56MHz with NFC (USB) - 9137421E, 9137424E, 9137420E
You can skip directly to point 4 creating user
If you do not have an external usb reader
Go to section "Events-> Access Log"
Swipe your Card/Fob and you should be able to see it as shown in the picture below and copy the Card ID
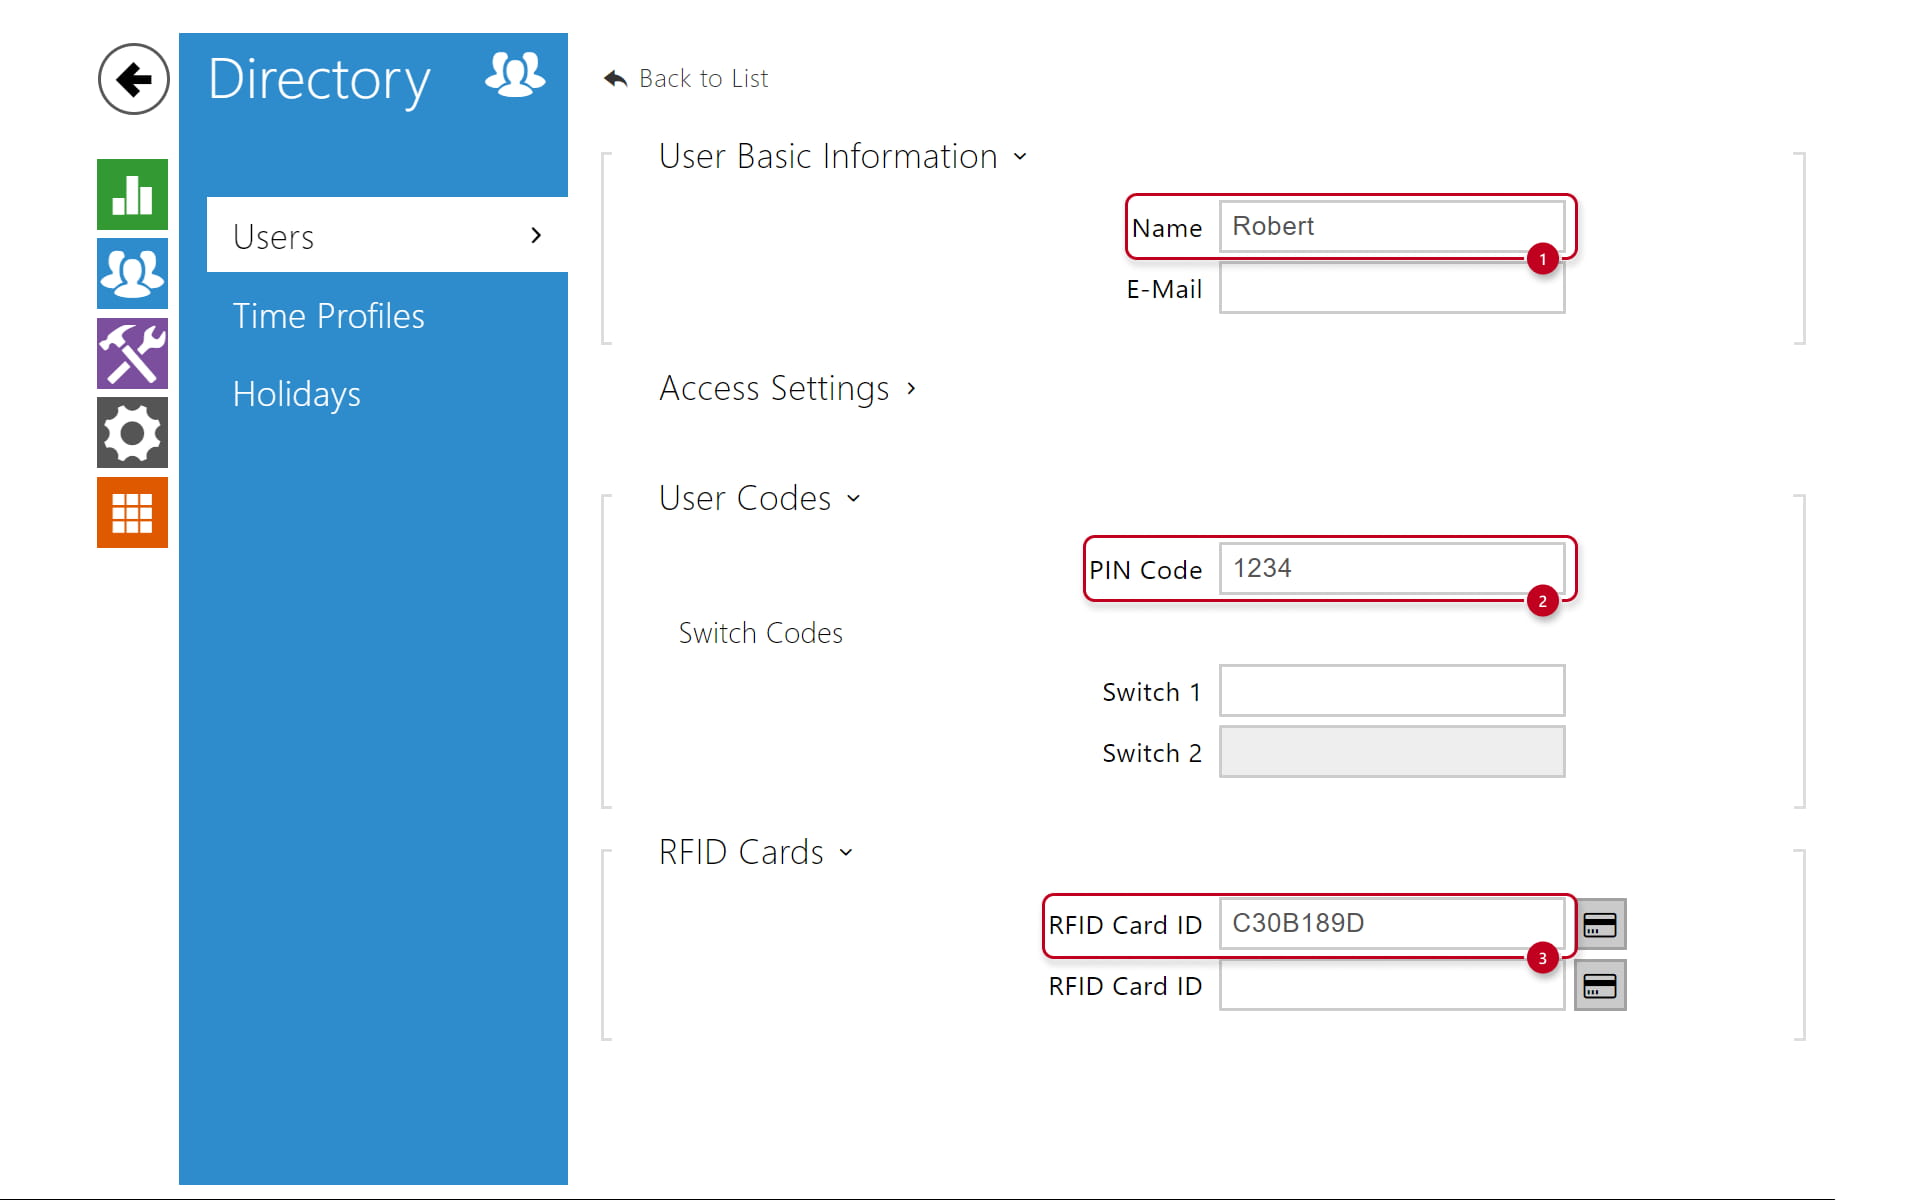
5. Go to section "Directory -> Users" and create a new user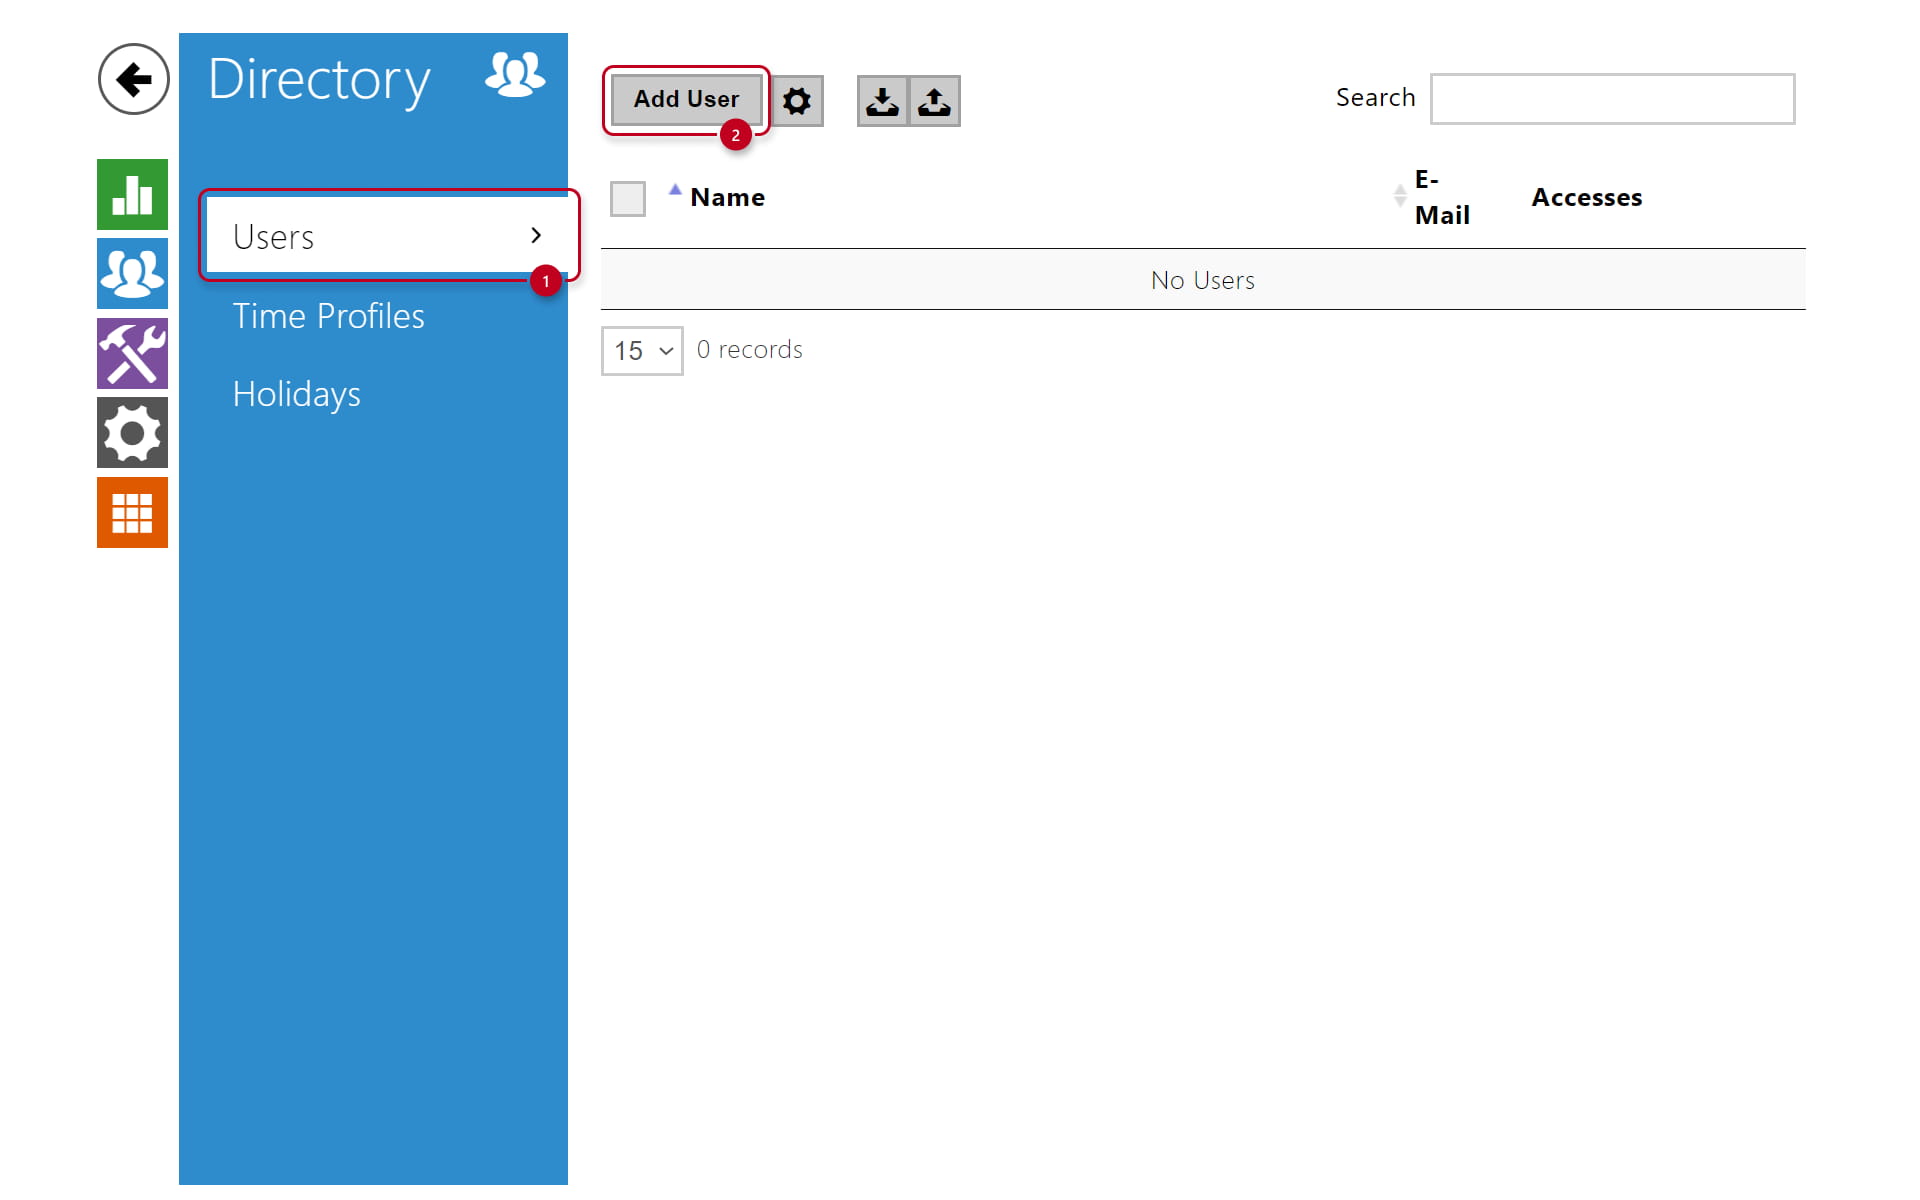
Name: Robert - name of the tennant
PIN Code: 1234 - unique Code for unlocking the door
Card ID: C30B189D - the ID of your Card
If you have an external USB Reader you can click on the Card icon and by placing your Card on the Reader the Card will be send to 2N® Access Unit