Installation of virtual machine and Box solutions
The nerve centre of our access control solution is 2NAccess Commander. Use it for managing access to the building and monitoring the status of 2N access devices in real time. Its intuitive user interface lets you set up the system quickly and delegate everyday activities directly to the customer.
The 2N Access Commander is distributed as an image for server installation (2N Access Commander Virtual Machine) or as a software pre-installed on mini-PC (2N Access Commander Box 2.0).
Virtual machine solution is scalable and by nature of virtualization systems can receive additional hardware resources from the physical computer it runs on, therefore this solution is suitable for installation of any size and is operating system independent.
Box 2.0 solution has a limit to a maximum of 7000 connected 2N IP devices.
Now we will look on how to install the product.
Installation
Please click on the part you are interested in and it will be displayed for you.
2N Access Commander Virtual Machine
Prerequisites
- Requirements for the host computer:
- VT-X virtualisation technology activated in the BIOS,
How to enable virtualization on your computer - Hardware elements according to the count of connected 2N devices,
Recommended hardware elements - Supported virtualization platform
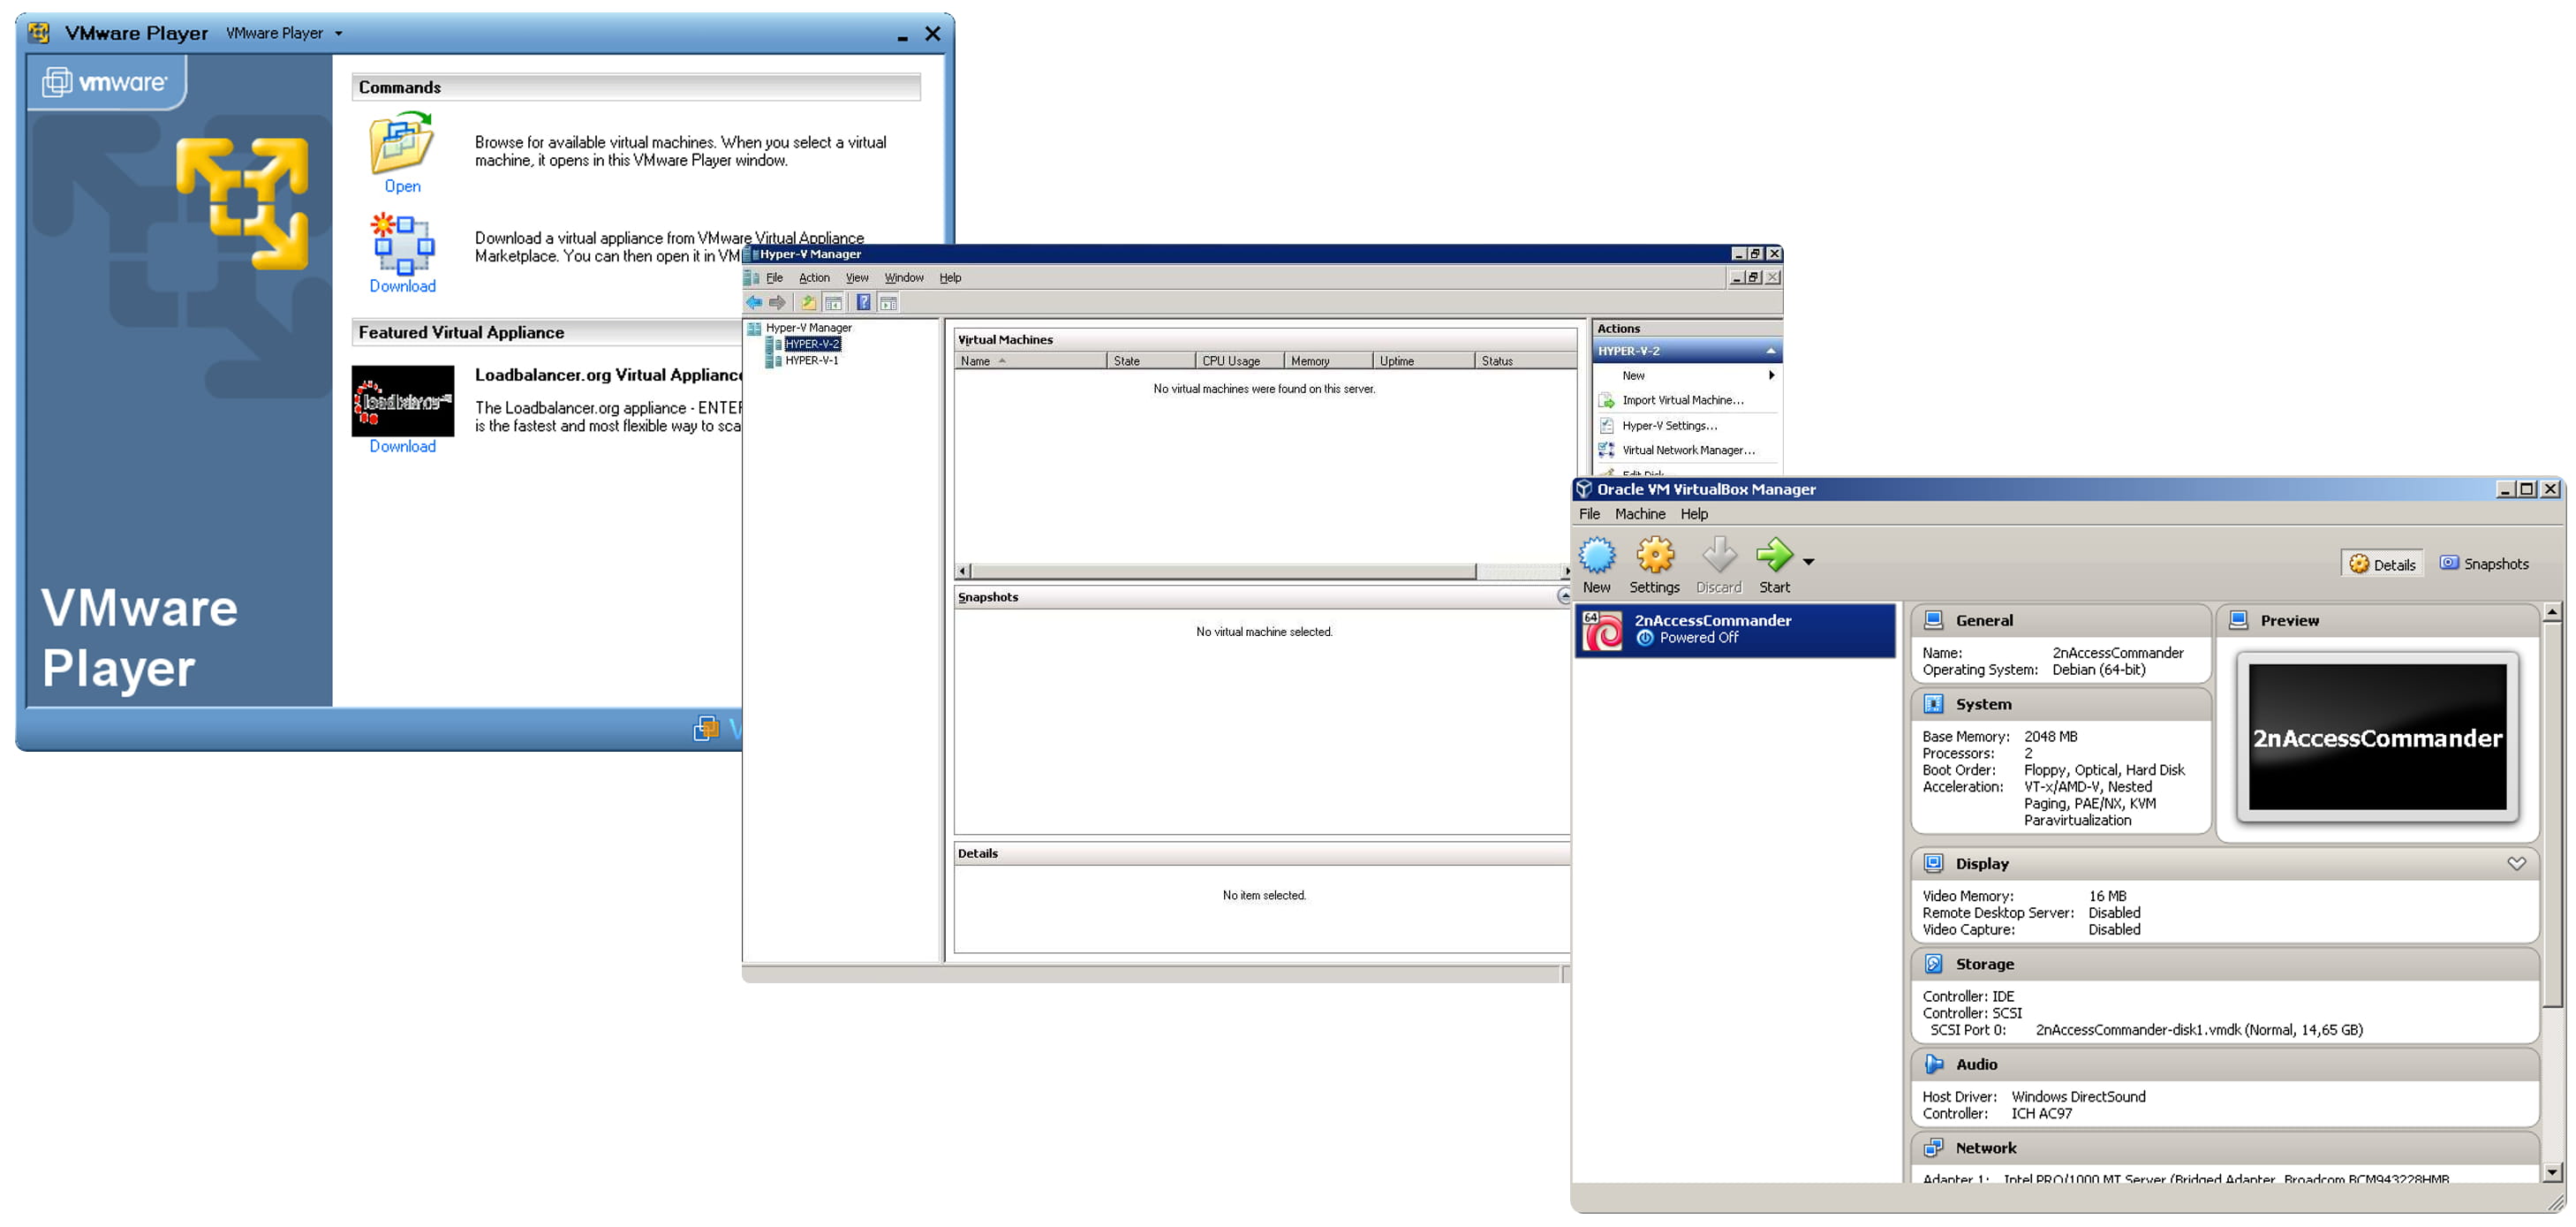
Oracle VirtualBox / VMware (6.5 and higher) / Hyper-V
- VT-X virtualisation technology activated in the BIOS,
- Requirements for the virtual machine:
- Minimum system resources requirements already set in a distributed virtual image,
it is not recommended to lower them.
- Minimum system resources requirements already set in a distributed virtual image,
Guide
- Deploy on your computer one of the supported virtualization platforms (Oracle VirtualBox / VMware / Hyper-V).
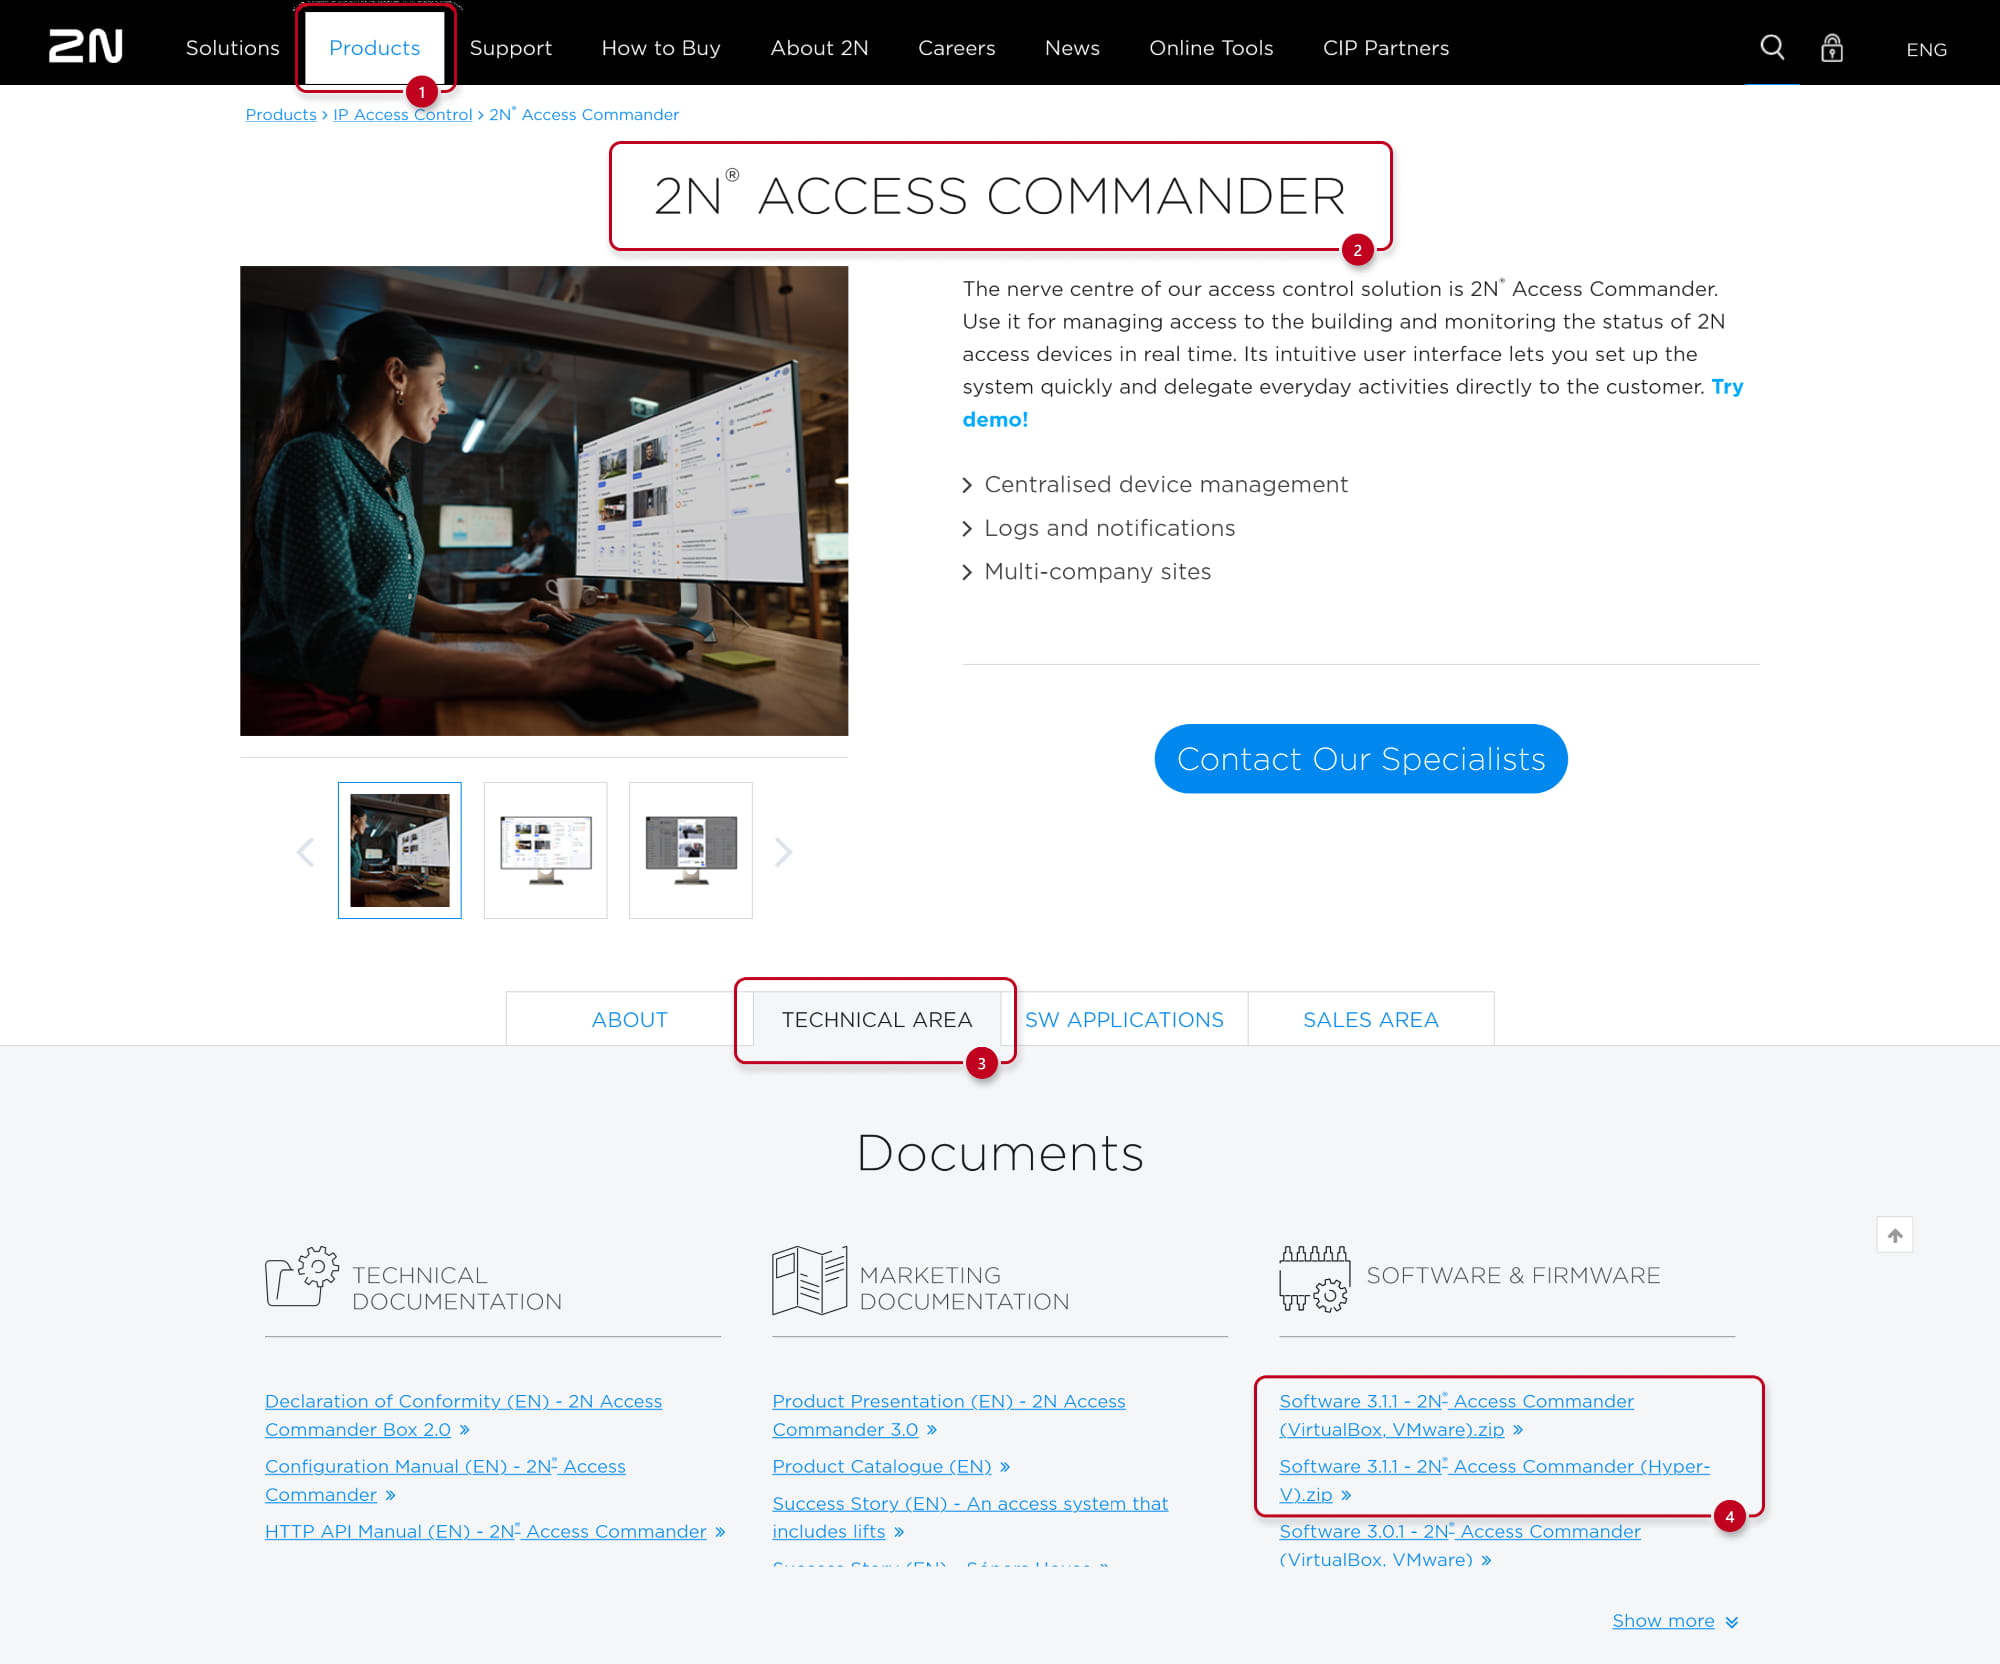
- Download and extract the Access Commander image file for your virtualization platform from 2N webpage (click here).
- Import downloaded virtualization file from your computer to virtualization platform,
choose the used network interface and generate a new MAC address.
(Example demonstrates usage of VirtualBox platform)
- Run imported virtual machine
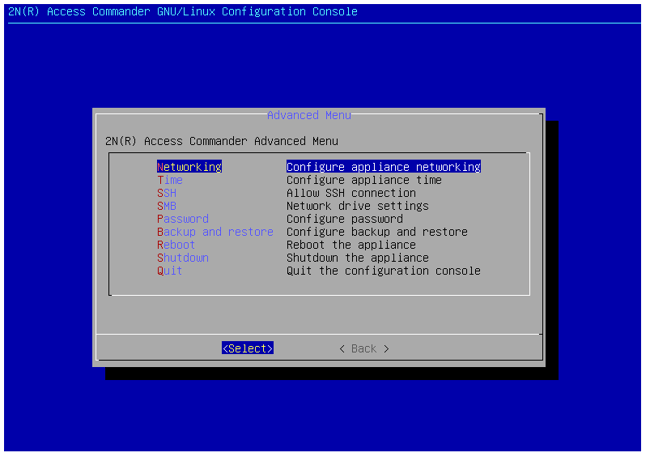
- If no DHCP is present, you can setup network in the linux interface, among another parameters like backup options, time settings, SSH, etc.
Default login: root / 2n
- If no DHCP is present, you can setup network in the linux interface, among another parameters like backup options, time settings, SSH, etc.
- If DHCP is present, you will see its IP address so you can go directly to the web interface where you can set all the setup parameters as well.
2N Access Commander Box
Prerequisites
- Hardware distribution of 2N® Access Commander
2N® Access Commander Box, order no. 91379030
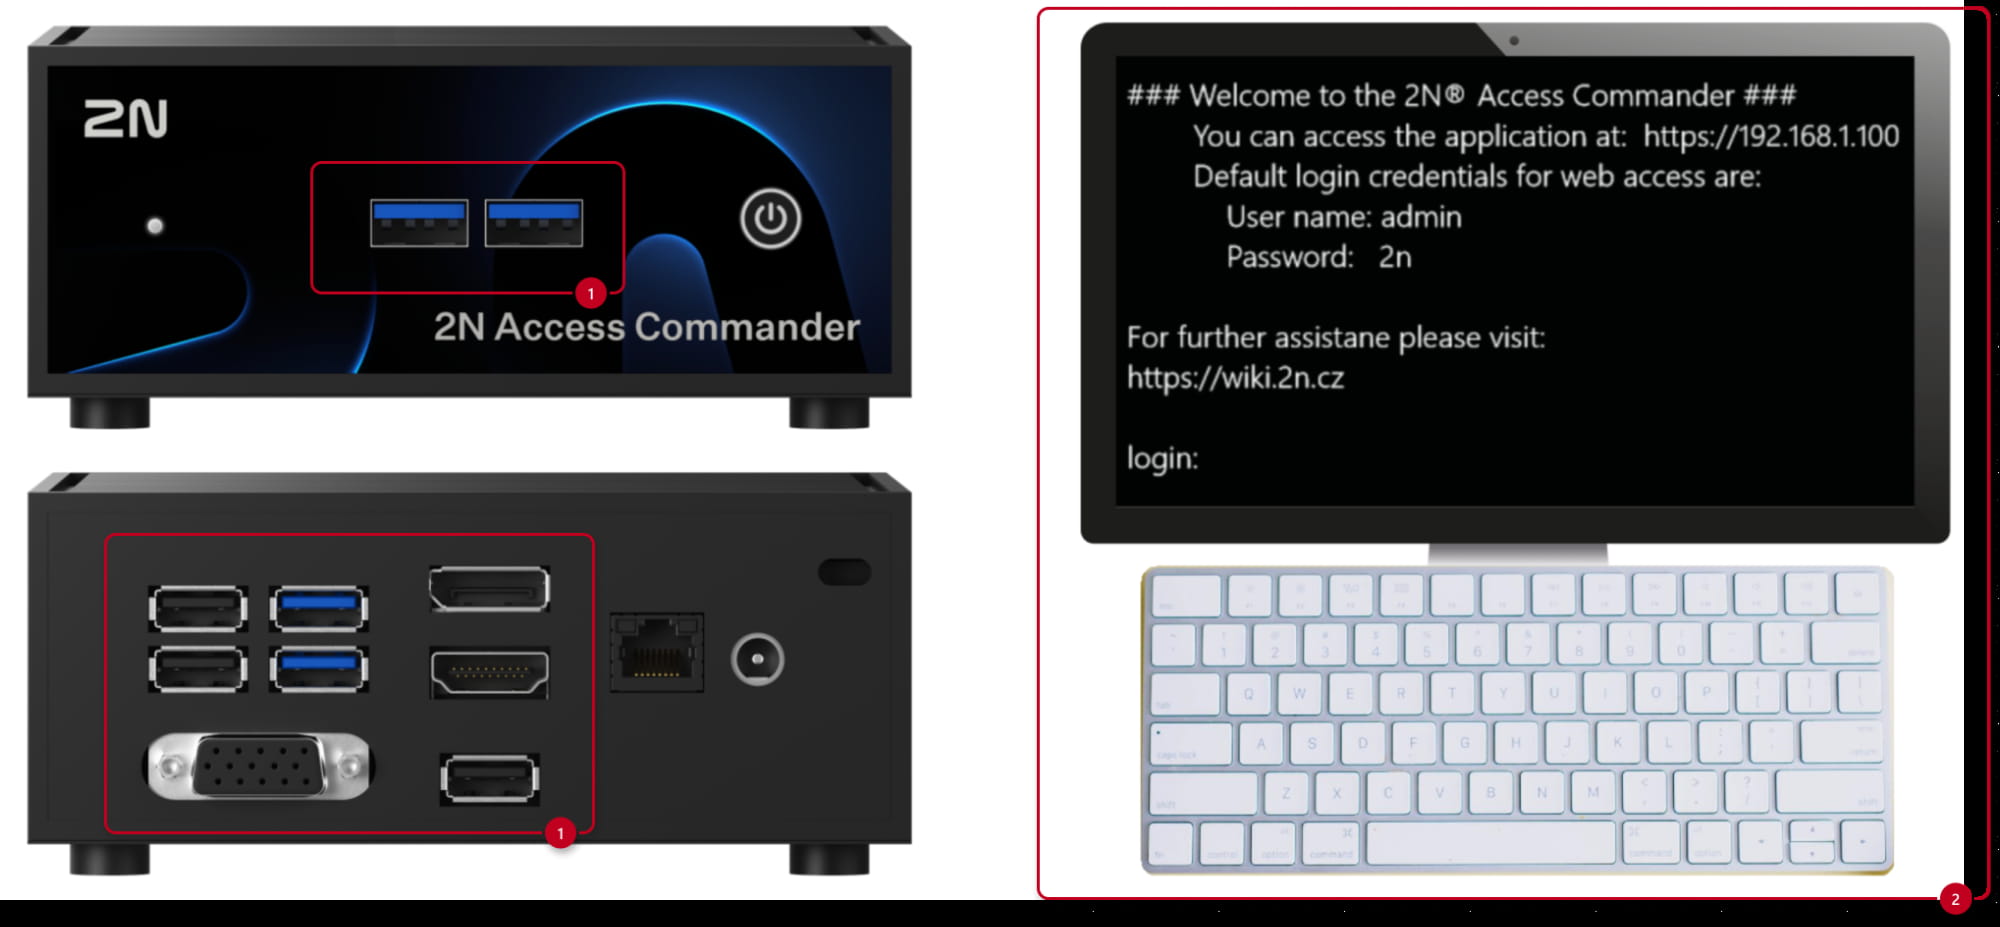
- A display (VGA/HDMI) and a keyboard (USB) in case DHCP is not present.
Guide
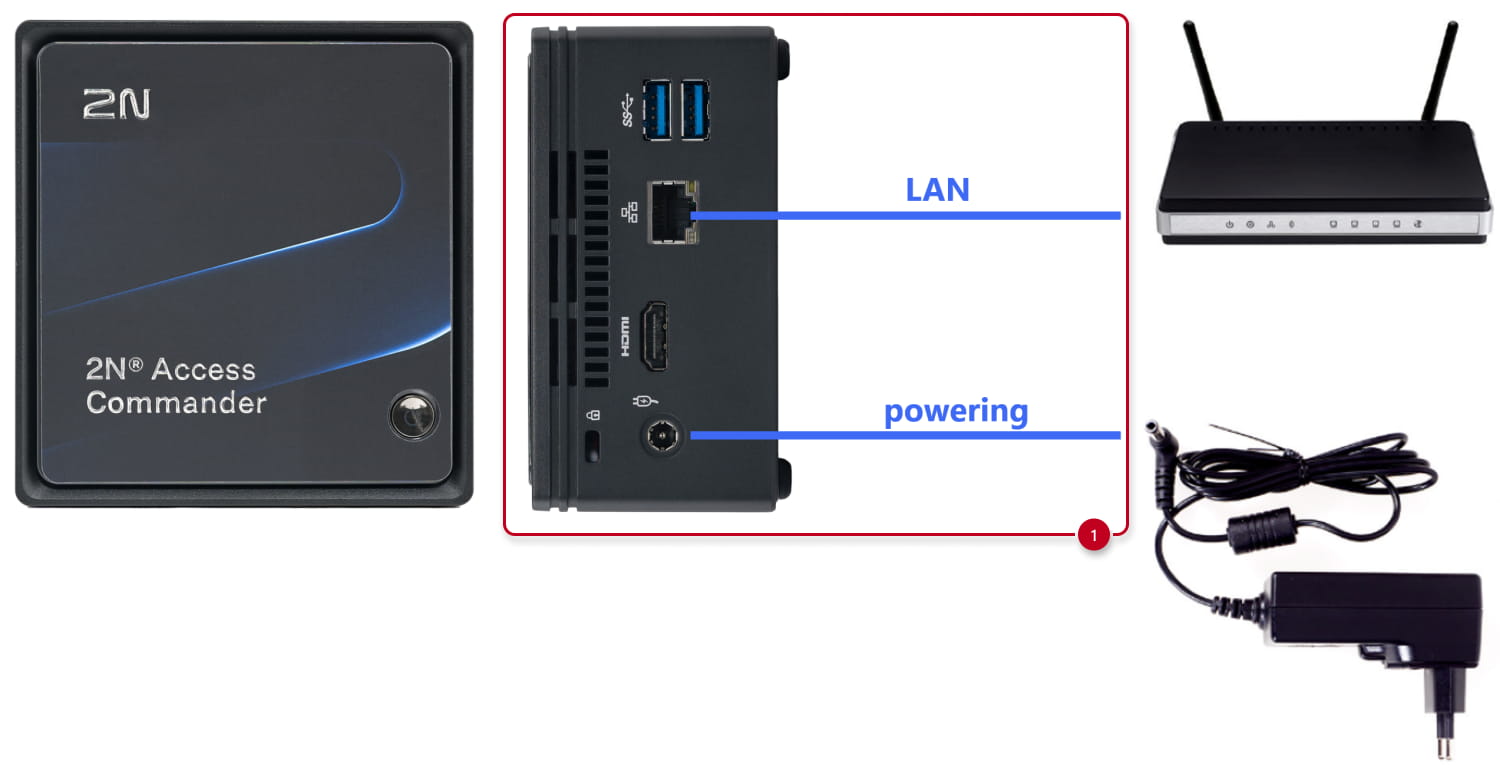
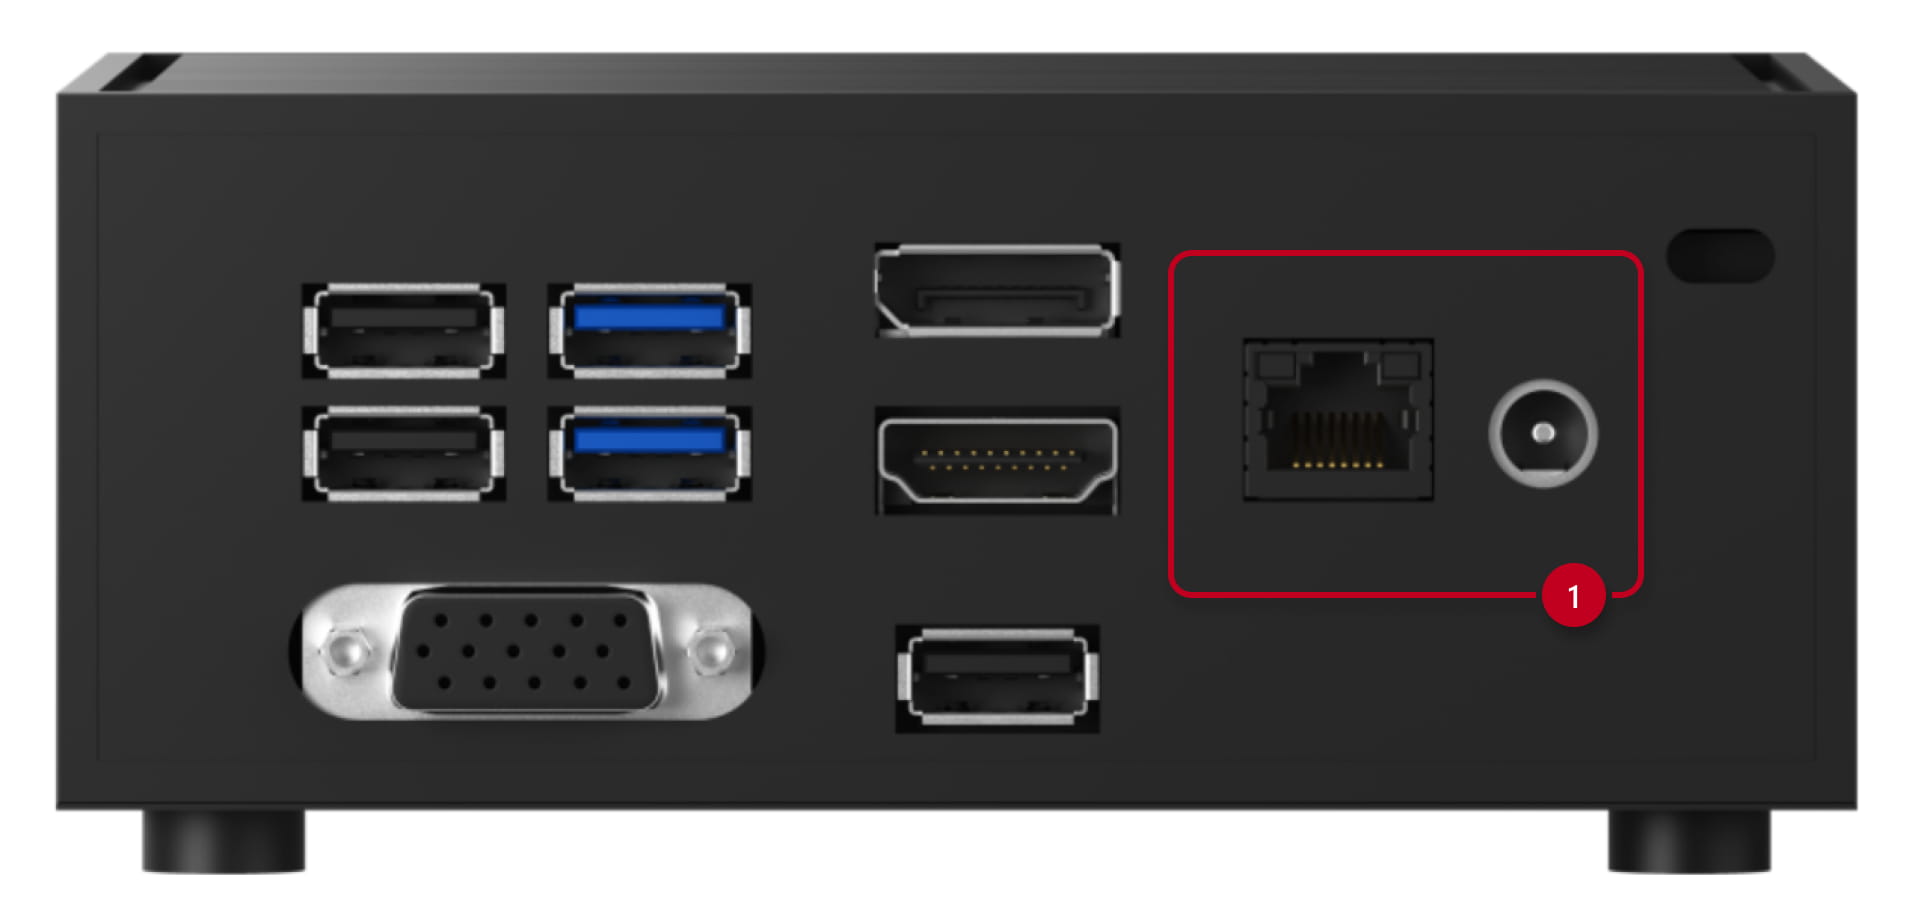
- Connect LAN cable and power supply to to the relevant port and start the device by short pressing the power button on top.

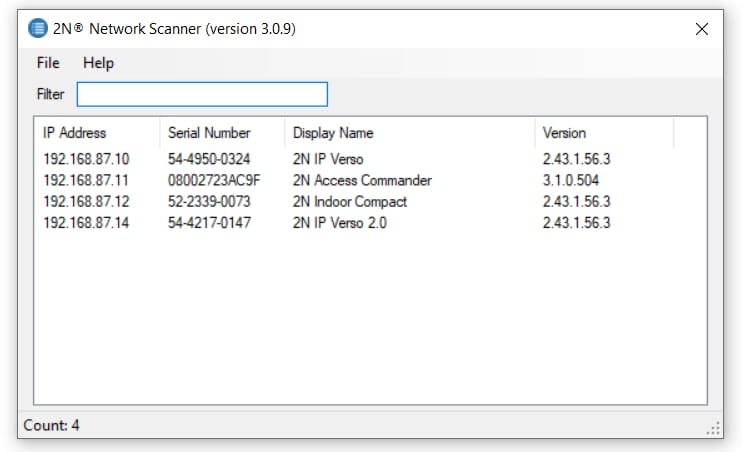
- If DHCP is present, you can locate 2N Access Commander in the network by our application 2N Network Scanner (click to download)
2N® Network Scanner - Locating 2N devices in the network
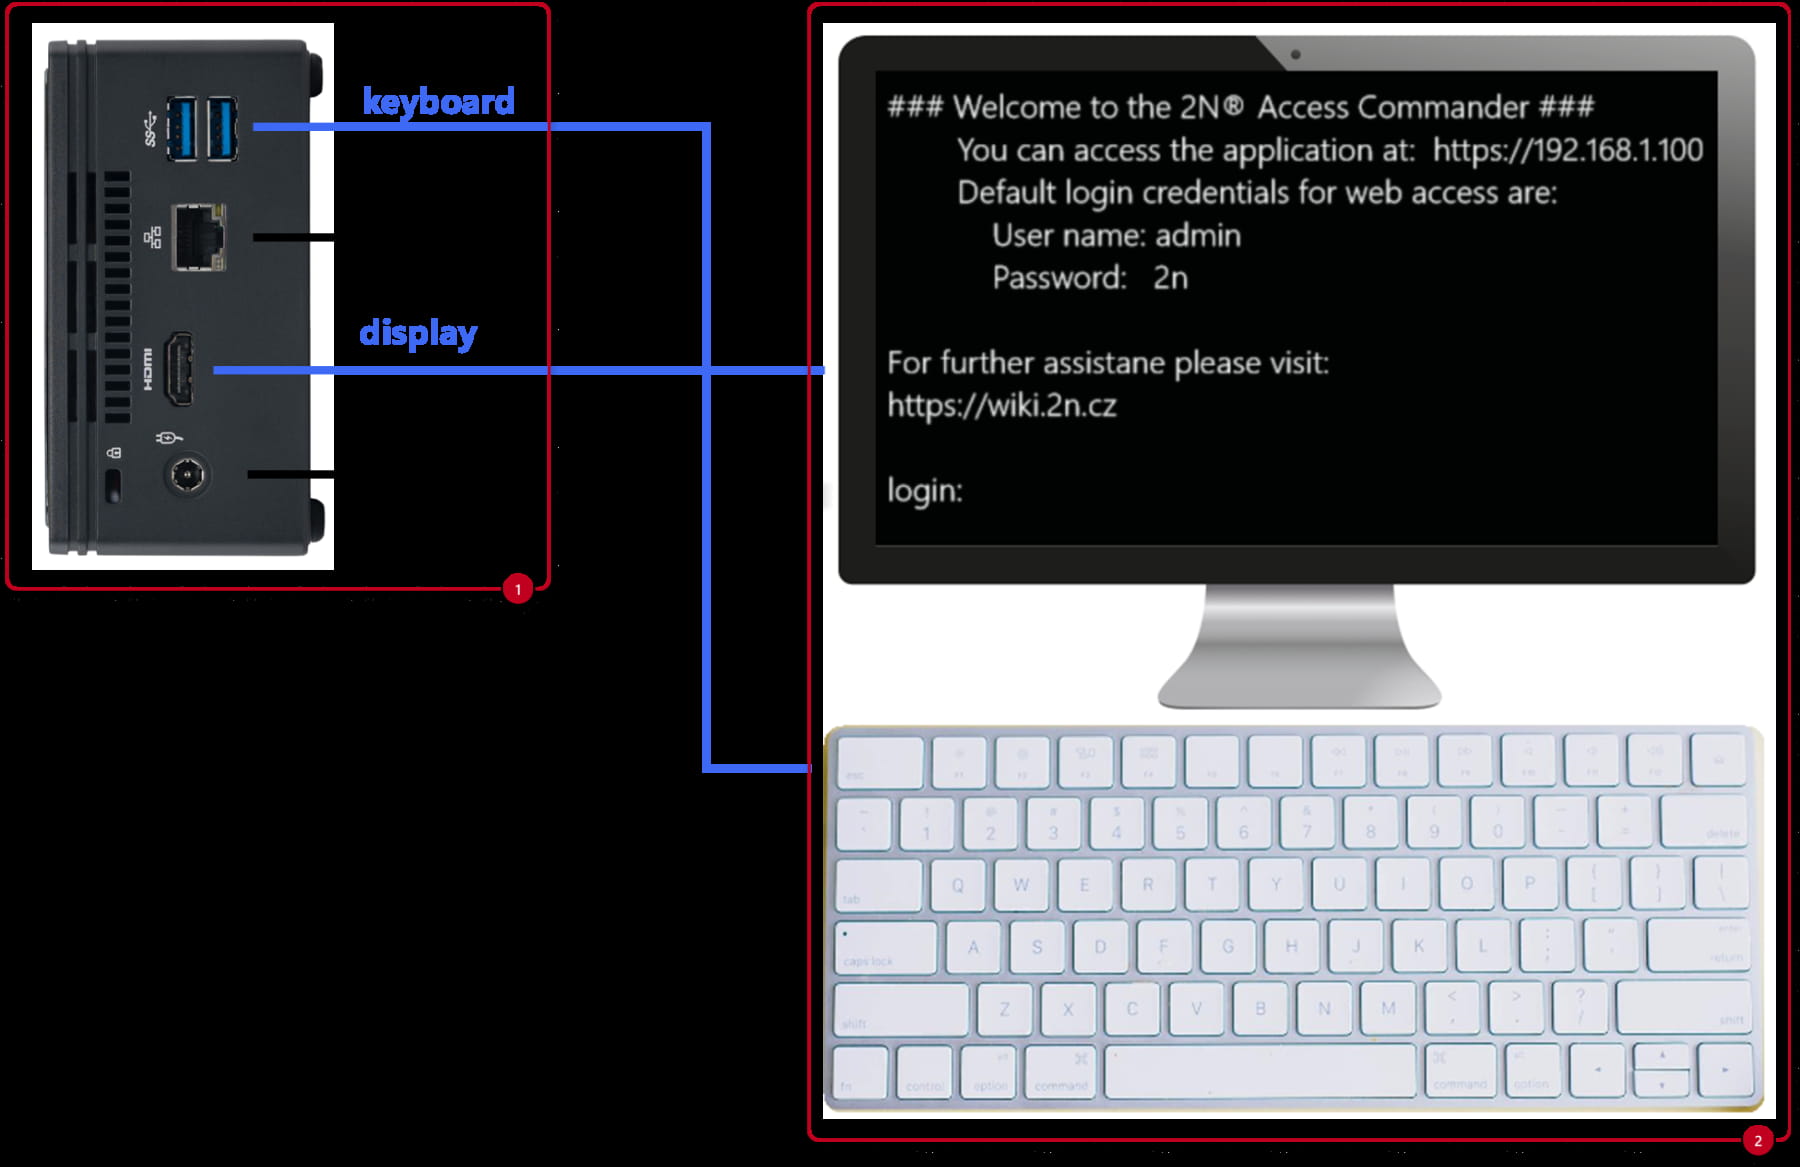
- If no DHCP is present, connect also a USB keyboard and VGA or HDMI display to the relevant port.
Now you can setup network in the linux interface, among another parameters like backup options, time settings, SSH, etc.
Default login: root / 2n
2N Access Commander Box 2.0
Prerequisites
- Hardware distribution of 2N® Access Commander
2N® Access Commander Box 2.0, order no. 1120120E / 1120120GB / 1120120US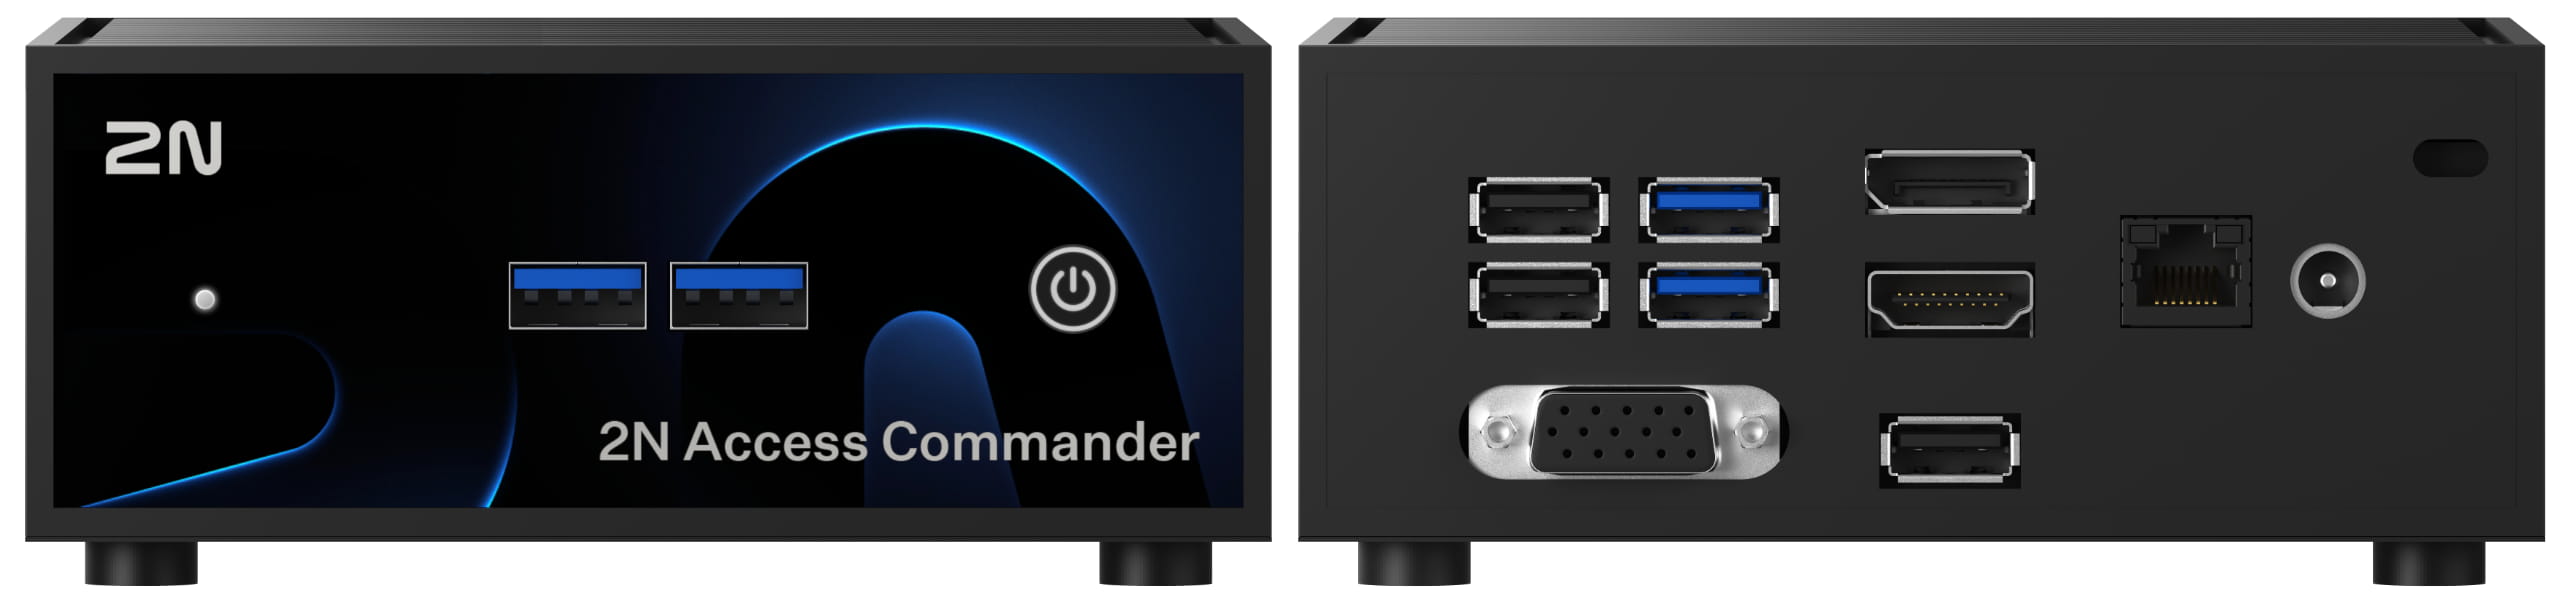
- A display (VGA/HDMI) and a keyboard (USB) in case DHCP is not present.
Guide
- Connect LAN cable and power supply to to the relevant port and start the device by short pressing the power button on the front side.

- If DHCP is present, you can locate 2N Access Commander in the network by our application 2N Network Scanner (click to download)
2N® Network Scanner - Locating 2N devices in the network
- If no DHCP is present, connect also a USB keyboard and VGA or HDMI display to the relevant port.
Now you can setup network in the linux interface, among another parameters like backup options, time settings, SSH, etc.
Default login: root / 2n
Configuration
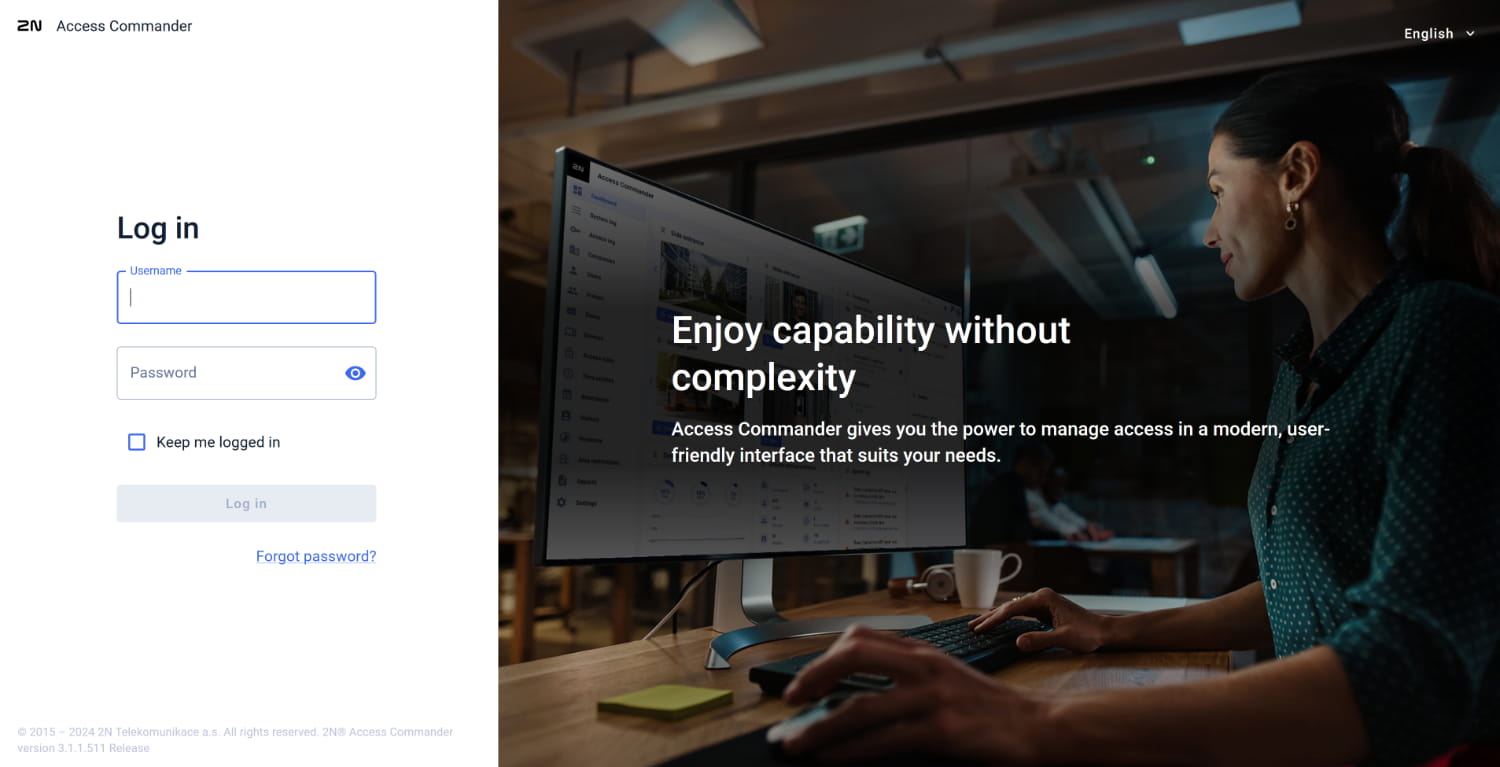
The Access Commander interface is available via its IP address in a web browser.
- If you don´t know 2N Access Commander´s IP address, you can locate it in the network by our application 2N Network Scanner (click to download)
2N Network Scanner - Locating 2N devices in the network
- Open your web browser and open the page in IP address provided by Access Commander in order to access its configuration.
Default login: admin / 2n
- Now you can start with the basic settings configuration like server date and time, network settings, SSH & root password change.
Please note, when you change the configuration method to DHCP, you also change the server’s IP address which may result in a connection loss.
If you change the IP address to static, you will be automatically redirected to the new IP address.


- Continue with the rest access control configuration...
Video - 2N® Access Commander - Basic setup guide