2N IP Intercoms - Factory reset
The steps in this article require using the web interface of a 2N device. Please follow this manual in case this is your first time using the web interface.
Dear customers,
If needed, you can return the device to the factory settings. In case you can access the web interface (know the login password), you can backup the configuration and use the software reset with possibility to keep the network settings. Otherwise there is available the hardware reset.
The factory reset erases the licence key (if entered) as well, we recommend you to store it for entering it back after the procedure.
In case of on-line installation, the device can get the license back from our license server by itself.
Prerequisites
- 2N IP Intercom with the latest firmware if possible
(especially in case of software reset)
Software reset
Click here for firmware 3.0 and newer.
Read more about the differences in long-term support and active track 2N OS.
Firmware 2.50 and older (LTS)
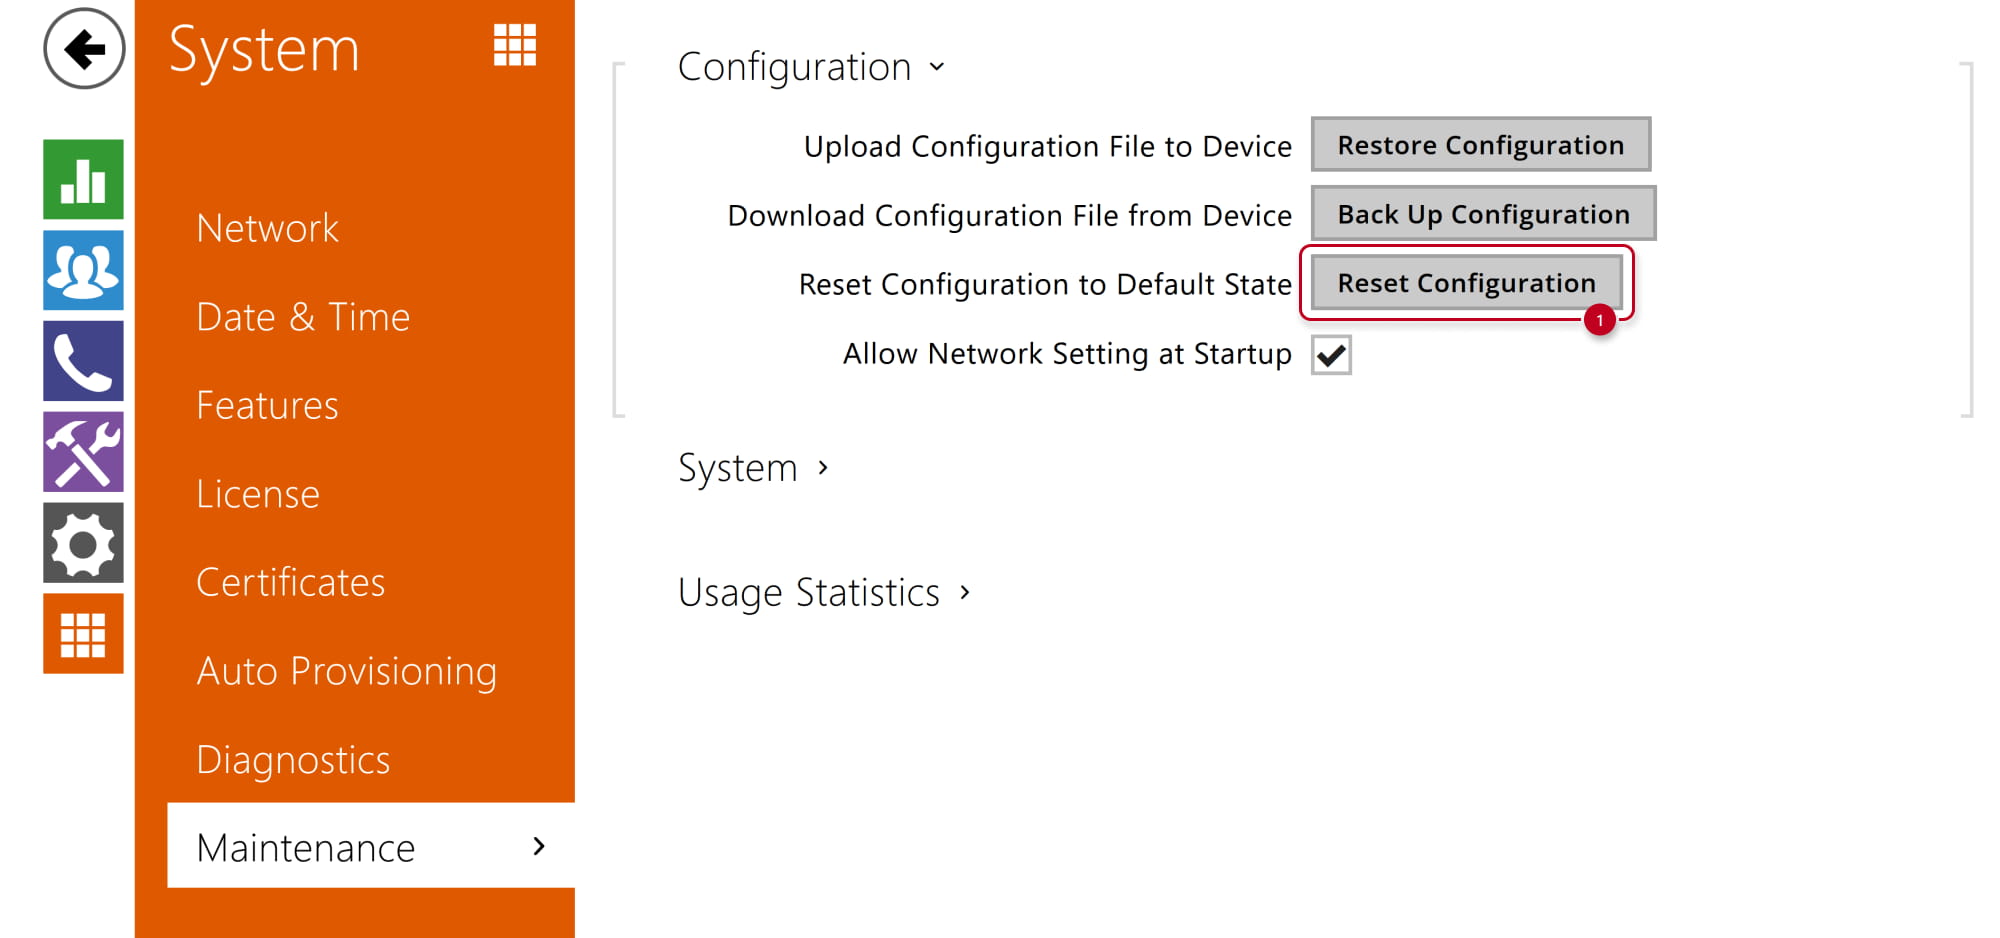
- At first backup your configuration in IP Intercom web interface, section System - Maintenance.

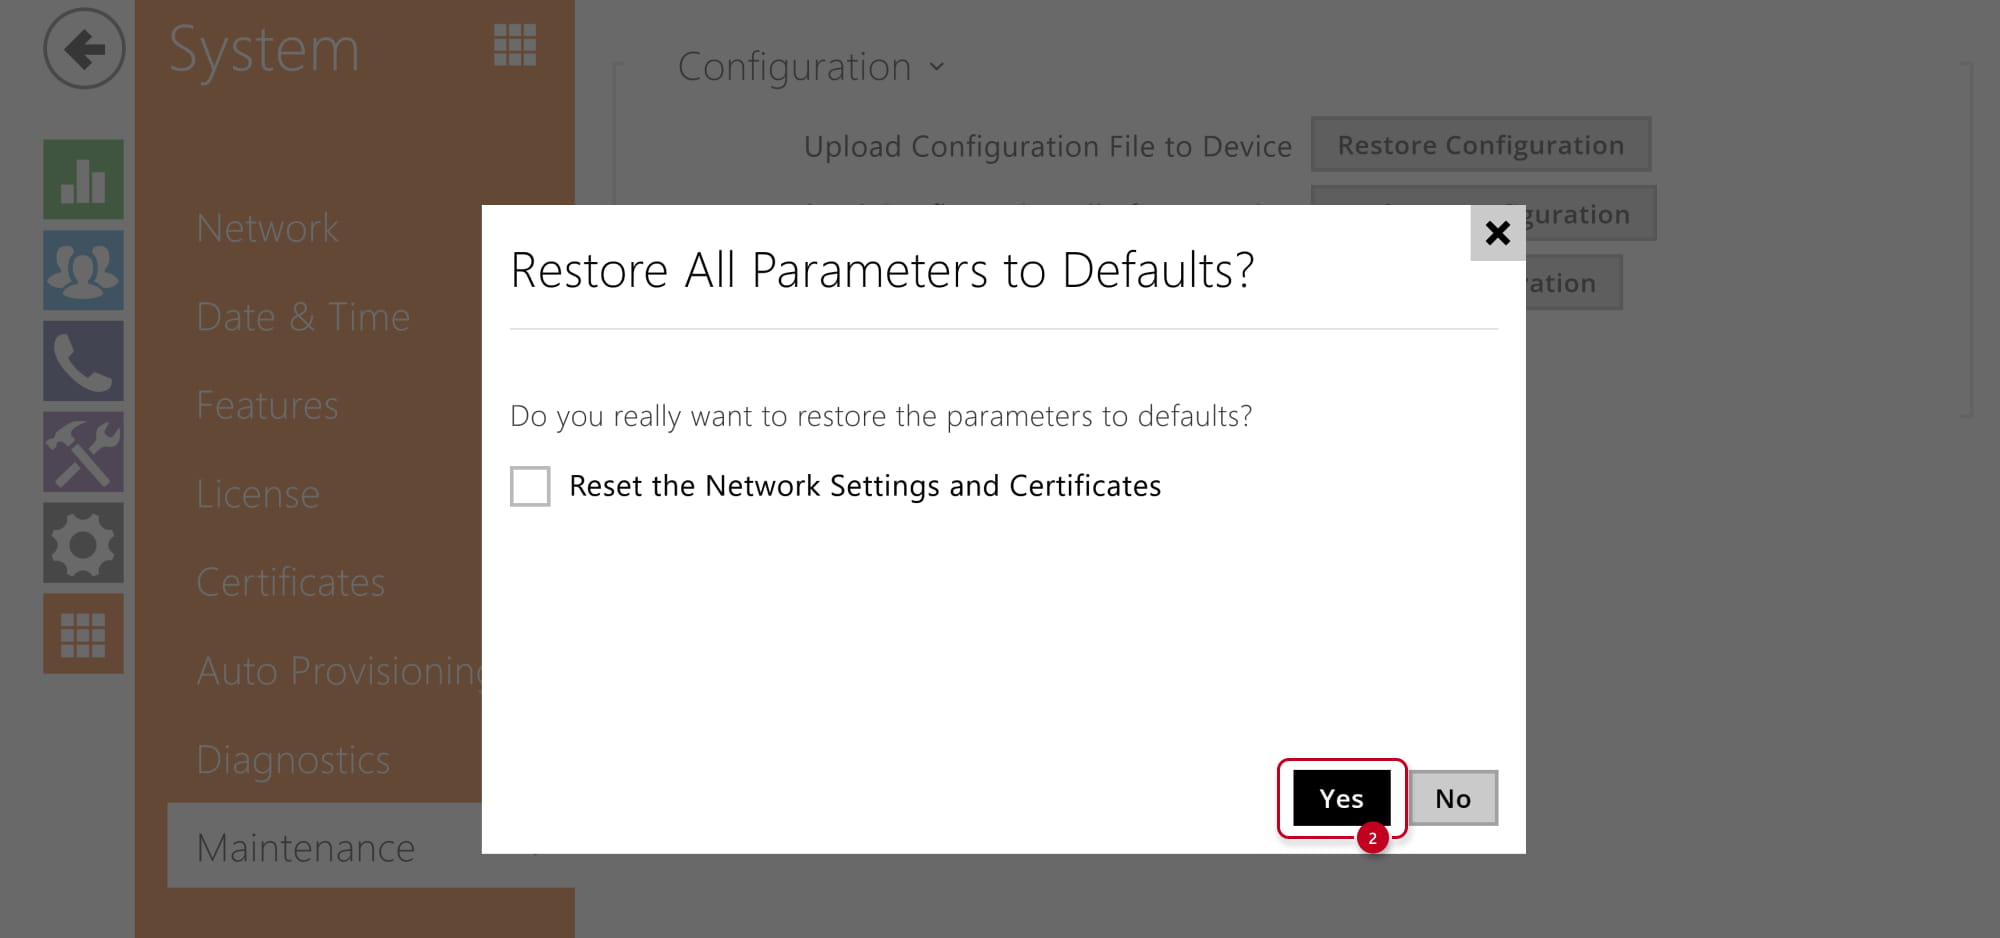
- Now on the same place click on Reset Configuration button and confirm it, you can choose if keep the network settings.
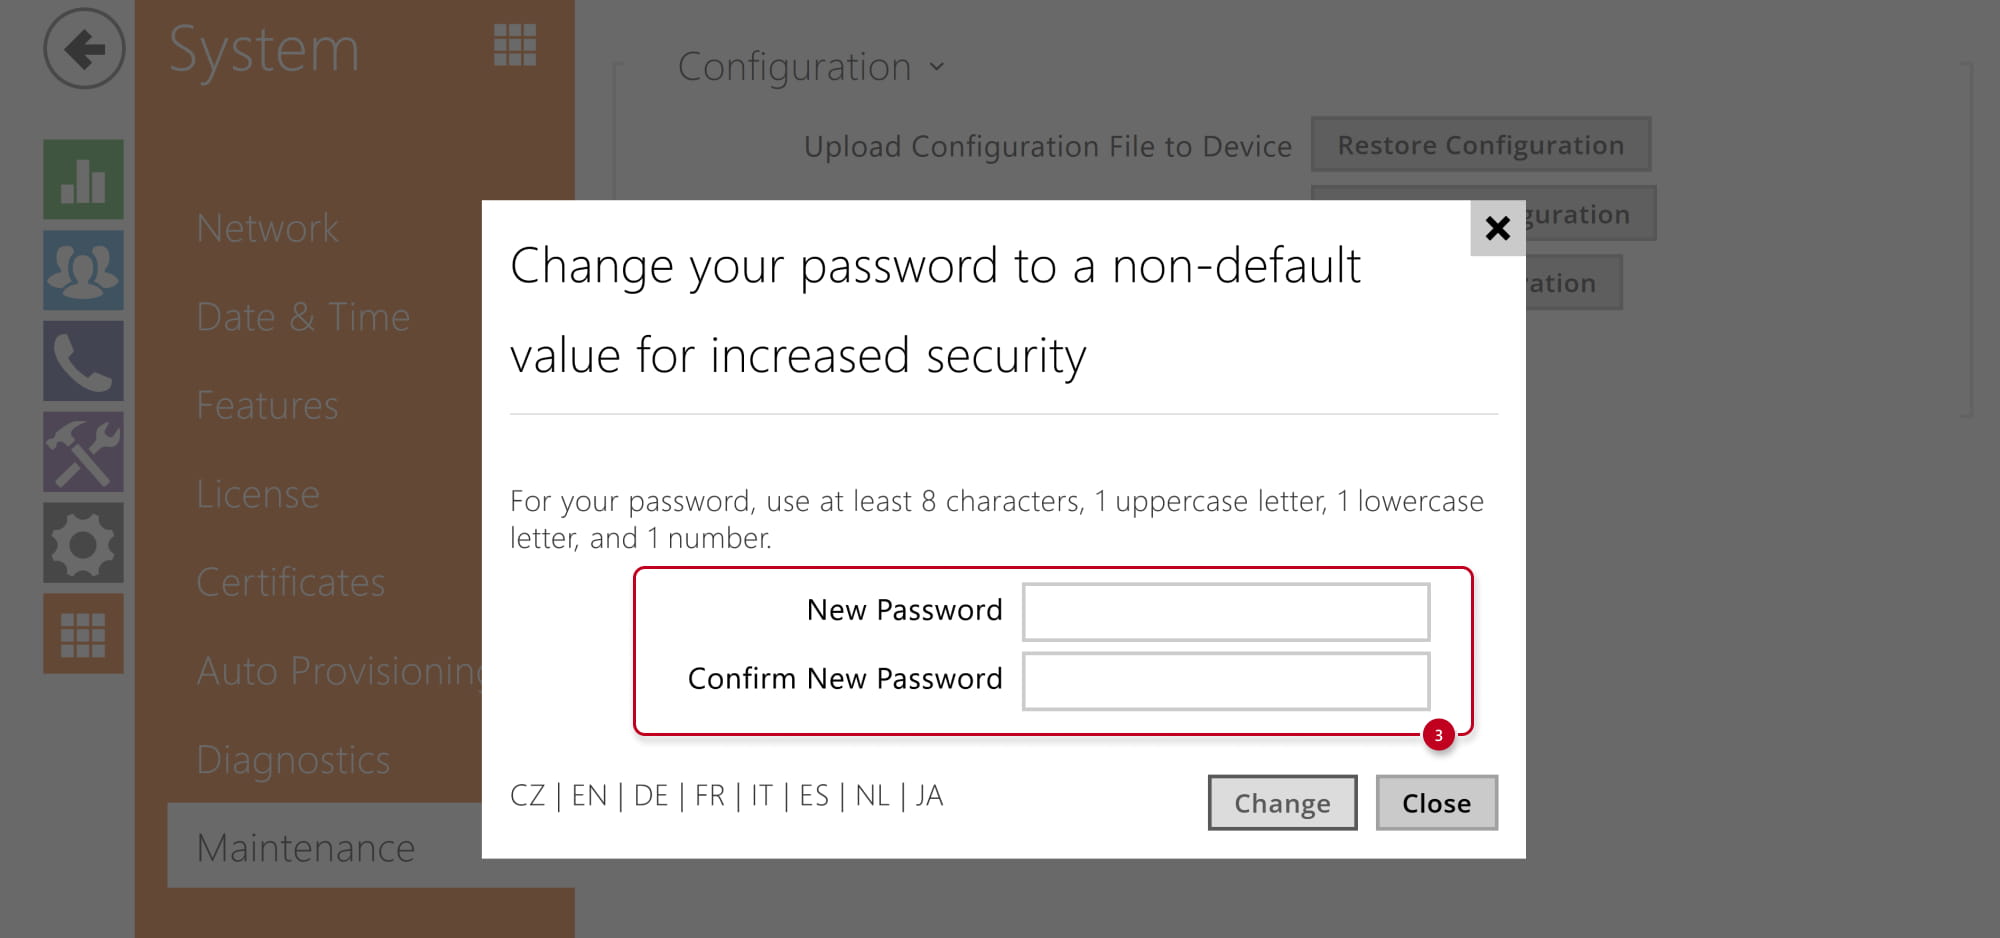
The procedure is completed in a while and you are asked for the new login password.
Firmware 3.0 and newer
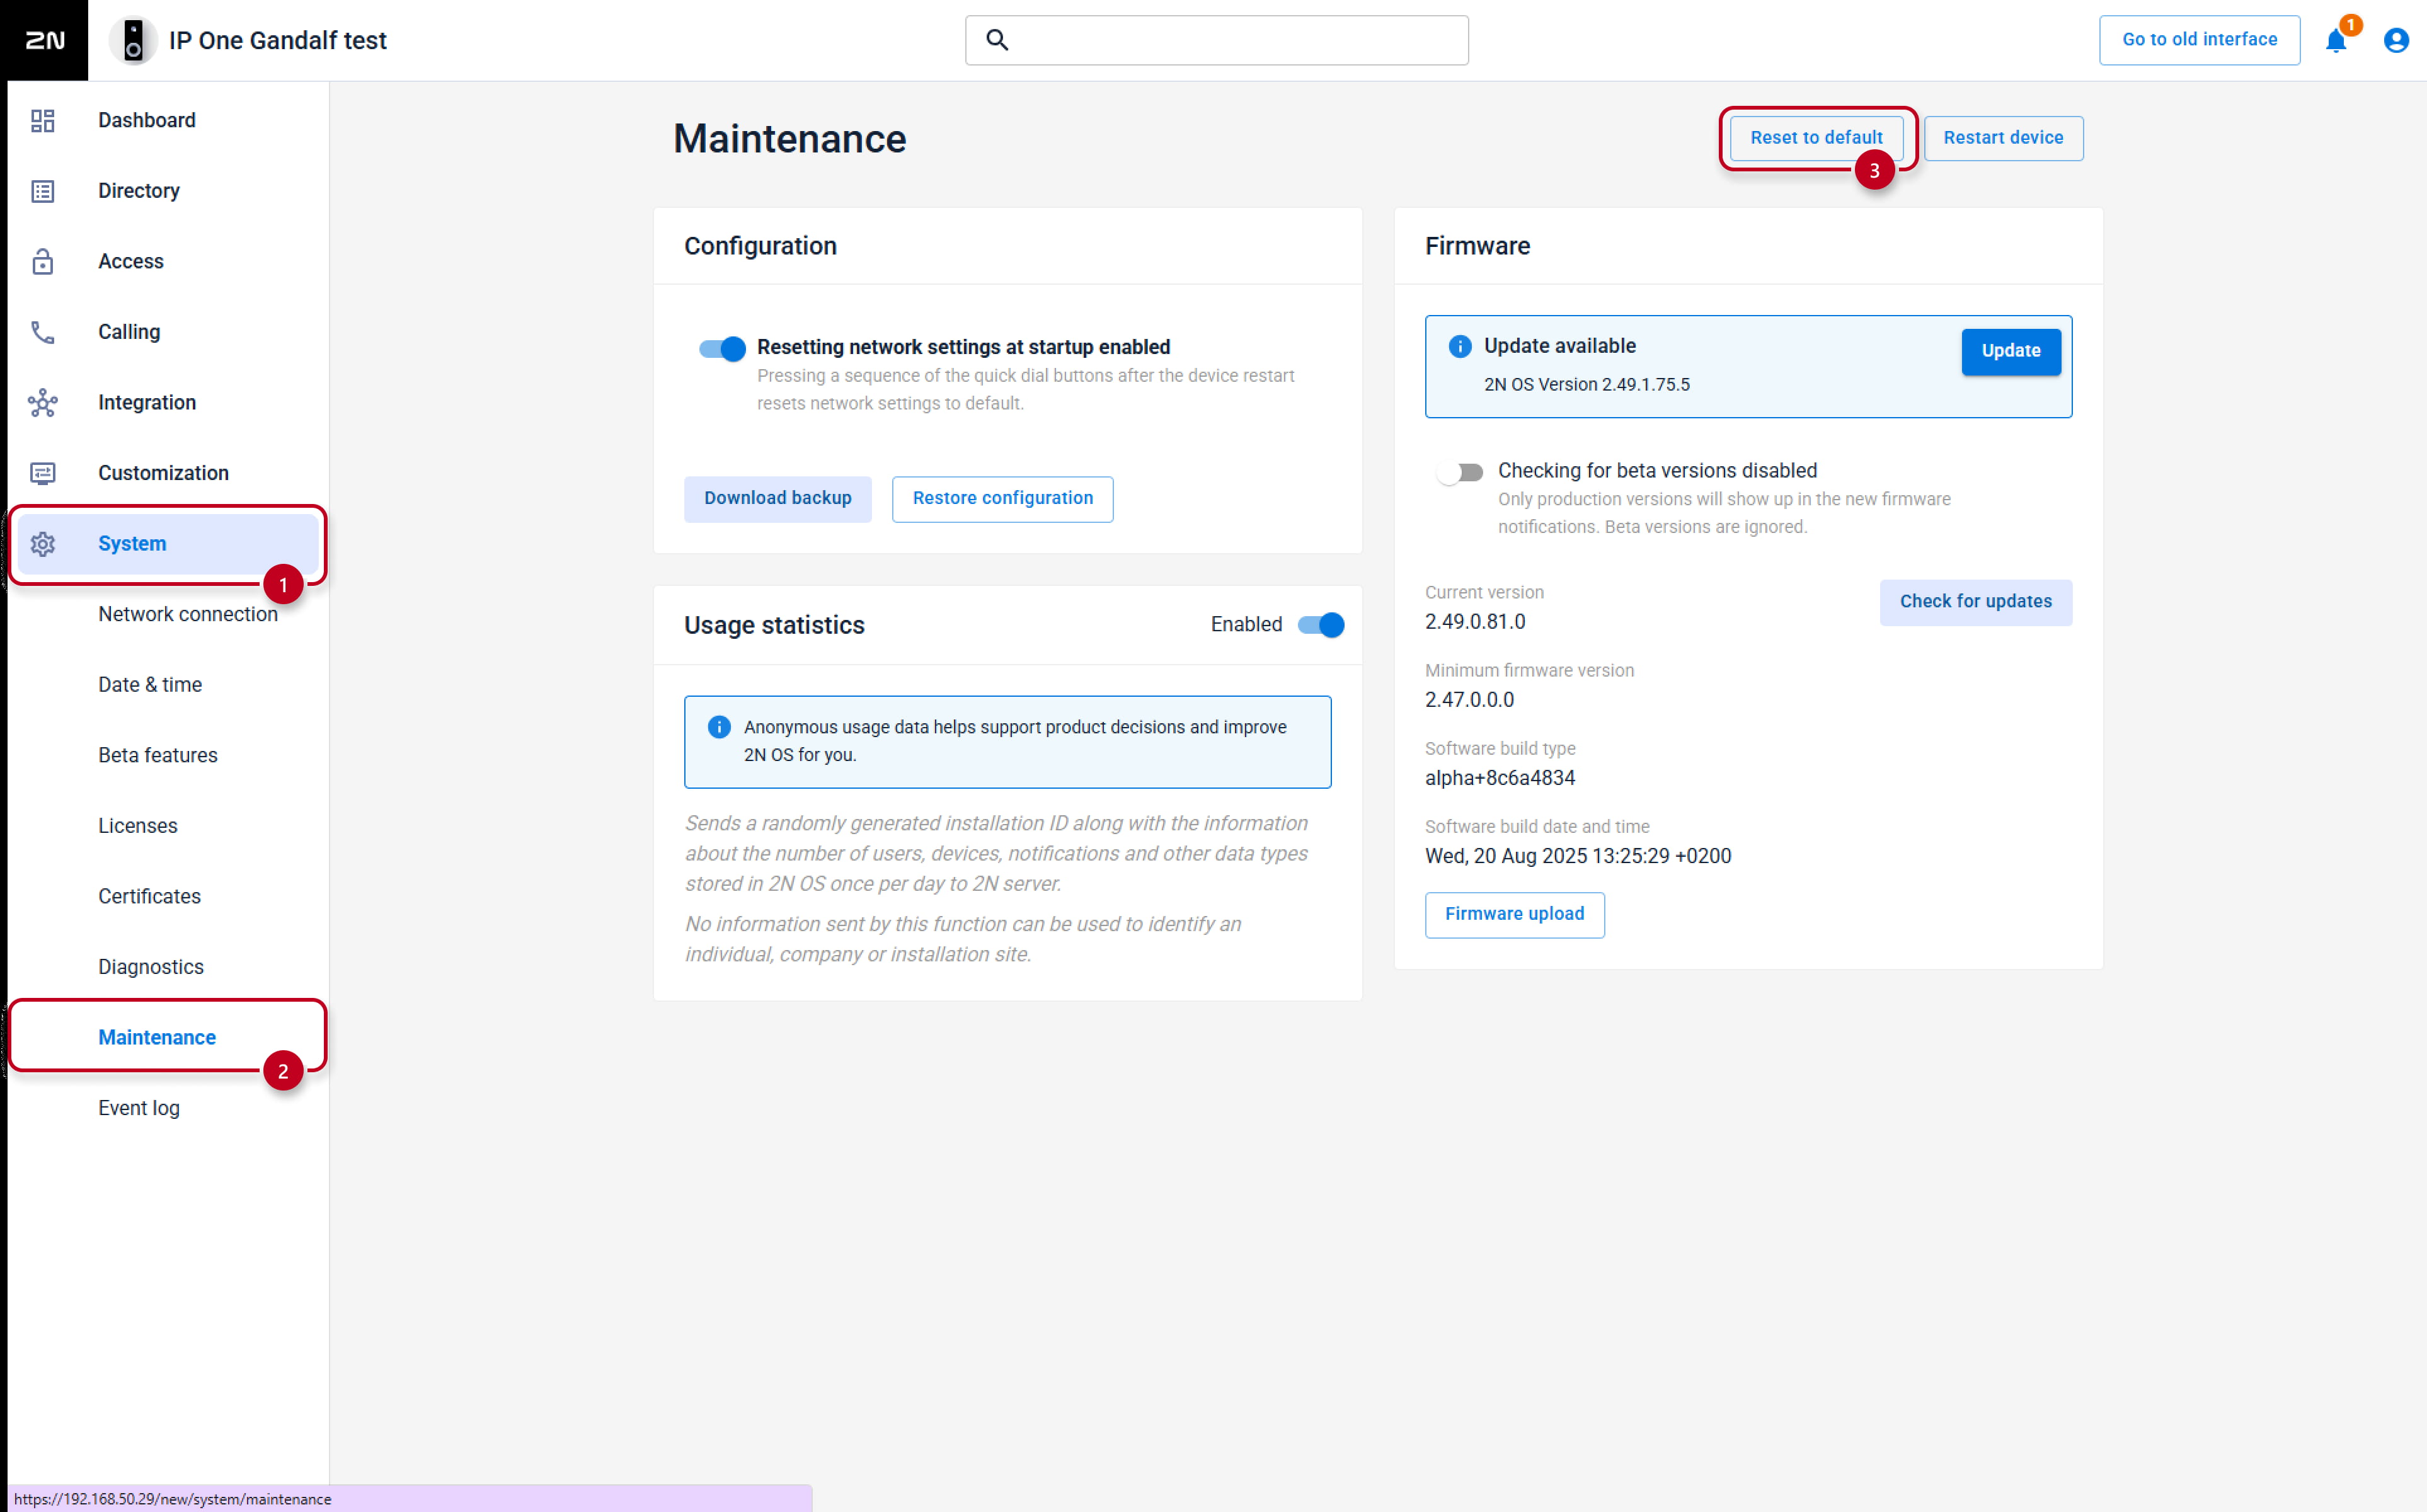
- At first backup your configuration in IP Intercom web interface, section System - Maintenance.

- Now on the same place click on Reset Configuration button and confirm it, you can choose if keep the network settings.
The procedure is completed in a while and you are asked for the new login password.

Hardware reset
Please click on the part (model) you are interested in and it will be displayed for you.
2N IP Audio/Video Kit
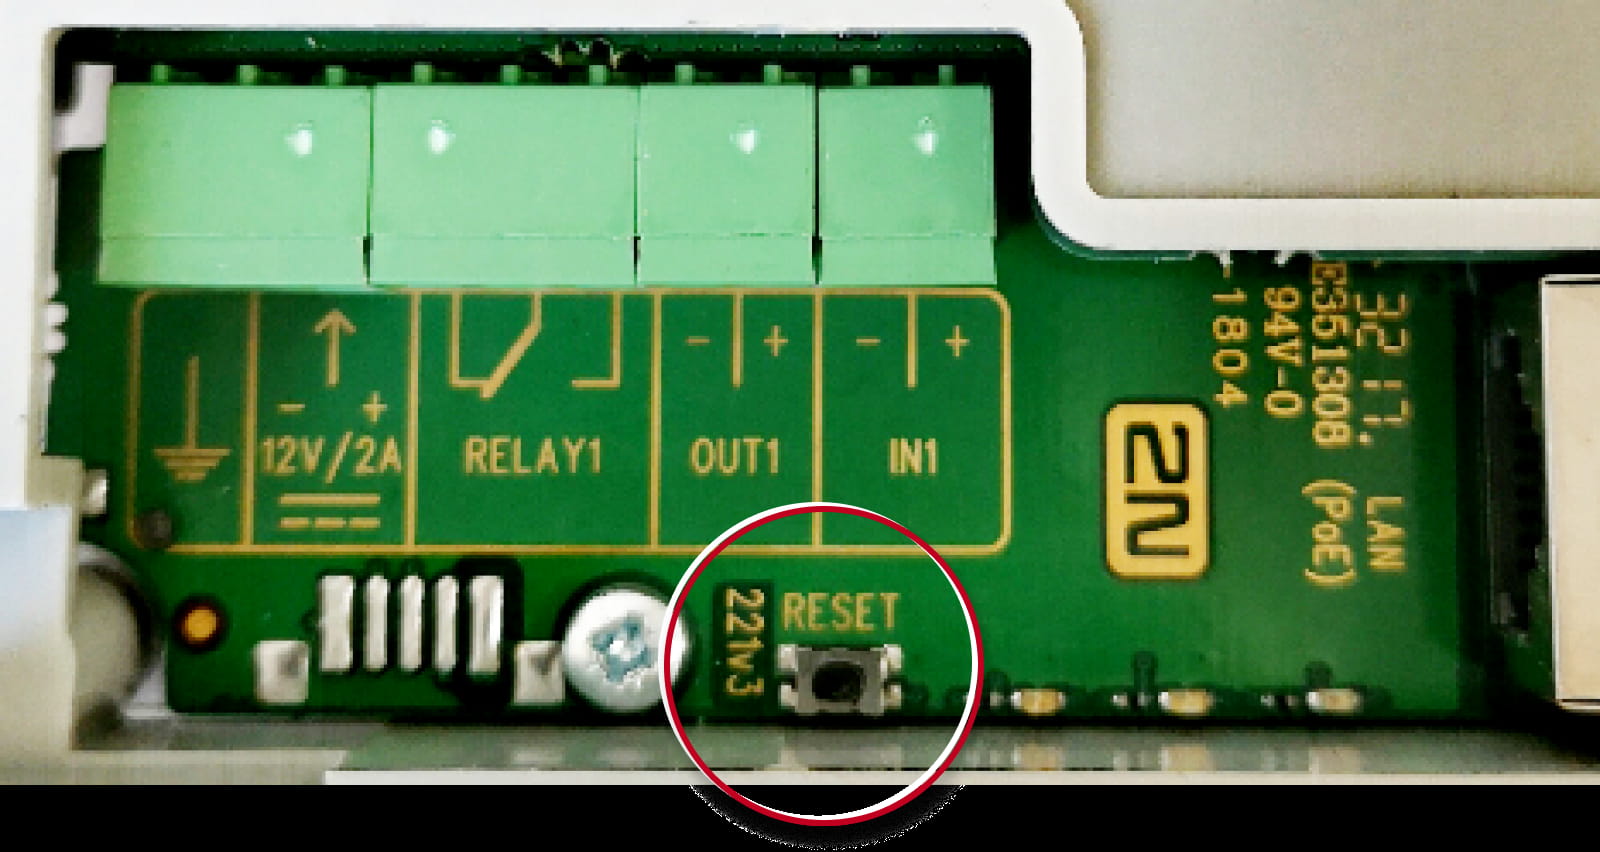
- Press and hold the RESET button.

- Watch and hear (if connected speaker) this LED / beep sequence
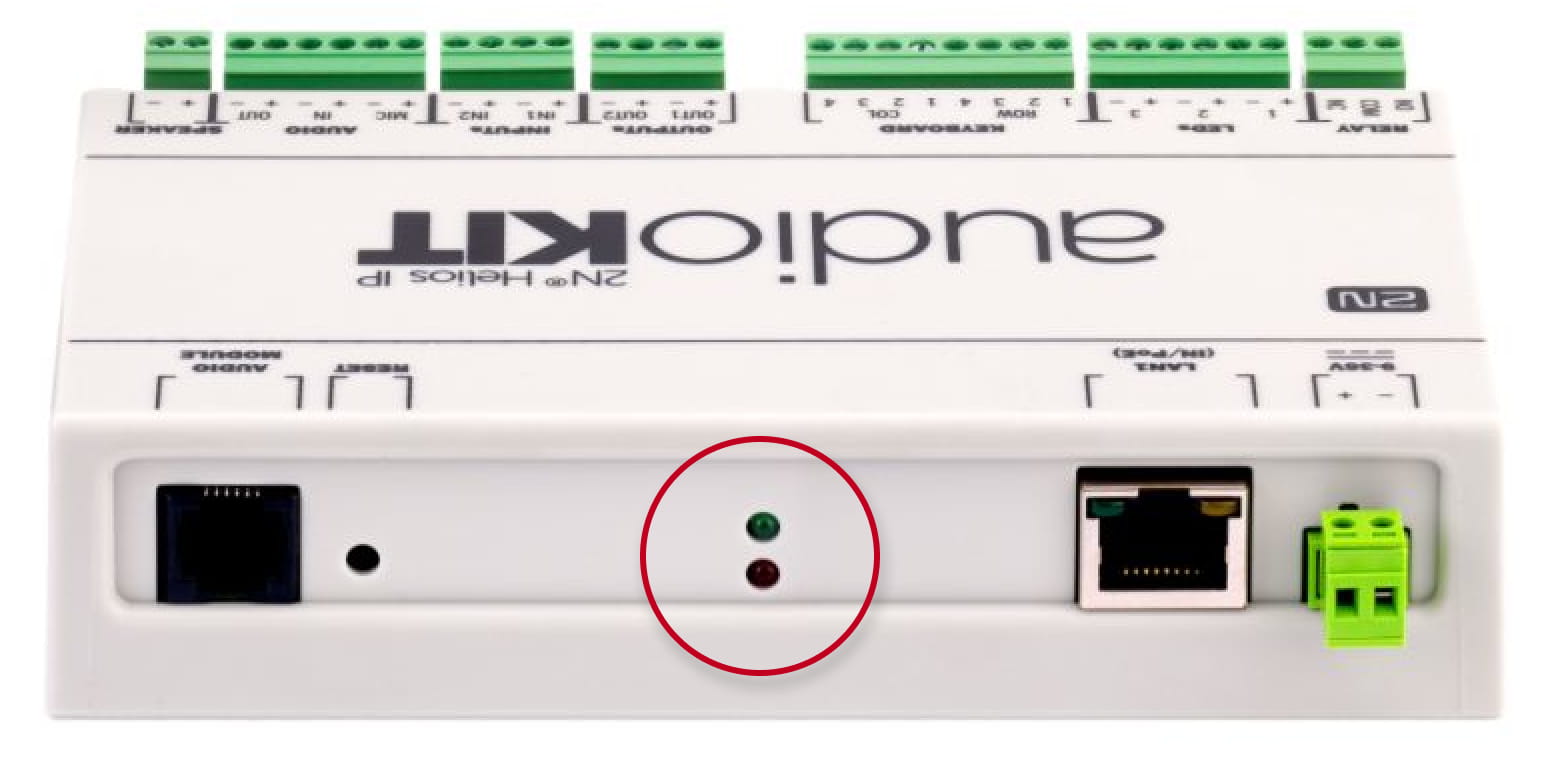
approx. 15 seconds approx. 3 seconds approx. 3 seconds approx. 3 seconds approx. 3 seconds __ _ __ _ __ _ __ _ __ _ __ _ __ _ __ _ __ _ __ _ 🔈 ) 🔈 )) 🔈 ))) 🔈 )))) -
Release the RESET button immediately when the last step starts (when you hear 4 beeps).
If pressed longer till finishing boot, then factory reset is not proceeded.
2N IP Base
- Press and hold the RESET button.
- Watch and hear this LED / beep sequence
approx. 15 seconds approx. 3 seconds approx. 3 seconds approx. 3 seconds approx. 3 seconds __ _ __ _ __ _ __ _ __ _ __ _ __ _ __ _ __ _ __ _ 🔈 ) 🔈 )) 🔈 ))) 🔈 )))) -
Release the RESET button immediately when the last step starts (when you hear 4 beeps).
If pressed longer till finishing boot, then factory reset is not proceeded.
2N IP Force/Safety
The procedure depends on version of PCB, you can find this information here: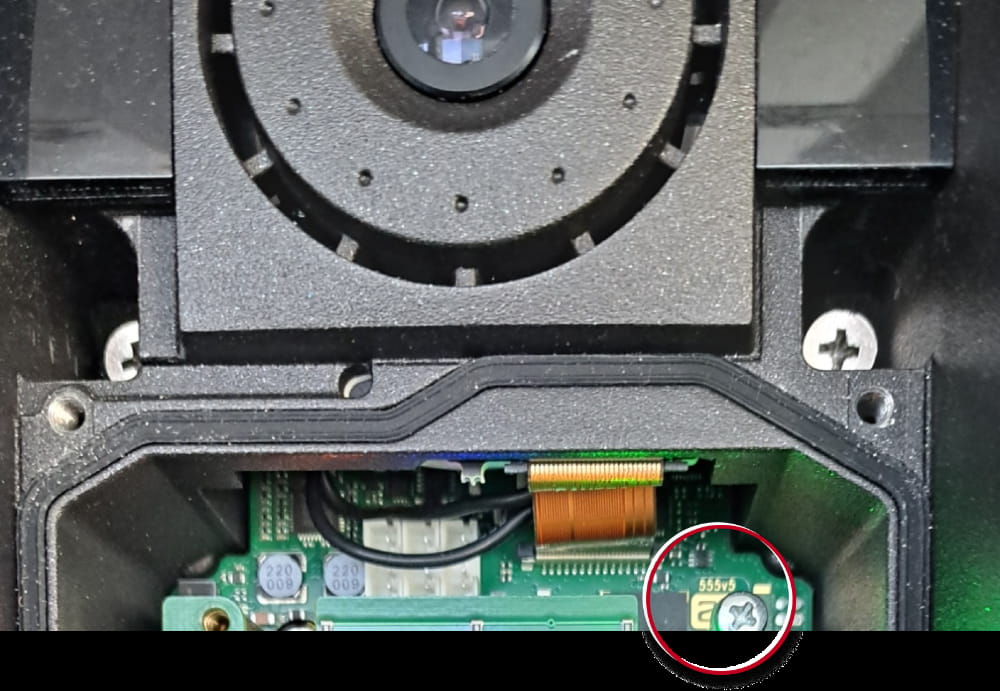
PCB version 555v5 (the actual procedure)
- Press and hold the RESET button.

- Watch and hear this LED / beep sequence
approx. 15 seconds approx. 3 seconds approx. 3 seconds approx. 3 seconds approx. 3 seconds __ _ __ _ __ _ __ _ __ _ __ _ __ _ __ _ __ _ __ _ 🔈 ) 🔈 )) 🔈 ))) 🔈 )))) -
Release the RESET button immediately when the last step starts (when you hear 4 beeps).
If pressed longer till finishing boot, then factory reset is not proceeded.
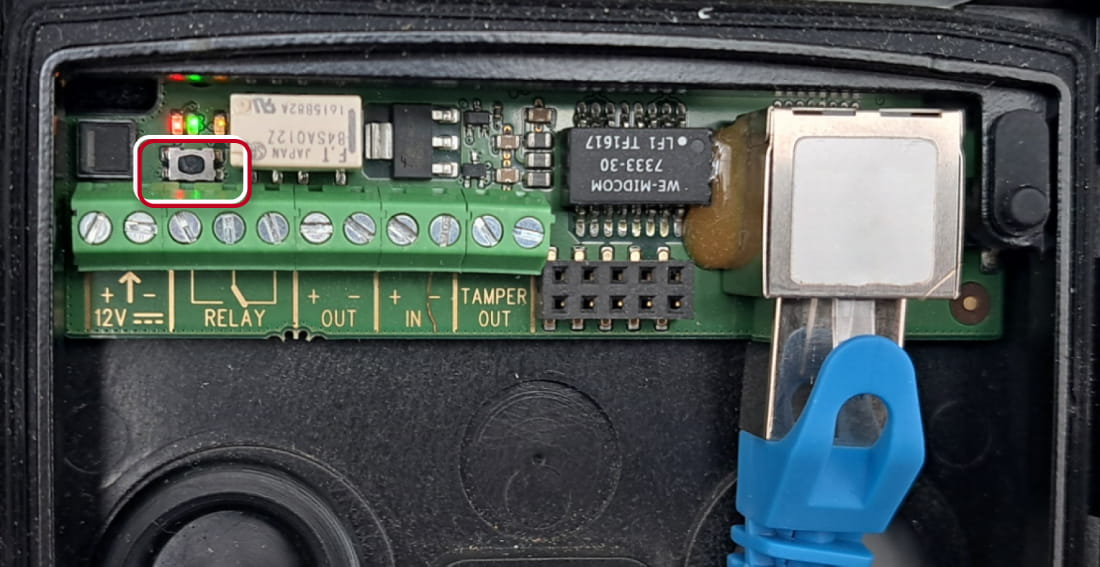
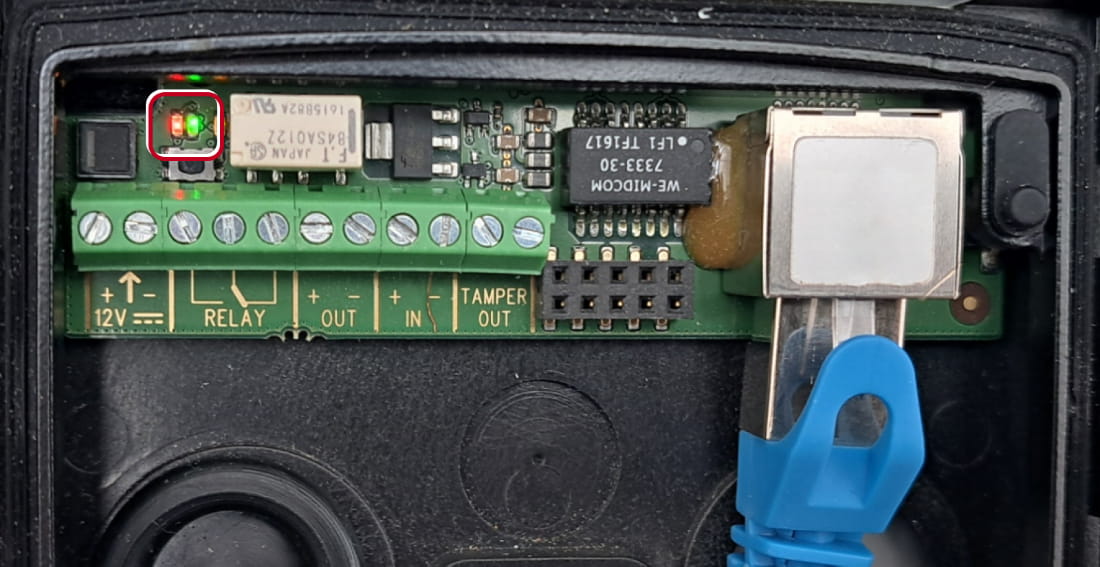
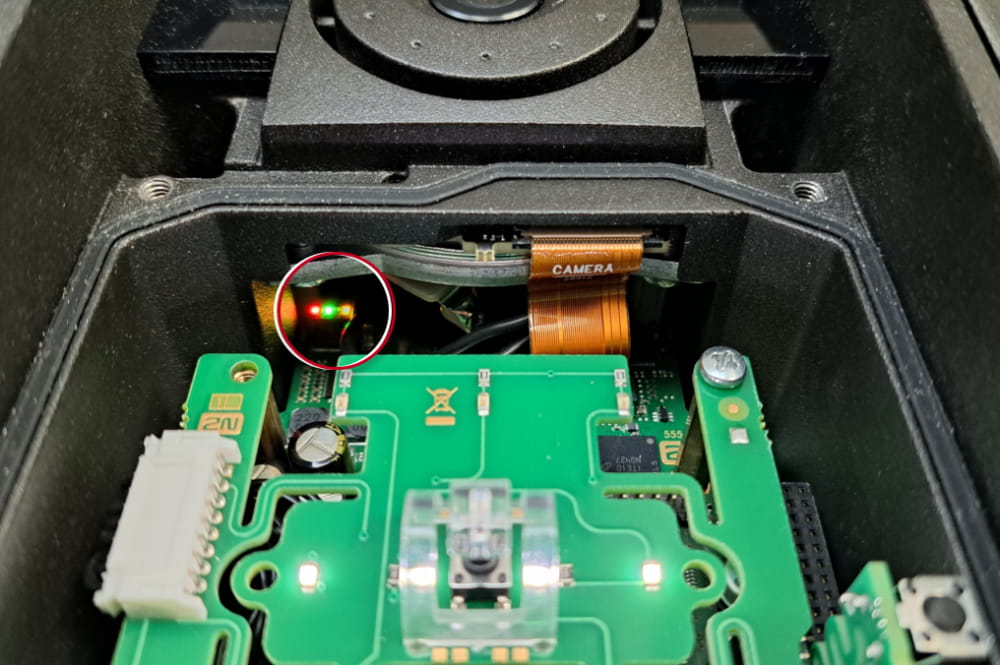
PCB version 555v4 and 555v3
- Press and hold the SW1 button.
- Wait for the first sound signalization and then release the button.
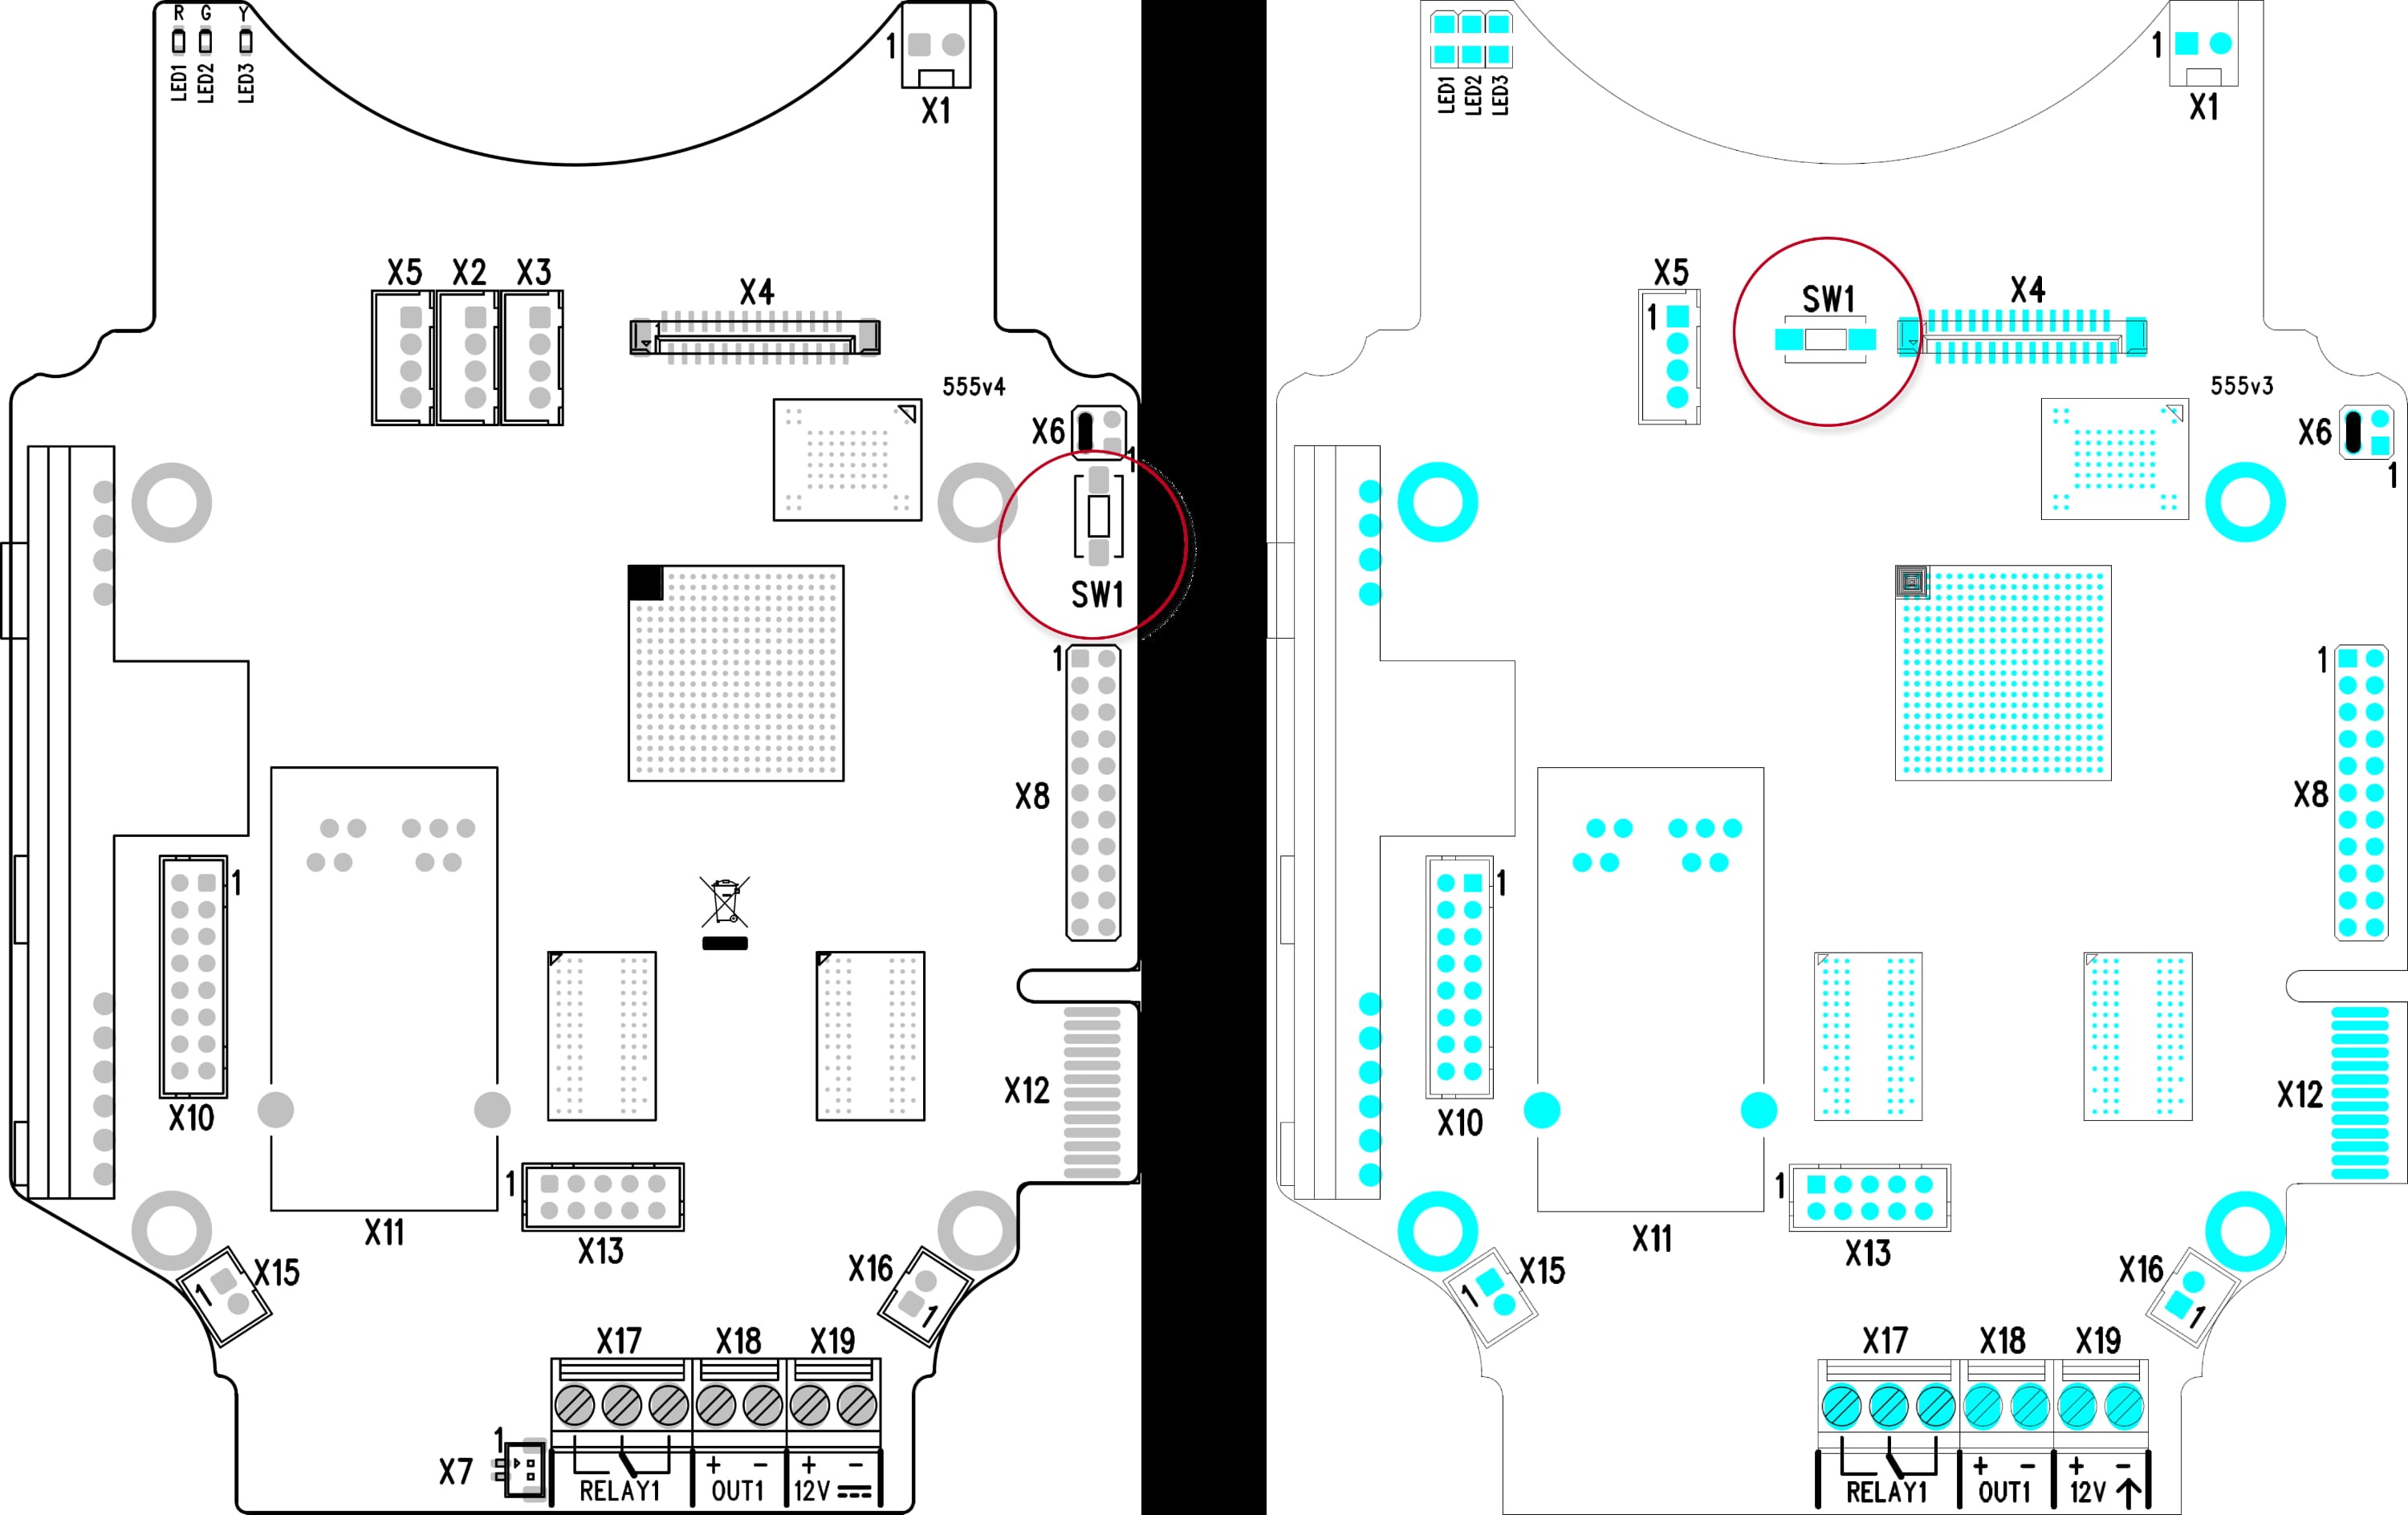
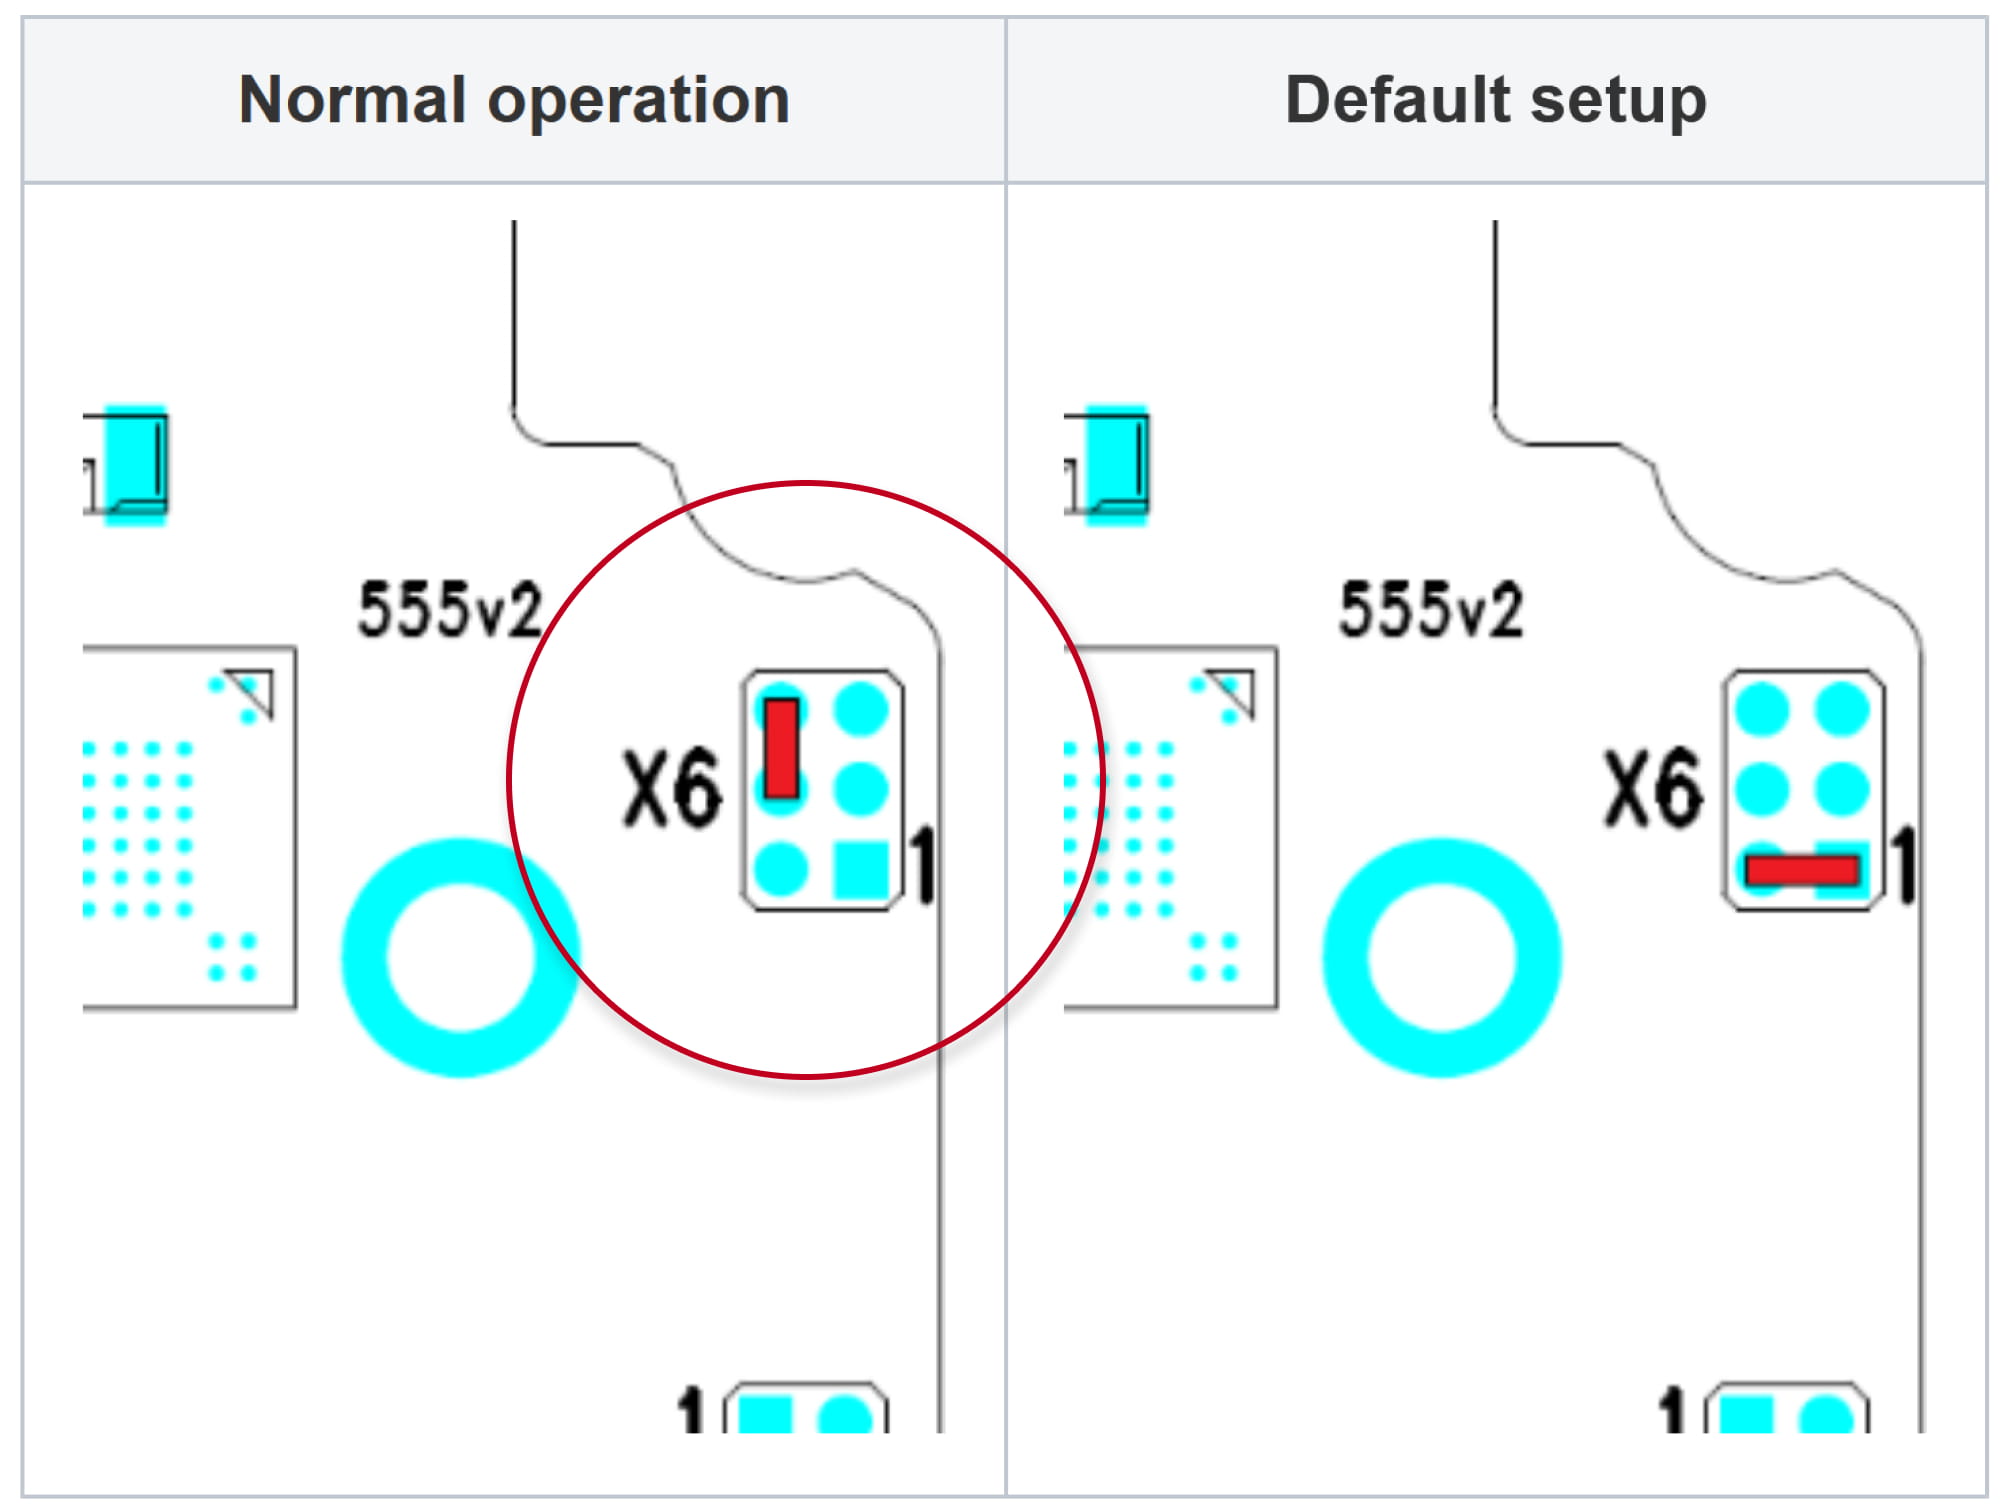
PCB version 555v2
- Disconnect the device from the power supply.
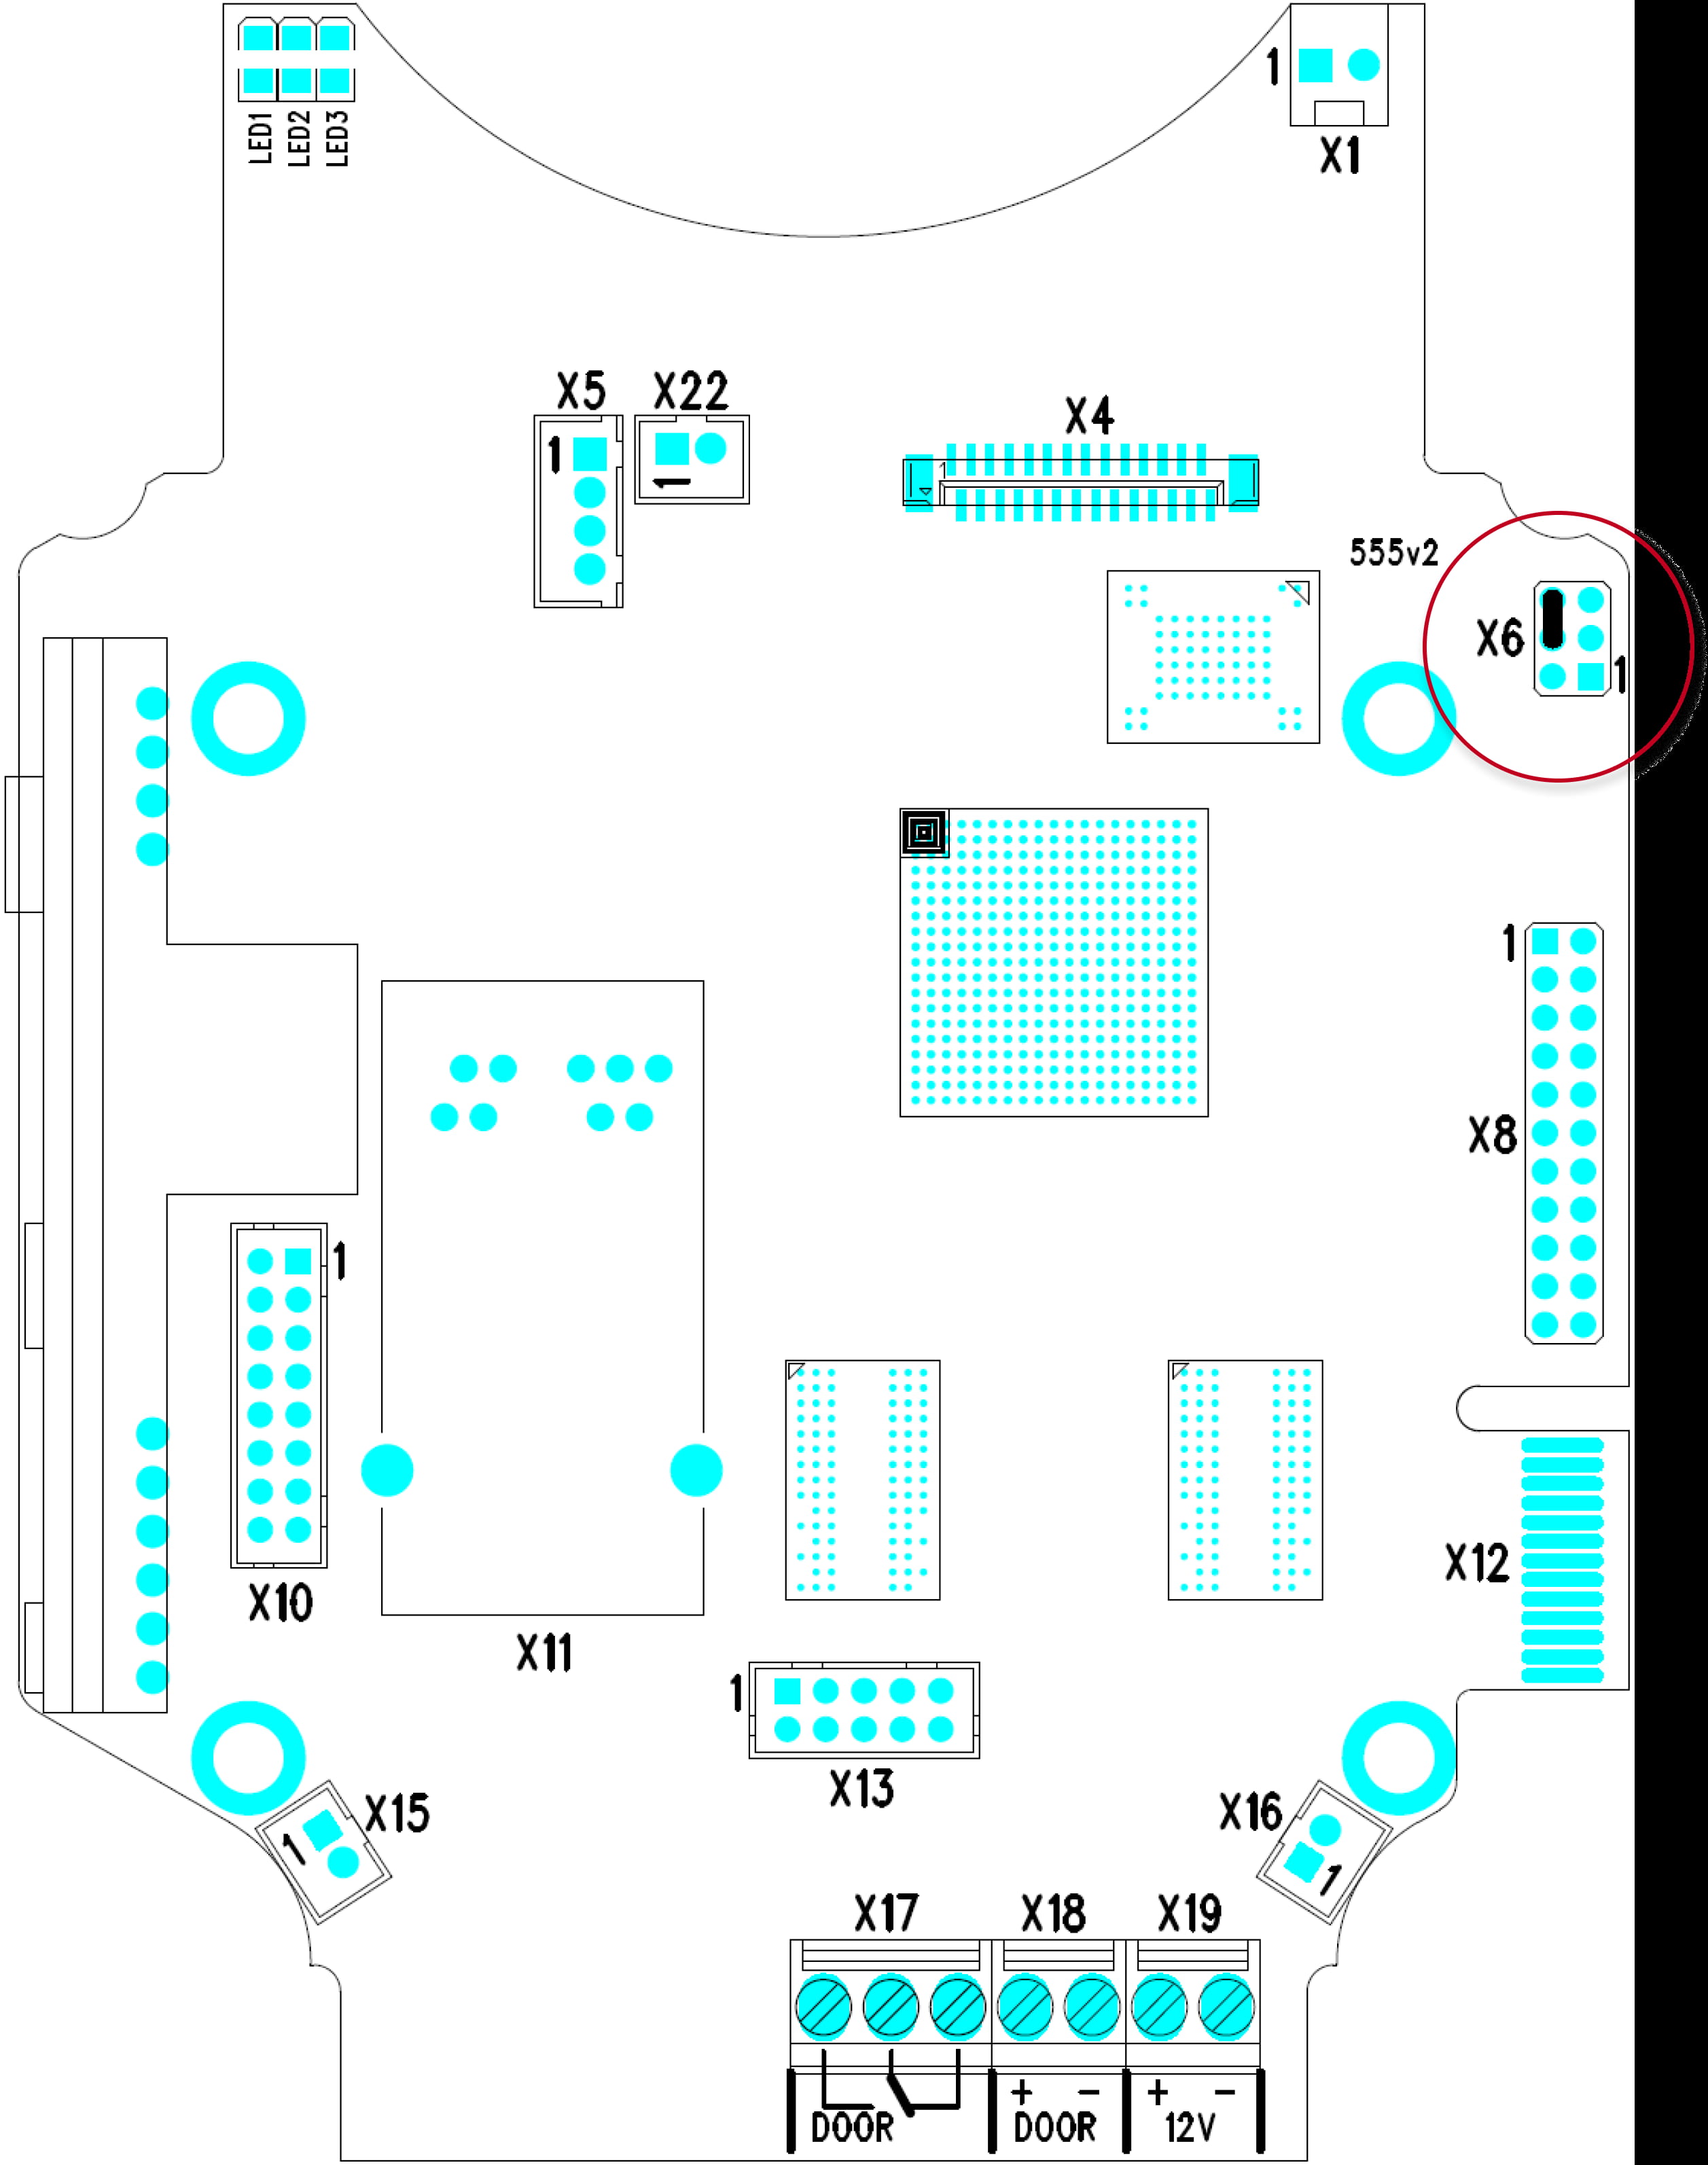
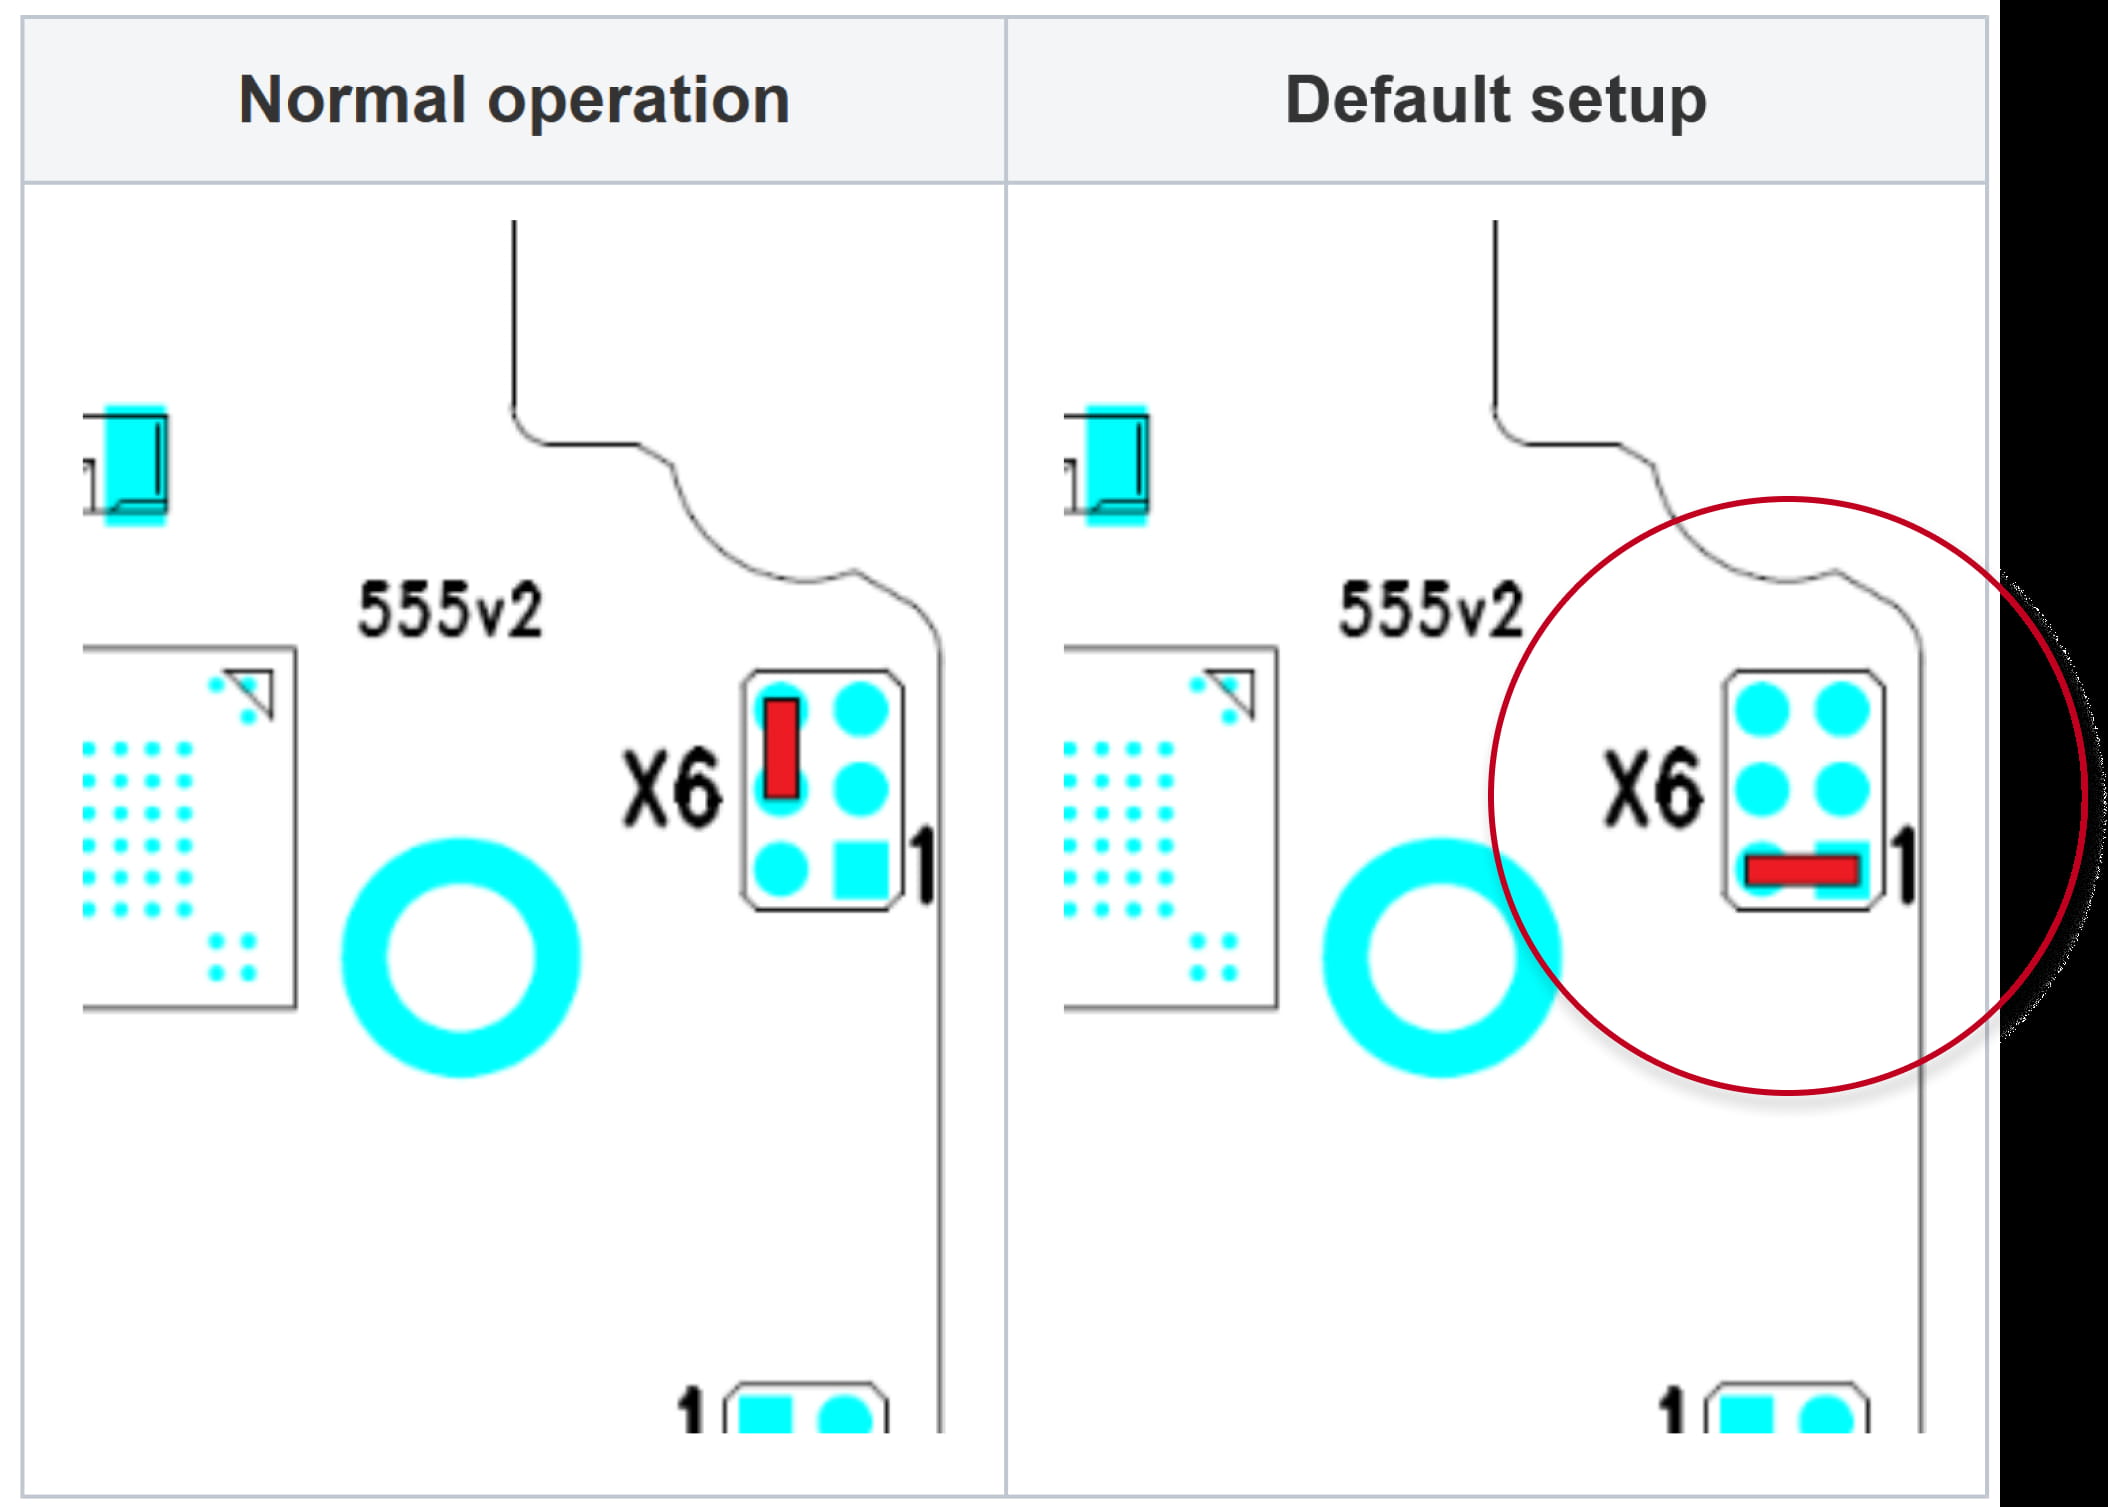
- Move the short-circuit jumper on connector X6 into the Default setup position.
- Reconnect the power supply and wait for the signalling sound.
-
Disconnect the device from the power supply.
-
Move the short-circuit jumper on connector X6 into the Normal operation position.
-
Reconnect the power supply.
2N IP One
-
Disconnect the device from the power supply.
-
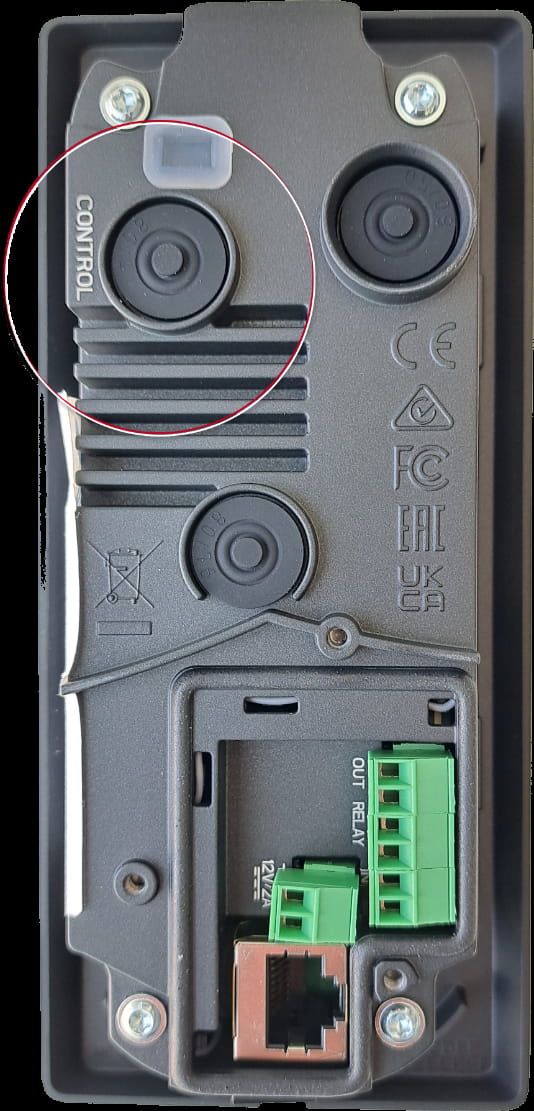
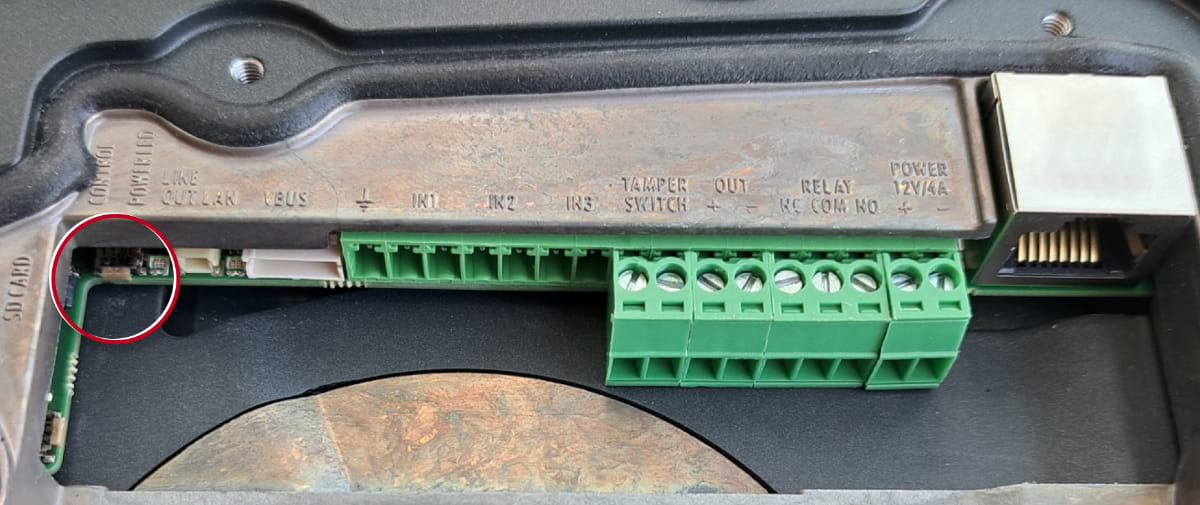
Press and hold the CONTROL button.
-
Connect the device to the power supply.
-
Keep holding the button for a few seconds and then release it.
2N IP Solo
- Press and hold the RESET button.
- Watch and hear this LED / beep sequence

approx. 15 seconds approx. 3 seconds approx. 3 seconds approx. 3 seconds approx. 3 seconds __ _ __ _ __ _ __ _ __ _ __ _ __ _ __ _ __ _ __ _ 🔈 ) 🔈 )) 🔈 ))) 🔈 )))) -
Release the RESET button immediately when the last step starts (when you hear 4 beeps).
If pressed longer till finishing boot, then factory reset is not proceeded.
2N IP Style
-
Disconnect the device from the power supply.
-
Press and hold the CONTROL button.
-
Connect the device to the power supply.
-
Keep holding the button for a few seconds and then release it.
2N IP Vario
The procedure depends on version of PCB, you can find this information here:
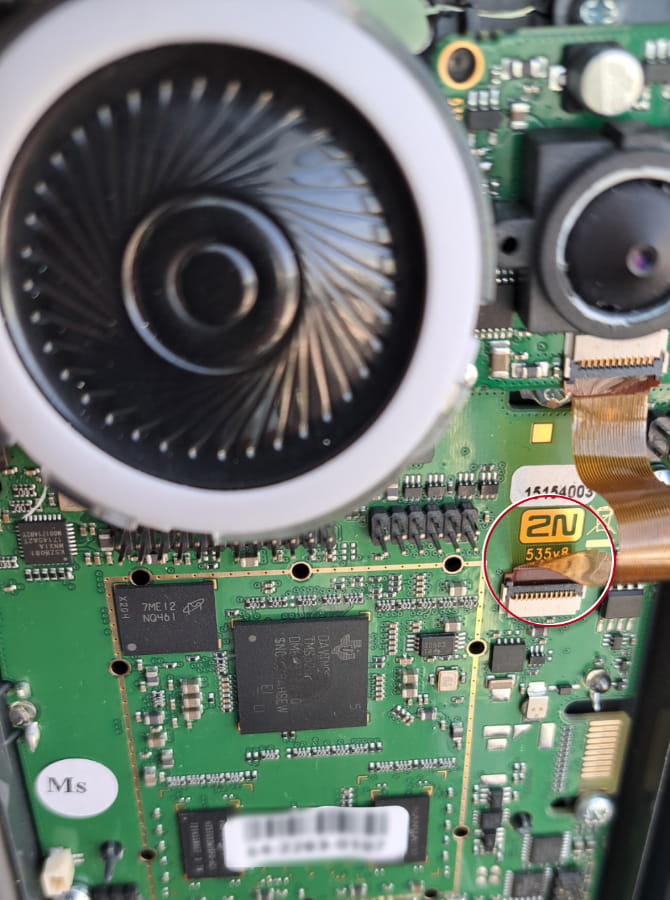
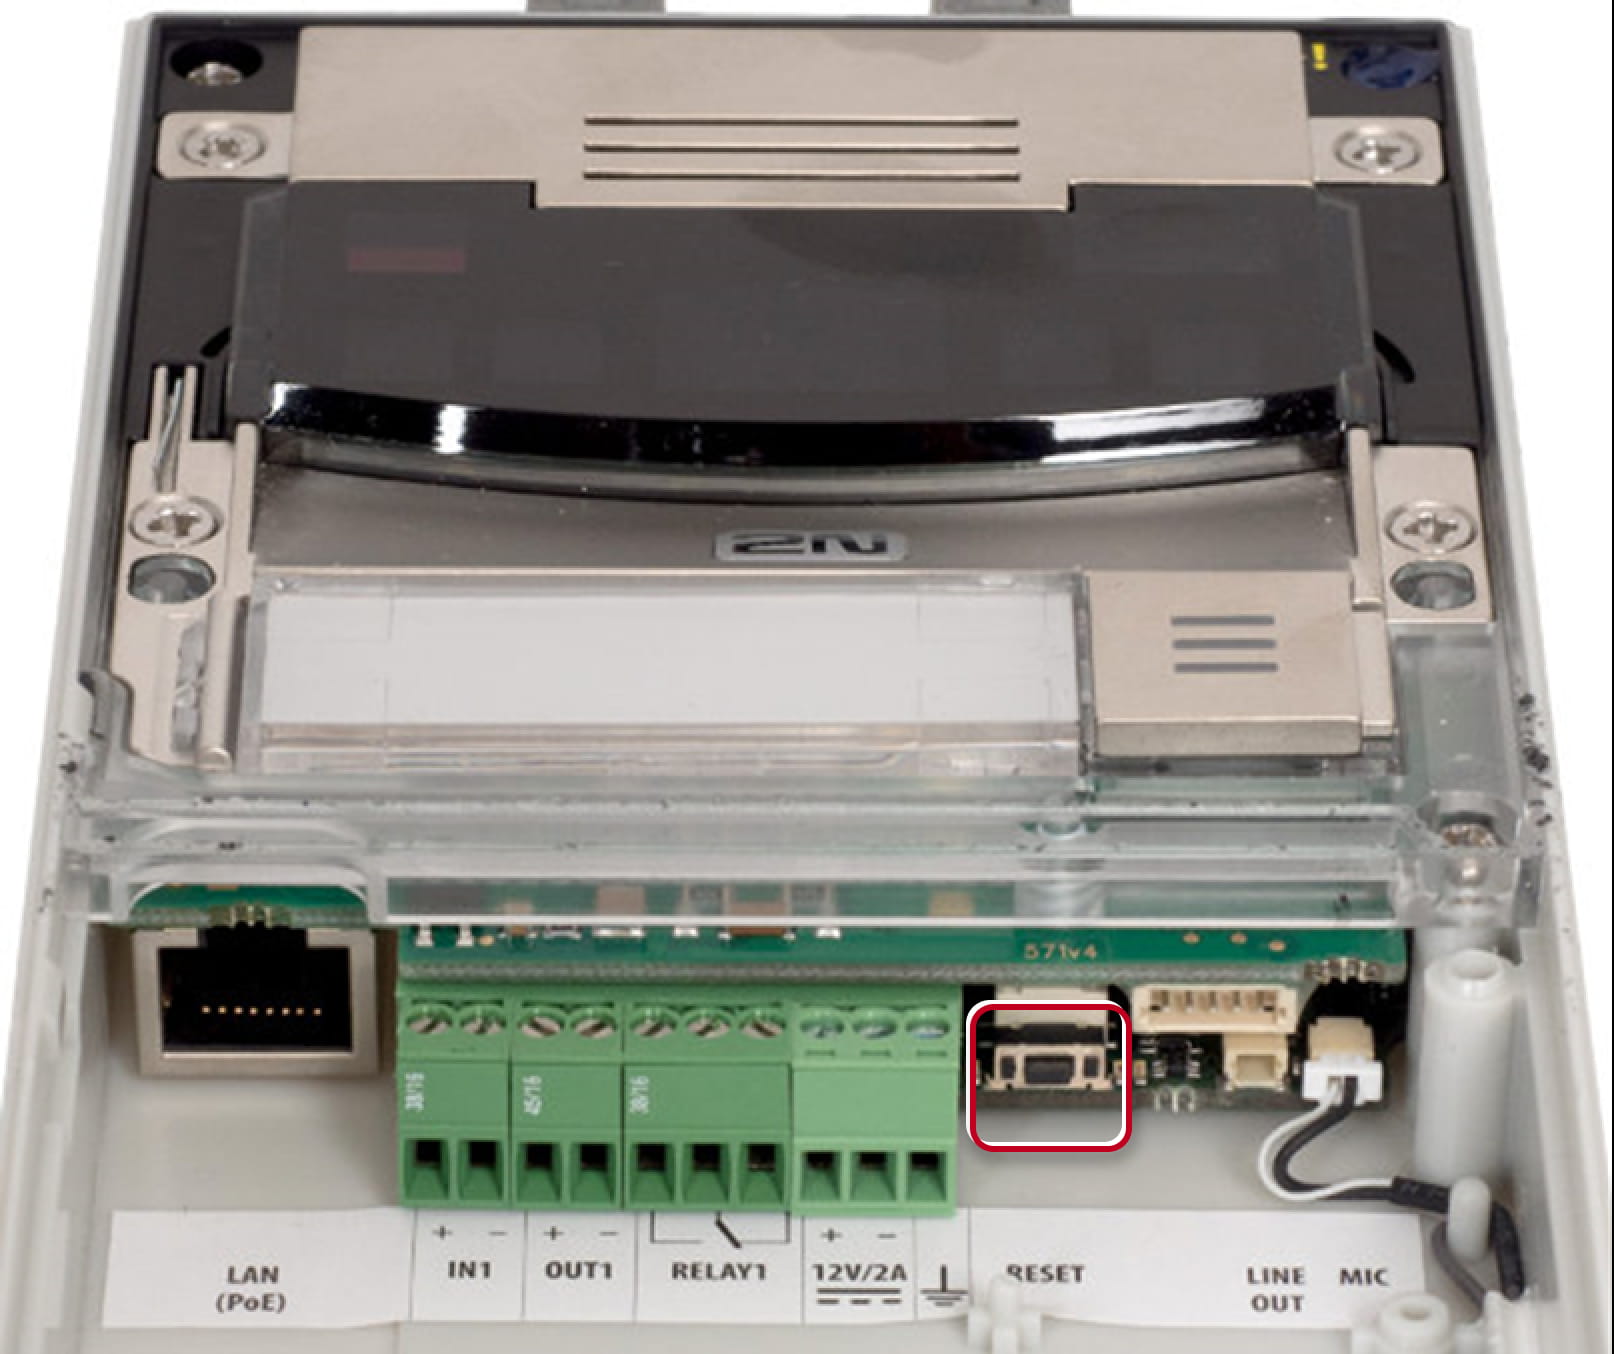
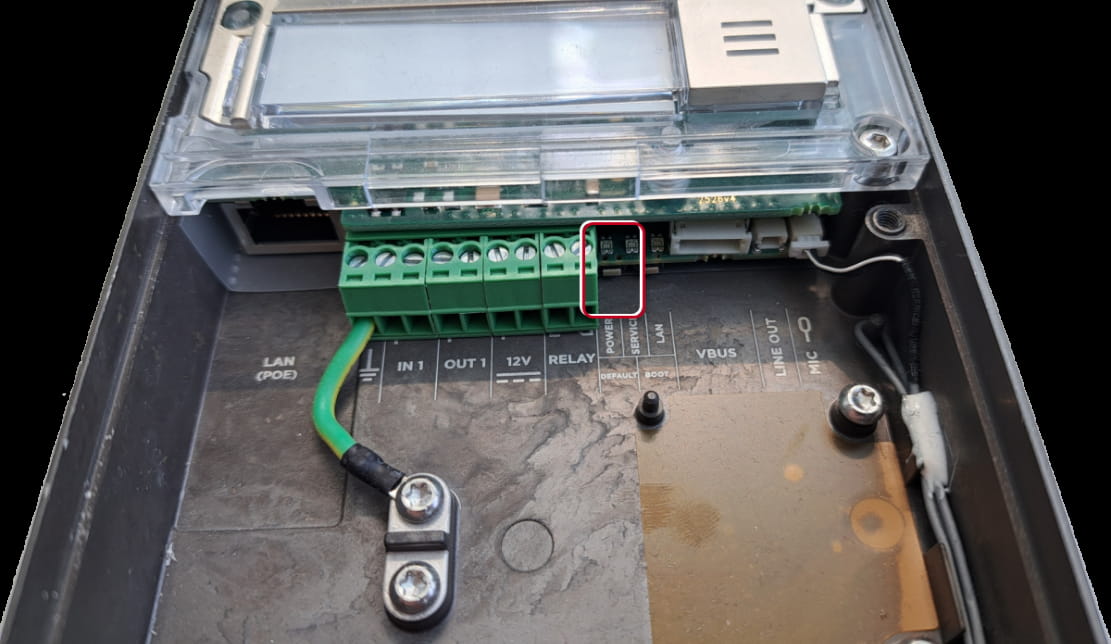
PCB version 535v8 (the actual procedure)
- Press and hold the RESET button.
- Watch and hear this LED / beep sequence

approx. 15 seconds approx. 3 seconds approx. 3 seconds approx. 3 seconds approx. 3 seconds __ _ __ _ __ _ __ _ __ _ __ _ __ _ __ _ __ _ __ _ 🔈 ) 🔈 )) 🔈 ))) 🔈 )))) -
Release the RESET button immediately when the last step starts (when you hear 4 beeps).
If pressed longer till finishing boot, then factory reset is not proceeded.
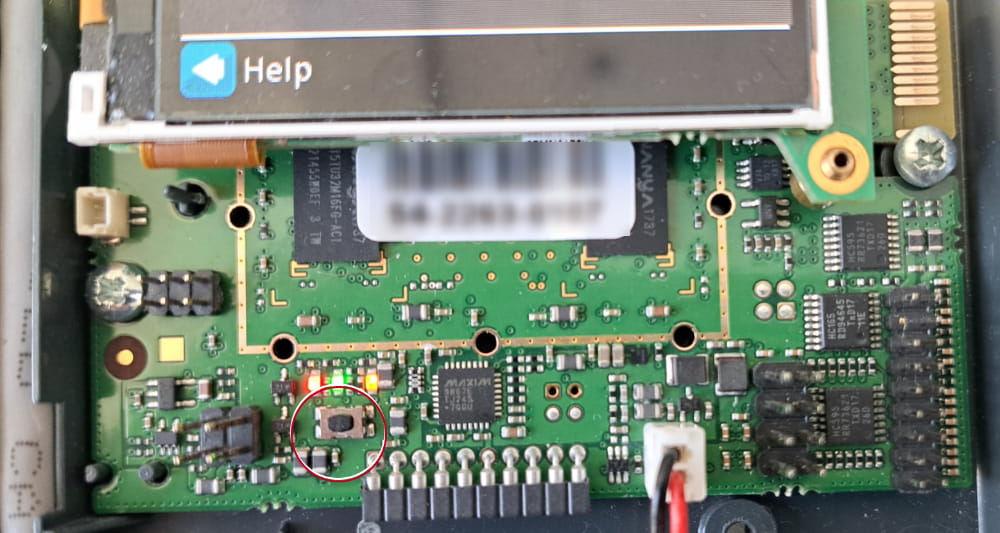
PCB version 535v5, 535v2, 535v1, 530v2
-
Switch 2N IP Vario off.
-
Connect the jumper into the resetting (default setting) position
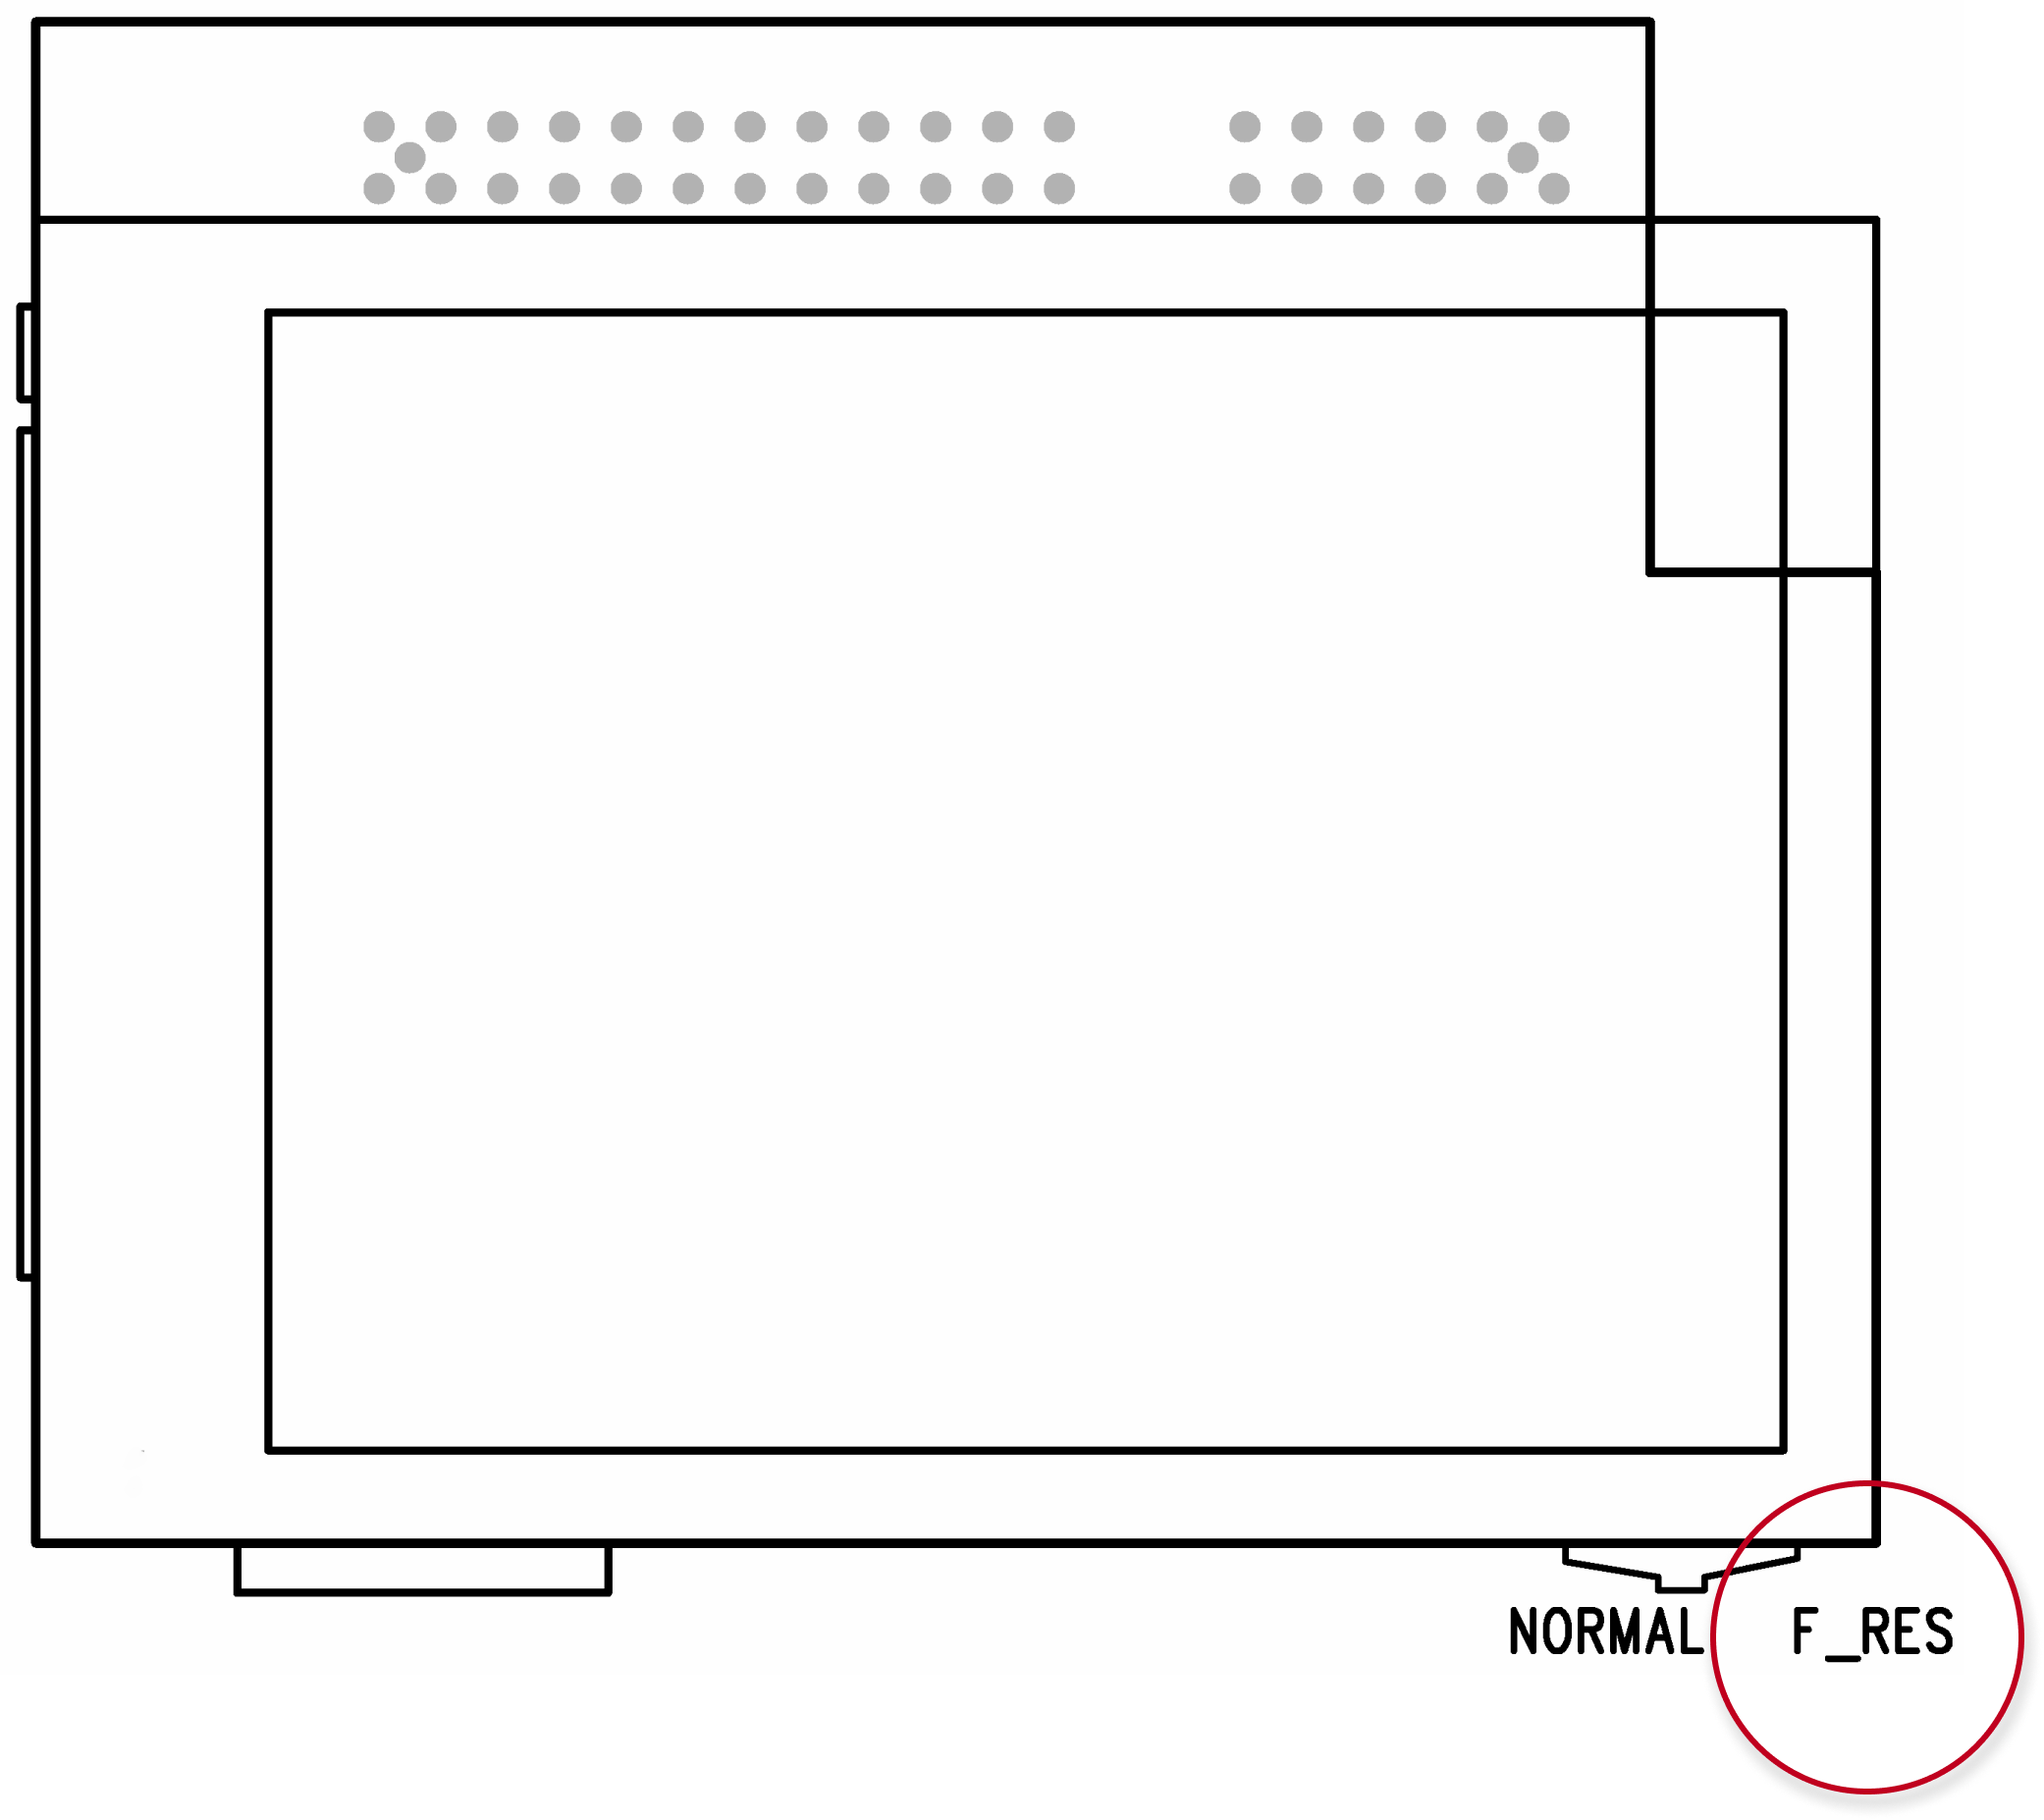
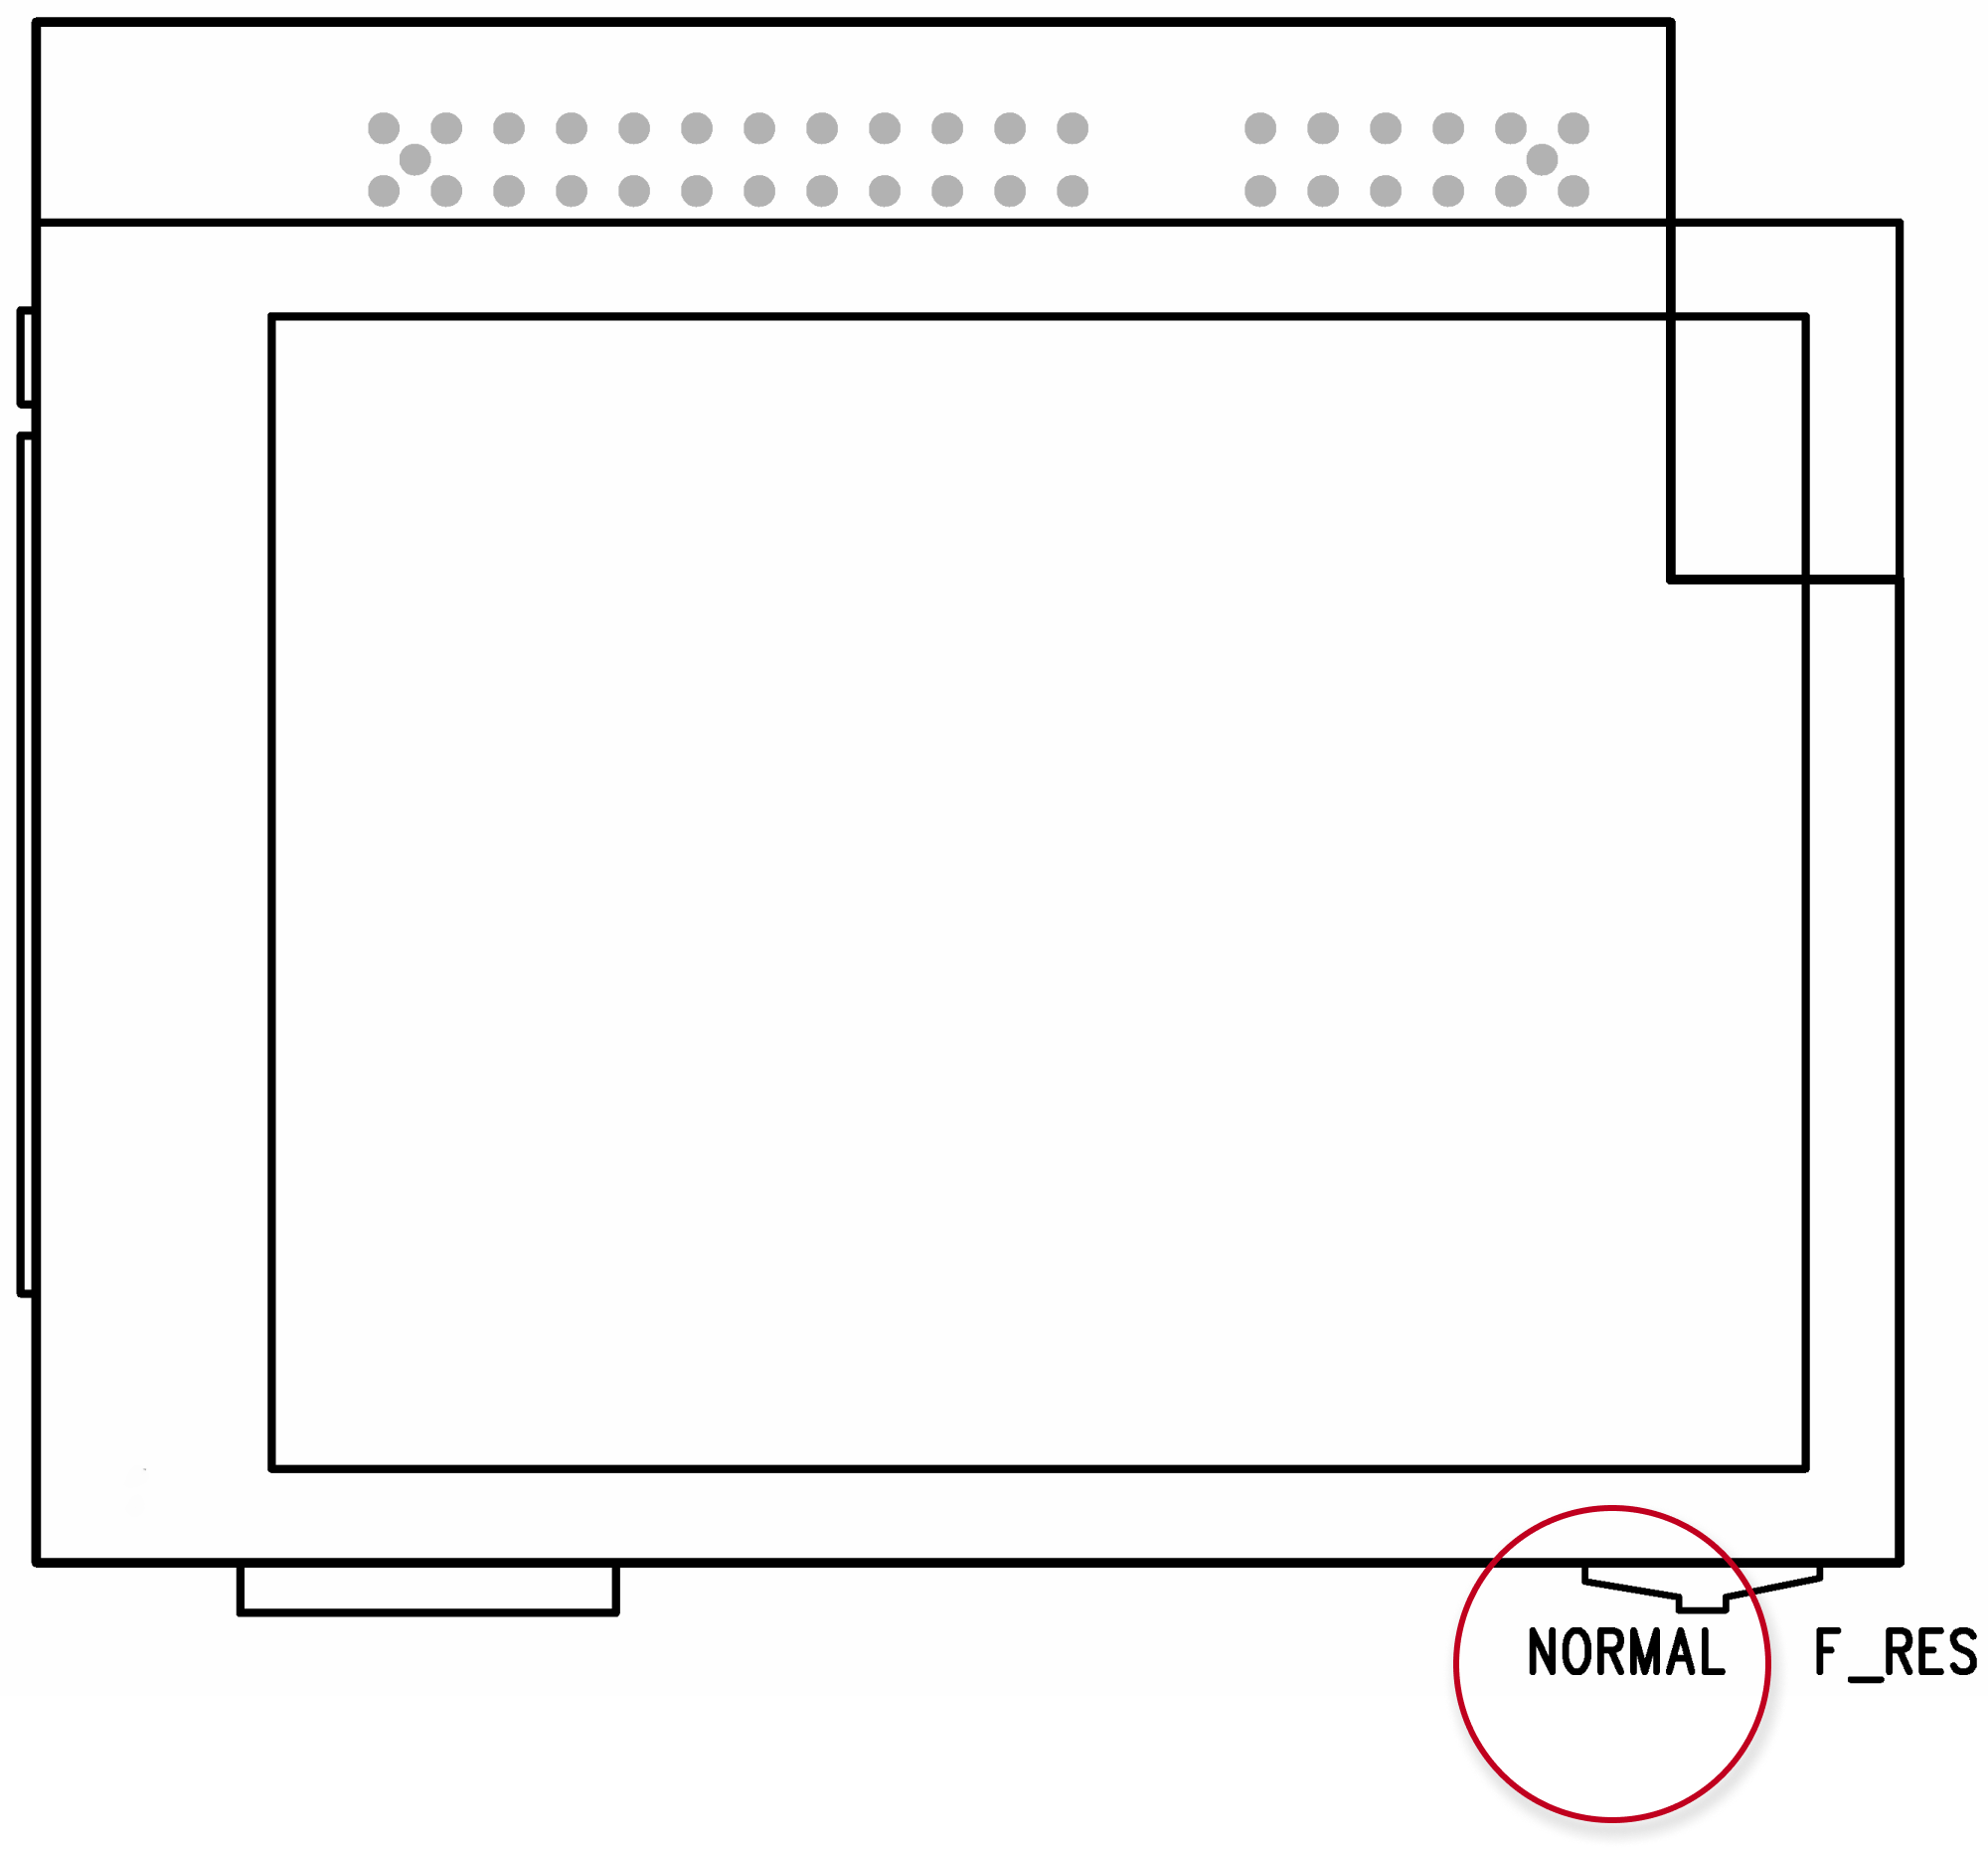
(put the display switch into the F_RES position in the display-equipped models with 535v1 and 535v2 board versions).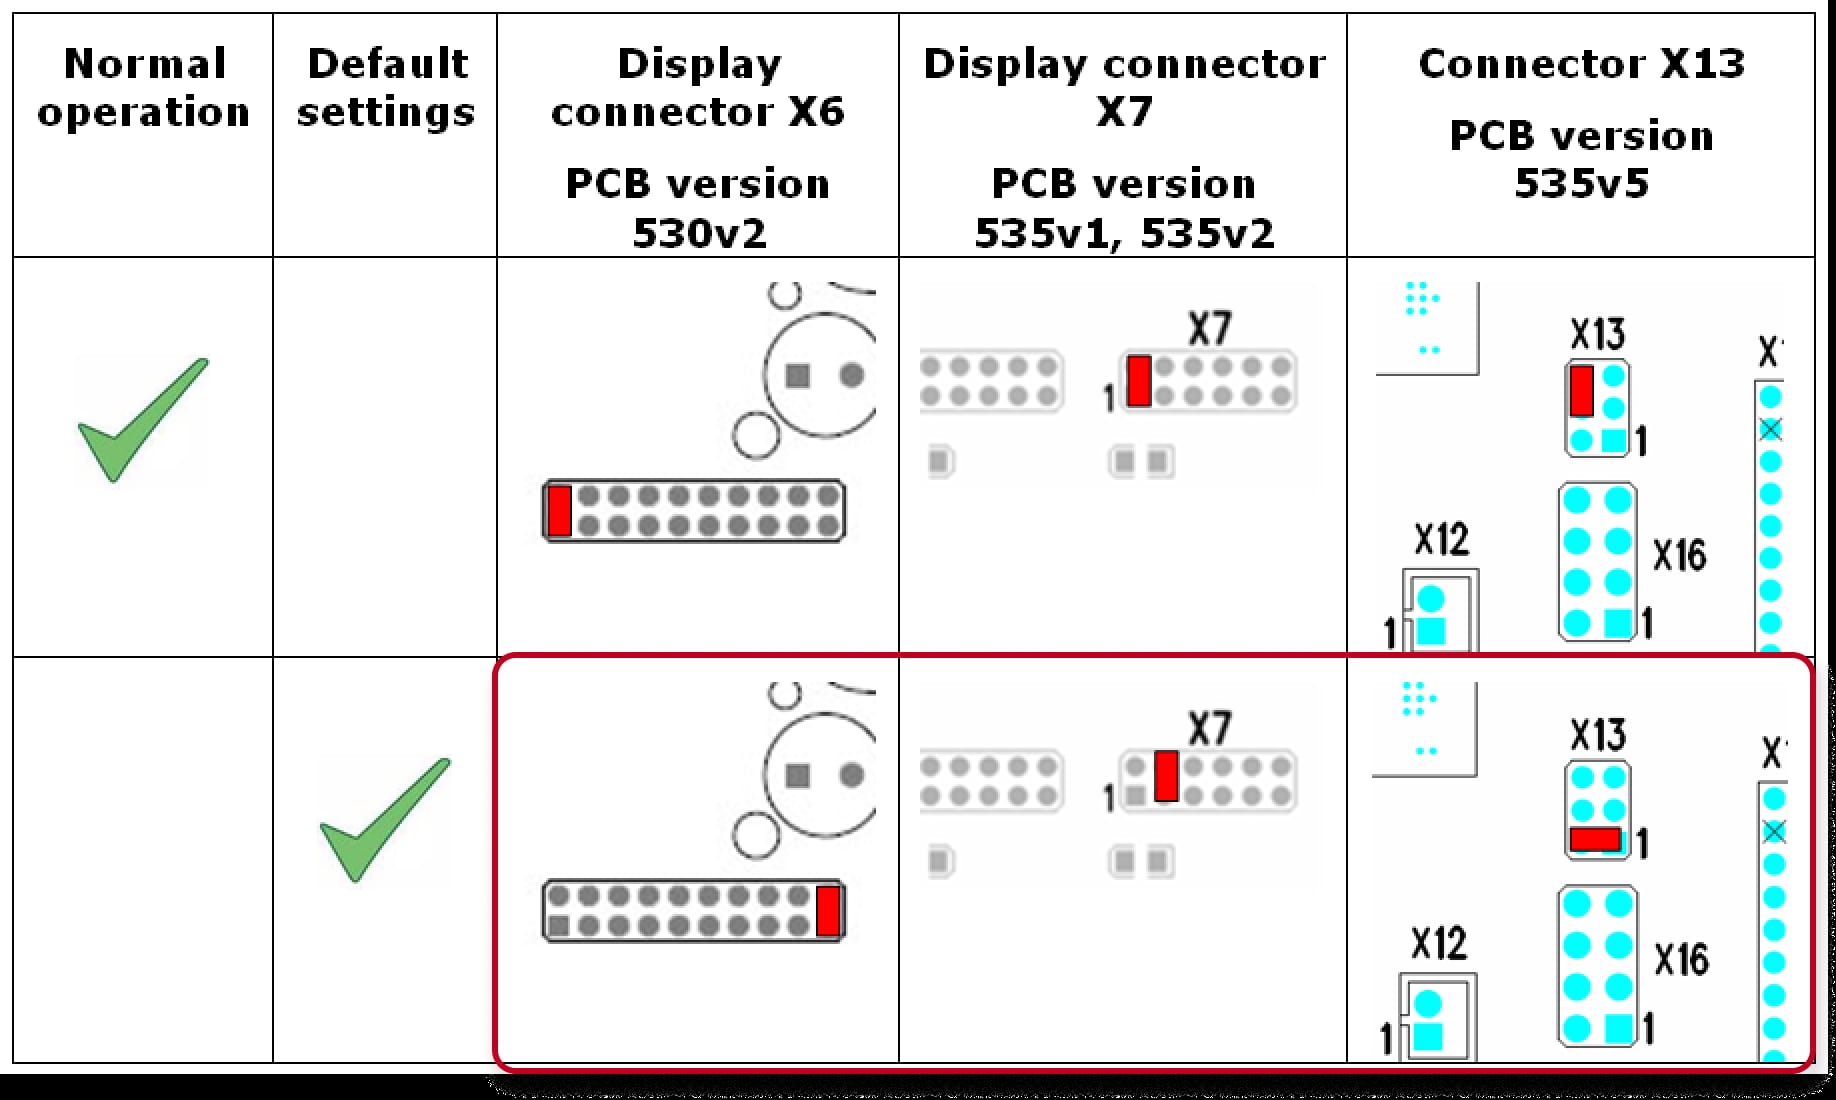
-
Switch 2N IP Vario on and wait for the start signalling sound.
-
Switch 2N IP Vario off.
-
Remove the jumper from the resetting (default setting) position
(put the display switch into the NORMAL position in the display-equipped models with 535v1 and 535v2 board versions).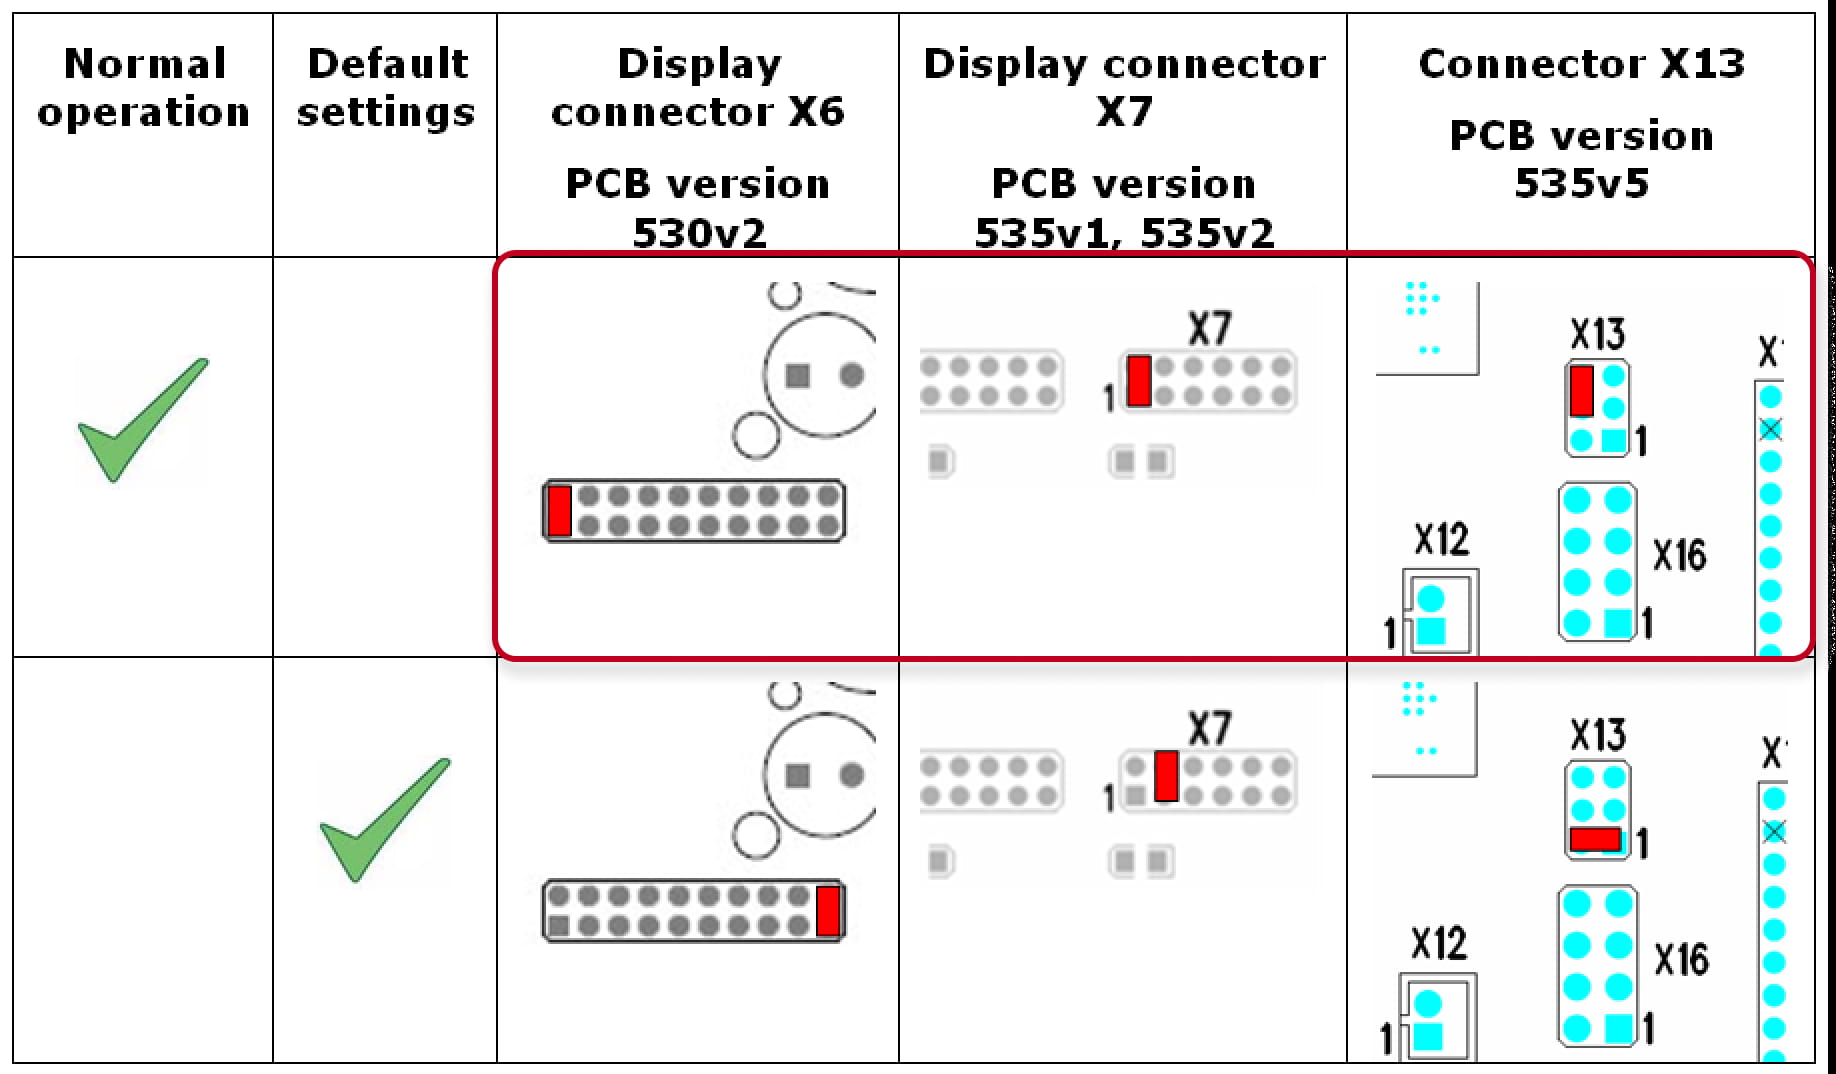
-
Switch 2N IP Vario on.
2N IP Verso
- Press and hold the RESET button.
- Watch and hear this LED / beep sequence

approx. 15 seconds approx. 3 seconds approx. 3 seconds approx. 3 seconds approx. 3 seconds __ _ __ _ __ _ __ _ __ _ __ _ __ _ __ _ __ _ __ _ 🔈 ) 🔈 )) 🔈 ))) 🔈 )))) -
Release the RESET button immediately when the last step starts (when you hear 4 beeps).
If pressed longer till finishing boot, then factory reset is not proceeded.
2N IP Verso 2.0
-
Disconnect the device from the power supply.
-
Press and hold the DEFAULT button.
-
Connect the device to the power supply.
-
Keep holding the button for a few seconds and then release it.
2N IP Uni
- Press and hold the RESET button for more than 20 seconds (eventually for 40 seconds if there is firmware 2.19 and older).
