The steps in this article require using the web interface of a 2N device. Please follow this manual in case this is your first time using the web interface.
This FAQ describes how to add access credentials to 2N IP intercoms and Access Units. These scenarios can be used on following devices:
-
2N IP Verso
-
2N IP Vario
-
2N IP Base
-
2N IP Force
-
2N IP Style
-
2N Access Unit
-
2N Access Unit 2.0
-
2N Access Unit M
Access Credentials that can be used include:
RFID card access
Versions 2.50 (LTS) or earlier
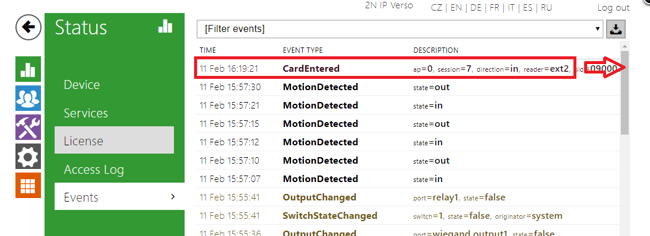
To add a new RFID card to the unit, you need to first find the ID of the card. Please put the card on the reader and then see the unit's log in Status -> Events.
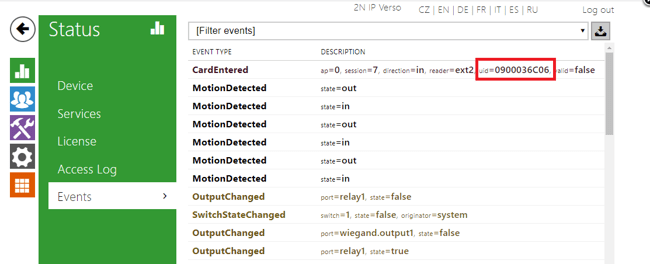
- You will see the event "CardEntered", you need to see the "uid" parameter. Scroll to the right and copy it:
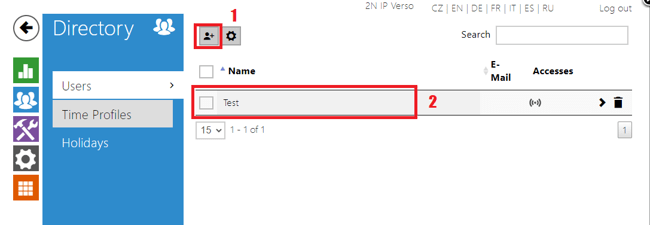
- Now please go to Directory -> Users. You can either create a new user (1) or edit an existing one (2):
- In User details, go to User Cards and paste the card ID here:
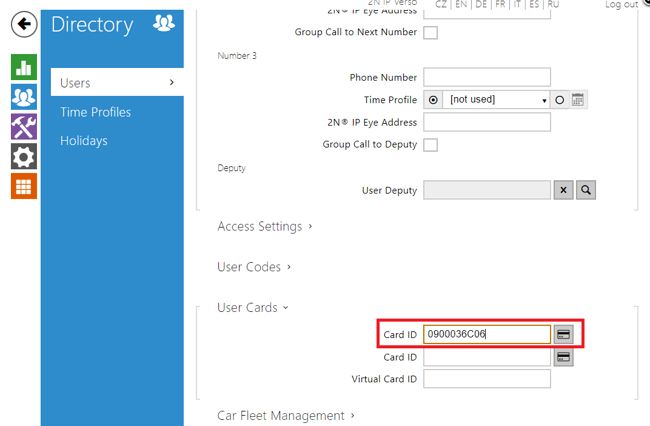
- Now the RFID card access has been created.
- Saving a new RFID card's ID can be also done with 2N USB RFID reader. A driver is needed for this device, more info is here. When the driver is installed, you can start scanning from the reader by clicking the button next to the field for Card ID.
Version 3.0 or later
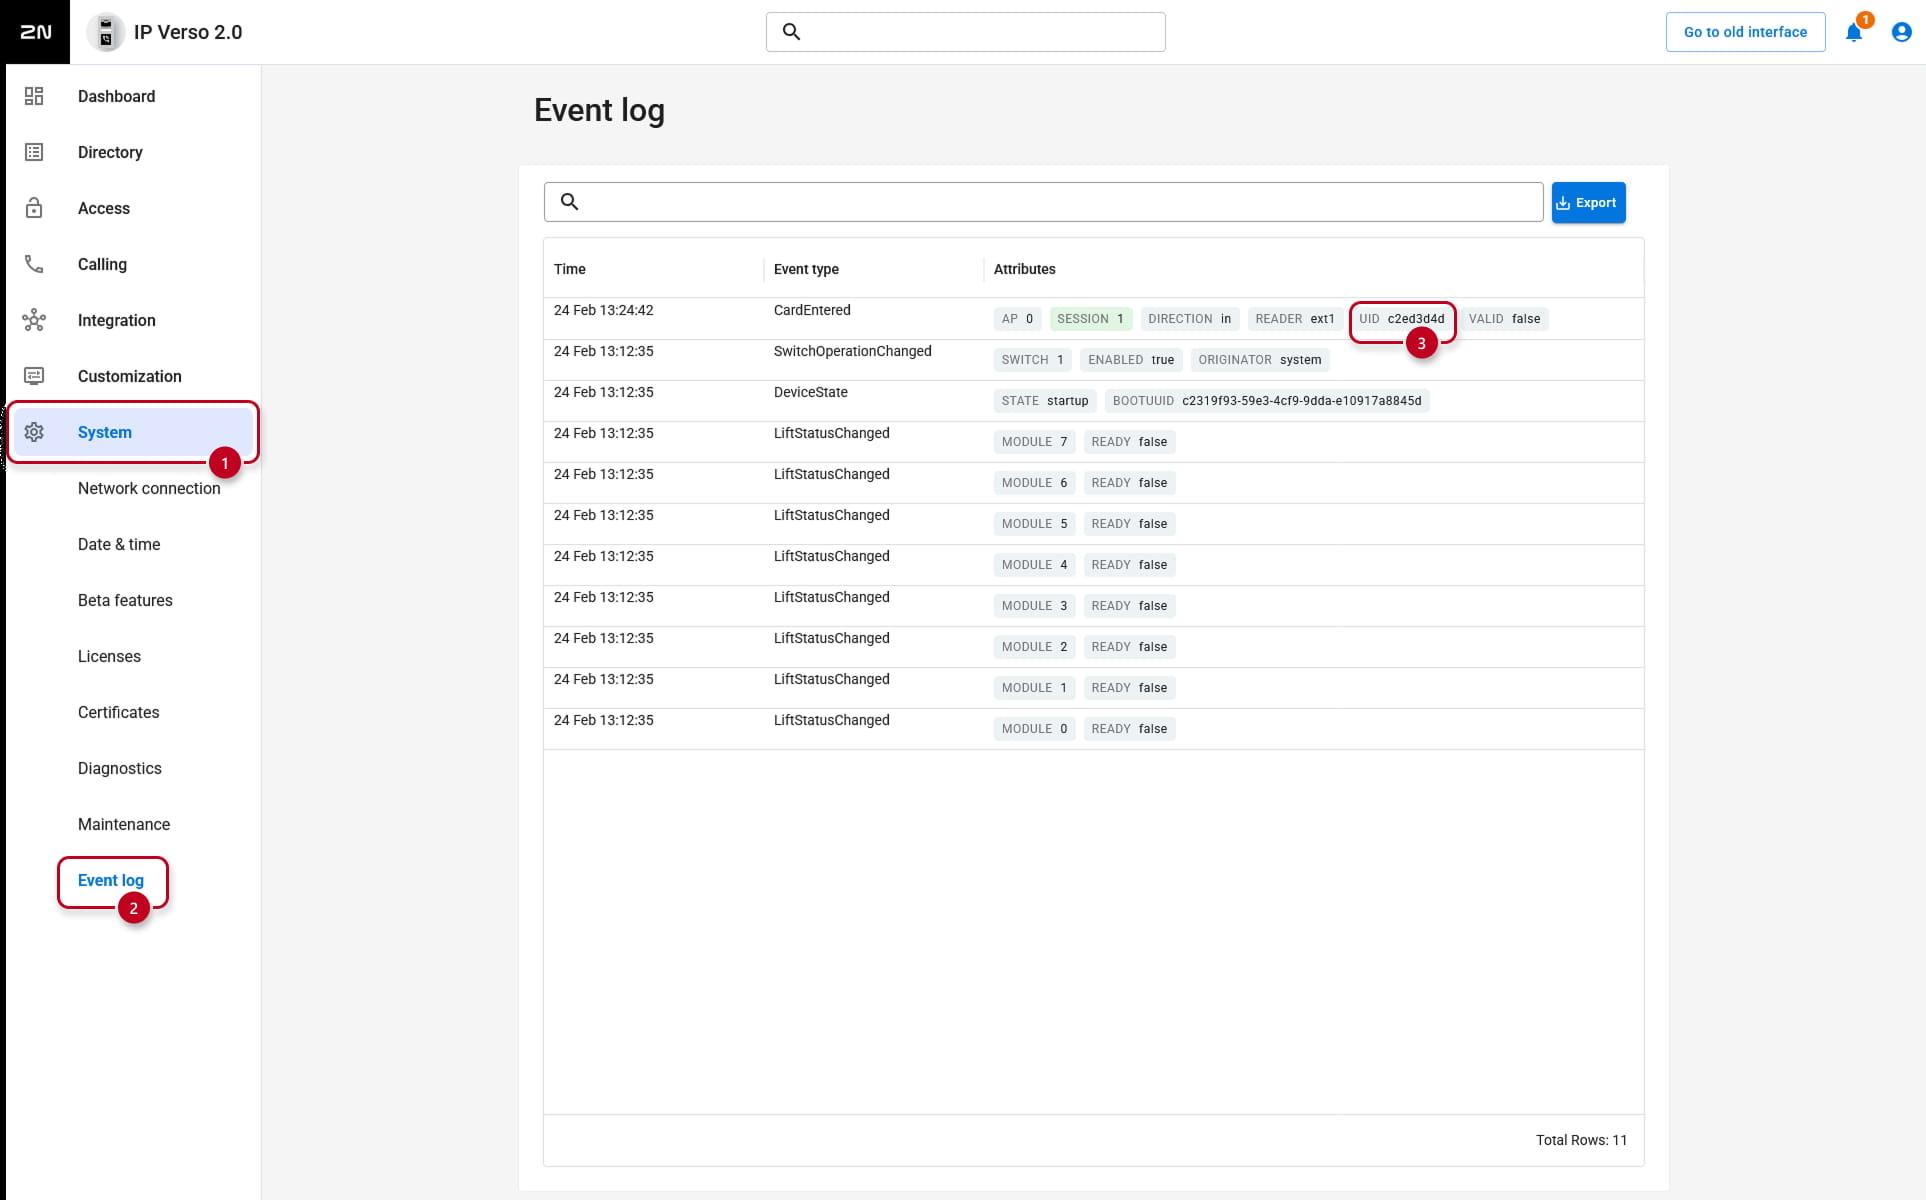
To add a new RFID card to the unit, you need to first find the ID of the card. Please put the card on the reader and then see the unit's log in System-> Event log.
- You will see the event CardEntered, you need to see the uid:
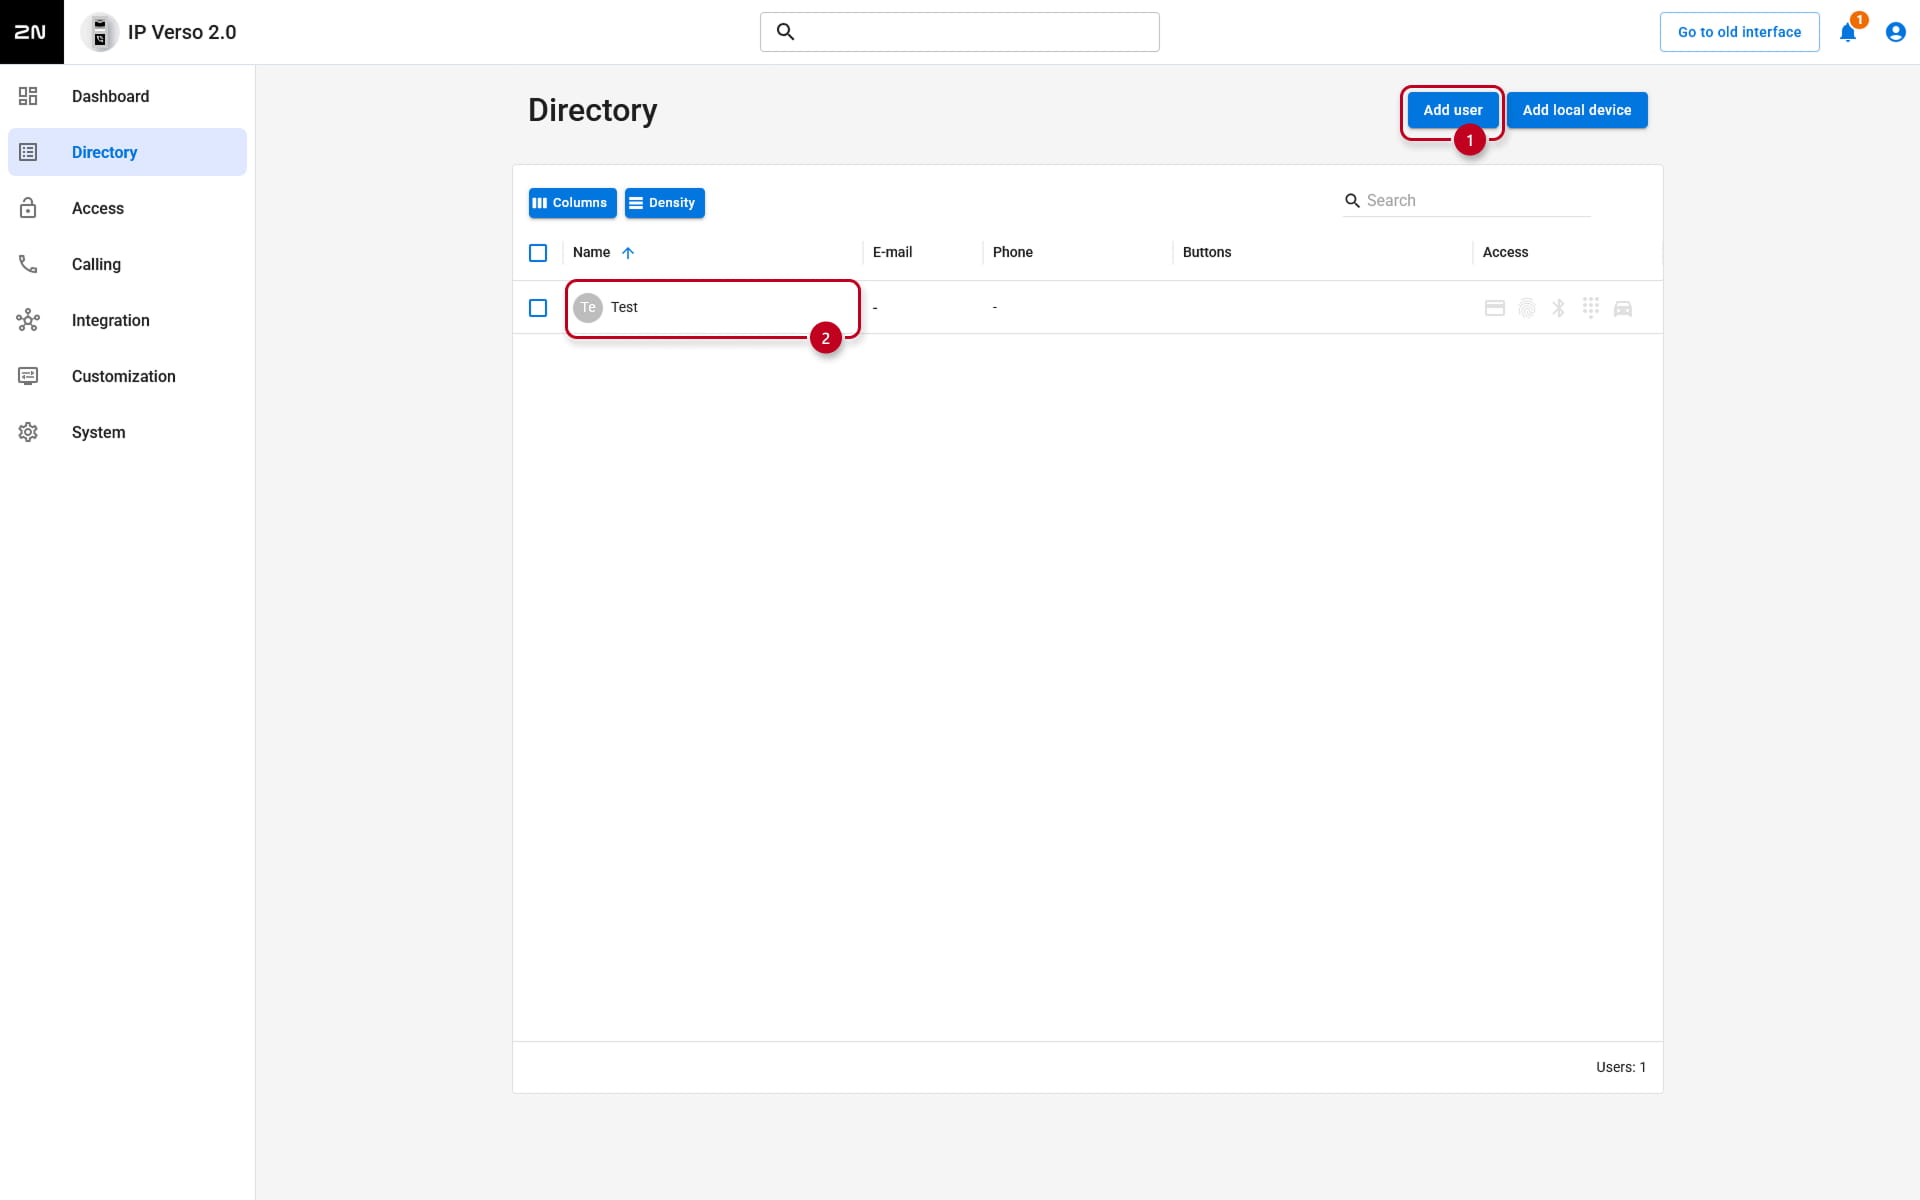
- Now please go to Directory. You can either create a new user (1) or edit an existing one (2):
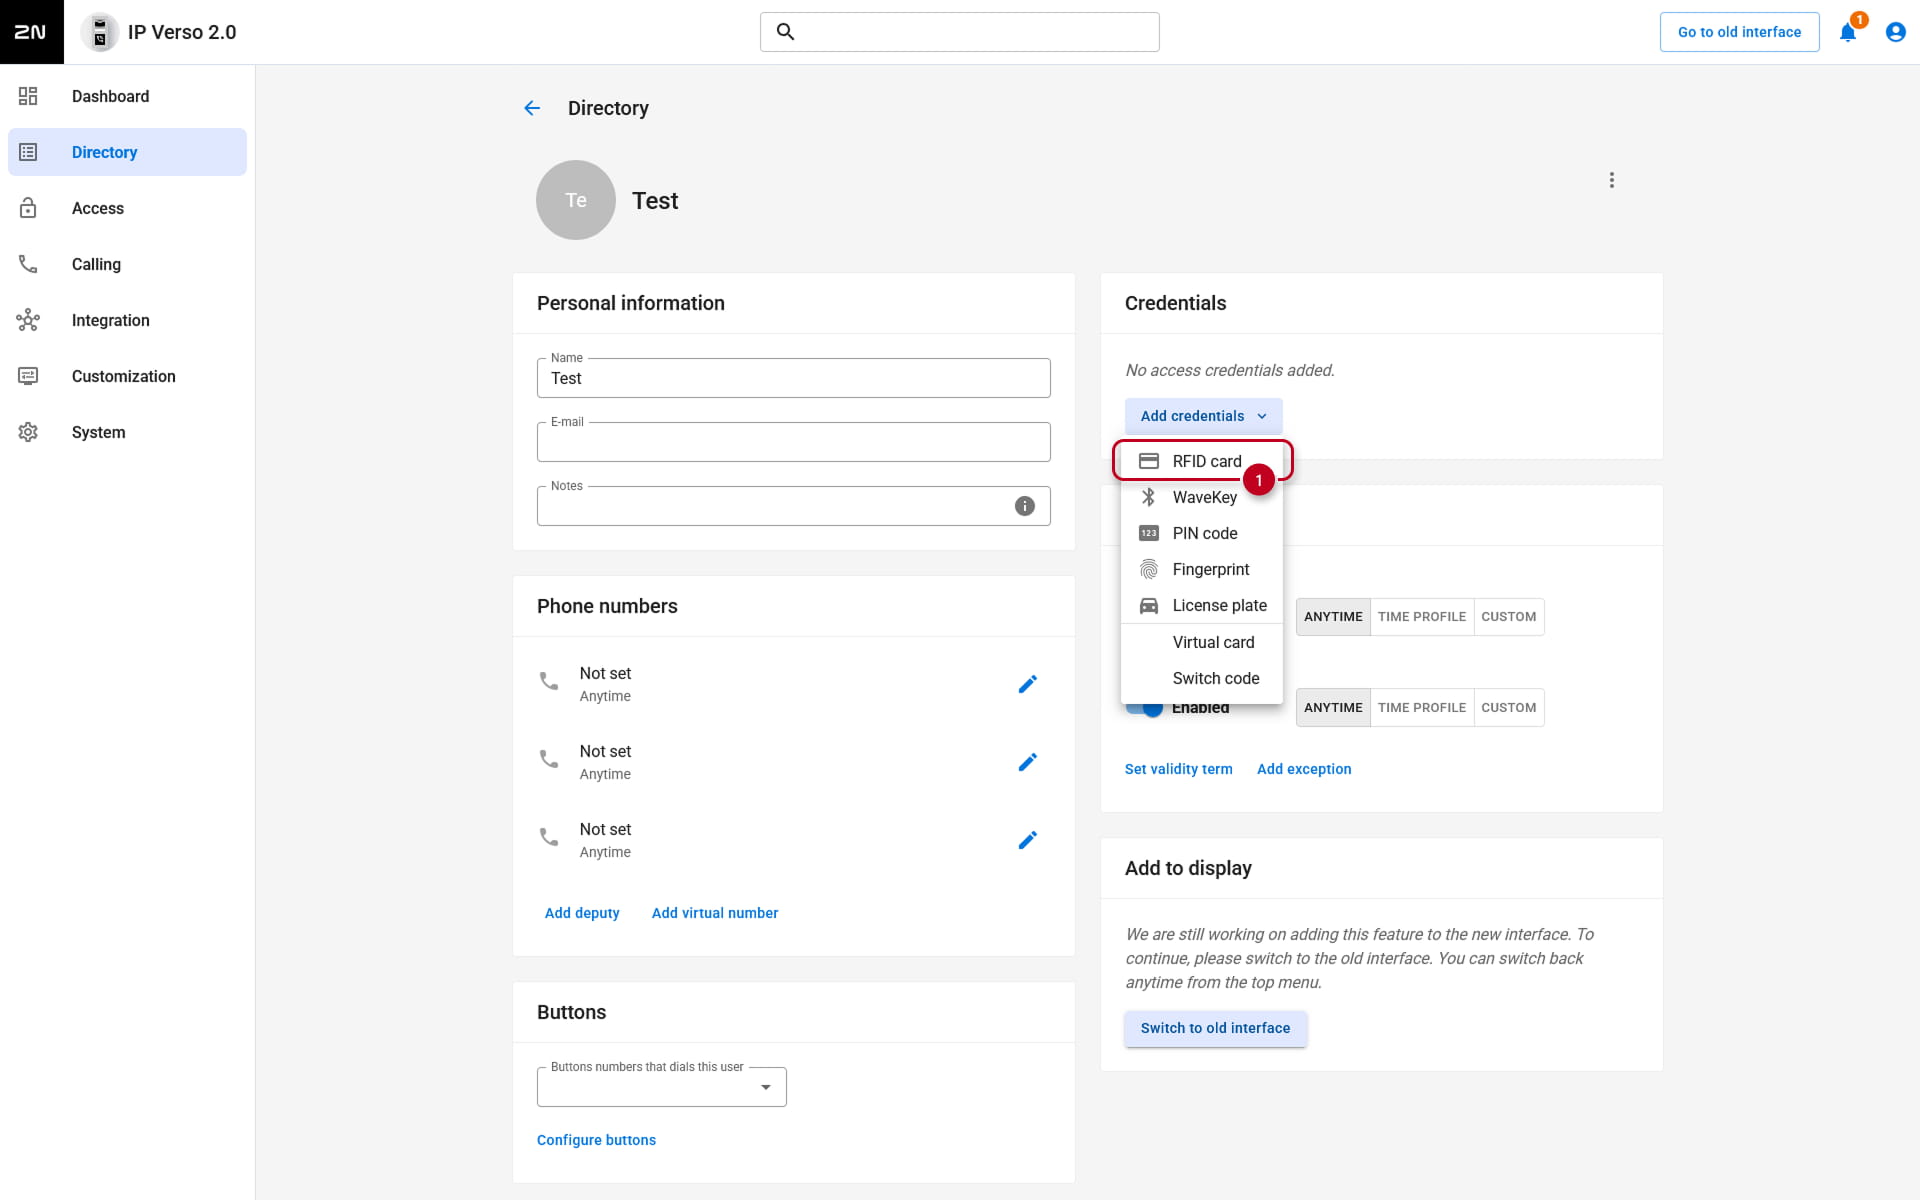
- In User details, go to User Cards and paste the card ID here:
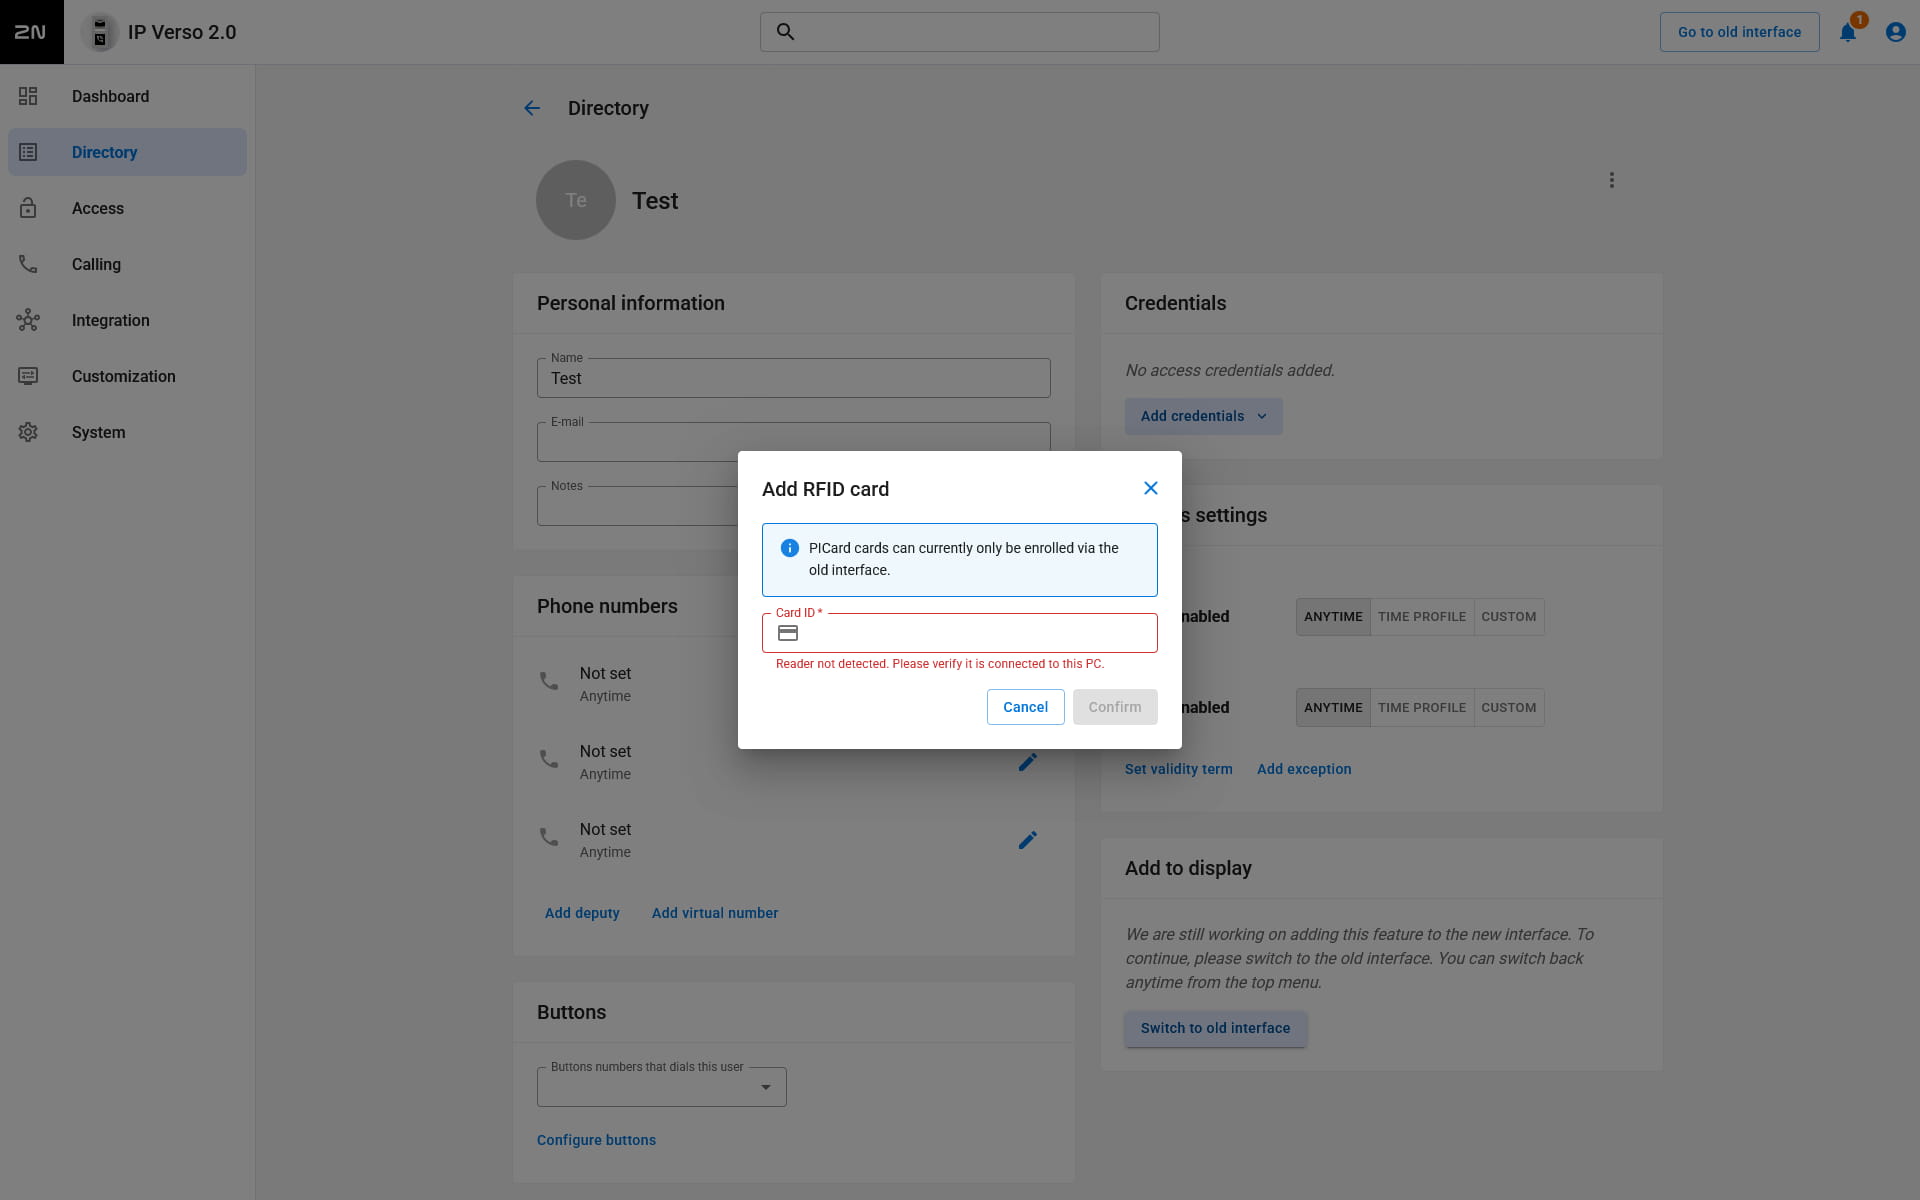
- Now the RFID card access has been created.
- Saving a new RFID card's ID can be also done with 2N USB RFID reader. A driver is needed for this device, more info is here. When the driver is installed, you can start scanning from the reader by clicking the button next to the field for Card ID.
Fingerprint access
Versions 2.50 (LTS) or earlier
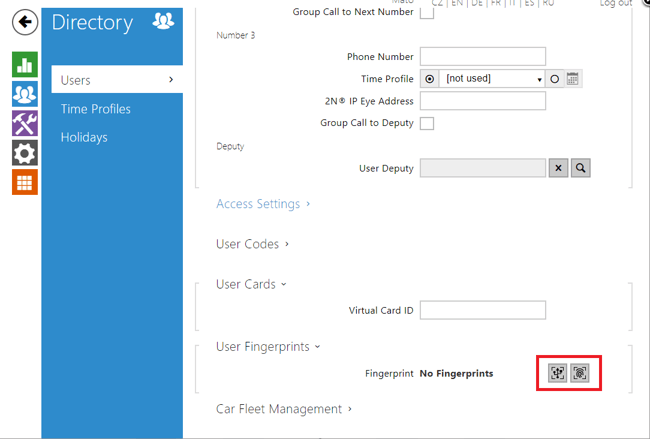
To setup a fingerprint access, go to Directory -> Users -> select User -> User Fingerprints -> click on one of the highlighted buttons.
- Left one is for assignment via 2N External Fingerprint reader. Right one is for assignment via reader module mounted on a unit:
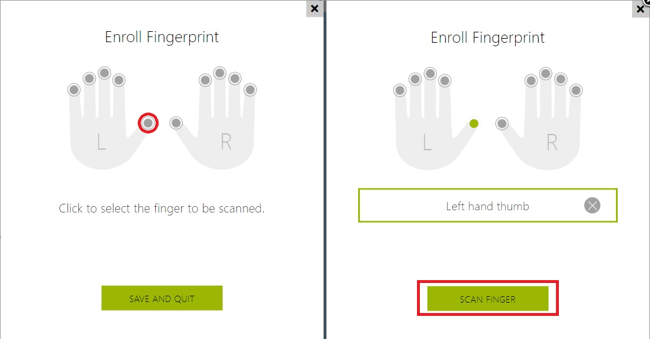
- Now select the finger you want to use and click Scan Finger:
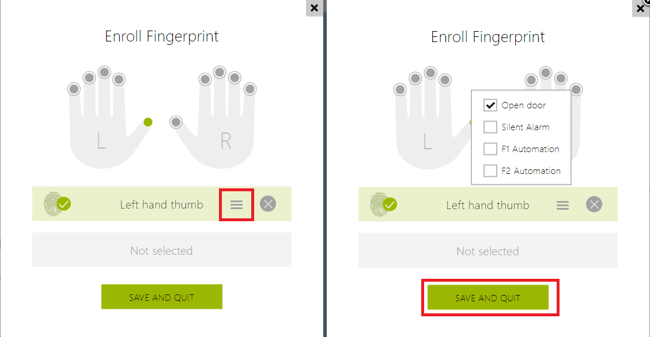
- Now you can choose what this fingerprint will be used for by clicking on the highlighted button:
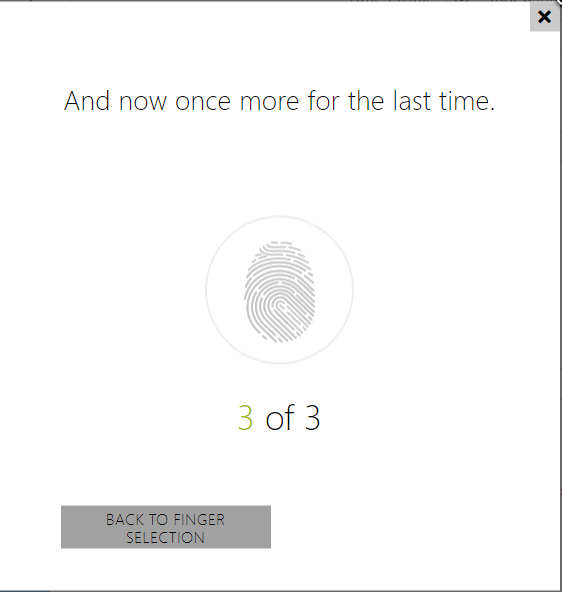
- Now you need to scan it 3 times and save it:
Versions 3.0 and later
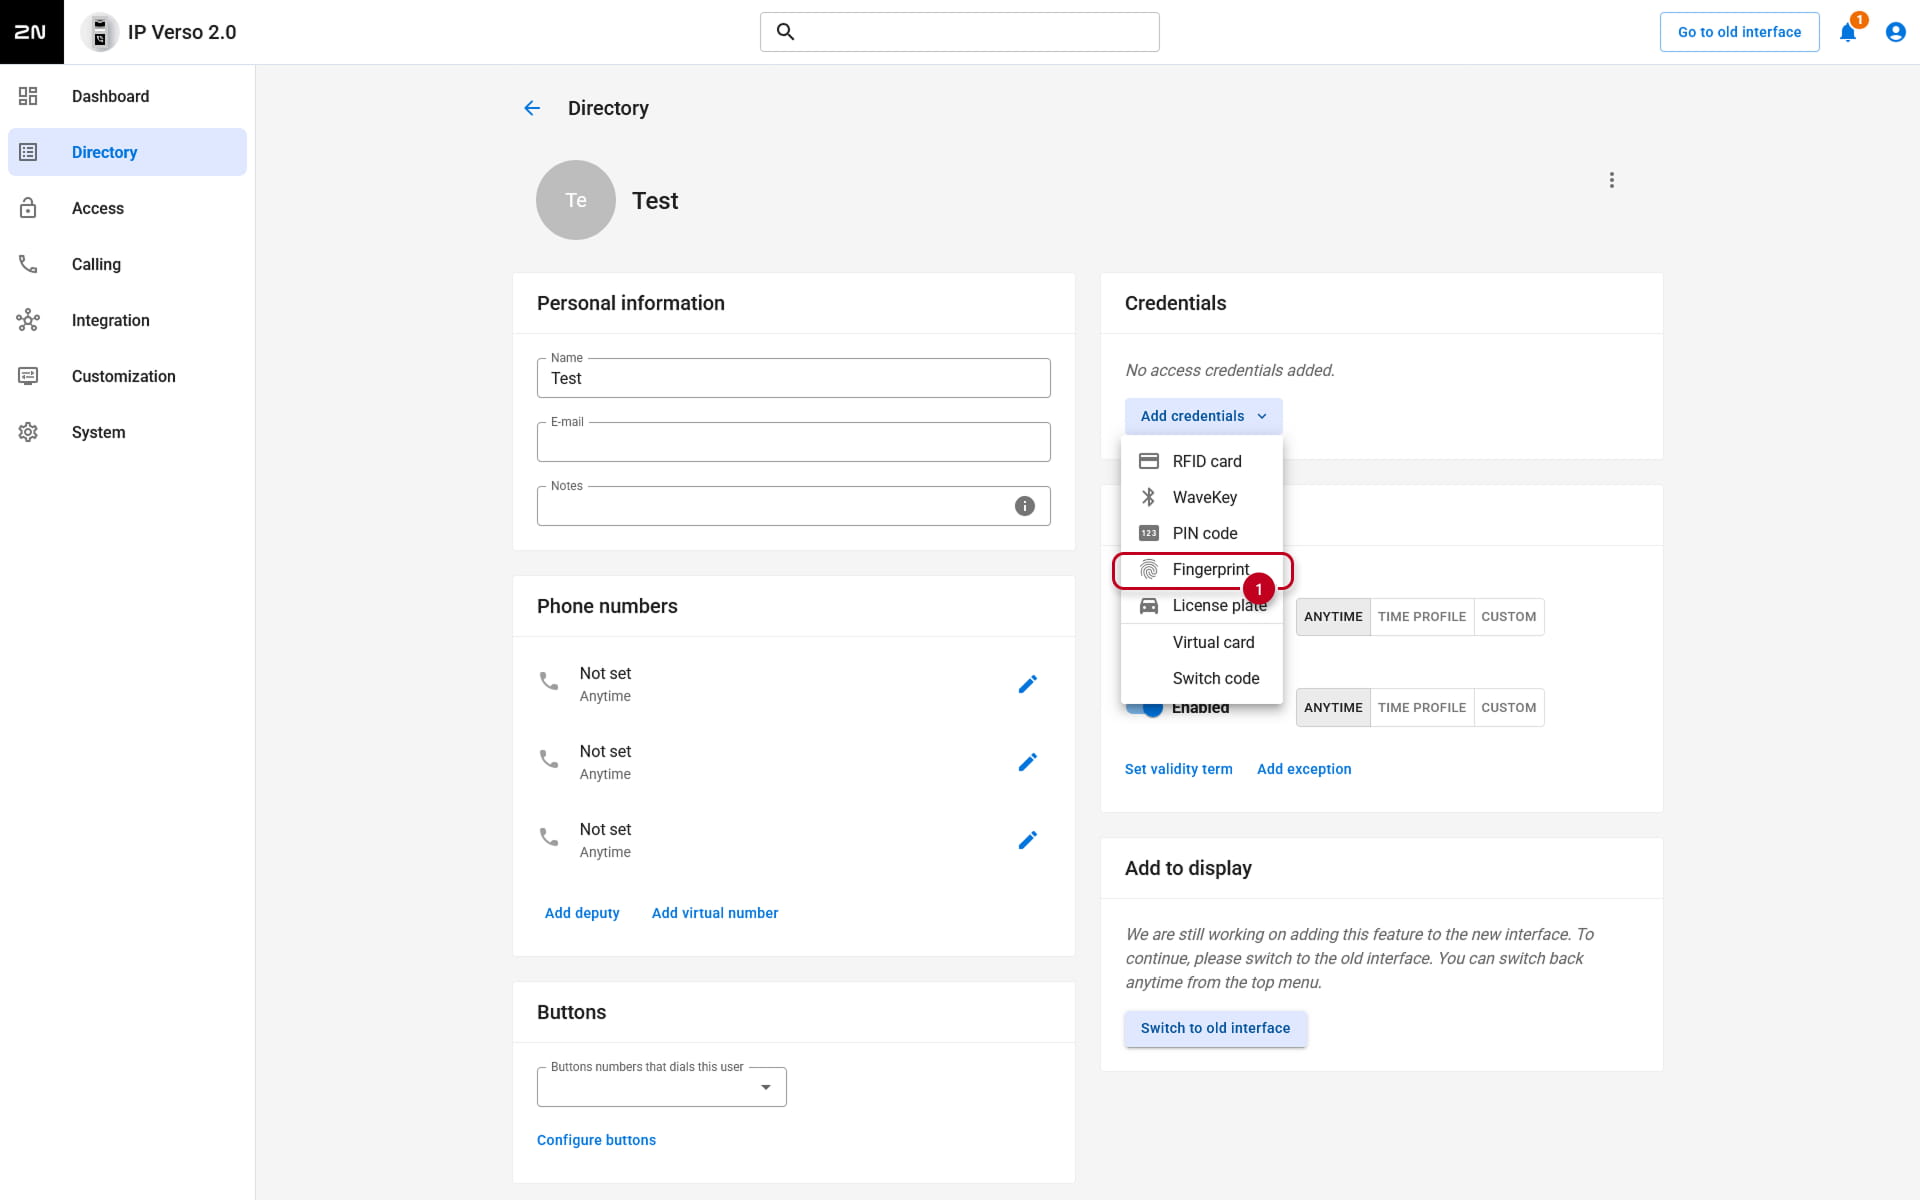
To setup a fingerprint access, go to Directory -> Users -> select User -> Add credentials -> Fingerprints click on one of the highlighted buttons.
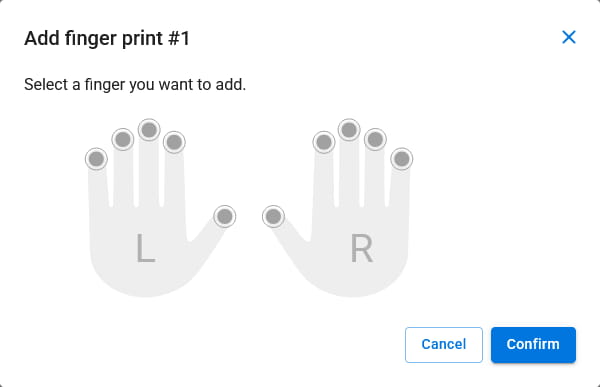
- Now select the finger you want to use and click Scan Finger:
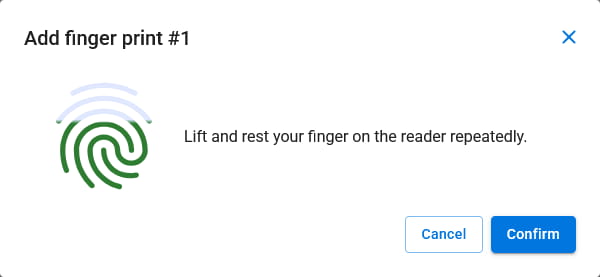
- Now you need to scan it 3 times and save it:
- Now you can choose what this fingerprint will be used for by clicking on the Confirm button:
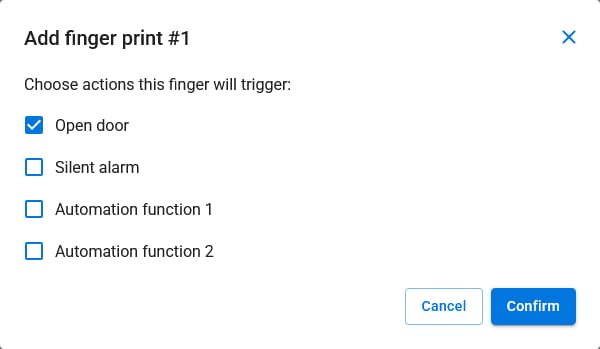
- By default, Open door option is selected. Silent Alarm option is for triggering a silent alarm when this finger is scanned. F1 and F2 Automation option is for use in Automation scenarios. After you set the correct function, click Confirm.
PIN code access
There are several ways of adding a PIN code access to the device:
Versions 2.50 (LTS) or earlier
1) The PIN code is associated with the respective Switch
In this case, when the correct PIN is entered, unit will not show which User activated the switch, it will just show that the correct PIN was entered and the switch was activated.
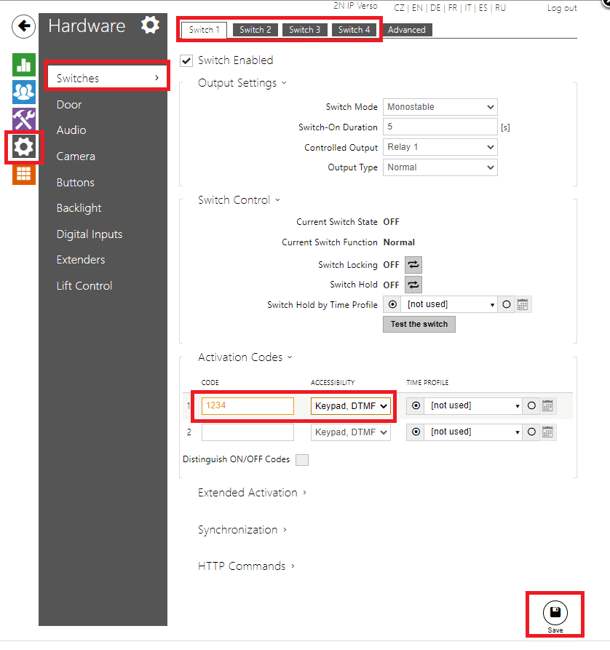
- You can set this in Hardware -> Switches -> (for example) Switch 1 -> Activation Codes. You will also need to make sure that Keypad, DTMF or Keypad only option is active. After you enter the code, click Save:
2) The PIN code is associated with a User
In this case, using a PIN code will generate an Event in the unit that will inform which User's PIN code was used. In this scenario, each User has their own PIN code(s).
- To configure this, go to Directory -> Users -> select the User -> User Codes:
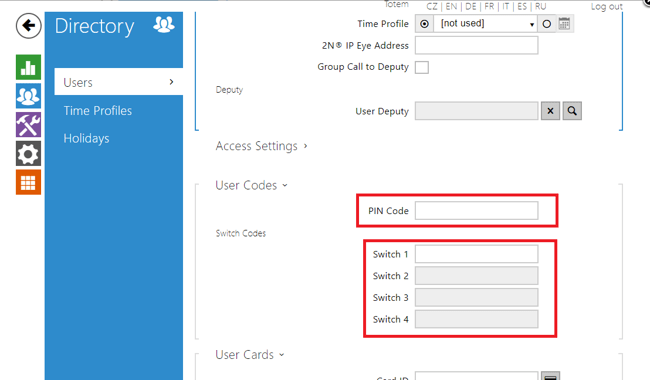
- PIN Code option - this PIN code will activate a Switch that is associated with Door (in Hardware -> Digital Inputs). Good for scenarios where each User needs their own PIN code and they need to control just one Switch.
- Switch codes - these codes are associated with respective Switch. User can control each Switch individually and those PIN codes are associated with this User only. The fields for codes here are greyed out if the respective Switch is not enabled. You can enable a Switch in Hardware -> Switches.
Versions 3.0 or later
1) The PIN code is associated with the respective Switch
In this case, when the correct PIN is entered, unit will not show which User activated the switch, it will just show that the correct PIN was entered and the switch was activated.
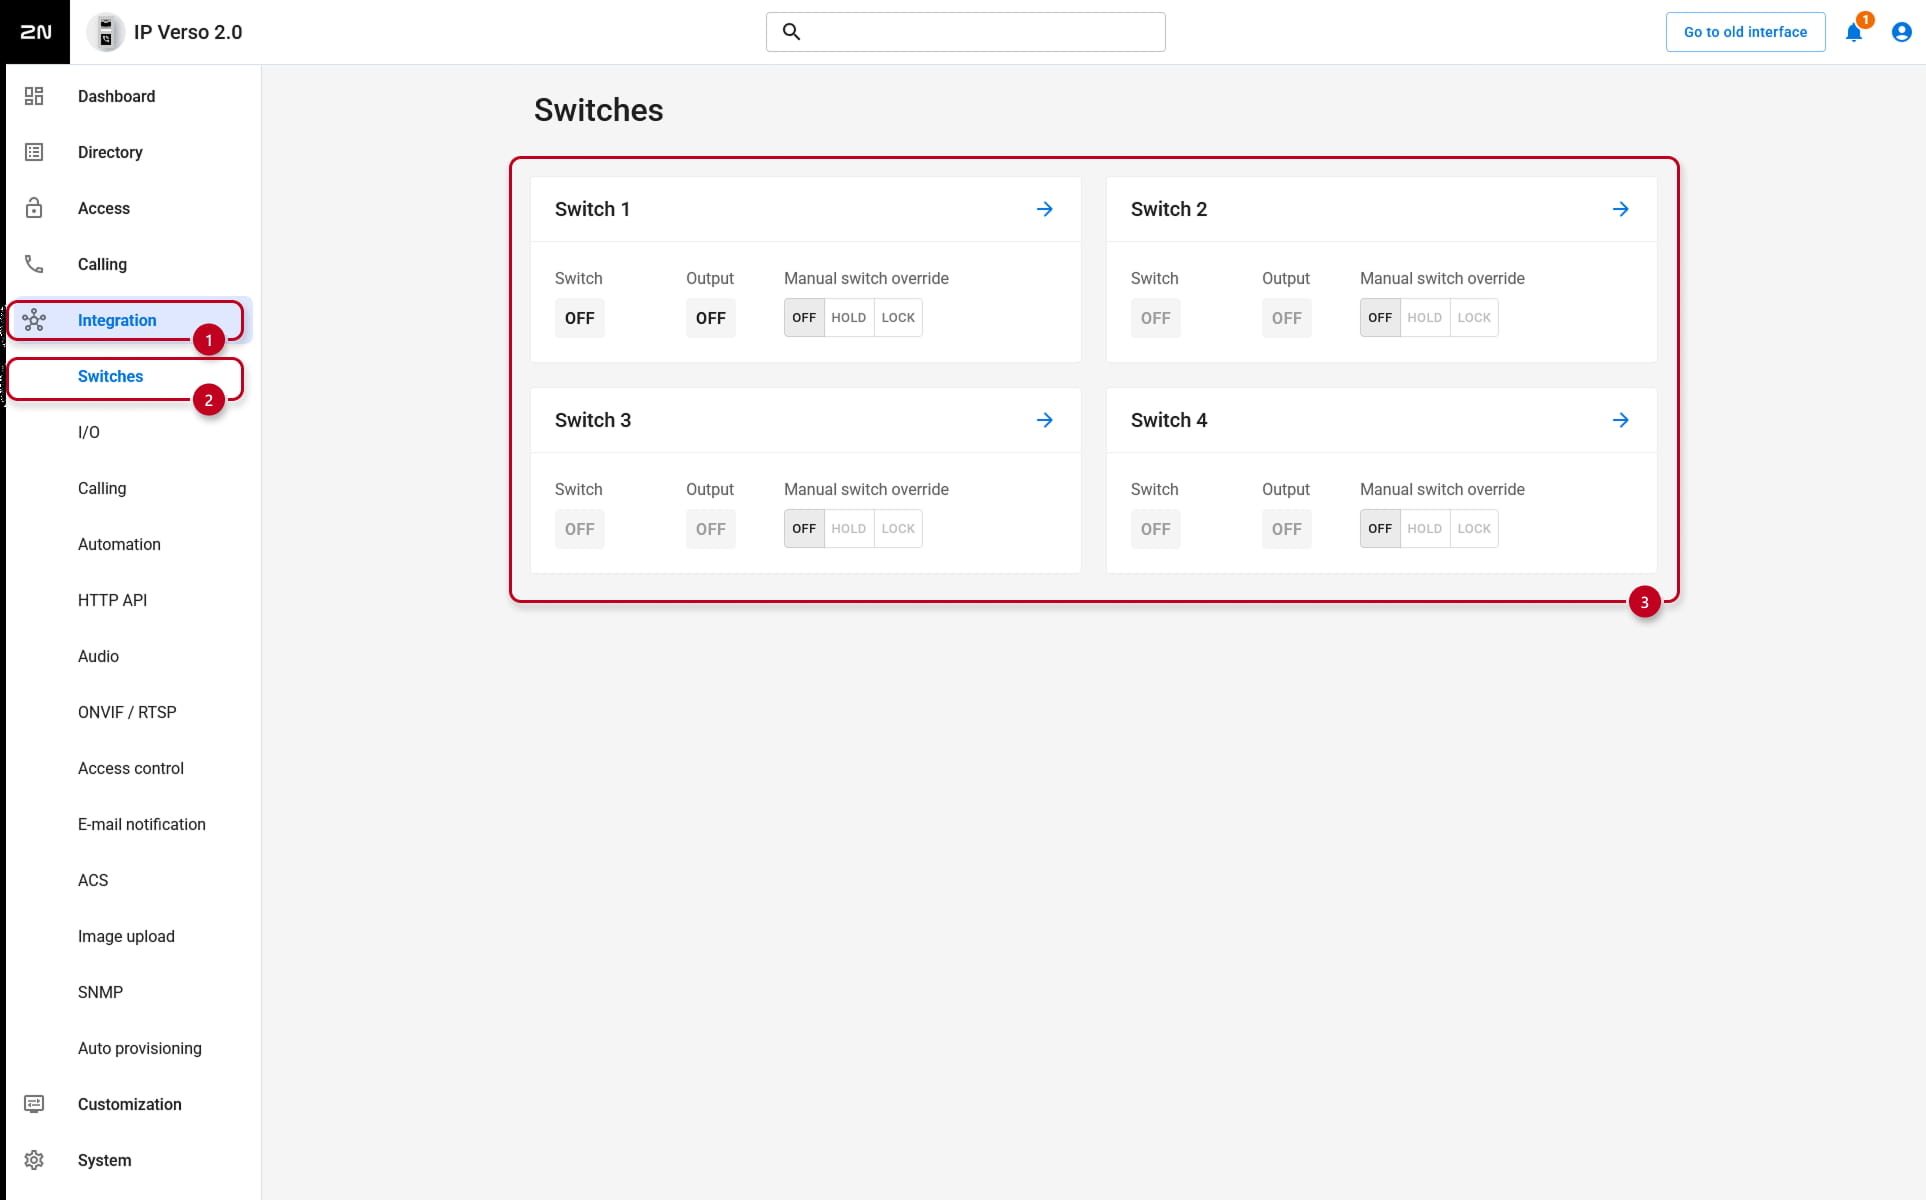
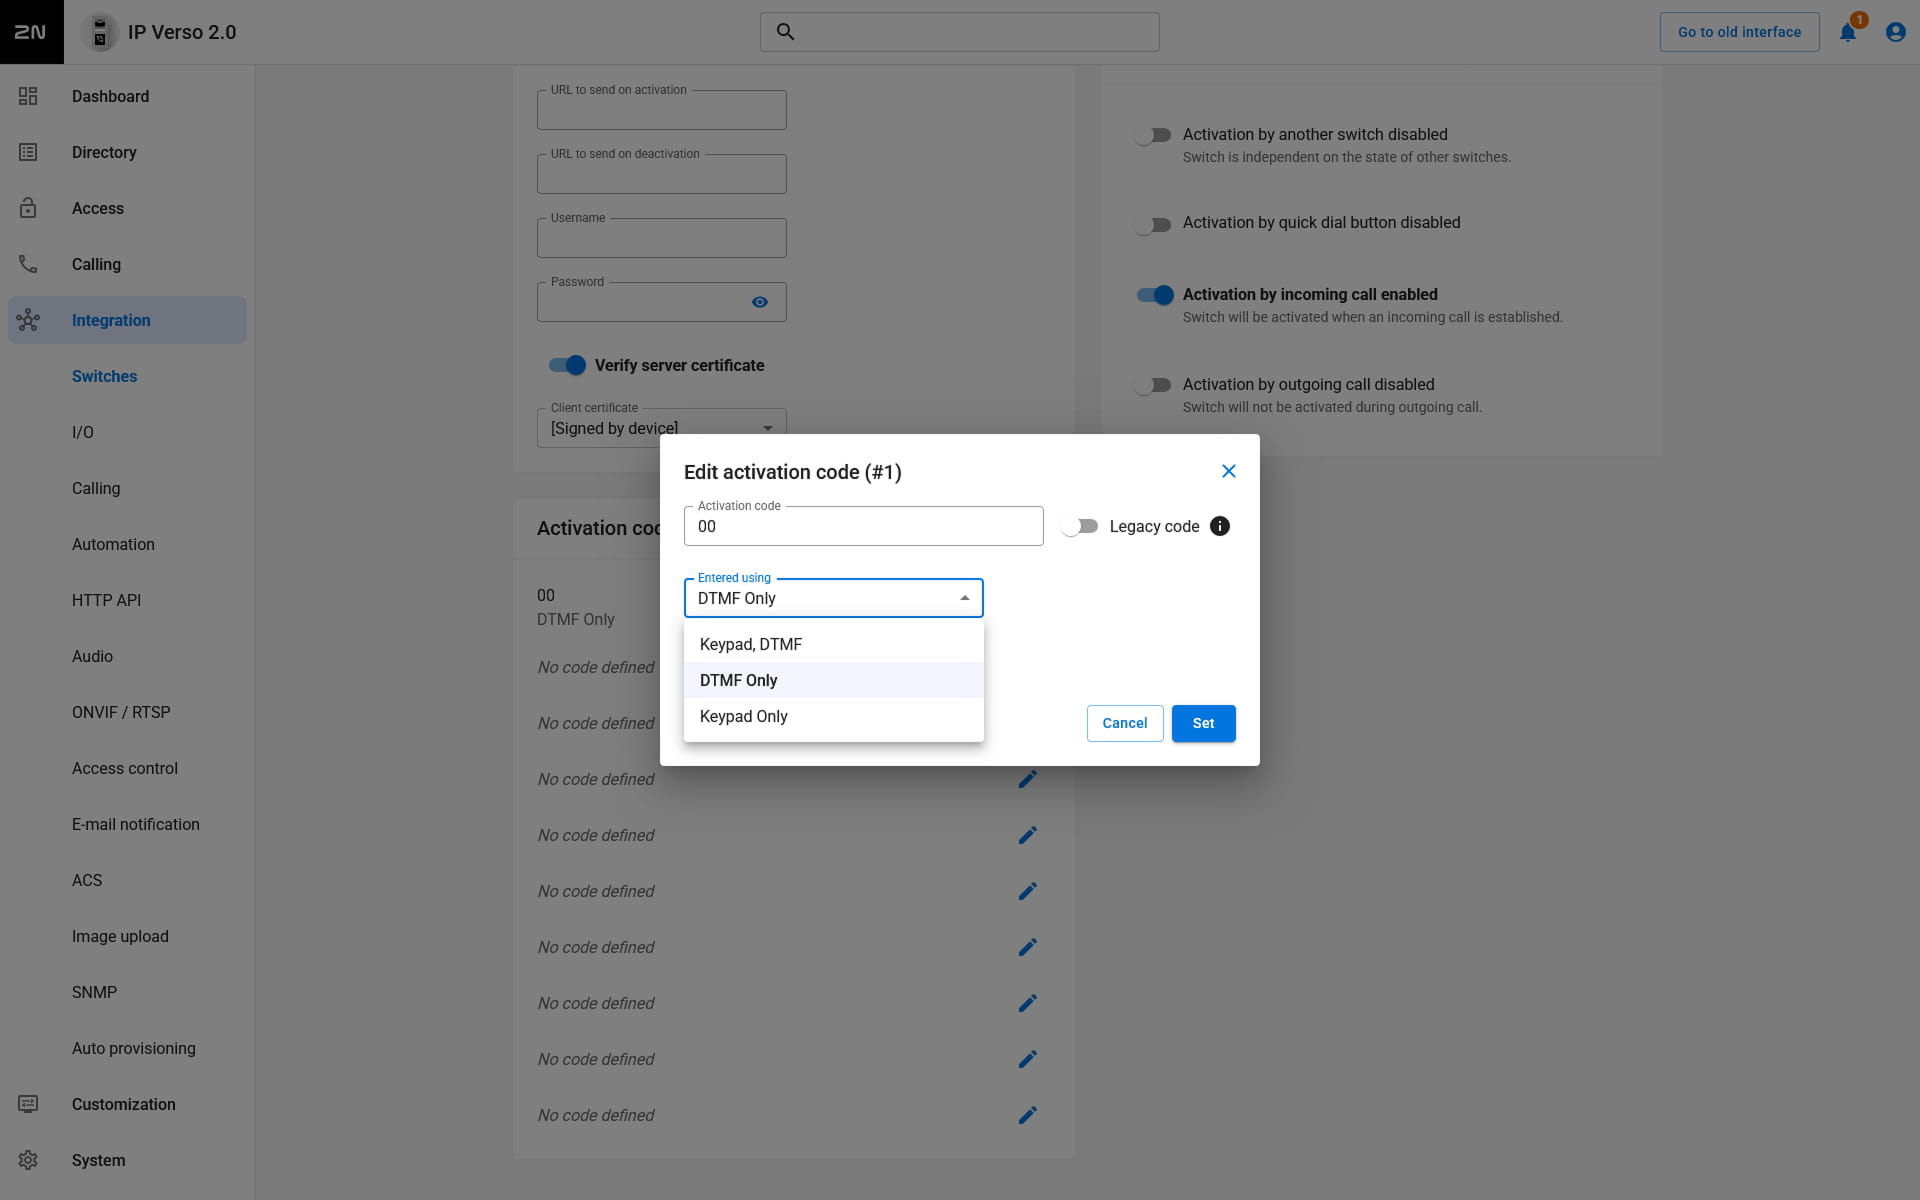
- You can set this in Integration -> Switches -> (for example) Switch 1 -> Activation Codes. You will also need to make sure that Keypad, DTMF DTMF only or Keypad only option is active. After you enter the code, click Save:
2) The PIN code is associated with a User
In this case, using a PIN code will generate an Event in the unit that will inform which User's PIN code was used. In this scenario, each User has their own PIN code(s).
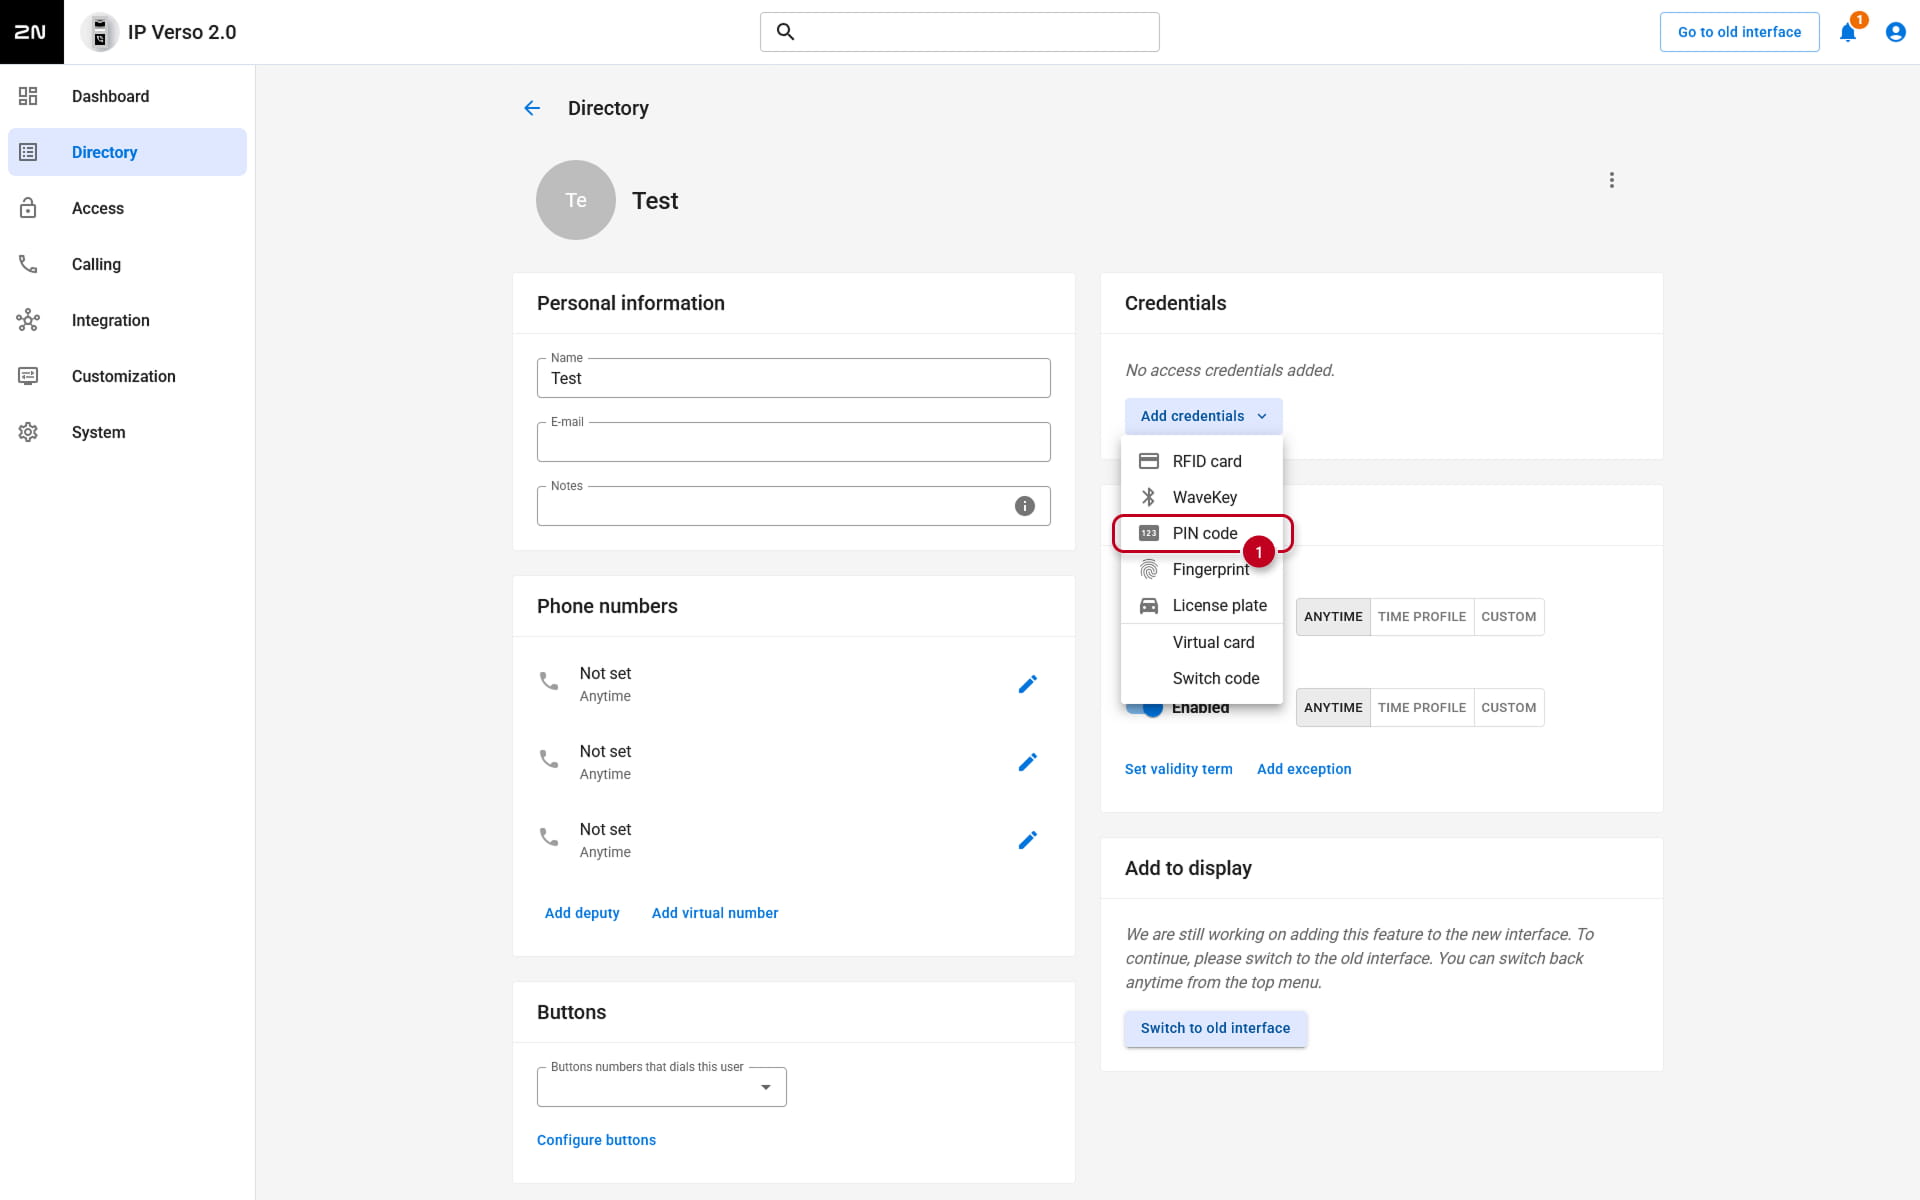
- To configure this, go to Directory -> Users -> select the User -> Add credentials -> PIN code/Switch code:
- PIN Code option - this PIN code will activate a Switch that is associated with Door (in Integration -> Switches). Good for scenarios where each User needs their own PIN code and they need to control just one Switch.
- Switch codes - these codes are associated with respective Switch. User can control each Switch individually and those PIN codes are associated with this User only. The fields for codes here are greyed out if the respective Switch is not enabled. You can enable a Switch in Integration -> Switches.
QR code
To be able to use QR codes for authentication, you need to first enable this function.
Versions 2.50 (LTS) or earlier
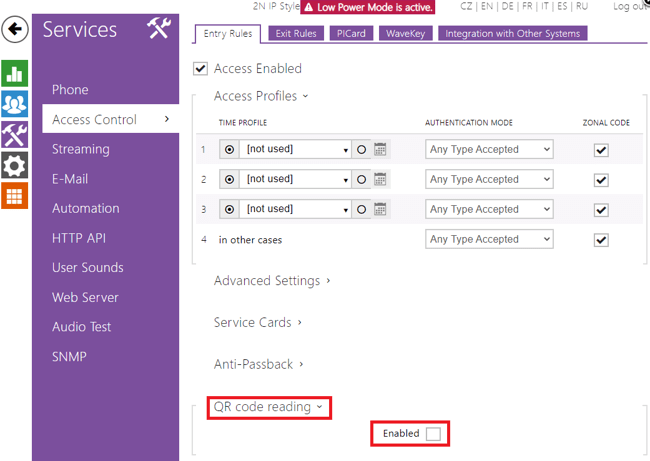
- You can do so in Services -> Access Control -> Entry rules -> QR code reading:
- To create a new QR code credential, go to Directory -> Users -> select a User -> User Codes:
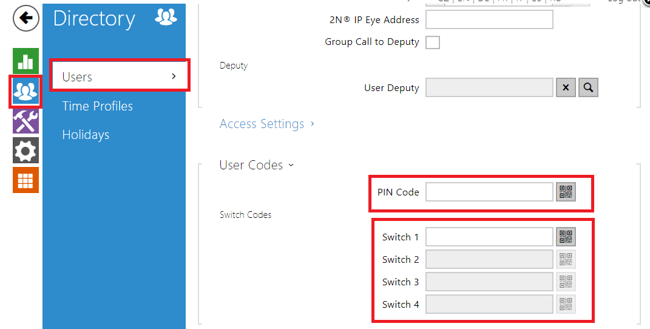
-
PIN Code - this QR code is associated with a Switch that is assigned to Door, in Hardware -> Digital Inputs section
-
Switch codes - these codes are associated with respective Switch
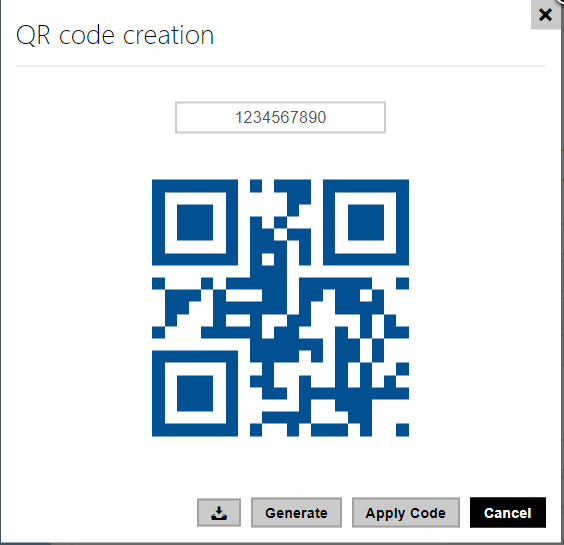
You can enter numeric code with at least 10 digits and then click the button with QR symbol next to the field for entering the code. This will show you a QR code representing the digits entered:
Versions 3.0 or later
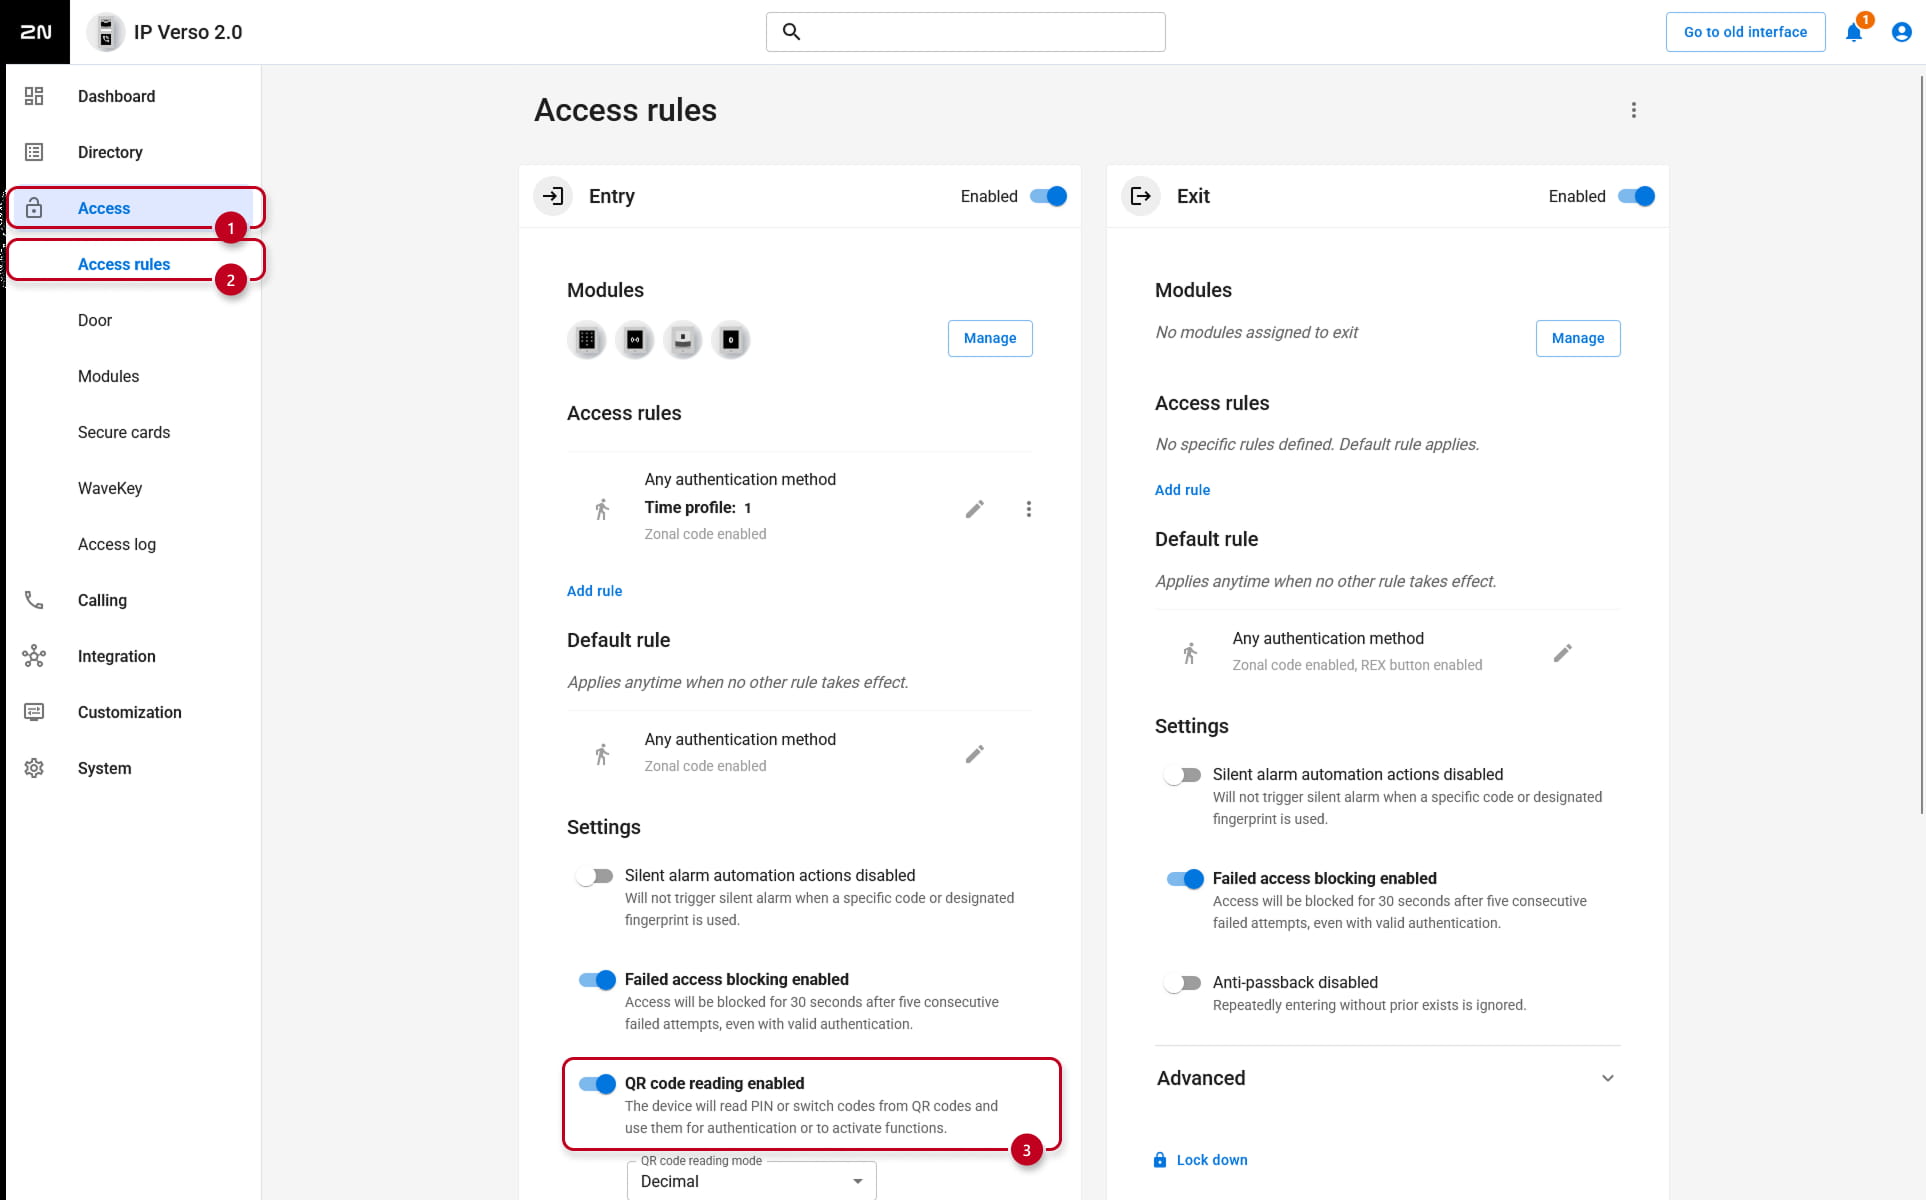
- You can do so in Access-> Access Rules -> Entry rules -> Settings -> QR code reading:
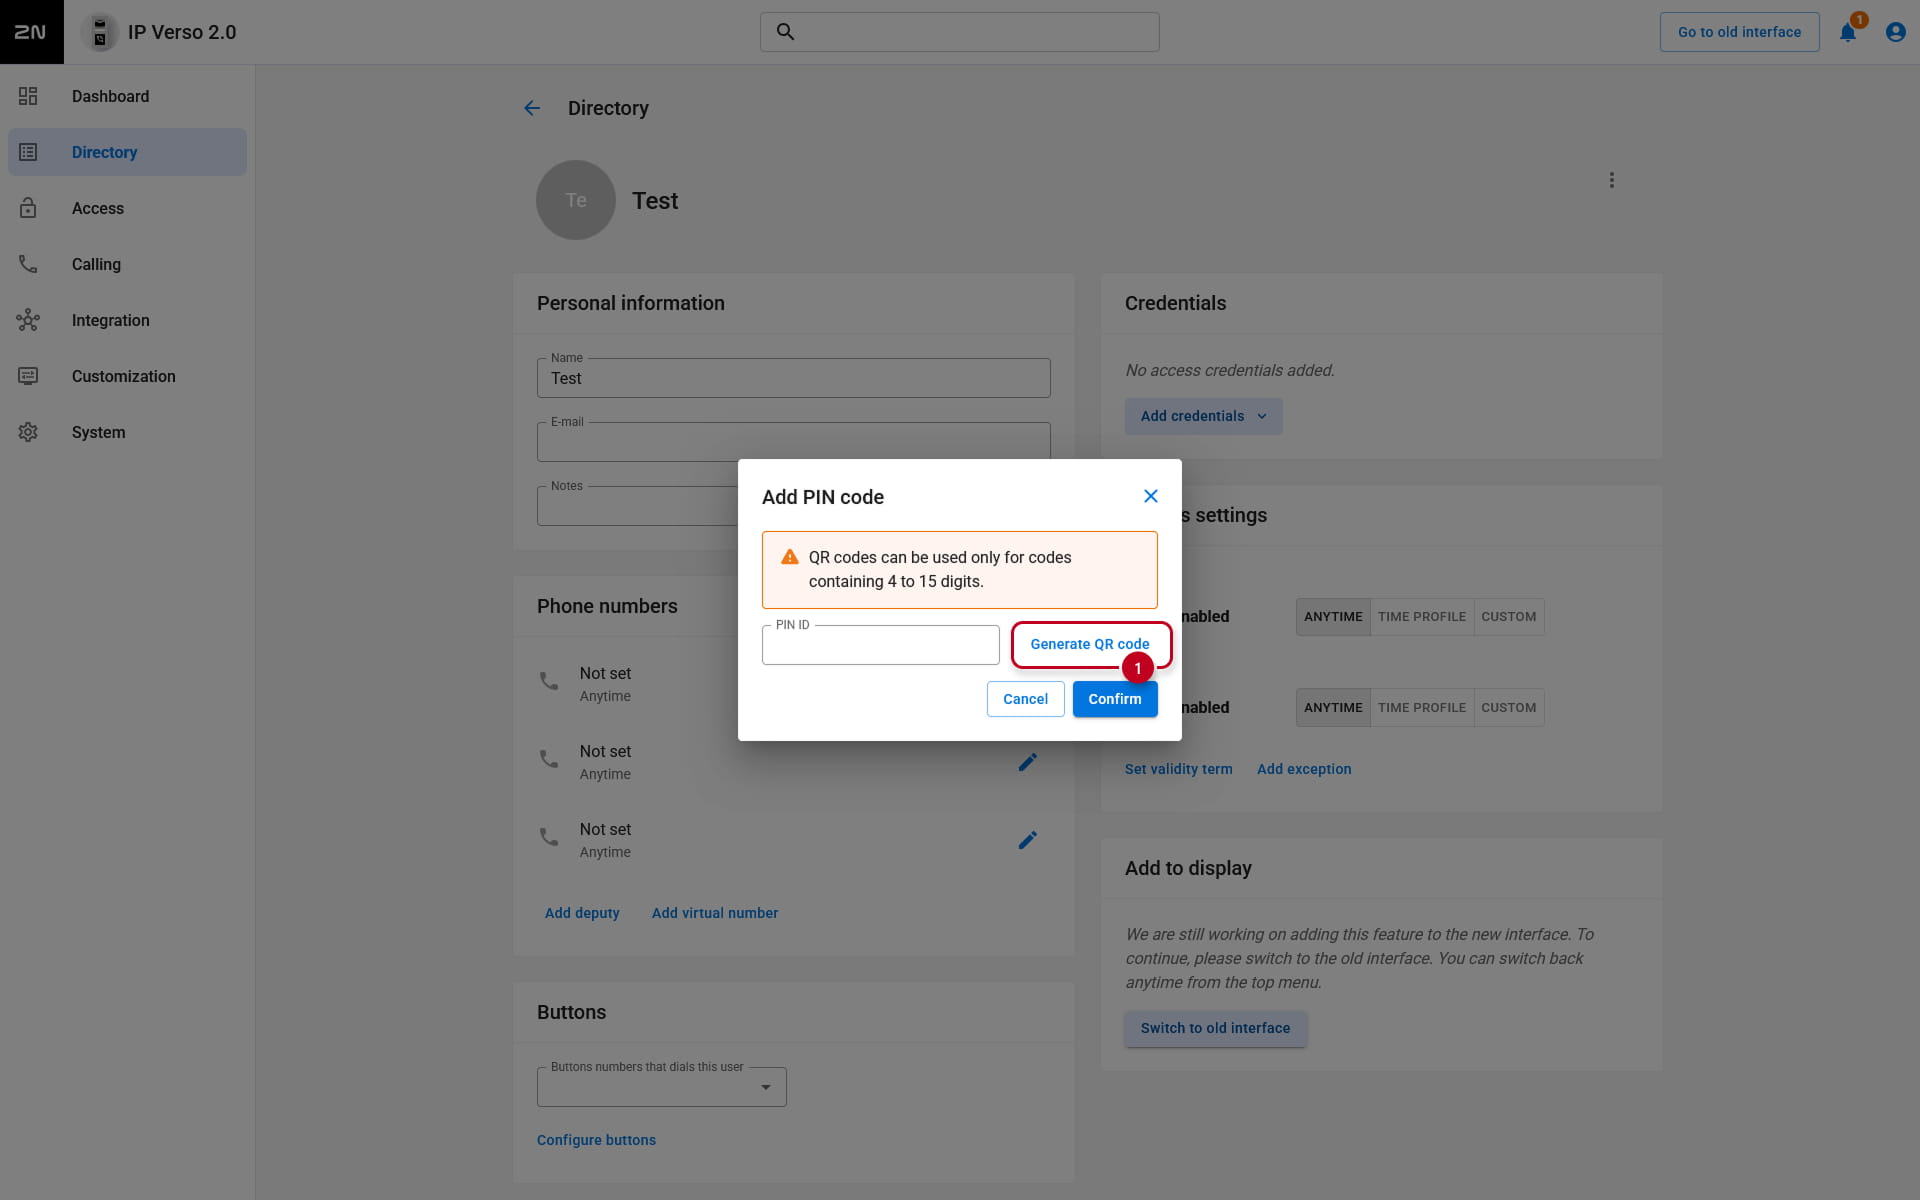
- To create a new QR code credential, go to Directory -> Users -> select a User -> Add credentials -> PIN Code -> Generate QR Code:
-
PIN Code - this QR code is associated with a Switch that is assigned to Door, in Integration -> Switches section
-
Switch codes - these codes are associated with respective Switch
- You can enter numeric code with at least 10 digits and then click the button with QR symbol next to the field for entering the code. This will show you a QR code representing the digits entered:

You can download the image with QR code with the Download the image button. Generate QR code button will generate a new code. Confirm will close the window and fill in the field for the code with the last generated code.
Virtual Card
For more information about Virtual Card, please refer to this manual: Virtual Card ID – What is it for and how to set it up
Bluetooth access
For more information about adding a Bluetooth access credential, please refer to this manual: Bluetooth, 2N® Mobile Key - Opening door with Bluetooth
License Plate Recognition
For more information about adding a car's license plate as an access credential, please refer to this manual: License Plate Recognition (LPR) – how to configure it?