Grandstream GXV3275 - How to set it up with 2N IP Intercom
The Grandstream GXV3275 is a 7-inch touchscreen IP phone with Wi-Fi connectivity and a variety of features, supporting a range of audio codecs and video codecs (H.264, H.263 and H.263+).
| Note: The IP addresses used will always vary depending on your network. In the example below, the IP address used is 192.168.48.151 for the 2N IP Intercom and the IP address 192.168.51.97 for the Grandstream GXV3275. |
How to set up the 2N IP Intercom
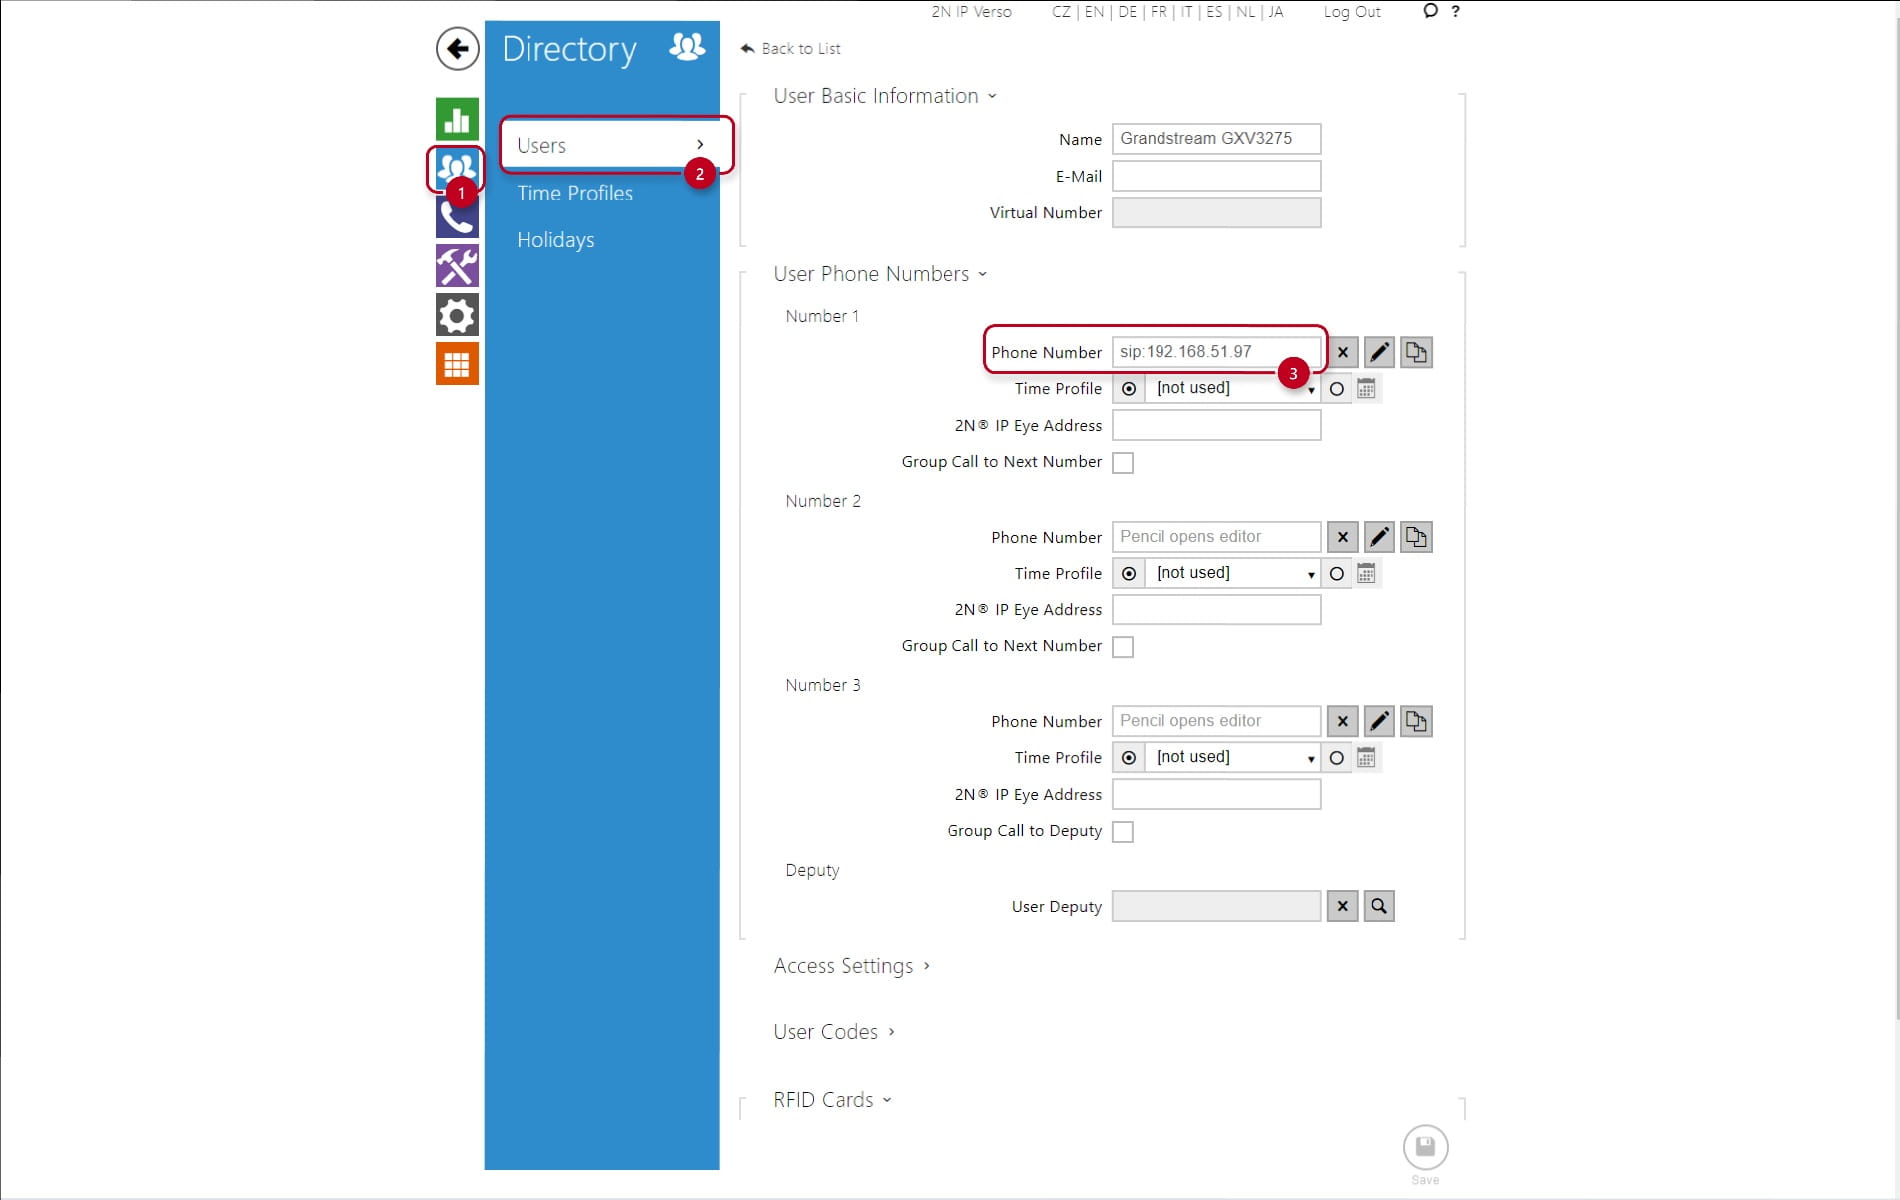
Setting up the 2N IP Intercom is very easy. First, it is necessary to create a new user in the blue section directory and assign him a phone number - in our case it will be a direct call (peer to peer) to the GXV3275 phone. For this reason, we enter a phone number in the form sip:IP_address (or sip:x@IP_address), where IP_address is the IP address of the GXV3275 phone. The setting corresponds to the picture below.
In the next step, go to the "Calling -> SIP 1" section, enable the SIP 1 account and fill in the "Domain" field with the IP address of the 2N IP Intercom.

We can adjust the video codec settings and video resolution. These settings can be made in the section "Calling -> SIP 1-> Video" section, where you can set the maximum resolution for the given intercom model (VGA in this case for the 2N IP Verso intercom), change the frame rate and also the video bitrate. We also enable "Use sendrecv Attribute for Video" in the advanced SPD settings option.

Finally, we need to assign the user to the quick dial button of the 2N IP Intercom in the section "Calling -> Dialing-> Quick Dial Button".

How to set up the Grandstream GXV3275 IP phone
The easiest way to set up this IP phone is via the web interface. The following describes how to set up the phone via the web interface. We start from the default IP Phone settings - available in the "Maintenance/Upgrade" section.

Scroll down on this page and click on the "reset" button to put the IP Phone to the default settings.

The next step is to enable and set up the first user account "Account 1" in the "general setttings -> account-> account 1" section. As it was said at the beginning of this article, we will be setting up a direct connection between the IP Intercom and the IP phone, so we will fill in the "SIP Server" field with the IP address of the 2N IP Intercom to which the IP phone will register. It is not necessary to fill in the authorization name and password in this case.

Then go to "SIP Settings -> Account -> Account 1" and uncheck the SIP registration box.

To enable the Video Preview function, i.e. displaying the video from the intercom on the phone screen before picking up the call, you must enable the function in the menu "Advanced Settings -> Call Features". The Video Preview feature on the GXV3275 is supported from FW 1.0.1.50.

At the end don't forget to save all changes using "Apply configuration changes" as shown on the pictures above.