Fill IP address of 2N Access Unit to your browser (IP address - How to get IP address of 2N Access Units?)
Backup configuration:
Go to section System - Maintenance - Configuration
In that tab, you can launch capturing of incoming and outgoing packets on the intercom network interface.
Click button Backup Configuration
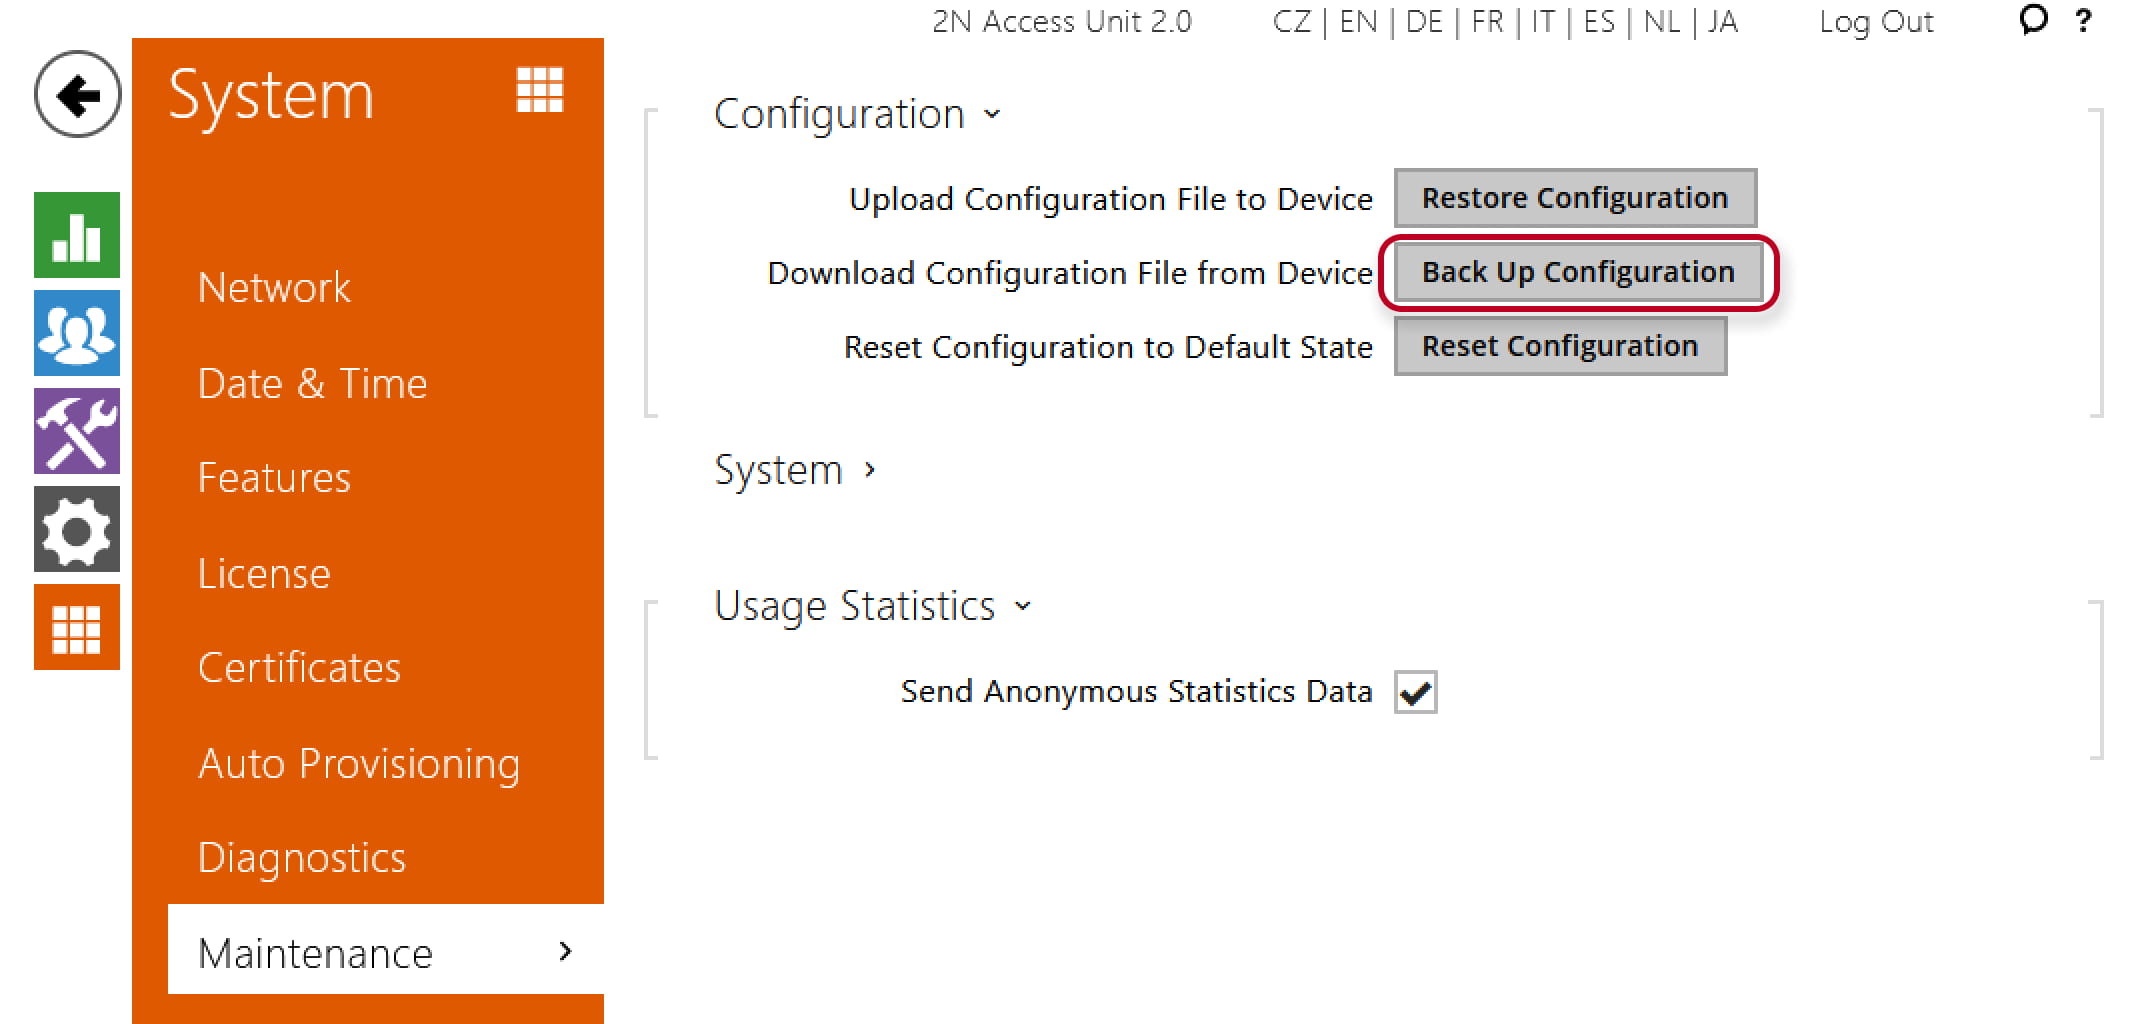
Configuration will be stored to your folder Downloads (file config.xml)

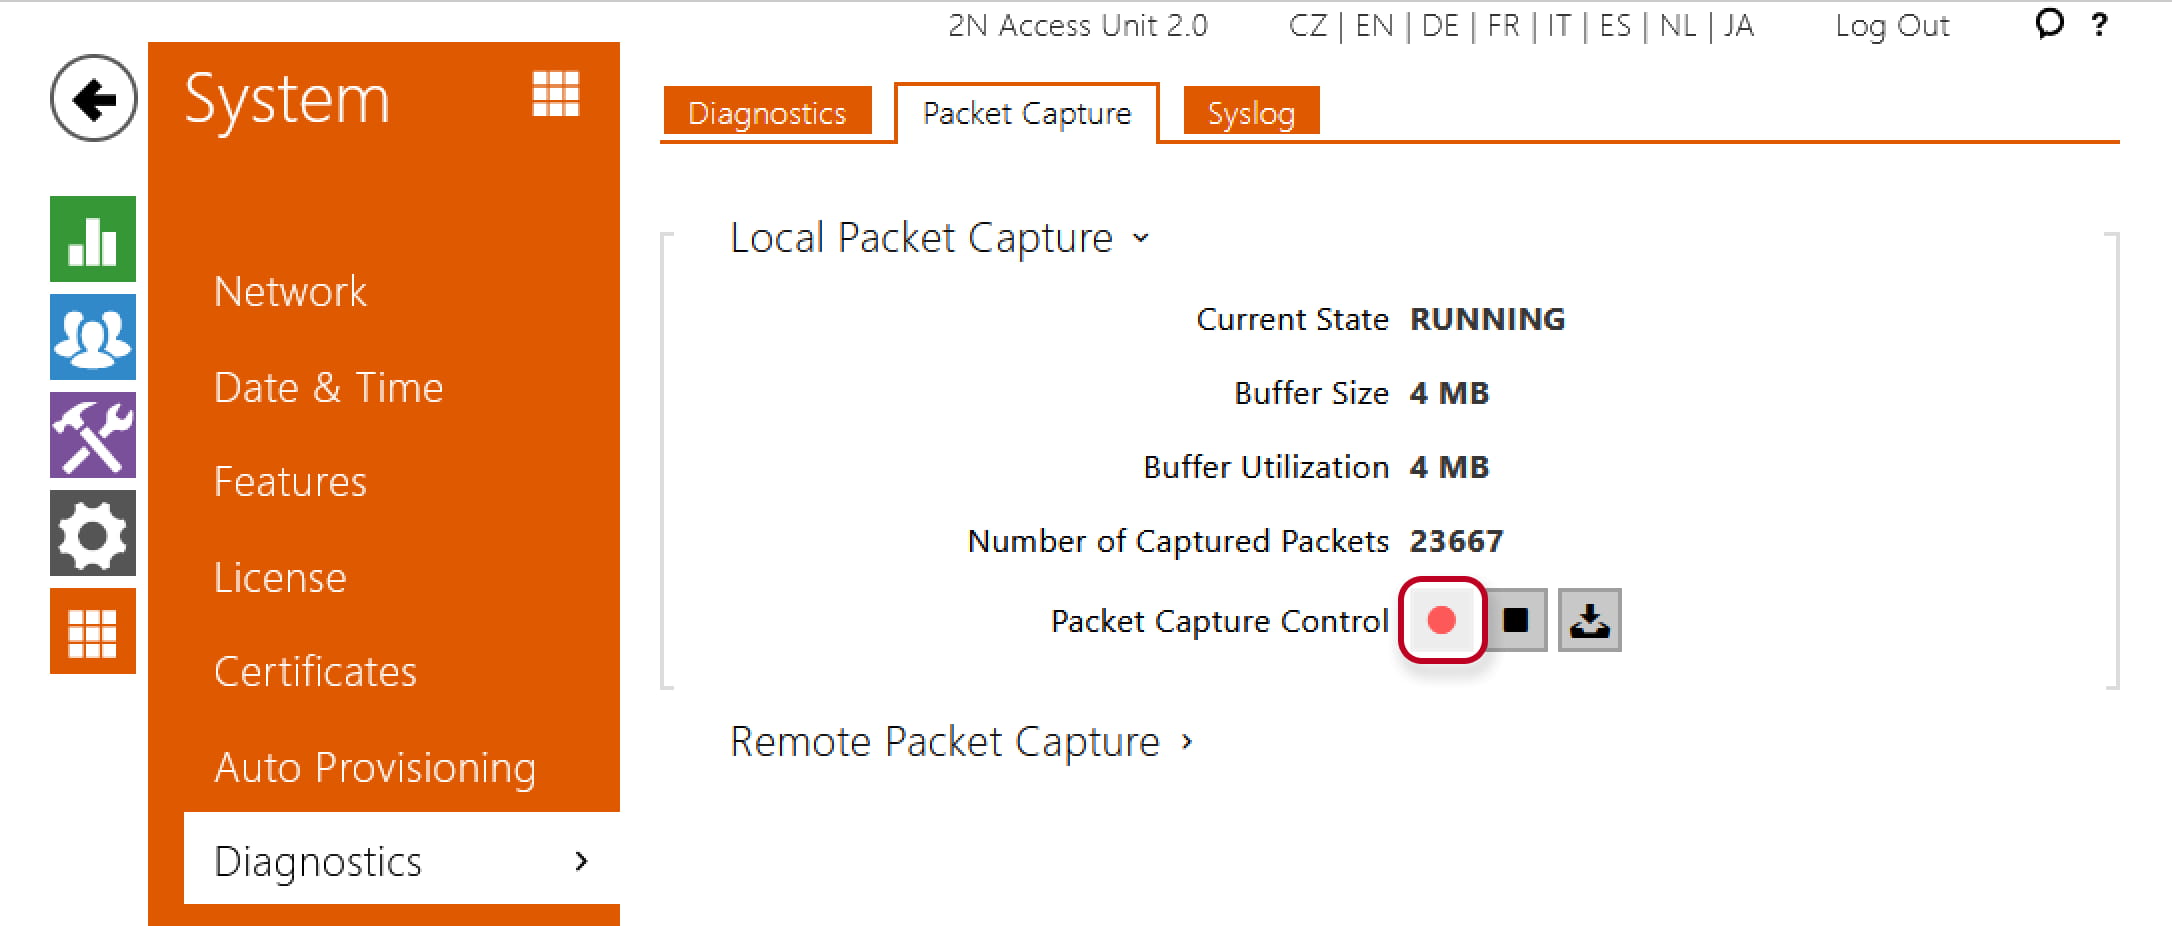
Trace download
Go to section System - Diagnostics - Packet Capture
1) click red button for star capturing trace
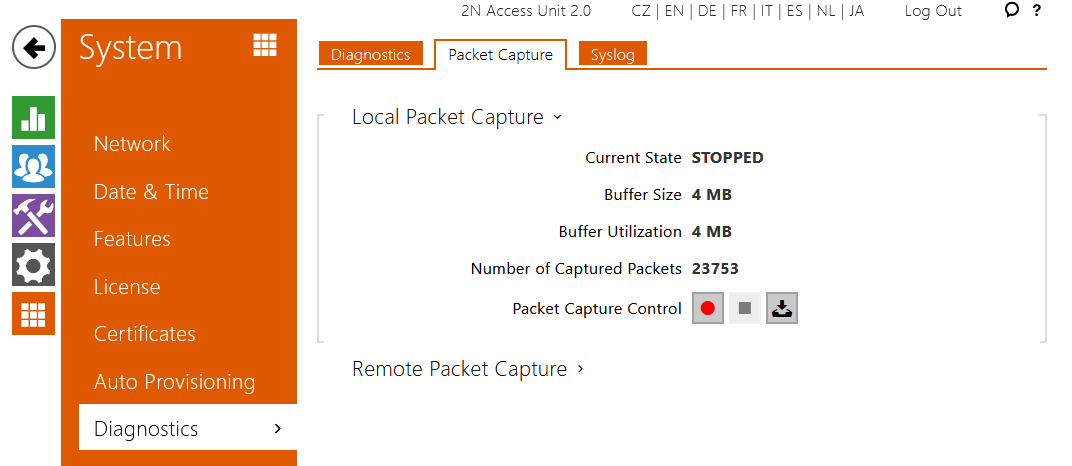
2) click stop button ![]() for stop the trace
for stop the trace
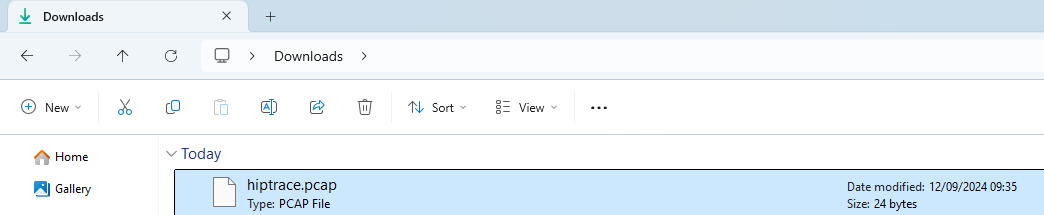
3) download trace to your PC - click button download ![]() (file hiptrace.pcap)
(file hiptrace.pcap)
Captured packets can be stored either locally in the device buffer whose size depends on the device, or remotely on the user's PC, subject only to the specified storage duration and available disk space.
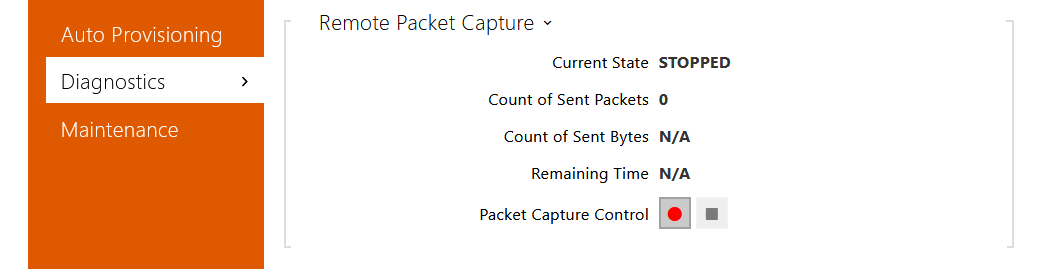
Press ![]() to start remote capturing. Specify the capturing time interval (s) for the incoming and outgoing packets. When the set time value passes, the packet capture file will be downloaded automatically to the user PC. Press
to start remote capturing. Specify the capturing time interval (s) for the incoming and outgoing packets. When the set time value passes, the packet capture file will be downloaded automatically to the user PC. Press ![]() to stop capturing.
to stop capturing.
|
This procedure can be applied to:
|