Automation
The most popular scenarios available to download immediately
Setting up scenarios in the Automation section is simple. But to simplify your work even more, we’ve prepared some .AM files for the most common scenarios. Just change them slightly, load them into the intercom, and bill the customer.
Other automation scenarios to download
Didn’t find a scenario for your project? We have a lot more of them for you!
We’ll help you
We’ll discuss with you how to use automation in your project. We’ll show you the actual settings in automation. We’re ready.
What is automation?
Take a look at the video where Gareth introduces automation. He uses an example to show you how to set up several actions which are triggered if the door has been kicked in. And if you don’t like videos, we have a description for you below instead.
Regular settings need not necessarily be enough for your customers. This is where the Automation interface comes in. You can use it to modify settings for intercoms and access control readers to suit your customers’ requirements.
It’s also a great tool we use to test functions which the 2N OS still doesn’t have though we’re working on. It’s often you that come up with new functions. Send us your settings in automation and tell us that this would be a great addition to our operating system. And we’ve listened to you on many occasions.
How to go about setting things up?
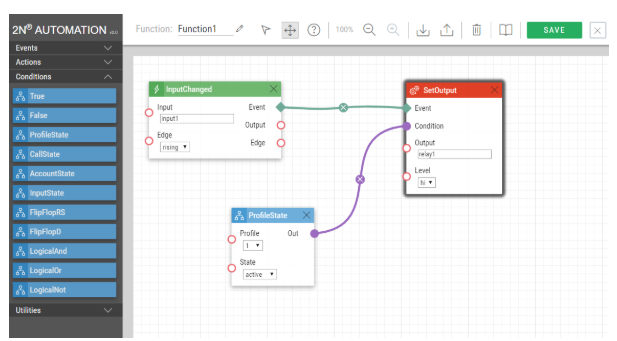
Select predefined events, actions and conditions. Drag them onto the desktop and link them to each other. In doing so, you’ll create complicated scenarios that exactly meet your customers’ needs in just a few clicks.

- Event – triggers the related action. Example: the press of a button, user authorisation, swiping of a card, setting of a specific time, entry of a code, activation of a silent alarm, detection of movement in front of the camera or the door being kicked in.
- Action – triggered when a defined event occurs. May be subject to meeting of a condition. Example: activation of a switch, opening a door, starting a call, playing a message, sending an e-mail, sending an HTTP command.
- Condition – you can set an action to be triggered only once a condition is met. If you don’t specify a condition, the action is performed whenever the event occurs. Example: true, false, call status, security status.
A detailed description of Automation settings can be found in the Automation Manual for 2N intercoms and access control systems.
Where to find the automation section?
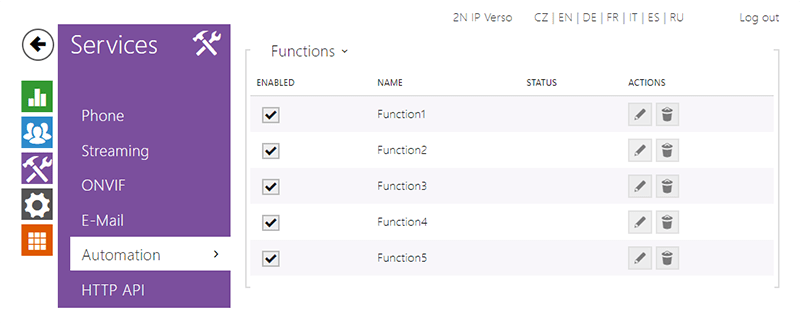
Open the web interface for intercoms and access control readers, click on the purple Services section and select the Automation section.

What do you need for that?
In order to gain access to the unlimited world of automation, all you need to do is purchase a Gold (01380-001) licence. If you have a new intercom and want to try out all the things this section offers, activate a trial licence for 800 hours. You don’t need a licence for access control readers; those are already loaded into the devices.
You’ll use automation while integrating with third-party systems
Imagine the following scenario: An unauthorised person forces the door open. At that moment, the 2N intercom changes the value of the virtual ONVIF input, and in doing so, informs the security guards who monitor the camera system. The camera system also starts recording footage from the intercom camera, and a preview of the video in the camera system is displayed to the security guards. This is one of the endless number of examples of use of the Automation function in 2N devices and connection with third-party systems. Take a look at our integration portal, the 2N Integration HUB, and find the right technology partner for you.
Learn how to work with automation
Sign up for the webinar at the 2N Academy dedicated to this topic.