Visitors in My2N – How to create visitors
You can create visitors with time-limited access and a randomly generated PIN code. It may be done either on the My2N site or in a specific apartment inside of the site.
Visitor - My2N site
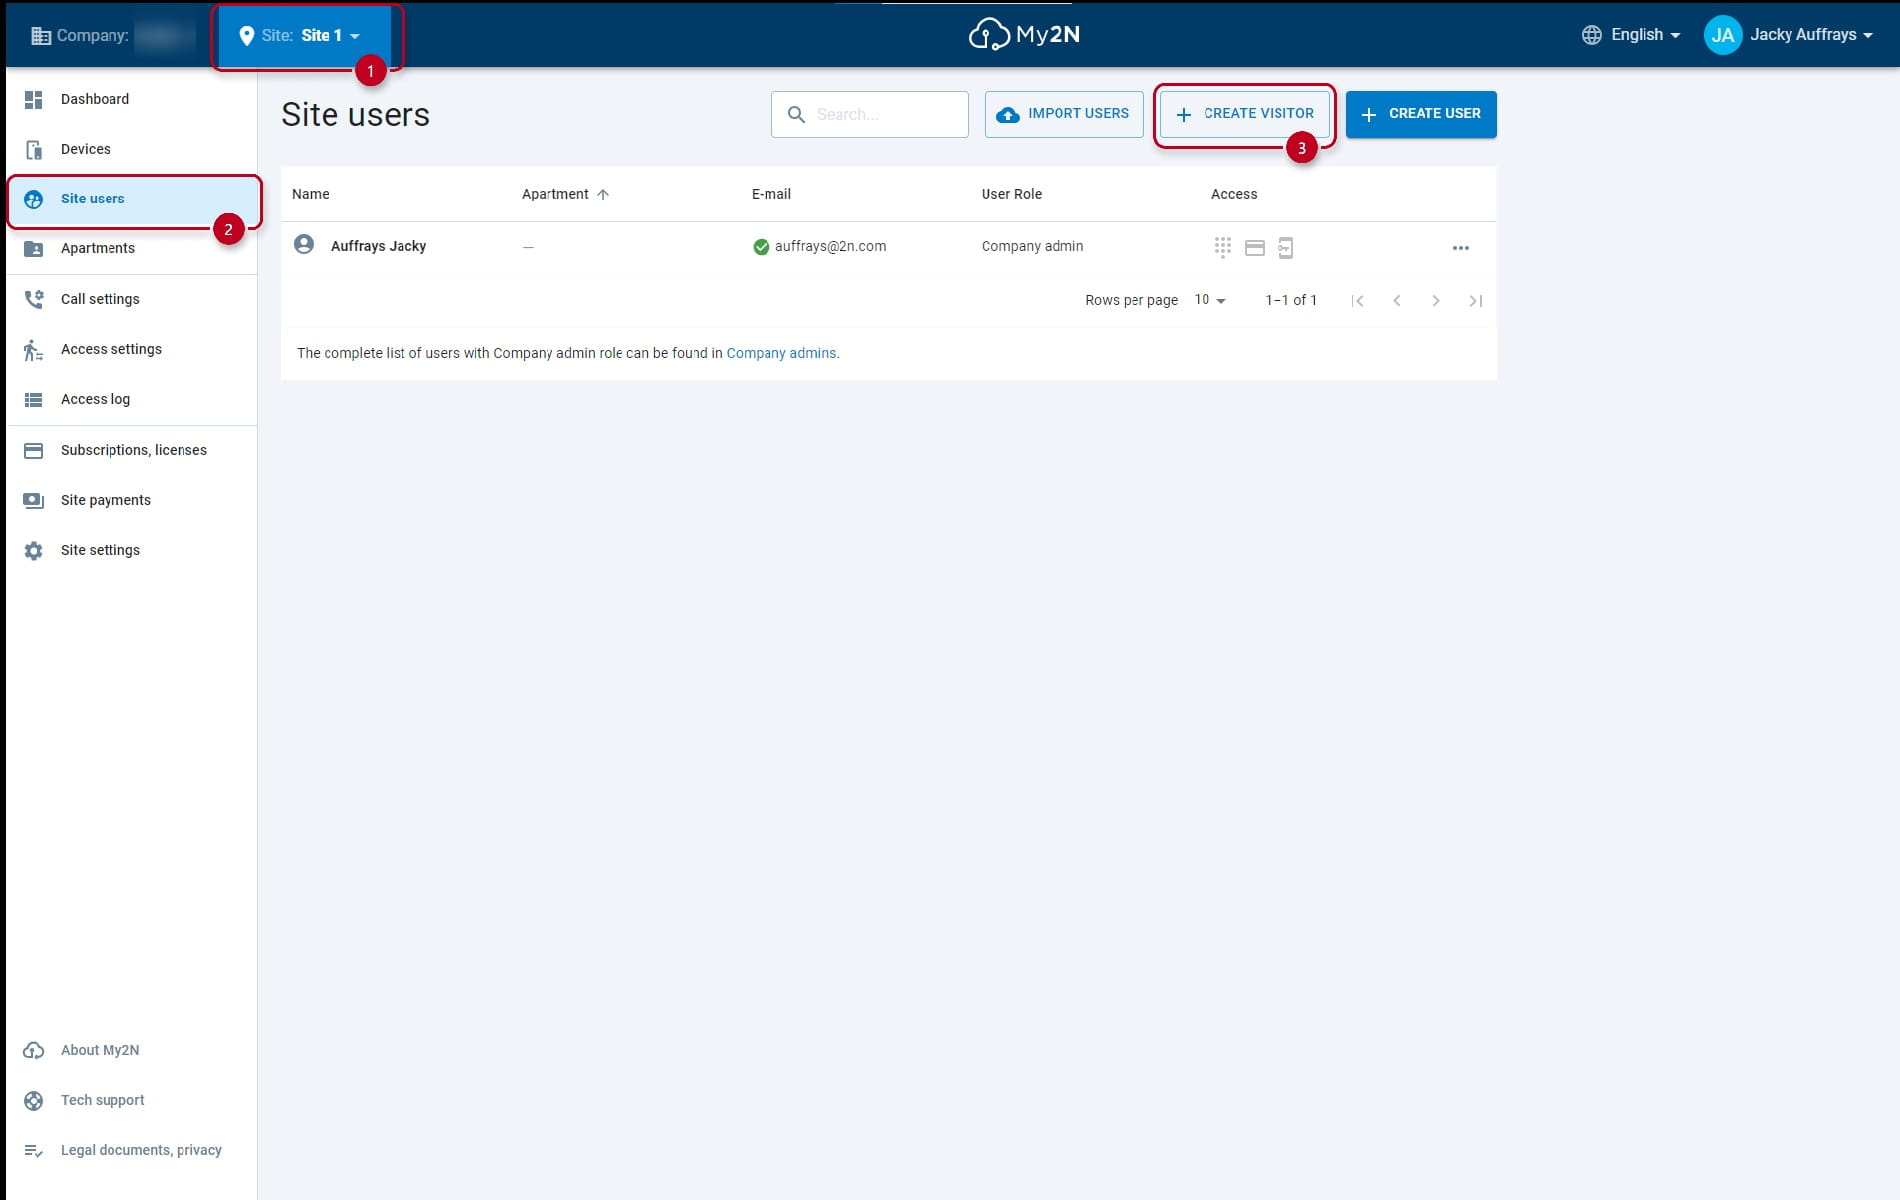
In My2N, choose the site where you want to create the visitor, go to the section site users and click on the button create visitor.
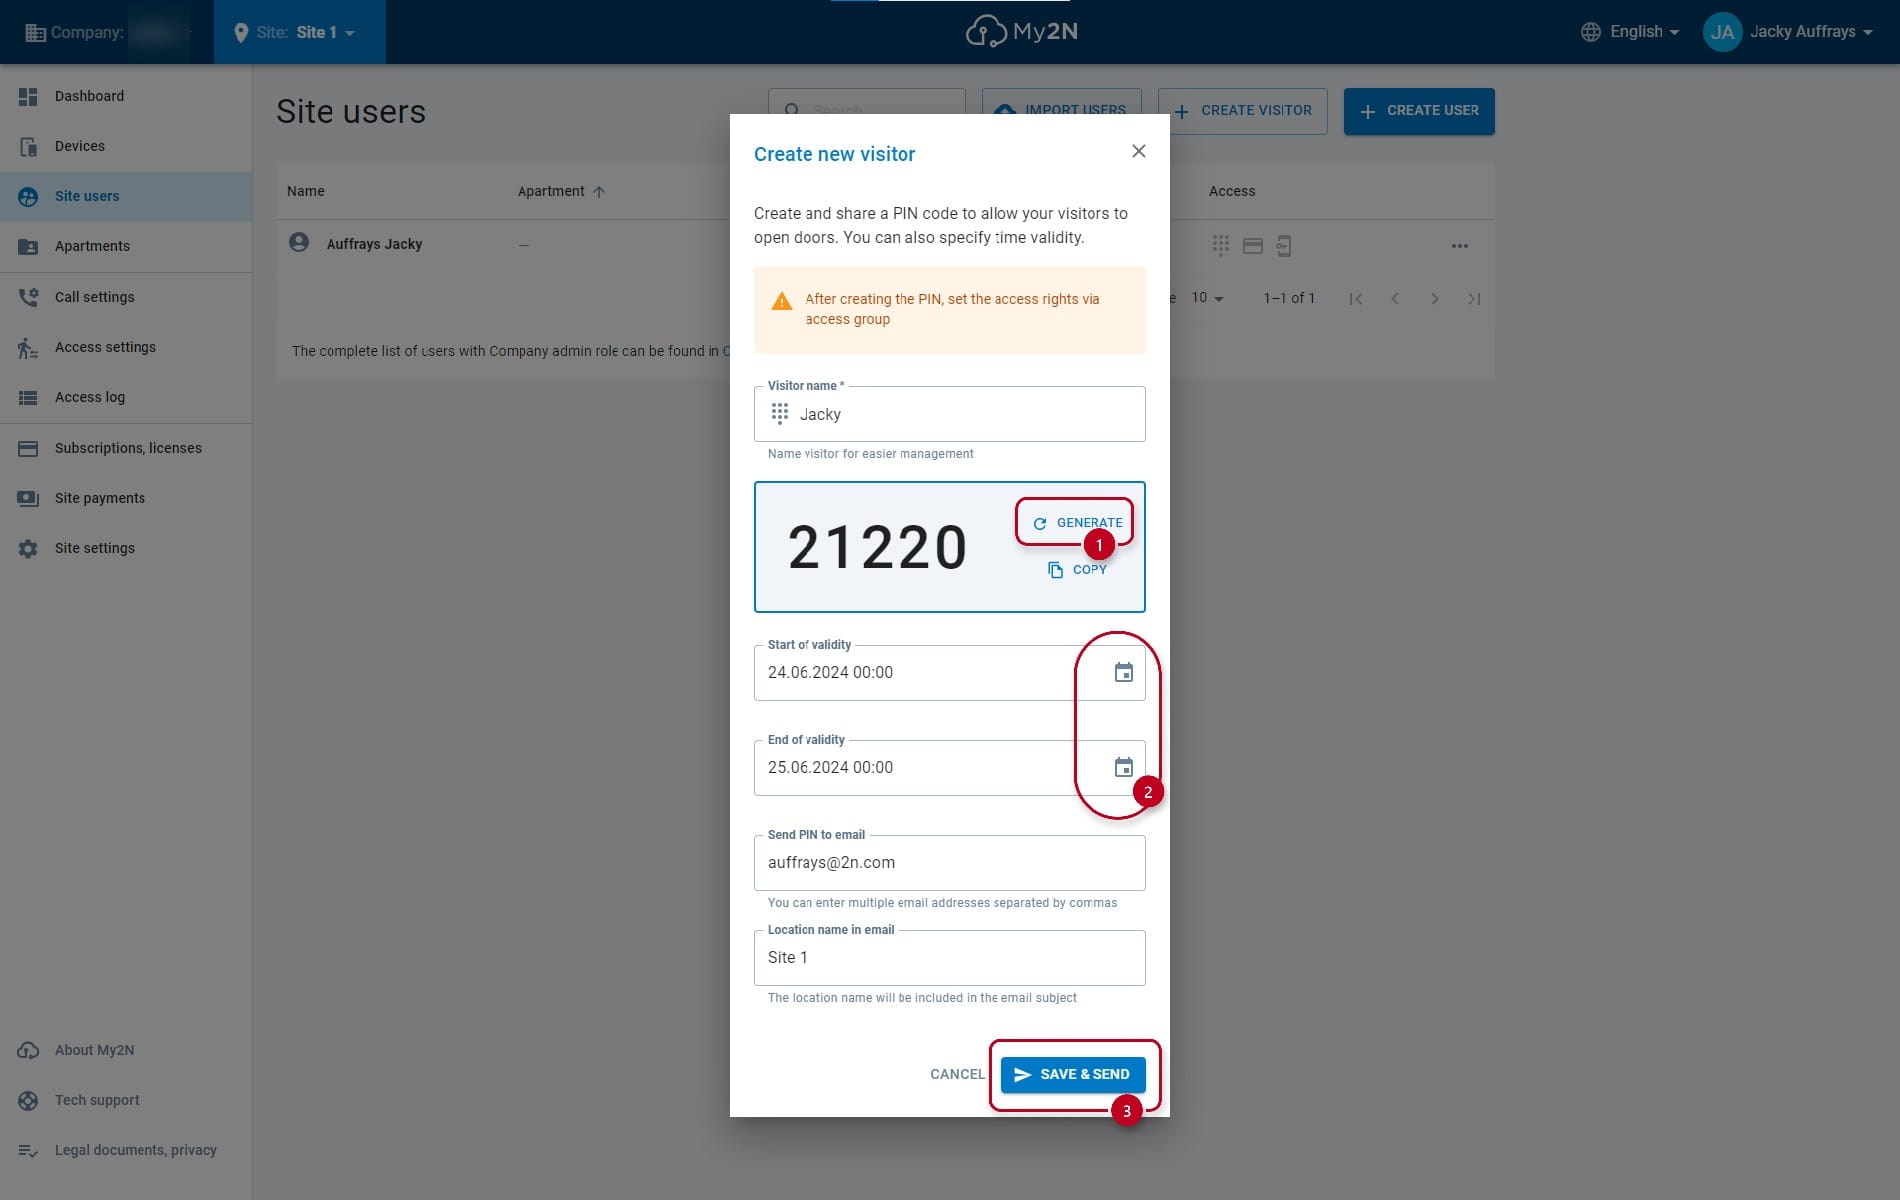
A new window will appear for you to fill out the needed information. The code is automatically generated, if you want a different one, you may generate it again. The date can be chosen when clicking on the calendar buttons. When you have everything, click on the button save and send.
Visitor – My2N apartment
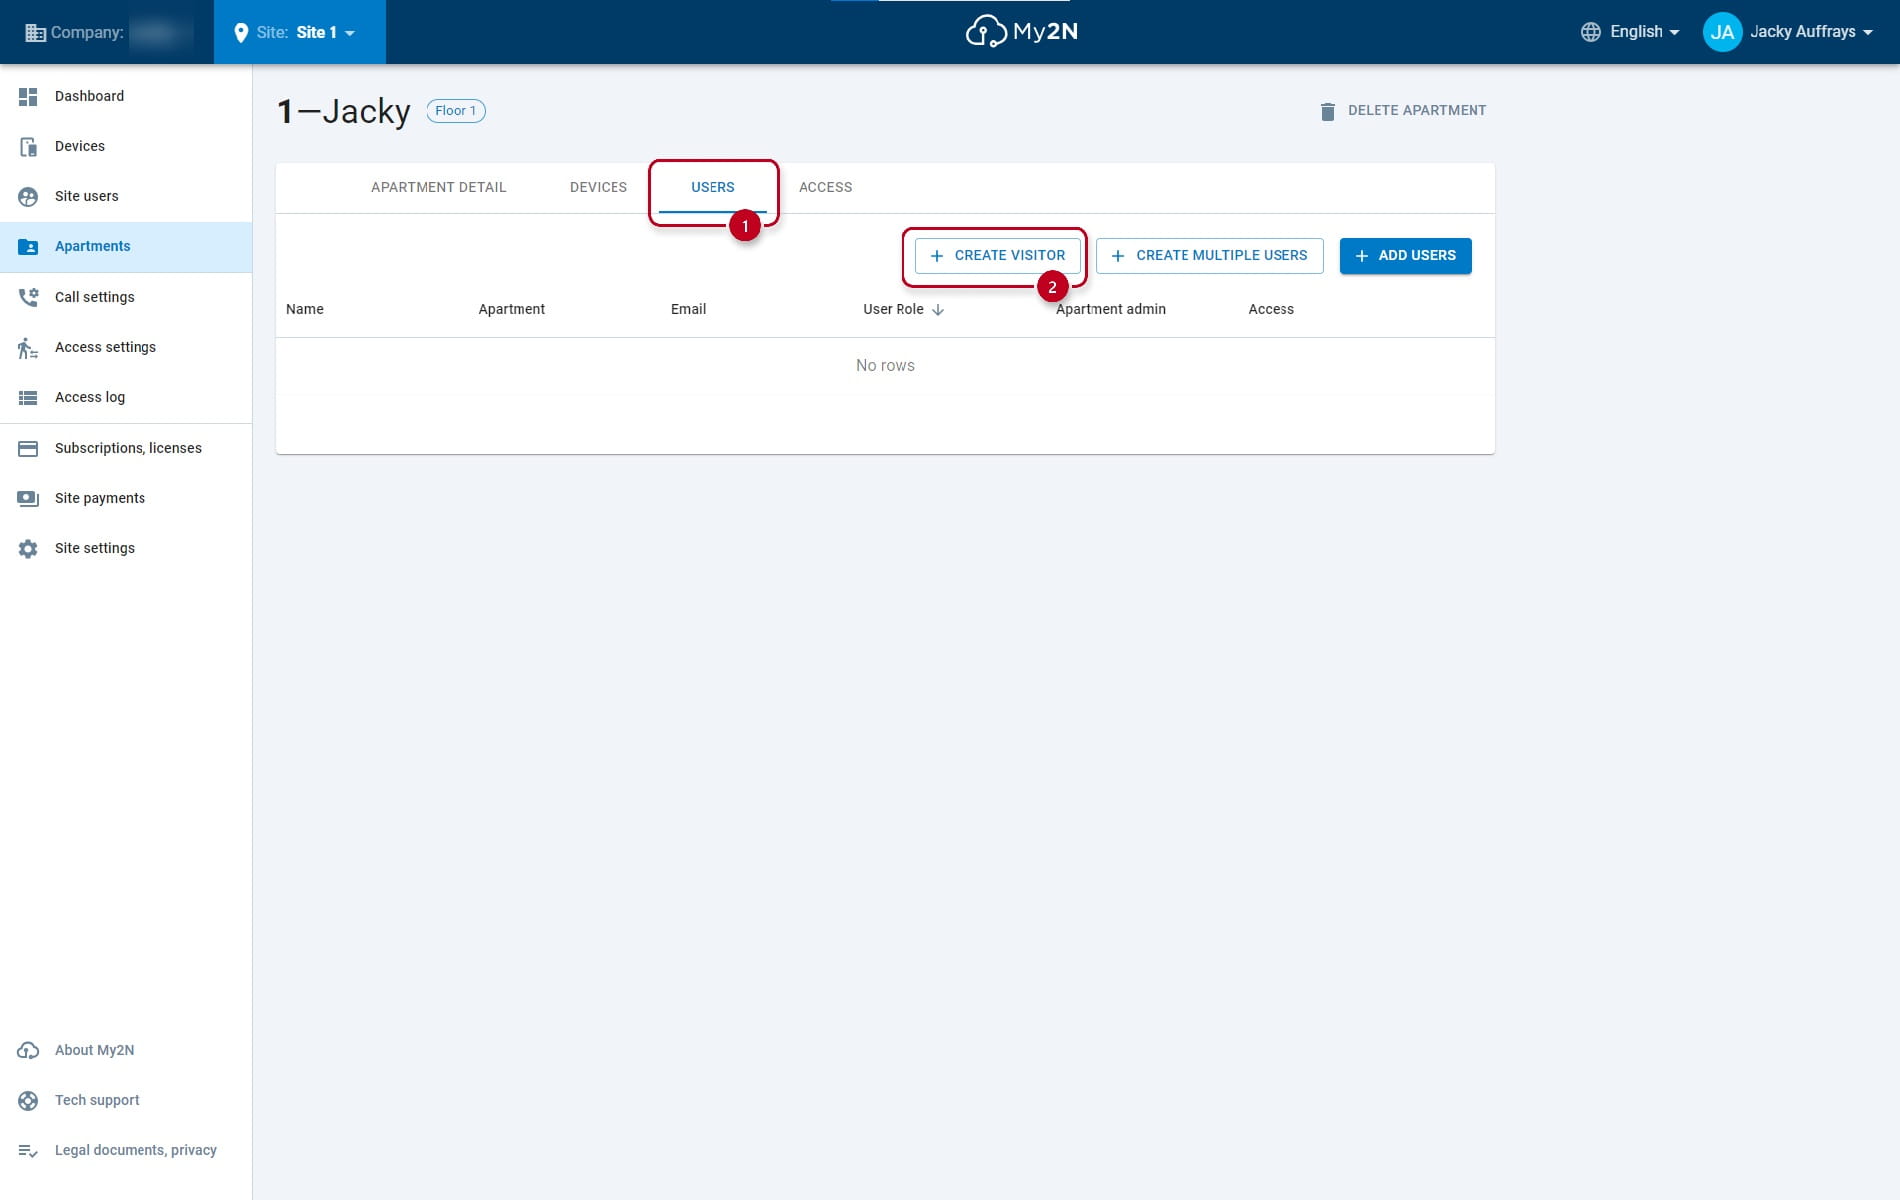
In My2N, choose the site where you want to create the visitor, go to the section apartments and either create a new apartment or click on the existing one.

After you click on the chosen apartment, go to the section users and and click on the button create visitor.
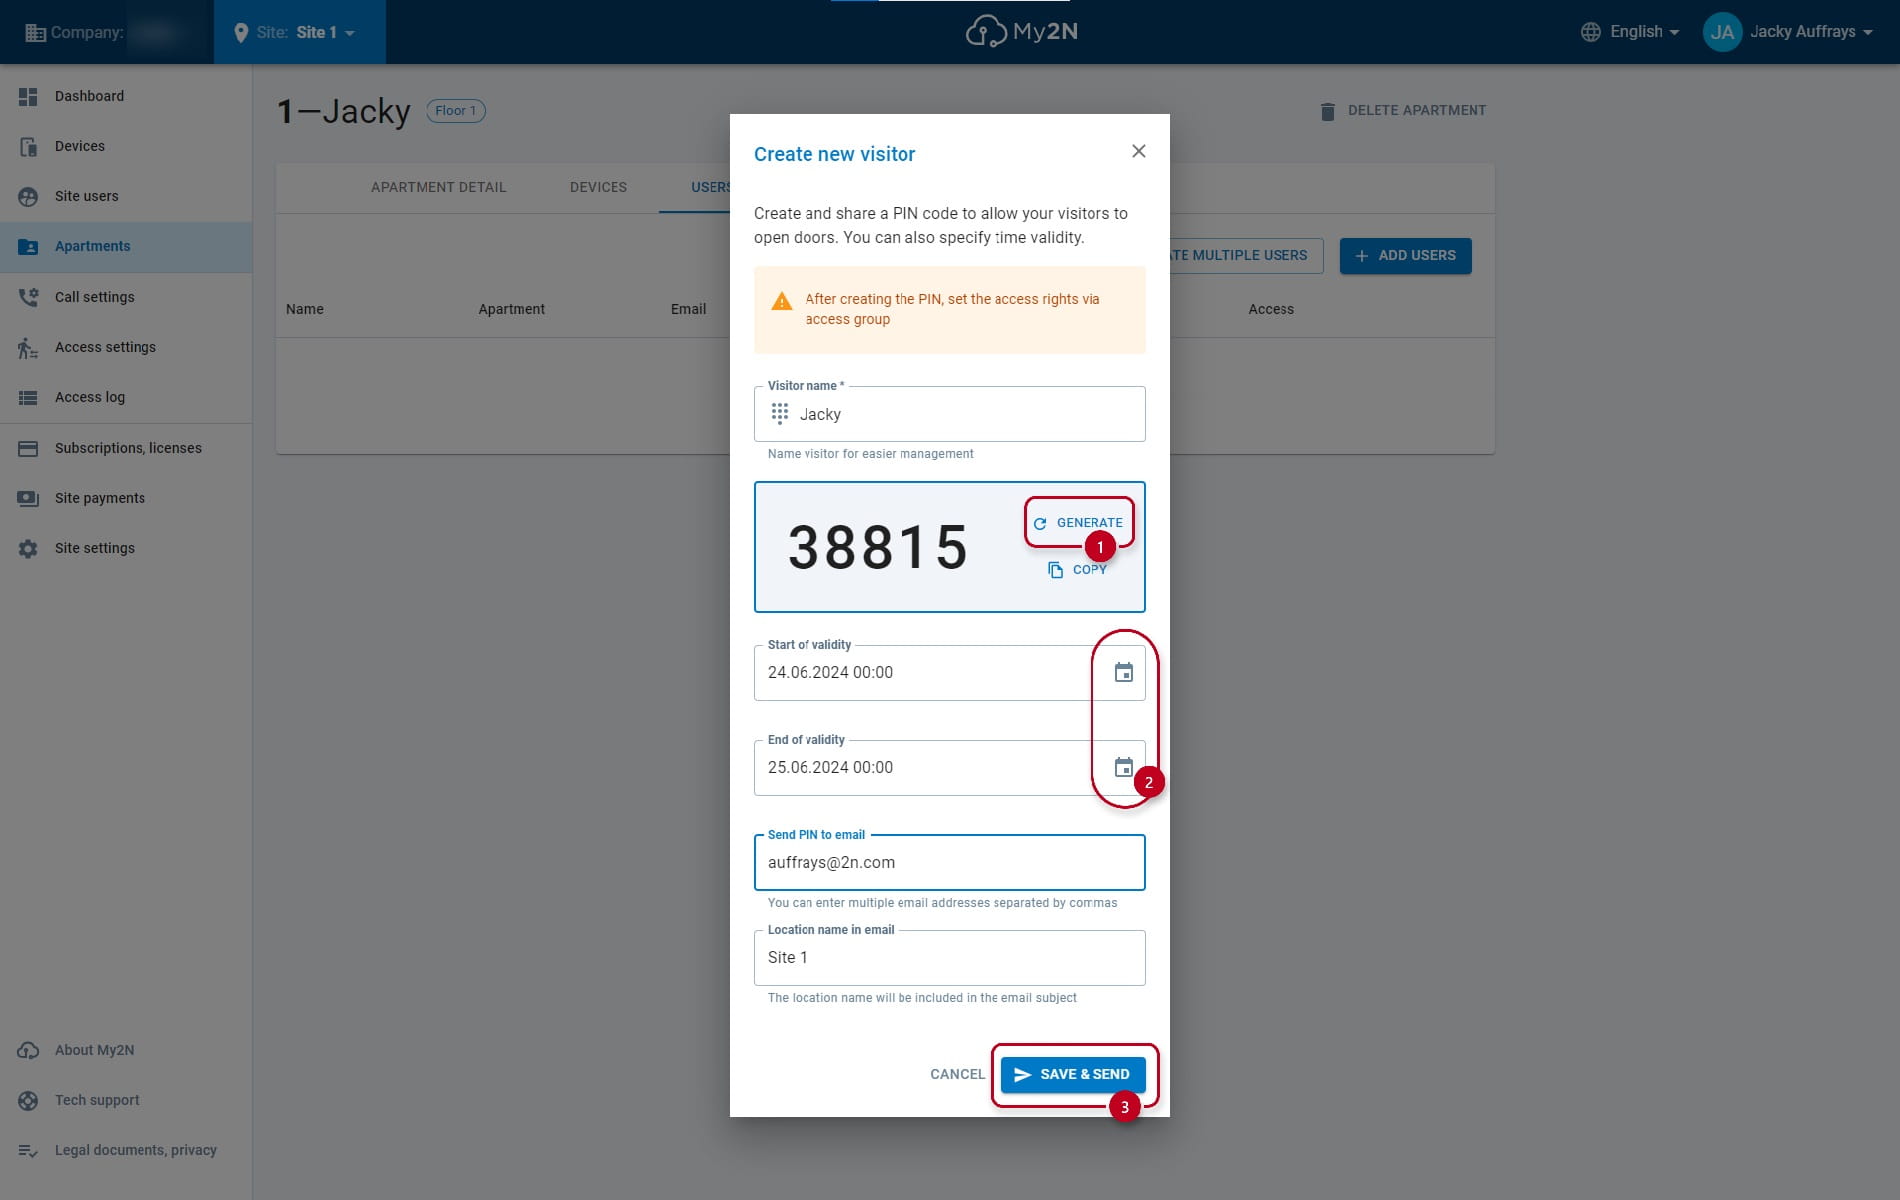
A new window will appear for you to fill out the needed information. The code is automatically generated, if you want a different one, you may generate it again. The date can be chosen when clicking on the calendar buttons. When you have everything, click on the button save and send.
Access Settings
For the visitors to have access, it also needed to configure the access settings in My2N.
On your My2N site, go to the section Access settings and click on the button create access group.

A new window will appear for creating the access group. Name it and click on the create group button.

Now, click on the 3 dots of the created apartment. A new menu will appear with options to add apartment, device, and user to the access group. For the access settings to work, it is mandatory to add device (intercom, access unit) and user. The apartment is optional.

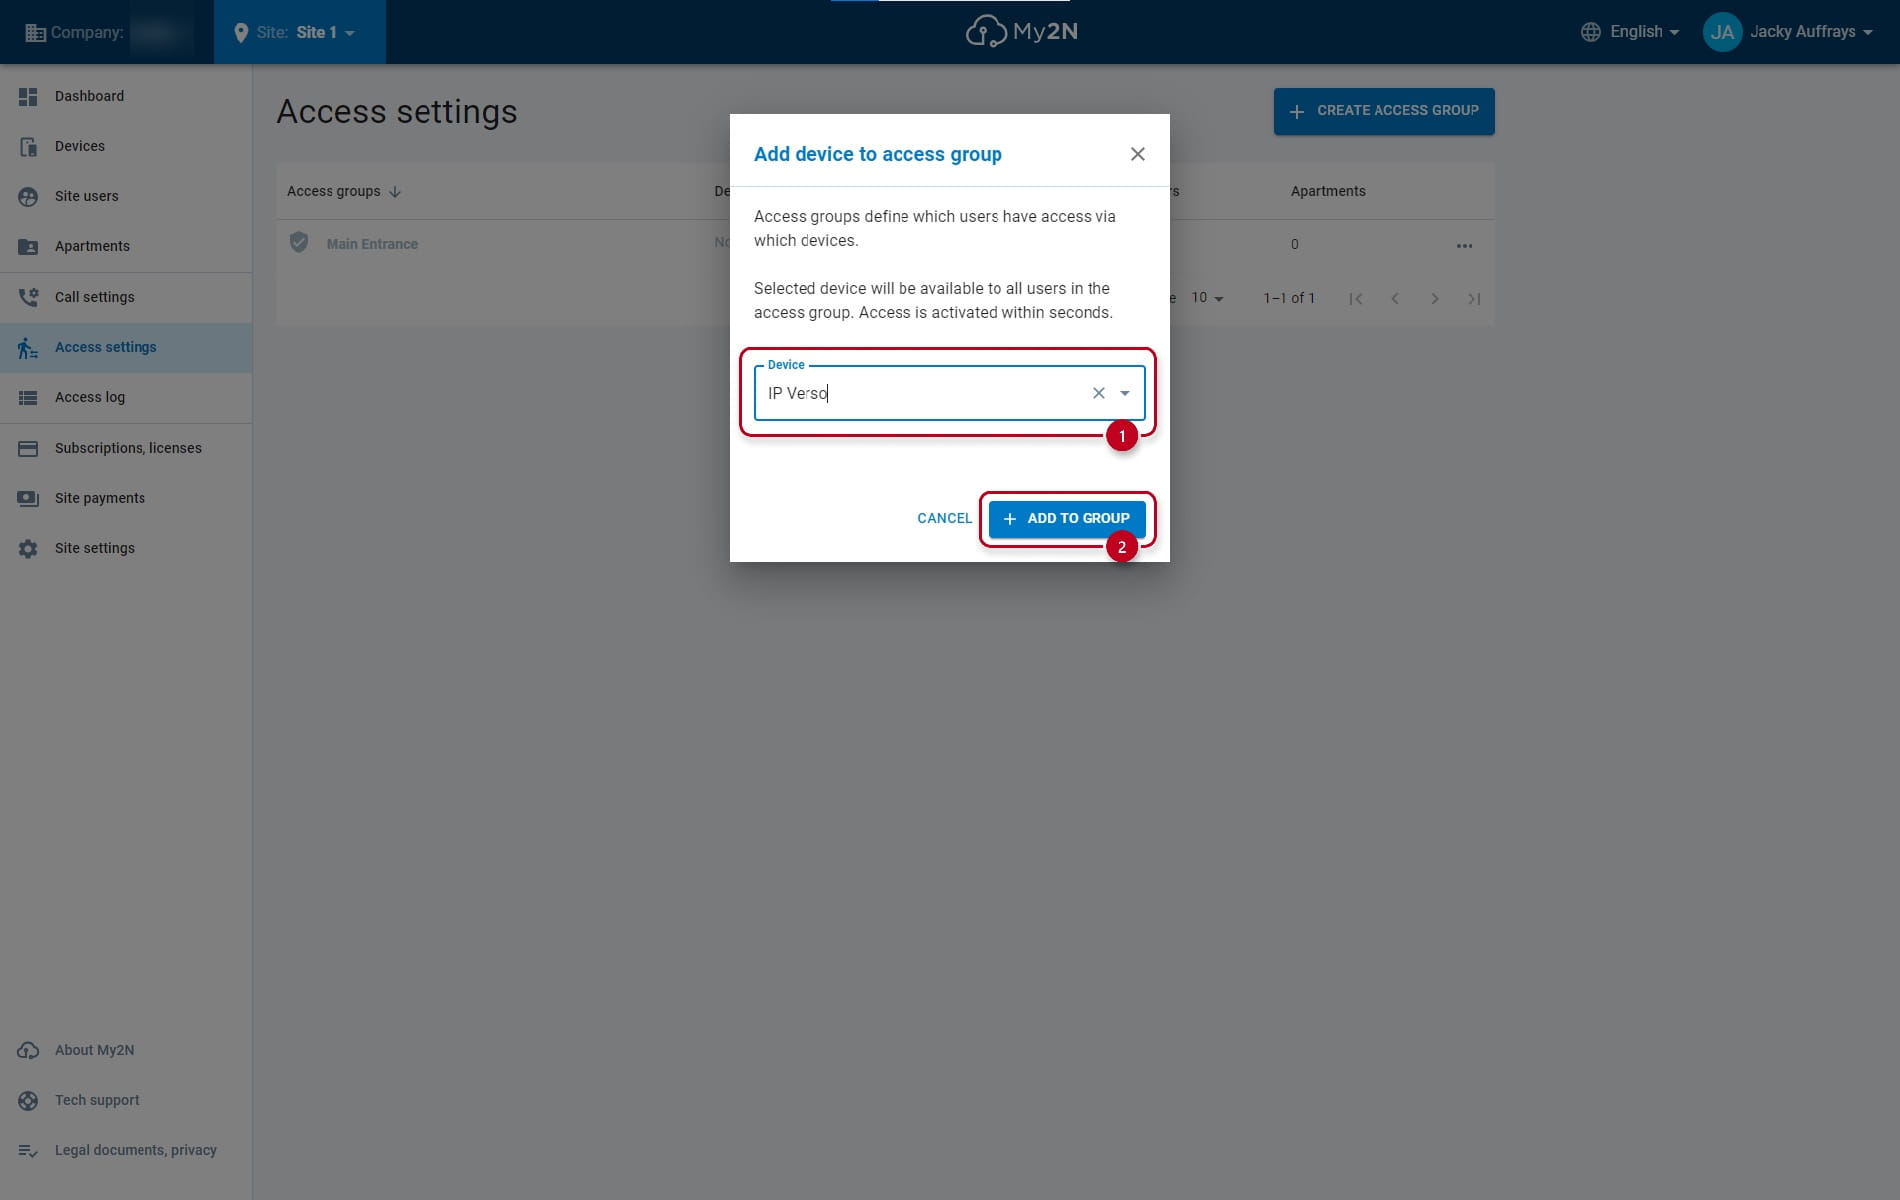
Firstly, the addition of the device. Choose the device and click on the add to group button.
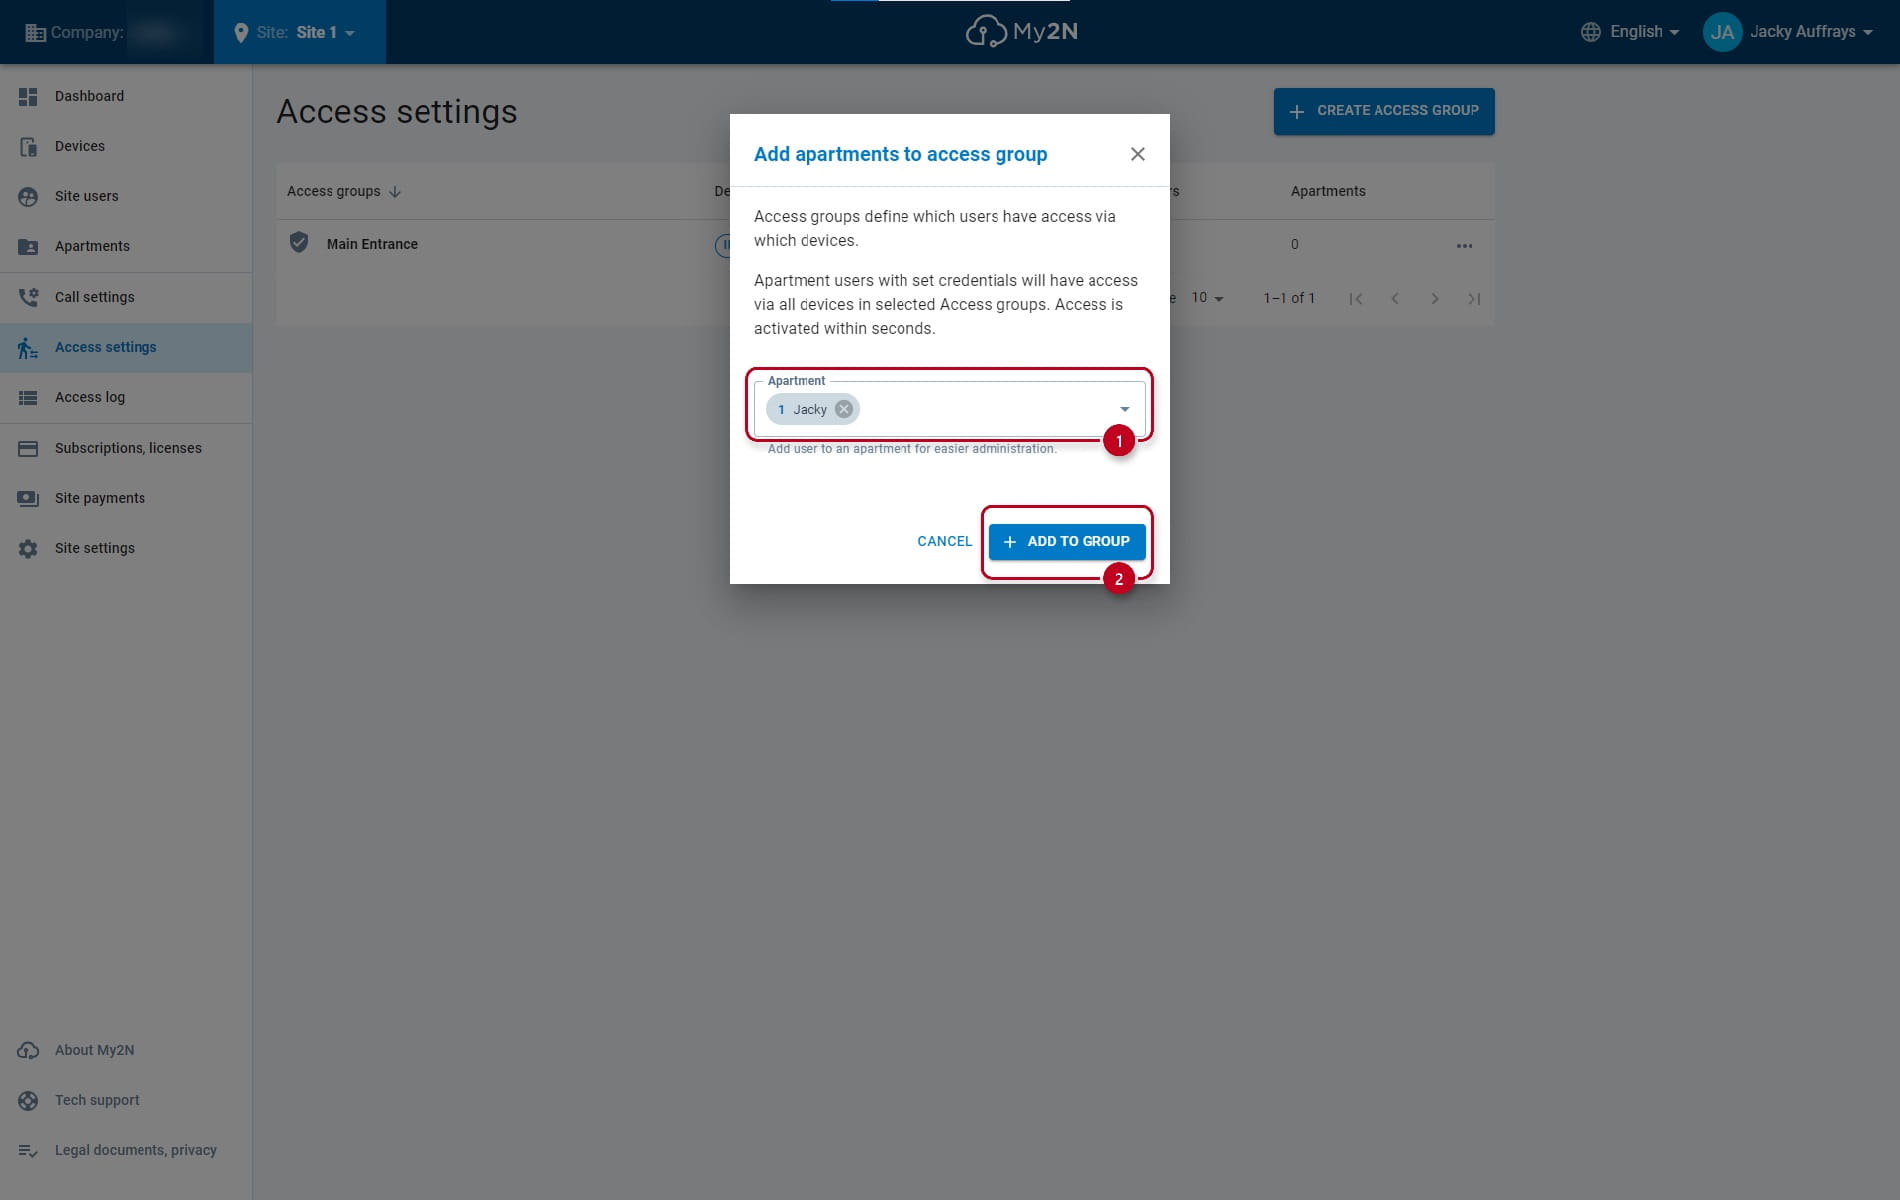
Secondly, the addition of the user. Choose the user (visitor) and click on the add to group button.

Optionally, you may add the apartment as well.
After adding the device, the user, and optionally the apartment to the access group, the visitor will have access via the generated PIN code.
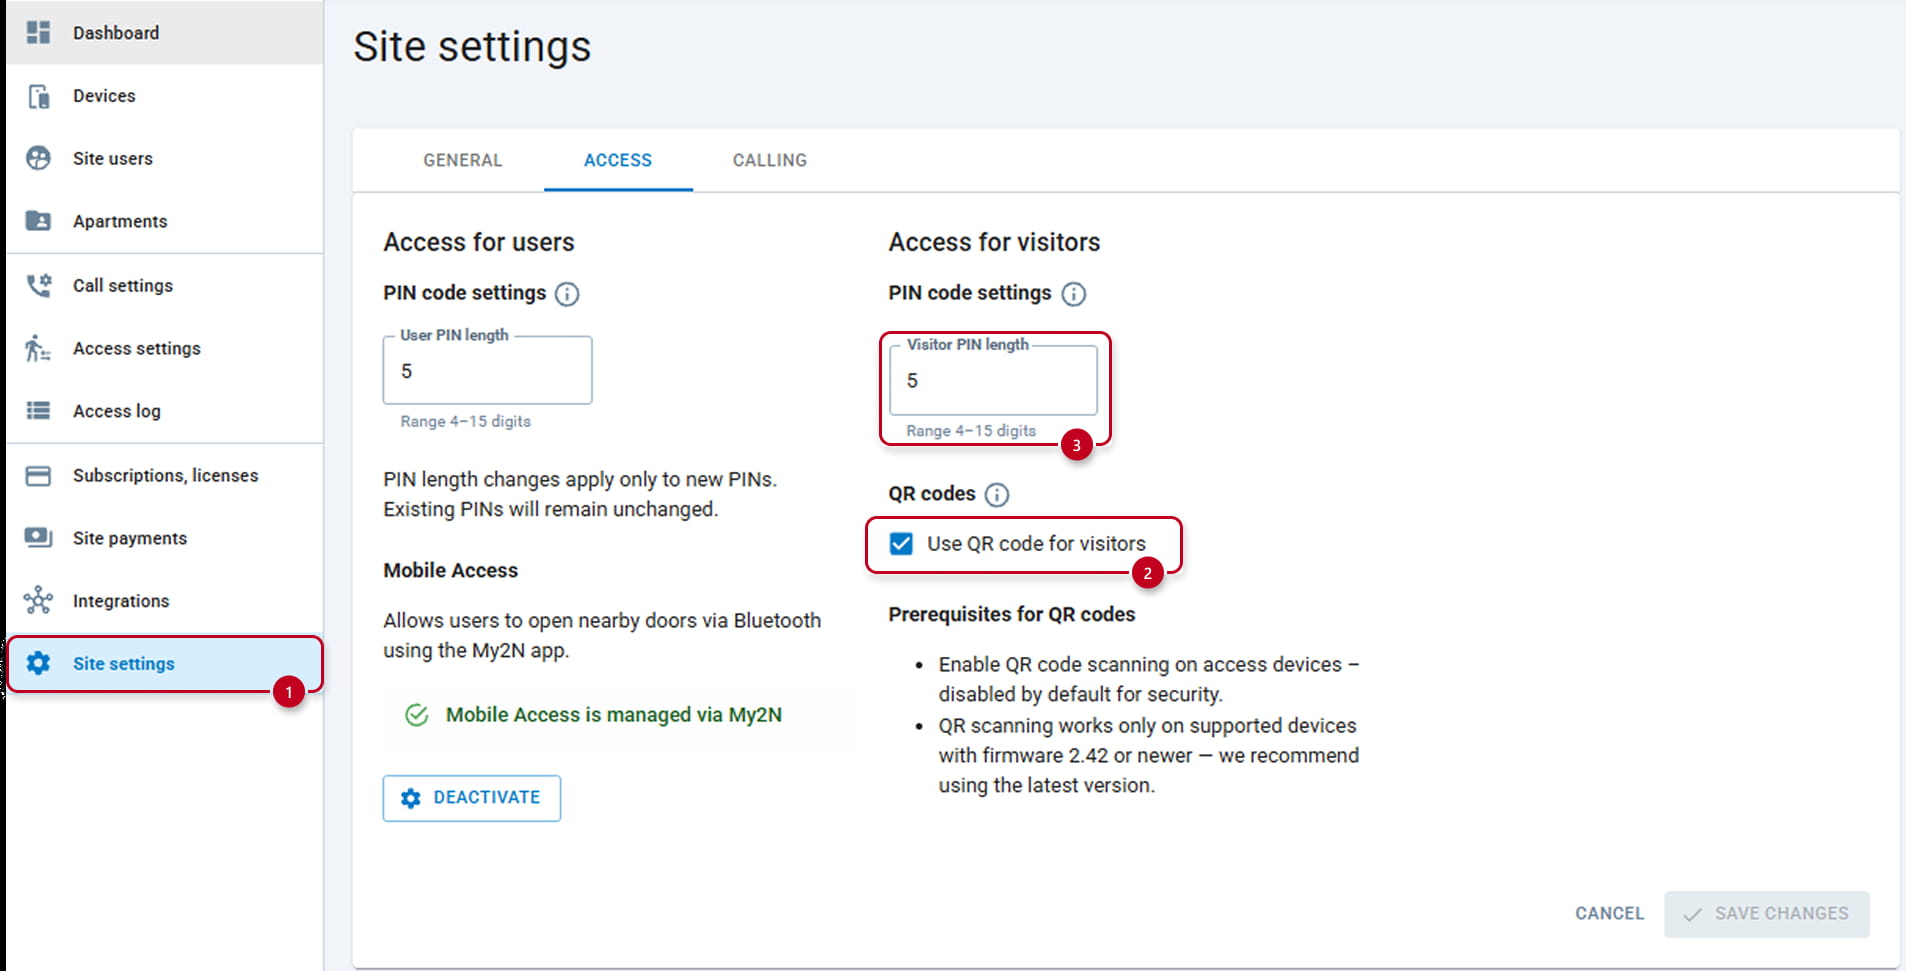
Additionally, the visitor can get a PIN and a QR code. For that make sure that you have checked this option (2) under Site settings section (1). You can change the PIN length from 4 up to 15 digits (3).
In this case, this visitor will receive such an email:

|
Tips for QR Codes: It is possible that you generated QR codes and realized that the PIN is working fine but the Intercom is not able to read the QR code. In this case, make sure of that those settings in the Intercom's web interface are properly set:
Follow the path Access/Access rules/Settings and make sure you have the QR code Reading option (3) properly enabled and mostly QR code reading mode set to Decimal (4)
Follow the path Services/Access Control/Entry Rules/QR Code reading and make sure you have the QR code Reading option (5) properly enabled and mostly QR code reading mode set to Decimal (6)
|


Visitors Management in My2N App
It's possible to create and manage visitors from the My2N App. For a detailed guide on how to do that, please follow this FAQ page.