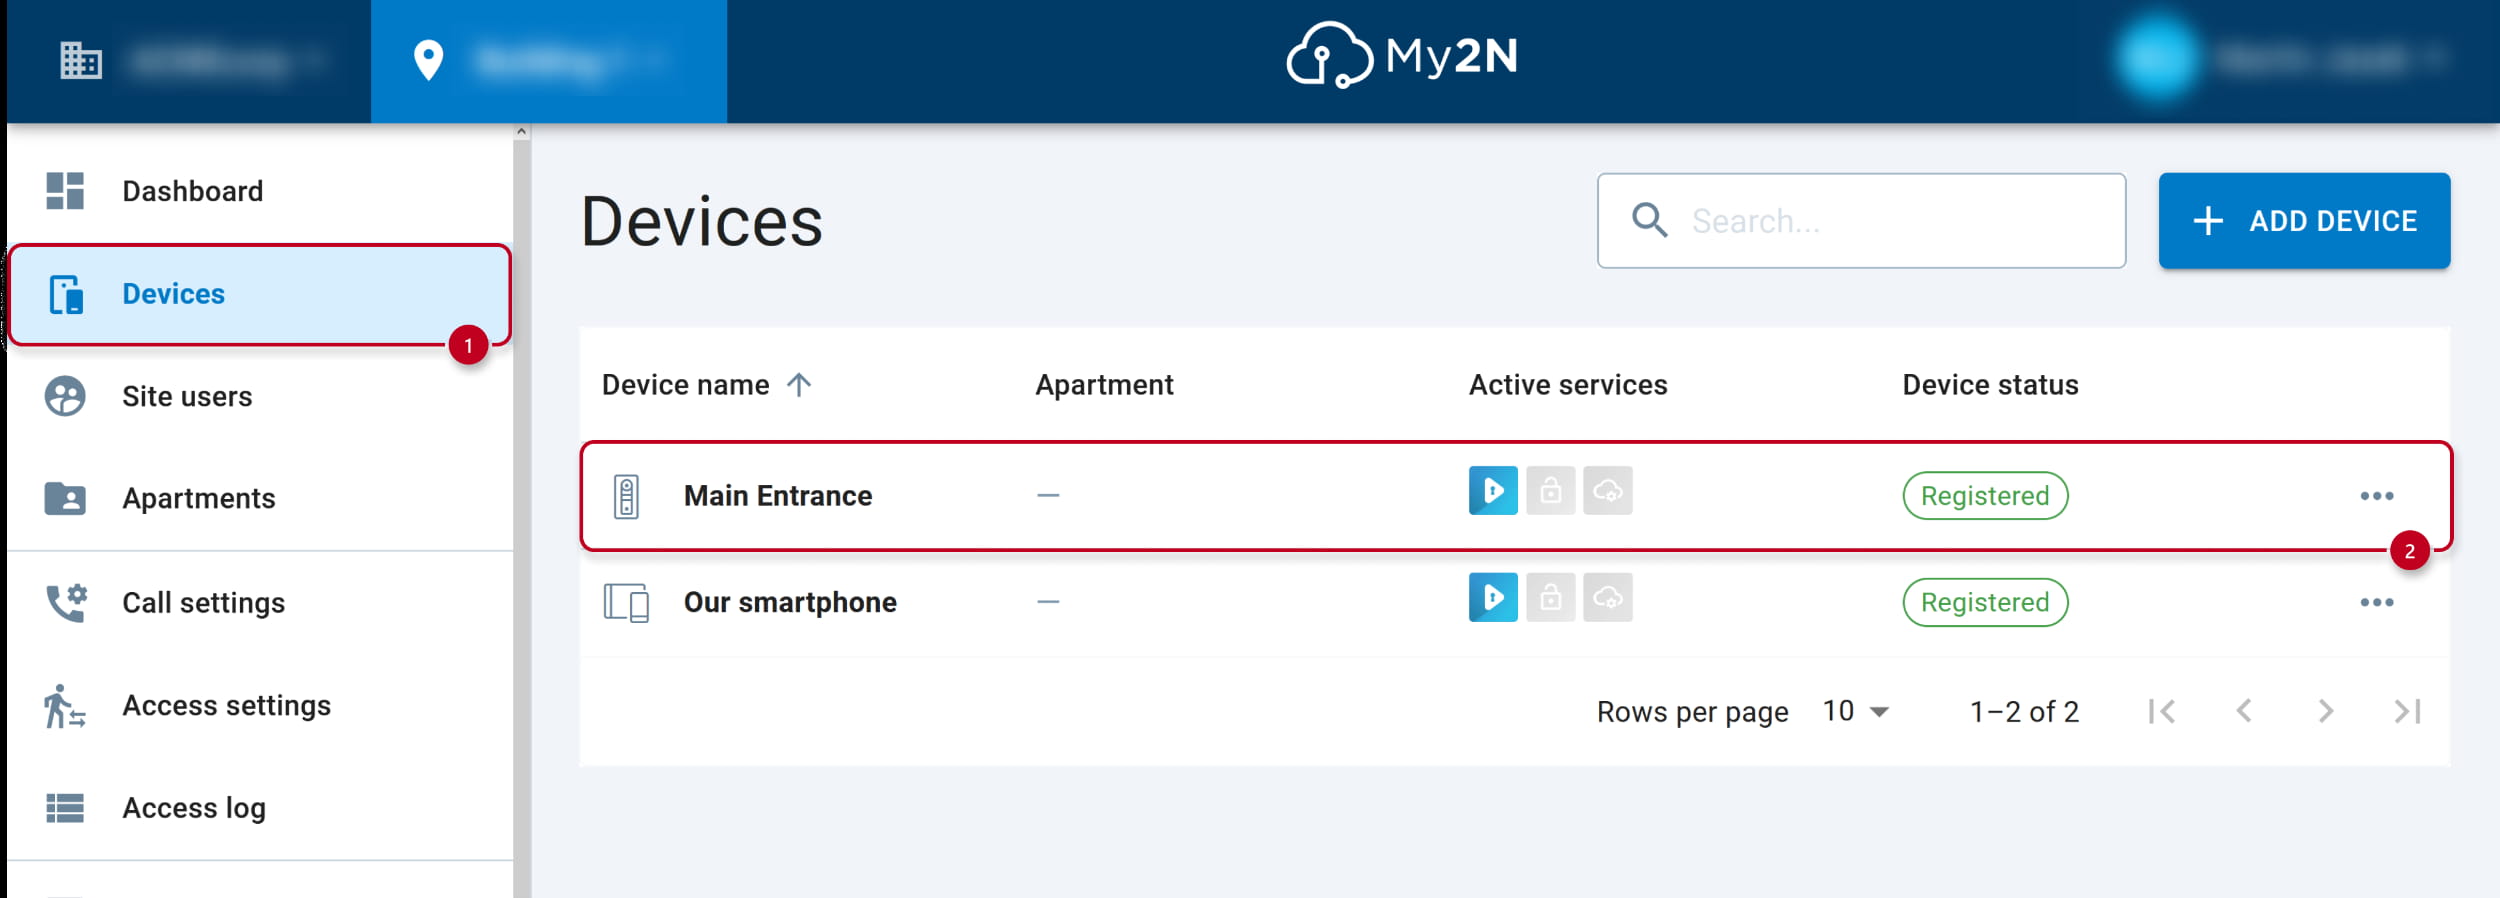
In My2N account, add Axis intercom
- Login to your My2N account, go to section Devices and add a new device.
Choose the AXIS Intercom option.

- Fill in its MAC address and device name.

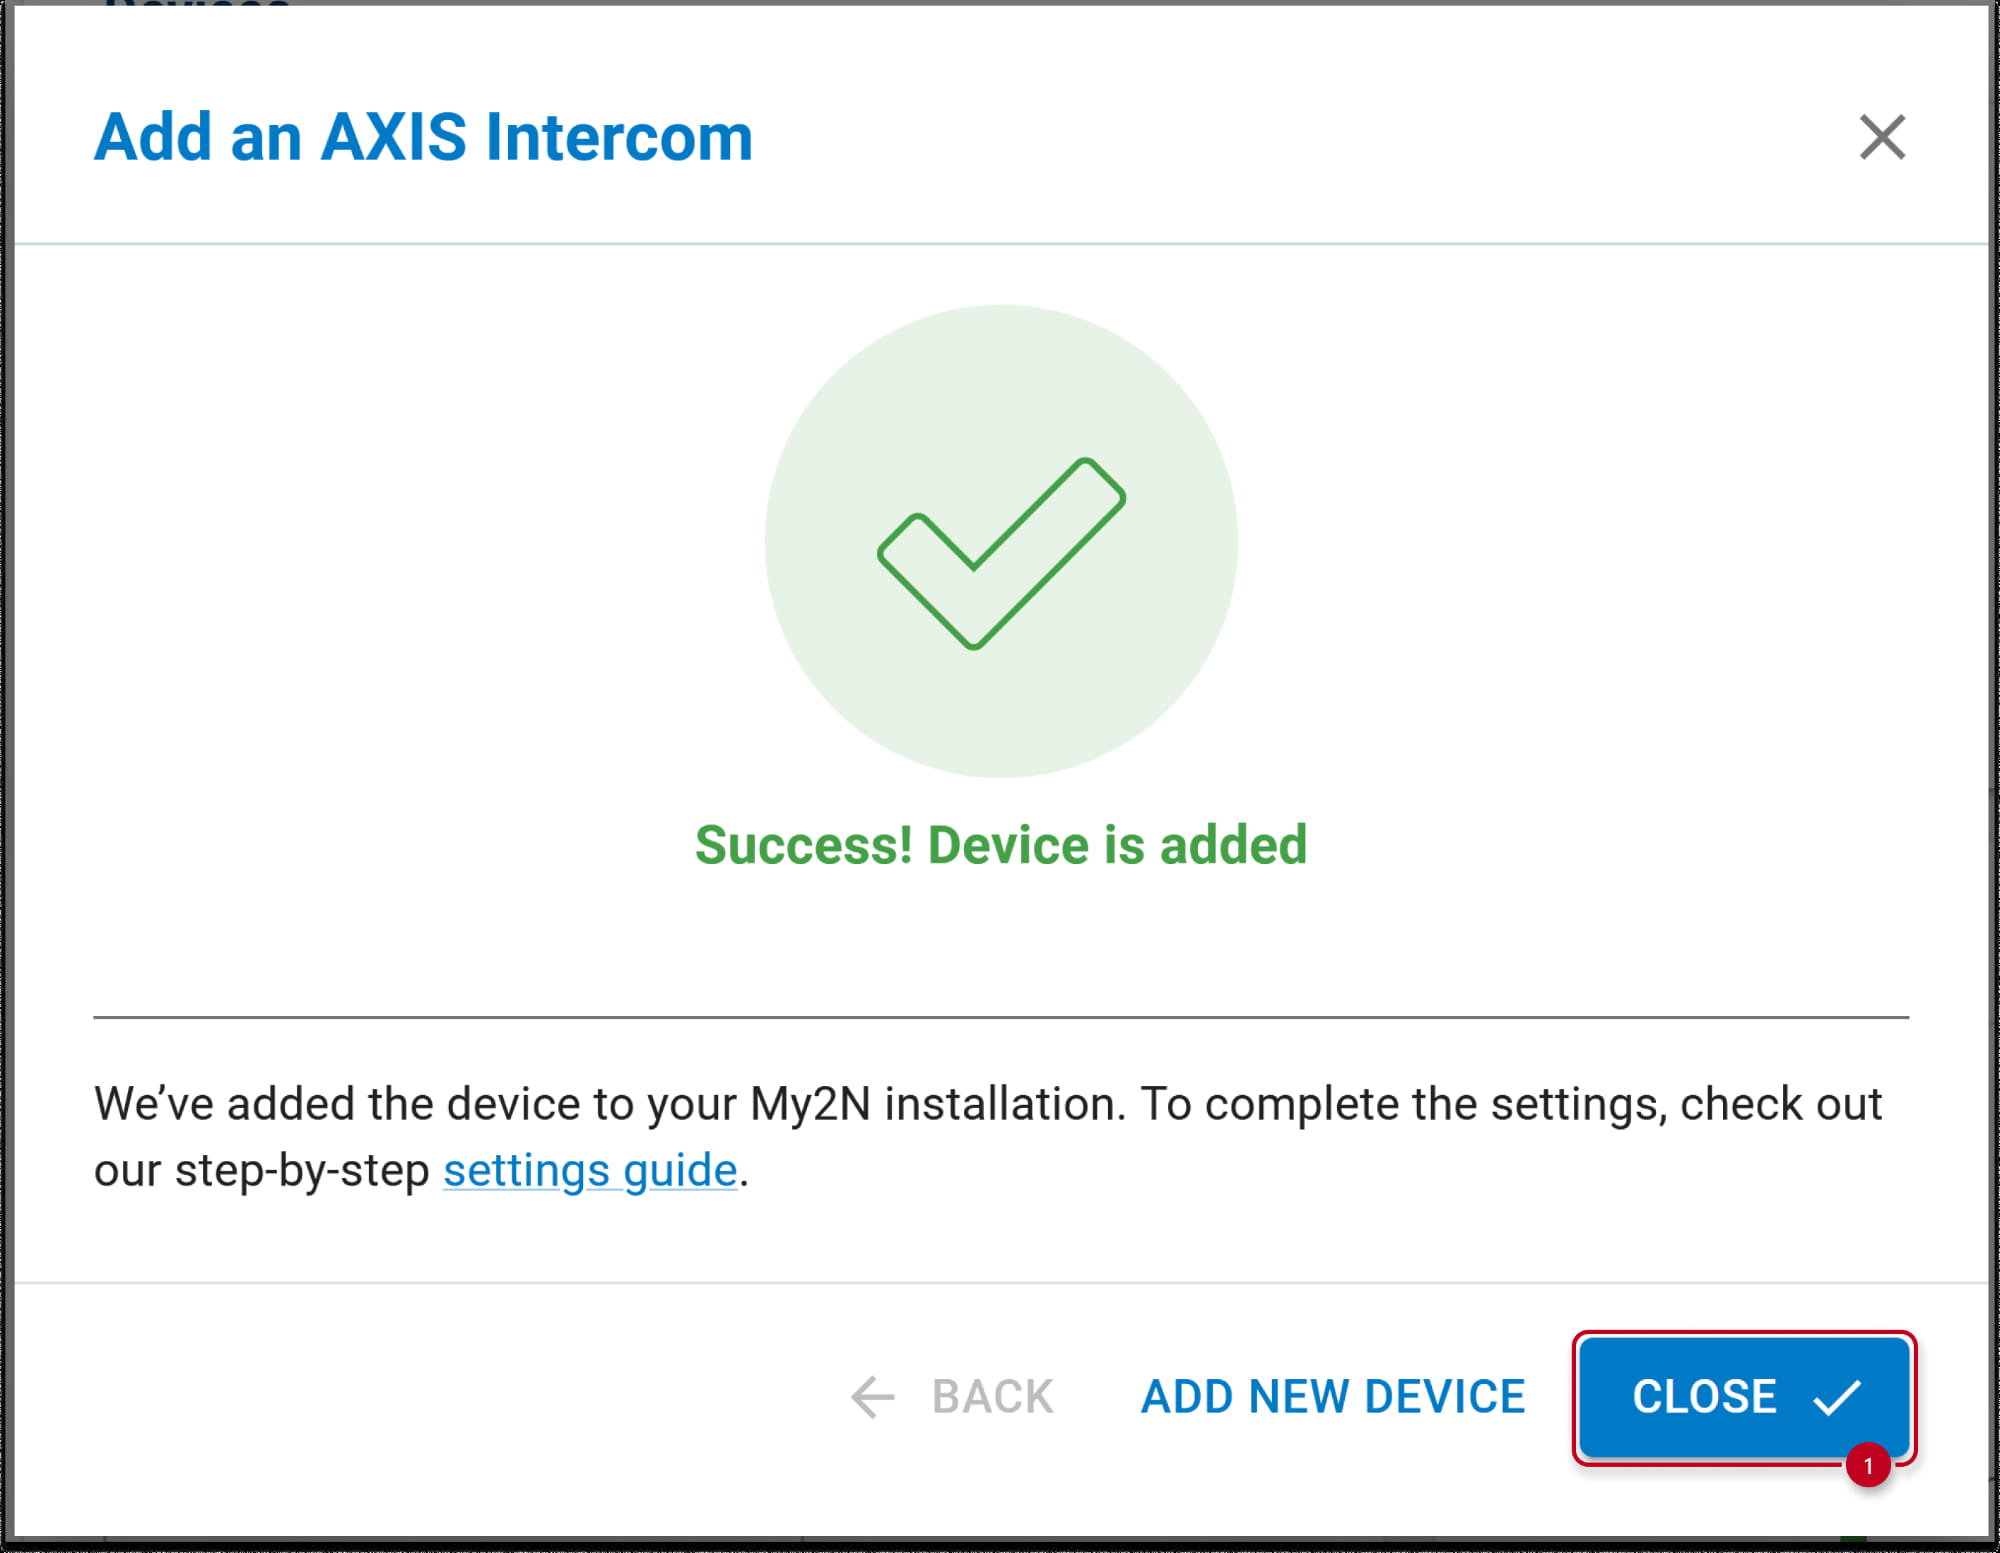
- Your Axis intercom has been successfully added to My2N.
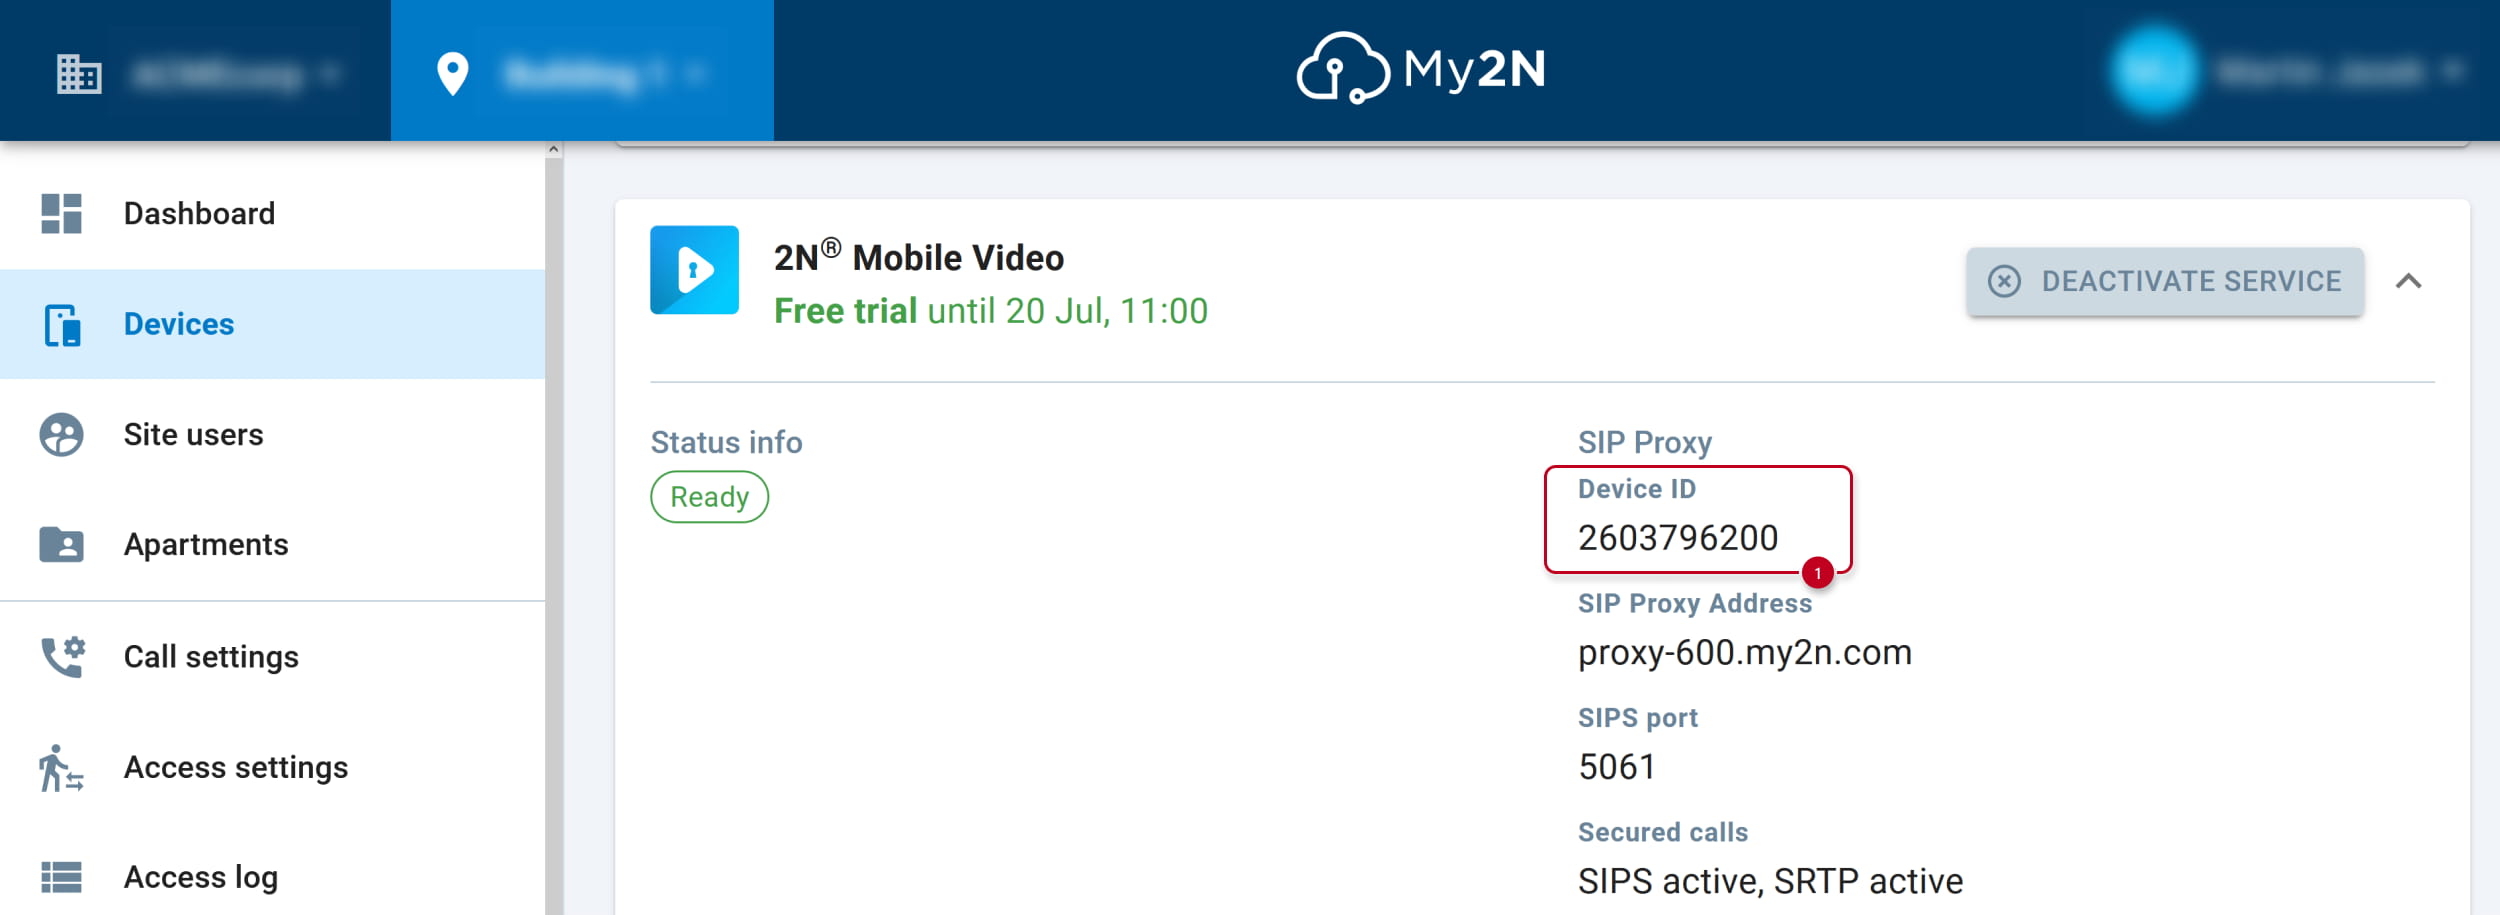
In My2N account, find SIP Proxy details for Axis intercom
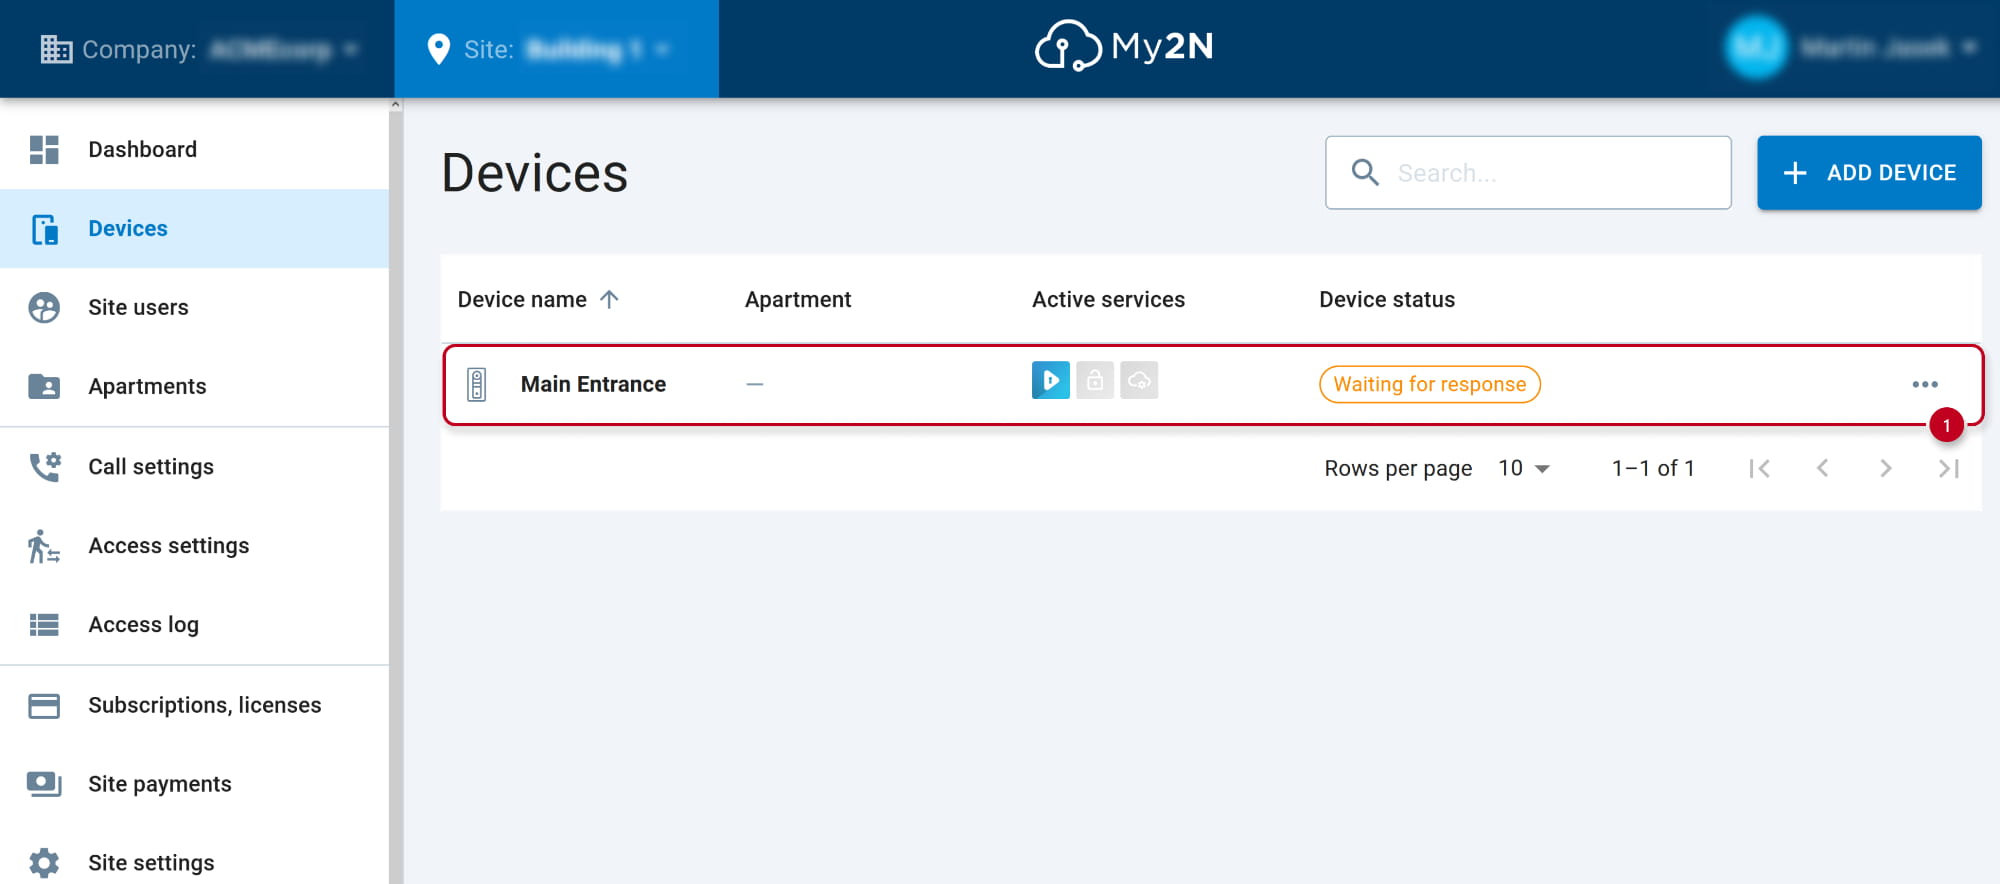
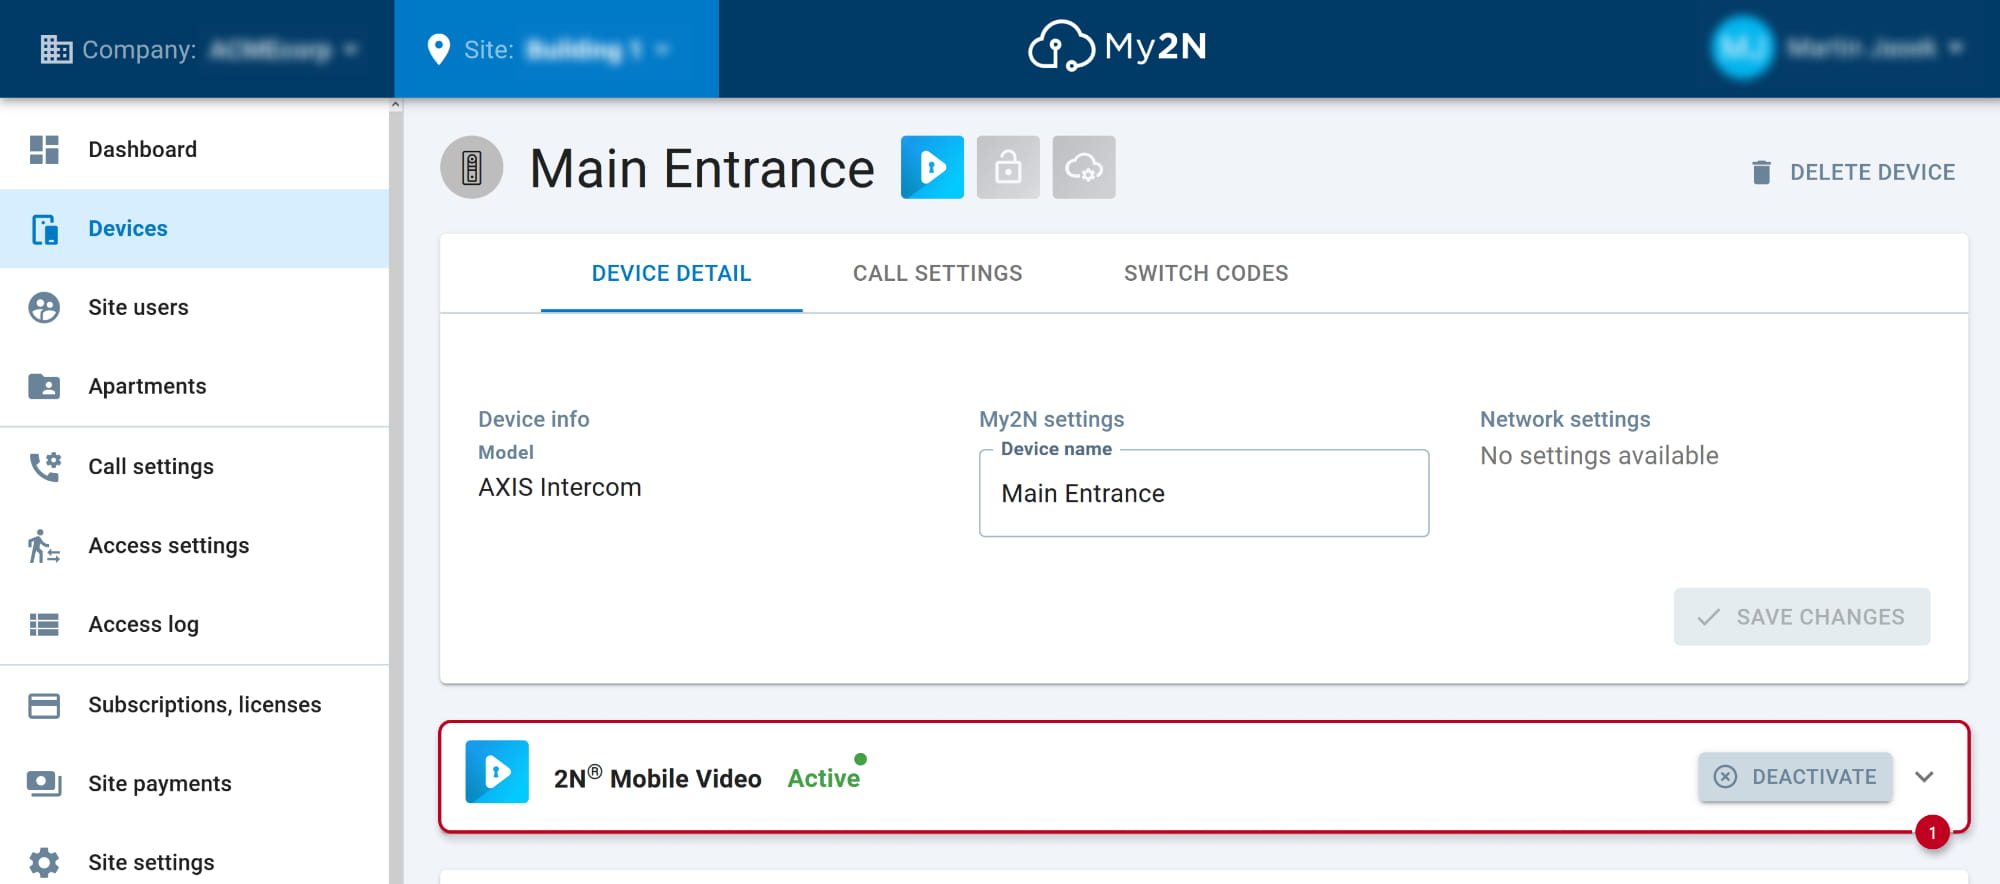
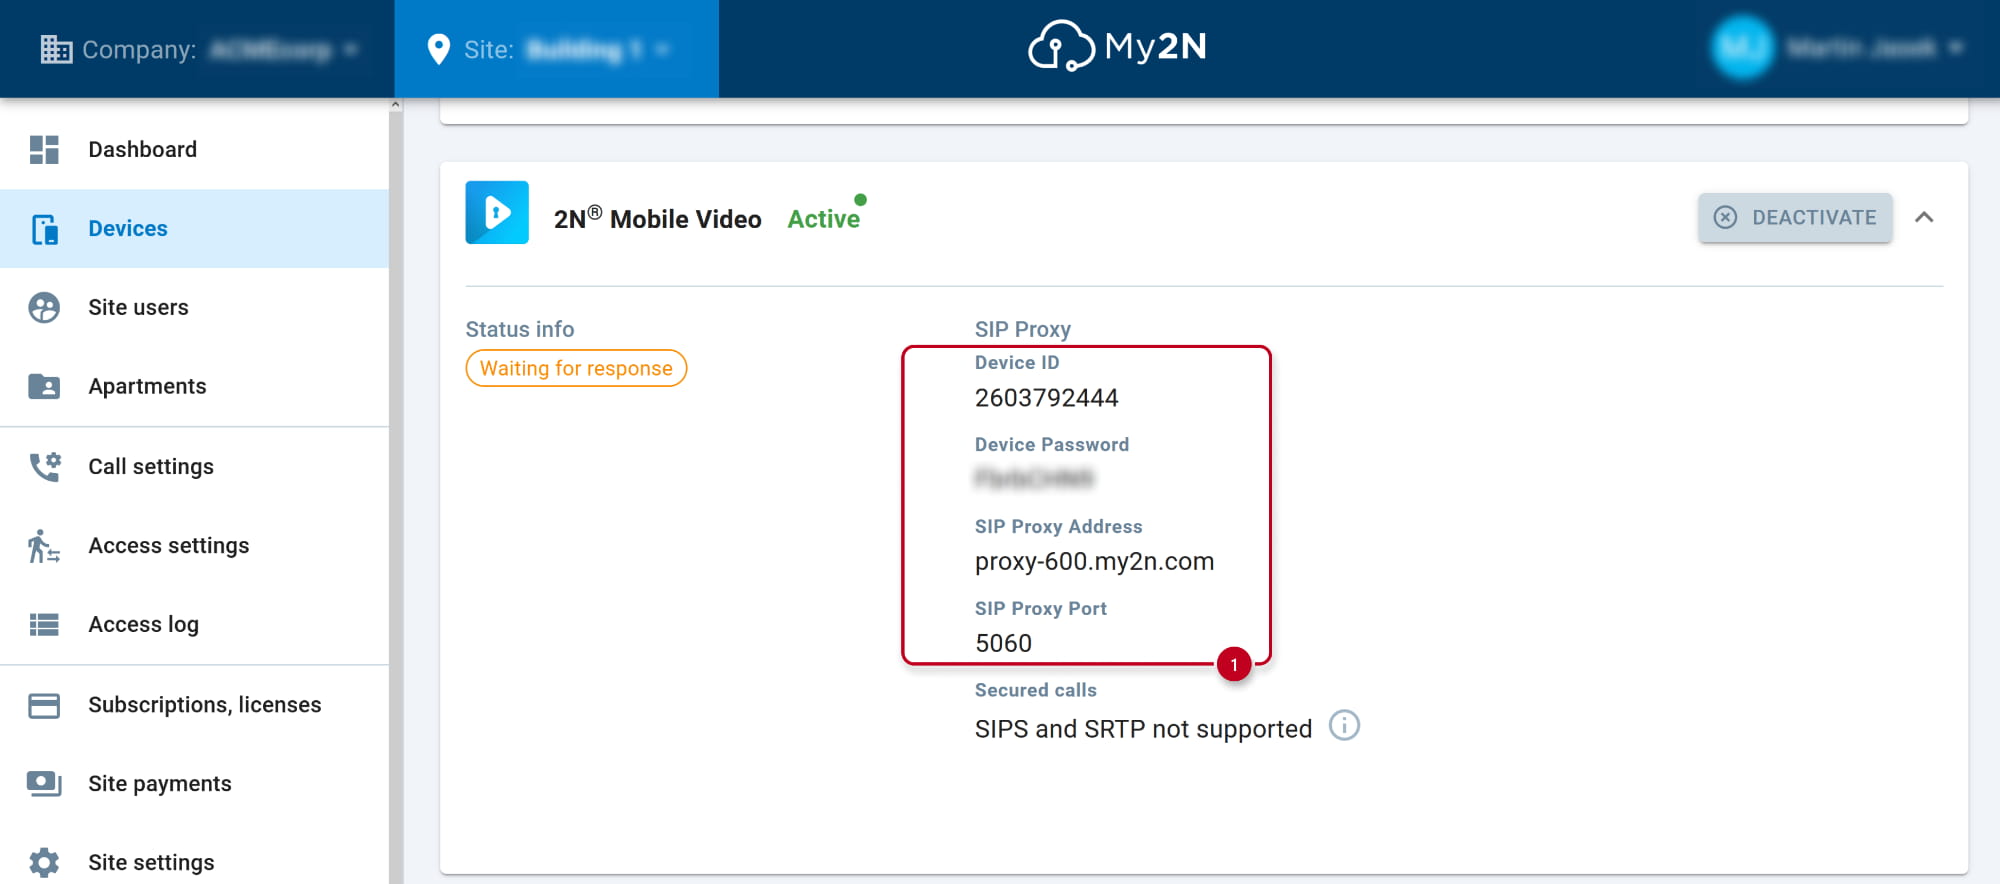
- The new device has status "Waiting for response" at this moment.
Click on the added device to find the SIP Proxy registration details.
- Open section 2N Mobile Video.
- Use this SIP Proxy details for configuration of Axis intercom SIP account.
In Axis intercom web interface, enable SIP and configure SIP account
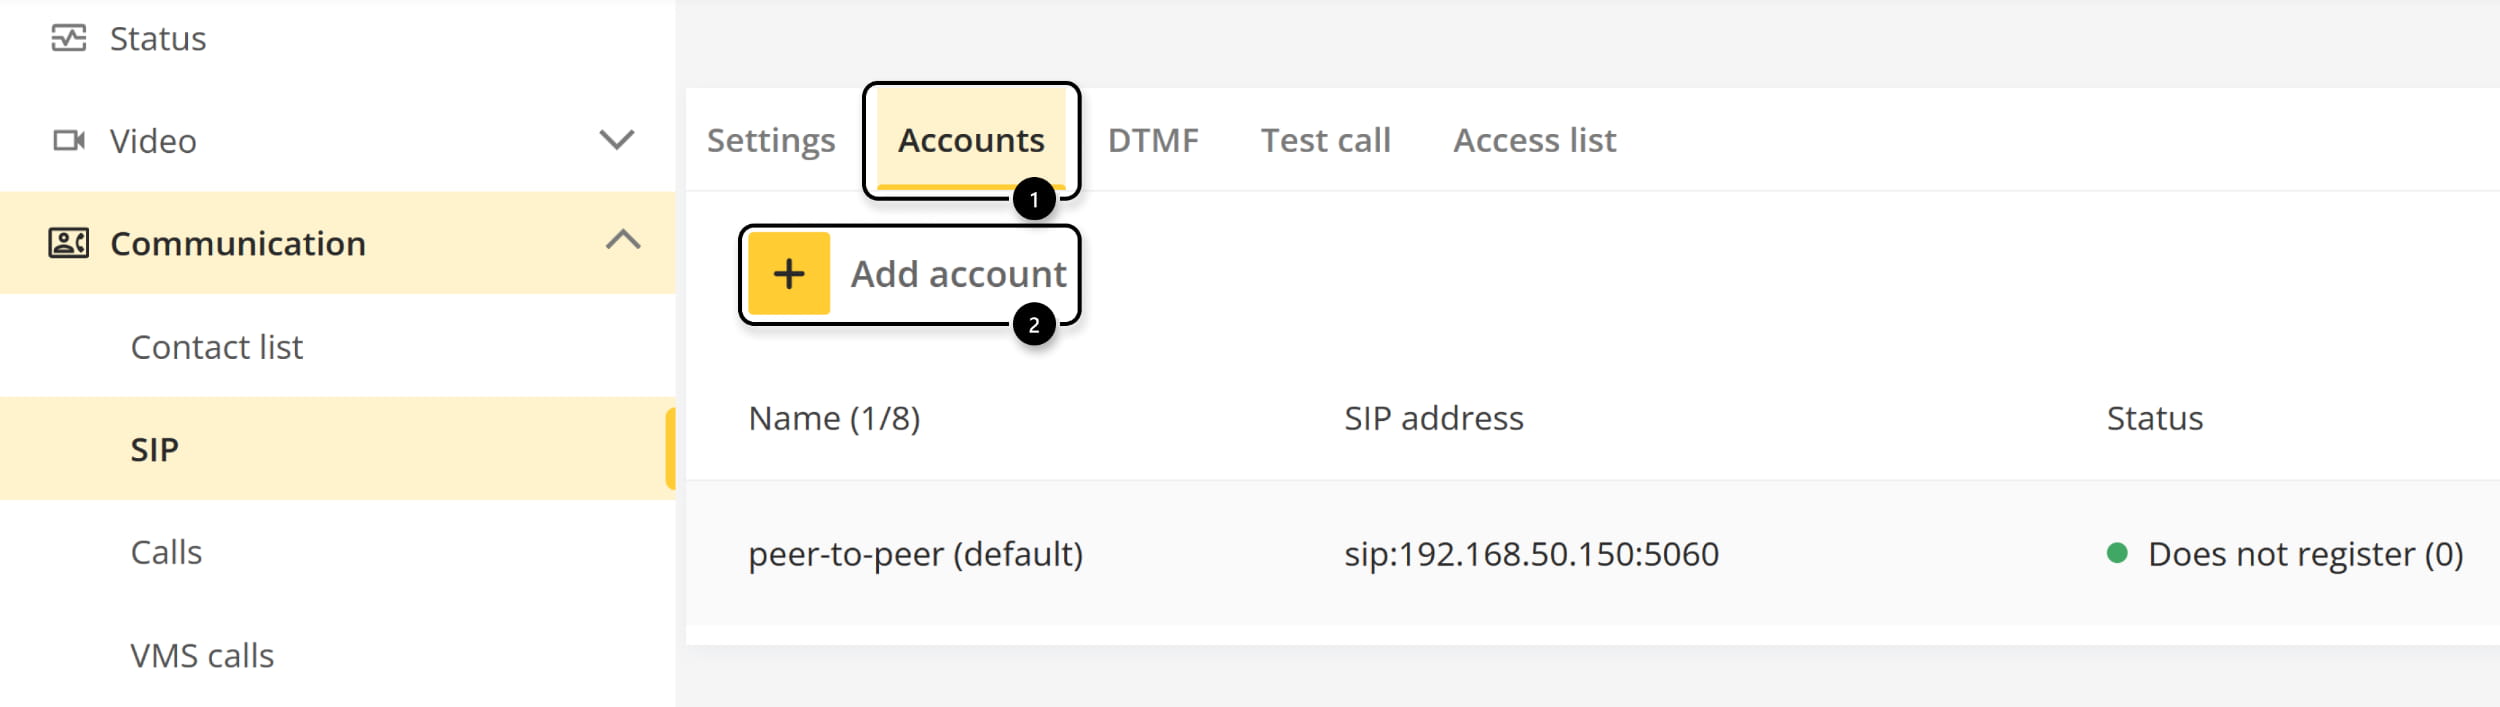
- In section Communication - SIP, enable SIP and allow incoming SIP calls.
It is also advised to change the end calls after value to prevent long connection to the device.

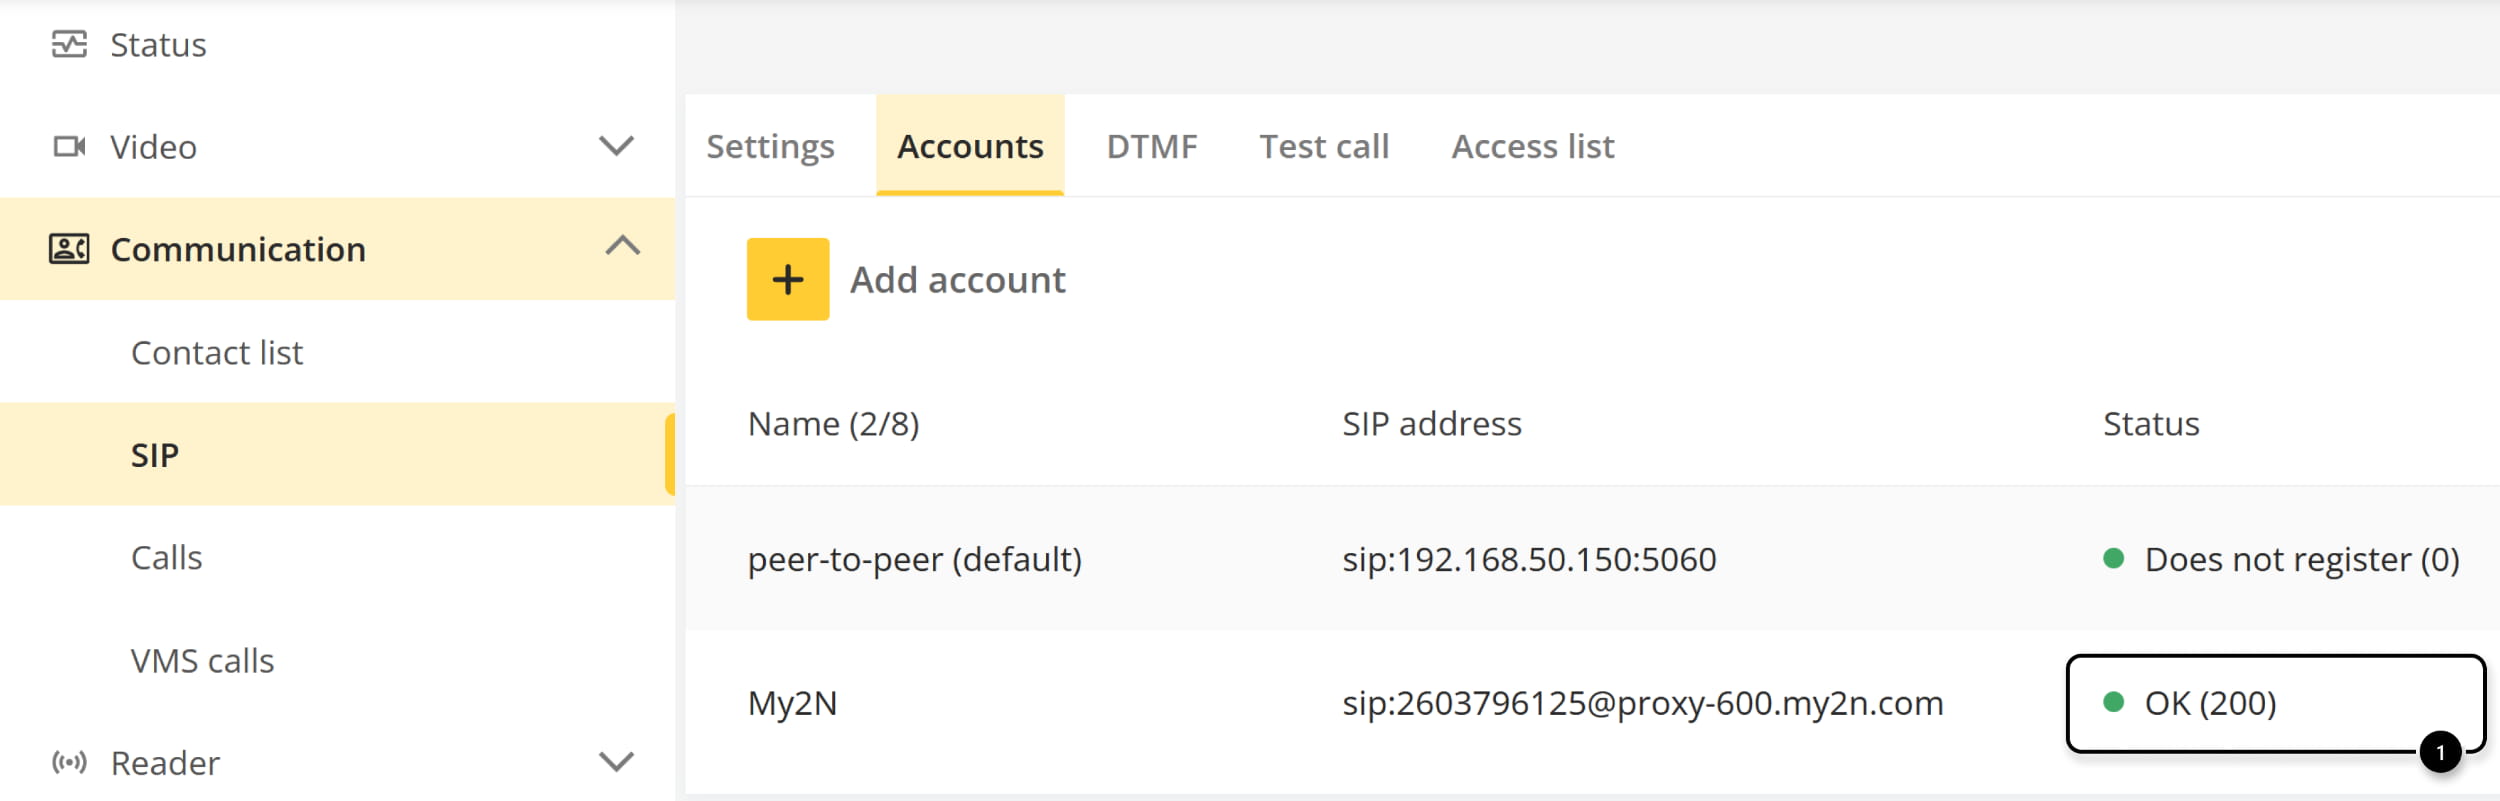
- Go to Accounts and add a new account.
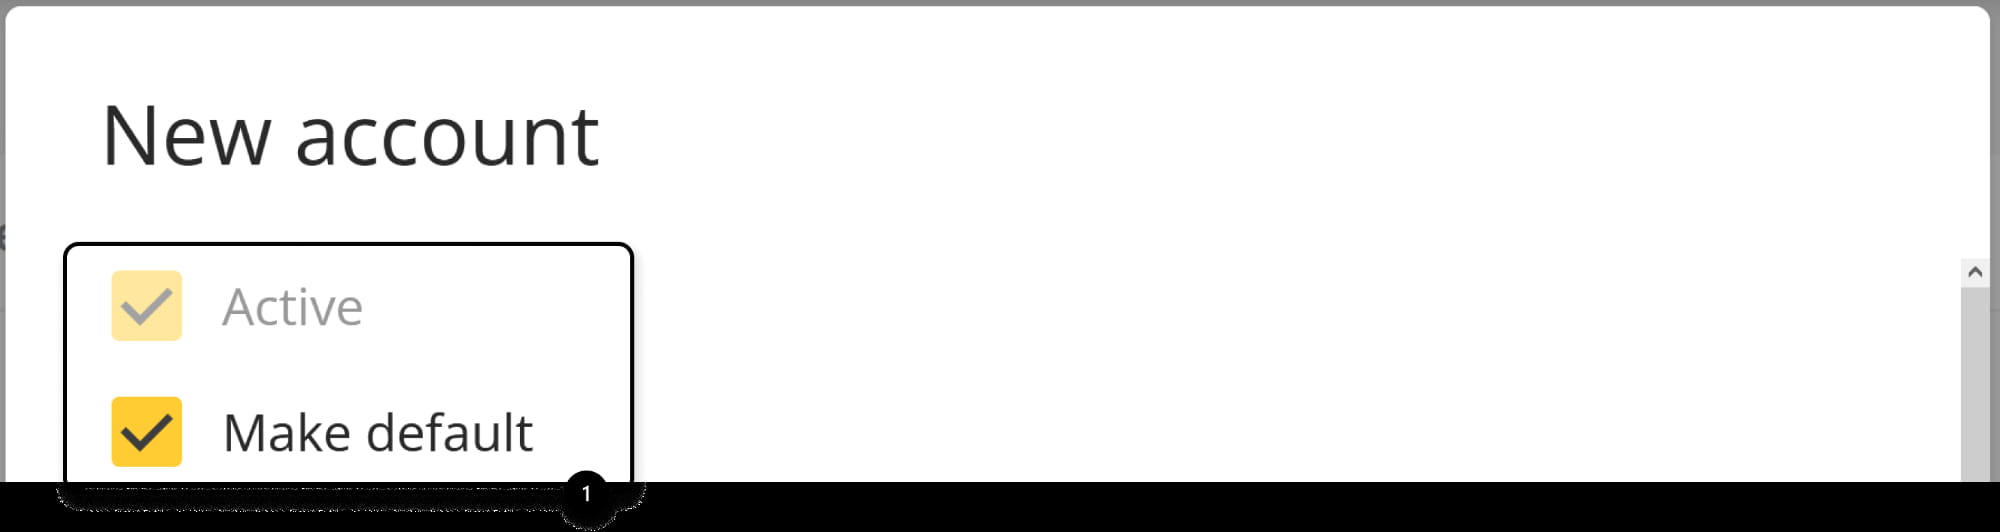
- Be sure, the new account will be set as active and default.
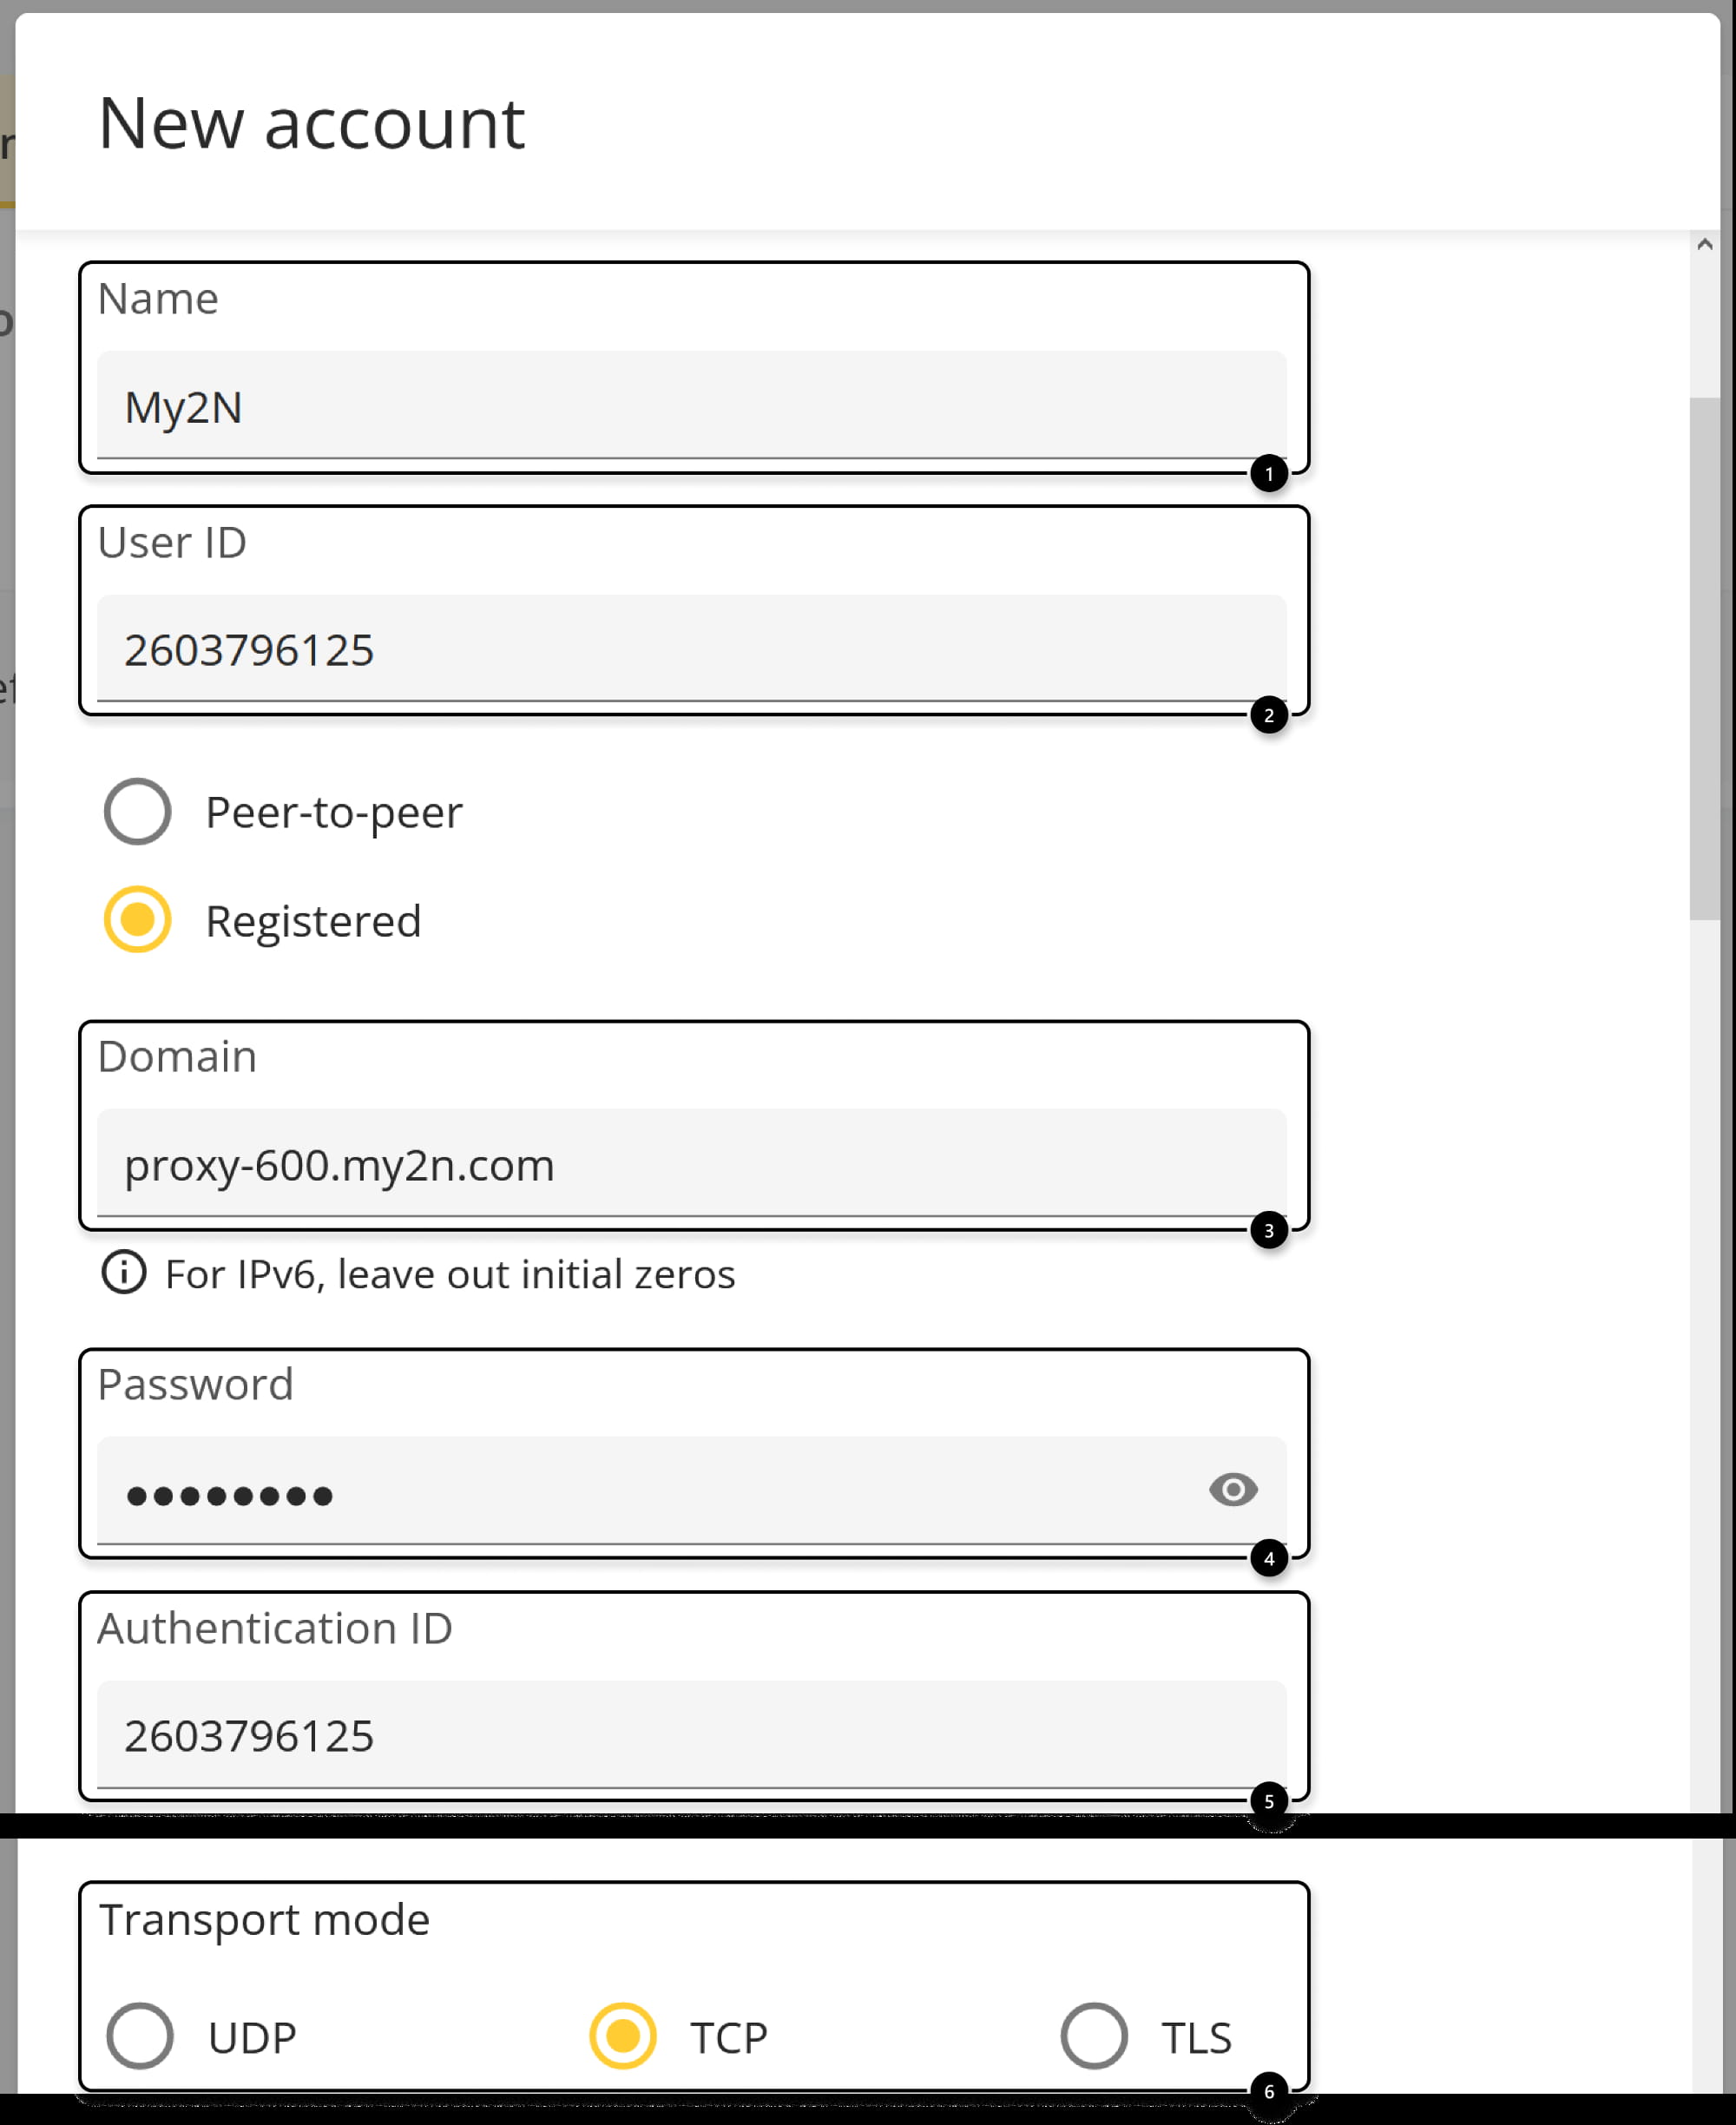
- Now fill in the SIP Proxy details from My2N
- Name - name the account
- User ID - in My2N, this parameter is named Device ID
- Domain name - in My2N, this parameter is named SIP Proxy Address
- Password - in My2N, this parameter is named Device Password
- Authentication ID - the same as User ID
- Transport mode - select TCP
- Axis intercom has been successfully registered to My2N.
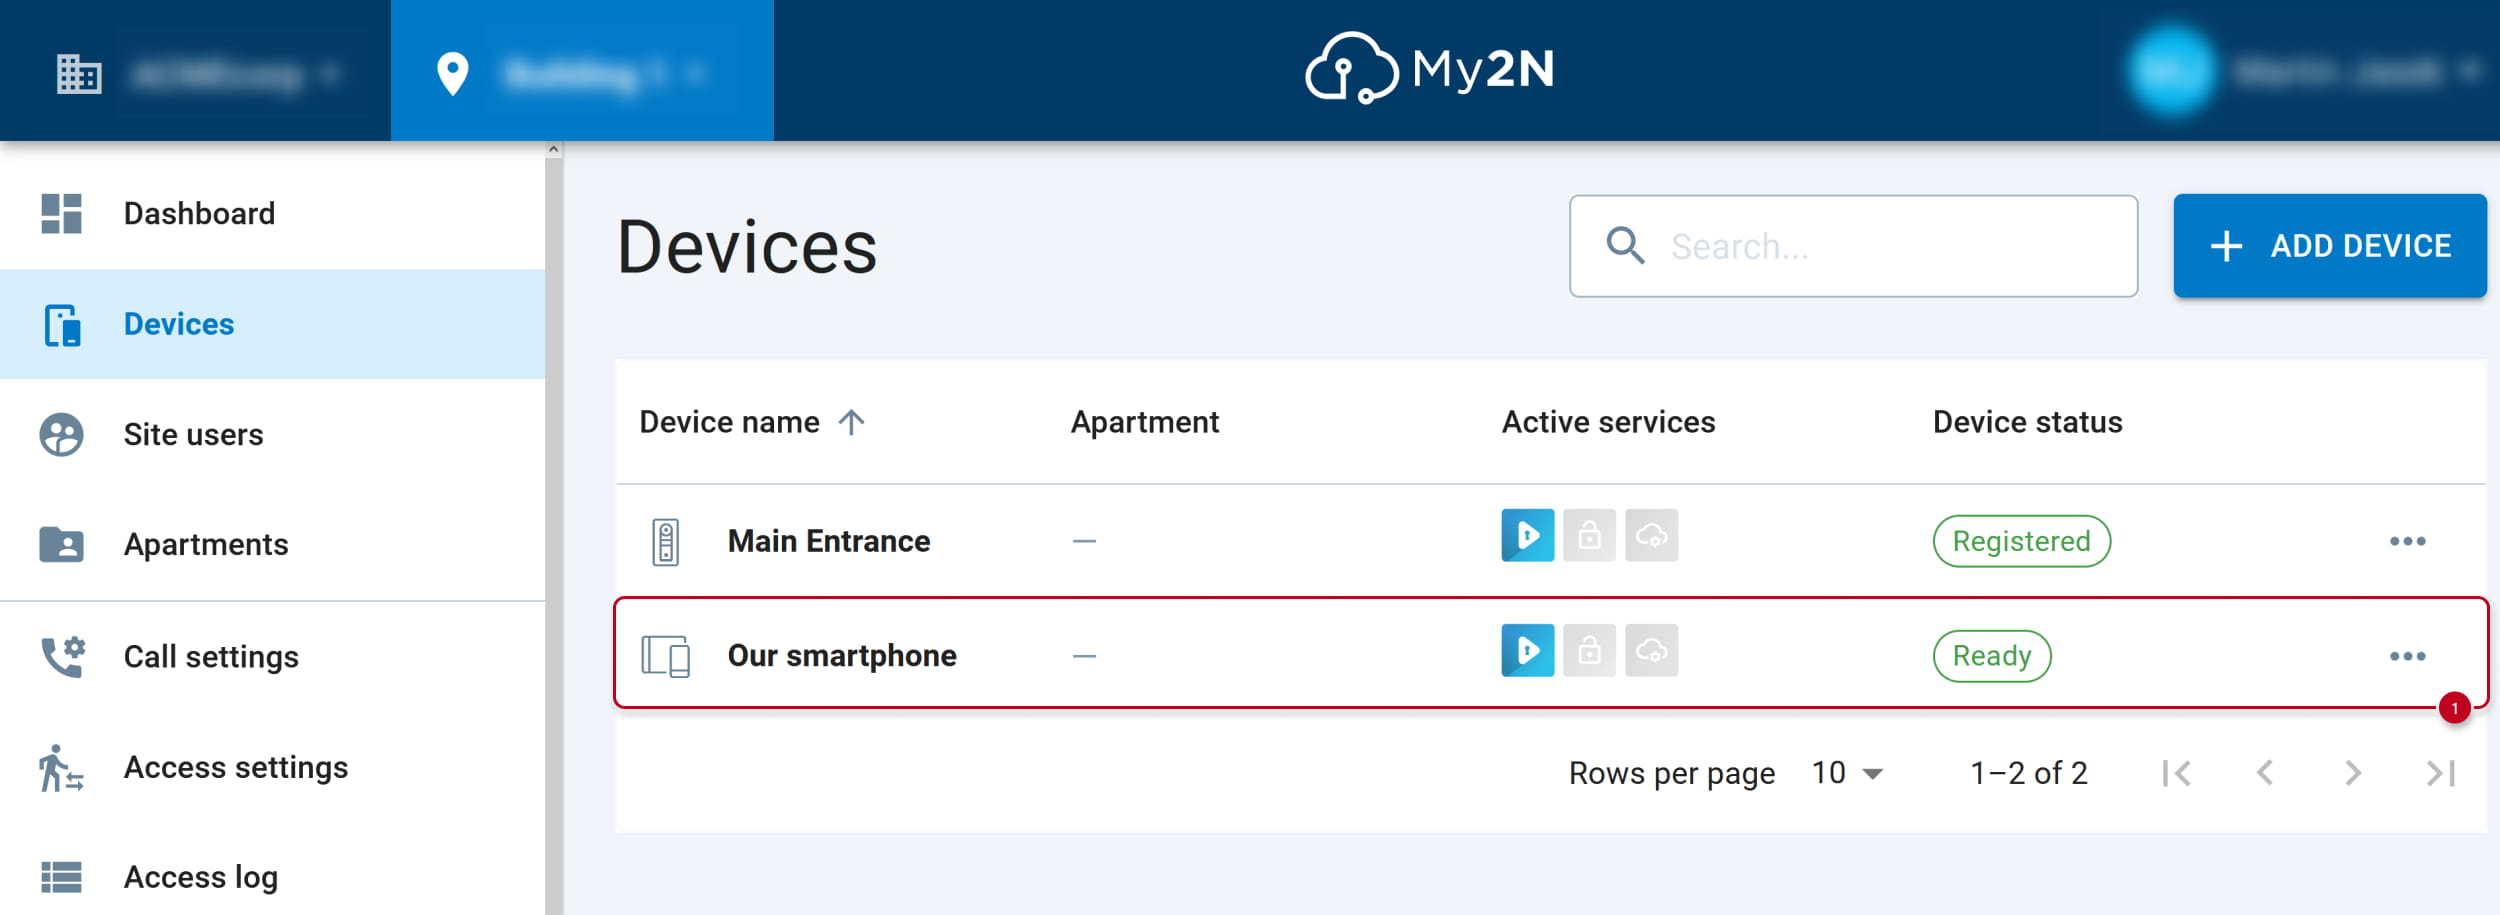
In My2N account, find the device to be called and copy its DeviceID.
- In our example, we will call to a smartphone with My2N app. Open its details.
If you have added your smartphone into My2N account not yet, please follow the article in prerequisites.
- Open section 2N Mobile Video.
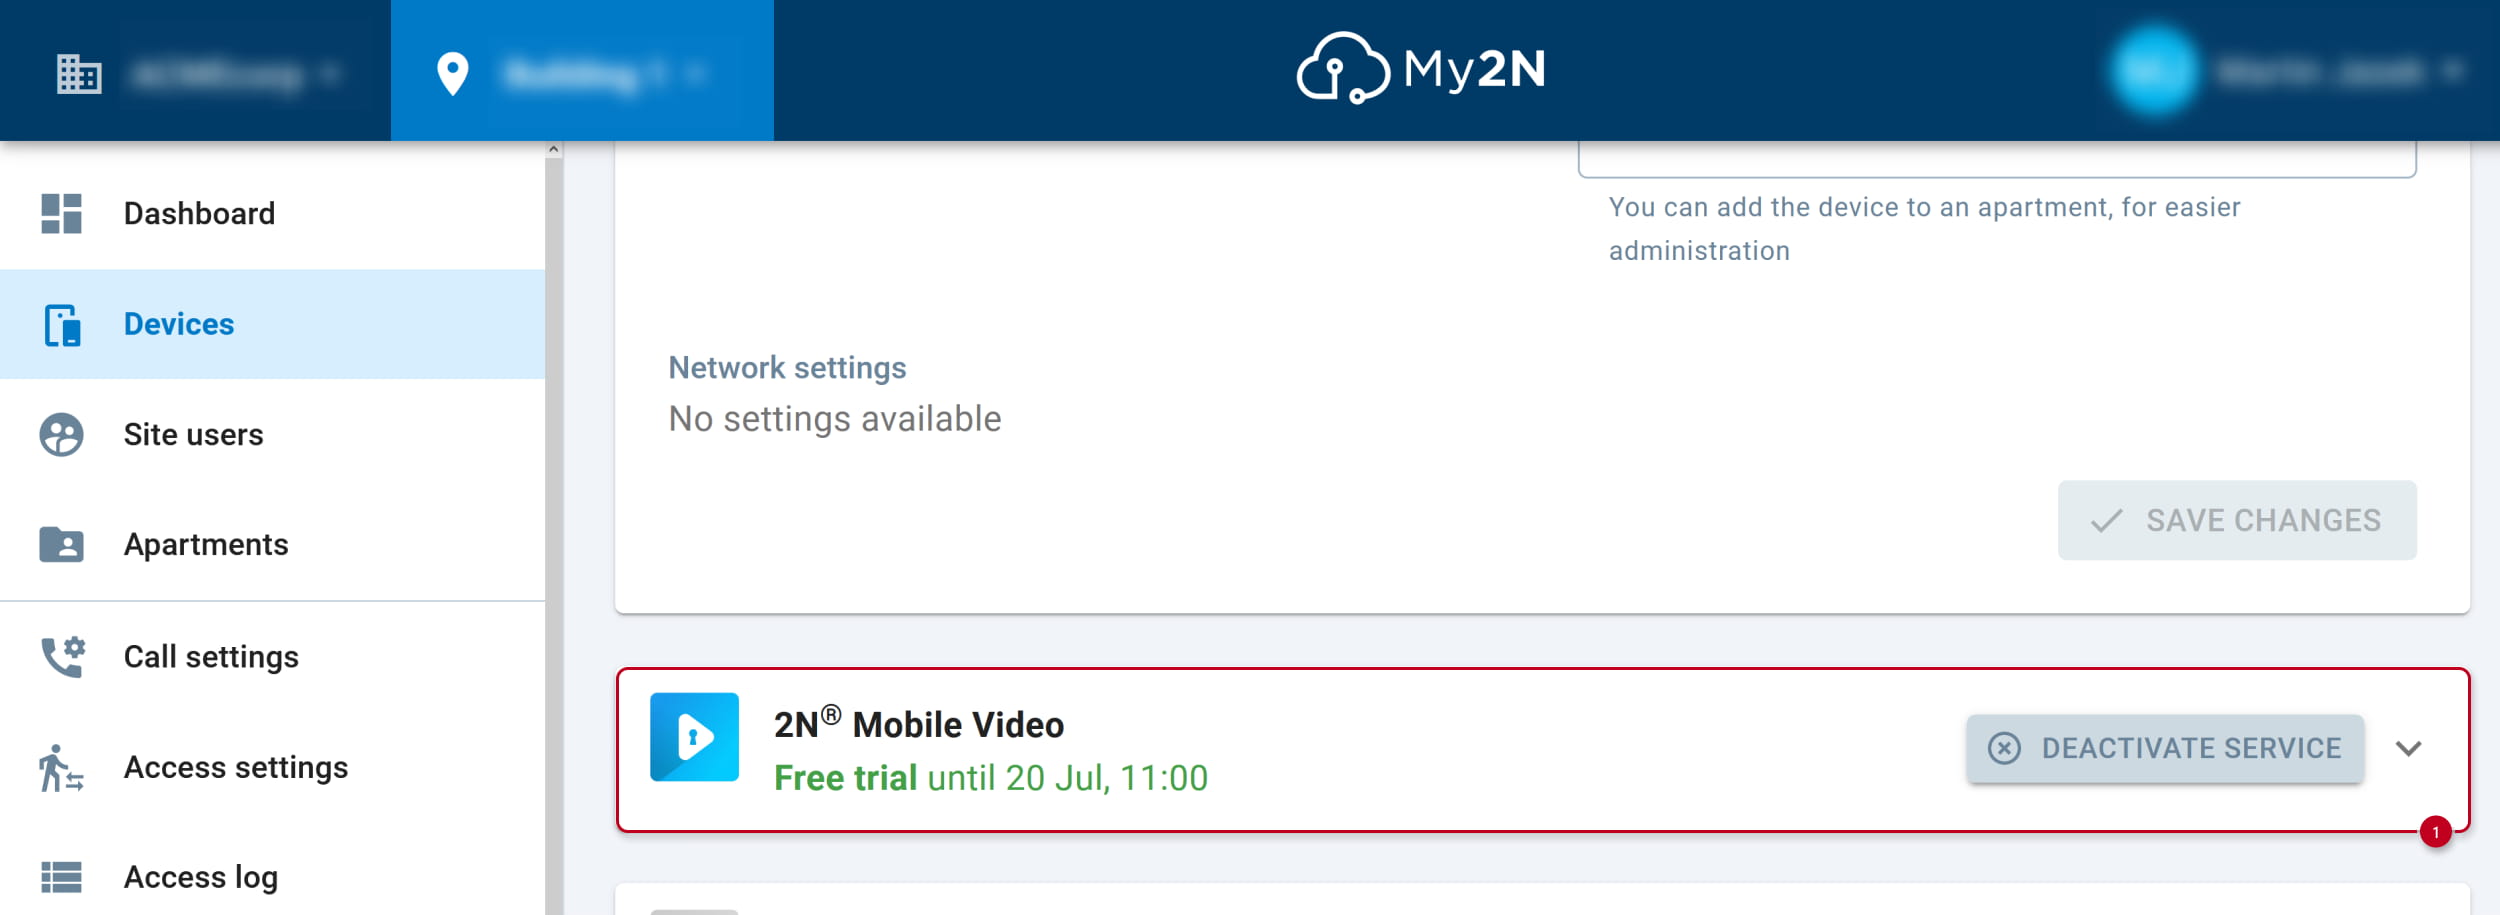
- Use this Device ID for configuration of Axis intercom’s call button.
In Axis intercom web interface, setup the call button
- In section System - Events, go to Recipients and add a new recipient.

- Fill in the name, change type to SIP, fill in prepared Device ID into "To SIP address" parameter and save.

- Go to Rules and add a new rule.
If you have already some rule for the call button, you can just edit it.

- Name the new rule, in the Condition part select Digital input is active and port Call button,
in the Action part select Make call and our created recipient.

- Now you can press the Axis intercom’s call button to reach your smarthphone with My2N app.

In Axis intercom web interface, set DTMF sequence for opening the door
- In section Communication - SIP, go to DTMF and add a new sequence.
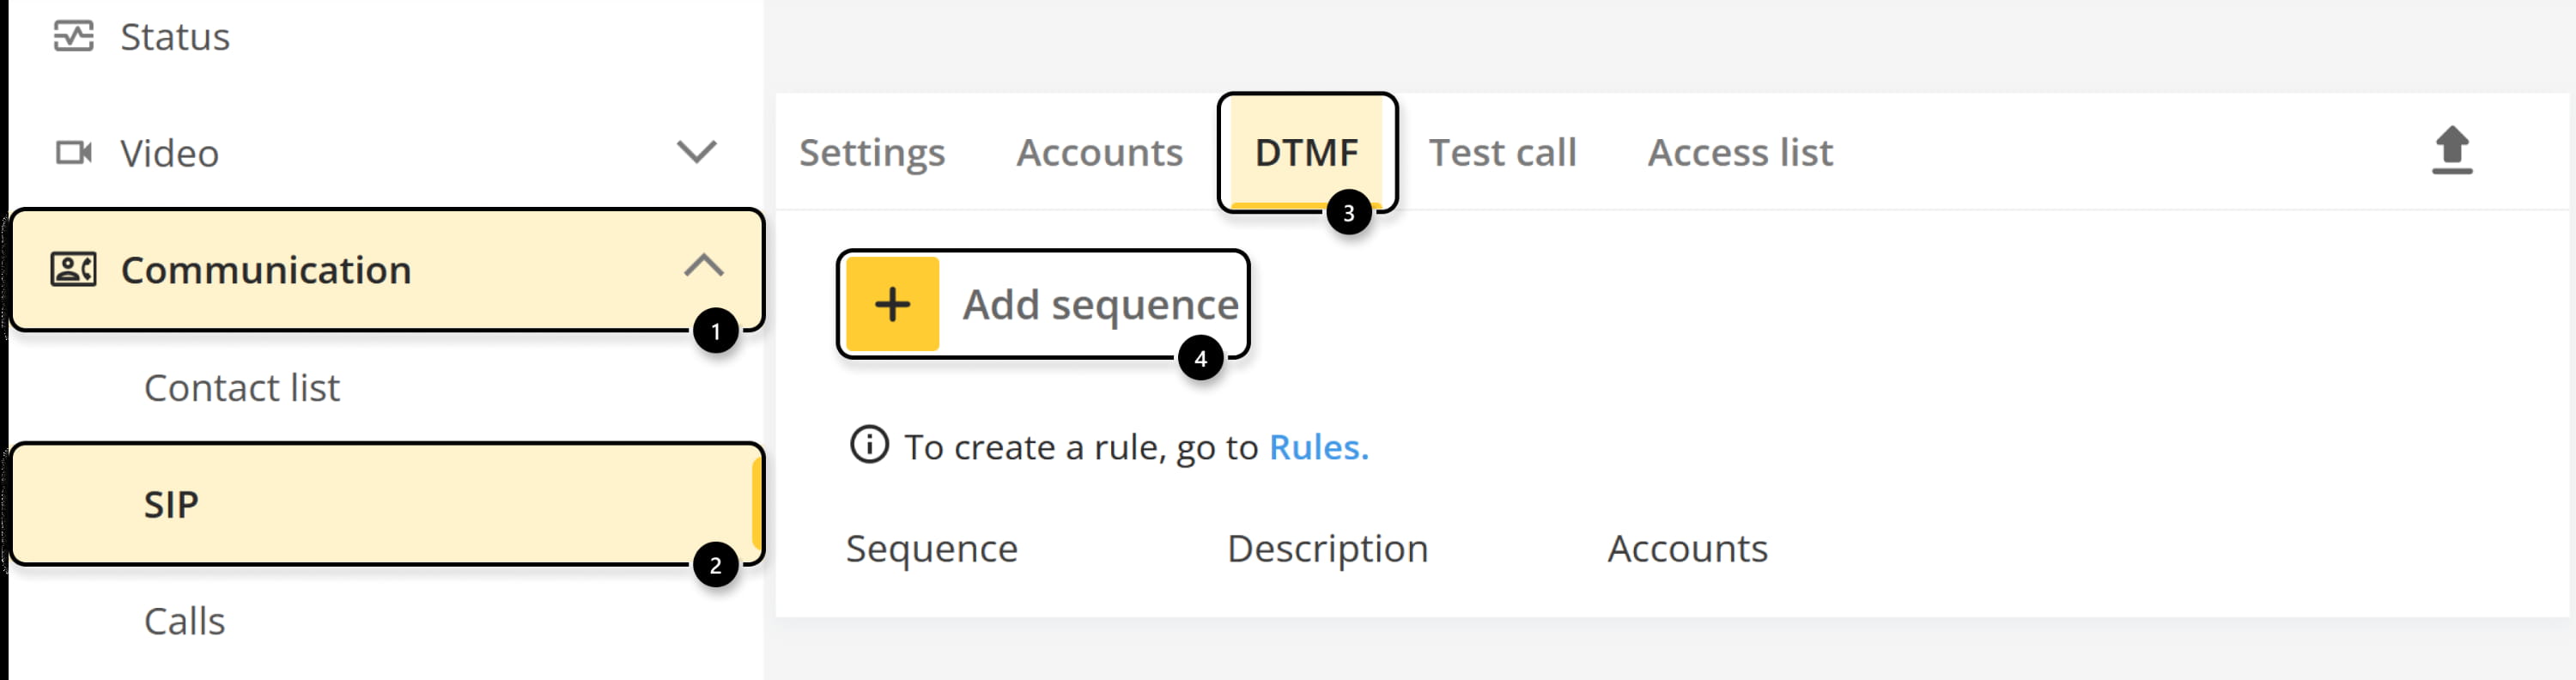
- Fill in the numeric sequence, describtion, assign it to My2N account and save.

- In section System - Events, go to Rules and add another rule.
If you have already some rule for opening the door, you can just edit it.

- Name the new rule, in the Condition part select DTMF and your created DTMF sequence as DTMF Event ID,
in the Action part select Toggle I/O once and Door as a port.
You can adjust here also the Duration, time after which the door is closed again.

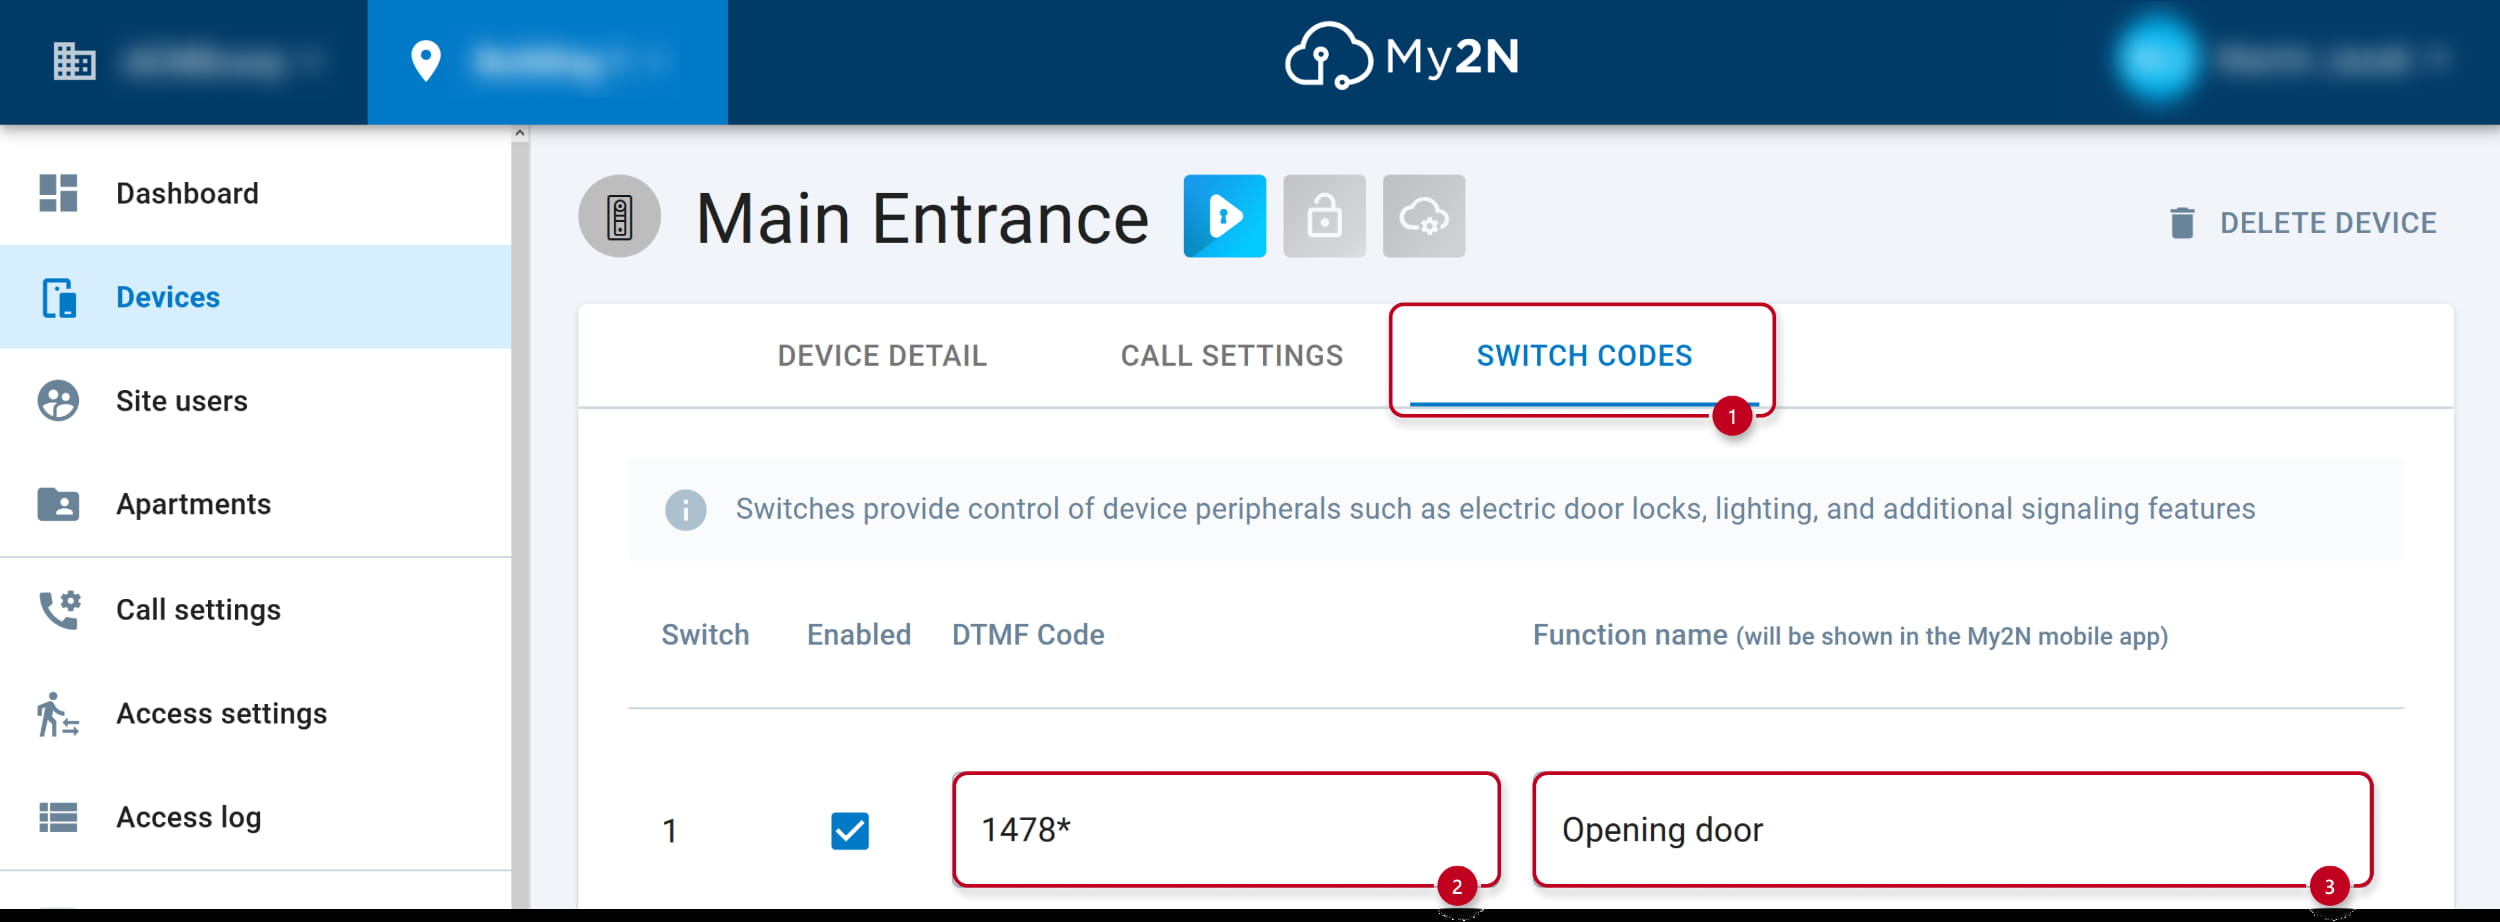
In My2N account, assign the same DTMF sequence under a new switch button
- Open section Devices and continue to Axis intercom details.
- Go to SWITCH CODES and assign DTMF sequence from Axis intercom here as DTMF Code.
Symbol "*" will be added automatically just as a confirmation character, you can keep it here.
Name the function and save.
- During the call tap on the lock icon. The door is open.