Milestone XProtect and 2N IP Intercom integration
The steps in this article require using the web interface of a 2N device. Please follow this manual in case this is your first time using the web interface.
With physical and cyber security threats on the rise, it’s more important than ever to level up your business security systems. Milestone XProtect video management software (VMS) connects your cameras, sensors, analytics, and sites in one easy-to-manage interface. We will show you how our 2N IP Intercom can be part of it.
Prerequisites
- 2N IP Intercom with the latest firmware (the article created on version 2.44);
additional GOLD license is necessary. - Milestone XProtect (the article created on version 2023 R1)
Connecting 2N IP Intercom to Milestone XProtect
-
Enable ONVIF in 2N IP Intercom
- Go to 2N IP Intercom web interface, section Services - Streaming - ONVIF / RTSP, and enable RTSP Server.

- In the User Accounts part, create the user account with administrator access level.

- In the Transmission Quality Settings part, make sure that UDP Unicast Enabled is checked.

-
Add 2N IP Intercom to Milestone XProtect
-
- On the side of Milestone server (via Milestone XProtect Management Client),
go to Servers - Recording Servers menu and do the right click on your server. Select Add hardware...
- On the side of Milestone server (via Milestone XProtect Management Client),

-
- Choose the hardware detection method.
The express is the easiest, it scans the local network,
however we will look on the Address range scanning method where you can adjust the scanning range.
- Choose the hardware detection method.

-
- Add and select the user account created in 2N IP Intercom web interface.

-
- To speed up the scanning, select just common ONVIF drivers.

-
- Specify the network ranges to scan for hardware. Select using HTTPS.

-
- Once the scan is finished, select your hardware to add.

-
- System collected information about the hardware. Continue to the next step.

-
- Now choose the available peripheries of the intercom to use.
Typically, you will use camera, microphone, speaker and some inputs and outputs.
- Now choose the available peripheries of the intercom to use.

-
- Add the device to groups. If you did not create the groups yet, you have to do it now.

-
- Once the procedure is finished, you will see added devices and their peripheries, incl. camera preview.
If Milestone is not able to connect to the camera, then please check your firewall settings.
- Once the procedure is finished, you will see added devices and their peripheries, incl. camera preview.

-
- Now the device appears in the Devices menu where you can adjust some settings, e.g. name of the periphery.

Operation in Milestone XProtect
Right now you can start Milestones XProtect Smart Client which is surveillance window for video monitoring (for security guys).
-
Video Preview
- Drag selected camera and drop it into any window on the right side.


-
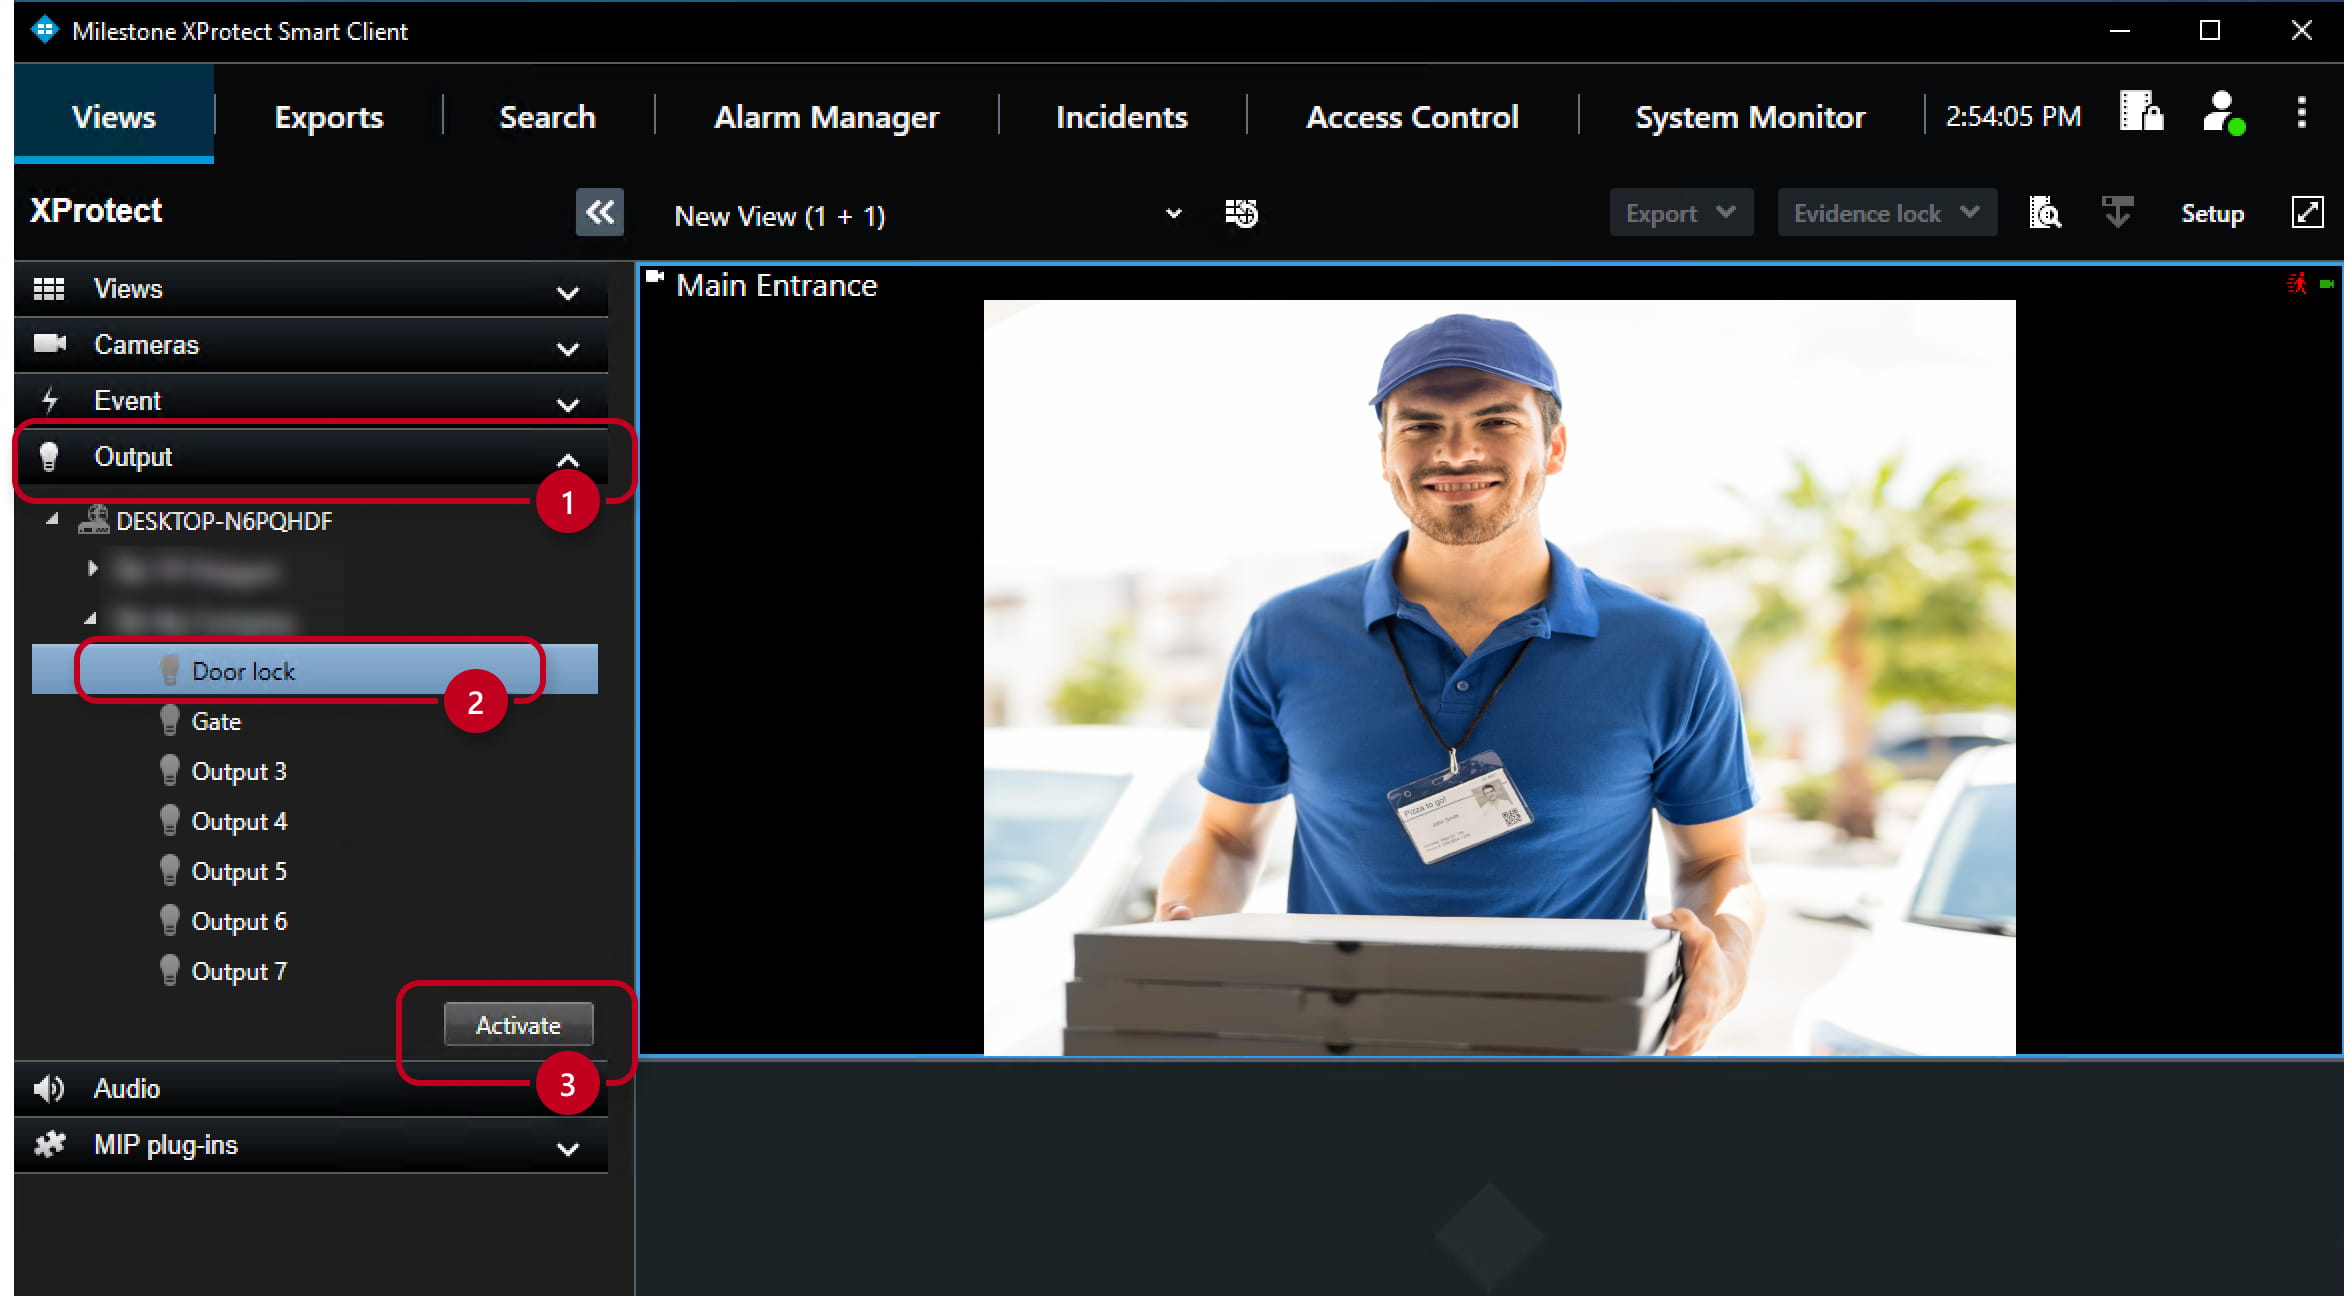
Outputs control
- You can also activate selected output from this client.
-
Two-way audio
-
- You can also set microphone for listening-in and
also select appropriate speaker to which you want to talk when holding the button "Talk".
- You can also set microphone for listening-in and

-
Overlay buttons
- Add some special buttons for relay activation or for talking to the speakers to the Video preview window.
Click on the "Setup" button on the top right corner. Then everything is based on drag and drop principle.
- Add some special buttons for relay activation or for talking to the speakers to the Video preview window.

