The 2N Indoor Talk unit is designed for an audio communication with the 2N IP Intercom. You can see all intercoms connected to the LAN, you are able to accept incoming audio calls, make outgoing calls to 2N IP Intercom and also control locks connected to the intercom.
Requirements
How to configure 2N IP Intercom?
Go to the section "Directory – Users", press Create new user.
Fill in the Name. If you want to call the 2N Indoor Talk unit, the Phone number has to be filled in a format: "sip: ip address". In our example the ip address “192.168.49.62” is being used, please see the picture below.
In the next step you can set the intercom to automatically pick up the incoming calls in order to easily reach it at any time.
Go to the section "Calling – Genetal Settings" and enable Automatic Pickup for incoming calls for both SIP1 and SIP2, see the picture below.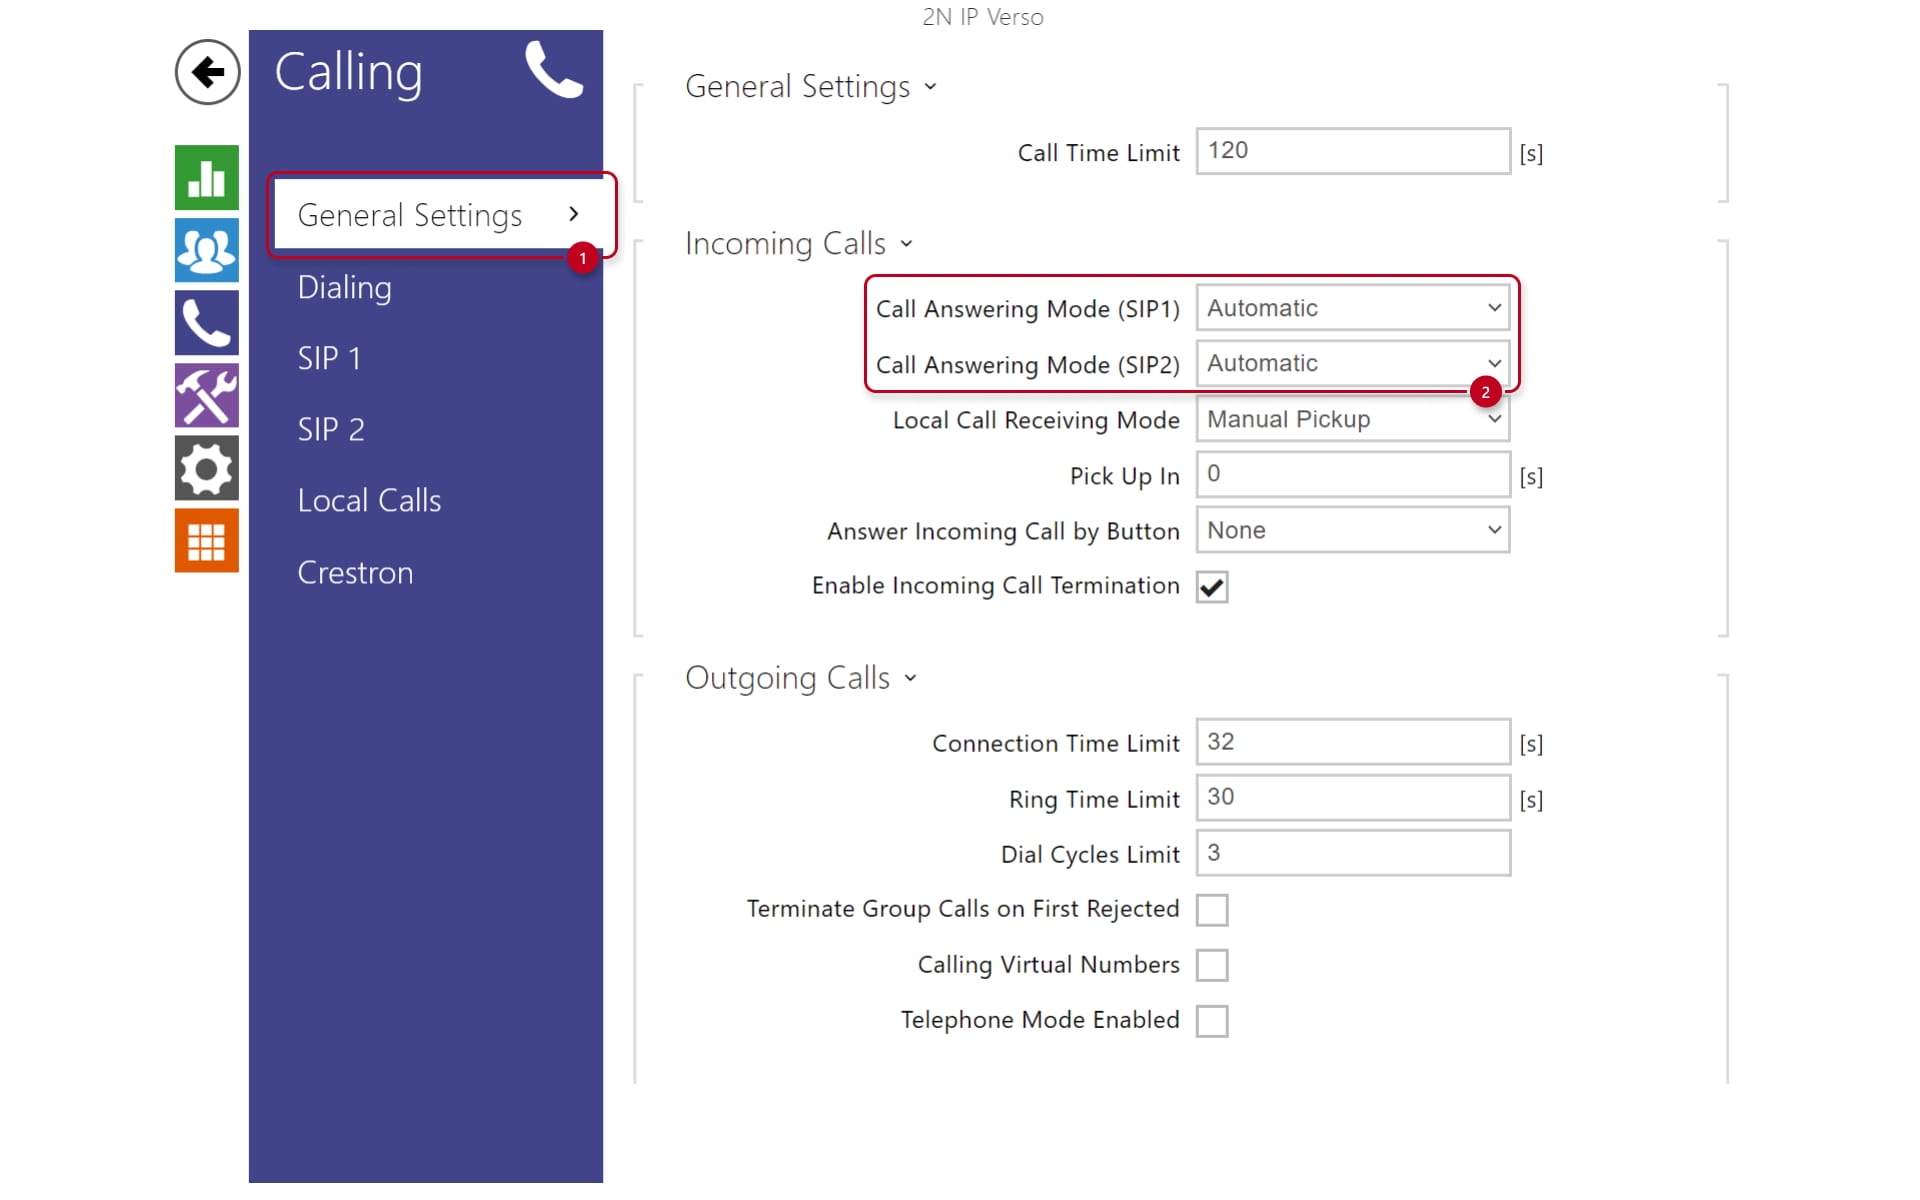
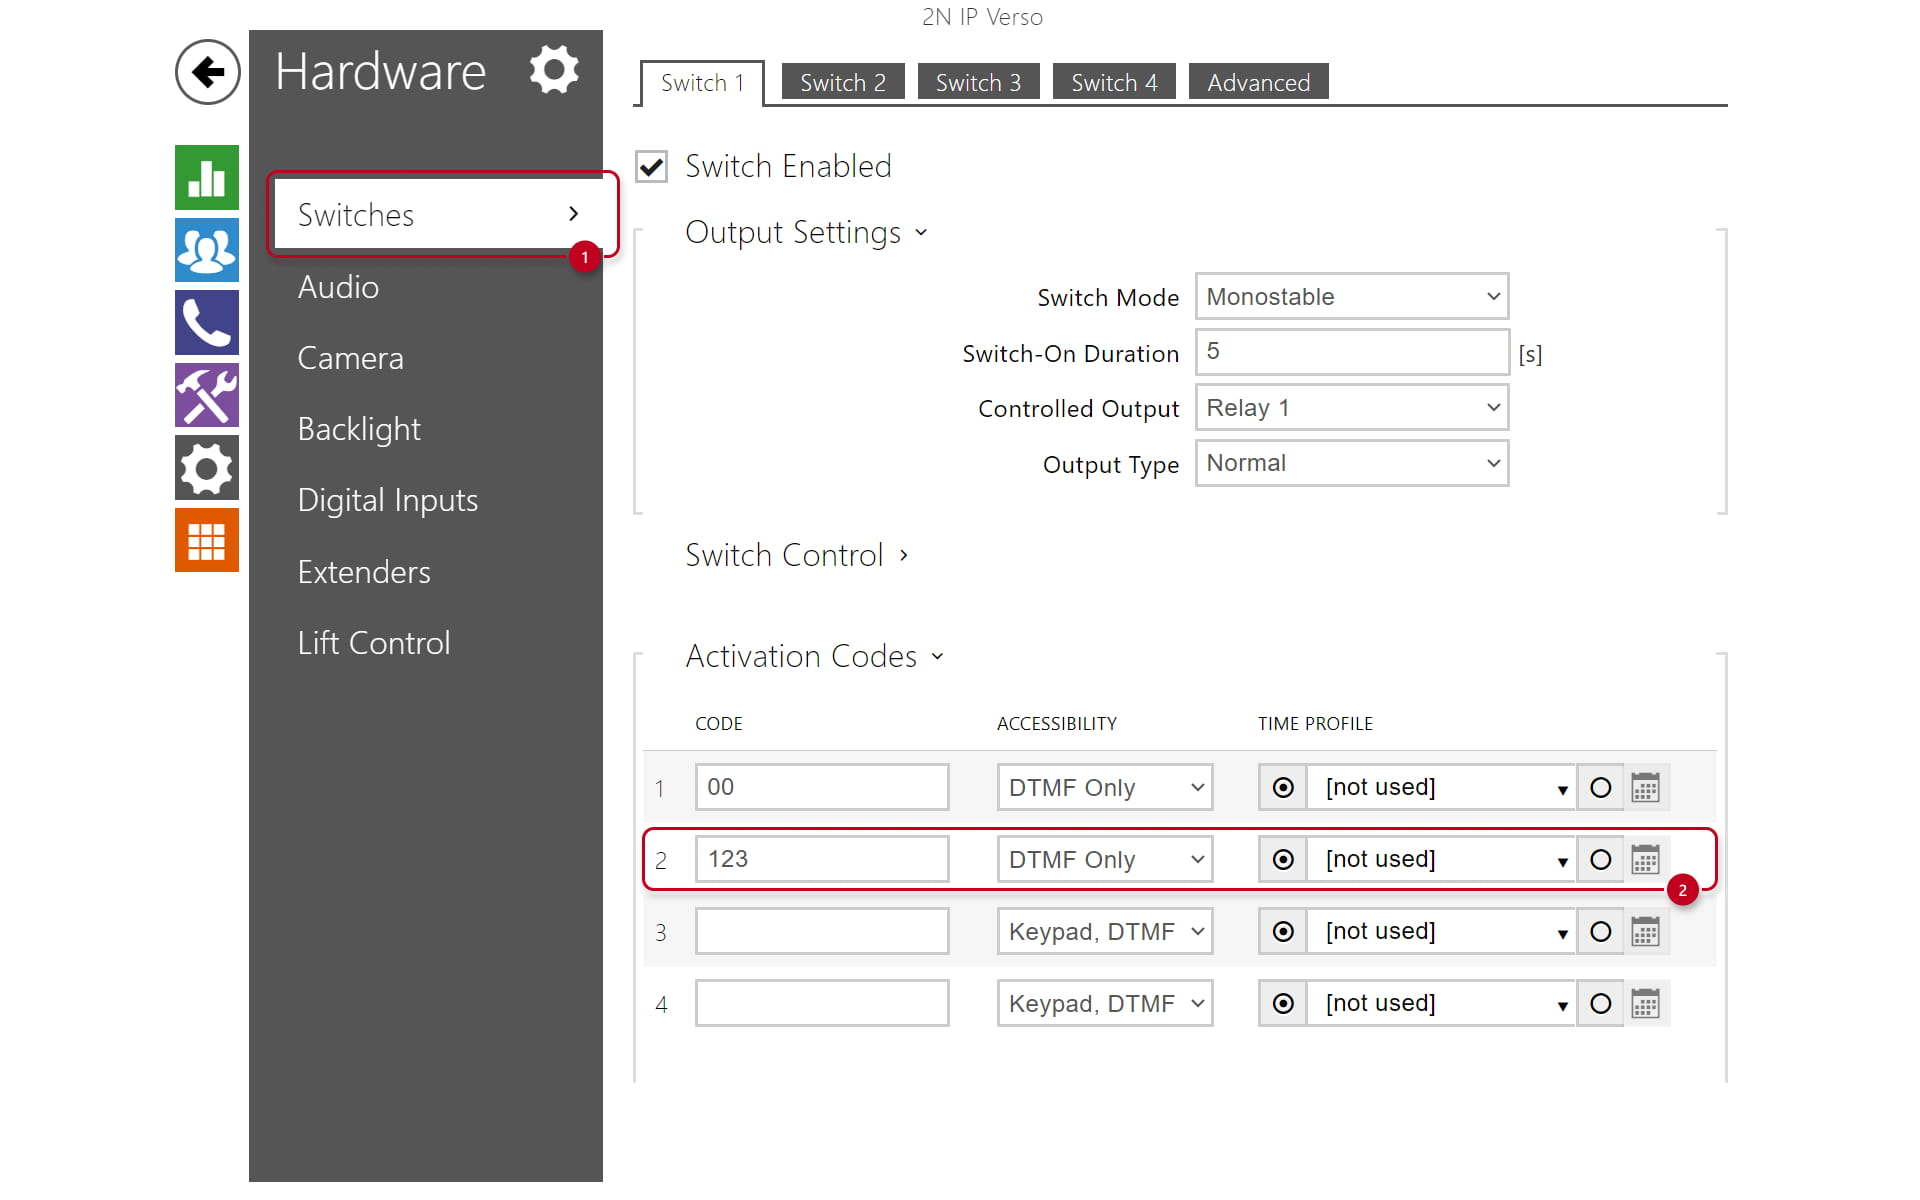
A next step is to set a DTMF code by which the Switch can be triggered.
Go to "Hardware - Switches" and add an Activation code.
Make sure that the electric opener/lock is always connected to the intercom's 12V output using a security relay to make the installation safe. The motherboard relay is used for switching lights or other peripherals that do not have to be secured.
It is always recommended that the 2N Security Relay (Part No. 9159010) is used for increased security.
Last step is to assign the recently created contact to quick dial button.
Go to "Calling - Dialing" click on the Add user to the quick dial button and choose desired users.

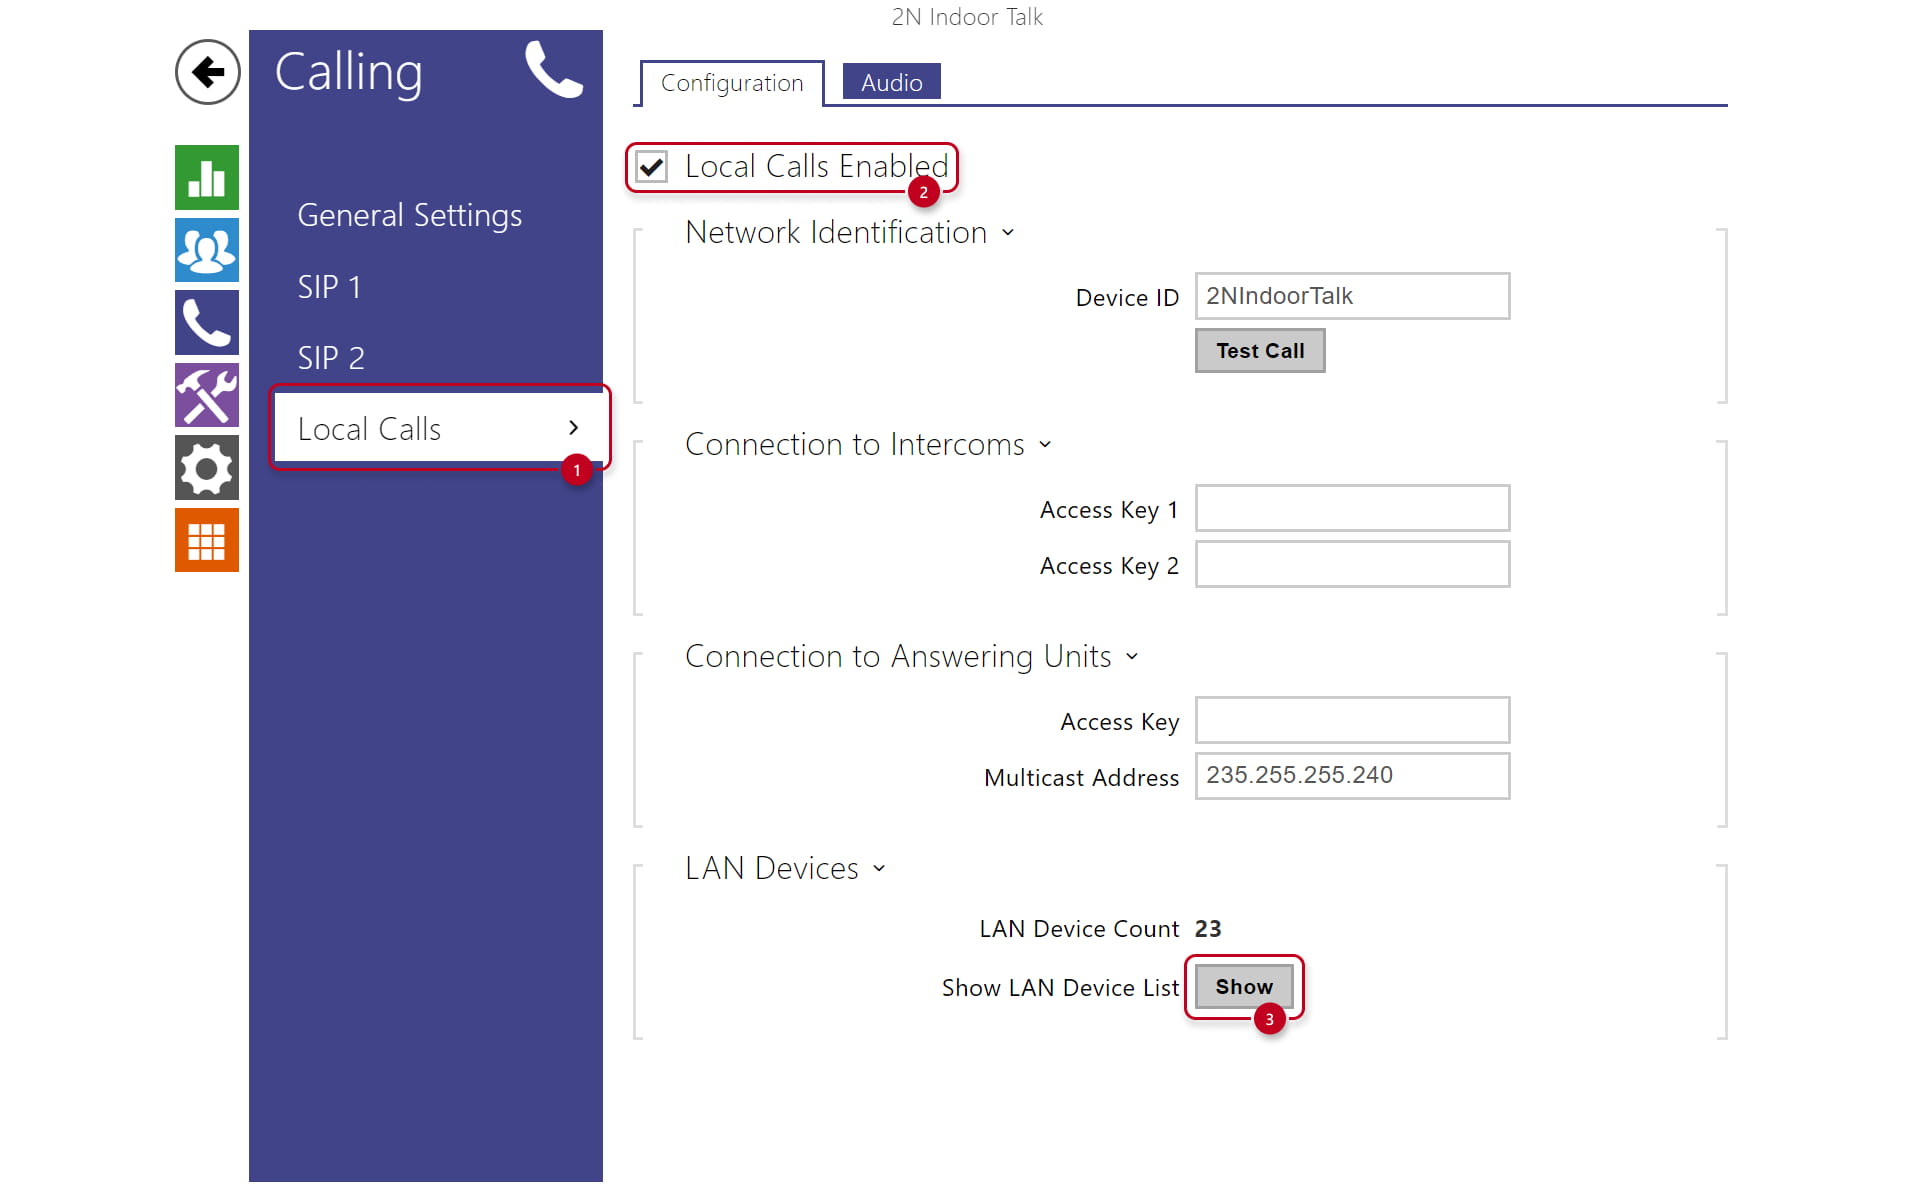
List of connected devices on 2N IP intercom
A list of registered Device names can be easily viewed on the 2N IP intercom in the menu Calling - Local Calls, see the example below.


How to configure 2N Indoor Talk?
Once the 2N Indoor Talk is connected to the local network, go to its web page - section Directory - Devices. Press Search registered devices and choose the device you want to add.


After you have added the device Device Name and Phone Number are filled automatically. In our example we use IP address instead of Device ID, so please fill the Phone Number with IP address of the intercom. In our example we use "sip:192.168.50.11" as a phone number. Please see the picture below.
-
You can call up to 2 devices from 2N Indoor Talk.
-
Start call with a short/long press: Choose whether you want to call this user by a short or a long press of a call button on the 2N Indoor Talk
-
Code after short press: Defines a DTMF code sent to the intercom during or outside the call
-
Code after long press: Defines a DTMF code sent to the intercom only during the call by long pressing the unlock button

List of available devices on 2N Indoor Talk
A list of available intercoms can be easily viewed on the 2N Indoor Talk in the menu Calling - Local Calls, see the example below.