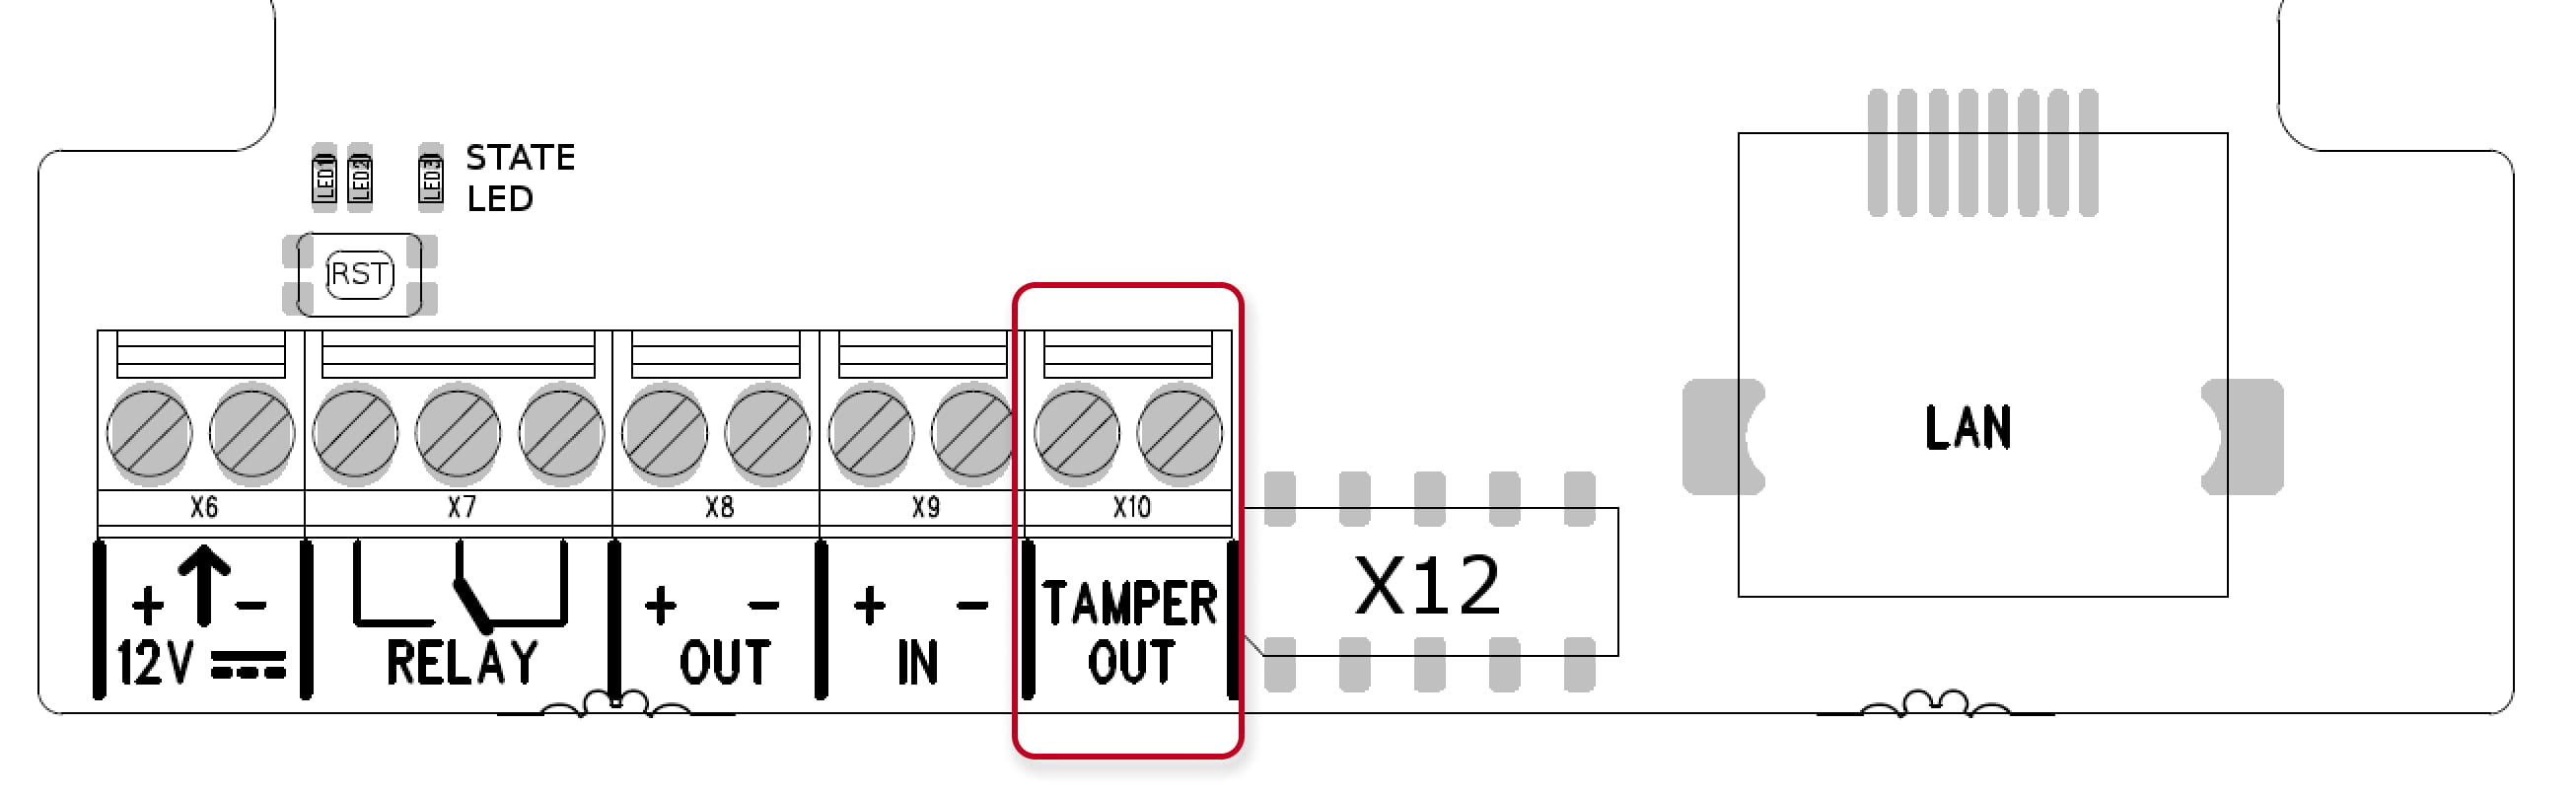
Tamper switch - Location (installation) and configuration

The steps in this article require using the web interface of a 2N device. Please follow this manual in case this is your first time using the web interface.


Tamper switch detects any unauthorised opening of the intercom. By using this, you significantly improve the security of the whole installation.


Prerequisites

  • 2N IP Intercom or 2N Access Unit with Tamper interface and the latest firmware,
    GOLD license is required for scenario setup via automation (N/A for 2N IP Uni).

    2N Access Unitpart of the device
    (mechanical sensor)
    2N Access Unit 2.0part of the device
    (optical sensor)
    2N Access Unit M
    part of the device
    (mechanical sensor)
    2N IP Basepart of the device
    (mechanical sensor)
    2N IP Forceincluded in additional switch or RFID reader
    (mechanical sensor)
    2N IP Onepart of the device
    (mechanical sensor)
    2N IP Safetyincluded in additional switch
    (mechanical sensor)
    2N IP Solopart of the device
    (mechanical sensor)
    2N IP Stylepart of the device
    (mechanical sensor)
    2N IP Unipart of the device
    (mechanical sensor)
    2N IP Verso,
    2N IP Verso 2.0
    additional module connected via additional I/O or Wiegand module
    (mechanical sensor)


Location or Installation

Please click on the 2N device where you would like to use the tamper switch.


2N Access Unit

  • The tamper switch is already installed as a mechanical sensor

    2N Access Unit - tamper 


2N Access Unit 2.0

  • The tamper switch is already installed as an optical sensor

    2N Access Unit 2.0 - tamper 


2N Access Unit M

  • The tamper switch is already installed as a mechanical sensor

     2N Access Unit M - tamper 


2N IP Base

  • The tamper switch is already installed as a mechanical sensor

    2N IP Base - tamper 

  • Output contact can be triggered.


2N IP Force

  • In order to mount the tamper switch, you need to install
    also the Additional switch (
    9151010) or the RFID reader (9151011, 9151031, 9151031S). 

    • With the Additional switch
      If the Additional Switch is installed, it is not possible to install Internal RFID Card Reader.

      • First install the additional switch to the intercom.

        2N IP Force - Additional switch


      •  Now mount the tamper switch on the additional switch. 

        2N IP Force - Tamper switch on additional switch


    • With RFID card reader
      Keep in mind as the tamper switch shares the relay output (NO and NC) terminals,
      you cannot use the RELAY2 output with the tamper switch at the same time.

      • First install the RFID reader board (4) to the intercom.

        2N IP Force - RFID reader


      • Now mount the tamper switch (10) on the RFID reader board. 

        2N IP Force - Tamper switch in RFID reader


  • Once you will cover the front plate, two black buttons will be pressed and it will switch on NO and C of the terminal block and close the circuit. Afterwards if somebody tries to entry the 2N IP Force , it will undo the circuit and trigger the tamper switch event.


2N IP One

  • The tamper switch is already installed as a mechanical sensor

    2N IP One - tamper 


2N IP Safety

  • In order to mount the tamper switch, you need to install also the Additional switch (9151010).
    The additional switch is the only way to install the tamper switch,
    as 2N IP Safety does not support any internal RFID reader.

    Keep in mind that it is not possible to connect this module to two buttons main unit (9152102W).


    • First install the additional switch to the intercom.

      2N IP Force - Additional switch


    •  Now mount the tamper switch on the additional switch. 

      2N IP Force - Tamper switch on additional switch

  • Once you will cover the front plate, two black buttons will be pressed and it will switch on NO and C of the terminal block and close the circuit. Afterwards if somebody tries to entry the 2N IP Safety , it will undo the circuit and trigger the tamper switch event.


2N IP Solo

  • The tamper switch is already installed as a mechanical sensor

    2N IP Solo - tamper 


2N IP Style

  • The tamper switch is already installed as a mechanical sensor

    2N IP Style - tamper 


2N IP Uni

  • The tamper switch is already installed as a mechanical sensor under the front cover.

  • Output contact can be triggered.

    2N IP Uni - tamper output  


2N IP Verso and 2N IP Verso 2.0

  • You are able to mount the tamper switch (9155038) to the 2N IP Verso
    with usage of I/O module (9155034) or Wiegand module (9155037) in order to be used via Automation.

    2N IP Verso - tamper 


  • In order to control events of the temper switch in the Automation (Event - “InputChanged”) the input Tamper is addressed as follows: <module_name>.<tamper>, e.g. module2.tamper. 
  • The switch leads directly to the terminal board and is designed for connection to an external security exchange (32 V DC / 50 mA max).

    2N IP Verso - tamper


Configuration

  • In 2N IP Intercom web, section Hardware - Digital Inputs - Securityassign the proper input for the Tamper function.
    You can also activate Automatic Switch Blocking for 30 mins when tamper is activated.

2N IP Intercom - Hardware - Digital Inputs - Security


  • Another scenarios, e.g. to send an e-mail or HTTP command, you can set via Automation.
    Go to section Services - Automation and setup the function.

2N IP Intercom - Services - Automation

2N IP Intercom - Automation - Input Changed, SendEmail


Czy ta strona była pomocna?