2N Fortis deployment with 2N Access Commander and Fortis Commander
This FAQ article describes the initialisation and deployment of 2N Fortis Cylinders and Handles (also known as 2N Electronic locks) and configuration with 2N Access Commander.
This solution has the following prerequisites:
- 2N Access Commander version 3.5+
- At least one 2N OS device running FW version 2.50+ or 3.0+ or later, with a compatible RFID card reader (MIFARE ® DESFire® EV1/EV2/EV3 compatible) connected to the 2N Access Commander as well.
- For the configuration, the External RFID Card Reader 125kHz + 13.56MHz with NFC (USB) (part numbers 9137424E or 9137421E ) and the External USB driver (1.8.0 or higher) are required.
- It is also required to have a computer (laptop) equipped with Bluetooth and Microsoft Windows OS (recommended version 10+).
Some additional useful information:
- Supported cards are MIFARE ® DESFire® RFID cards EV1/EV2/EV3.
- 2N provides MIFARE ® DESFire® RFID cards/fobs EV3 4K (part numbers 11202601 and 11202602).
- One such 2N RFID access card can be used for access to up to 90 doors with the 2N Electronic locks, depending on the number of time profiles applied. However, the 2N Fortis Cylinders and Handles can be grouped so the 2N RFID access card can be used for more accesses. More information can be found in this FAQ article.
- If the card memory capacity is exceeded, data writing to the card will fail. A write failure event is recorded in the system access log.
Please make sure you have the External RFID Card Reader connected, the 2N Driver for External USB Readers installed, and set up with at least the following settings:

Where are credentials stored?
Unlike 2N OS IP devices, where access credentials are stored in the device, credentials for access are stored in MIFARE ® DESFire® cards as a list of allowed handles or cylinders.
How are the access rights updates made?
Information on user cards is updated by scanning the card on an RFID reader on a 2N OS device that the card is authorised for; therefore, at least one 2N OS device with a compatible RFID reader must be used.
To update information on cards, users must be authorized for that particular 2N OS device.
Table of article's content:
Configuration of 2N Access Commander for 2N Electronic locks
Configuring 2N Fortis devices in 2N Access Commander
Configure each of 2N Electronic locks in your installation
2N Fortis Commander configuration
Allowing an access to each lock in 2N Access Commander
Program user cards and assign them to users
Program additional maintenance cards
Configuration of 2N Access Commander for 2N Electronic locks
Go to the "Settings -> Electronic locks" section of the 2N Access Commander's web interface.
If there are no IP devices compatible with 2N electronic locks connected to 2N Access Commander, a message will be shown.
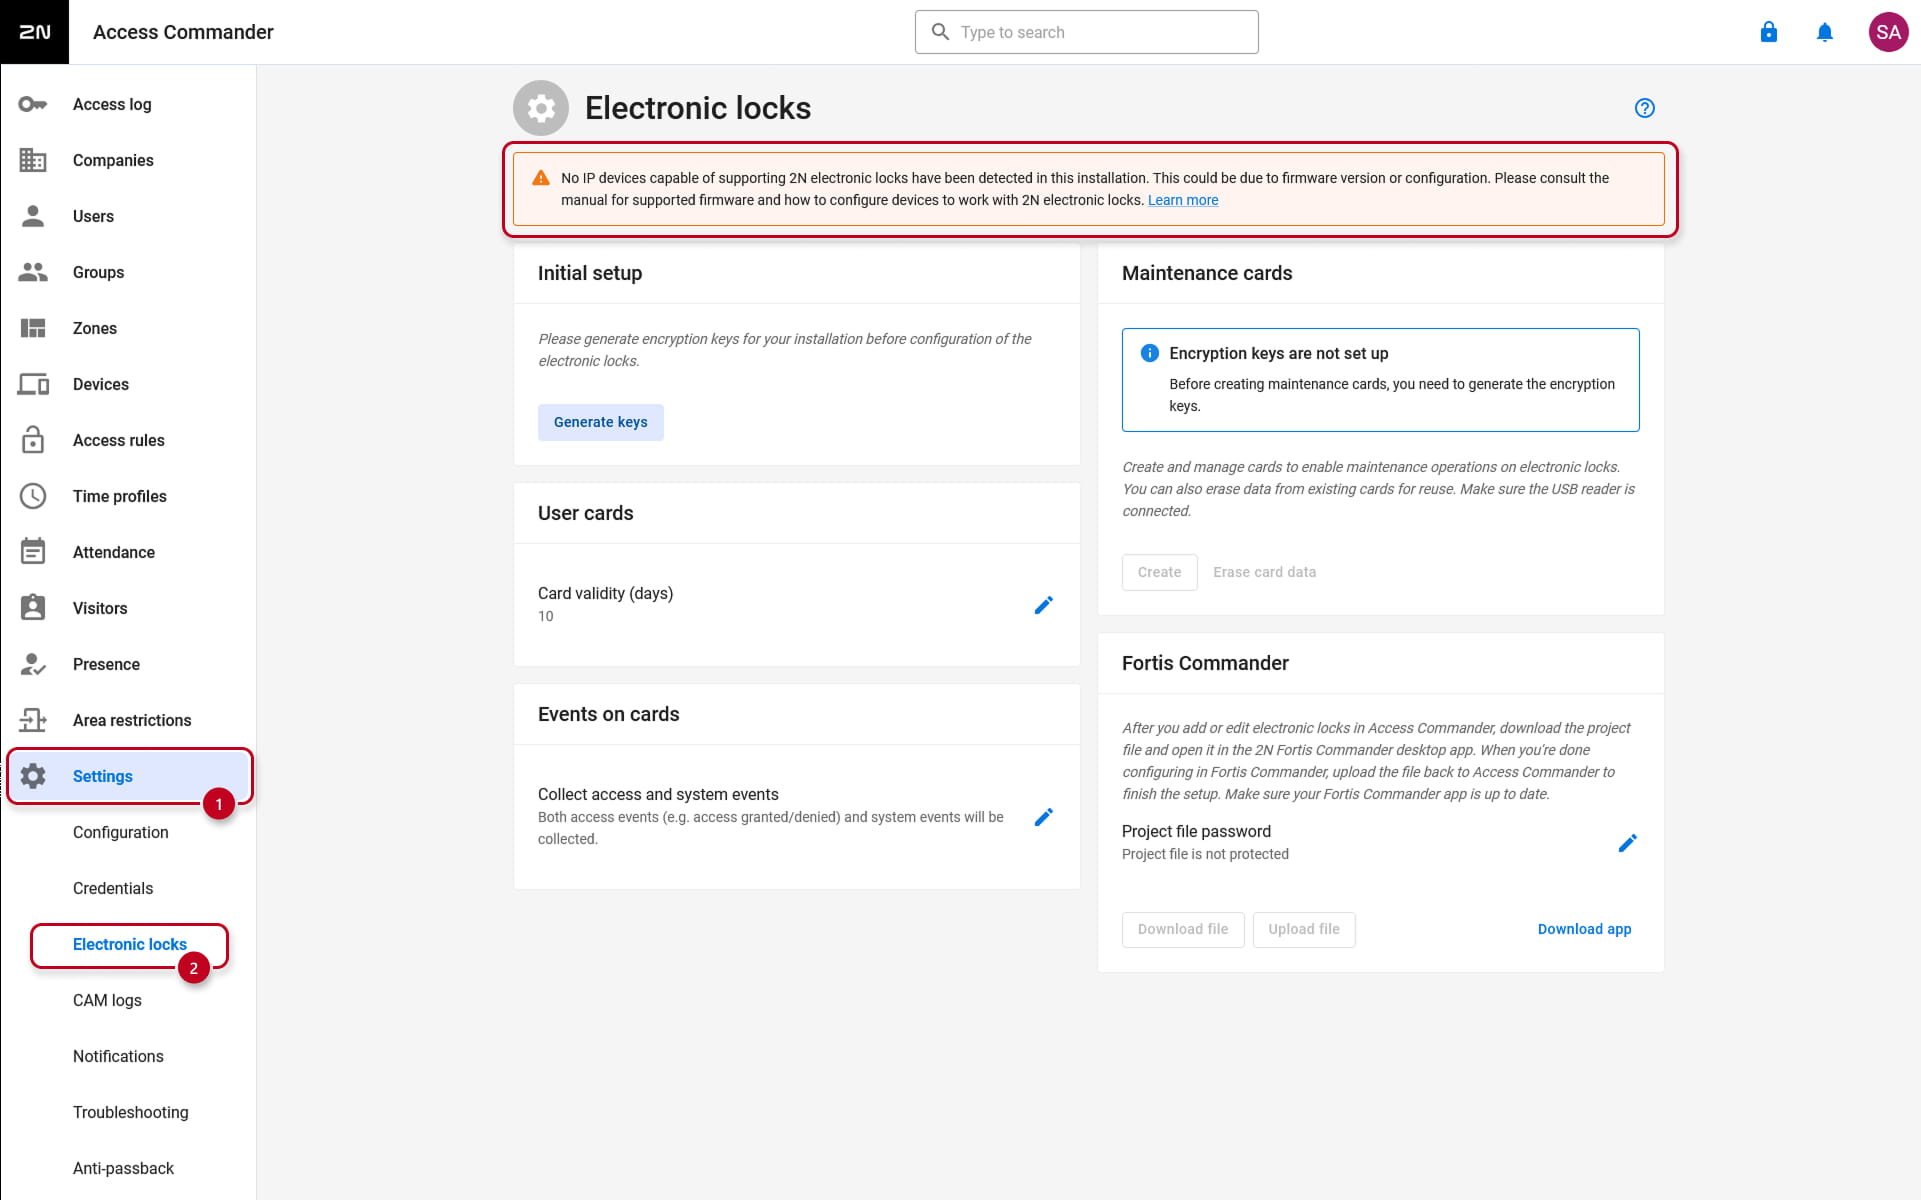
Add a compatible 2N OS IP device to Access Commander
When a compatible 2N OS IP device is added to the 2N Access Commander, a message about the device not being configured will be displayed as well.
It is because the encryption keys have not been generated in 2N Access Commander yet.
Click on the "Generate keys" button, select and confirm a Main Encryption key and continue by clicking on the "Generate" button.
Note that the main encryption key is not visible in the application later on. We recommend making a copy of the selected key and storing it in a safe place.


After generating the key, the message about the 2N OS IP device configuration should disappear, and a message about encryption keys being set up should be shown (if the message about the device's configuration does not disappear, please refresh the page).
Double-check the 2N OS IP device in case the message is still showing up
In case the message does not disappear even after a while or refreshing the page, please visit the configuration page of that particular 2N OS device itself and navigate to the section Hardware - Extenders (or Card reader)
The Pair button associated to device's RFID reader needs to be greyed out. If it is not, click on it to pair the RFID reader in the device.

If all is set correctly, you shall see a message about encryption keys being set up in 2N Access Commander.

Configuring 2N Fortis devices in 2N Access Commander
Now you need to add the 2N Electronic locks as devices to the 2N Access Commander.
Initially, you need to add just a list of the names for each 2N Fortis device added.
Add the list of 2N Electronic locks to the 2N Access Commander
Go to the "Devices" section, click on the +Device button, select the 2N Electronic lock option, name the lock and click on the Add button.


Add all your 2N Electronic locks and name them to suit their deployment locations or usage.
After adding the 2N Electronic locks, it is possible to add the device to the correct zone (can be assigned later, after the lock is fully configured).

After all 2N Electronic locks are added to the 2N Access Commander, in the section "Devices", you can see the 2N electronic locks' status being NOT CONFIGURED.

Configure each of the 2N Electronic locks in your installation
To fully configure the 2N Electronic locks with the 2N Access Commander, it is necessary to create a Lock setup & Service RFID card and export a 2N Fortis Commander project file containing a list of all your added 2N Electronic locks in 2N Access Commander, which will be imported into the 2N Fortis Commander software.
Create Lock setup & Service card
First, go to the "Settings -> Electronic Locks" section and click on the Create button in the "Maintenance cards" section to create the Lock setup & Service card.

Select the Lock setup & Service option and the card expiration date, and click on Continue.

Place the MIFARE ® DESFire® card (EV1, EV2 or EV3) on the USB card reader and keep it there until the process is complete.
You will hear a tone being played first and melody after a short while from the External USB RFID reader, signalling that the card is successfully configured.
The pop-up window will disappear as well.

Please make sure you label the card in order to recognise what card it is later.
Export a 2N Fortis Commander project
First, set up a password for the 2N Fortis commander project file.
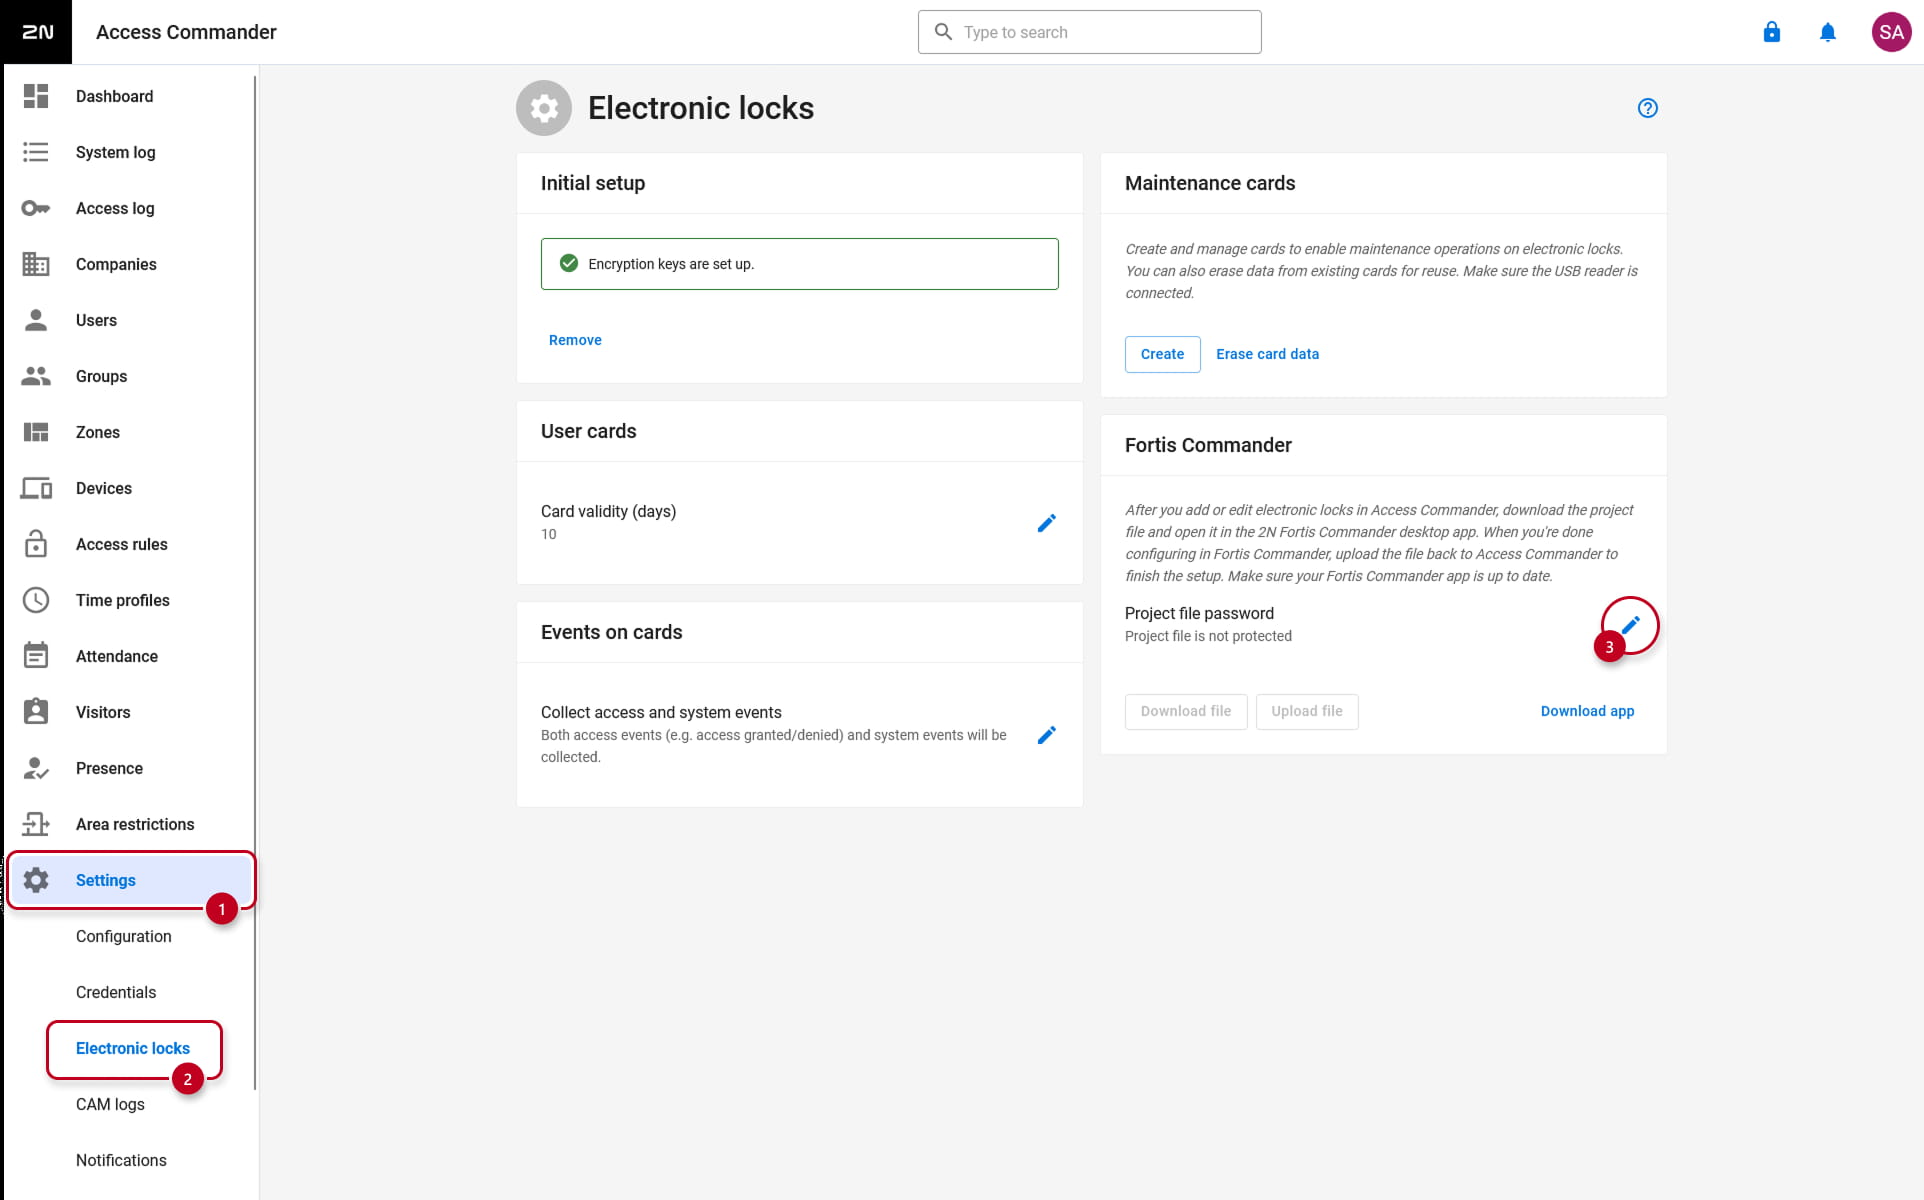

After setting up the password, the option to download the 2N Fortis Commander and the project file will be available.
After downloading the project file, please download the 2N Fortis Commander and install it on your computer.

2N Fortis Commander configuration
When the 2N Fortis Commander is installed, it is possible to open the project file, which was downloaded from the 2N Access Commander on your computer.
The 2N Fortis Commander will automatically open and will ask for the password, which was created in the 2N Access Commander before the option for downloading the project file was available.

Or it is possible to open the installed 2N Fortis Commander software and open the project file which was downloaded from the 2N Access Commander by selecting the "Open project" option.
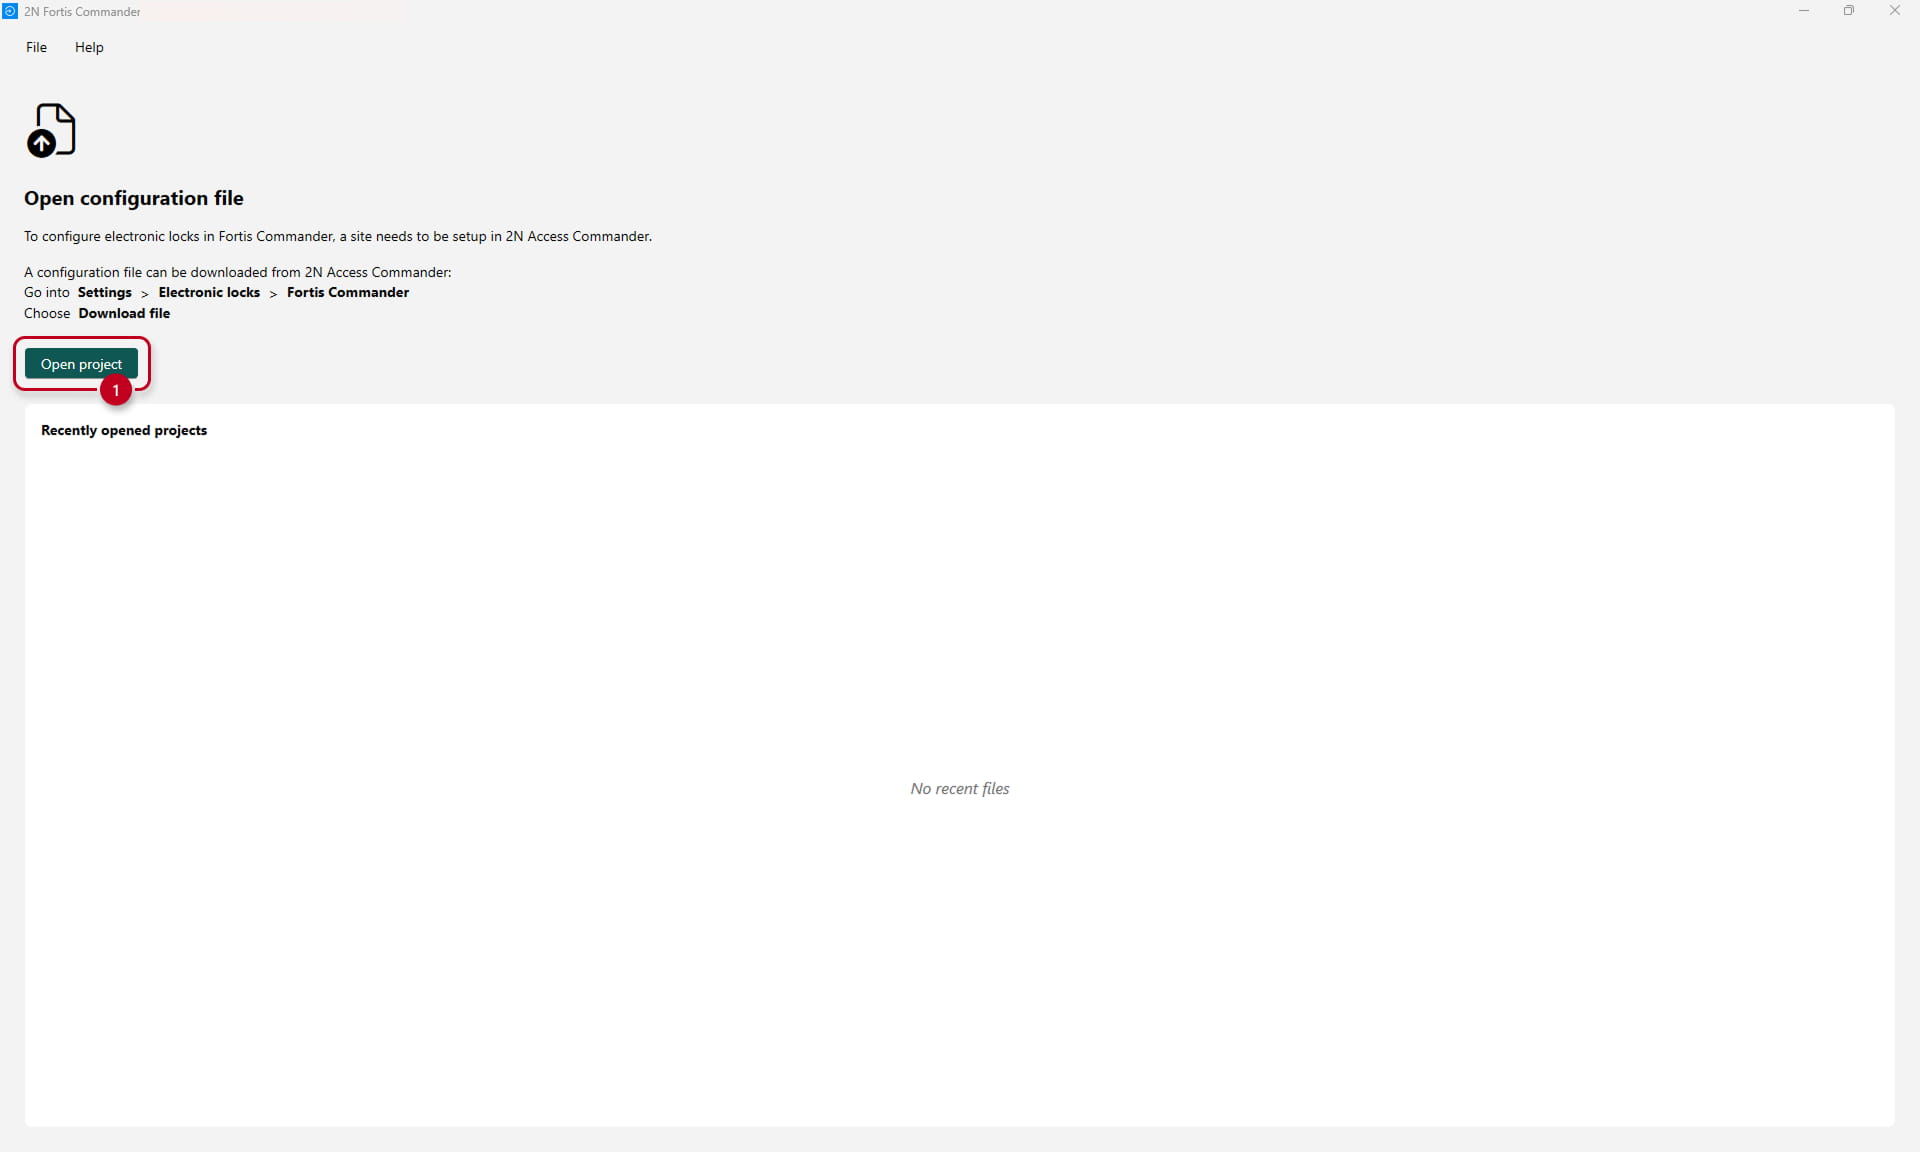
After selecting the project file, you will be asked for the password, which was created in the 2N Access Commander before the option for downloading the project file was available.

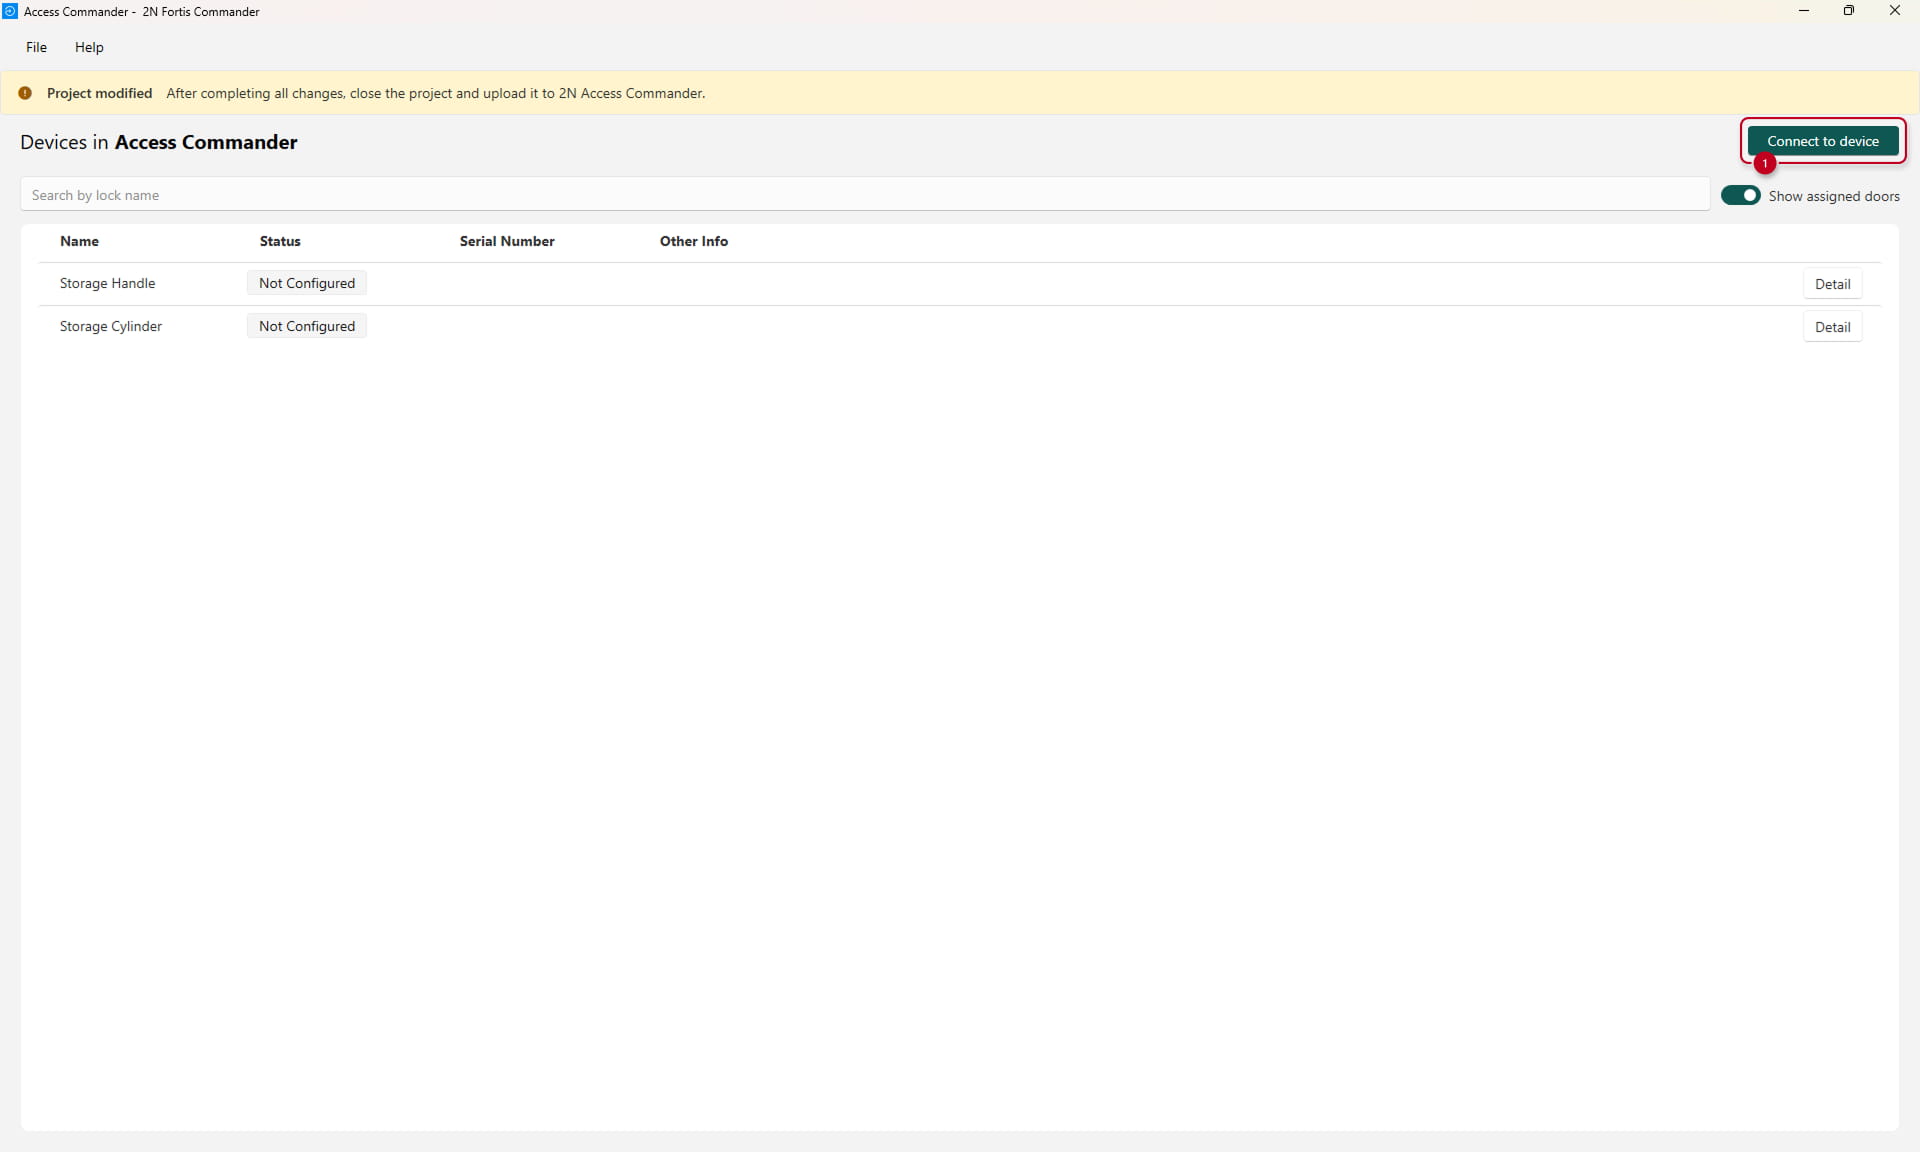
Now it is necessary to add the 2N Fortis electronic locks to the 2N Fortis Commander by connecting them to the 2N Fortis electronic locks.
Tap the service card to the electronic lock to enable the pairing mode. The lights on the 2N Fortis Cylinder or handle will be blinking with a blue light.
Pairing uses Bluetooth. Keep your laptop close to the 2N Fortis Cylinder/Handle throughout the pairing process.
Service cards can be created for your project in the Access Commander (Settings > Electronic Locks > Maintenance cards) section of the 2N Access Commander.

Once the 2N Fortis Lock/Handle is paired and connected with the computer, it is possible to see the details about the device.
Now it is necessary to assign the connected 2N Fortis Handle/Cylinder to the device that was created in the 2N Access Commander. based on your preference.
Click on the "Assign" button, select the device from the list of 2N Fortis devices from the 2N Access Commander and confirm it.


After assigning the lock, the status will change to "Lock assigned", and it is possible to make adjustments (more can be found in this FAQ article).
When the 2N Fortis device is assigned and configured, you can disconnect from the 2N Fortis device.

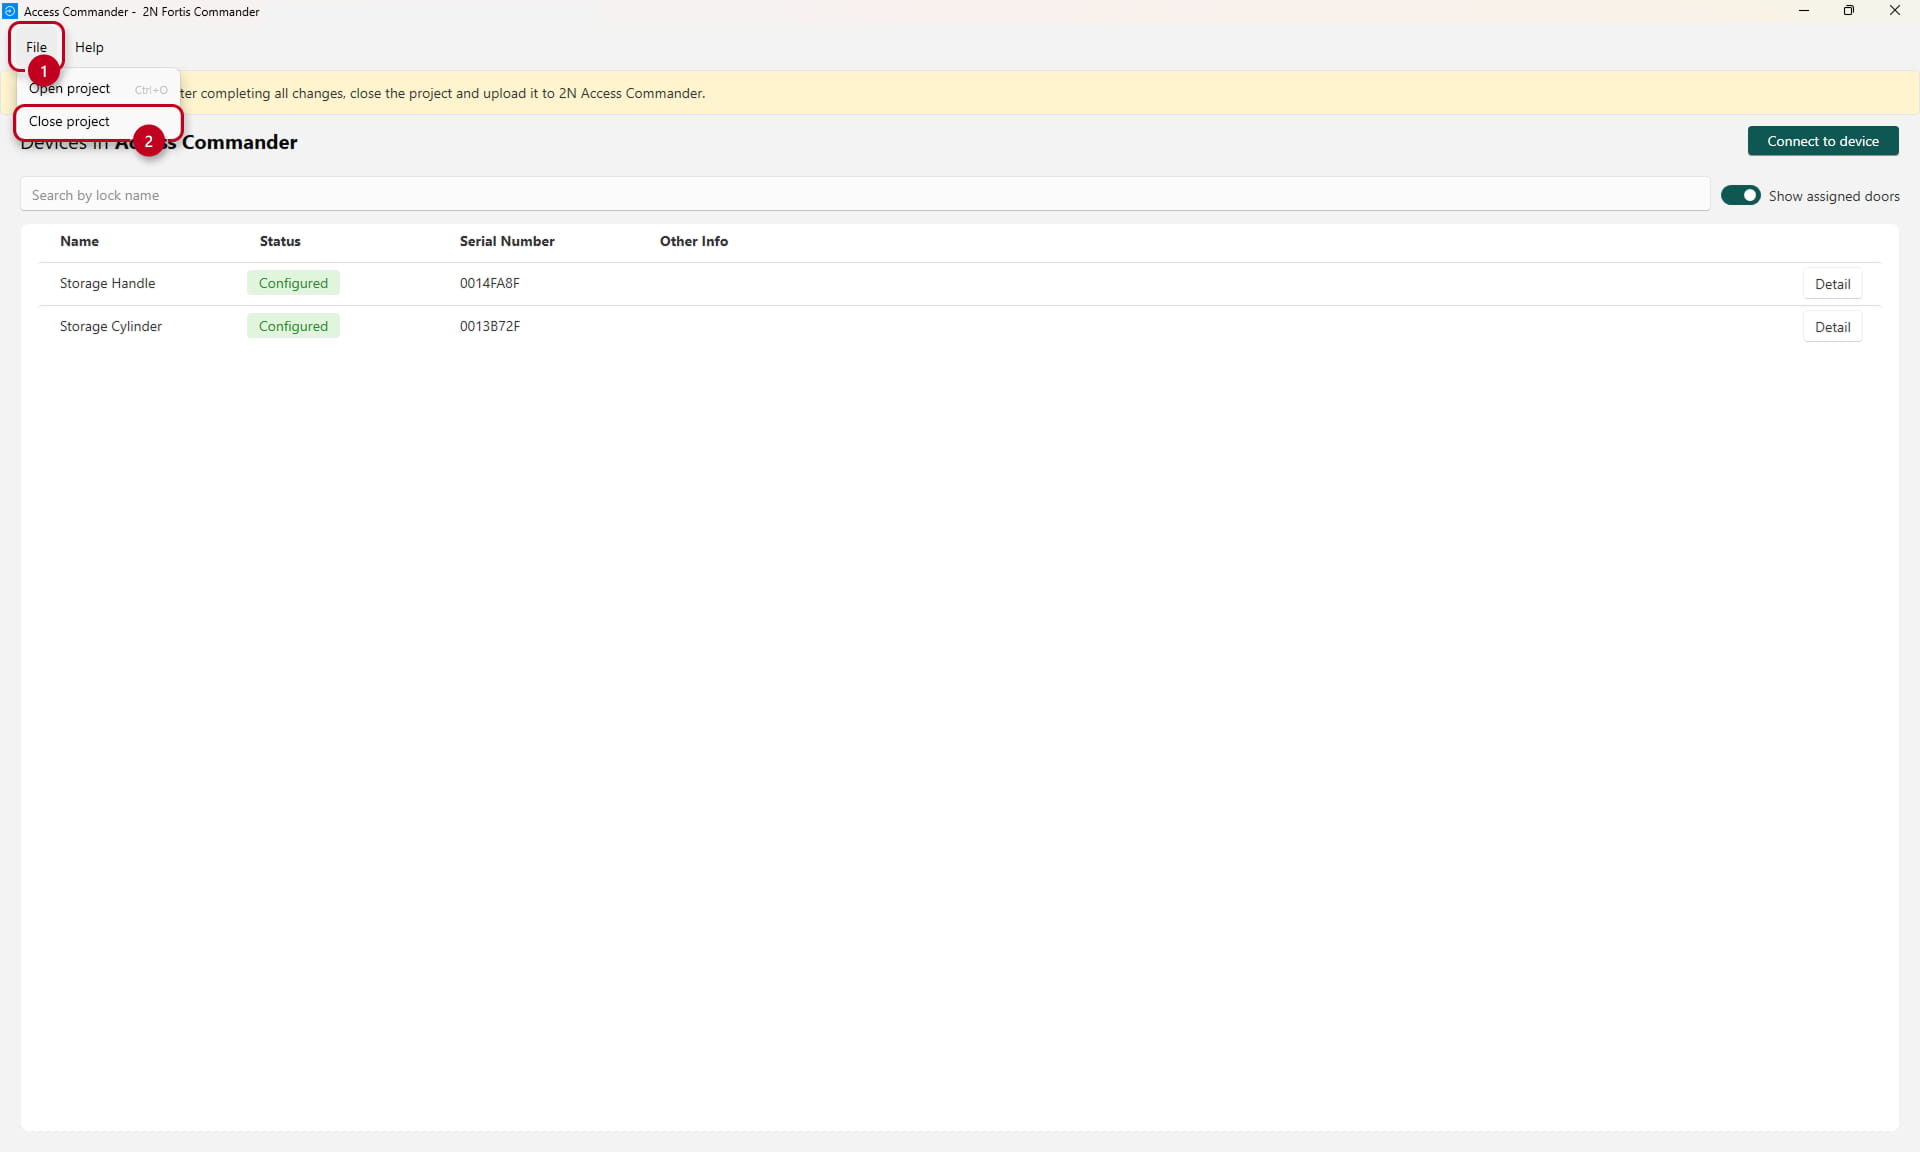
After disconnecting, you can see a list of configured and assigned 2N Fortis devices.

To pair them with the 2N Access Commander, simply close the project and upload the same project file back to the 2N Access Commander.
All changes in the 2N Fortis Commander are saved after every action.

After importing the 2N Fortis Commander file into the 2N Access Commander, the 2N Electronic locks should be shown as Configured in the "Devices" section

Allowing an acces to each lock in the 2N Access Commander
Add 2N electronic locks to zones
You can assign a Zone to the device if you have not done so before, and continue by assigning cards to users.

Program user cards and assign them to users
When programming cards for users once the card is read in user's detail it has to be initialized specifically for 2N Electronic locks
Place the MIFARE ® DESFire® card (EV1, EV2 or EV3) on the USB card reader and keep it there until the process is complete.
You will hear a tone being played first and melody after short while from the External USB RFID reader signalling the card is successfully configured.
The pop-up up window will disappear as well.

Do not forget to add the user to Groups.
HINT: The Zone has to be connected with Group of Users via Access Rules in 2N Access Commander in order to allow access.
Program additional maintenance cards
Once a project in 2N Access Commander is generated, you can create additional Maintenance cards and select the expiration date of the card.
Please make sure you label the card in order to recognise what card it is later.


Lock setup & Service
Used for switching locks to service mode and performing maintenance. Supports both factory default encryption keys (for new locks) and installation keys (for ongoing service).
Battery card
This card is used for already programmed 2N Electronic Cylinders in the same 2N Access Commander project to remove the battery cover.
You can check the 2N YouTube channel for a video about how to operate the Battery card.
Dissassembly card
This card is used for already programmed 2N Electronic Cylinders in the same 2N Access Commander project to fix it to or remove it from the cylinder in the door.
You can check the 2N YouTube channel for a video about how to operate the Assembly/Disassembly card.
Erase a programmed card
Programmed cards for 2N Electronic Locks can be erased in the "Settings - Electronic locks" section of 2N Access Commander.
Place the MIFARE ® DESFire® card (EV1, EV2 or EV3) on the USB card reader and keep it there until the process is complete.
You will hear a tone being played first and melody after a short while from the External USB RFID reader, signalling that the card is successfully erased.

