External IP Relay 9137410E & 9137411E - Controlling using HTTP commands from a 2N IP intercom or 2N Access Unit
The steps in this article require using the web interface of a 2N device. Please follow this manual in case this is your first time using the web interface.
Do you need an intercom to switch on lights or call a lift, but the switched devices are far away and laying cables all the way to the intercom isn’t an option? Use an external IP relay, which is controlled using HTTP commands from a 2N IP intercom or Access Unit. The command is sent to the relay in unsecured form.
Prerequisities
- 2N IP intercom or 2N Access Unit with the latest firmware
- Additional GOLD license is neccessary for 2N IP intercom
- Additional GOLD license is neccessary for 2N IP intercom
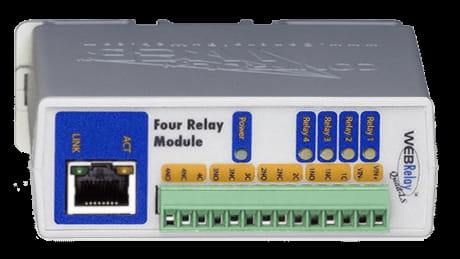
- External IP Relay from 2N
- 9137410E (1 output)
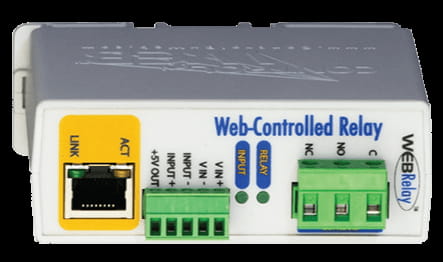
- 9137411E (4 outputs)
- 9137410E (1 output)
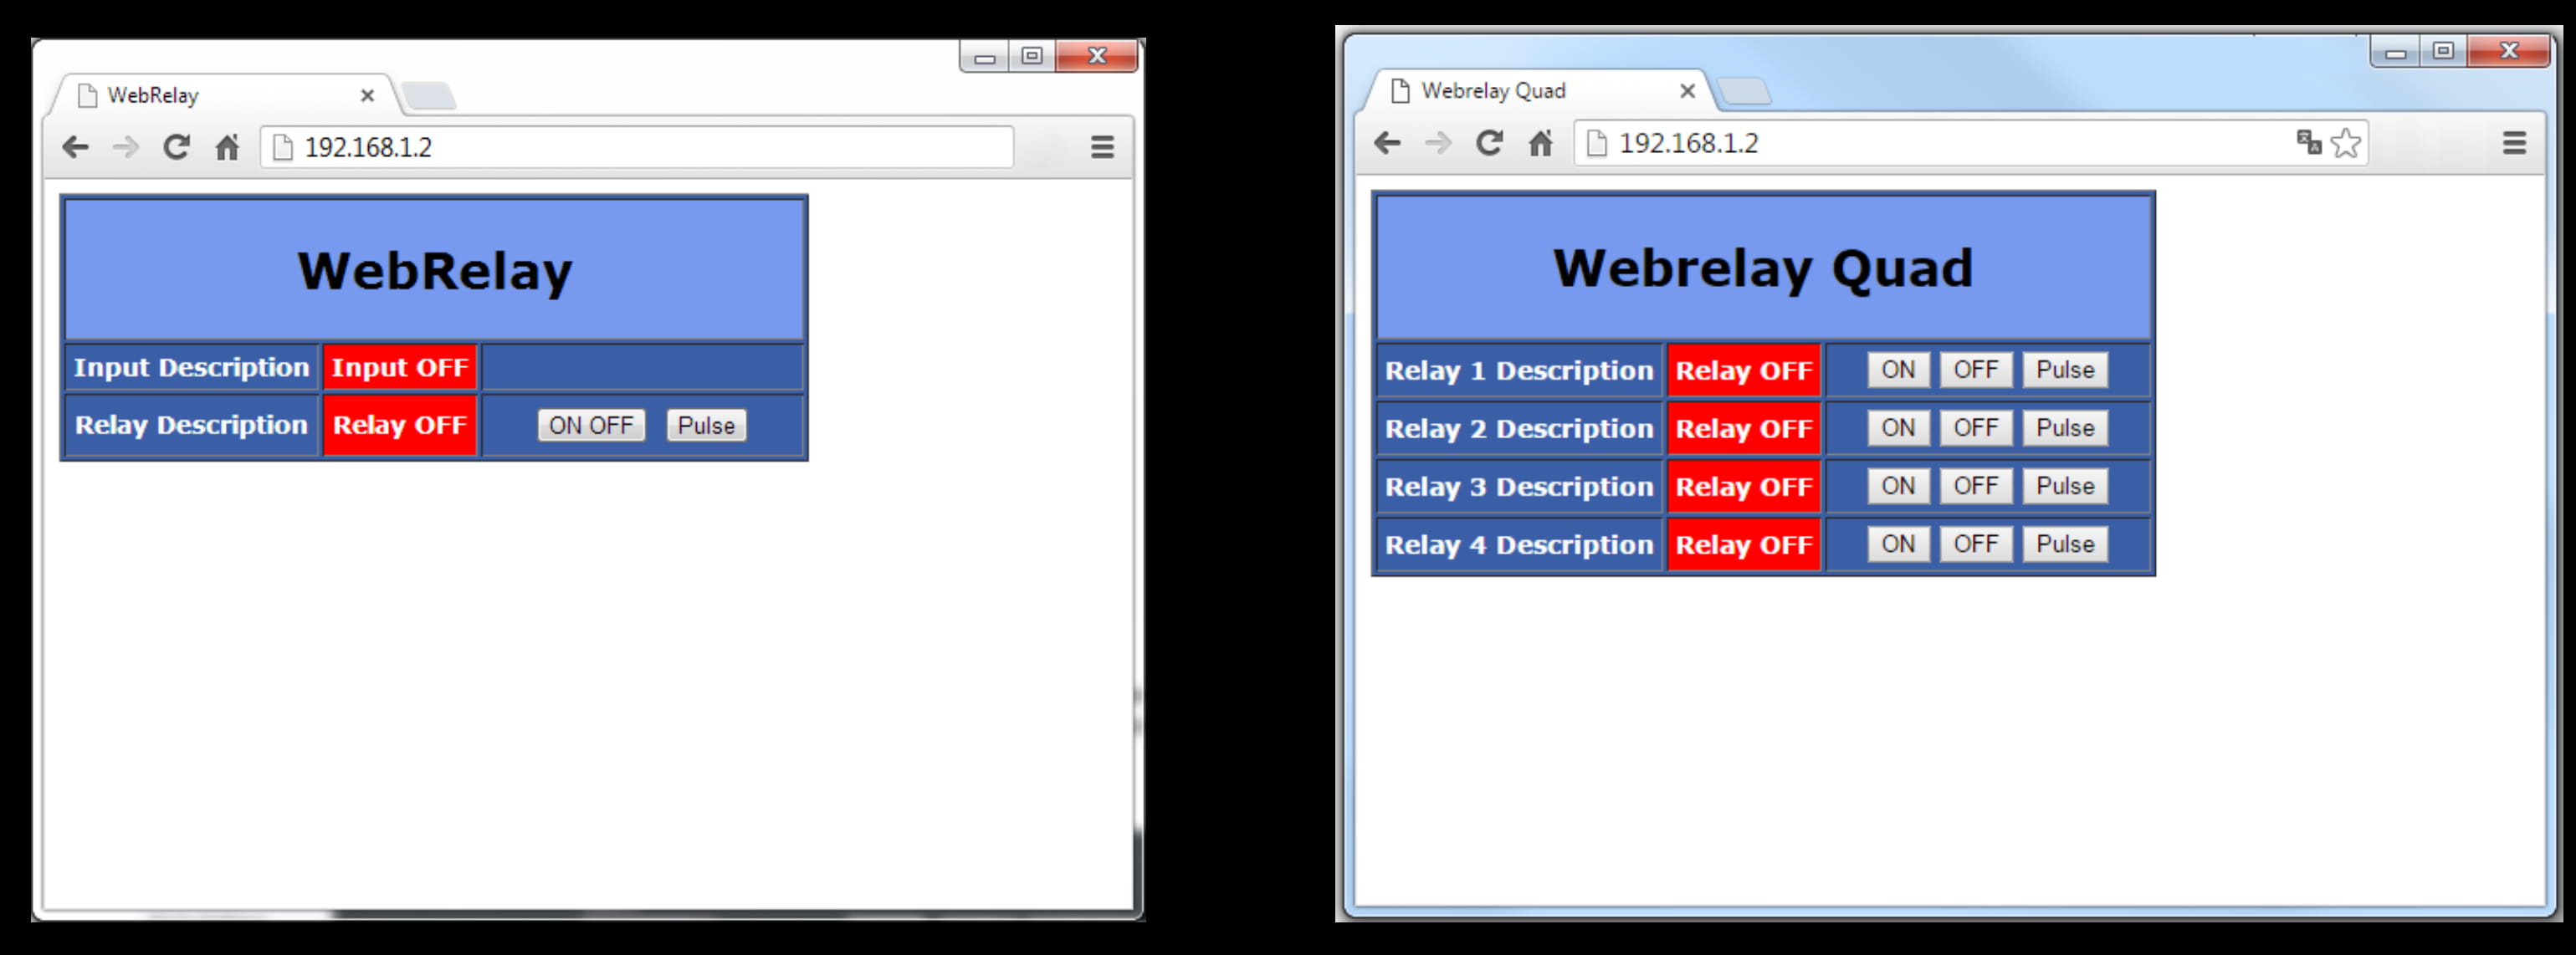
Web interface of External IP Relay
- Control page
If you have your IP relay in the default setting, open your web browser and enter IP address 192.168.1.2, then you should be able to see control page depending on the version of the product you own. If you are not able to access the IP relay web interface, then please check if your computer is in the same network as IP relay (PC must have an IP address 192.168.1.x).
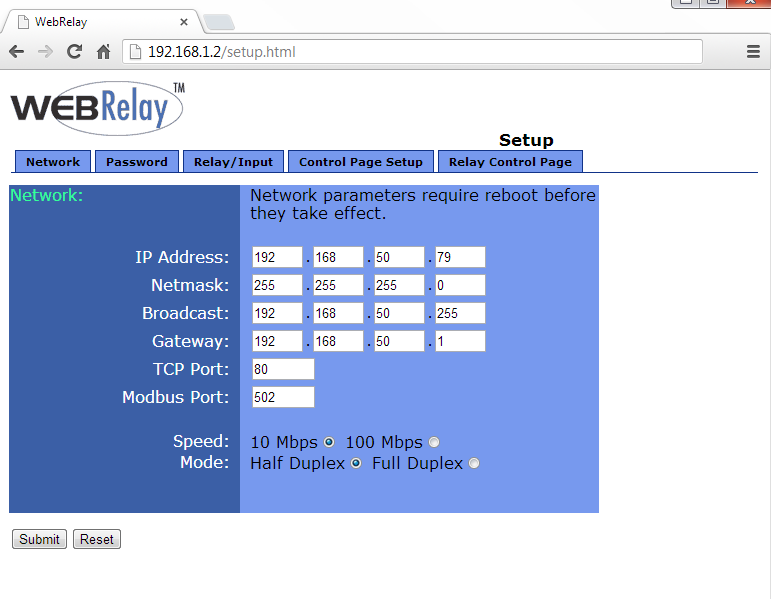
- Setup page
For entering the IP relay setup page, type to web browser http://192.168.1.2/setup.html
Username: admin
Password: webrelay
Now you can configure its parameters according to your needs.
e.g. network parameters (change IP address), look of the control page, relay pulse duration.
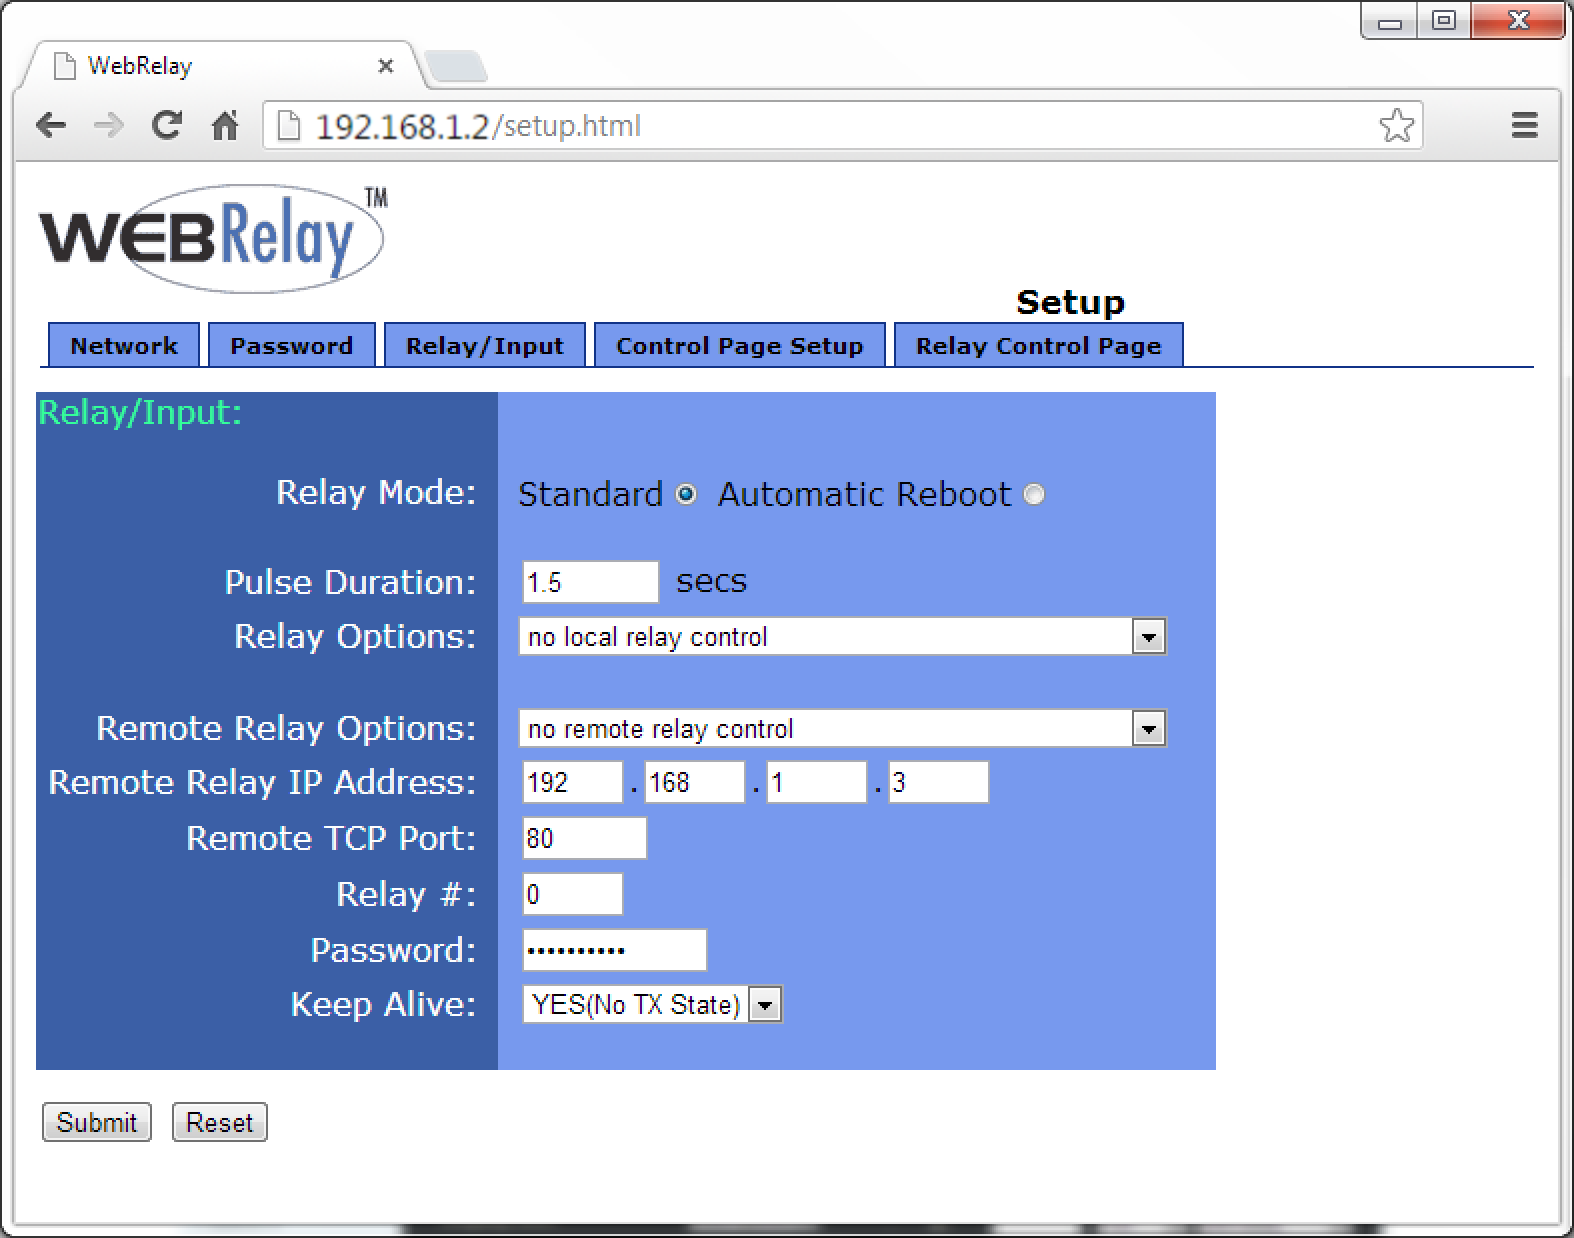
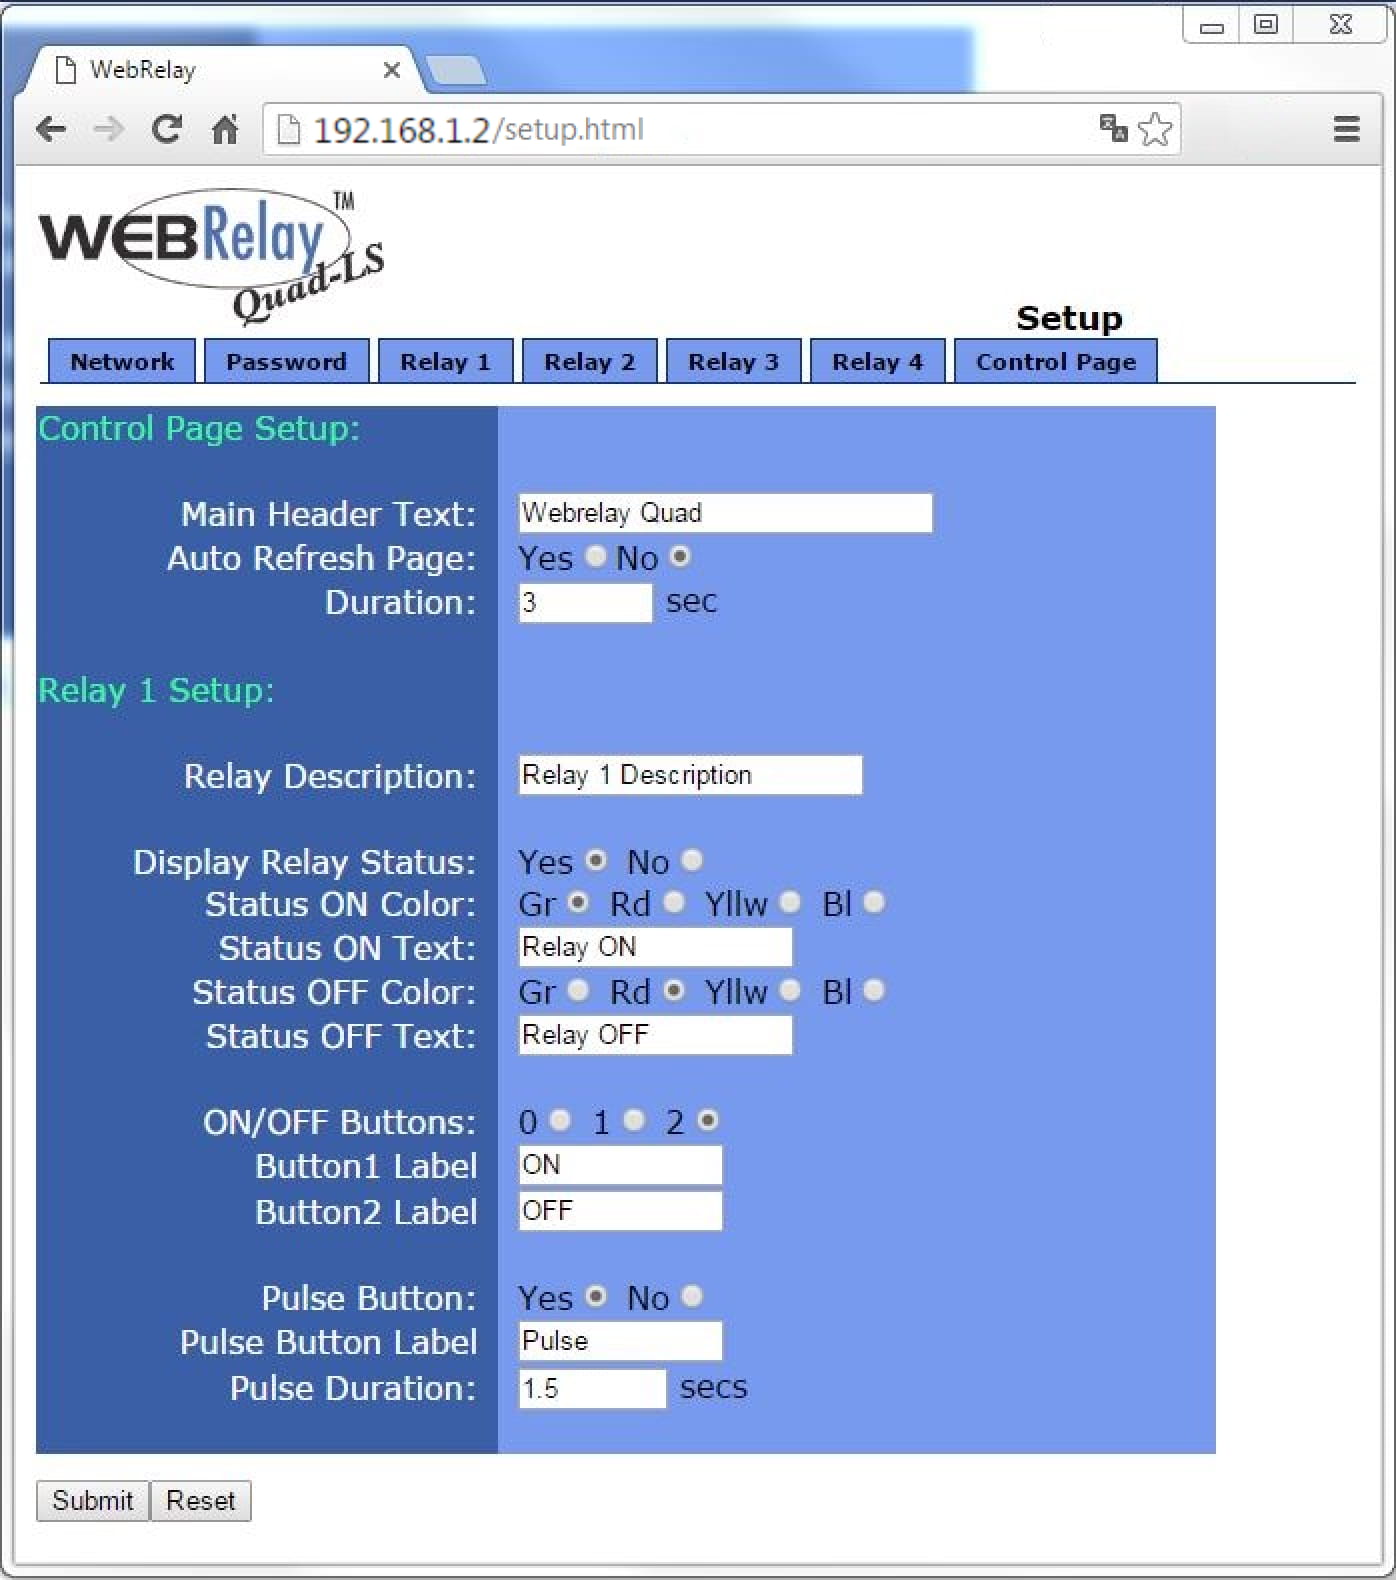
Detailed information about the IP relay settings and additional features is found in the manual linked below.
Manual for External IP Relay
HTTP commands to control External IP Relay outputs
- External IP Relay with 1 output (9137410E)
Pulse http://192.168.1.2/state.xml?relayState=2 ON http://192.168.1.2/state.xml?relayState=1 OFF http://192.168.1.2/state.xml?relayState=0
- External IP Relay with 4 outputs (9137411E)
Pulse relay 1 http://192.168.1.2/state.xml?relay1State=2 relay 2 http://192.168.1.2/state.xml?relay2State=2 relay 3 http://192.168.1.2/state.xml?relay3State=2 relay 4 http://192.168.1.2/state.xml?relay4State=2 ON relay 1 http://192.168.1.2/state.xml?relay1State=1 relay 2 http://192.168.1.2/state.xml?relay2State=1 relay 3 http://192.168.1.2/state.xml?relay3State=1 relay 4 http://192.168.1.2/state.xml?relay4State=1 OFF relay 1 http://192.168.1.2/state.xml?relay1State=0 relay 2 http://192.168.1.2/state.xml?relay2State=0 relay 3 http://192.168.1.2/state.xml?relay3State=0 relay 4 http://192.168.1.2/state.xml?relay4State=0
Sending HTTP commands to External IP Relay by 2N IP intercom or 2N Access Unit
- Login to 2N IP Intercom web interface, section Hardware - Switches.
- For the used switch setup Switch-On Duration and Switch-On and Switch-Off HTTP Commands, use the commands from the previous table.

- Now every time when the 2N IP Intercom´s switch is activated, the IP relay is triggered on and after 5 second triggered off.
More information about Switch settings in our manual: 2N IP Intercom - Configuration manual