How to install 2N Clip 2Wire-IP
This article explains how to install 2N Clip 2Wire-IP. This product requires 2N Clip 2Wire-IP Switch that powers and connects it to LAN network. Switch is compatible with DIN rail or can be wall-mounted. Single switch can connect up to 6 2N Clip 2Wire-IP. In case the installation requires multiple switches, here is ho to connect them. Switches can be interconnected over 2wire or over ethernet cables:

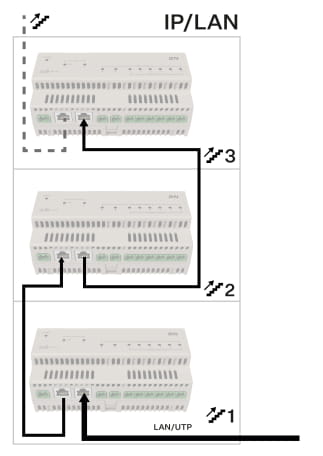
After thw switch(es) are installed, connect twisted 2wire cable(s) for all Clip(s) and then install the Clips themselves:
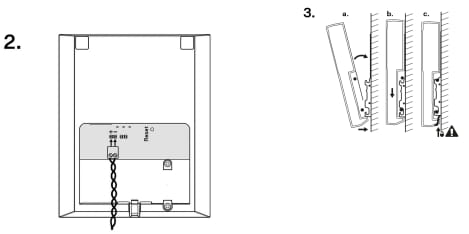
On-the-wall mount:

Single-Gang Box Mounting (US):

Stand Installation:


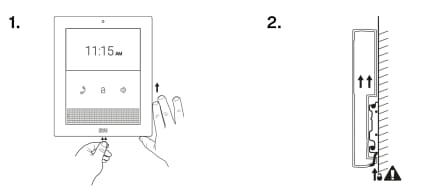
Device Removal:
Configuration:
After the 2N Clip 2Wire-IP is installed, it needs to be configured. You will need to connect a computer to the LAN and then do the following:
1) download and install 2N Network Scanner. This program is useful for finding the IP address of the Clip and basic network configuration. Follow this article on how to use it: https://www.2n.com/en-GB/faqs/2n-network-scanner-locating-2n-devices-in-the-network-kA0Rn000000tttXKAQ?category=intercoms
2) connect to the web interface: https://www.2n.com/en-GB/faqs/Web-interface-access-2N-IP-intercoms-kA0Sd000000JF4zKAG?category=intercoms
3) configure 2N Clip 2Wire-IP for calls with the intercom: https://www.2n.com/en-GB/faqs/Communication-via-Device-ID-of-2N-IP-intercom-kA0Rn000000r6k2KAA?category=indoor-stations&product=2n-clip