This article is showing you how to configure the switch codes within the My2N service to be able to open doors. In case you don't have an electric lock connected to the intercom, please read the following articles before configuring the switch:
Step-by-step Guide
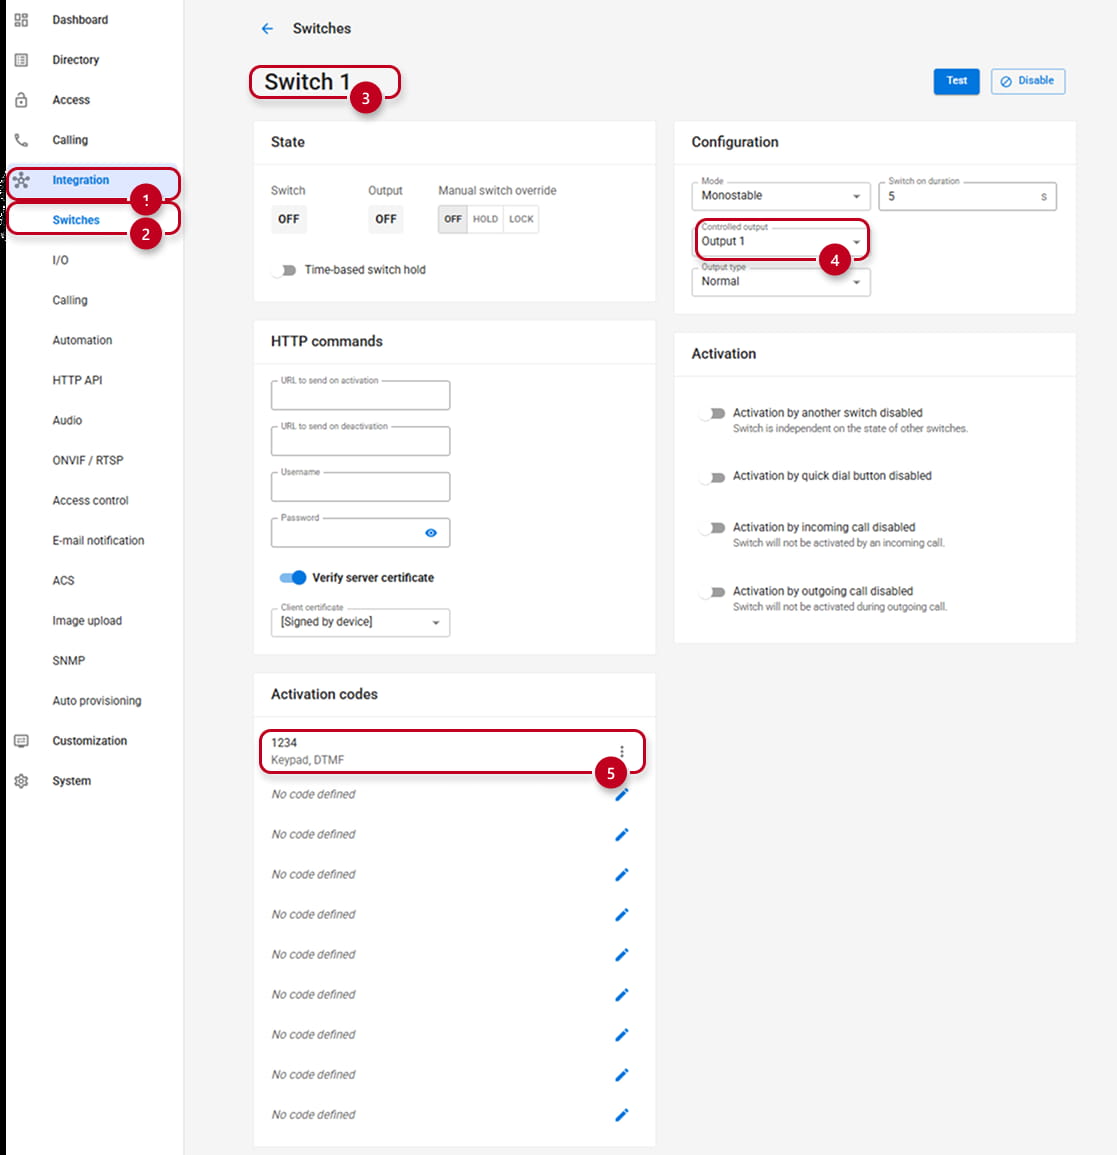
Firstly it is necessary to configure the switch codes under the intercom in your My2N account.
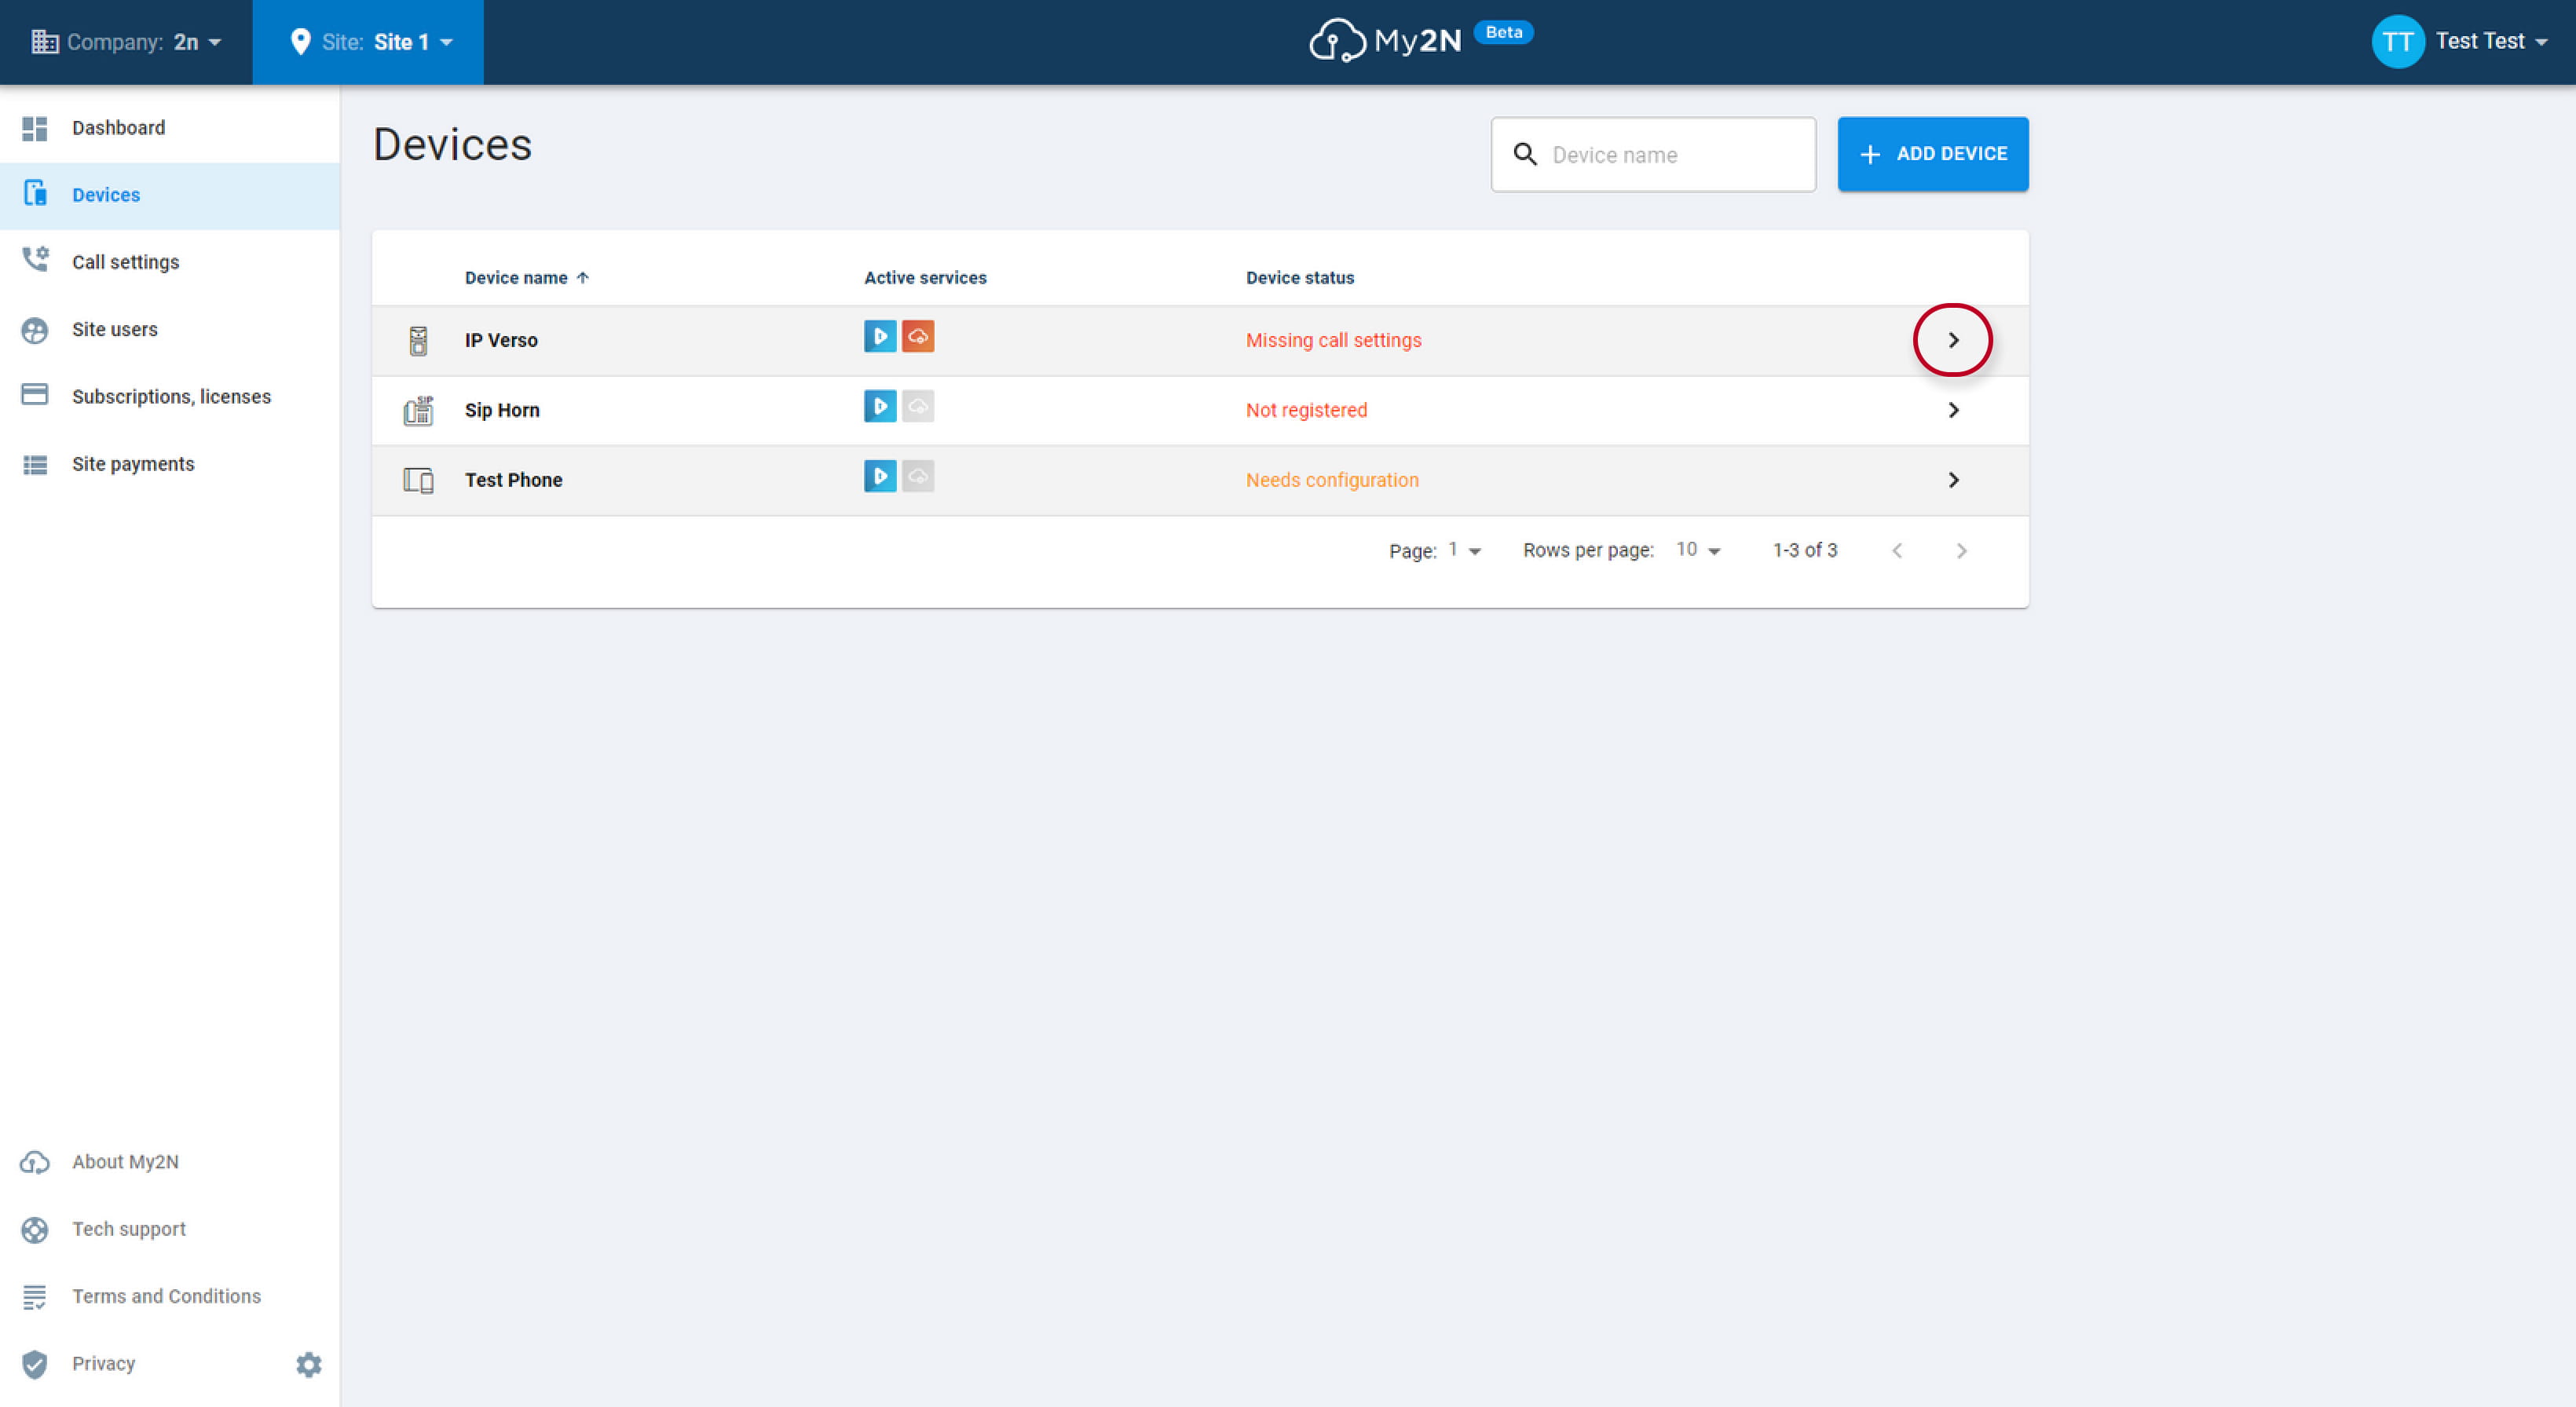
Figure 1: How to add the switch code - My2N portal
Once you click on the edit button you will see the details of your intercom and the section Switch codes. In this section, you can configure your switch code for each switch. In this example, I have defined code 1234* for the switch one. You can also define your own name for the switch. The name of the switch is shown in your 2N Mobile Video application.
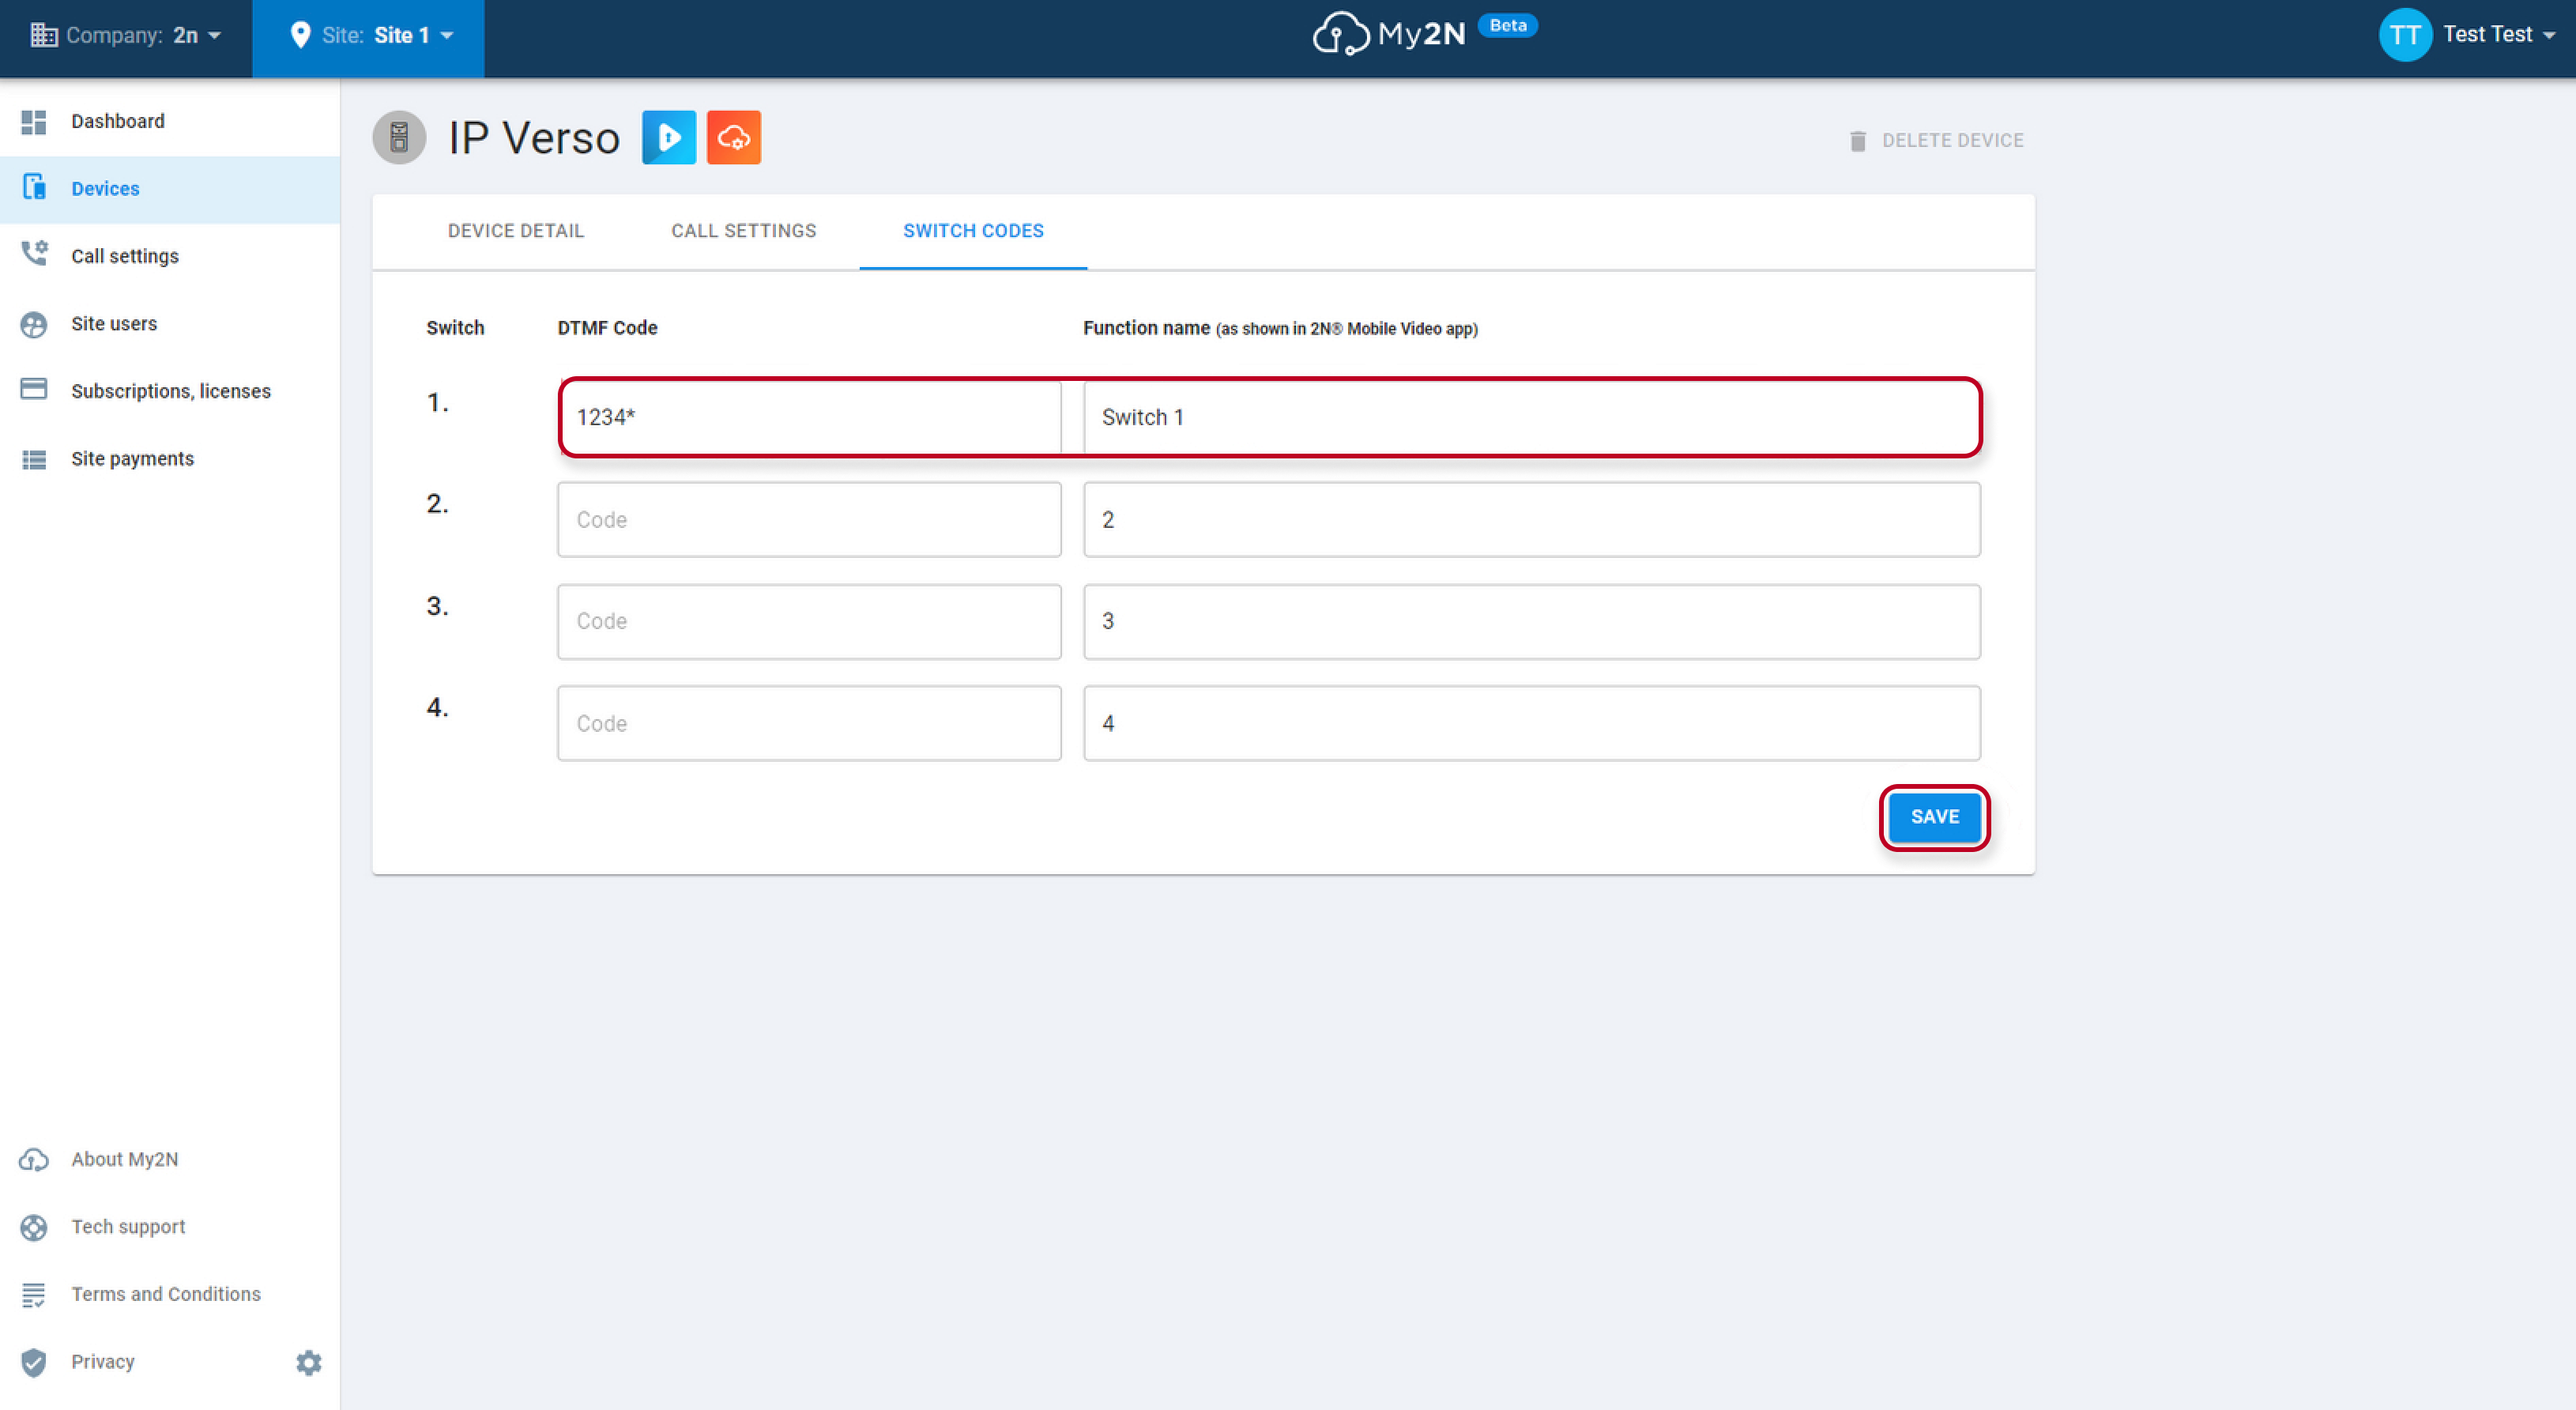
Figure 2: Switch codes setting
The code is uploaded into the intercom automatically however you can also take a look into the intercom setting and verify if the code has been uploaded into the intercom or in case of manual configuration the code can be configured in the following section Hardware->switches.
In the Old Web interface:
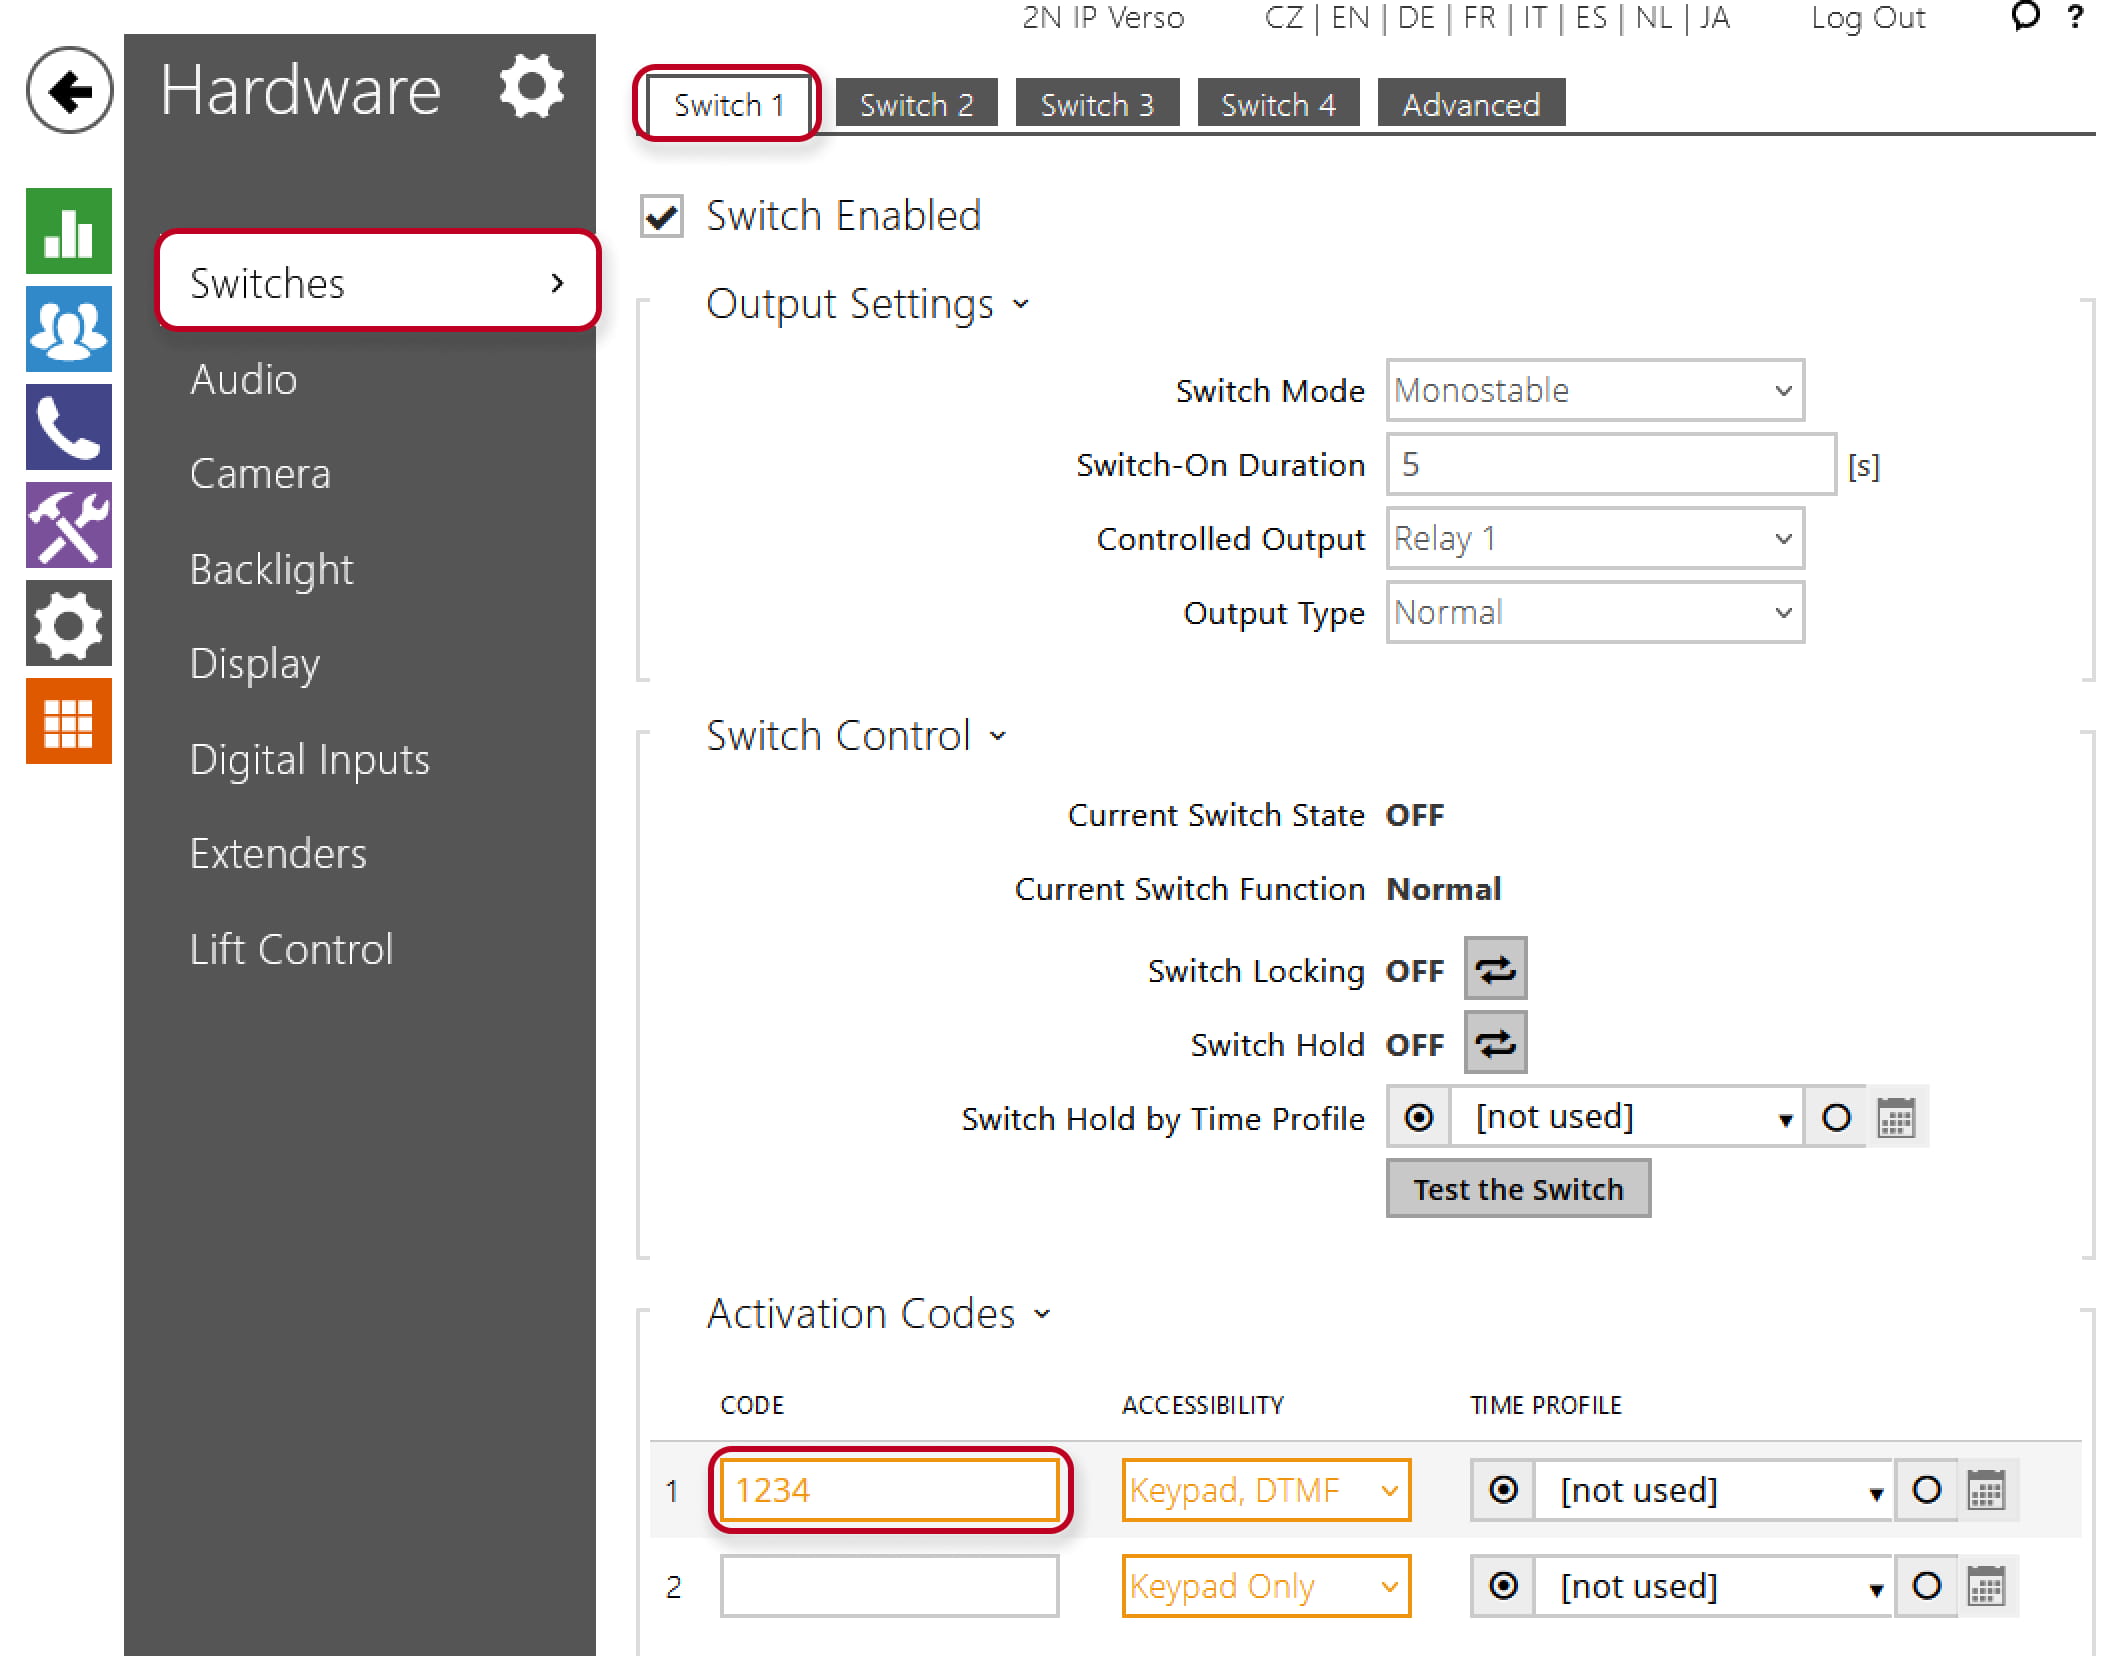
Figure 3: Switch codes intercom setting - global code
In the New Web Interface:
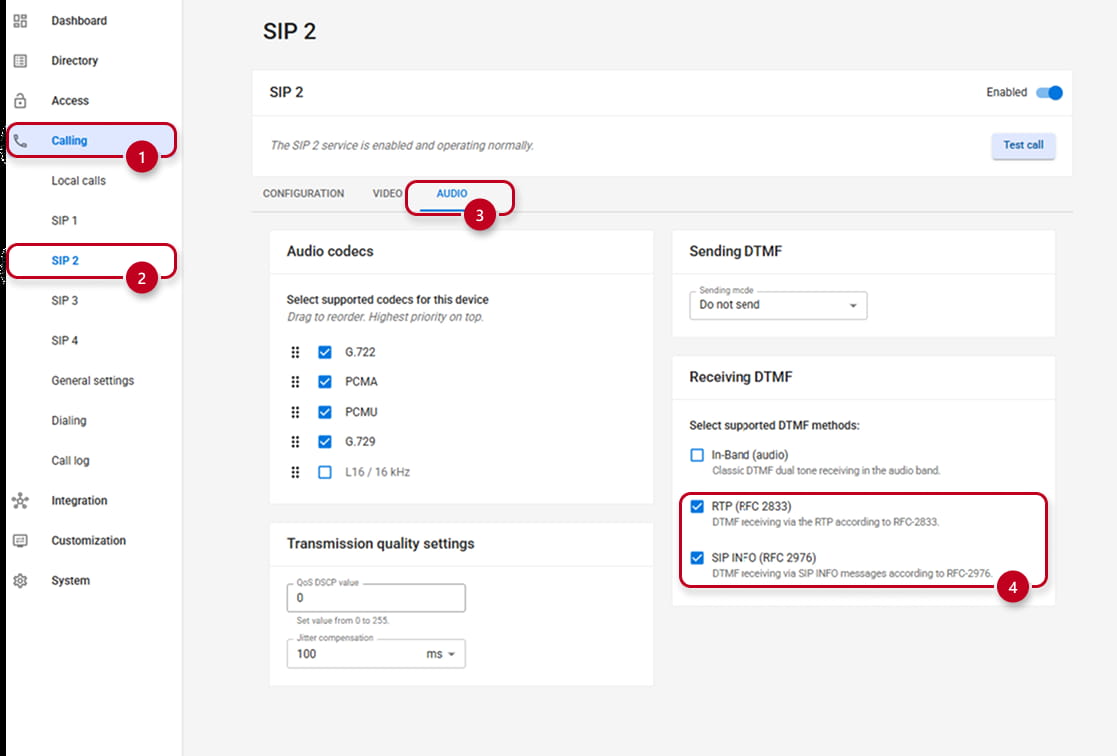
In case of some issues with the opening of the door, please verify the following section and enable only SIP INFO DTMF receiving (the most reliable way) in the section Calling > SIP2 > Audio
Make sure that SIP INFO (RFC-2976) is checked as it is the protocol used by 2N devices and RTP (RFC-2833) as well as it it often used by third party devices.
In the Old Web interface:
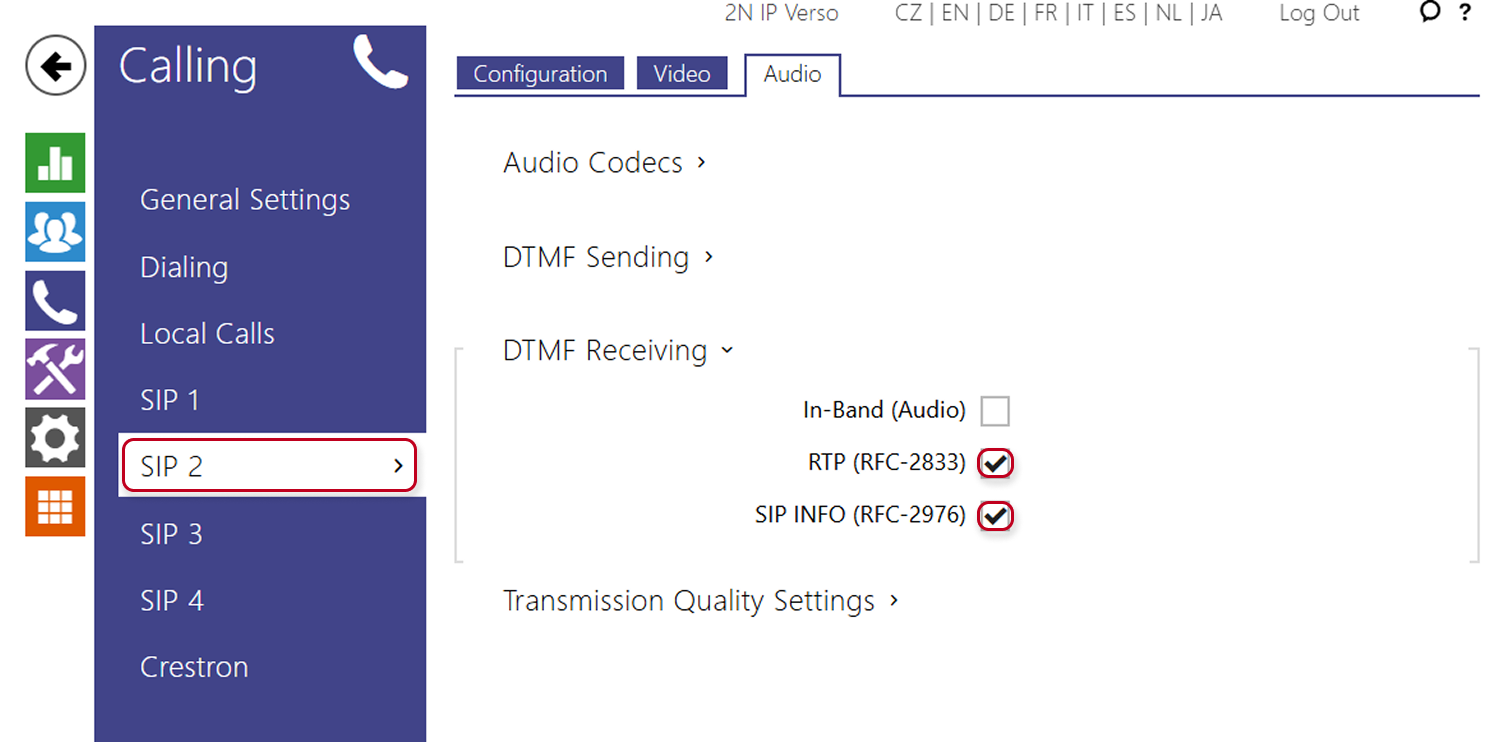
Figure 5: DTMF intercom setting
In the New Web interface: