2N IP Intercom
Log into 2N IP Intercom (default login is admin and password 2n), open the menu Hardware / Extenders, and find the connected OSDP module.
Select the Baudrate compatible with your CP. Change the Mode to Installation to be able to establish a secured communication. PD address can be set in range 0 – 126, Genetec can manage the address up to 63. Save the configuration by clicking on the Save button.

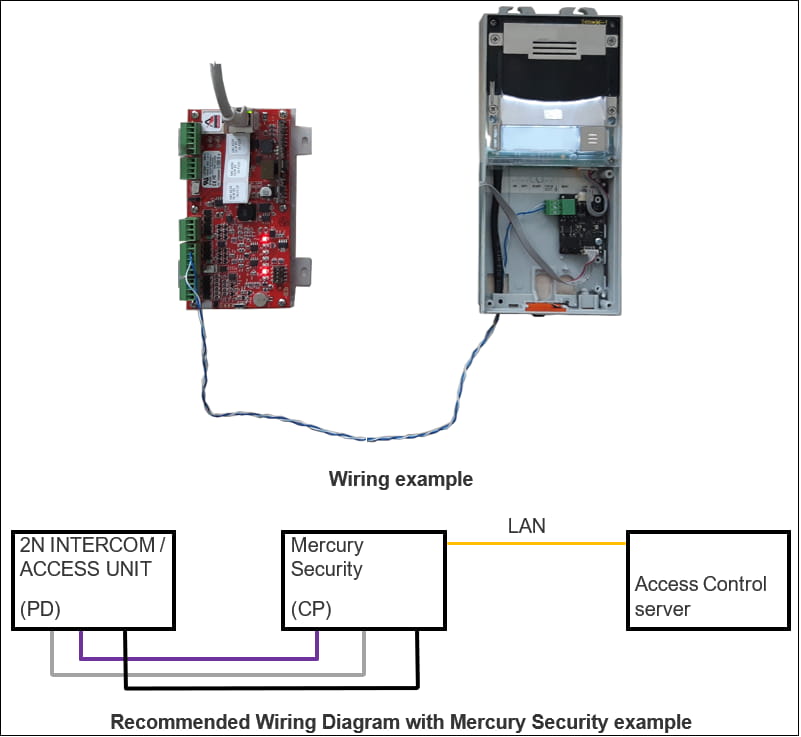
Wiring example
Parameter explanation
Transmitted Code Format – It is the same as for the Wiegand module if you need to specify the format (length) of the credential to be sent via OSDP. For E.g., some access control or security system can handle formats like 26-bit, 45-bit, and so on. If there is an Auto format set, credentials from cards are sent as they are.
Encryption Key – That is the key for secured communication between our OSDP module with a connected control panel. On both ends, there must be the same key to establish encrypted communication. There are some differences between Axis CP (A1001, A1601) and Genetec (Mercury security CP), which we tested, and others are similar.
-
Axis CP – The Encryption key is set manually. It means, that a 128-bit key should be entered into this field in the 2N Intercom web UI and on Axis CP using VAPIX API.
-
Genetec + Mercury security CP – When the Installation mode is set on the 2N Intercom, it can be configured automatically from Genetec. So, when the secured OSDP is enabled on the Genetec side and an admin starts pairing with the connected device (with 2N Intercom), the key is exchanged via OSDP protocol on the line, 2N Intercom remembers it, switches from Installation mode to Normal mode and encrypted communication begins.
Mode
-
Normal – Normal operation mode
-
Installation – In the installation mode, the 2N Intercom awaits Encryption Key exchange from the Control panel side.
-
Automatically switches to Normal mode:
-
When The key is received
-
After a 30-minute timeout
-
When the Intercom is restarted
-
-
| Installation mode should be switched by purpose by the administrator, as that is potentially insecure in case of “men in the middle” attacks. |
Force Encryption – If this option is off, the 2N OSDP can communicate both unencrypted and encrypted. When Force Encryption is enabled, the 2N OSDP module doesn’t accept unencrypted messages on the OSDP line.
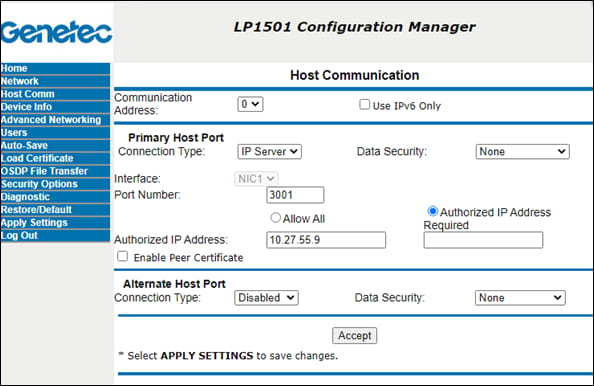
Mercury Security CP
Connect to your Mercury Security CP web GUI. Set up the connection to your Genetec server in the menu Host Comm. Set the Connection type to IP Server, Data Security could be set to None, but it should be set to TLS Required later. The Authorized IP Address Required can be set too according to Genetec IP Address. Then accept all changes and apply them by selecting Apply Settings menu.
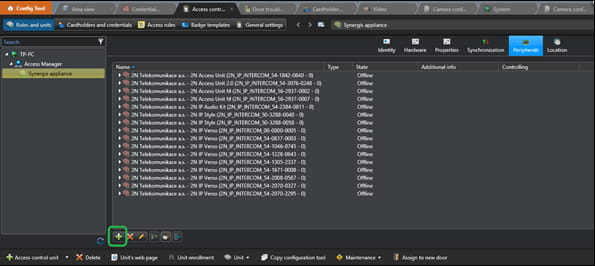
Genetec – Security Centre
Open your Genetec Config Tool, and enter the Access control menu and Peripherals section. Click on the green "plus" button.
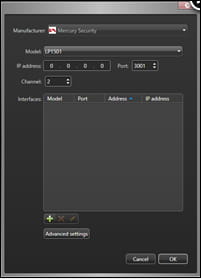
Chose the Manufacturer of your CP you want to add and a Model. Then configure its IP address and check the Port number.
Roll up the newly added CP, double-click on a reader you connected the 2N OSDP module to, and set the Type of reader to OSDP 2. Check Baudrate and Address, save the configuration and Apply it.

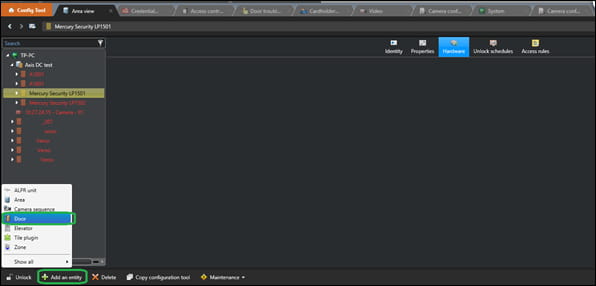
In the Genetec Config Tool, enter the Area view menu and Hardware section. Click on Add an entity and chose Door.
In the Creating a door dialog, enter an Entity name and chose Location.

Then chose the Access control unit and find the Interface module you added in the last steps.

Configure Connected Readers, Door lock, and other inputs if needed.

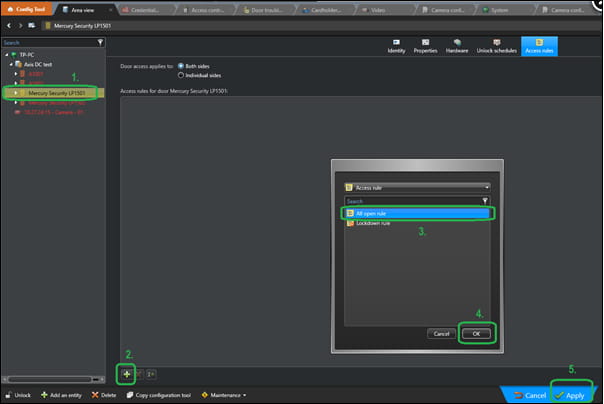
Now switch to the Access rules section, chose the CP you added, and click on the green "plus" button. In the opened window click on the preferred Access rule, confirm it by clicking on the OK button, and then Apply.
Pair OSDP devices to establish secured communication
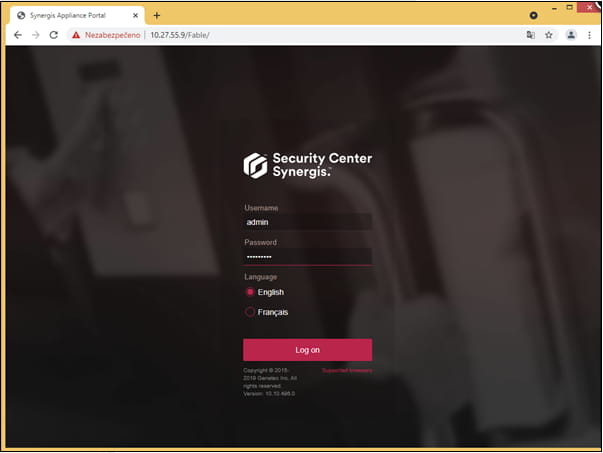
In your browser open the IP address of your Genetec server and Log on.
In the menu click on Secure OSDP button.

There should be the connected CP waiting for Pairing with its reader (2N ODP module). Click on Pair and wait for a while until it's done.
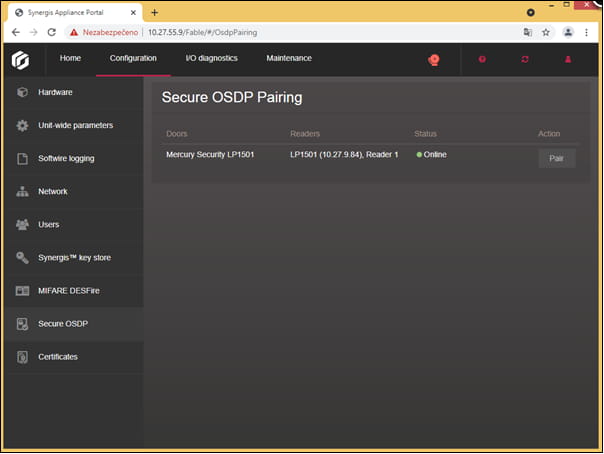
When it switches to Paired state, you can open the 2N IP Intercom web GUI, menu Hardware / Extenders, there you should find an Encryption Key agreed with Genetec server. You can switch Mode to Normal Operation and Save.

Last updated: 04.10.2022
Used devices in manual:
-
2N IP Verso (firmware version 2.34)
-
2N OSDP Module
-
Mercury LP1501
List of compatible Hardware:
-
2N IP Style
-
2N IP Verso
-
2N Access Unit 2.0