Alarm1_2 and Long_Alarm2_setting
LiftIP2 - Alarm1 and Alarm2 call distinction
Demand:
Activation of input Alarm1 or Alarm2 should realise the SIP call to one device, and on the device should be possible to recognise from which input was the call activated.
Solution for connection with SIP PBX:
- SIP accounts setting
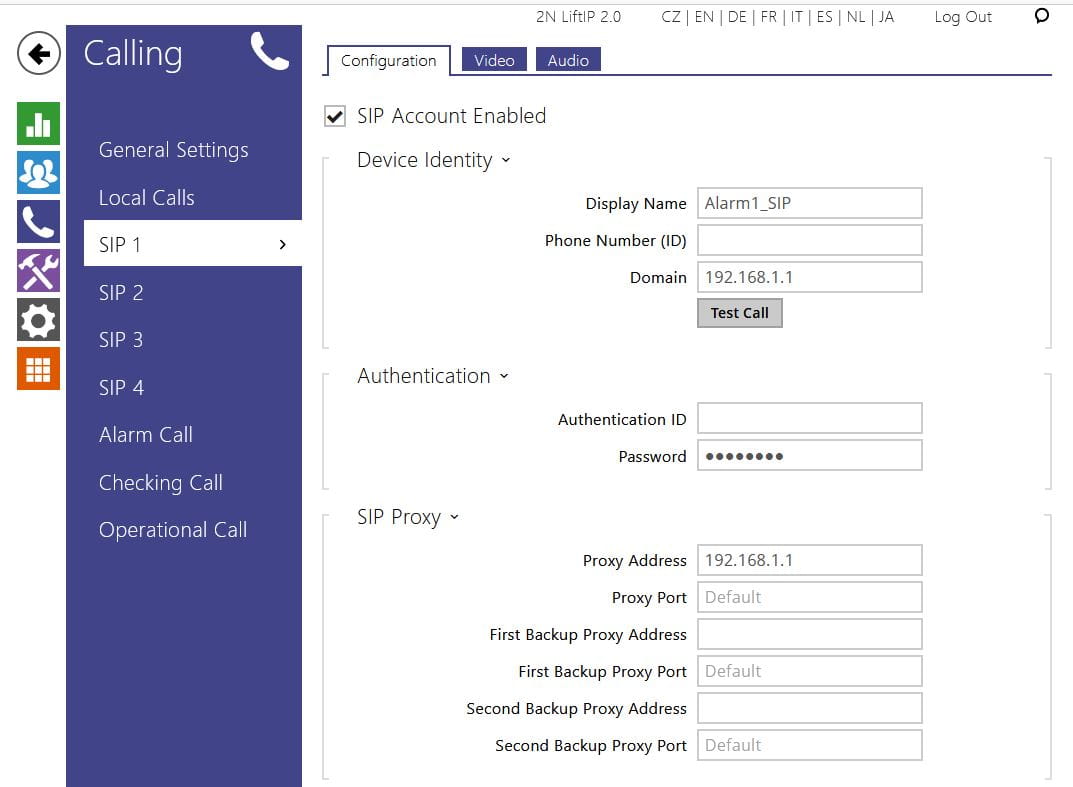
Two SIP accounts must be dedicated to the PBX. In the menu Calling on LiftIP2 (LIP2) these accounts must be set as SIP1 and SIP2 (SIP3 and SIP4 can be used too). SIP PBX must be in the same LAN as connected devices (example below) or on a public IP address.
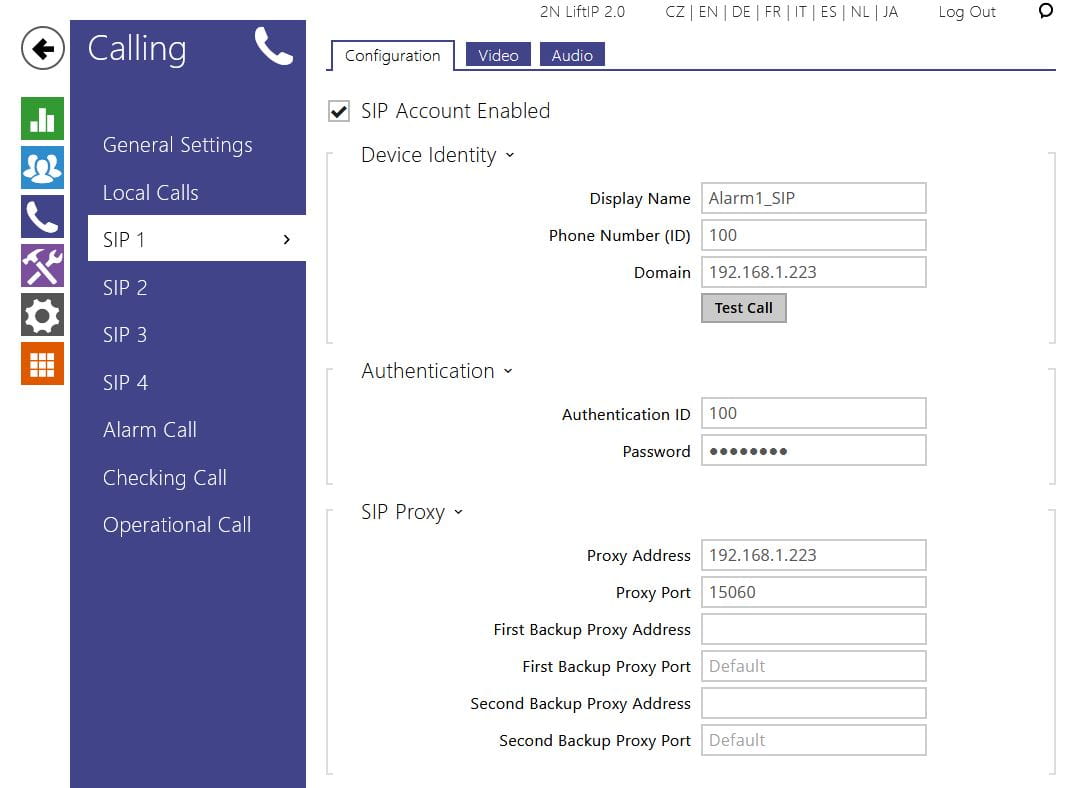
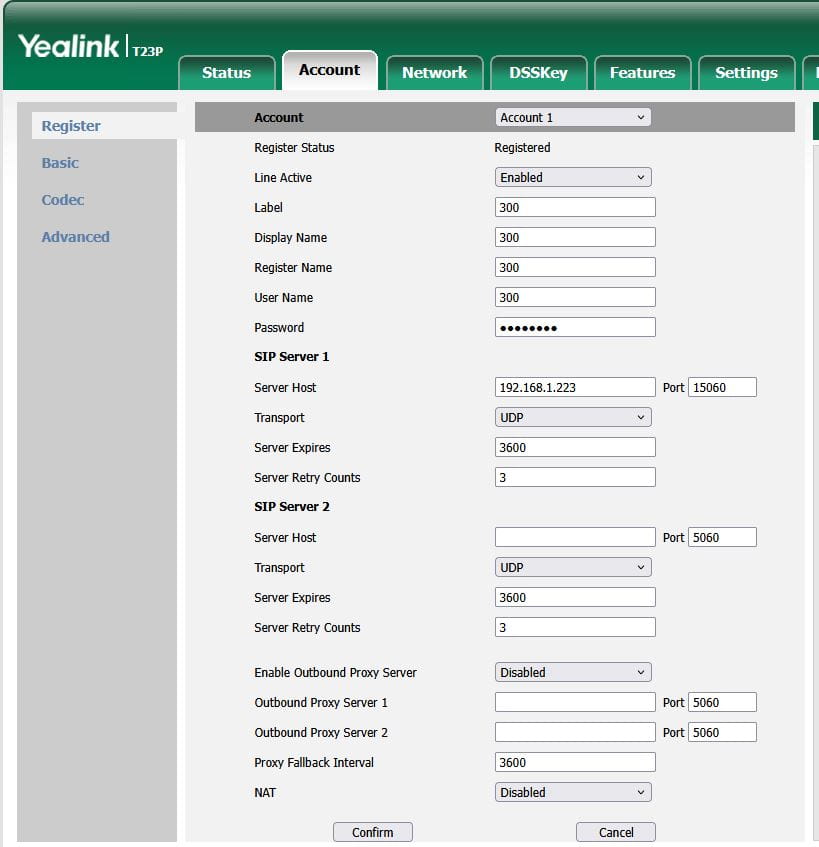
Example SIP1 setting (values to be set according to SIP account on PBX)
Display Name (for Alarm1 identification in call): Alarm1_SIP
ID and phone number on SIP PBX for SIP1: 100
IP address of PBX: 192.168.1.223
Port on PBX: 15060
Password: 100100 (not visible)
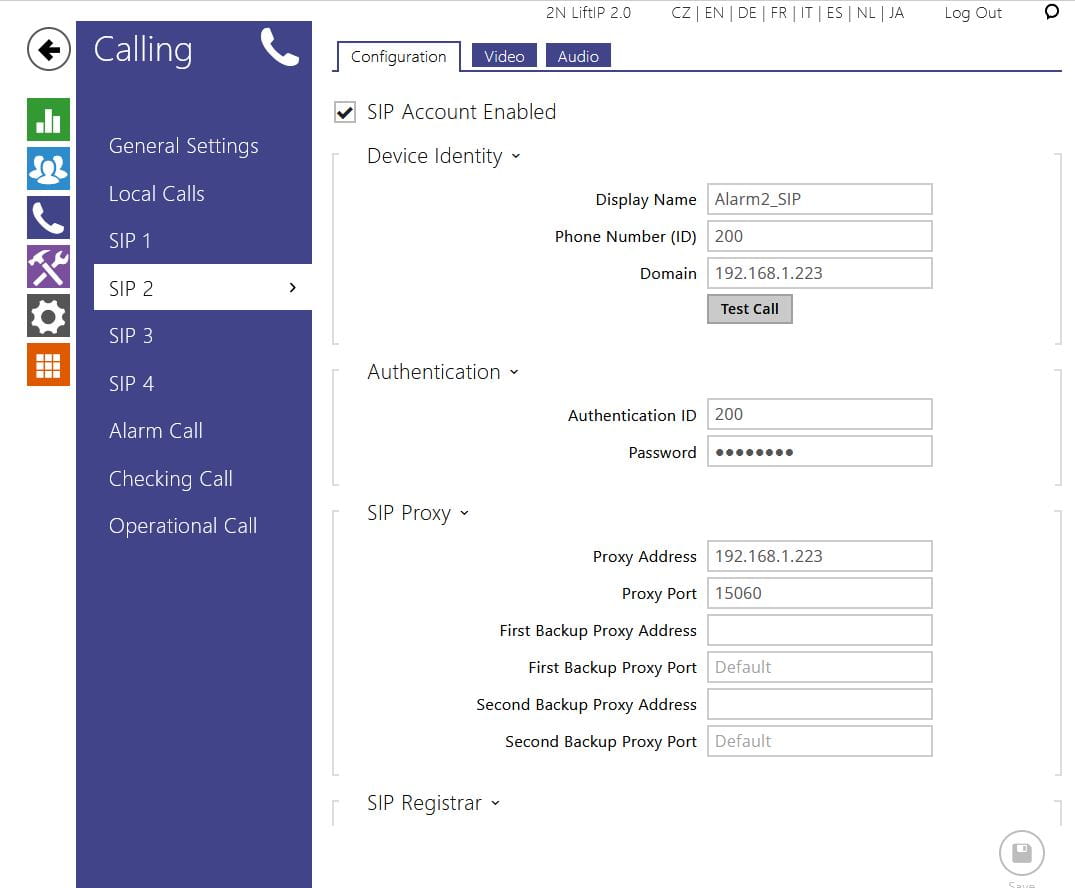
Setting of SIP2 according to second account on PBX: Alarm2_SIP, phone number 200

- User setting
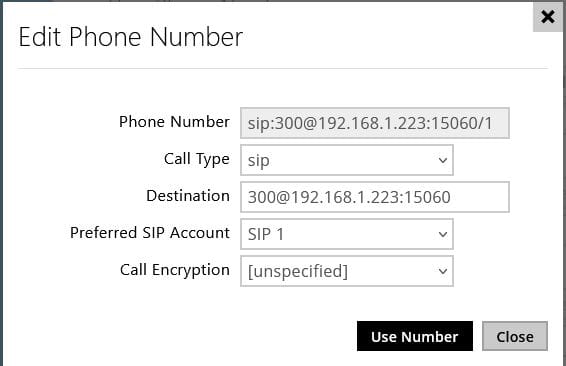
In the menu User must be set two different users for calling when Alarm1 or Alarm2 is activated. It must be set in the menu ‘User setting details’, you can use box ‘Edit phone number details’.
Must be set:
Call Type: sip
Destination: Phone_number@IP_address_of_SIP_PBX:port
Example for destination number 300 on the SIP PBX

Box for phone number edit:
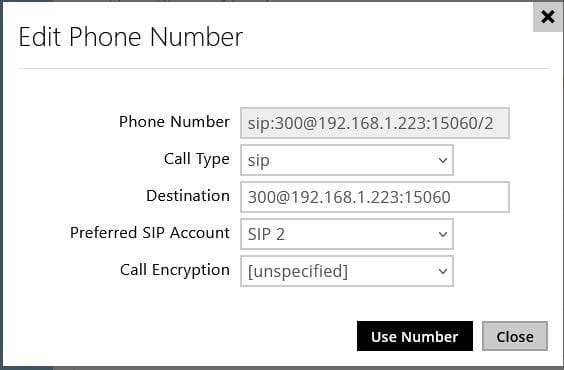
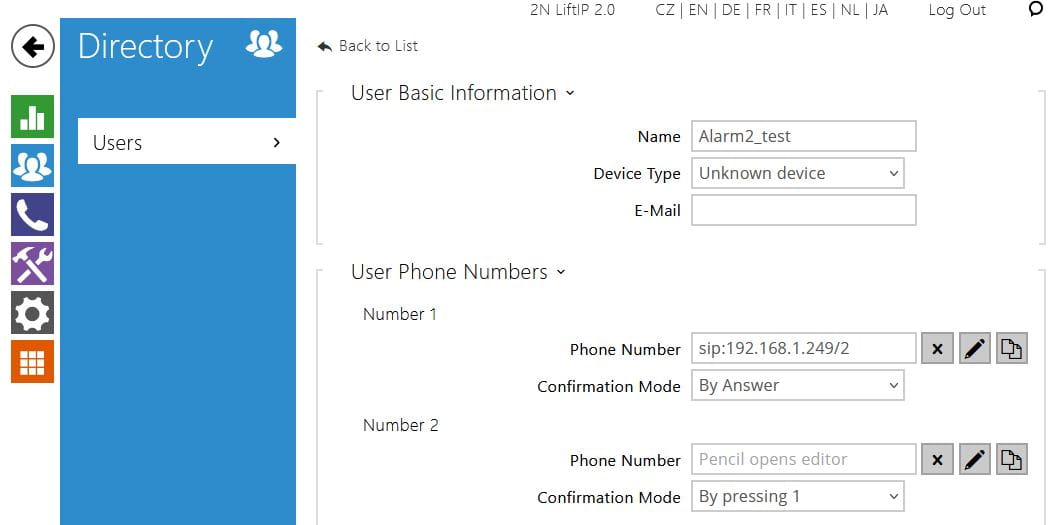
User2 will be set with name Alarm2_test and Preferred SIP Account will be set to SIP2
Box for phone number edit:
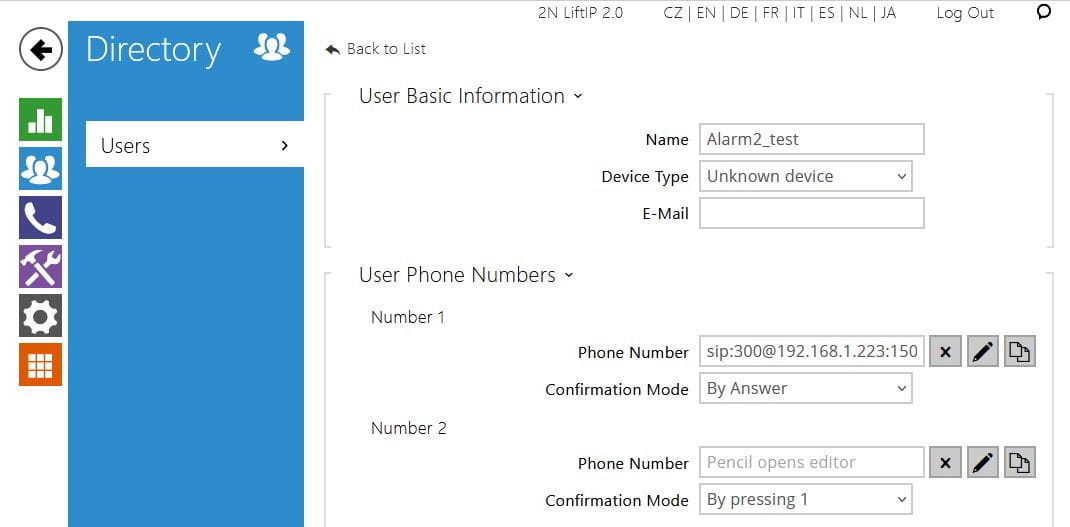
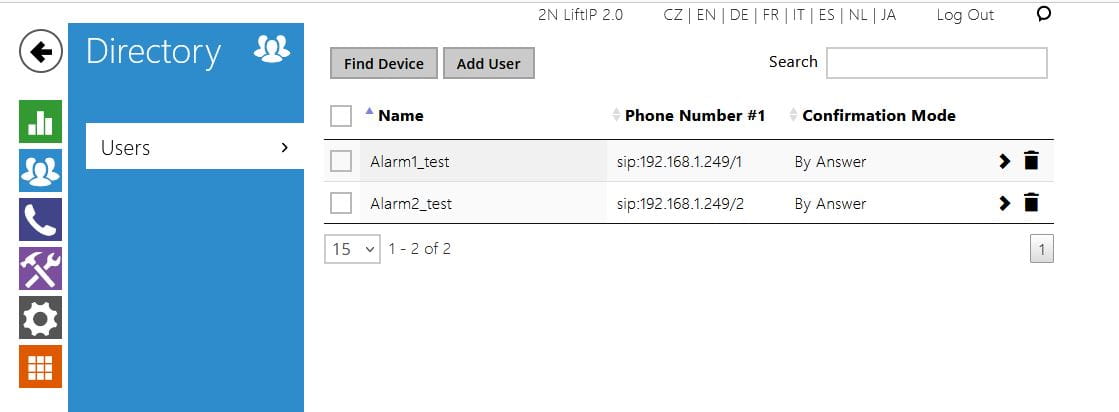
Overview of users:

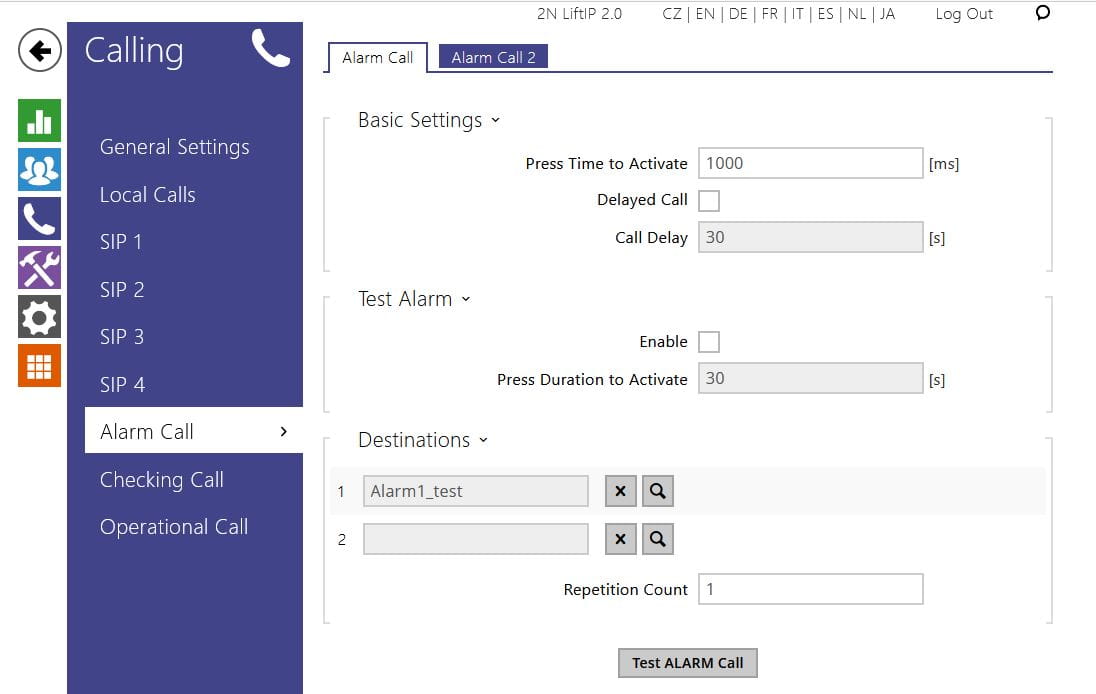
- Alarm call setting
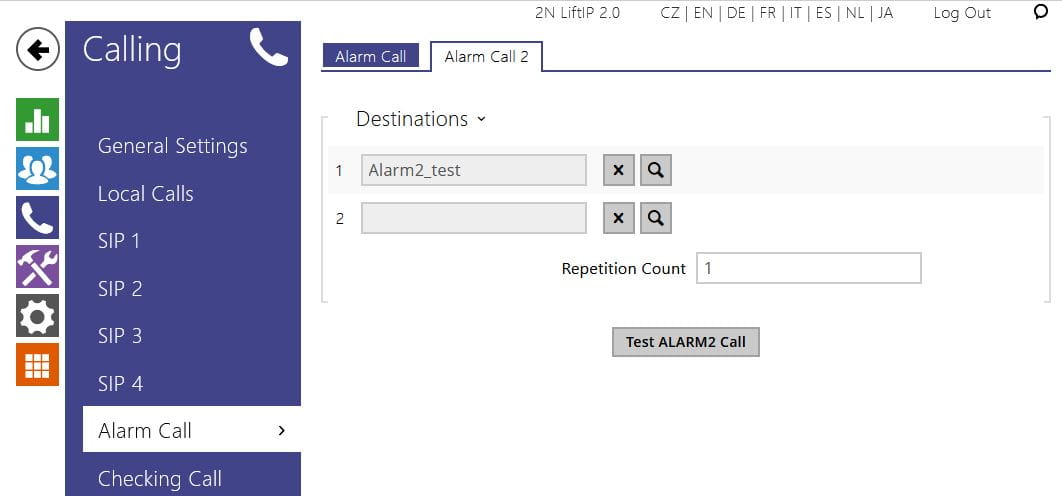
In the menu Calling must be set for Alarm call/Destinations users, which should be called when button Alarm1 is activated, for Alarm Call2/Destinations users, which should be called when button Alarm2 is activated.
Example for users Alarm1_test and Alarm2_test:

- Destination device setting
Alarm calls are directed to SIP Phone Yealink. Any SIP phone can be used.
For this phone, there is a dedicated SIP account on PBX with phone number 300.
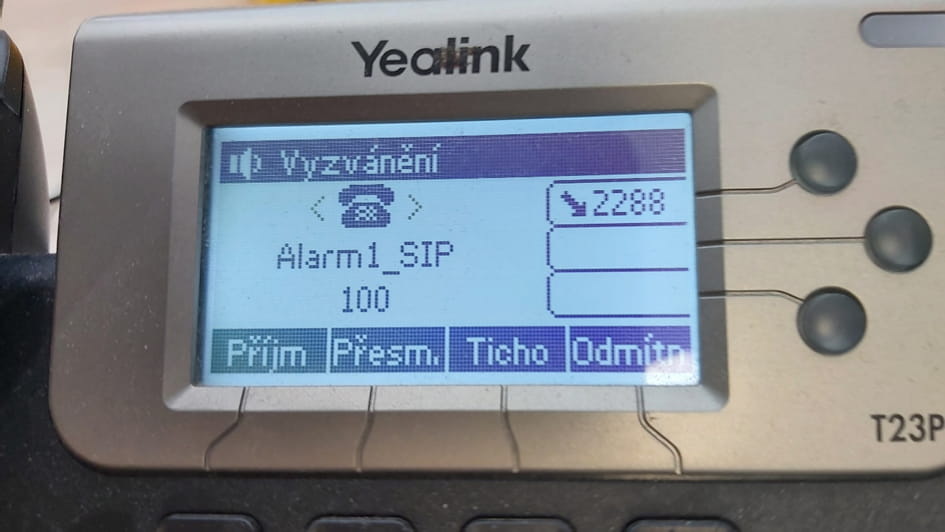
Result of call when button Alarm1 activated on phone receiving call (Alarm1_SIP, phone number 100)
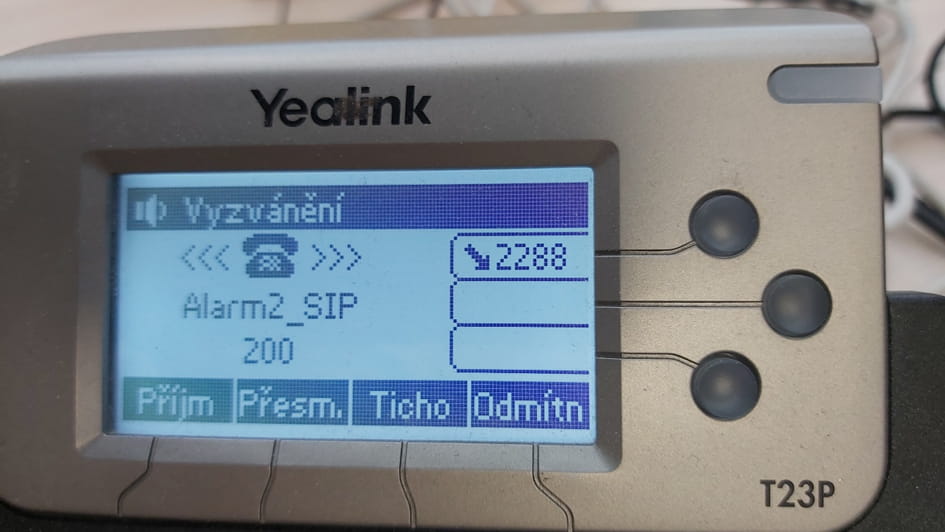
Result of call when button Alarm2 activated on phone receiving call (Alarm2_SIP, phone number 200)
Solution for Peer-to-Peer connection without SIP PBX:
- SIP accounts setting
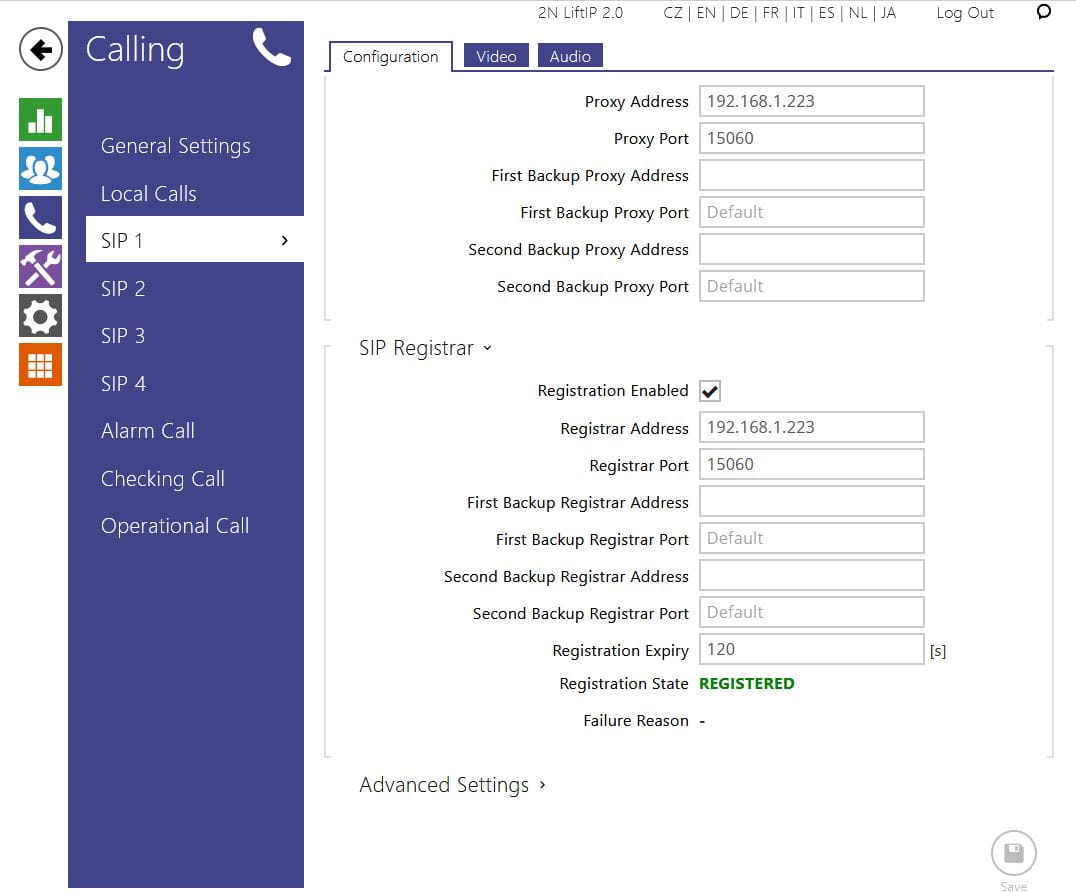
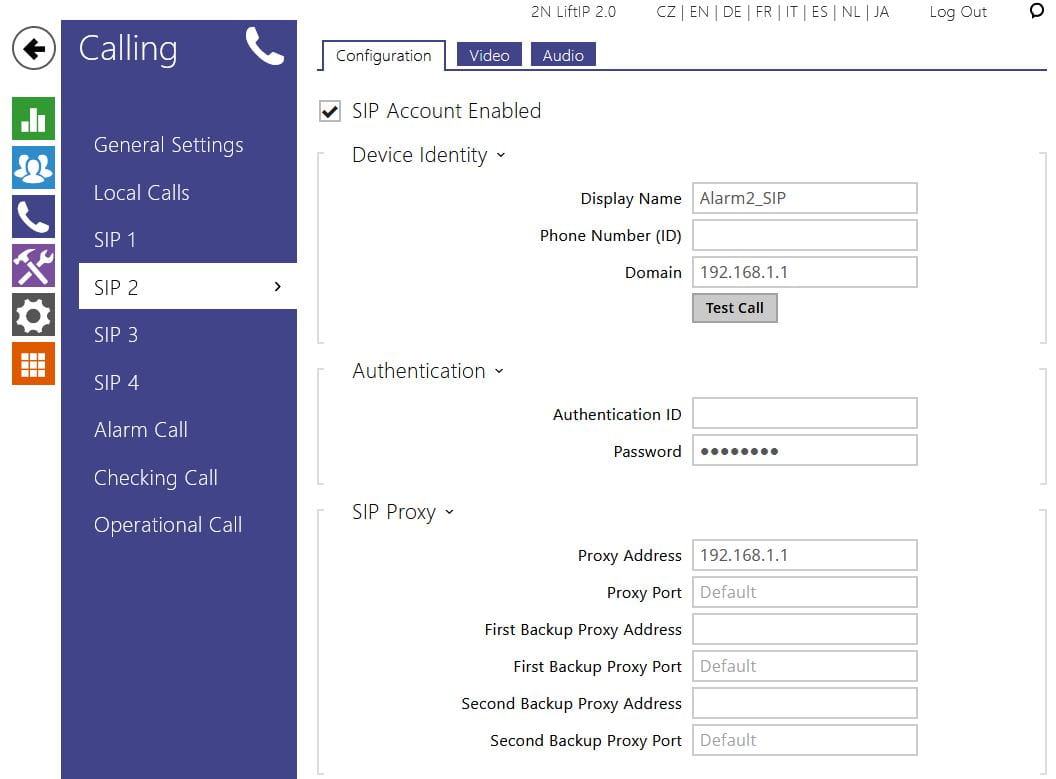
In the menu Calling on LIP must be active SIP accounts SIP1 and SIP2 (SIP3 and SIP4 can be used too). These accounts are not registered to SIP PBX (it is not used because of connection peer to peer).
Example for enabled and not registered SIP1 and SIP2
- User setting
In the menu User must be set two different users for calling when Alarm1 or Alarm2 is activated. It must be set in menu ‘User setting details’, you can use the box ‘Edit phone number details’.
Must be set:
Call Type: sip
Destination: IP address of the called device
Preferred SIP Account: SIP1 for Alarm1, SIP2 for Alarm2
Example for the called device on address 192.168.1.249

Overview of users:
- Alarm call setting
In the menu, Calling must be set for Alarm call/Destinations users, which should be called when button Alarm1 is activated, for Alarm Call2/Destinations user, which should be called when button Alarm2 is activated. The same setting as for SIP PBX.

- Destination device setting
In this case, if the destination device not connected to the SIP PBX (is not used), you have to know IP address of the device. In the example, the Yealink phone is connected to the LAN at the address 192.168.1.249. The result of the call is the same as in the previous example. Recognition of activated button is done by the assigned SIP account (Alarm1_SIP or Alarm2_SIP), although the SIP real account is not used.
When connection peer to peer is used, devices must be connected to one LAN, and the IP address in the LAN for the used devices must be fixed. Using of DHCP server is not recommended, as when the DHCP server restarts, a different address can be assigned, and the system is than out of function.
Long pressing of Alarm2 on LiftIP2 action
Short pressing of the Alarm2 button (less than 0,5s) is interpreted as a demand to call the user set in the menu Calling/AlarmCall/Destinations.
Long pressing of the Alarm 2 button is used for Rescue mode and is set in menu Services/Lift/Rescue mode. When rescue mode by the Alarm2 button is not active, long pressing doesn’t activate any action.
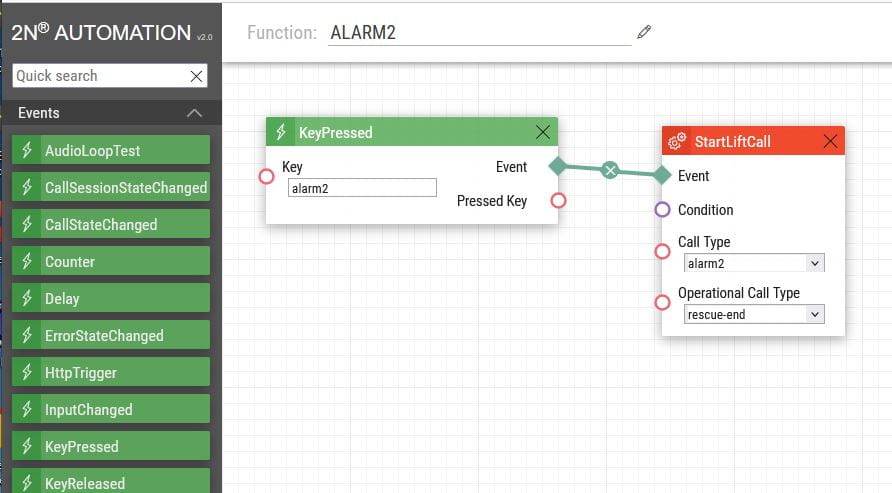
When a response to both short and long pressing of the Alarm2 button is demanded, rescue mode by Alarm2 should be inactive, reaction to pressing of Alarm2 in the moment of pressing can be set using Automation functionality.
Select menu Services/Automation and enable functionality for Alarm2 service support. In this example is named ALARM2:
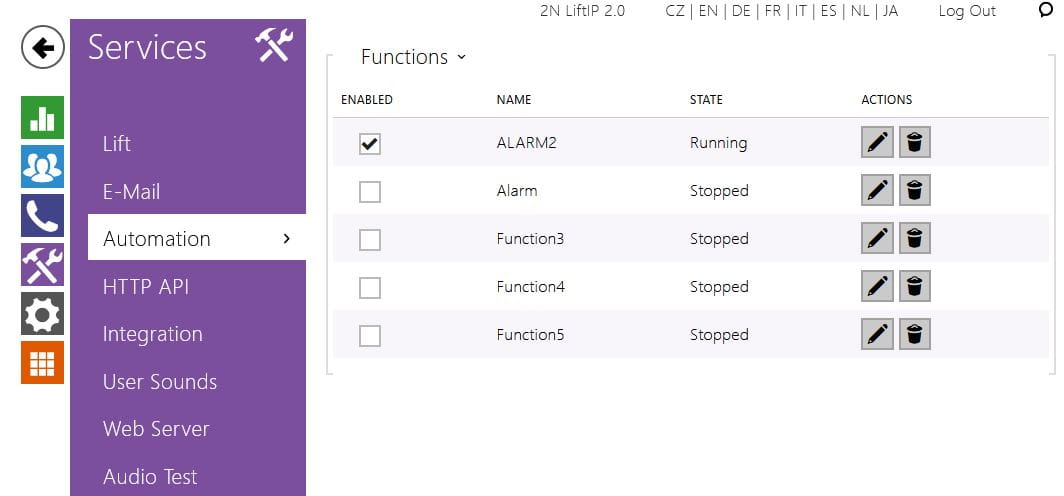
Select the icon with a pen to edit the function connecting event key alarm2 pressed to action call set for alarm2. In the moment of pressing the button Alarm2, the call will be initiated: